
As an Amazon Associate KitchenwareSets.com earns from qualifying purchases.
Ultimate 4th Of July BBQ Ideas: Best Recipes For Home Cooks
Hosting a massive Independence Day feast often feels completely overwhelming. You want an unforgettable cookout, but feeding a crowd on a budget quickly turns stressful. Finding the perfect 4th of July BBQ ideas shouldn’t leave you trapped in the kitchen.
The best 4th of July BBQ ideas center around a balanced, patriotic menu featuring low-and-slow smoked beef brisket, classic all-American burgers, and vibrant red white and blue desserts. To host a successful backyard BBQ party, plan your cooking timeline around your grill’s capacity, utilize make-ahead sides, and always follow safety temperatures.
Drawing from comprehensive culinary analysis and verified industry leading methods, this guide eliminates the guesswork. We’ve structured a complete morning-to-evening event plan featuring expert pitmaster tips to prevent dry meat and ensure safe, mouth-watering results. Discover how to flawlessly execute your ultimate holiday cookout today.
Contents
show
What Are The Best 4th of July BBQ Ideas For A Backyard Cookout?
Planning an epic Independence Day cookout requires a structured, foolproof approach to your patriotic BBQ menu. The secret to a stress-free holiday isn’t just about what you cook; it’s about seamlessly coordinating your prep from the early morning until the final fireworks display. Whether you prefer to quickly grill or patiently smoke your meats, balancing complex proteins with simple crowd-pleasers like burgers and hot dogs is essential. This holistic approach to summer entertaining solves the ultimate host’s dilemma: feeding a large group delicious, high-quality food without breaking the bank. By following professional timing strategies and avoiding common pitfalls like sudden grill flare-ups, you can safely deliver an unforgettable feast. Let’s explore the ultimate, chef-tested menu timeline designed to elevate your backyard gathering.
9 Ultimate 4th Of July BBQ Ideas: Best Recipes For Home Cooks
Building the perfect July 4th food ideas menu means balancing robust flavors, varying cooking methods, and manageable preparation times. Instead of endlessly scrolling through generic lists, this curated mega-menu provides nine exceptionally detailed classic American BBQ recipes covering every course. From perfectly executed grilling to low-and-slow smoking, these dishes are designed to maximize your equipment—whether you use advanced Traeger Grills or classic Weber BBQ setups with charcoal briquettes. Each recipe integrates crucial prepping strategies and precise meat thermometer targets to guarantee food safety and enhance flavor with the right wood chips. Let’s dive into these comprehensive, step-by-step guides to create your ultimate holiday feast.
1. Marinating and Grilling Vegetable Skewers

Pin this colorful appetizer hack to your ‘Summer BBQ Menu’ board!
A perfect grilled vegetable skewer requires uniform chopping and a robust oil-based marinade to prevent dry meat and produce a beautiful char. Starting your backyard BBQ party with a vibrant, healthy and fresh appetizer instantly accommodates your vegetarian guest options while keeping the menu budget-friendly. While the debate between a skewer vs kabob often comes down to regional terminology, the secret to both is proper spacing.
Ingredients
- 2 large bell peppers (red and yellow), cut into 1-inch chunks
- 1 large red onion, quartered and separated
- 2 medium zucchini, sliced into thick rounds
- 1/4 cup olive oil whisked with balsamic vinegar
- 2 tablespoons homemade herb seasoning
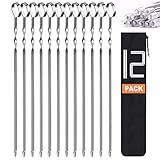
- Heavy-duty flat stainless steel skewers
Instructions
- Prepping the vegetables by cutting them into uniform, bite-sized pieces for even cooking.
- Marinating the chunks in a large bowl with the olive oil and herb blend for at least 30 minutes.
- Assembling the skewers by alternating colors, ensuring you leave a tiny gap between pieces.
- Grilling over medium-high direct heat for 8-10 minutes, basting occasionally until beautifully charred.
What most guides miss: Using flat stainless steel skewers prevents the vegetables from spinning when you flip them. Applying convection grilling techniques with the lid down ensures the zucchini softens perfectly while the peppers get that essential Maillard reaction char. Leaving a slight gap between each vegetable piece ensures they grill beautifully rather than steaming together.
2. Smoking the Ultimate Beef Brisket

Pin this ultimate pitmaster brisket guide to your ‘Smoker Recipes’ board!
A juicy and tender smoked beef brisket demands strict temperature control, high-quality wood fuel, and the patience to push through the dreaded stall point. Delivering this wood-fired masterpiece is the ultimate flex for any host, but it can be intimidating. Whether you are operating a high-tech pellet grill vs offset smoker, the fundamental principles of smoking remain identical.
Ingredients
- 1 whole packer beef brisket (10-12 lbs), trimmed
- 1/2 cup coarse kosher salt and coarse black pepper mix (50/50 blend)
- Apple juice or beef broth for spritzing
- Wood chips or pellets (hickory or oak preferred)
- Pink butcher paper for wrapping
Instructions
- Trimming the fat cap down to a uniform 1/4-inch thickness to ensure proper bark formation.
- Seasoning generously with the simple salt and pepper dry rub, pressing it firmly into the meat fibers.
- Smoking the meat fat-side up at 225°F, maintaining clean blue smoke in your smoker.
- Wrapping the brisket tightly in butcher paper (the crutch method) once the internal temperature hits 165°F to push through the stall.
- Resting the meat in a dry cooler for at least 2 hours after it reaches an internal temperature of 203°F.
Expert insight: Never skip the resting phase. Allowing the meat to rest allows the meat fiber breakdown to finalize and the juices to redistribute, which is critical to prevent dry meat. Use a high-quality dual-probe thermometer to monitor the stall point in brisket without constantly opening the lid and losing thermal mass in grills. Always follow USDA guidelines for safe minimum temperatures.

3. Searing the Perfect All-American Burger

Pin this foolproof burger technique to your ‘Classic BBQ Mains’ board!
Searing an all-American burger over high heat locks in juices and creates a savory crust that forms the ultimate foundation for your cookout. This kid-friendly recipe serves as a base for an interactive, DIY topping bar and is ideal for large groups. When balancing the burgers vs hot dogs debate, remember that burgers require intense heat, making proper charcoal + flavor management essential.
Ingredients
- 2 lbs 80/20 ground chuck beef
- 1 tablespoon kosher salt and cracked black pepper
- 6 thick slices of sharp cheddar cheese
- 6 buttered and toasted brioche buns
- Classic toppings: crisp lettuce, heirloom tomatoes, red onions, pickles
Instructions
- Forming the ground beef into 6-ounce patties, handling the meat as little as possible to keep it tender.
- Pressing a slight thumb indent into the center of each patty to prevent them from shrinking into meatballs on the grill.
- Searing the patties over high direct heat (charcoal briquettes provide the best flavor) for about 3-4 minutes per side.
- Melting the cheese during the final minute of cooking by closing the grill lid.
- Assembling the char-grilled burger on toasted buns, setting up a DIY station for guests.
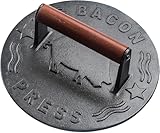
An often-overlooked strategy: For the ultimate crust, skip the grate and use a cast iron griddle on your BBQ. The heavy metal provides superior heat retention, ensuring every inch of the patty develops a savory Maillard reaction crust. Make sure you are comfortably handling charcoal ash cleanup by lining the bottom of your kettle grill with heavy foil beforehand.
4. Slow-Cooking Tender Baby Back Ribs

Pin this sticky, sweet rib recipe to your ‘Summer Smoker’ board!
Slow-cooking baby back ribs using the 3-2-1 method guarantees incredibly tender meat that perfectly holds a caramelized glaze. The iconic combination of ribs + bbq sauce complements traditional sides and stands out as a crowd favorite. For those searching for a reliable low and slow bbq ribs recipe for beginners, understanding when to apply your spices is critical.
Ingredients
- 2 racks of pork baby back ribs (membrane removed)
- 1/4 cup sweet paprika and brown sugar-based BBQ rub
- 1/2 cup apple cider vinegar (for spritzing)
- 1 cup of your favorite mouth-watering thick BBQ sauce
- 4 tablespoons unsalted butter and 2 tablespoons honey (for wrapping)
Instructions
- Seasoning the ribs generously with the dry rub and letting them sweat at room temperature for 30 minutes.
- Smoking the ribs unwrapped at 225°F for exactly 3 hours, spritzing with apple cider vinegar every 45 minutes to prevent dry meat.
- Wrapping the ribs tightly in heavy-duty foil along with the butter and honey, then returning to the grill for 2 hours to steam and tenderize.
- Glazing the ribs by unwrapping them, brushing thickly with BBQ sauce, and charring them for 1 final hour to set the sticky glaze.
Expert insight: When evaluating a dry rub vs wet marinade for ribs, always start with a dry rub to build the bark, saving the wet sauces for the final glazing phase. Avoid relying solely on temperature probes. Instead, use the “bend test.” Pick up the rack from the center with tongs; if the ends droop significantly and the bark begins to crack slightly at the top, the meat fiber breakdown is perfect.

5. Prepping Juicy Beer Can Chicken

Pin this juicy, crowd-pleasing chicken method to your ‘BBQ Masterpieces’ board!
Prepping a beer can chicken utilizes steaming liquid from the inside out to ensure incredibly juicy, flavorful meat while the exterior crisps beautifully. This method breaks the monotony of standard chicken + wings and serves as an impressive centerpiece for your guests. Successfully executing this requires careful attention to indirect heat zones and strict adherence to food safety tips.
Ingredients
- 1 whole chicken (4-5 lbs), giblets removed
- 1 can of lager beer (half full)
- 3 tablespoons olive oil
- 1/4 cup savory BBQ poultry rub (paprika, garlic powder, onion powder, salt, pepper)
- 1 sturdy stainless steel roasting stand
Instructions
- Prepping the grill for two-zone cooking by placing hot charcoal briquettes on one side, leaving the other side empty for indirect heat zones.
- Rubbing the outside of the chicken generously with olive oil and the poultry seasoning blend.
- Assembling the dish by placing the half-full can of beer into the roasting stand, then sliding the chicken cavity firmly over the can.
- Grilling the chicken upright on the indirect side of the grill at 350°F for about 75-90 minutes.
- Carving only after letting the bird rest for 15 minutes to lock in the juicy and tender flavors.
What most guides miss: While brining poultry beforehand adds moisture, the internal steaming effect of the beer can method achieves similar results with less prep. For the safest cook, ditch balancing an actual beer can on the grates and use a dedicated stainless steel roaster stand. Always verify the thickest part of the thigh reaches a safe minimum temperature of 165°F per USDA guidelines to prevent cross-contamination.
6. Simmering Smoky Baked Beans

Pin this ultimate BBQ side dish to your ‘Cookout Sides’ board!
Simmering smoky baked beans directly on the grill infuses them with authentic wood-fired flavor that perfectly supports your heavy main courses. These traditional favorites bridge the gap between savory meats and the sweet treats found in your sides + dessert spread. It is also an incredibly budget-friendly option that solves the mystery of how to prep a BBQ the day before.
Ingredients
- 3 (15 oz) cans of navy or pinto beans, slightly drained
- 1/2 lb thick-cut bacon, diced
- 1 medium sweet yellow onion, finely diced
- 1/2 cup dark molasses and 1/4 cup brown sugar
- 1/3 cup apple cider vinegar and 2 tablespoons Dijon mustard
- Cast iron Dutch oven
Instructions
- Searing the diced bacon and onions directly in the Dutch oven over the hot side of the grill until the fat renders and onions are translucent.
- Mixing in the beans, molasses, brown sugar, vinegar, and mustard until well combined.
- Simmering the mixture uncovered on the indirect heat side of the grill for 1.5 to 2 hours.
- Stirring occasionally, allowing the surface to absorb the charcoal + flavor and reduce into a thick, syrupy glaze.
Expert insight: To maximize the smoky flavor, position your uncovered Dutch oven underneath the brisket or ribs if you have a multi-tier grill. The savory drippings will fall directly into the beans, creating an award-winning BBQ side dish profile. Furthermore, this method excels at keeping sides warm without monopolizing your indoor oven space.

7. Assembling a Patriotic Potato Salad

Pin this classic, make-ahead potato salad to your ‘Summer Holiday Feasts’ board!
Assembling a patriotic potato salad ahead of time allows the creamy dressing and seasonings to fully meld, offering a refreshing temperature contrast to hot grilled meats. Nothing highlights the theme of your event quite like a chilled potato + salad side, serving as a hearty alternative to a standard homemade coleslaw recipe.
Ingredients
- 3 lbs red-skinned potatoes (leave skins on for color)
- 1 cup premium mayonnaise and 2 tablespoons yellow mustard
- 4 hard-boiled eggs, chopped
- 1/2 cup celery and 1/4 cup red onion, finely diced
- 1/4 cup sweet pickle relish
- Smoked paprika and fresh dill for garnish
Instructions
- Boiling the red potatoes until just fork-tender, then immediately draining and letting them cool completely to maintain their shape.
- Whisking the mayonnaise, mustard, relish, and a pinch of salt and pepper in a large mixing bowl to create the dressing base.
- Folding the cooled potatoes, chopped eggs, celery, and red onions gently into the dressing until evenly coated.
- Decorating the top with a dusting of smoked paprika and sprigs of fresh dill.
- Chilling in the refrigerator for at least 4 hours before serving to allow flavors to meld.
An often-overlooked strategy: Waxy potatoes (like red or Yukon gold) hold their structural integrity much better than russets when boiled. When wondering how to keep food cold at an outdoor BBQ, always nestle your potato salad bowl inside a slightly larger bowl filled with ice. This ensures strict food safety tips are followed, preventing mayonnaise spoilage in the intense summer heat.

8. Charring Sweet Corn on the Cob

Pin this sweet and smoky corn hack to your ‘Easy Grilling Sides’ board!
Charring sweet corn directly on the hot grates rapidly caramelizes its natural sugars, providing a deeply savory complement to classic all-American style menus. Slathering your corn + butter post-grill is an iconic summer tradition. For those debating corn in foil vs on grate, direct heat is the undisputed champion for flavor.
Ingredients
- 8 ears of fresh sweet corn, completely husked and silked
- 1/2 cup (1 stick) melted unsalted butter
- 1 teaspoon garlic powder and 1 teaspoon smoked paprika
- Coarse sea salt and fresh cilantro
- Heavy-duty aluminum foil (optional for wrapping)
Instructions
- Prepping the corn by removing all husks and silks, washing them briefly under cold water.
- Basting each ear of corn generously with the melted butter, garlic powder, and paprika mixture.
- Grilling directly on the hot grates over medium-high heat for 10-12 minutes, turning every 2-3 minutes.
- Charring until the kernels become tender and develop spotty, dark brown caramelization marks on all sides.
- Seasoning immediately with coarse sea salt and cilantro while still hot.
Expert insight: If you are searching for how to grill corn on the cob without burning, the secret is constant rotation. Grilling raw corn directly on the grates allows the intense heat to rapidly evaporate surface moisture, triggering a caramelization process that deeply enhances the natural sweetness of the kernels without reducing them to mush inside a foil wrap.

9. Decorating a Red, White, and Blue Dessert

Pin this show-stopping patriotic dessert to your ‘July 4th Sweets’ board!
Decorating a vibrant red, white, and blue dessert provides a visually stunning, no-bake conclusion to your feast that perfectly highlights the holiday theme. This beautiful trifle serves as a base for holiday photos and is incredibly festive and fun. It ranks among the top easy red white and blue desserts for kids and adults alike, perfectly timed for the evening fireworks display.
Ingredients
- 1 large store-bought angel food cake, cut into 1-inch cubes
- 2 cups fresh strawberries, sliced
- 2 cups fresh blueberries
- 1/4 cup granulated sugar (for macerating)
- 3 cups heavy whipping cream and 1/2 cup powdered sugar
- 1 large clear glass trifle bowl
Instructions
- Prepping the fruit by tossing the sliced strawberries in a bowl with the granulated sugar and letting them sit for 15 minutes to release their juices.
- Whipping the heavy cream and powdered sugar in a chilled bowl until stiff peaks form.
- Assembling the base by placing a layer of angel food cake cubes at the bottom of the glass trifle bowl.
- Layering the macerated strawberries over the cake, followed by a thick layer of whipped cream, then a layer of blueberries.
- Decorating the final top layer of whipped cream with a beautiful, alternating star-pattern of strawberries and blueberries.
What most guides miss: Macerating the berries draws out their natural syrups, elevating the flavor profile significantly. Building this patriotic themed trifle 4-6 hours before your fireworks display actually improves the dish. The dry angel food cake acts as a sponge, soaking up the sweet juices without becoming overly soggy.

Key Takeaways: Your Quick Guide to 4th of July BBQ Ideas
Synthesizing the perfect Independence Day cookout comes down to mastering timelines and respecting food safety. This quick-reference guide distills the most critical elements of your backyard BBQ party so you can confidently manage the fire and your guests without missing a beat.
- Plan Your Cookout Timeline Around the Smoker – If you are making a smoked beef brisket, start cooking 10-12 hours in advance, allowing ample time for the meat to rest in a cooler while you grill faster items like the all-American burger.
- Utilize Indirect Heat Zones – For thicker meats like beer can chicken, set up your charcoal briquettes on one side of the grill. This convection grilling method cooks the center safely without burning the exterior.
- Keep Cold Sides Safe – Maintain strict food safety standards by nesting mayonnaise-based dishes like patriotic potato salad inside larger ice-filled bowls to avoid cross-contamination and spoilage.
- Prep Sides the Day Before – Reduce day-of stress by making your smoky baked beans and red white and blue dessert 24 hours in advance; their flavors actually deepen and improve when left to meld in the fridge.
- Cook to Temperature, Not Time – Always rely on a calibrated meat thermometer rather than the clock. Follow USDA guidelines: poultry must hit 165°F, while tough cuts like brisket need to reach 203°F for proper meat fiber breakdown.
- Harness the Maillard Reaction – For the best char-grilled flavor on burgers and steaks, use heavy cast iron accessories on your grill to retain heat and create a savory, caramelized crust.
People Also Ask About 4th of July BBQ Ideas
Even with a perfectly planned menu, hosting a massive holiday event inevitably brings up specific logistical questions. From portion planning to equipment management, these expert answers address the most common queries surrounding July 4th barbecue recipes to ensure your celebration goes off without a hitch.
What are the best 4th of July BBQ recipes for a large crowd?
The best recipes for a large crowd include pulled pork shoulder, smoked beef brisket, and a DIY hot dog bar.
These large-format meats are highly cost-effective and ideal for large groups because they can be cooked in bulk and served buffet-style. Pairing these with make-ahead sides like a homemade coleslaw recipe reduces day-of cooking stress. Using a pellet grill vs offset smoker also frees up the host to mingle rather than constantly tending a fire.
How many hot dogs and burgers do I need per person for a party?
A standard catering rule is to plan for 1.5 burgers or hot dogs per adult and 1 per child.
If you are hosting an Independence Day cookout with 20 adults, prepare roughly 30 total mains. It is always wise to provide vegetarian guest options as well. Keep extra charcoal briquettes on hand so you can quickly fire up the grill again if unexpected guests arrive.
How to keep food cold at an outdoor BBQ in the summer heat?
Keep perishable food cold by nesting serving bowls inside larger containers filled with crushed ice and coarse salt.
The salt lowers the freezing point of the ice, keeping your patriotic potato salad and deviled eggs colder for much longer. Additionally, keep all food in the shade, use mesh food covers to keep bugs away, and never leave dairy-based sides out in temperatures exceeding 90°F for more than one hour per USDA guidelines.
What time should I start the grill for a July 4th cookout?
Start your grill 45 to 60 minutes before you plan to begin cooking your first appetizer.
If you are using charcoal briquettes, they need about 20-30 minutes to ash over completely and reach peak cooking temperature. If your party features guests arriving at 2:00 PM and eating at 3:30 PM, light the grill by 2:15 PM. For low and slow smoking, you will need to start your fire several hours before.
Can I make 4th of July food ahead of time?
Yes, almost all BBQ side dishes and desserts taste better when made 24 hours in advance.
Dishes like smoky baked beans, potato salad, coleslaw, and your red white and blue dessert trifle benefit from sitting in the fridge overnight. However, grilled mains like the all-American burger and grilled vegetable skewers should always be cooked fresh to order to prevent dry meat and retain their crisp texture.
What are budget-friendly 4th of July food ideas?
The most budget-friendly BBQ ideas focus on chicken leg quarters, pork shoulder, and robust, filling side dishes.
Pork butt (for pulled pork) is incredibly cheap per pound and feeds a massive crowd. Serving heavy, inexpensive sides like corn on the cob and macaroni salad ensures guests fill up quickly without breaking the bank. Choosing a dry rub vs wet marinade made from pantry staples also saves money.
Is brisket or pulled pork better for a crowd?
Pulled pork is significantly better for a crowd because it is cheaper, more forgiving to cook, and yields more servings per pound.
While a smoked beef brisket is the ultimate pitmaster flex, it is expensive and prone to drying out if mishandled during the stall point in brisket. Pork shoulder practically melts into juicy shreds even if overcooked slightly, making excellent sandwiches for an outdoor holiday cooking feast.
How to ensure grilling safety during the holiday?
Ensure grilling safety by keeping your grill at least 10 feet away from your home, deck railings, and overhanging branches.
Always keep a fire extinguisher or a bucket of sand nearby to handle sudden grease grill flare-ups. Never use water on a grease fire. Furthermore, rigorously separate raw meat platters from cooked food platters to avoid cross-contamination, and verify all proteins reach their safe minimum temperature.
What are healthy alternatives for a BBQ?
Healthy BBQ alternatives include grilled portobello mushrooms, lean turkey burgers, and vibrant vegetable skewers.
You can easily swap out heavy mayonnaise in salads for Greek yogurt, or serve a large, fresh watermelon salad with feta and mint. Utilizing healthy and fresh ingredients or low-carb options like grilled fish wrapped in foil ensures that guests with dietary restrictions can fully enjoy the communal meal.
How do I make a DIY hot dog bar?
Create a DIY hot dog bar by grilling a large batch of quality franks and setting up a buffet of diverse, regional toppings.
Keep the hot dogs warm in a slow cooker on the “warm” setting. Set out bowls featuring classic ketchup and mustard, but elevate the station with warm chili, shredded cheese, diced onions, jalapeños, celery salt, and sweet relish. This interactive kid-friendly recipe setup is festive and fun.
Final Thoughts on 4th of July BBQ Ideas
Executing the ultimate 4th of July BBQ ideas doesn’t require decades of culinary school; it simply requires a solid game plan, quality ingredients, and a little bit of patience around the fire. By preparing your smoky baked beans and patriotic potato salad the day before, you free yourself up to focus entirely on managing your grill and entertaining your guests during the backyard BBQ party.
Remember that barbecue is fundamentally about community. Whether you are smoking an ambitious 12-hour smoked beef brisket or simply grilling up a massive platter of all-American burgers, the goal is to create a warm, inviting atmosphere for your friends and family. Lean on the expert pitmaster tips and USDA guidelines provided in this guide to ensure your holiday grilling ideas are not only mouth-watering but incredibly safe.
As you finalize your grocery lists for August 2026 and prep your charcoal briquettes for the big Independence Day celebration, don’t forget to take a step back, grab a cold drink, and actually enjoy the party you’ve worked so hard to put together.
What is the one classic BBQ side dish your family absolutely demands every 4th of July? Let us know in the comments below, and happy grilling!
Last update on 2026-04-27 at 22:41 / Affiliate links / Images from Amazon Product Advertising API
