As an Amazon Associate KitchenwareSets.com earns from qualifying purchases.
11 Whimsical Kitchen Ideas For Cozy Colorful Spaces
Are you tired of staring at a kitchen that feels more like a sterile operating room than the heart of your home? Does the endless sea of white, gray, or beige leave you feeling uninspired? So many of us end up with “safe” kitchen designs that lack personality, feeling trapped in a space that’s functional but utterly devoid of joy and creativity. It’s a common frustration—wanting a kitchen that reflects your vibrant personality but not knowing where to start without it feeling chaotic or mismatched.
This feeling of being stuck with a boring kitchen is a real pain point for homeowners who crave a space that’s as unique and creative as they are. You spend countless hours in your kitchen; it should be a place that energizes you, sparks conversation, and makes you smile. The fear of choosing the “wrong” color or a “weird” piece of decor often leads to playing it too safe, resulting in a room that feels like it belongs to anyone and no one at the same time. You deserve a kitchen that tells your story, a charming and playful sanctuary for cooking, gathering, and making memories.
The perfect solution is to create a whimsical kitchen, which is a playful, creative space that breaks from conventional design rules. It masterfully blends bold colors, vintage finds, quirky decor, and deeply personal touches to create a unique environment that evokes a sense of wonder, charm, and nostalgia. This guide will provide you with actionable, visually stunning ideas to help you transform your uninspired kitchen into a cozy, colorful space that is unapologetically you.
Tired of Your Boring Kitchen? Here’s How to Infuse It with Personality
The desire for a kitchen with personality stems from the need for our homes to be a true reflection of ourselves. A whimsical kitchen makeover is the answer for anyone looking to escape the conventional and create a space that feels alive with story and character. We’ve helped thousands of readers move beyond cookie-cutter designs to create spaces that truly reflect who they are. This guide is built on core design principles and real-world inspiration to help you do the same. It’s not about following rigid rules; it’s about curating a collection of colors, objects, and textures that you absolutely love.
What Exactly is a Whimsical Kitchen?
At its core, a whimsical kitchen is characterized by a delightful mix of vibrant colors, playful patterns, vintage or thrifted items, and quirky decor. This highly personal aesthetic values charm and storytelling far more than it does strict design rules, resulting in a cozy, eclectic, and imaginative space that feels like a warm hug. It’s a style that gives you permission to have fun and experiment.
Drawing from established interior design principles, a whimsical kitchen often shares traits with other charming aesthetics like cottagecore and eclectic decor, but with its own unique spin. The key characteristics include:
- Embracing the Unconventional: This style celebrates the unusual. Think squiggly painted cabinets, a repurposed vintage dresser as an island, or a collection of novelty salt and pepper shakers.
- Mixing Styles and Periods: A whimsical kitchen confidently pairs an antique crystal chandelier with modern appliances or retro-themed wallpaper with industrial bar stools. It’s the artful combination that creates a unique narrative.
- Telling a Personal Story: This is the most crucial element. The kitchen becomes a gallery of your life, displaying thrifted art, framed family recipes, and cherished collections that have personal meaning.
- Prioritizing Charm Over Perfection: A small chip on a vintage teacup or the patina on a brass fixture isn’t a flaw; it’s part of the story. This style celebrates the beauty in imperfection and the history of well-loved objects.
11 Whimsical Kitchen Ideas for a Charmingly Colorful Space
Ready to transform your kitchen from mundane to magical? Here are 11 actionable and inspiring whimsical kitchen ideas. This isn’t about a complete, costly overhaul overnight. Instead, view this as a joyful journey of slowly collecting and curating pieces that speak to you. We’ve gathered these concepts from top interior designers and stunning real-home makeovers, ensuring they are both stylish and practical for 2025. From bold color choices to charmingly functional sinks, these tips will help you create a delightfully unique and cozy kitchen.
1. Embrace a Palette of Playful Colors & Patterns
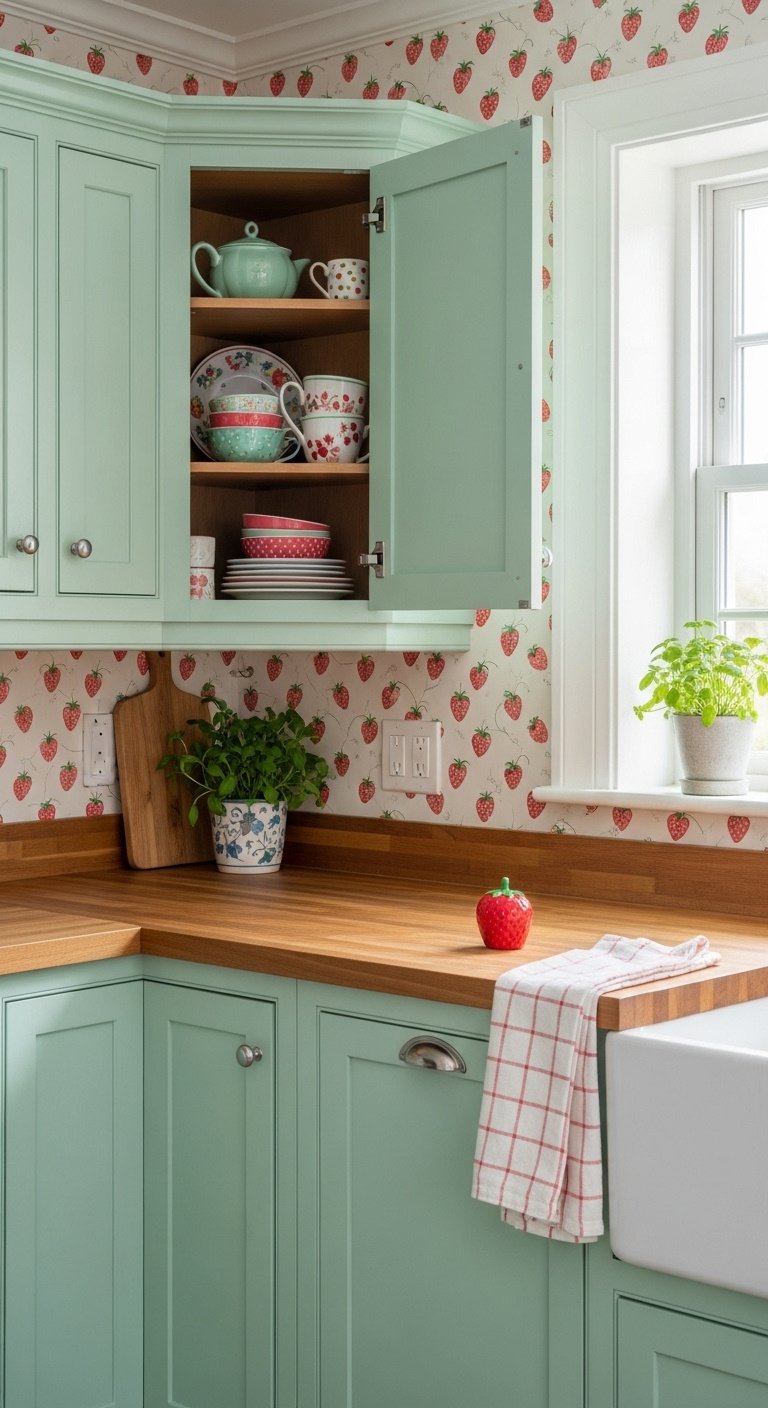
The most effective way to create a whimsical foundation is by fearlessly embracing a palette of playful colors and patterns. Forget the all-white kitchens of the past; whimsy thrives on vibrant hues and delightful designs that express personality. This is your chance to experiment with combinations that make you happy, whether they are bold and bright or soft and dreamy.
- Materials Needed: High-quality interior paint in 2-3 chosen colors (e.g., one for cabinets, one for an accent wall), patterned wallpaper or stencils, painter’s tape, rollers, brushes, floor paint or peel-and-stick tiles for checkerboard effect.
- Step-by-Step Directions:
- Choose Your Hero Color: Start by selecting one bold, statement color that you truly love. Think avocado green, cherry red, or a vibrant aqua blue. Use this for a major element that will act as the room’s anchor, such as your lower cabinets or a freestanding kitchen island.
- Select Supporting Hues: Next, pick one or two complementary colors to balance the boldness. If you chose a strong color for the cabinets, consider a softer buttercup yellow or a creamy off-white for the walls and trim to keep the space feeling bright.
- Introduce a Pattern: This is where the fun really begins. Apply a whimsical floral or botanical wallpaper to a single accent wall, like the one behind your breakfast nook. Alternatively, use a stencil to add a subtle geometric pattern to your backsplash for a touch of detail.
- Ground with a Classic: To anchor all the color and pattern, consider a timeless floor design. A black-and-white checkerboard pattern is a hallmark of playful kitchens and can be achieved with durable floor paint or easy-to-install peel-and-stick vinyl tiles.
Pro-Tip: When mixing patterns, the key to harmony is varying their scale. If you have a large-scale pattern like a wide checkerboard floor, pair it with a small-scale pattern like mini polka dots on your dish towels or a delicate gingham print on your curtains. This creates visual interest without overwhelming the eye.
Pin this color inspiration for your dream kitchen makeover!
2. Hunt for Vintage & Eclectic Treasures
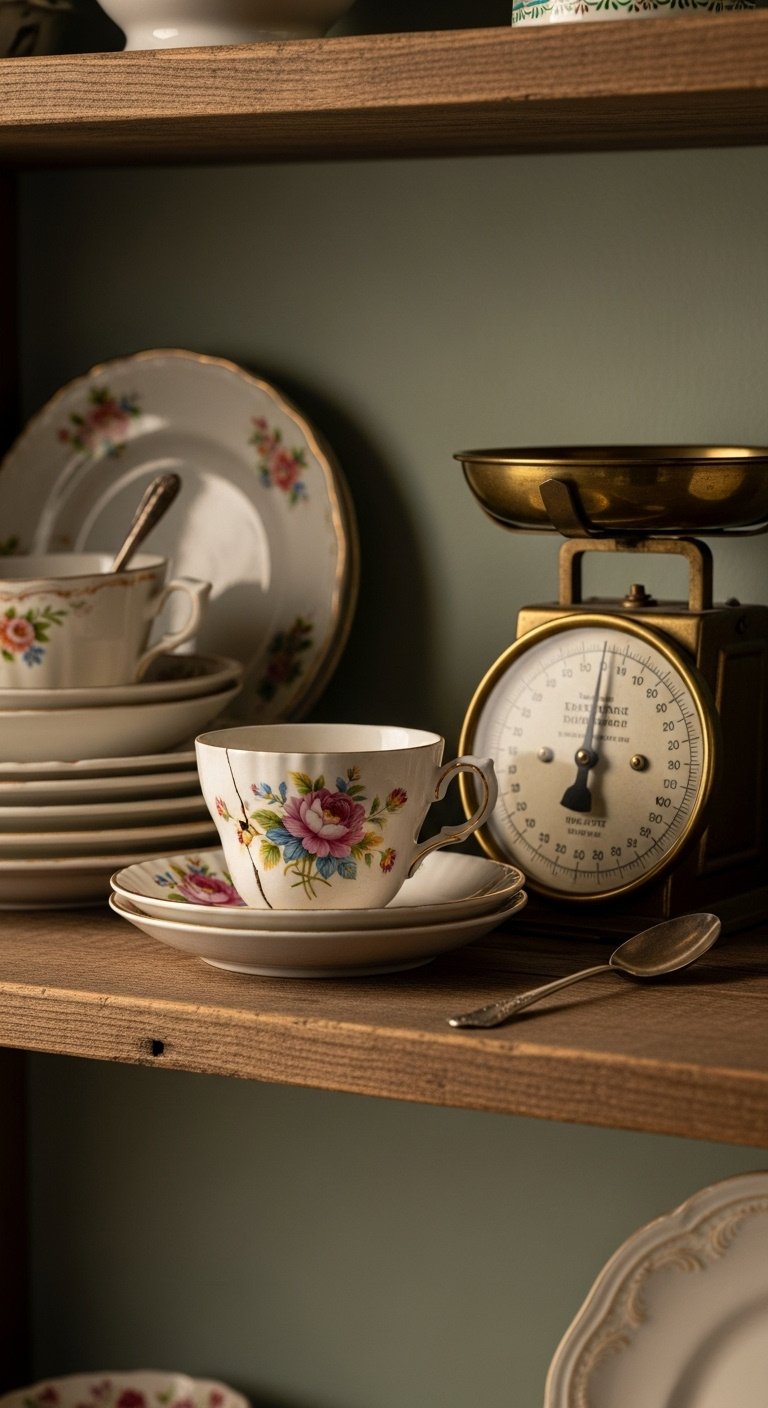
To give your kitchen a sense of history and soul, you must hunt for unique vintage and eclectic treasures that tell a story. A key aspect of whimsical design is the inclusion of items with character and a past life. These are the pieces that set your kitchen apart from a standard showroom design, infusing it with warmth and individuality.
- Materials Needed: A list of “Treasure Hunt” items (e.g., vintage tea cups, antique silverware, old-fashioned timer, unique cabinet knobs), a reliable vehicle for flea market trips, measuring tape.
- Step-by-Step Directions:
- Make a Wishlist: Before you set out, brainstorm a list of specific vintage items you’d love to find. This could be anything from a set of floral dessert plates, a retro-style Smeg toaster, or an antique kitchen scale. Having a list helps focus your search, but always stay open to unexpected finds.
- Scour Local Shops: Dedicate a weekend to becoming a treasure hunter. Visit your local thrift stores, antique shops, estate sales, and flea markets. Remember to look beyond the kitchen section—you might find the perfect quirky art print in the framing aisle or a small table that can be repurposed.
- Think Repurposing: The most creative finds often come from seeing potential in non-kitchen items. An old wooden ladder can be suspended from the ceiling to serve as a charming pot rack. A small vintage dresser can be painted a cheerful color and used as a coffee bar or extra storage island.
- Mix, Don’t Match: Intentionally break the rules of uniformity. Actively collect mismatched plates, glasses, and bowls from different eras and styles. The beautiful variety in pattern, color, and design is central to the whimsical, collected-over-time aesthetic.
Lesson Learned: Don’t overlook items that have minor imperfections. From my own experience, I’ve found that a small, hairline crack in a vintage pitcher or a bit of tarnish on a brass scale adds to the story and authenticity of the piece. These “flaws” are badges of a life well-lived and contribute to the kitchen’s soulful charm.
What’s your best thrift store find? Share it in the comments!
3. Curate Quirky Decor & Personal Touches
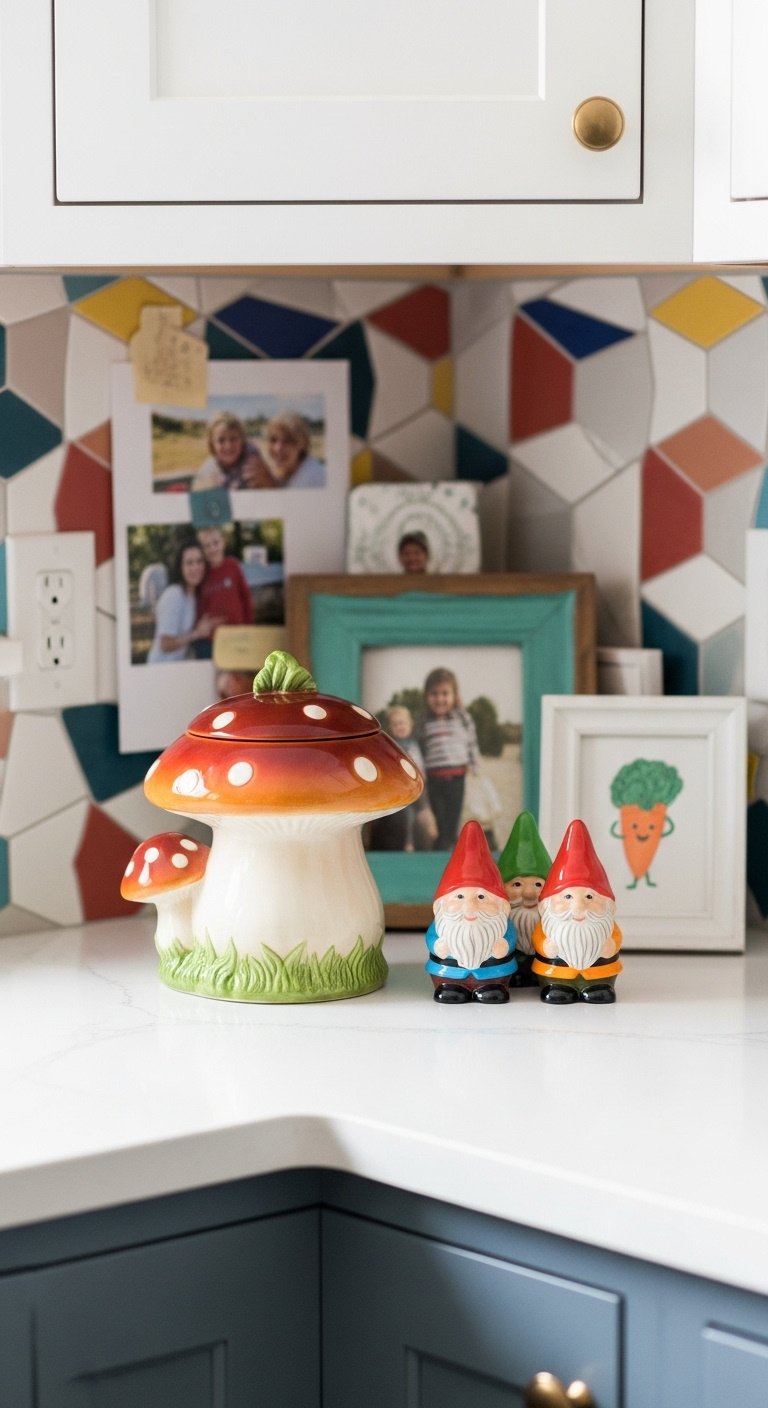
Your kitchen should be a direct reflection of your personality, so the next step is to curate a collection of quirky decor and deeply personal touches. This is where you move beyond general “decor” and start adding items that are uniquely you. Whimsical kitchens are deeply personal spaces that showcase the owner’s hobbies, sense of humor, and cherished memories.
- Materials Needed: A collection of personal items (photos, children’s drawings, inherited recipes), picture frames of various sizes, quirky objects (e.g., novelty salt shakers), wall hooks or floating shelves.
- Step-by-Step Directions:
- Shop Your Home First: Before buying anything new, take a walk through your own home. Look for items you already own and love that could be repurposed as kitchen decor. A colorful scarf can be framed, a collection of interesting mugs can be displayed on hooks, or a stack of beloved cookbooks can add a pop of color.
- Create a Gallery Wall: Dedicate a small wall or backsplash area to a personal gallery. Frame meaningful items like a handwritten recipe from your grandmother, vintage food advertisements you found at a flea market, your children’s first drawings, or your favorite art prints.
- Embrace Food-Themed Fun: Lean into the kitchen theme with fun, food-inspired accessories. Look for ice cream cone salt and pepper shakers, a ceramic strawberry dish soap holder, or a pie-themed wall clock. These small touches add a layer of playfulness.
- Display with Pride: Use open shelving and countertops to display not just your everyday dishes, but also your prized collections. Whether it’s quirky cookie jars, colorful Fiestaware, or vintage colanders, treat these functional items as works of art.
Pro-Tip: Your kitchen should tell your story, and stories are rarely perfectly coordinated. Don’t be afraid to display something that is purely sentimental, even if it doesn’t “match” the rest of the decor in a traditional sense. That unexpected, cherished object is the very essence of a truly personal and whimsical space.
Save this to your “Quirky Home” board on Pinterest!
4. Weave in Natural Materials & Greenery
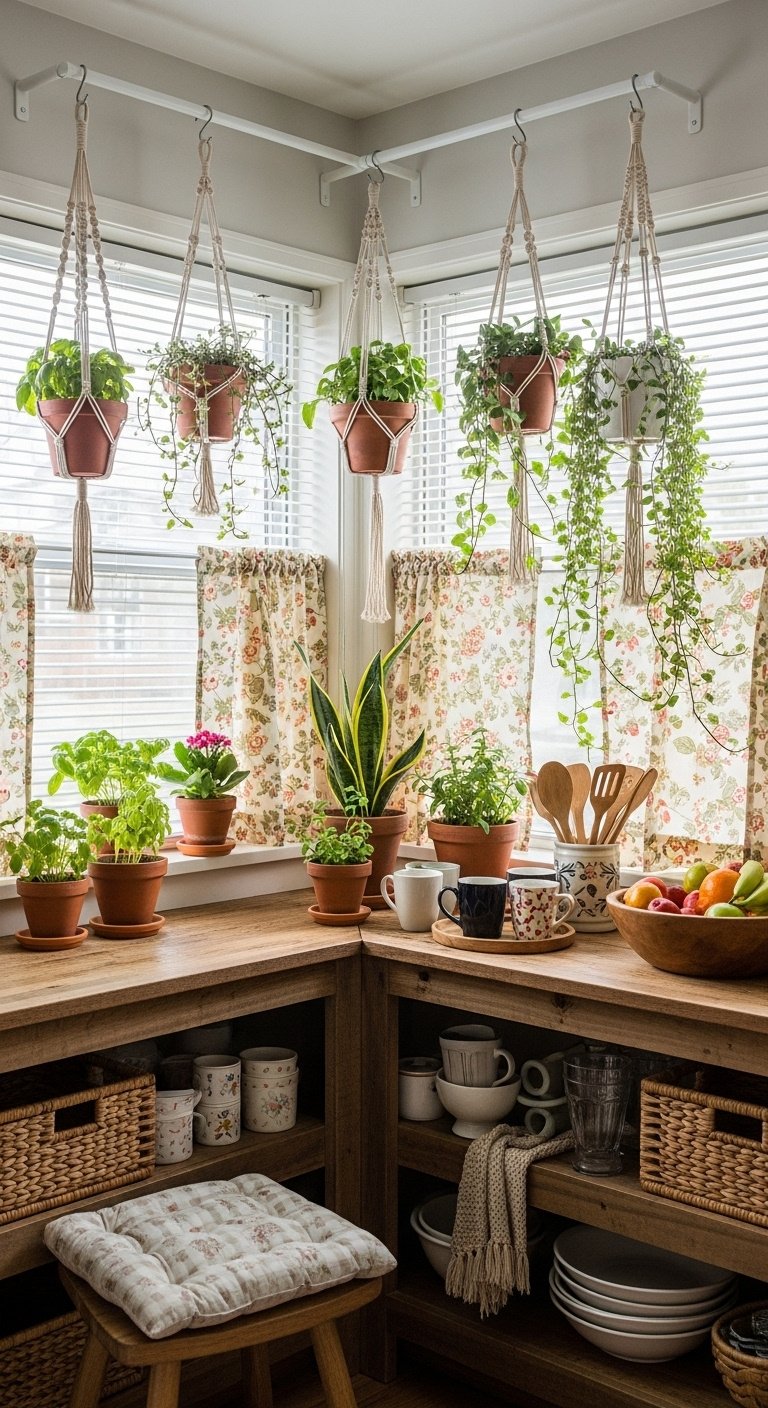
To balance the bold colors and quirky decor, it’s essential to weave in plenty of natural materials and greenery for warmth and life. Bringing the outdoors in is a cornerstone of whimsical and cottage-style kitchens. These organic elements provide a calming, earthy base that prevents the eclectic mix from feeling overwhelming and adds a layer of cozy, rustic charm.
- Materials Needed: Potted herbs (basil, mint, rosemary), flowering plants, macramé plant hangers, floral or gingham fabric for curtains, reclaimed wood for a shelf, wicker baskets.
- Step-by-Step Directions:
- Start a Windowsill Herb Garden: This is one of the easiest and most rewarding additions. Place small terracotta pots of your favorite culinary herbs like basil, mint, and rosemary on the kitchen windowsill. They’ll get plenty of light and are both beautiful and wonderfully functional.
- Go Vertical with Greenery: Use macramé hangers or simple ceiling hooks to suspend trailing plants like pothos, ivy, or string of pearls. Placing them in corners or above a window creates a lush, jungle-like effect and draws the eye upward.
- Introduce Warm Wood: Embrace the beauty of natural wood. Install a single, thick floating shelf made from reclaimed wood to display mugs and small plants. Swap out your plastic utensil holder for a beautiful, hand-carved wooden one, or use a large wooden bowl to hold fresh fruit.
- Soften with Textiles: Textiles are key to a cozy feel. Replace standard blinds with soft curtains in a floral or gingham pattern. Add cushioned seat pads to your kitchen chairs, and use knitted or linen dishcloths to add texture.
Pro-Tip: If you’re new to indoor gardening or worry you don’t have a green thumb, choose low-maintenance plants. I always recommend snake plants, ZZ plants, and pothos to beginners. They are incredibly forgiving, tolerate a range of light conditions, and add just as much green charm and life to your space as their more finicky counterparts.
Love this cozy vibe? Share it with a friend who loves plants!
5. Display Your Wares with Open Shelving
To create an open, airy, and personality-packed display, you should replace some upper cabinets with open shelving to showcase your wares. This is a hallmark of cottage and farmhouse styles for a reason. It not only provides practical, easy-access storage but also gives you a dedicated stage to display your favorite dishware, colorful glassware, and rustic accessories, turning everyday items into decor.
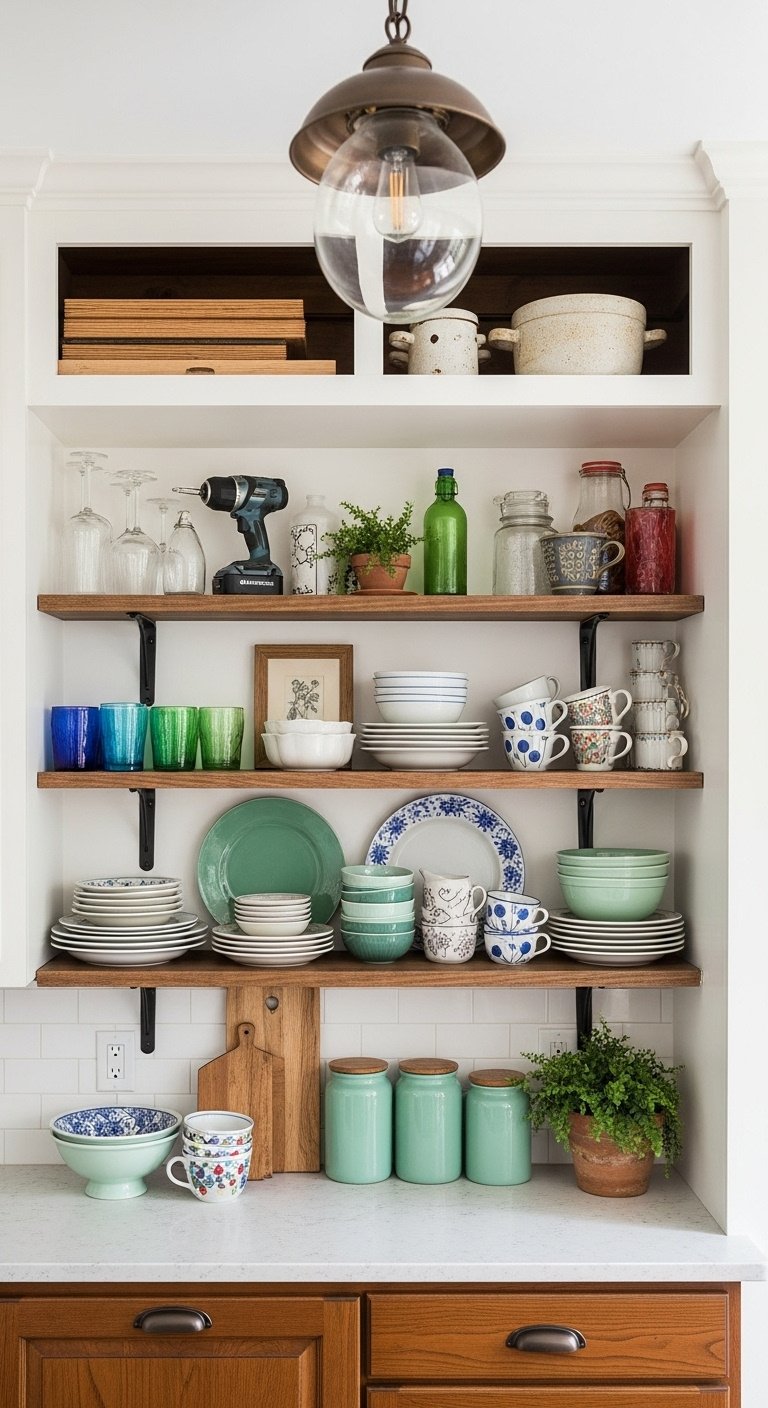
- Materials Needed: Solid wood planks (reclaimed or new), heavy-duty shelf brackets, a stud finder, drill, level, screws, and your collection of display-worthy items.
- Step-by-Step Directions:
- Remove Upper Cabinets: For the most dramatic and airy transformation, carefully remove one or two upper cabinets. This instantly opens up the space. You’ll need to patch any holes and paint the wall behind for a clean slate.
- Install Sturdy Shelves: It is critical that your shelves are secure. Use a stud finder to locate the studs in your wall for the strongest possible mounting points. Install your brackets and wooden shelves, using a level to ensure they are perfectly straight.
- Curate Your Display: Now for the best part! Arrange your most beautiful dishware, colorful glasses, and rustic accessories. Create visual interest by varying heights and textures. Stack plates, lean small art prints against the wall, and intersperse small plants or quirky objects.
- Combine Form and Function: Your shelves should be as practical as they are pretty. Place your most-used items, like everyday mugs and breakfast bowls, on the lowest and most accessible shelf. This makes your morning coffee routine a breeze and ensures the display feels lived-in.
Lesson Learned: A common concern with open shelving is that it will look cluttered. I’ve found the best way to prevent this is to stick to a loose color palette for the items you display. For example, you might decide to showcase only your blue, green, and white dishes together. This creates a cohesive look, and you can store any less aesthetic or clashing items in your lower cabinets.
Click save to remember this beautiful shelf styling idea!
6. Make a Statement with Whimsical Lighting
A truly enchanting kitchen needs layers of light, so you should make a bold statement with a primary whimsical lighting fixture. Lighting is the jewelry of a room, and in a whimsical kitchen, it’s an opportunity to add a major dose of personality and drama. Choose a pendant lamp or chandelier that acts as a focal point and a piece of art in its own right.
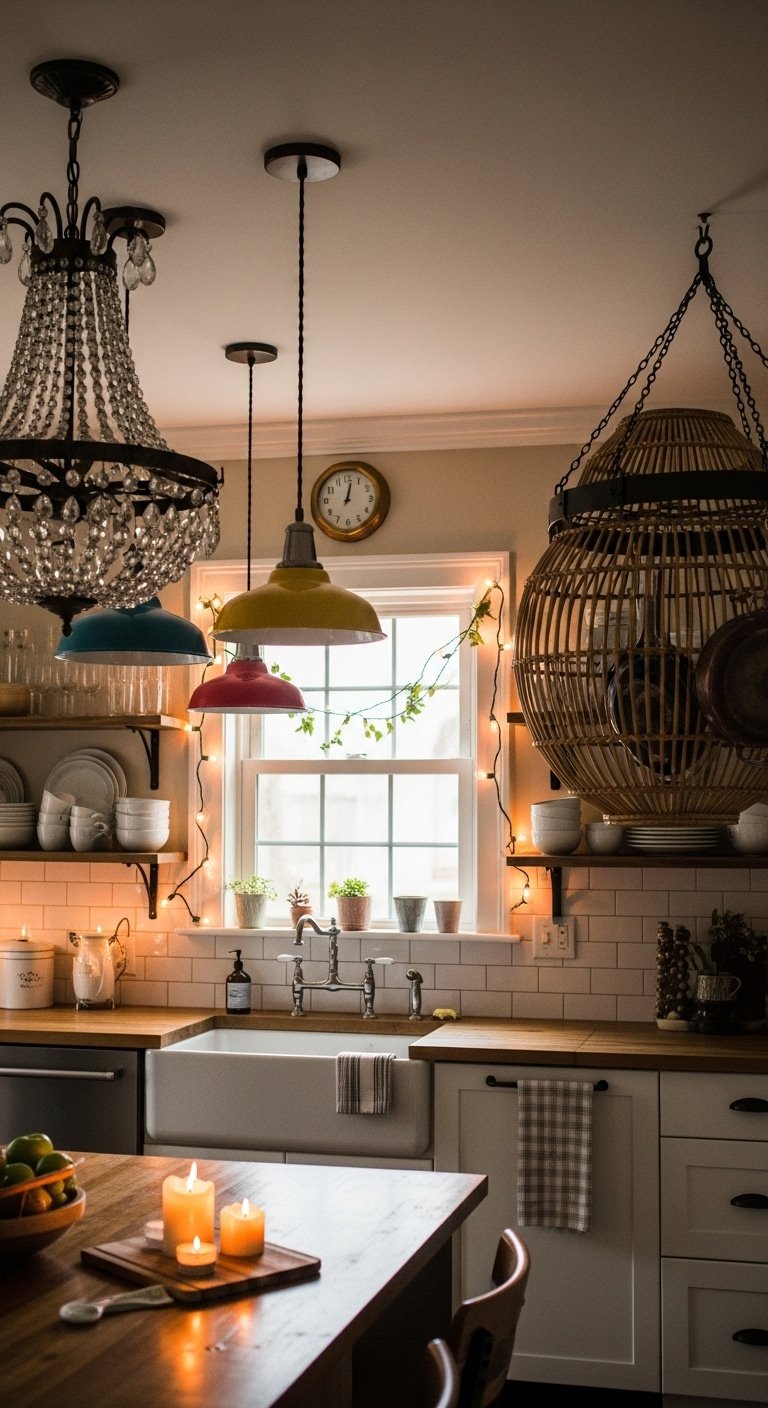
- Materials Needed: Your chosen statement light fixture, ladder, wire cutters/strippers, voltage tester, and potentially help from an electrician. For ambient lighting: string lights (fairy lights) and hooks.
- Step-by-Step Directions:
- Choose a Focal Point: Select a light fixture that makes a powerful statement and aligns with your vision. This could be a glittering antique crystal chandelier for a touch of unexpected glam, a series of colorful enamel pendant lights hanging over your island for a retro diner feel, or a large, woven rattan fixture to bring in a natural, boho vibe.
- Install Safely: Electrical work requires caution. Always turn off the power at the breaker before you begin. Carefully follow the manufacturer’s instructions to install your new fixture. If you have any doubts, it’s always best to hire a licensed electrician for safety and peace of mind.
- Layer Your Lighting: A whimsical kitchen shouldn’t rely on just one overhead light. Create a magical ambiance by weaving delicate string lights or fairy lights around an open shelf, a window frame, or a hanging pot rack. This adds a soft, ambient glow that is perfect for evenings.
- Add Candlelight: For the ultimate cozy atmosphere, incorporate candles. Place a few scented candles on a safe surface like a countertop or dining table to create an intimate and relaxing glow for dinners or quiet evenings at home.
Pro-Tip: I always recommend installing a dimmer switch for your main light fixture. This is a relatively simple and inexpensive upgrade that gives you complete control over the room’s ambiance. It allows you to transition from bright, functional light for cooking and cleaning to a soft, moody glow for relaxing or entertaining.
Light up your life! Pin this stunning fixture idea.
7. Anchor the Charm with a Farmhouse Sink
For a touch of timeless, traditional charm that is both beautiful and highly practical, anchor your kitchen design with a classic farmhouse sink. Also known as an apron-front sink, this style is a staple in cottage, farmhouse, and whimsical kitchens. Its deep basin is incredibly functional for washing large pots and pans, while its exposed front adds a substantial, architectural element to the room.
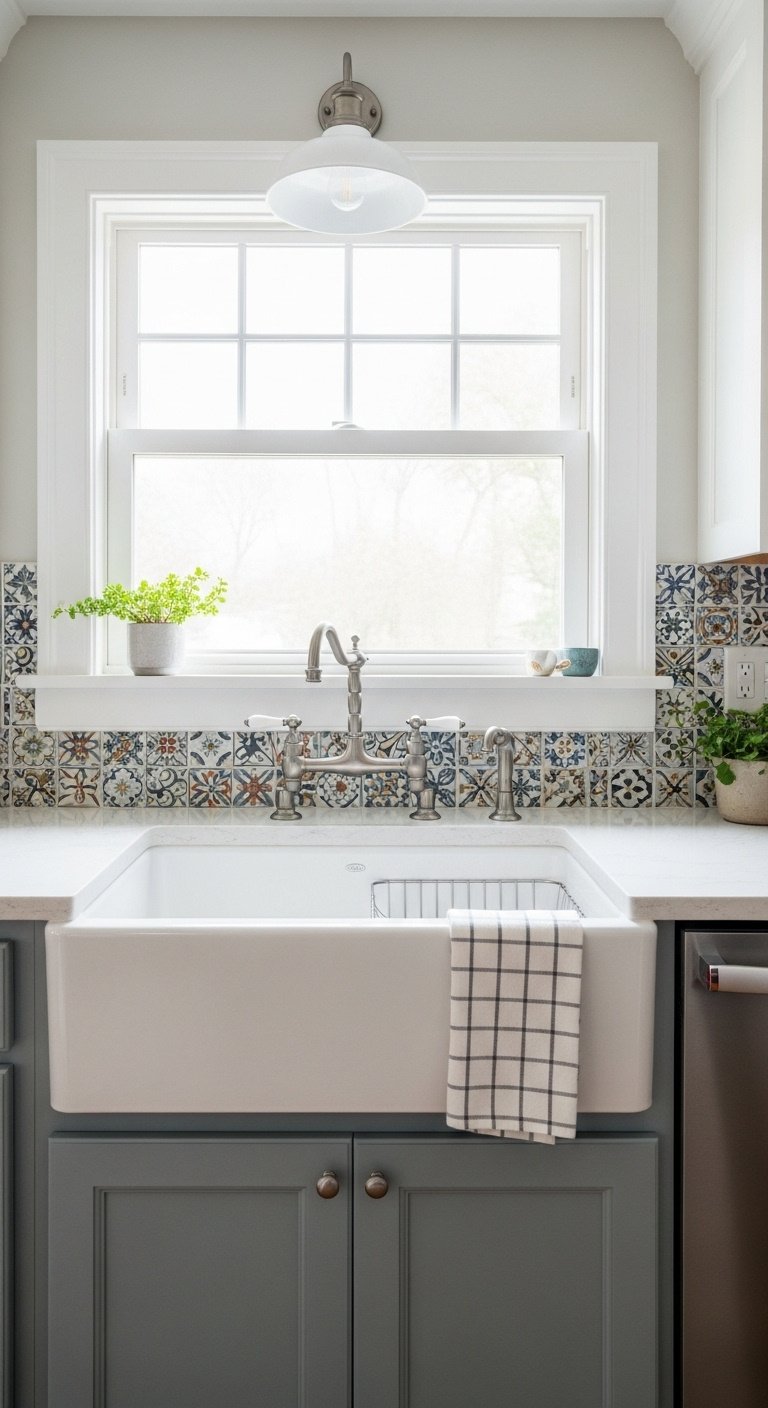
- Materials Needed: An apron-front sink, new faucet, custom or modified base cabinet, plumber’s putty, silicone sealant, and professional installation tools.
- Step-by-Step Directions:
- Measure Your Space: Farmhouse sinks are not a simple drop-in replacement. They require a specific type of base cabinet where the front is cut down to accommodate the sink’s apron. Measure your available space very carefully before you purchase the sink.
- Select Your Sink: The classic choice for a timeless cottage look is a white fireclay sink. However, you can find them in other materials like cast iron, copper, or natural stone to create a different stylistic twist.
- Professional Installation Recommended: Due to their significant weight and the custom cabinetry work required, I highly recommend having a professional plumber and carpenter install your farmhouse sink. This ensures it is properly supported to prevent sagging and perfectly sealed to prevent leaks.
- Pair with a Vintage-Style Faucet: The right faucet is the perfect finishing touch. Complete the charming look with a high-arc, gooseneck faucet in a classic finish like unlacquered brass (which will develop a beautiful patina over time), polished nickel, or oil-rubbed bronze.
Lesson Learned: While incredibly durable and beautiful, white fireclay sinks can be prone to getting scuff marks from heavy pots and pans. After installing mine, I quickly learned that a simple stainless steel sink grid placed at the bottom is a lifesaver. It protects the surface from scratches and scuffs, keeping it looking pristine for years to come.
Is a farmhouse sink on your kitchen wishlist? Let us know!
8. Get Creative with a Whimsical Backsplash
Your backsplash is a prime opportunity for a splash of creativity, so you should choose a playful and whimsical tile to serve as an artistic focal point. The backsplash is like the wallpaper of the countertop area. Instead of opting for standard, neutral subway tile, select a tile with an interesting shape, a vibrant color, or a unique pattern to inject a major dose of personality into your kitchen.
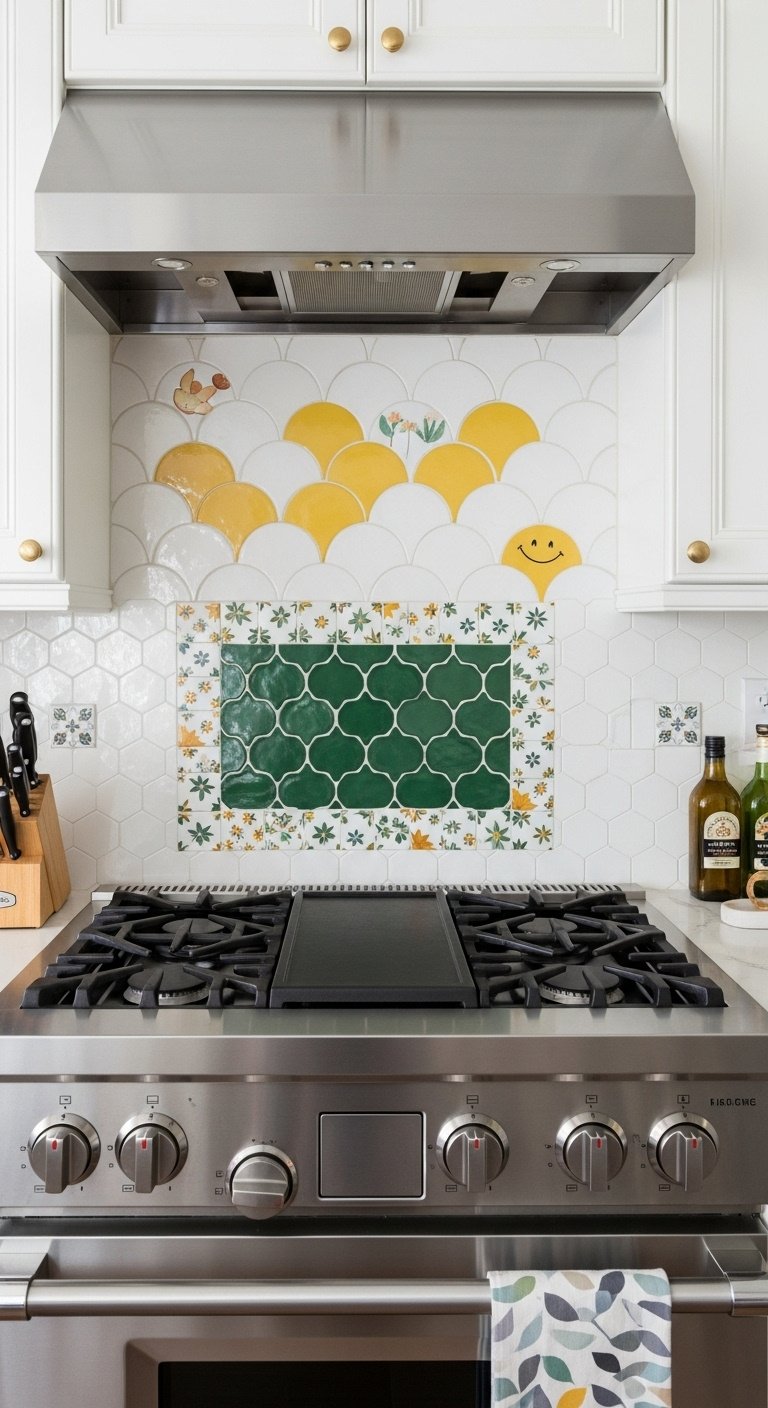
- Materials Needed: Your chosen tile (e.g., colorful penny tiles), thin-set mortar, notched trowel, tile spacers, tile saw or cutter, grout, grout float, sponge.
- Step-by-Step Directions:
- Choose a Playful Tile: Think outside the box! Consider mermaid-scale (scallop) tiles in a dreamy ocean blue, cheerful yellow penny tiles for a retro vibe, star-and-cross patterns, or even tiles with a delicate, hand-painted floral motif.
- Create a Mural: For the ultimate whimsical statement, dedicate the area behind your stove for a small tile mural. You can find artists who create custom murals, or you can piece together different colored tiles to create an abstract pattern that serves as the kitchen’s centerpiece.
- Try Peel-and-Stick for Renters: If you’re renting or want a less permanent, budget-friendly option, the world of high-quality peel-and-stick tiles has exploded. They come in countless whimsical patterns and are remarkably easy to apply and remove without damaging the wall.
- DIY or Hire Out: Tiling a backsplash can be a very manageable DIY project for a handy homeowner. The process involves preparing your wall surface, applying mortar with a trowel, placing your tiles with spacers, allowing it to dry, and then applying grout to fill the gaps.
Pro-Tip: Don’t be afraid to use a contrasting grout color to make your tile’s unique shape pop. For instance, using a dark gray or even black grout with white penny tiles creates a stunning graphic effect. Similarly, a crisp white grout against dark green scallop tiles will beautifully outline each “scale,” making the pattern even more dramatic.
Add a pop of color! Save this backsplash idea now!
9. Repurpose Furniture for Unique Functionality
To add unexpected charm and individual character, you can repurpose a piece of vintage furniture for unique kitchen functionality. Bringing a non-kitchen item into the space is a brilliant way to add storage and personality that you simply can’t get from standard cabinetry. A vintage dresser, an old workbench, or a narrow console table can be transformed into a one-of-a-kind kitchen island, coffee bar, or storage station.
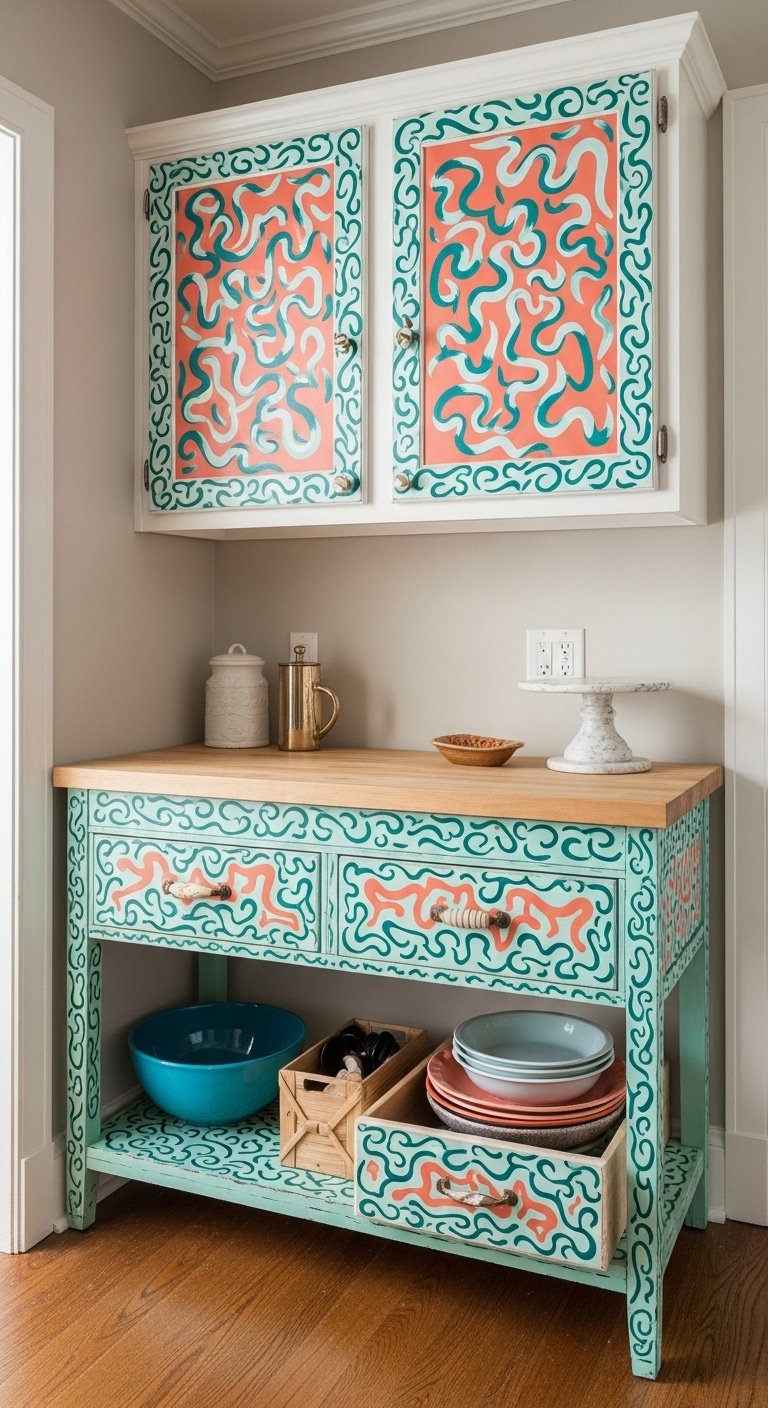
- Materials Needed: A piece of vintage furniture (e.g., a small dresser), sandpaper, primer, paint, new hardware (knobs/pulls), potentially a new top (butcher block, marble remnant).
- Step-by-Step Directions:
- Find the Perfect Piece: Hunt for a sturdy vintage dresser or console table at a flea market or secondhand store. Look for something made of solid wood. Most importantly, check its height to ensure it’s comfortable for you to use as a kitchen prep surface.
- Prep and Paint: The transformation begins with paint. Clean the piece thoroughly, then lightly sand the entire surface to scuff it up so the primer will adhere. Apply a coat of high-quality primer, followed by two coats of a durable paint in a fun, whimsical color like teal, coral, or mustard yellow.
- Upgrade the Top: For a more durable and food-safe work surface, consider replacing the original top. You can have a piece of butcher block or even a small stone remnant cut to size and affix it securely to the top of the dresser.
- Add New Hardware: The final touch is the hardware. Swap out the old, dated knobs or pulls with quirky new hardware that matches your kitchen’s aesthetic. You can find beautiful and unique options online or at antique shops. Use the drawers for fantastic hidden storage for linens, silverware, or baking supplies.
Lesson Learned: Before you commit to a piece of furniture, I highly recommend using painter’s tape to mark its dimensions on your kitchen floor. This simple step helps you visualize the space it will occupy and ensures you have enough clearance to walk around it comfortably. As a guideline, the “3×4 kitchen rule” suggests having at least three feet of walkway space to ensure comfortable movement.
What furniture would you repurpose? Pin this clever idea!
10. Paint Your Cabinets a Squiggly, Whimsical Design
For those who are truly brave and artistic, you can transform your cabinets into a work of art by painting them with a squiggly, whimsical design. This is perhaps the boldest move on our list, but it’s a surefire way to create a kitchen that is absolutely unforgettable and completely your own. A hand-painted pattern adds a playful, modern, and artistic touch that turns your functional cabinets into a major statement piece.
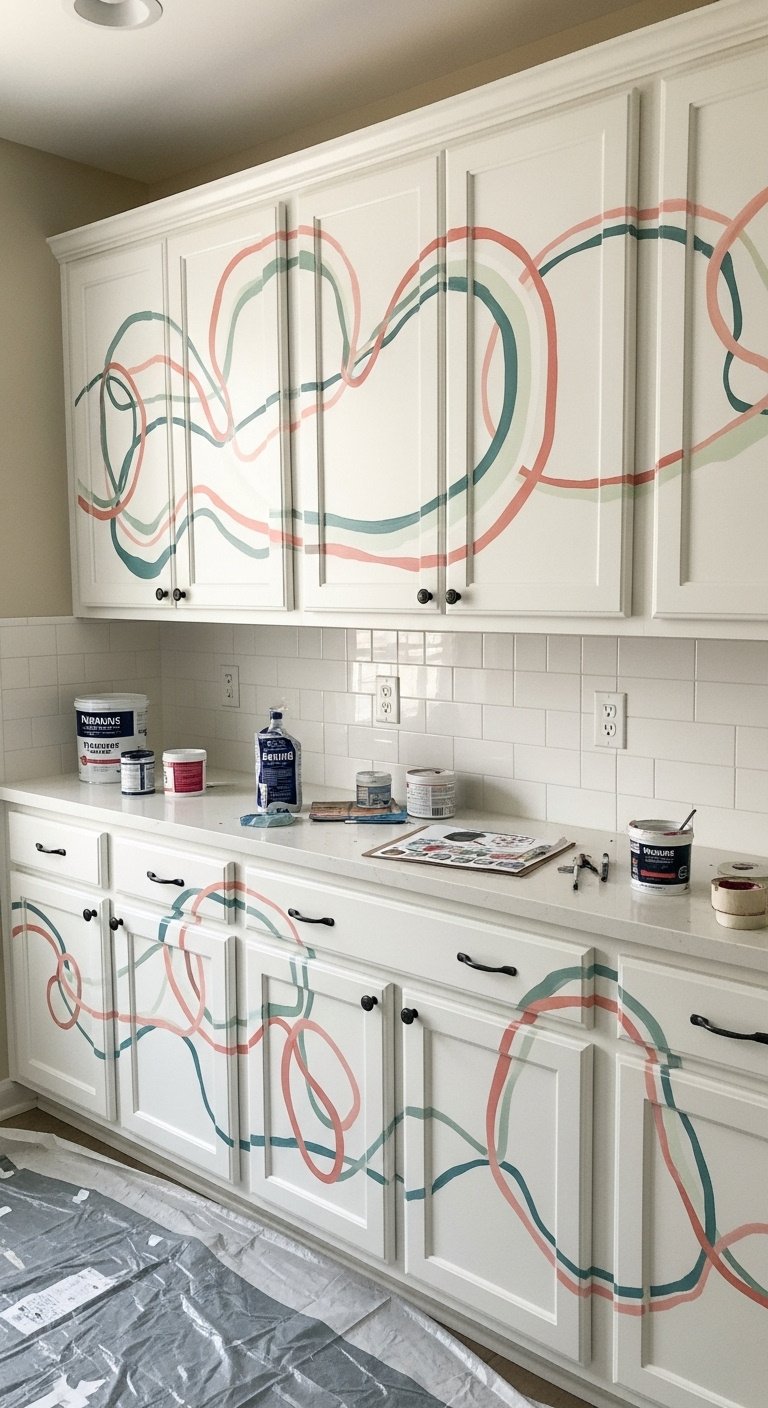
- Materials Needed: High-adhesion primer, durable cabinet paint in a base color and 1-2 accent colors, small artist’s brushes, painter’s tape, clear topcoat (polyurethane or polycrylic).
- Step-by-Step Directions:
- Prep is Key: Proper preparation is 90% of the work in cabinet painting. Remove all doors and hardware. Clean every surface thoroughly with a degreaser to remove any kitchen grime. Then, lightly sand everything to remove the glossy finish and give the primer something to grip onto.
- Prime and Paint Base: Apply a thin, even coat of high-adhesion primer. Once it’s fully dry according to the manufacturer’s instructions, apply 2-3 coats of your chosen base color, allowing ample drying time between each coat for a smooth, hard finish.
- Sketch Your Design: Once the base coat is cured, lightly pencil your whimsical design onto the cabinet fronts. This could be a single, continuous squiggle that flows across all the doors, soft organic waves, or a repeating geometric shape.
- Paint the Pattern: Using a small, high-quality artist’s brush, carefully paint your design with your accent color(s). Take your time and use a steady hand.
- Seal for Durability: This final step is crucial. Once your beautiful design is completely dry, apply 2-3 thin coats of a clear, non-yellowing topcoat like polycrylic. This will protect your artwork from the inevitable bumps, spills, and wear and tear of a busy kitchen.
Pro-Tip: If you’re nervous about free-handing a design directly onto your cabinets, create a stencil first. You can draw your design on a piece of cardboard or stiff poster board and carefully cut it out with a craft knife. This allows you to test the design and ensures a consistent, clean pattern across all your cabinets.
Dare to be different! Save this bold cabinet idea.
11. Don’t Forget the Fifth Wall: The Ceiling
For a truly immersive and unexpected touch of magic, you must treat the ceiling as a “fifth wall” and give it a statement treatment. The ceiling is one of the most overlooked surfaces in any room. In a whimsical kitchen, decorating it with paint or wallpaper can tie the entire space together, creating an enchanting, jewel-box effect that completely envelops you in your charming new world.
- Materials Needed: Ceiling paint or wallpaper, drop cloths, painter’s tape, rollers with extension poles, brushes for cutting in, wallpaper adhesive and smoothing tools (if applicable).
- Step-by-Step Directions:
- Prep the Room: This is a messy job, so preparation is essential. Remove as much as you can from the room and cover all remaining furniture, countertops, and floors with drop cloths. Use painter’s tape to protect the tops of your walls and any light fixtures.
- Choose Your Treatment: For a simpler yet highly effective approach, paint the ceiling a soft, unexpected color. A pale sky blue can make the room feel taller, while a warm, sunny yellow can make the entire space feel more cheerful and bright.
- Go Bold with Wallpaper: For a truly immersive and jaw-dropping whimsical feel, apply a large-scale floral or whimsical patterned wallpaper to the entire ceiling. This is definitely a two-person job, so enlist a patient friend to help.
- Apply Carefully: Whether you’re painting or wallpapering, work in small, manageable sections. Use an extension pole for your roller to avoid straining your back and neck. For paint, apply two thin coats for the most even and professional-looking coverage.
Lesson Learned: From personal experience, when choosing a wallpaper for the ceiling, I strongly advise opting for a “paste-the-wall” variety. It is infinitely easier to manage applying paste to the ceiling section by section than trying to handle a large, heavy, sticky sheet of wallpaper over your head. It makes the process much less frustrating!
Look up! Pin this stunning ceiling inspiration.
Key Takeaways: Your Quick Guide to a Whimsical Kitchen
Creating a whimsical kitchen is a joyful process of curation and self-expression. To keep it simple, here are the core principles to remember as you begin your transformation:
- Color is Your Friend: Don’t be afraid to use bold, playful, and pastel colors on your walls, cabinets, and accessories. A colorful kitchen is a happy kitchen.
- Mix, Don’t Match: The most interesting spaces come from combining vintage finds with modern pieces. Blend different patterns, styles, and textures to create a curated, eclectic look that feels collected over time.
- Tell Your Story: The most important element in your whimsical kitchen is you. Display personal art, quirky collections, and thrifted treasures that have meaning and bring a smile to your face.
- Bring Nature In: Ground your playful design with the warmth of nature. Use wood tones, natural textiles like linen and cotton, and plenty of indoor plants to add life and coziness.
- Think Functionally Charming: Every practical element in your kitchen, from the sink and faucet to your storage canisters, is an opportunity to add character and charm.
People Also Ask About Whimsical Kitchens
What is a cottagecore kitchen?
A cottagecore kitchen is a style that embraces a cozy, rustic, and romanticized farmhouse or fairytale cottage aesthetic. It heavily features natural materials like wood, floral patterns, vintage or distressed items, indoor plants, and a handmade, slightly cluttered feel. It’s a very close cousin to the whimsical kitchen style, with a strong focus on warmth, nostalgia, and nature.
What is the style for kitchens in 2025?
While timeless styles always have a place, the overarching kitchen style for 2025 is moving away from sterile, all-white designs towards more personalized and expressive spaces. Key trends include using bold, saturated colors that reflect personality, incorporating natural wood tones for warmth, and creating “living kitchens” that feel cozy and inviting, all of which align perfectly with the core principles of a whimsical aesthetic.
What kitchen style will never go out of style?
The classic white kitchen is often cited as a style that will never completely go out of style due to its clean, bright, and incredibly versatile nature. However, styles that emphasize quality craftsmanship and personal character, like a well-designed cottage, traditional, or eclectic kitchen, also have a timeless appeal because they transcend fleeting trends and are built on a foundation of solid design and personal storytelling.
How can I make my kitchen look whimsical on a budget?
You can absolutely achieve a whimsical look on a budget by focusing on paint, thrifted items, and greenery. A fresh coat of colorful paint on a single accent wall or your existing cabinets can make a huge impact for very little money. Scour local thrift stores and flea markets for unique mugs, plates, art, and quirky decor. Finally, bring in clippings from your garden or purchase a few affordable potted herbs to add a touch of fresh, green life.
Final Thoughts
Creating a whimsical kitchen is your permission slip to have fun with design. It’s about letting go of the idea of a “perfect” or “trendy” kitchen and instead building a space that is perfectly you. See your kitchen not just as a room for cooking, but as a canvas for your creativity and a gallery for the things you love. It’s a journey of surrounding yourself with objects and colors that bring you joy every single day.
What’s the first whimsical touch you’re going to add to your kitchen?
