As an Amazon Associate KitchenwareSets.com earns from qualifying purchases.
9 Freestanding Kitchen Ideas for Small Spaces and Budgets
Feeling stuck with a kitchen that’s too small, too dated, or just doesn’t fit your life? If the thought of a full-scale renovation makes your wallet ache, you’re not alone. Many of us dream of a functional, beautiful kitchen but are held back by permanent fixtures and a hefty price tag.
The good news is, you don’t have to be trapped. There’s a smarter, more flexible, and incredibly stylish solution that’s perfect for renters, budget-conscious homeowners, and anyone who loves a space with unique character. It’s time to rethink everything you know about kitchen design and embrace a more creative approach.
A freestanding kitchen is a modular design that uses standalone pieces of furniture like cabinets, islands, and shelves instead of built-in, permanent cabinetry. This unfitted approach is often cheaper, more flexible for small or awkward spaces, and allows you to create a unique, eclectic style that you can change, rearrange, or even take with you when you move. We understand the challenge of making a small kitchen work without a massive renovation budget. That’s why we’ve curated these 9 proven, practical solutions to transform your space.
Feeling Stuck? Why a Freestanding Kitchen is the Smart Solution for Your Small Space
A freestanding kitchen is a design approach that uses individual, standalone pieces of furniture—like cabinets, islands, and shelves—instead of traditional, built-in cabinetry. This modular method, also known as an “unfitted kitchen,” is often more affordable and offers unmatched flexibility, making it an ideal solution for small spaces, rental homes, and budget-friendly updates. It allows you to build a unique, eclectic kitchen that can evolve with your needs.
Fitted vs. Freestanding: What’s Really the Difference?
The primary difference is that freestanding kitchens are cheaper and more flexible because you only buy the specific units you need, avoiding the cost of custom cabinetry and complex installation. They offer greater freedom for renters or those who may want to reconfigure their space later, while fitted kitchens are a permanent, custom-built installation.
| Feature | Fitted Kitchen | Freestanding Kitchen |
|---|---|---|
| Cost | Higher initial investment for custom cabinets and professional installation. | Lower cost; you buy individual pieces over time as your budget allows. |
| Installation | Requires professional fitting, plumbing, and electrical work. A complex process. | Minimal to no installation. Many pieces are ready-to-use. |
| Flexibility | Permanent and fixed. Cannot be easily changed or moved. | Highly flexible. Units can be rearranged, replaced, or taken with you if you move. |
| Style | Tends to be uniform and seamless, creating a “cookie-cutter” look. | Eclectic, personal, and unique. Allows for mixing vintage, modern, and DIY pieces. |
| Resale Value | A modern, well-done fitted kitchen can add significant value. | May not add as much direct resale value, but the pieces can be taken with you. |
9 Freestanding Kitchen Ideas for a Stylish Upgrade on a Budget
Ready to transform your kitchen without the dust and expense of a major renovation? These nine practical and stylish freestanding kitchen ideas are chosen for their big impact on both functionality and aesthetics. Curated from top interior design trends for 2025 and real-world small-space solutions, these tips blend expert advice with easy, practical application.
1. The Multi-Functional Kitchen Cart Island
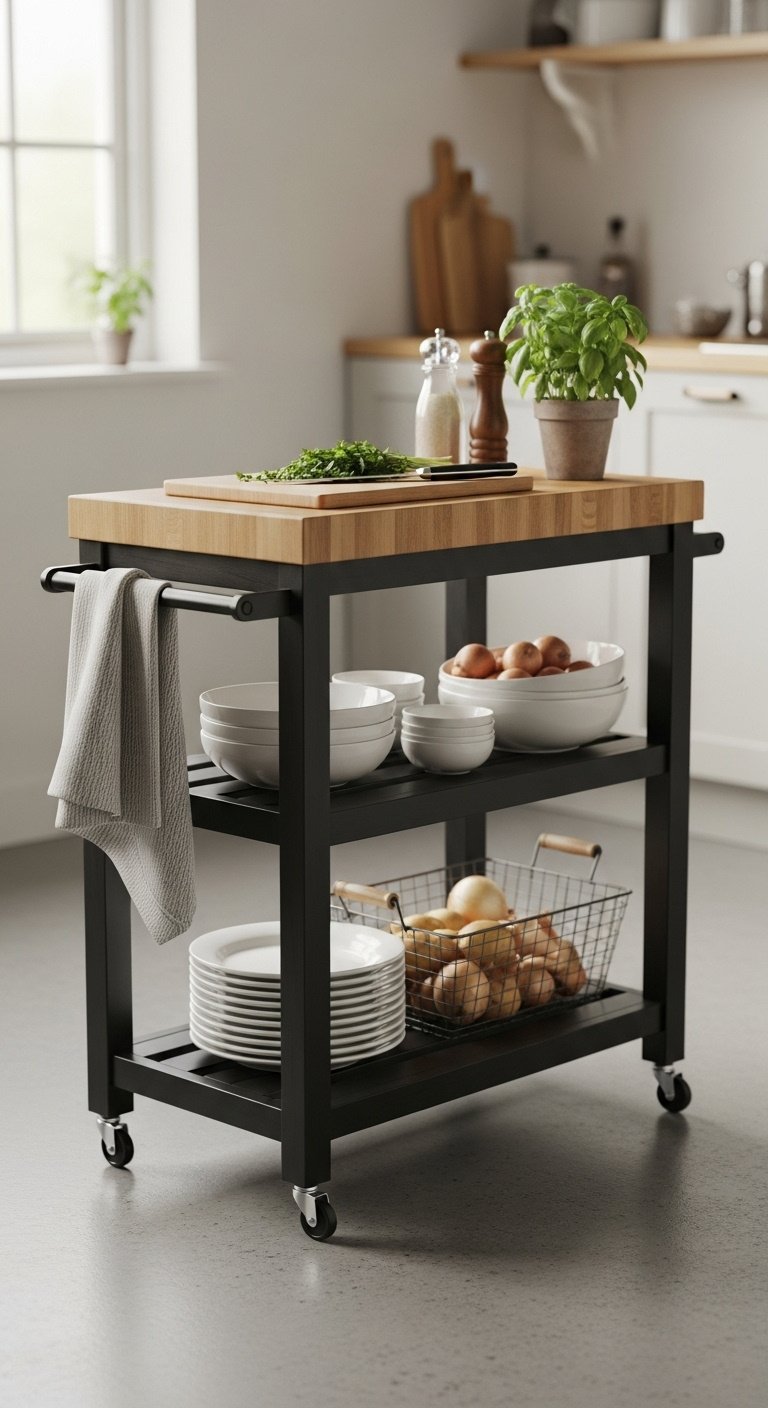
- Materials Needed: A pre-made kitchen cart (e.g., IKEA RÅSKOG or similar), optional S-hooks, small baskets or bins that fit the shelves.
- Step-by-Step Directions:
- Assemble the kitchen cart according to the manufacturer’s instructions. Ensure the wheels are securely attached and lockable if applicable.
- Designate zones for each shelf. Use the top for food prep, the middle for frequently used dishes, and the bottom for bulkier items.
- Use S-hooks on the sidebars to hang tea towels, utensils, or mugs to maximize vertical space.
- Place small bins on the shelves to corral smaller items like spices or snacks.
Pro-Tip: Choose a cart with locking wheels for stability when chopping or mixing. A stainless steel top is durable and easy to clean, while a butcher block top adds warmth and can be used as a cutting surface.
Save this flexible island idea to your ‘Small Kitchen Hacks’ board!
2. Smart Vertical Space with Open Shelving
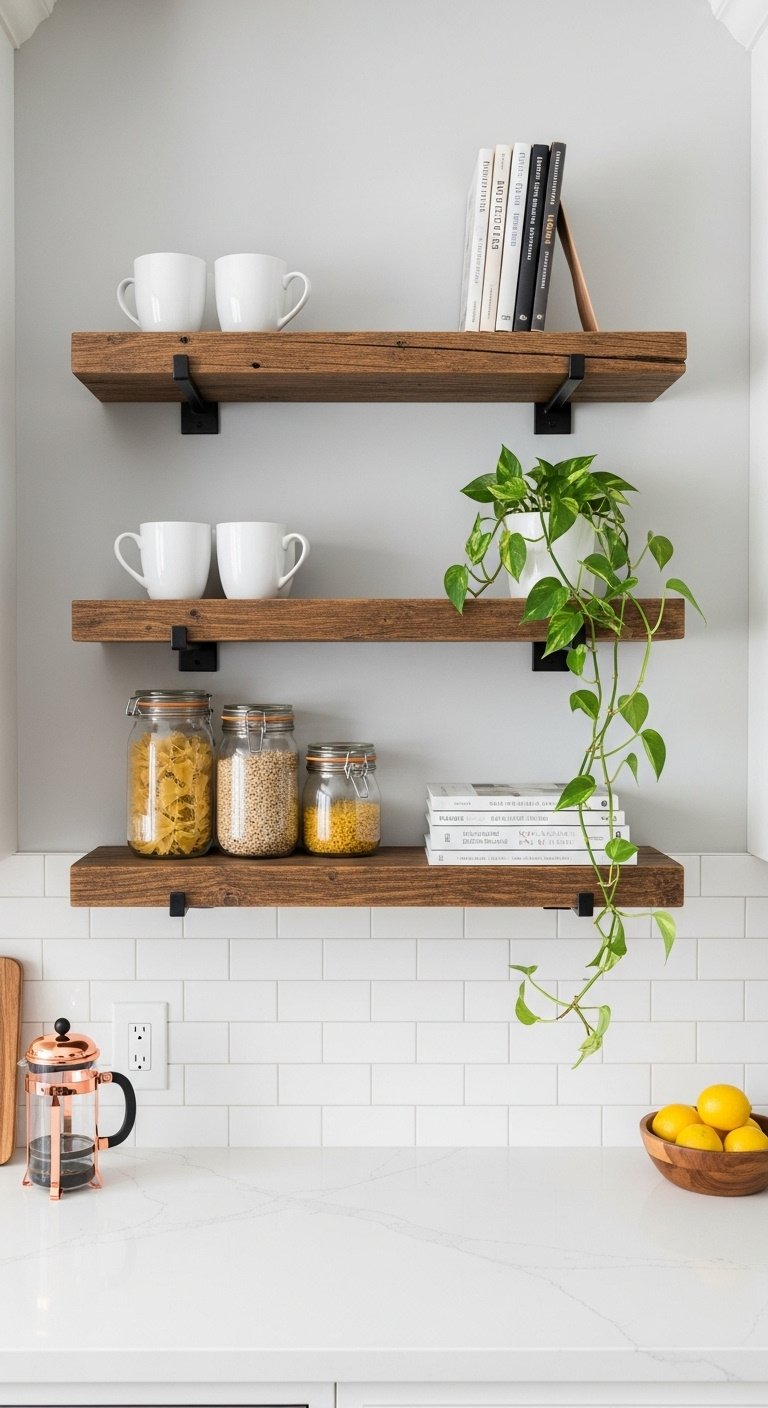
- Materials Needed: Wooden planks (cut to desired length), shelf brackets, a level, a drill, screws, and wall anchors appropriate for your wall type.
- Step-by-Step Directions:
- Measure and mark on the wall where you want your shelves to go. Use a level to ensure the marks are straight.
- Secure the brackets to the wall using the drill and screws. Use wall anchors for drywall to ensure a strong hold.
- Place the wooden planks on top of the brackets and secure them from underneath with smaller screws.
- Style the shelves, placing heavier items towards the back and near the brackets for support.
Lesson Learned: Always check for studs in the wall before drilling. Securing brackets to studs provides the most stable support for heavy items like plates and bowls.
Pin this airy shelving look for your kitchen refresh!
3. The Standalone Pantry Cabinet
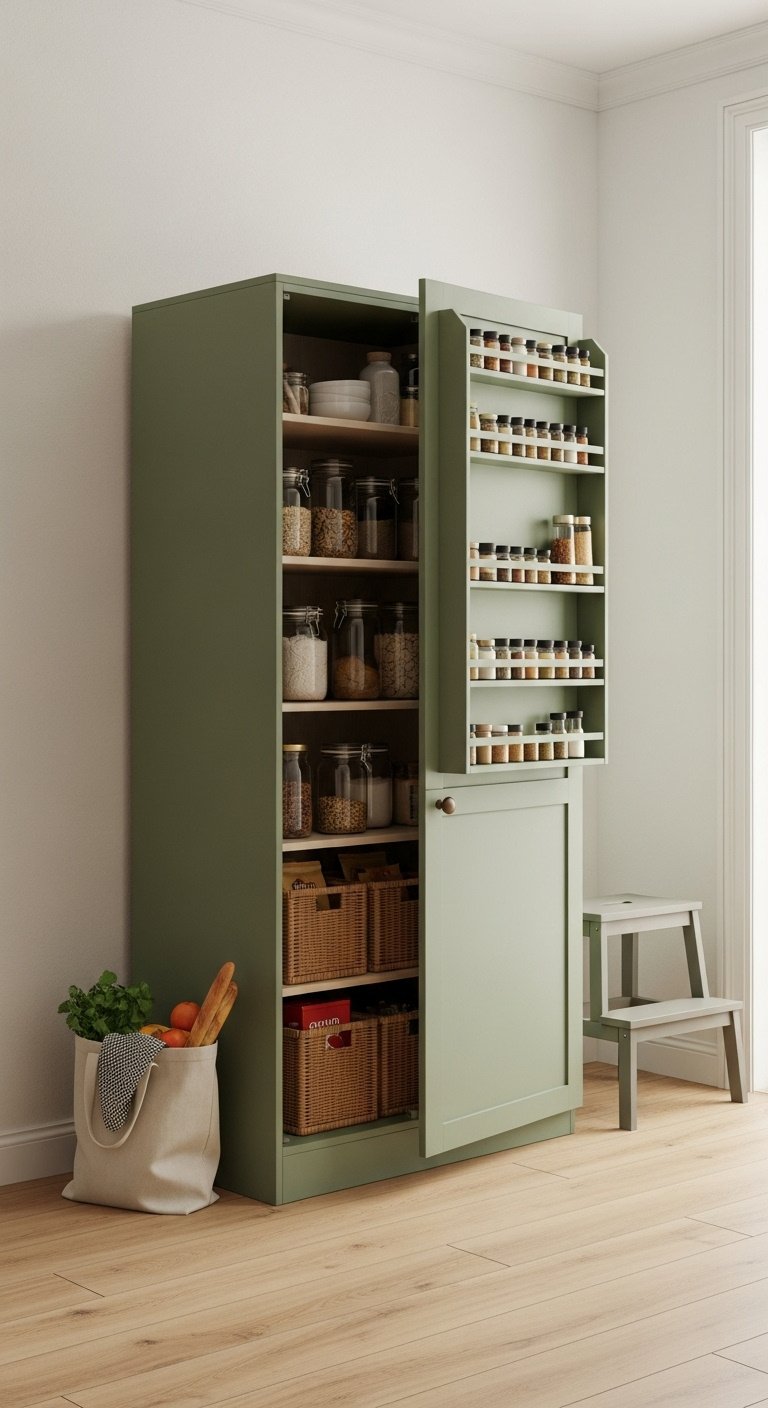
- Materials Needed: A freestanding cabinet or bookshelf, clear storage containers, labels, baskets or bins, optional tension rods for vertical division.
- Step-by-Step Directions:
- Source a cabinet that fits your space. Look in thrift stores or consider a simple IKEA option like the HAVSTA or BRIMNES.
- Decant dry goods like flour, sugar, pasta, and cereals into clear, airtight containers. This keeps food fresh and makes inventory easy.
- Label every container clearly.
- Group like items together (e.g., baking supplies, breakfast items, canned goods). Use baskets to hold loose items like snack bags or potatoes.
Pro-Tip: Before buying a cabinet, use painter’s tape on the floor to mark its footprint. This helps you visualize how much space it will take up and ensure you can still move around comfortably.
Need more pantry space? Save this freestanding cabinet idea!
4. Wall-Mounted Racks for Pots and Knives
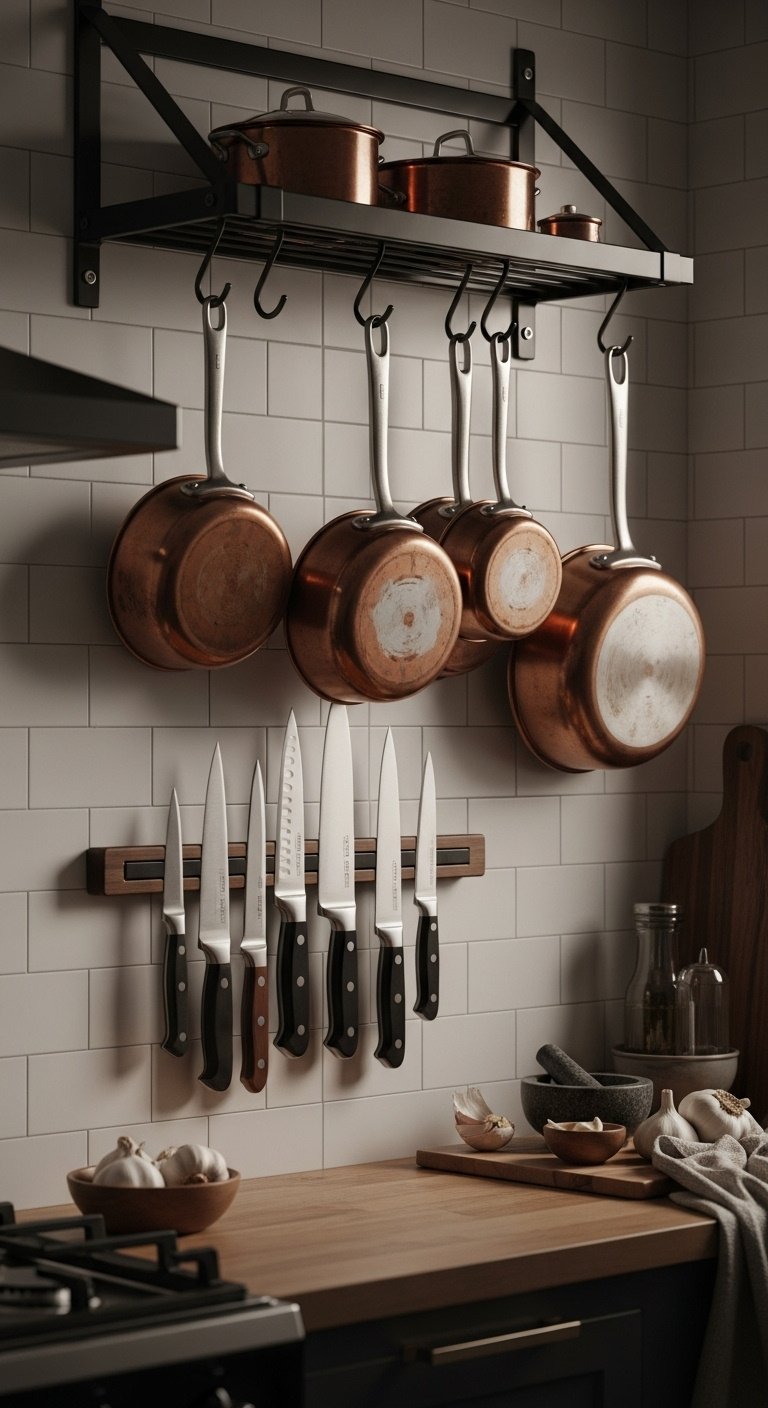
- Materials Needed: A pot rack or magnetic knife strip, a drill, a level, screws, and heavy-duty wall anchors.
- Step-by-Step Directions:
- Identify an empty stretch of wall, ideally near your stove for convenience.
- Use a stud finder to locate studs for the most secure installation, especially for a heavy pot rack.
- Hold the rack or strip against the wall and use a level to ensure it’s straight. Mark the drill holes with a pencil.
- Drill pilot holes, insert wall anchors if not drilling into a stud, and then screw the rack securely to the wall.
Pro-Tip: Arrange your pots and pans by size for a more organized, visually pleasing look. For knife strips, ensure the magnets are strong enough to hold your heaviest knives securely.
Free up cabinet space! Pin this smart wall storage solution.
5. The Repurposed Sideboard or Dresser
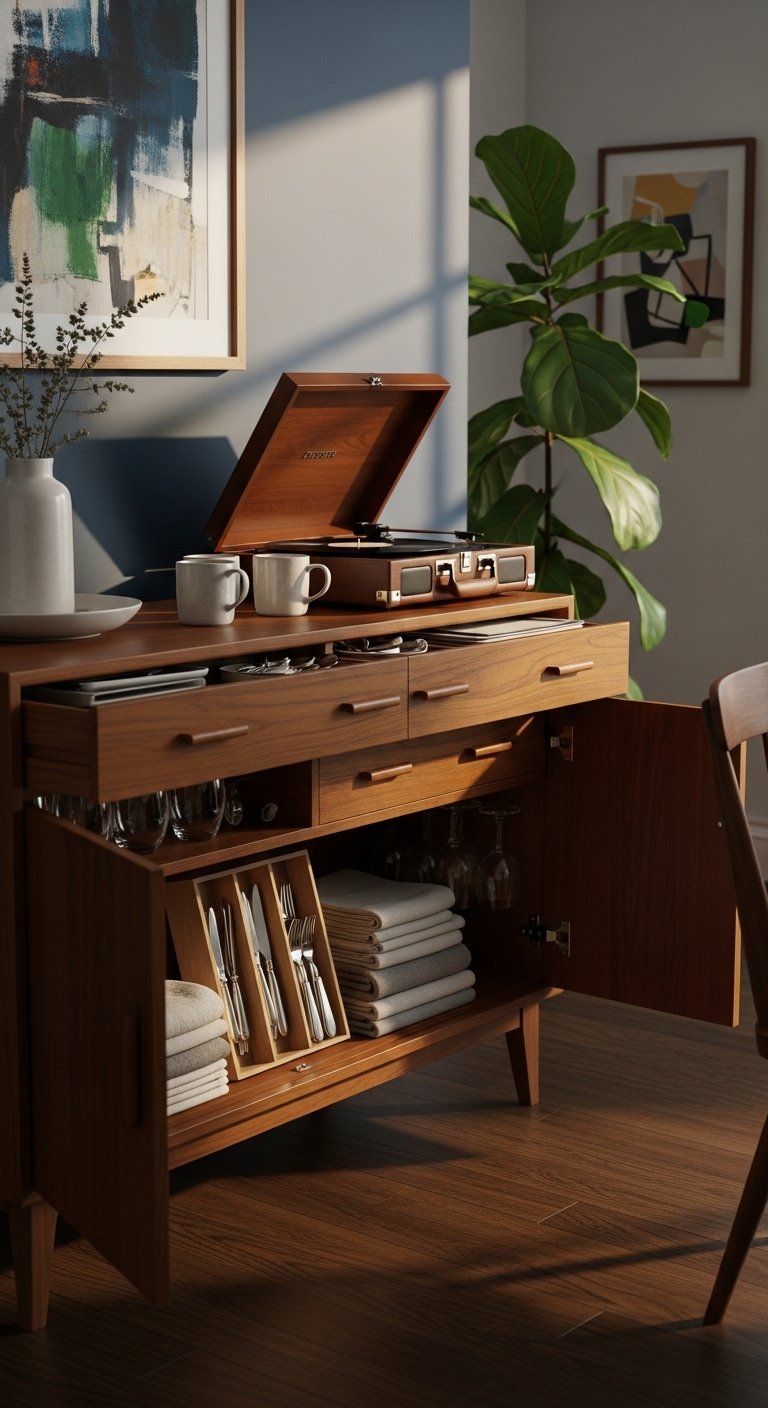
- Materials Needed: A vintage sideboard or dresser, sandpaper, primer, paint (optional), new hardware (optional), drawer liners.
- Step-by-Step Directions:
- Thoroughly clean the piece inside and out.
- If you plan to paint, lightly sand the entire surface, wipe away dust, and apply a coat of primer. Once dry, apply 2-3 coats of your chosen paint color.
- Update the hardware (knobs or pulls) for a quick, modern refresh.
- Line the drawers with decorative, easy-to-clean shelf liner paper.
- Organize your items inside: use drawers for silverware and linens, and cabinets for larger dishes or small appliances.
Lesson Learned: When thrifting, open all drawers and doors to check for functionality and any musty smells. A solid wood piece is a better investment for a kitchen environment than particleboard.
Love unique finds? Save this thrifted furniture idea!
6. The Dedicated Coffee & Tea Station
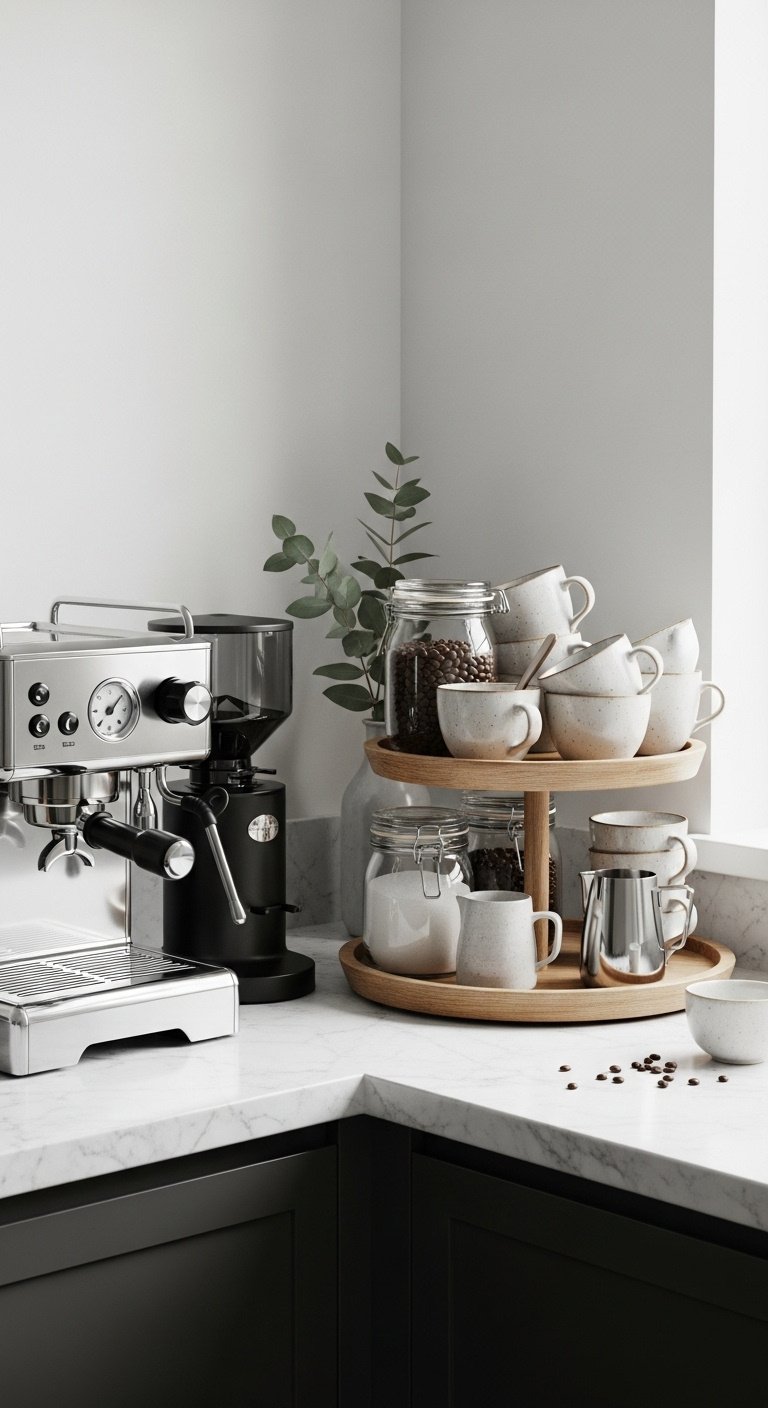
- Materials Needed: A small cart or a dedicated counter space, your coffee/tea maker, a tray, canisters for coffee/tea/sugar, a mug rack or hooks.
- Step-by-Step Directions:
- Choose a corner of your counter or a small freestanding cart for your station.
- Place your coffee or tea maker there.
- Use a tray to group together smaller items like sugar bowls, spoons, and canisters. This makes the area look intentional and contained.
- Store mugs on the station. You can stack them, use a small mug tree, or install a small under-cabinet rack for hanging mugs.
Pro-Tip: If using a cart, choose one with a power strip attached or place it near an outlet to avoid messy cords running across the kitchen.
Create your own café corner! Pin this coffee station setup.
7. Under-Cabinet & Over-the-Door Organizers
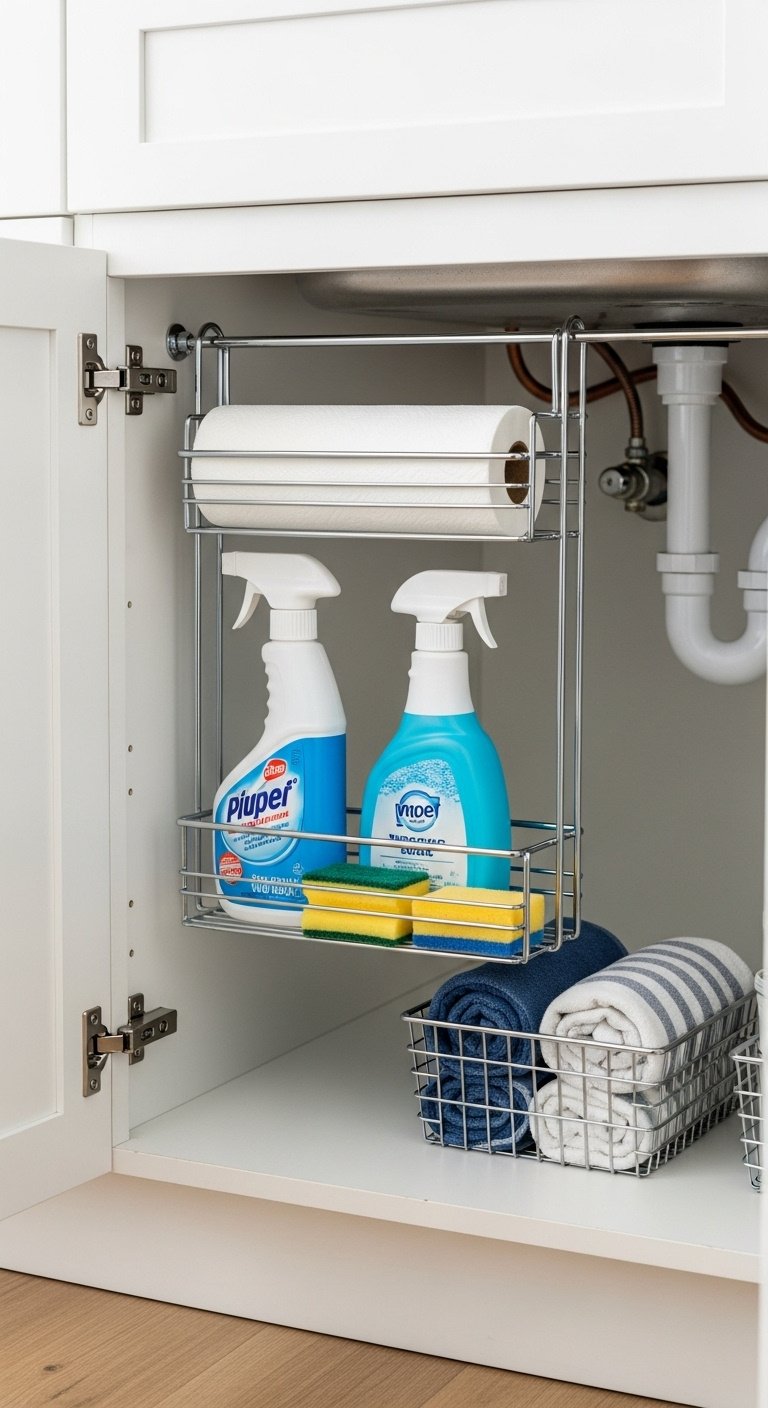
- Materials Needed: Over-the-door caddies, under-cabinet stemware racks, adhesive hooks.
- Step-by-Step Directions:
- For Under the Sink: Purchase an over-the-door organizer designed for cabinet doors. Simply hang it over the door to store cleaning supplies, sponges, and trash bags.
- For Under Upper Cabinets: Measure the depth of your upper cabinets. Purchase a stemware rack that fits and screw it into the underside of the cabinet to hang wine glasses, freeing up shelf space.
- For Inside Cabinet Doors: Use strong adhesive hooks on the inside of pantry doors to hang measuring cups and spoons.
Lesson Learned: Before buying an over-the-door organizer, measure the thickness of your cabinet door and ensure the organizer’s hooks will fit.
Maximize hidden space! Pin this genius organizing hack.
8. The Modular Cube Unit Solution
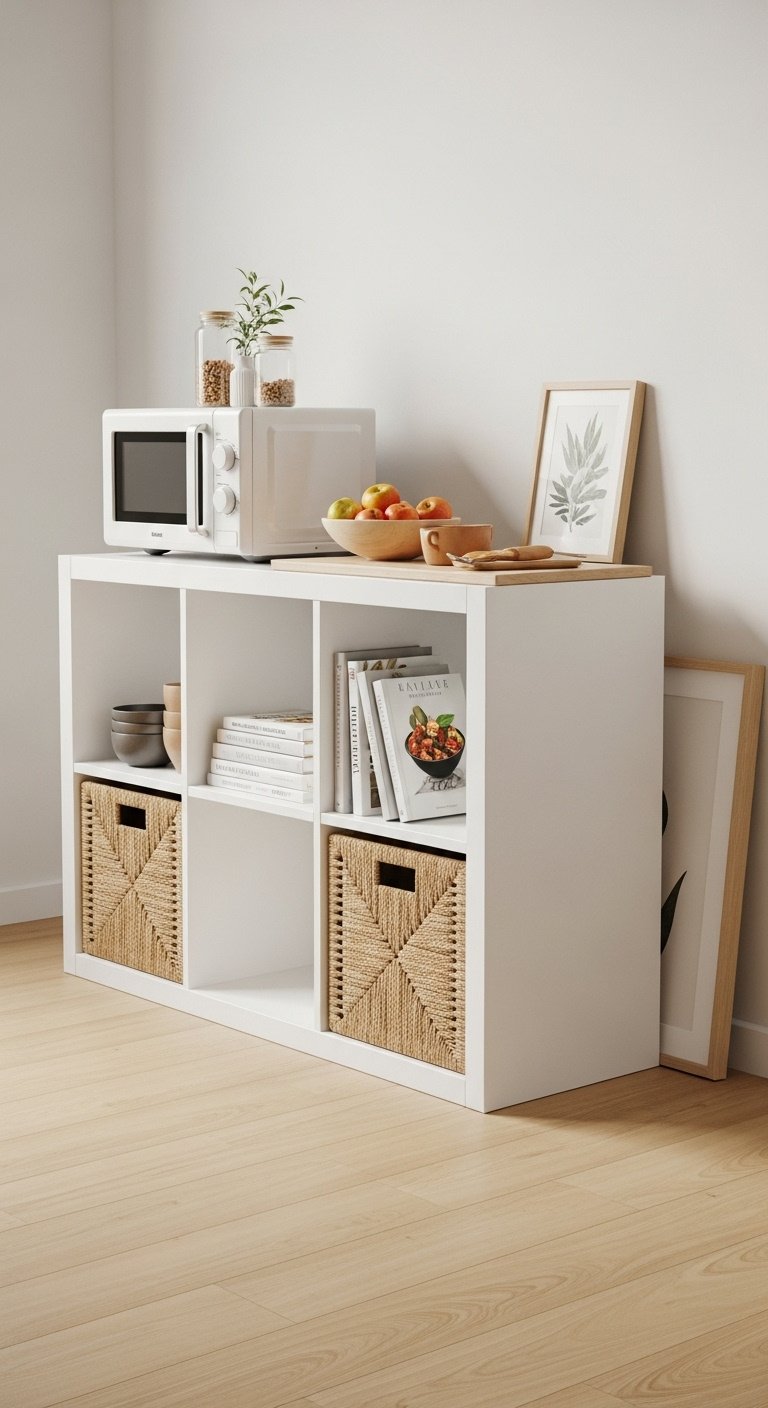
- Materials Needed: A cube shelving unit (e.g., 2×2 or 2×4), fabric or solid drawer inserts.
- Step-by-Step Directions:
- Assemble the cube unit according to instructions. For kitchen use, it’s highly recommended to anchor it to a wall for safety.
- Decide on the configuration. Use open cubes for items you want to display, like cookbooks or pretty bowls.
- Use pull-out fabric or solid bins for items you want to hide, such as extra linens, Tupperware, or pantry overflow items.
- Utilize the top surface as a station for a microwave, coffee maker, or just extra landing space.
Pro-Tip: If using the unit horizontally as a low console, consider adding furniture legs to the bottom. This elevates it slightly, making it look more like a deliberate piece of furniture and less like basic storage.
Get creative with storage! Save this modular furniture hack.
9. The Budget Backsplash Update
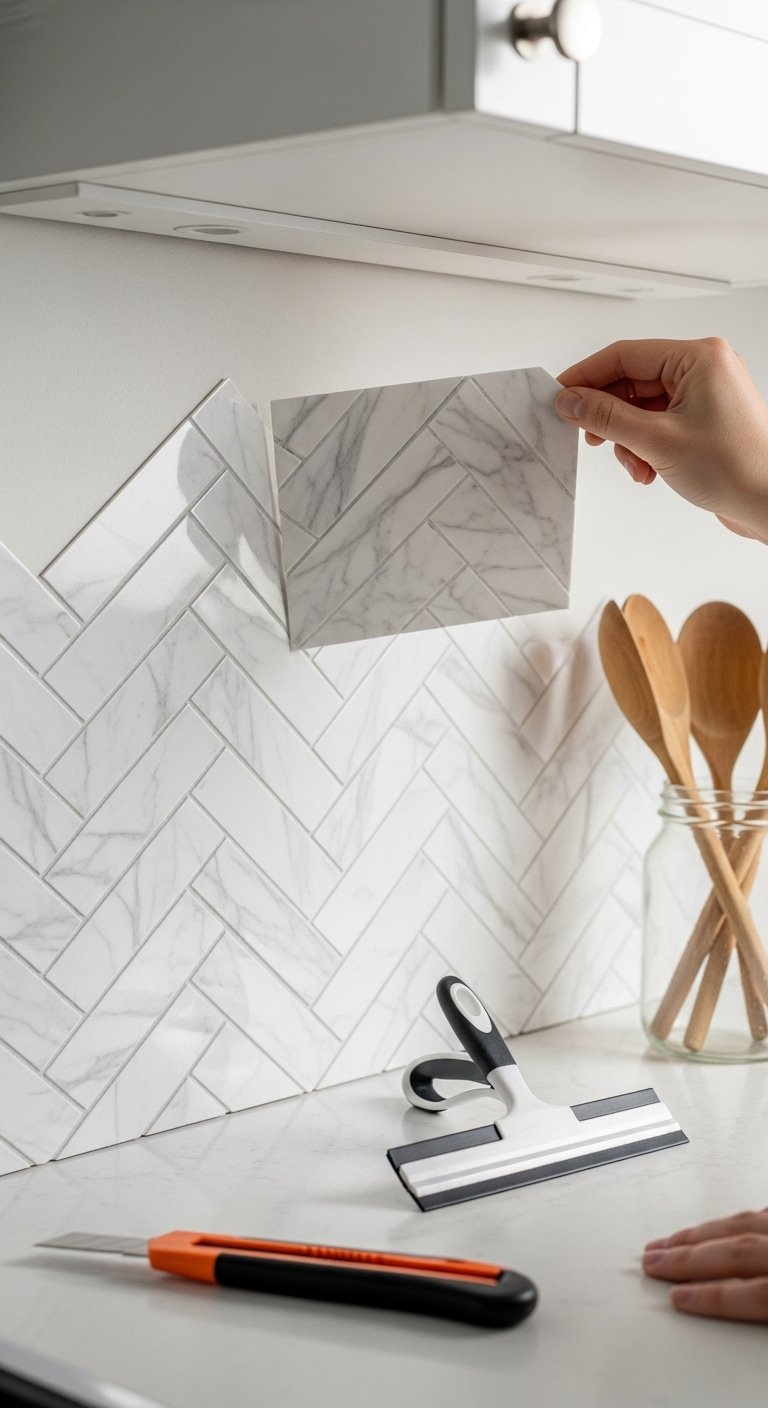
- Materials Needed: Peel-and-stick tile or wallpaper, measuring tape, a level, a utility knife or sharp scissors, a squeegee or credit card.
- Step-by-Step Directions:
- Thoroughly clean and dry the wall surface. It must be free of grease and dust for the adhesive to stick properly.
- Measure the area and plan your layout, starting from one corner. Use a level to draw a straight guideline for your first row.
- Peel a small section of the backing off the first tile. Align it with your guideline and press it firmly onto the wall.
- Use a squeegee to smooth out any air bubbles, working from the center outwards.
- Continue with the next tiles, overlapping them slightly according to the product’s instructions to create a seamless look. Use a utility knife to cut tiles to fit around outlets or corners.
Lesson Learned: Buy about 10% more material than you calculate you’ll need. This covers any mistakes, tricky cuts, or misaligned patterns. It’s better to have extra than to run out mid-project.
Want a new look without the reno? Pin this peel-and-stick backsplash idea!
Key Takeaways: Your Quick Guide to a Freestanding Kitchen
- Flexibility is Key: Freestanding units can be moved, rearranged, or taken with you, making them perfect for renters and small, evolving spaces.
- Embrace Vertical Space: Use open shelving and wall-mounted racks to draw the eye upward and free up valuable counter space.
- Think Outside the Kitchen Aisle: A vintage sideboard, dresser, or modular cube unit can provide stylish, affordable, and unique storage.
- Start Small for Big Impact: Simple changes like a portable cart, a dedicated coffee station, or a peel-and-stick backsplash can completely transform the feel of your kitchen without a major renovation.
@sixat21 A freestanding kitchen is not for everyone but it suits us, and I can change it around any time I want. . . . . #myktchn #myrustichome #modernrustic #tv_living #cottagekitchens #smallkitchens #designsponge #small kitchens #freestandingkitchen #kitchenstory #countrycottagestyle #kitchenliving #cottageinteriors #homeandkitchen #slowlivingforlife #bespokekitchen
♬ Coppélia, Act I: No. 1, Valse – Jean-Baptiste Mari & Orchestre de l’Opéra National de Paris
People Also Ask About Freestanding Kitchens
Is a free standing kitchen cheaper?
Yes, freestanding kitchens are almost always cheaper than fully fitted kitchens. You save money by only purchasing the specific pieces you need, avoiding expensive custom cabinetry, and often reducing installation costs as many items don’t require professional fitting. This modular approach allows you to build your kitchen over time as your budget allows.
Are unfitted kitchens trendy right now in 2025?
Absolutely. The unfitted, freestanding kitchen look is a major trend in 2025. It aligns with the growing popularity of eclectic, personalized interior design that mixes vintage and modern pieces. This style allows homeowners to express more personality and move away from the “cookie-cutter” look of many fitted kitchens.
How do you make a freestanding kitchen look cohesive?
To create a cohesive look, stick to a consistent color palette or material. For example, use all-white units with butcher block tops, or mix different wood tones with consistent black metal hardware. Using a unifying element like a runner rug or matching hardware across different pieces can tie the whole space together beautifully.
Can I use freestanding cabinets with my existing countertops?
It depends. You can place freestanding base units underneath an existing countertop, but you’ll need to ensure their height is correct. A more common approach is to buy free standing kitchen cabinets that come with their own countertops, creating a modular and flexible workspace that can be arranged as needed.
Final Thoughts
Your dream kitchen is more attainable than you think. By embracing the flexibility and charm of freestanding pieces, you can design a space that truly reflects your style and meets your needs without the stress or expense of a full remodel. The power to create a kitchen you love is in your hands, one beautiful piece at a time.
Which of these ideas are you most excited to try in your own home? Let us know in the comments below
