As an Amazon Associate KitchenwareSets.com earns from qualifying purchases.
9 Spooky Halloween Bats on Kitchen Cabinets Decor Ideas
When the calendar flips to October, do you find your spooky spirit stops at the kitchen door? We meticulously decorate our living rooms, porches, and entryways, but the heart of the home—the kitchen—often gets left behind, its plain, functional cabinets looking a little too cheerful for the season of spooks.
This common decorating dilemma leaves a huge opportunity untapped. Your kitchen cabinets are a blank canvas, a perfect backdrop waiting to be transformed from everyday ordinary to frightfully festive. Ignoring them means missing out on creating a fully immersive Halloween atmosphere that flows through your entire home. The challenge is finding ideas that are both high-impact and low-effort, and most importantly, won’t damage your surfaces.
Decorating kitchen cabinets for Halloween transforms the heart of your home into a spooky focal point. Using removable items like paper bat silhouettes, vinyl decals, or themed garlands allows you to create a high-impact, festive look without any permanent changes, making it a fun and easy project for 2025. As a home decor enthusiast who lives for seasonal transformations, I’ve spent years turning my own kitchen from a spooky dead zone into the festive heart of our Halloween celebrations, and I’m here to share the best ideas with you.
Are Your Kitchen Cabinets Looking a Little… Lifeless This Halloween?
The kitchen is often the most overlooked space when it comes to seasonal decorating. While we focus on curb appeal and living room ambiance, the kitchen cabinets—which we see and use every single day—remain plain. This is a missed opportunity to create a truly cohesive and festive home. Your cabinets offer a vast, vertical canvas perfect for unleashing some spooky creativity and making the heart of your home beat with a little Halloween magic.
You don’t need a massive budget or hours of free time to make a significant impact. The key is to use simple, removable decorations that are easy to apply and take down once the season is over. From classic paper cutouts to subtle, gothic hardware, there are countless ways to bring the spirit of Halloween to your kitchen without causing any damage or requiring a major overhaul.
This guide will walk you through creative and easy ways to decorate your kitchen cabinets for Halloween. We’ll move beyond the usual and explore ideas that create a spooky, fun, and memorable atmosphere. Let’s transform your kitchen from functional to fabulously spooky!
9 Spooky Halloween Bats on Kitchen Cabinets Decor Ideas for 2025
One of the most classic and effective motifs for Halloween is the bat, and its versatility makes it perfect for decorating your kitchen cabinets. We’ve curated and tested these nine spooktacular ideas, focusing on methods that deliver the biggest visual punch with the least amount of effort and expense. These distinct, easy-to-follow ideas range from simple and subtle to dramatic and immersive, ensuring there’s a perfect concept for every kitchen and skill level to create a spooky kitchen makeover.
Here are the top ideas for adding halloween bats on kitchen cabinets:
1. Paper Bat Silhouettes
2. Bat-Themed Cabinet Hardware
3. Bat Decals and Stickers
4. Bat Shelf Displays
5. Illuminated Bat Displays
6. Themed Vignettes with Bats
7. Bat Garland or Bunting
8. Googly Eyes on Appliances
9. Color Scheme Integration
1. Create a Swarm of Paper Bat Silhouettes
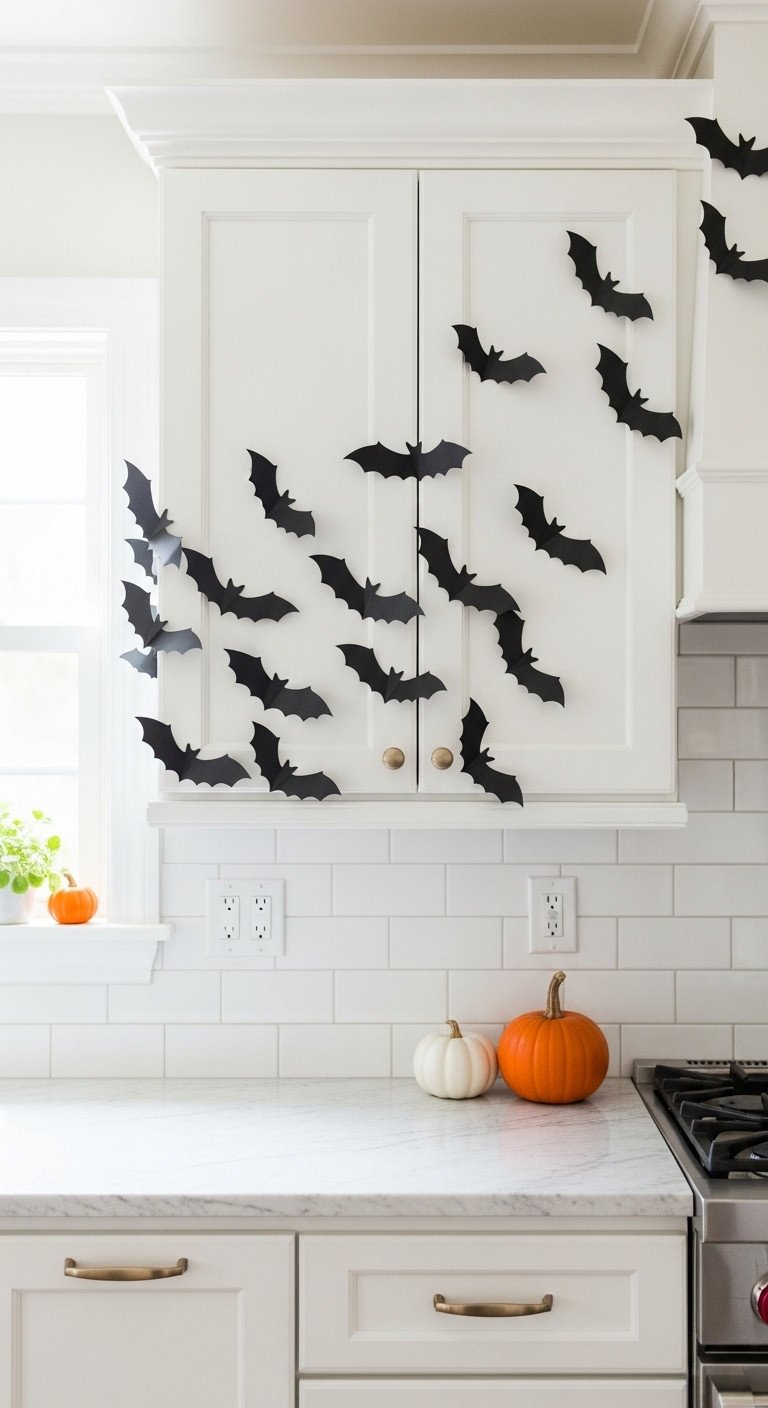
Pin this budget-friendly DIY for your Halloween party planning!
The most popular and budget-friendly method is to create a 3D swarm of paper bats that appear to fly across your cabinet doors. This high-impact look can be achieved with just a few simple materials and is completely removable, making it perfect for temporary decor.
Materials Needed:
* Black cardstock paper
* Bat template (printable)
* Scissors or a cutting machine (like a Cricut)
* Removable adhesive putty or double-sided tape
Step-by-Step Directions:
1. Print and cut out several bat templates in various sizes to create a more dynamic look.
2. Trace the templates onto your black cardstock and cut out the bats. For a faster method, use a craft cutting machine.
3. To create a 3D effect, gently fold the wings of each bat upwards along the body.
4. Place a small piece of removable adhesive on the back of each bat’s body. Using a good quality, pre-made set of 3D bat decorative wall stickers can save significant time.
5. Begin attaching the bats to your cabinets, starting from one corner and fanning them out to create the illusion of a swarm taking flight. Overlap them slightly for a more natural look.
Pro-Tip: Before sticking them on, lay your bats out on the floor to plan your swarm’s flight path. This helps visualize the final look and makes adjustments easier.
2. Swap in Spooky Bat-Themed Cabinet Hardware
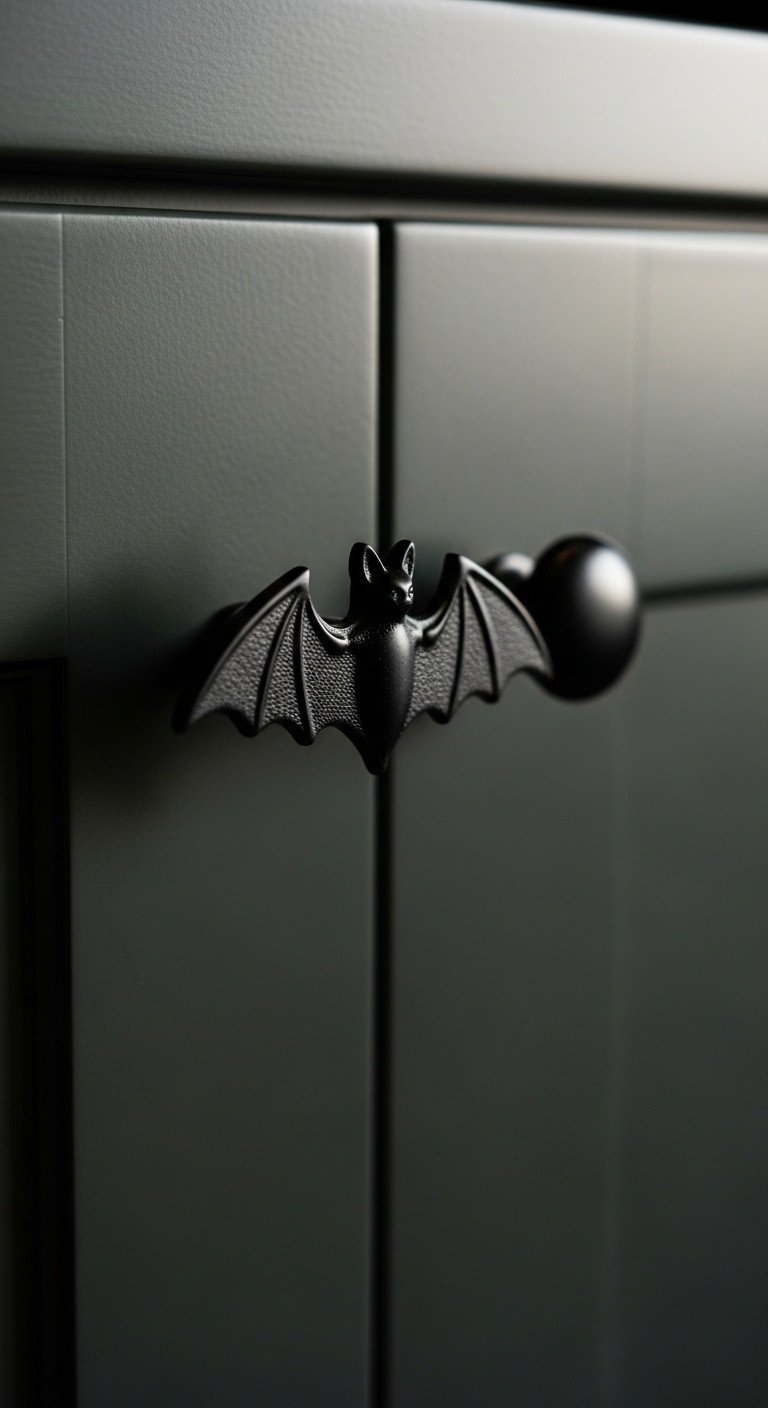
Save this to your “Gothic Home Decor” board for a touch of year-round spookiness!
For a more integrated and sophisticated touch, temporarily replace your existing cabinet knobs or pulls with bat-themed hardware. This subtle change adds a unique gothic elegance that feels custom and high-end, and it’s surprisingly easy to do.
Materials Needed:
* Bat-shaped cabinet knobs or pulls
* Screwdriver
* A small bag to store your original hardware
Step-by-Step Directions:
1. Carefully unscrew your existing cabinet knobs or pulls from the inside of the cabinet doors.
2. Store the original screws and hardware together in a labeled bag so you can easily switch them back after Halloween.
3. Install the new bat-shaped drawer pulls using the screws provided. Most hardware uses a standard bolt size, making this a quick and simple swap.
4. Tighten until secure, but be careful not to overtighten and damage the cabinet door.
5. Enjoy a subtle but delightfully gothic touch that elevates your kitchen’s spooky aesthetic.
Lesson Learned: Always measure the thickness of your cabinet doors before ordering new hardware. While most are standard, some custom cabinetry might require longer or shorter screws.
3. Use Removable Bat Decals and Stickers
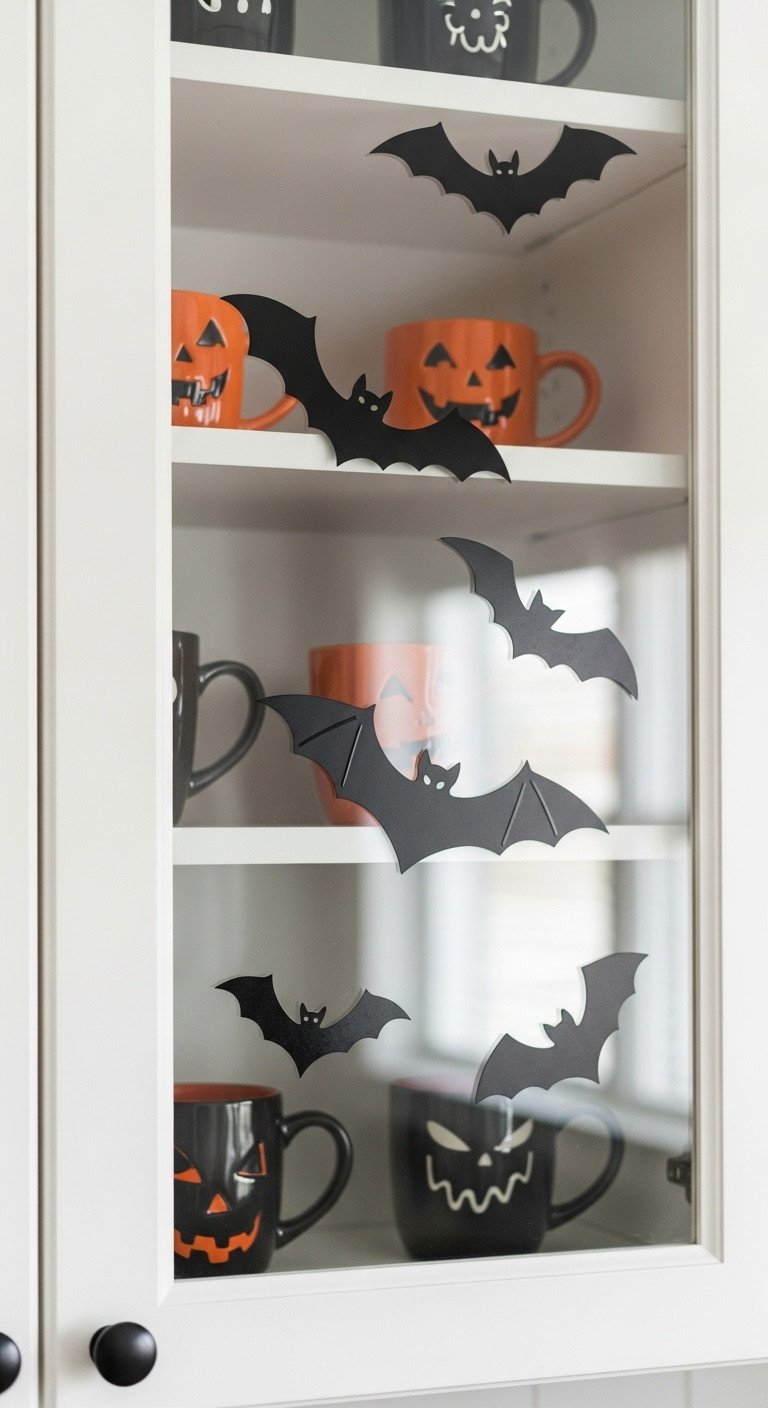
Love easy, damage-free decorating? Pin this idea!
The quickest and most foolproof method for decorating is to use vinyl decals or reusable static cling stickers featuring bat silhouettes. These are ideal for a fast transformation, require zero crafting skills, and are guaranteed to come off cleanly without damaging your cabinet surfaces.
Materials Needed:
* Pack of bat-themed vinyl decals or static clings
* Soft, clean cloth
* Water (if using static clings)
Step-by-Step Directions:
1. Thoroughly clean your cabinet doors with a cloth to ensure they are free of dust and grease, which can prevent the decals from sticking properly.
2. For vinyl decals, simply peel the bat sticker from its backing and carefully apply it to the cabinet door. Smooth it out from the center to the edges to remove any air bubbles.
3. For static clings (best for glass cabinet doors), lightly mist the surface with water before applying the cling. This allows you to slide it into the perfect position.
4. Use a squeegee or credit card to smooth out the static cling and remove excess water and air bubbles. Look for reusable PVC 3D decorative bat stickers for an option you can store and use again next year.
Pro-Tip: To save your reusable decals for next year, stick them back onto the original backing paper or a piece of wax paper. Store them flat in a cool, dry place.
4. Style a Spooky Bat Shelf Display
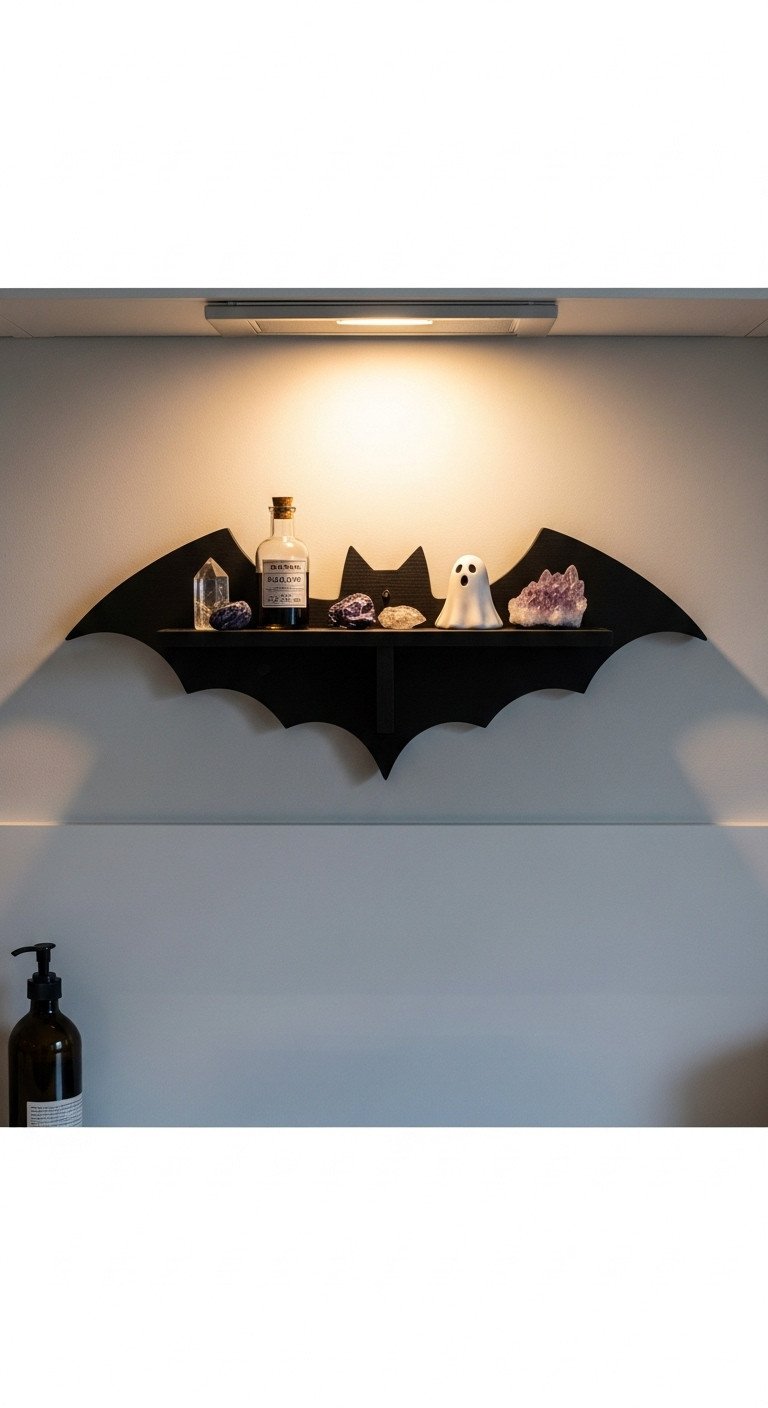
Pin this stylish and spooky shelfie idea!
To create a dedicated focal point, incorporate a bat-shaped shelf to display other Halloween-themed items. This approach adds depth and personality, turning a simple decoration into a curated piece of spooky art.
Materials Needed:
* A bat-shaped floating shelf or a small black shelf
* Mounting hardware (screws, wall anchors)
* A level and a drill
* A collection of small, spooky decor items (e.g., potion bottles, mini pumpkins, crystals, small skulls)
Step-by-Step Directions:
1. Choose a location for your shelf. This works well on an open wall space above the counter or on top of your kitchen cabinets if you have space.
2. Using a level, mark where you will install the shelf. Install it according to the manufacturer’s instructions, using wall anchors for stability. A unique gothic bat wall hanging decor shelf can become a centerpiece.
3. Once the shelf is secure, it’s time to decorate. This is where you can get creative!
4. Arrange your collection of spooky items on the shelf. Play with different heights and textures to create a visually interesting vignette.
5. Add a few bats (paper or vinyl) on the wall around the shelf to tie the look together.
Pro-Tip: Follow the “rule of three” when styling your shelf. Group items in odd numbers (1, 3, or 5) to create a more balanced and visually appealing arrangement.
5. Add an Eerie Glow with Illuminated Bats
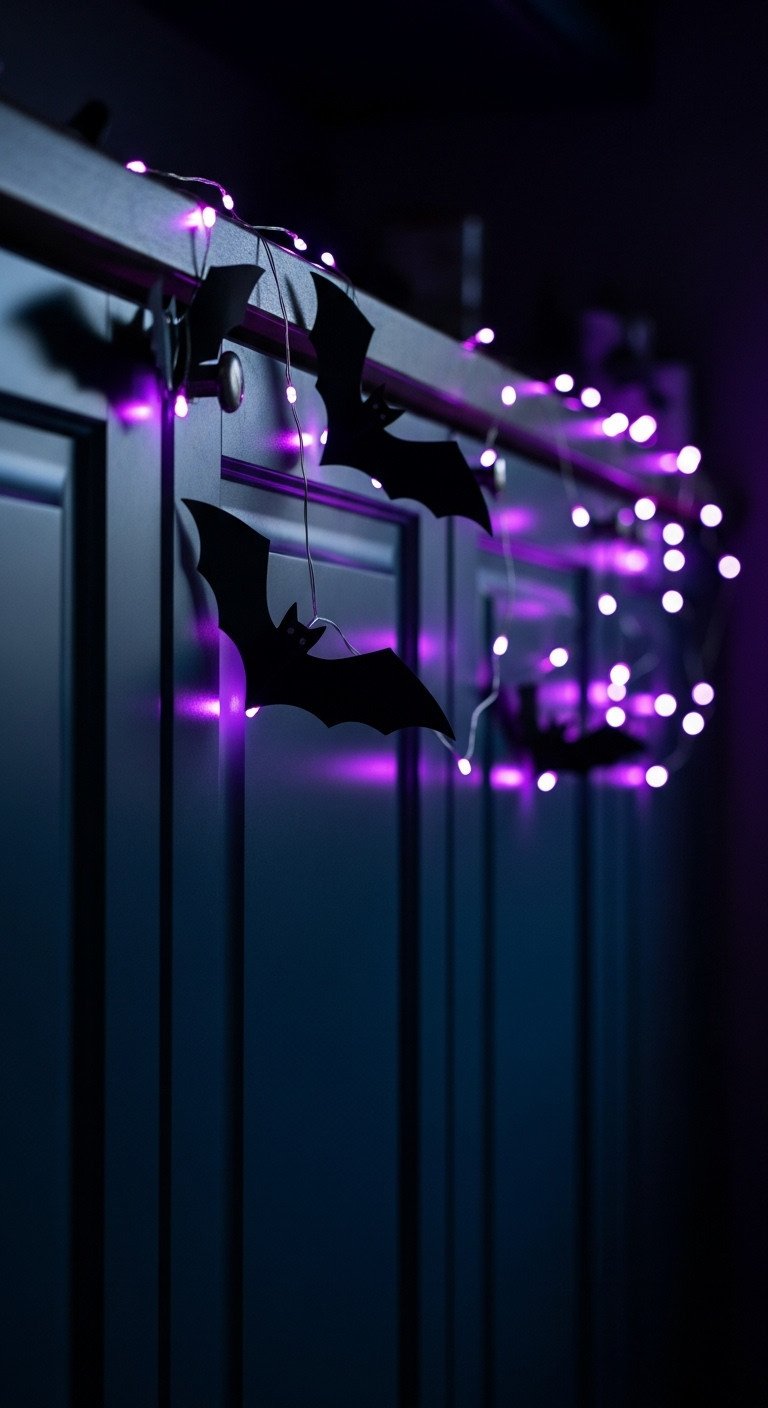
Want to create a magical Halloween mood? Pin this lighting tips!
To elevate your decor and create a truly spooky ambiance, use small LED lights to backlight your bat cutouts. This simple trick creates an eerie silhouette effect that looks especially dramatic in the evening or during a Halloween party.
Materials Needed:
* Black paper bat cutouts
* Removable adhesive
* A string of battery-operated mini LED fairy lights (purple or orange work best)
* Small, clear adhesive hooks or tape
Step-by-Step Directions:
1. First, apply your paper bat cutouts to the cabinets as described in the first idea, leaving a little space between them.
2. Using small, clear adhesive hooks or clear tape, carefully string the LED lights around and behind the bat cutouts.
3. Weave the wire so that the tiny bulbs are positioned behind the wings or body of the bats. This will create a cool silhouette effect.
4. Secure the battery pack in an inconspicuous spot, like on top of the cabinets or taped to the inside of a cabinet door.
5. Turn on the lights in the evening for an eerie, glowing bat display that transforms your kitchen’s ambiance.
Pro-Tip: Choose LED light strings with a timer function. This will automatically turn the lights on and off each evening, saving battery life and ensuring your kitchen is always spooky when the sun goes down.
6. Curate a Cabinet-Top Vignette with Bats
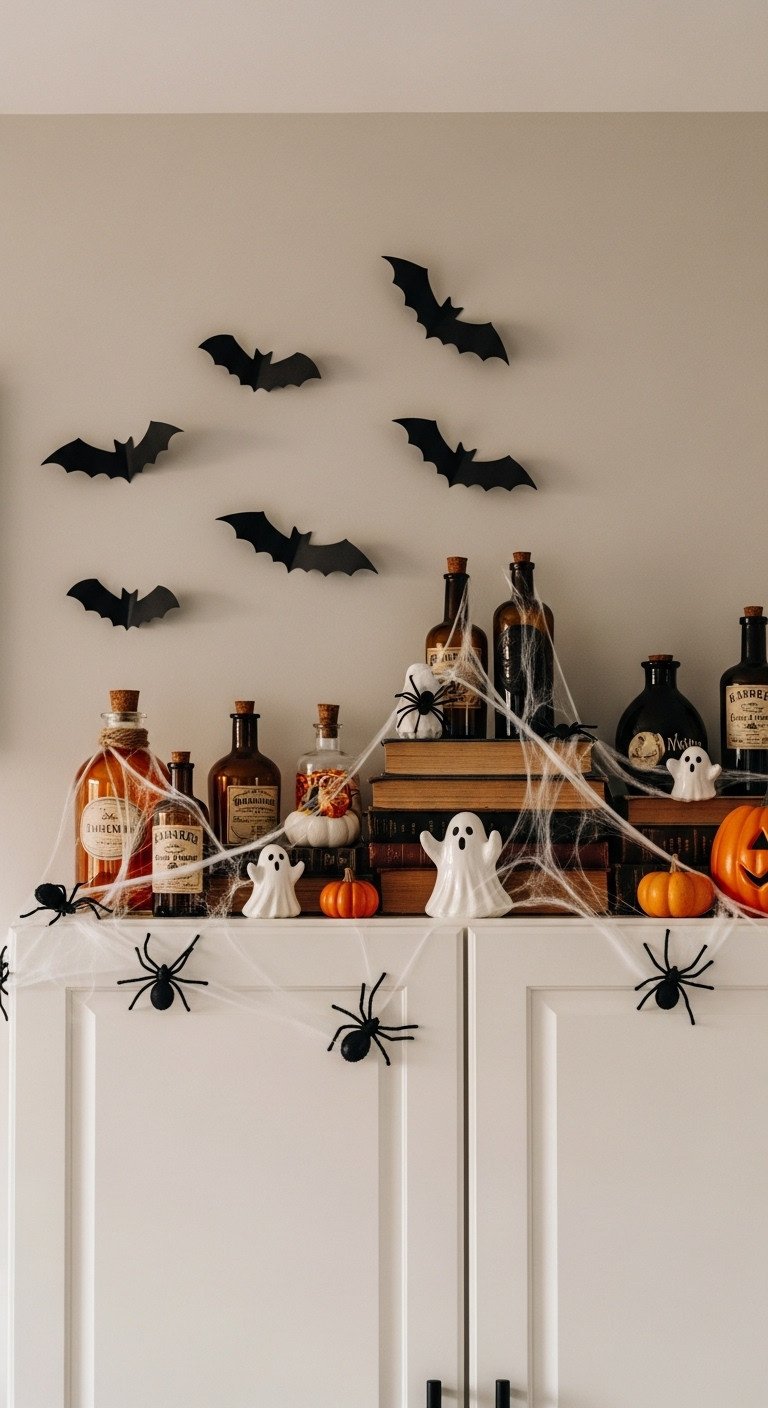
Take your decor to the next level! Pin this vignette inspiration.
To tell a small spooky story, create a curated vignette on top of your cabinets that incorporates bats into a larger scene. This method turns the often-unused space above your cabinets into a stage for Halloween magic.
Materials Needed:
* A collection of miniature Halloween decorations (e.g., tiny pumpkins, ghosts, skulls, potion bottles)
* Faux spiderwebs
* Old books or spellbook props
* Paper bat cutouts
* Removable adhesive
Step-by-Step Directions:
1. Clear the space on top of your kitchen cabinets. This will be your stage.
2. Start by placing your largest items first, such as a stack of old books or a small cauldron.
3. Layer in smaller items around the larger ones. Group potion bottles together, and place a mini ghost peeking out from behind a book.
4. Gently stretch and drape faux spiderwebs over the items and along the cabinet tops to add an aged, spooky texture.
5. Finally, add your bats. Stick some to the wall behind the vignette, making it look like they are flying out of the scene you’ve created. You can also place one or two within the display itself.
Lesson Learned: Less is more with faux spiderwebs. Stretch a small amount very thin for a realistic, wispy look. A thick, clumpy web instantly looks fake.
7. Drape a Festive Bat Garland or Bunting
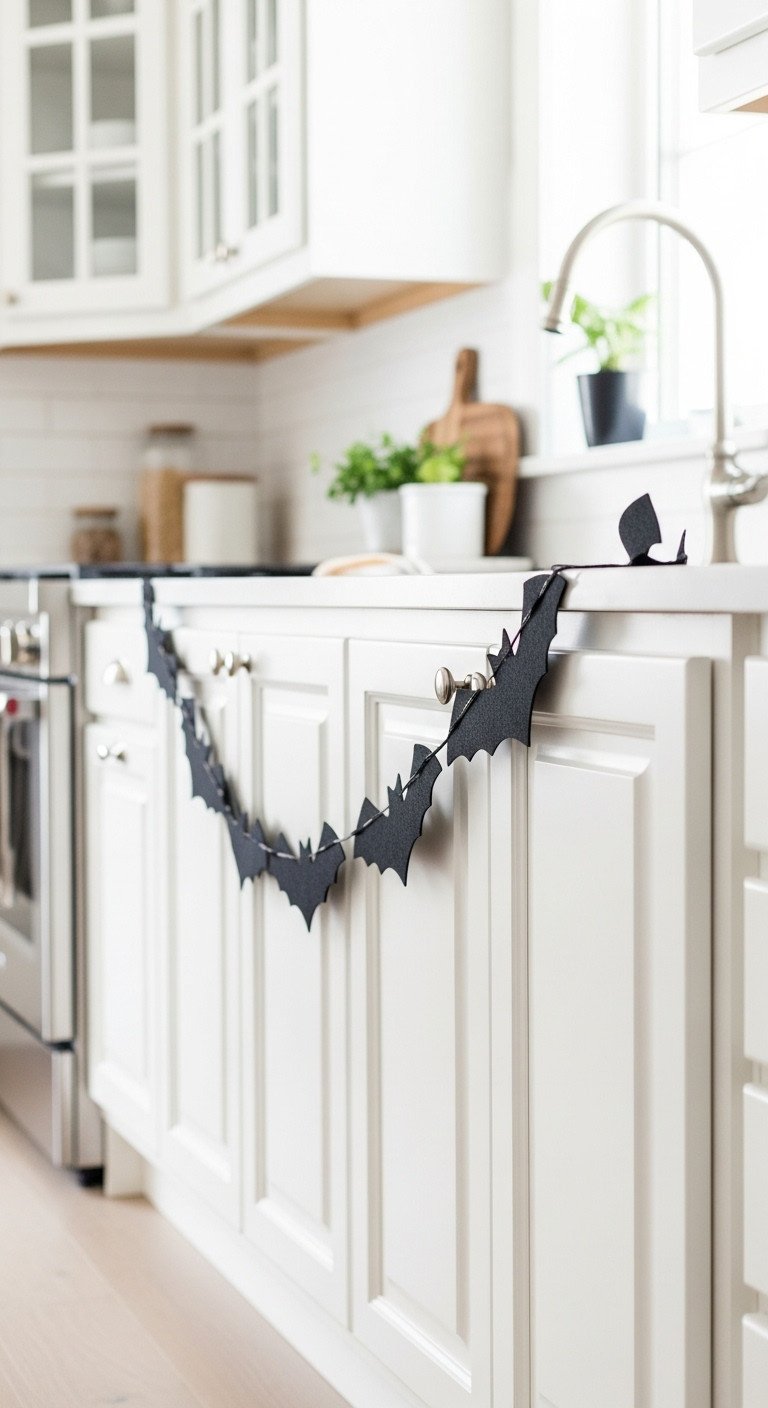
Pin this simple and charming decor idea for a quick festive touch!
For an effortlessly festive look that requires no adhesive on your cabinet faces, drape a bat-themed garland or bunting across the top of your upper cabinets. This adds a clean, decorative line that ties the whole kitchen together.
Materials Needed:
* A pre-made bat garland or materials to make your own (black felt or cardstock, bat template, scissors, twine, hole punch)
* Small, clear adhesive hooks
Step-by-Step Directions:
1. If making your own, trace and cut bat shapes from black felt or cardstock. Punch a small hole in the top or wings of each bat.
2. Thread a long piece of twine or string through the holes, spacing the bats evenly to create your garland.
3. Place small, clear adhesive hooks at the corners of your upper cabinets.
4. Drape the black felt bat garland across the hooks, allowing it to swag gently in the middle.
5. This method adds a fun, decorative line to your kitchen and is incredibly easy to put up and take down.
Pro-Tip: For a fuller look, create two garlands and twist them together before hanging, or layer a bat garland with a simple orange pom-pom garland.
8. Get Goofy with Googly Eyes
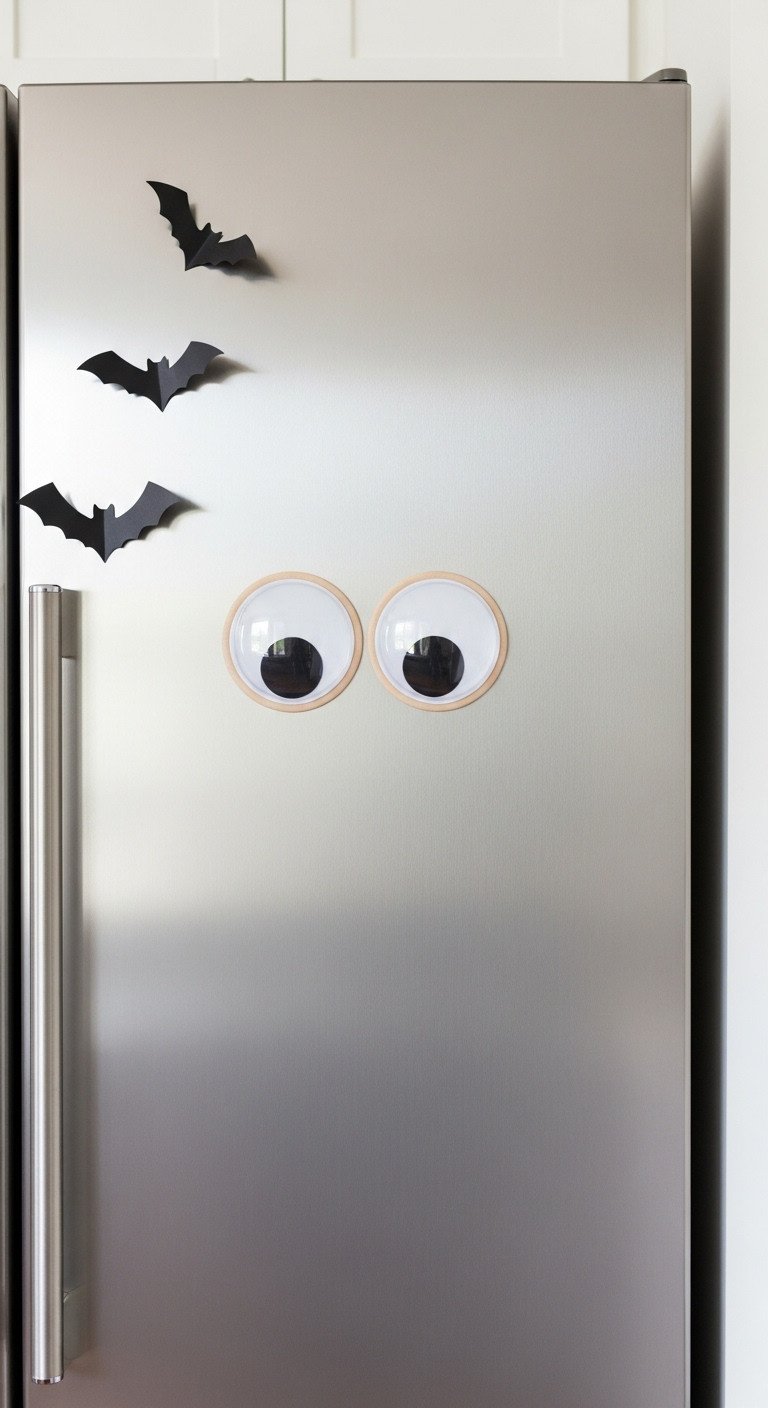
Need a laugh this Halloween? Pin this silly and simple idea!
To complement your bats with a touch of humor, add giant googly eyes to your appliances and even some cabinet doors. This whimsical, kid-friendly idea adds personality and fun, turning your kitchen into a room full of silly monsters.
Materials Needed:
* A pack of jumbo self-adhesive googly eyes in various sizes.
Step-by-Step Directions:
1. This is the easiest idea of all! Simply peel the backing off the self-adhesive googly eyes.
2. Stick pairs of eyes onto your refrigerator, microwave, coffee maker, toaster, or even a canister. These giant wiggle eyes add instant personality.
3. You can also place a few on cabinet doors to create silly “cabinet monsters” that hang out with your bats.
4. This adds a layer of whimsical fun to your spooky decor and is a project that kids will absolutely love helping with. The adhesive on most craft eyes is gentle and removes cleanly from smooth surfaces.
Pro-Tip: Create little “monster families” by using large eyes for the fridge, medium eyes for the microwave, and tiny eyes for the salt and pepper shakers.
9. Integrate a Spooky Color Scheme
Pin this for chic and cohesive Halloween styling inspiration!
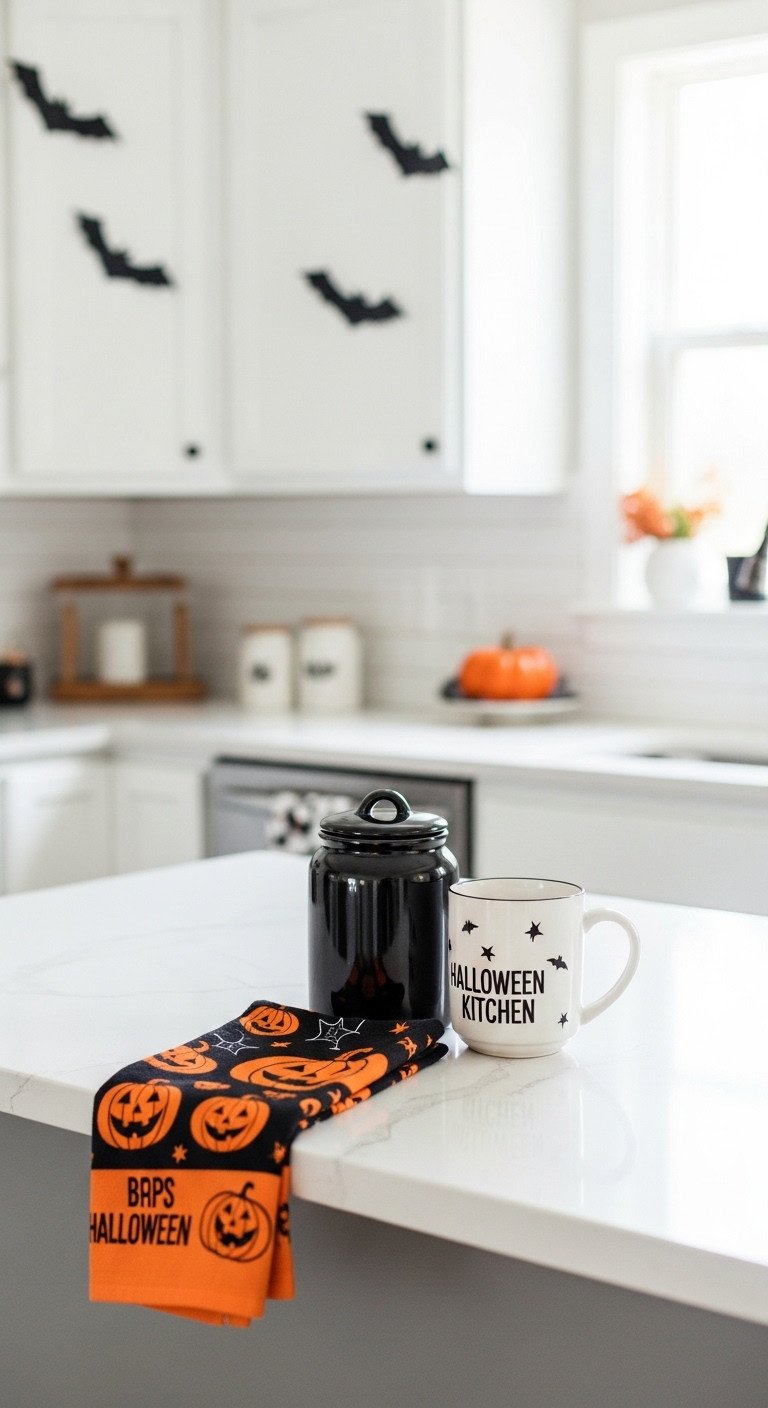
To make your bat decorations feel truly intentional, tie the entire room together by swapping in accessories that follow a Halloween color scheme. By repeating key colors like black, orange, and purple, you create a cohesive and immersive design.
Materials Needed:
* Kitchen accessories in a Halloween color scheme (black, orange, purple, white).
Step-by-Step Directions:
1. The easiest way to create a cohesive look is by swapping out your everyday soft goods. Hang up a set of Halloween-themed kitchen towels.
2. Place a black or orange soap dispenser by the sink.
3. Use a spooky-themed mug to hold utensils or simply for your morning coffee.
4. If you have open shelving, display some black or orange bowls or plates.
5. By repeating these key Halloween colors throughout the kitchen, your bat decorations on the cabinets will feel like a deliberate and integrated part of a complete design, rather than just a last-minute addition.
Pro-Tip: You don’t need to buy all new items. A simple black ribbon tied around your white utensil holder or a bowl of oranges on the counter can effectively bring in the desired color palette.
https://www.pinterest.com/pin/bats-decor-on-kitchen-cabinets–51369251993091416/
Key Takeaways: Your Quick Guide to halloween bats on kitchen cabinets
To quickly review the most important tips, remember that the best cabinet decor is both high-impact and low-commitment. Here are the essential takeaways to ensure your kitchen looks its spooky best.
- Go for 3D: Whether using paper or pre-made decals, slightly bending the wings creates a dynamic 3D swarm effect that brings the decor to life.
- Think Beyond Sticking: For a no-mess option, drape a bat garland over the tops of your cabinets or use a bat-shaped shelf as a focal point.
- Add a Glow: Use battery-operated purple or orange fairy lights behind your bats to create an eerie, atmospheric silhouette in the evenings.
- Accessorize: Tie the whole look together by swapping in Halloween-colored kitchen towels, mugs, and other small accessories.
People Also Ask About halloween bats on kitchen cabinets
Have more questions? Here are answers to some of the most common queries about decorating with bats for Halloween.
What is the significance of the bats on Halloween?
Bats are associated with Halloween partly because of the ancient Celtic festival of Samhain. During this harvest festival, large bonfires would attract insects, which in turn attracted bats. Over time, these night-flying creatures became linked with the spooky, mysterious, and magical aspects of the celebration.
How do you place bats on a wall or cabinet for Halloween?
For a “swarm” effect, start in one corner and arrange the bats in a flowing, curved line as if they are flying out from a single point. Use various sizes and angle the wings differently on each bat to create a sense of movement. Using removable adhesive putty makes it easy to reposition them until you get the perfect look.
How can I decorate my kitchen for Halloween on a budget?
To decorate on a budget, focus on high-impact DIY projects. Creating paper bat cutouts from black cardstock is extremely cost-effective. You can also find affordable decorations like faux spiderwebs, googly eyes, and themed garlands at dollar stores. Using items you already have, like a bowl of oranges for color, also helps keep costs down.
Final Thoughts
Transforming your kitchen for Halloween doesn’t have to be a complicated or expensive endeavor. As you can see, even the simplest additions, like a swarm of paper bats or a festive garland, can completely change the atmosphere of the room. By treating your cabinets as a blank canvas, you unlock a new realm of decorating possibilities that will make the heart of your home the spooky star of the season. Embrace the fun, get creative, and don’t be afraid to let your spooky spirit fly.
What spooky touches are you adding to your kitchen this 2025?
Last update on 2025-12-12 at 04:19 / Affiliate links / Images from Amazon Product Advertising API
