As an Amazon Associate KitchenwareSets.com earns from qualifying purchases.
11 Smart Apartment Kitchen Organization Ideas For Renters
Does the thought of opening your kitchen cabinets fill you with dread? You’re not alone in that cramped rental kitchen.
Apartment kitchen organization is the process of arranging your limited space for maximum function. It feels impossible when you can’t drill holes or make permanent changes. That constant clutter creates stress you don’t need.
The solution to apartment kitchen organization: is to use clever, damage-free tools and tipss that maximize every hidden and vertical space you have. This guide will show you 11 smart, renter-friendly ideas. You’ll learn how to create a kitchen that feels calm and works for you.
Is Your Small Rental Kitchen Driving You Crazy?
I know the struggle of trying to find a spot for everything in a kitchen with only two cabinets and a sliver of counter space. It’s frustrating when every cooking session starts with an avalanche of pots and pans. You feel trapped by the clutter and limited by your lease agreement, which often forbids permanent changes like new shelves.
This feeling of chaos in a cramped rental kitchen isn’t just an inconvenience; it can make your home feel less like a sanctuary and more like a source of stress. The biggest challenge in a rental kitchen is organizing without causing damage. The key is using vertical and underutilized spaces with non-permanent tools like tension rods, adhesive hooks, and over-the-door organizers to maximize every inch, damage-free. This post is dedicated to giving you back control with smart, non-destructive kitchen organization for small spaces.
11 Smart, Damage-Free Organization Ideas for Your Apartment Kitchen
Here are 11 clever, renter-friendly tipss to reclaim your kitchen and make it a space you love to be in. Each of these 11 ideas is based on proven organization principles for small spaces, focusing on maximizing vertical storage and creating functional zones. Every solution is chosen specifically for renters, focusing on affordability, ease of setup, and, most importantly, zero damage to your walls, cabinets, or doors.
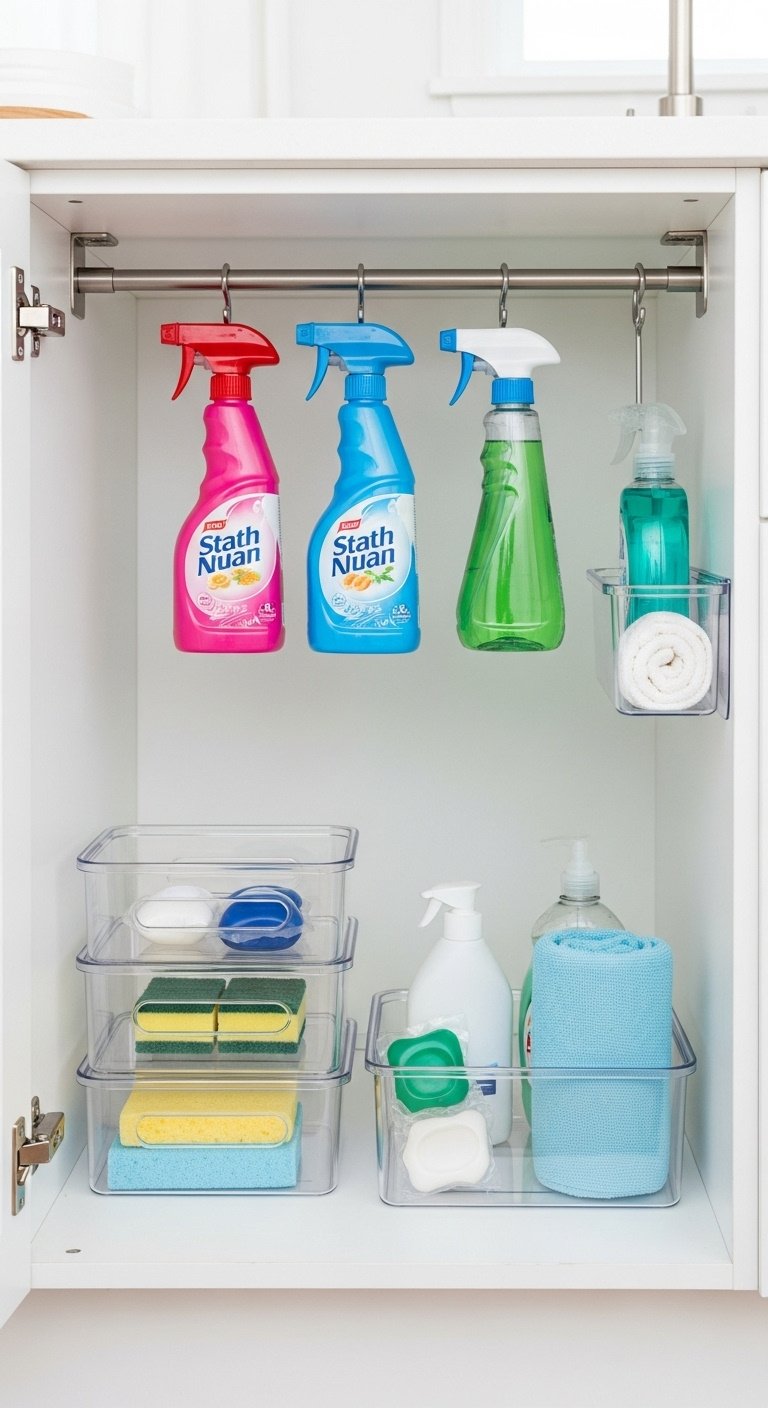
1. Create an Instant Cleaning Station with a Tension Rod
Pin this damage-free tips to your ‘Apartment Solutions’ board!
The space under the sink is famously awkward and cluttered. This tension rod tips uses vertical hanging space to instantly bring order to your cleaning supplies. By lifting spray bottles up, you free the entire cabinet floor for bins and other items.
Supplies Needed:
- One small, spring-loaded tension rod (measure the width of your cabinet first)
- Your collection of spray-bottle cleaning products
- Optional: Small stackable clear bins for sponges and dishwasher pods
Step-by-Step Directions:
- Empty and wipe down the entire area under your sink.
- Unscrew the tension rod so it’s slightly longer than the cabinet’s width.
- Wedge one end of the rod against the cabinet wall, then compress it slightly to fit the other end into place. Position it about two-thirds of the way up the cabinet to leave room for the bottles to hang freely.
- Hang all your spray bottles by their trigger handles on the rod. This instantly frees up the entire cabinet floor.
- Place sponges, pods, and cloths in the small bins on the cabinet floor below the hanging bottles.
Pro-Tip: Buy a tension rod with rubber ends to ensure it grips the cabinet walls securely without slipping or leaving marks.
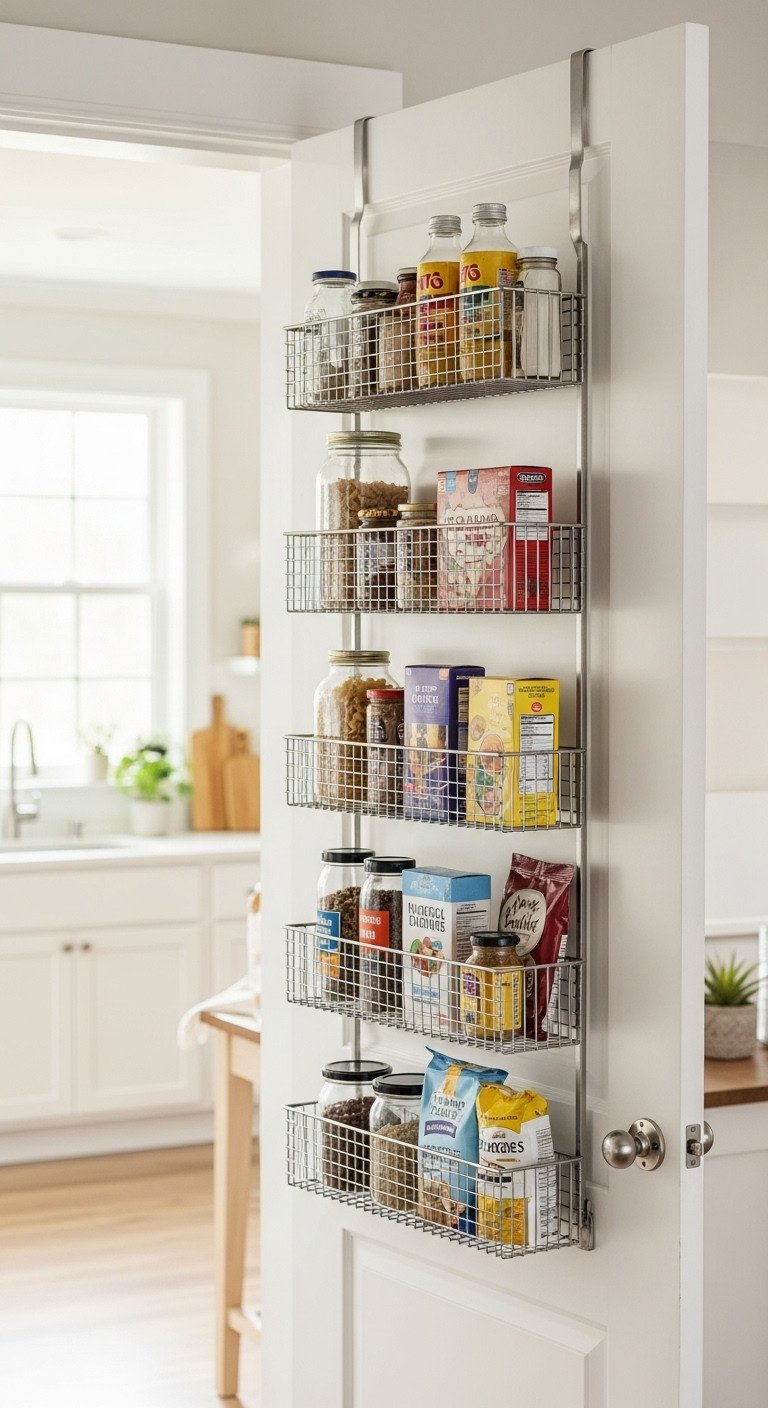
2. Build a No-Pantry Pantry with an Over-the-Door Organizer
Save this ‘no pantry’ solution for your apartment!
When your apartment lacks a pantry, you have to get creative. An over-the-door organizer is the ultimate renter-friendly pantry solution, transforming any nearby door into a massive storage space for spices, cans, and dry goods without a single screw.
Supplies Needed:
- One sturdy, multi-tiered over-the-door organizer with adjustable shelves if possible.
- Optional: Small bins or containers to group smaller items like spice packets.
Step-by-Step Directions:
- Choose a door for your new “pantry.” A kitchen closet door, the main kitchen entryway door, or even a hall closet door near the kitchen works perfectly.
- Assemble the organizer according to the manufacturer’s instructions. This usually involves snapping shelves into the side rails.
- Simply hang the organizer’s hooks over the top of the door. Most come with felt pads to prevent any scratching.
- Start stocking your shelves. Place heavier items like cans and jars on the bottom shelves and lighter items like snacks and bread on the top shelves for stability.
Lesson Learned: Before you buy, measure the clearance between the top of your door and the door frame to ensure the hooks will fit and the door can still close smoothly.
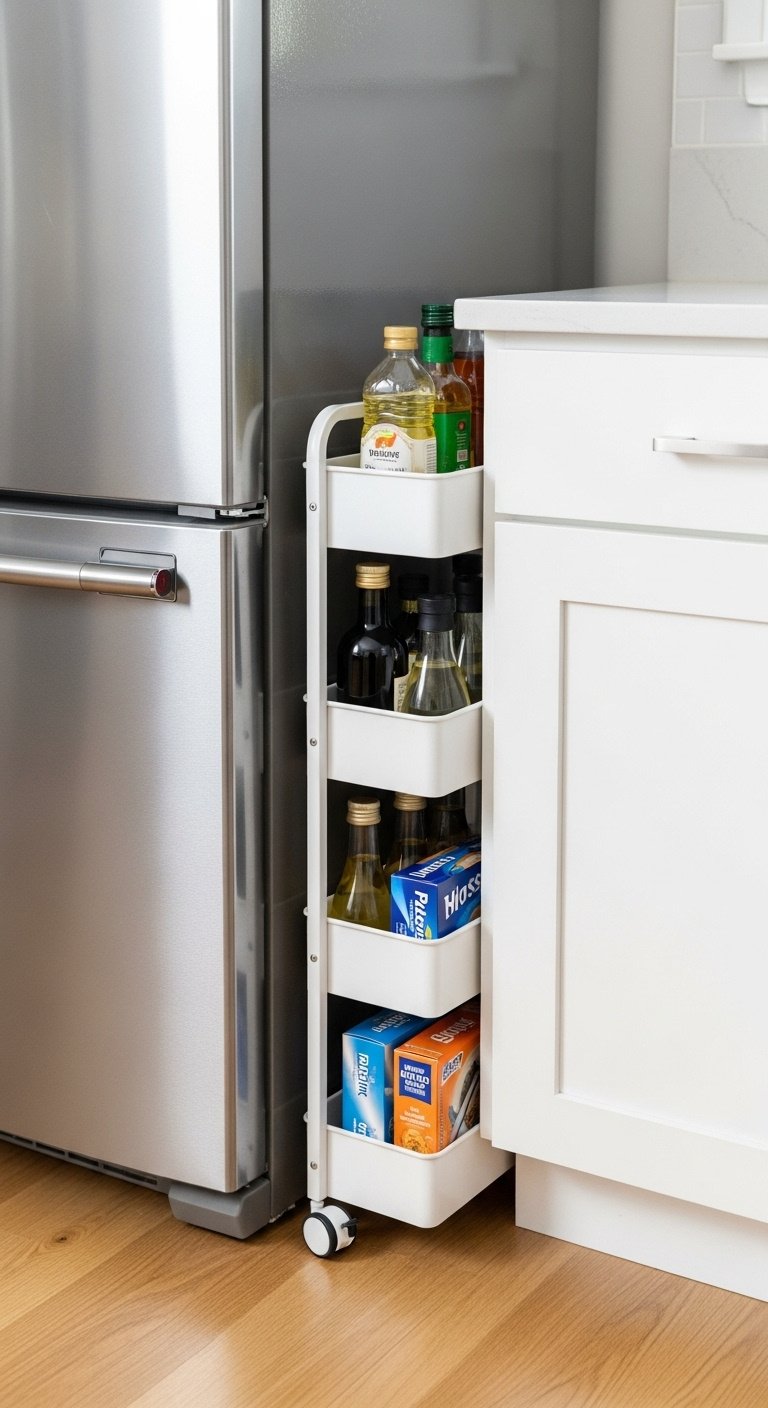
3. Claim Unused Space with a Slim Rolling Cart
Pin this genius space-saving cart idea!
That awkward 5-inch gap next to your refrigerator is not wasted space—it’s a hidden pantry waiting to happen. A slim rolling cart is designed specifically for these narrow spaces, providing multiple tiers of storage for oils, spices, and foils.
Supplies Needed:
- One slim rolling cart, specifically designed for narrow spaces (typically 4-6 inches wide).
Step-by-Step Directions:
- Identify the perfect gap in your kitchen. The most common spot is between the refrigerator and the adjacent wall or counter.
- Measure the width of the gap carefully at its narrowest point.
- Assemble your slim rolling cart, which usually just involves snapping the shelves and wheels into place.
- Load the cart with items you need accessible but don’t want on the counter, such as cooking oils, vinegars, spices, aluminum foil, or even cleaning supplies.
- Simply slide the fully loaded cart into the gap. Roll it out when you need something and slide it back to keep your kitchen looking neat.
Pro-Tip: Look for a cart with a raised edge on each shelf to prevent items from tipping over when you roll it in and out.
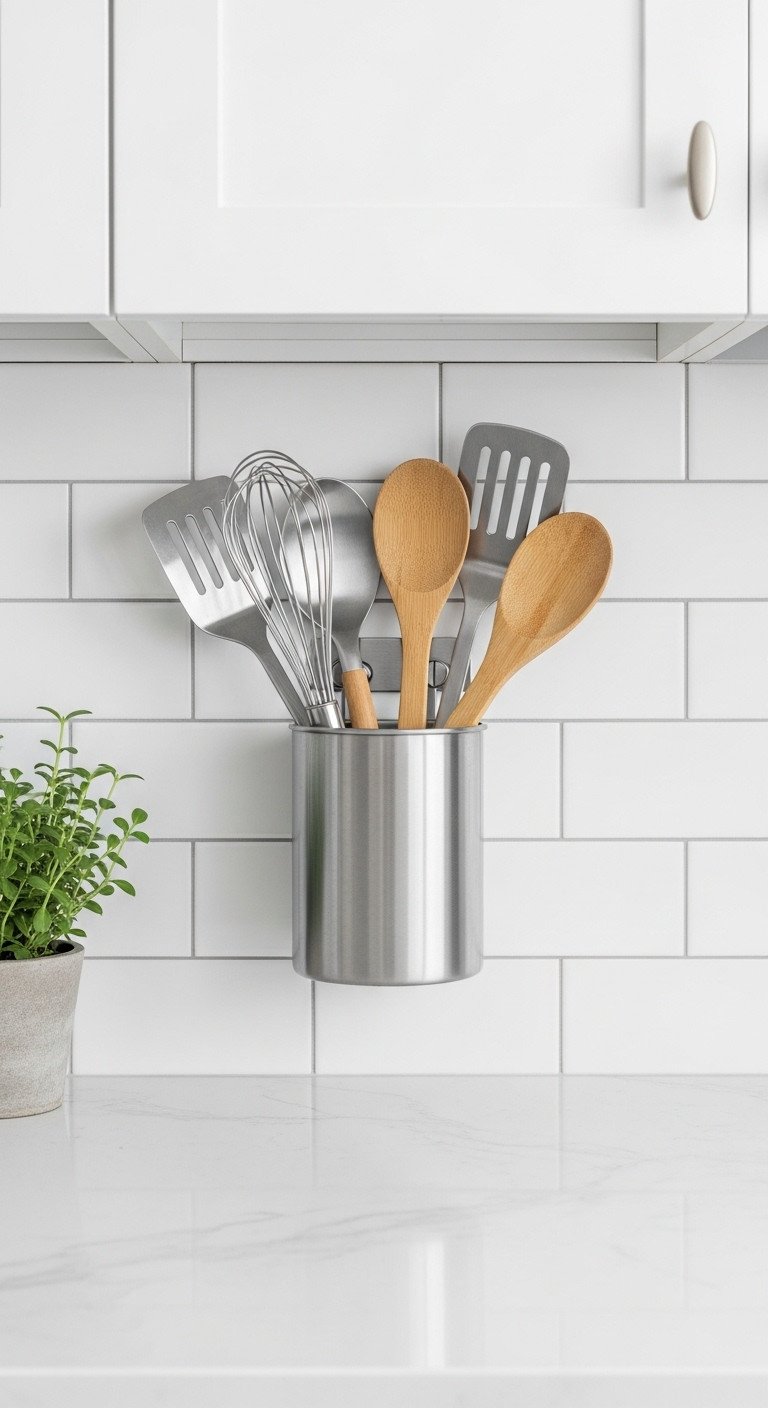
4. Master Your Backsplash with Adhesive Organizers
Save this no-drill wall storage idea for your kitchen!
Your backsplash is valuable vertical real estate. Instead of cluttering your countertops with a utensil crock, use damage-free adhesive hooks and caddies. These powerful stick-on solutions let you hang utensils, oven mitts, and even small spice racks without ever touching a drill.
Supplies Needed:
- Damage-free adhesive hooks or caddies rated for the appropriate weight (e.g., Command™ brand).
- Rubbing alcohol and a clean cloth.
Step-by-Step Directions:
- Decide what you want to hang. This works perfectly for utensils, oven mitts, measuring spoons, or even a small adhesive spice rack.
- Clean the spot on your backsplash or wall where you’ll place the hook. Use rubbing alcohol to remove any grease or residue, then let it dry completely. This step is crucial for a strong hold.
- Follow the package instructions to apply the adhesive strip to the back of the hook or caddy.
- Press the hook firmly against the wall for 30 seconds.
- Wait at least one hour before hanging anything on the hook. This allows the adhesive to cure and form a strong bond.
Pro-Tip: Use multiple small hooks in a row to hang a wire basket for holding sponges or small bottles, creating even more versatile storage.
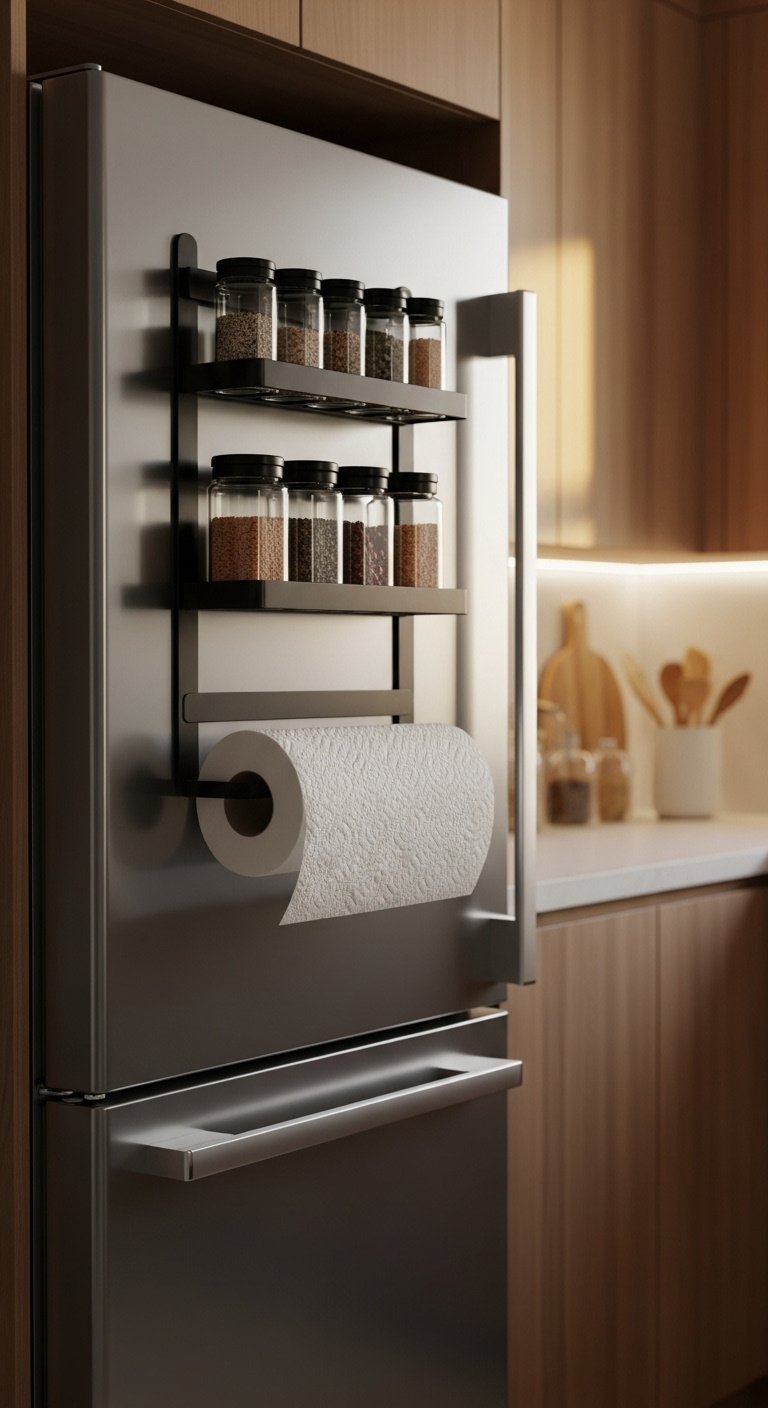
5. Use Your Fridge’s Hidden Real Estate with Magnetic Racks
Pin this simple, powerful organization tips!
The side of your refrigerator is one of the most underutilized surfaces in the kitchen. A strong magnetic rack is a zero-installation game-changer, providing instant storage for spices, oils, and paper towels, freeing up both counter and cabinet space in seconds.
Supplies Needed:
- One high-quality magnetic organizer. Look for one that includes a shelf, a paper towel holder, and/or hooks.
Step-by-Step Directions:
- Unbox your magnetic rack. There is no assembly required.
- Simply place the rack onto the side of your refrigerator. The powerful magnet on the back will hold it securely in place.
- Load it up! Use the shelf for your most-used spices, a bottle of olive oil, and salt and pepper shakers.
- Slide a roll of paper towels onto the holder to get it off your precious counter space.
- Use any included hooks for hanging oven mitts or small utensils.
Lesson Learned: Ensure the magnetic rack you choose has a strong, full-back magnet. Cheaper models with small magnet buttons can slide down when loaded with heavier items.
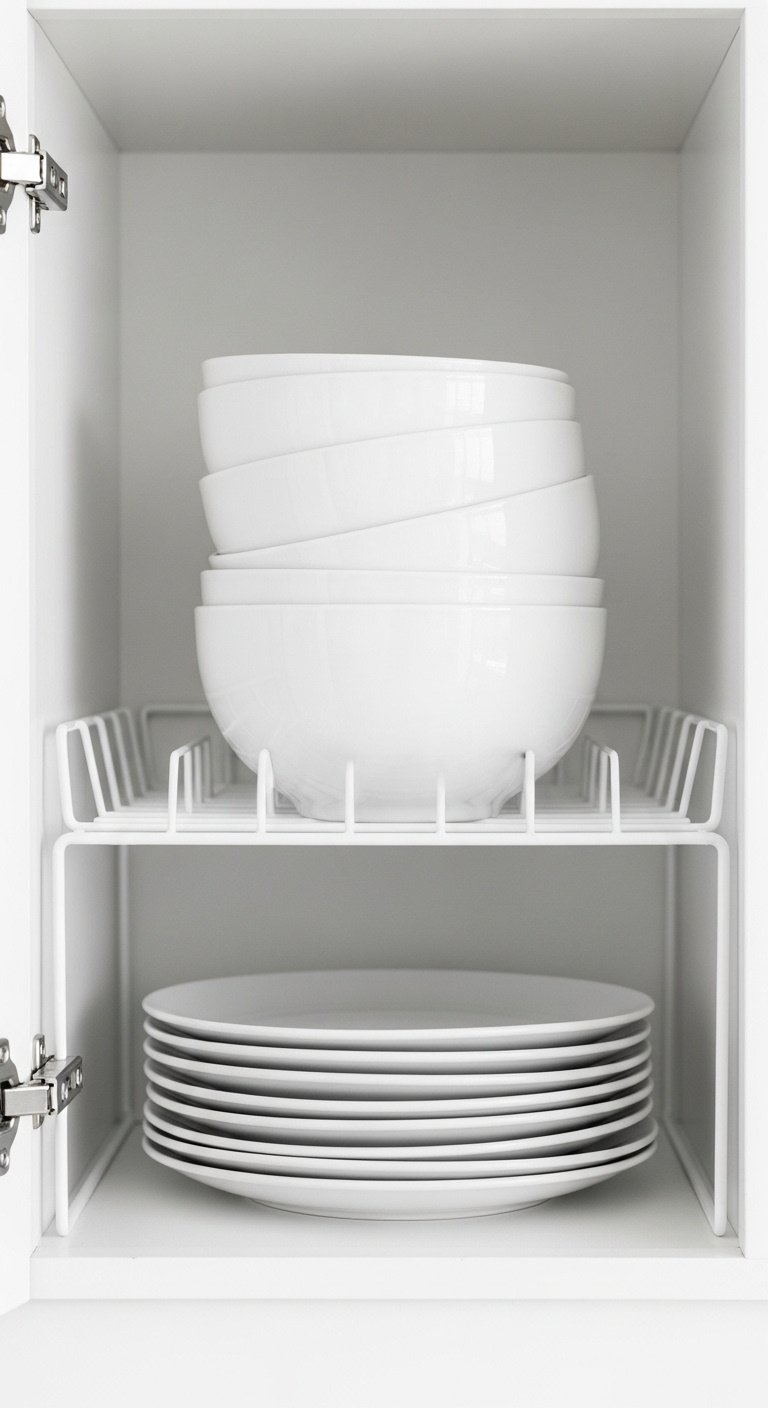
6. Double Your Cabinet Space Instantly with Shelf Risers
Save this classic cabinet organization trick!
Stop unstacking tall piles of bowls just to get a plate. Shelf risers are a simple but brilliant tool for conquering wasted vertical space in your cabinets. They essentially add a second level to any shelf, instantly doubling your storage surface for plates, bowls, and mugs.
Supplies Needed:
- One or more wire or acrylic shelf risers that fit the width and height of your cabinet.
Step-by-Step Directions:
- Identify a cabinet where you have a lot of empty air above your items. This is common in cabinets with plates, bowls, mugs, or cans.
- Measure the interior width, depth, and height of your cabinet shelf.
- Purchase shelf risers that are slightly smaller than these dimensions.
- Simply place the riser on the shelf.
- Organize your items. For example, place your large dinner plates on the cabinet shelf under the riser, and stack your smaller bowls or salad plates on top of the riser. You’ve just doubled your usable surface area.
Pro-Tip: For deep cabinets, use stackable risers that are long and narrow. You can place one in the front and one in the back to organize four distinct zones on a single shelf.
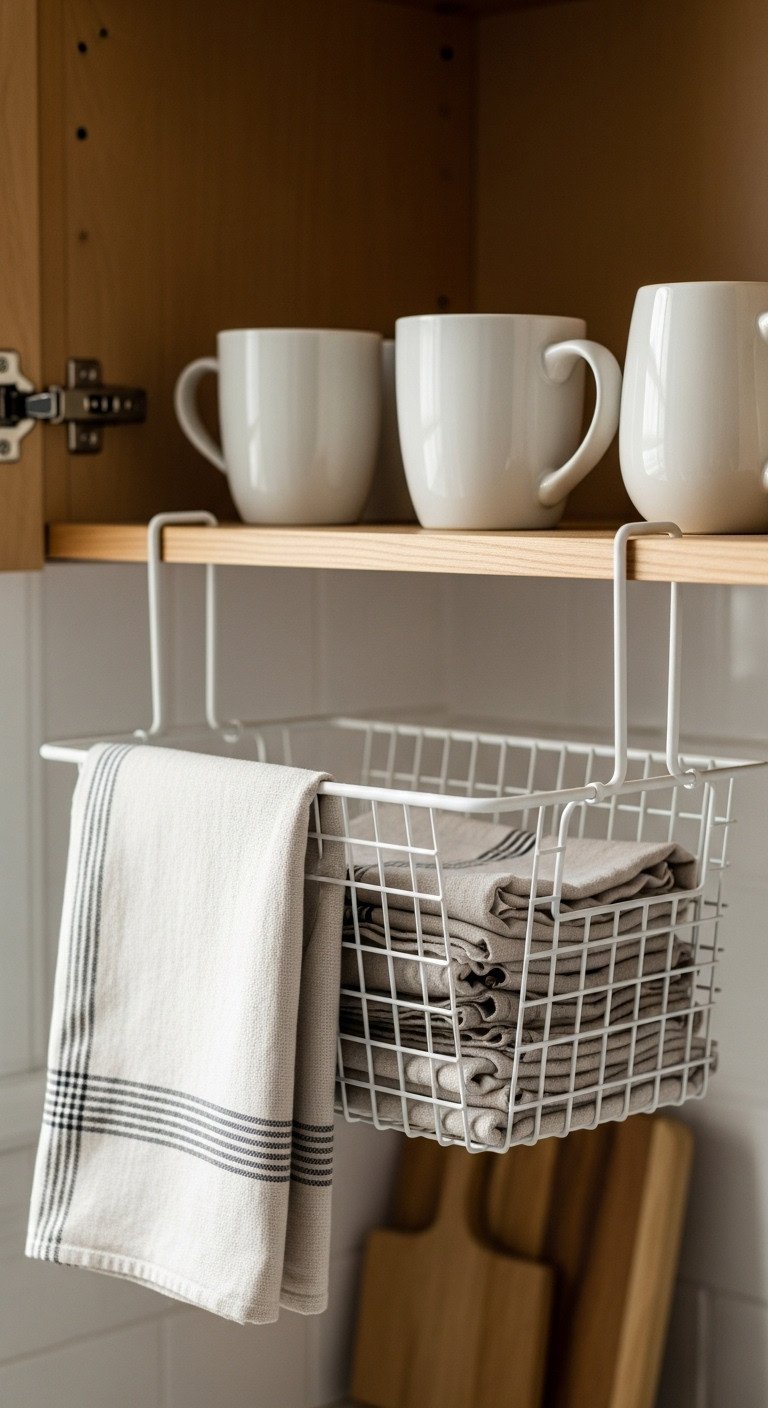
7. Create New Shelves from Thin Air with Under-Shelf Baskets
Pin this simple idea to add more shelving!
Just like shelf risers create a second level above a shelf, under-shelf baskets create a new storage level below it. These clever wire baskets simply slide onto your existing cabinet or pantry shelves, instantly creating a new spot for lightweight items like linens, bread, or food wrap boxes.
Supplies Needed:
- One or more under-shelf hanging baskets.
Step-by-Step Directions:
- Identify a shelf in your cabinet or pantry with a few inches of empty space below it.
- Take an under-shelf basket, which has two flat arms on top.
- Simply slide the basket’s arms onto the existing shelf. The basket will hang securely underneath, creating a new storage level.
- Fill the basket with lightweight items that are hard to stack, such as boxes of aluminum foil and plastic wrap, bags of chips or bread, or kitchen towels and linens.
Pro-Tip: Ensure the thickness of your cabinet shelf is not too wide for the basket’s arms. Most standard shelves work perfectly, but custom or thick wood shelves might be a tight fit.
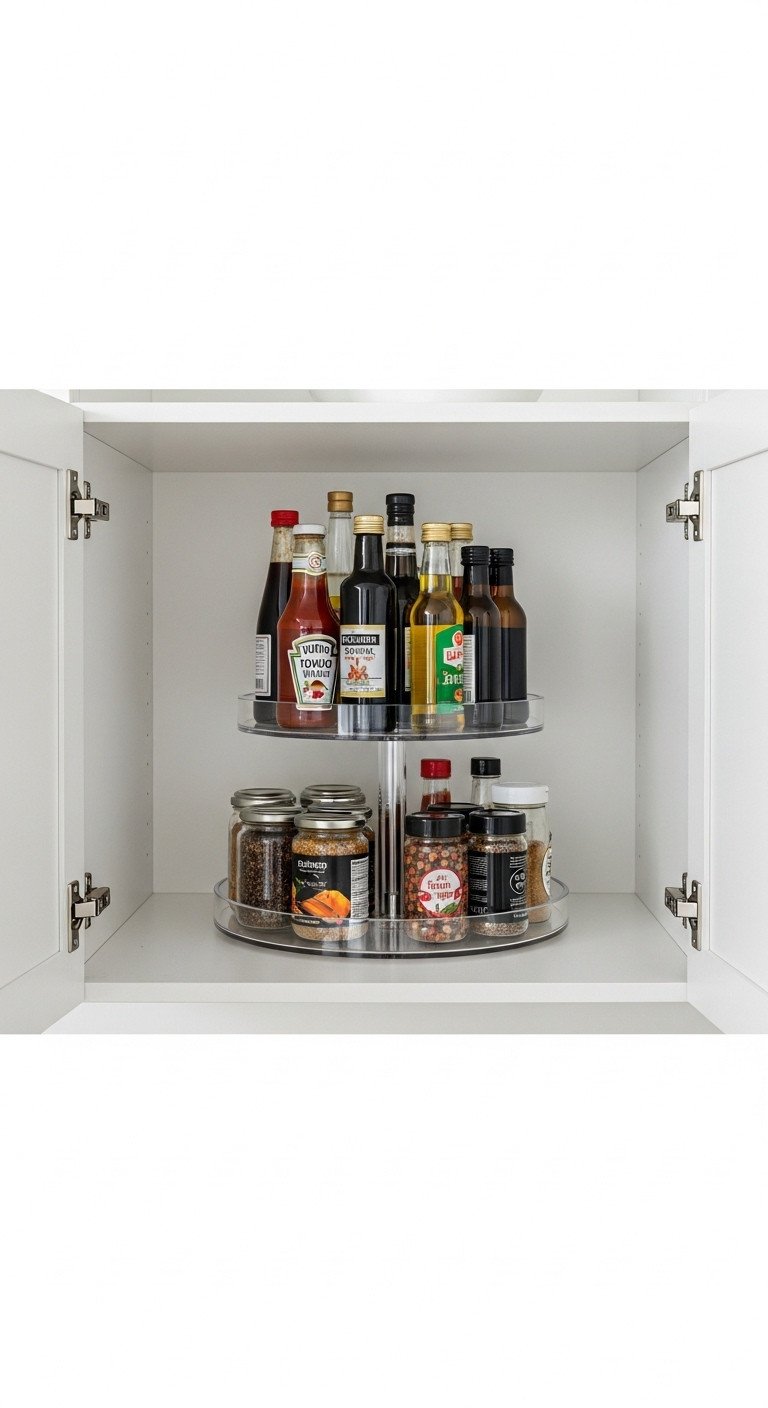
8. Conquer Deep Corner Cabinets with a Turntable
Save this must-have organizer for corner cabinets!
Deep corner cabinets are notorious black holes where condiments and spices go to get lost and expire. A simple turntable, or Lazy Susan, is the perfect solution. It allows you to spin your items from the dark recesses of the back to the front, making everything easily accessible.
Supplies Needed:
- One turntable (Lazy Susan) sized to fit your cabinet. For tall cabinets, a two-tiered version is ideal.
Step-by-Step Directions:
- Empty the cabinet you want to organize.
- Place the turntable inside, pushing it towards the back corner if it’s a corner cabinet.
- Arrange your items on the turntable. Group similar things together—oils and vinegars, condiments, or all your most-used spices.
- Now, instead of reaching into a dark corner, you can simply spin the turntable to bring items from the back directly to the front for easy access.
Lesson Learned: Before buying, measure the depth and width of your cabinet and subtract an inch to find the maximum diameter for your turntable. This ensures it can spin freely without hitting the cabinet walls or door hinges.
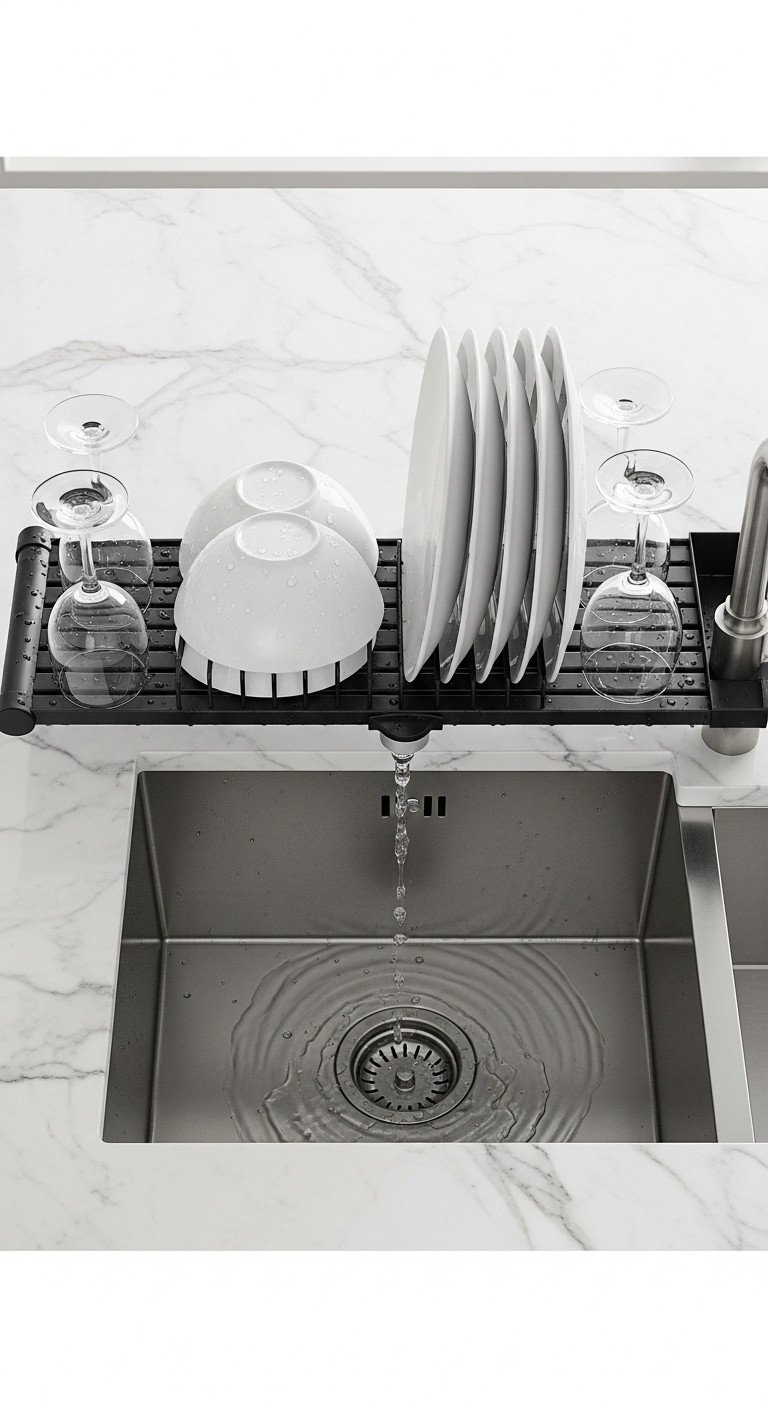
9. Free Up Your Counter with an Over-the-Sink Dish Rack
Pin this idea to reclaim your counter space!
A bulky dish drainer is one of the biggest culprits of countertop clutter. An over-the-sink or roll-up dish rack is a brilliant alternative. It lets you dry dishes directly over the sink, so water drips away and your counters stay clear for precious prep space.
Supplies Needed:
- One roll-up or over-the-sink dish rack. Measure the width of your sink before buying.
Step-by-Step Directions:
- Unbox the rack. There is no assembly needed for the roll-up style.
- Simply unroll the rack and lay it across one basin of your sink. The silicone-coated ends will grip the countertop and stay in place.
- Wash your dishes and place them directly on the rack to dry. The water drips straight into the sink, keeping your counters dry and clean.
- When the dishes are dry and put away, you can roll the rack up and store it in a drawer or cabinet, giving you back 100% of your counter space.
Pro-Tip: These racks are multi-functional! You can also use them as a colander for washing vegetables or as a cooling rack for baked goods.
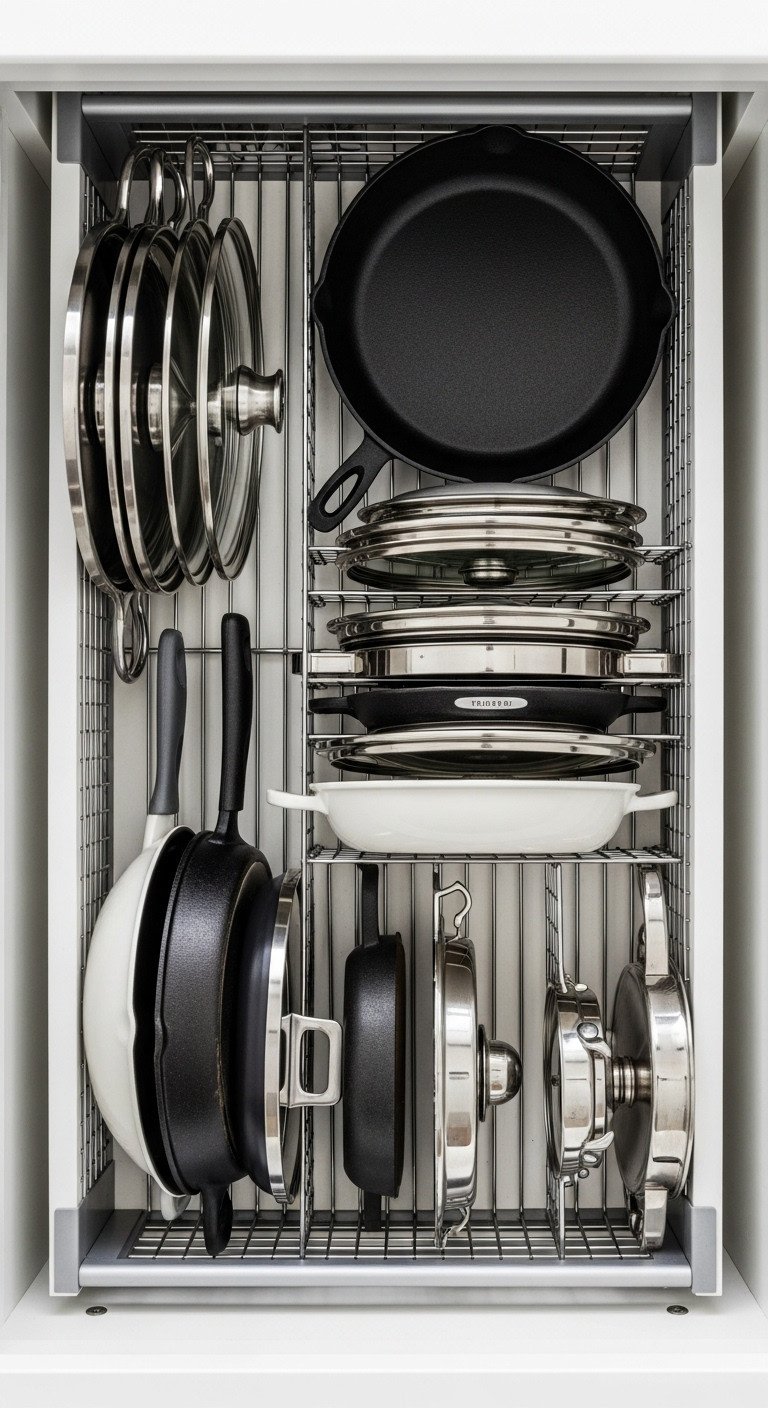
10. File Your Lids and Pans Vertically
Save this solution for messy pot and pan cabinets!
Stop the frustrating avalanche of mismatched lids and nested pans. An adjustable organizer rack allows you to store your cookware vertically, on its side, like files in a cabinet. This simple shift means you can see every piece at a glance and slide one out without causing a crash.
Supplies Needed:
- One adjustable pot and pan organizer rack.
Step-by-Step Directions:
- Assemble the rack base and insert the U-shaped wire dividers into the slots. The best part of an adjustable rack is you can customize the width of each slot to perfectly fit your specific pans and lids.
- Place the assembled rack inside a deep drawer or a lower cabinet.
- Instead of stacking your pans, slide them into the slots vertically, on their sides.
- Do the same with your pot lids, cutting boards, and even baking sheets.
- Now you can see all your cookware at a glance and easily slide out just the one you need.
Pro-Tip: This also works brilliantly on a cabinet door. Use a smaller, wall-mountable lid rack and screw it into the inside of a cabinet door for completely hidden lid storage. (Check your lease before drilling!)
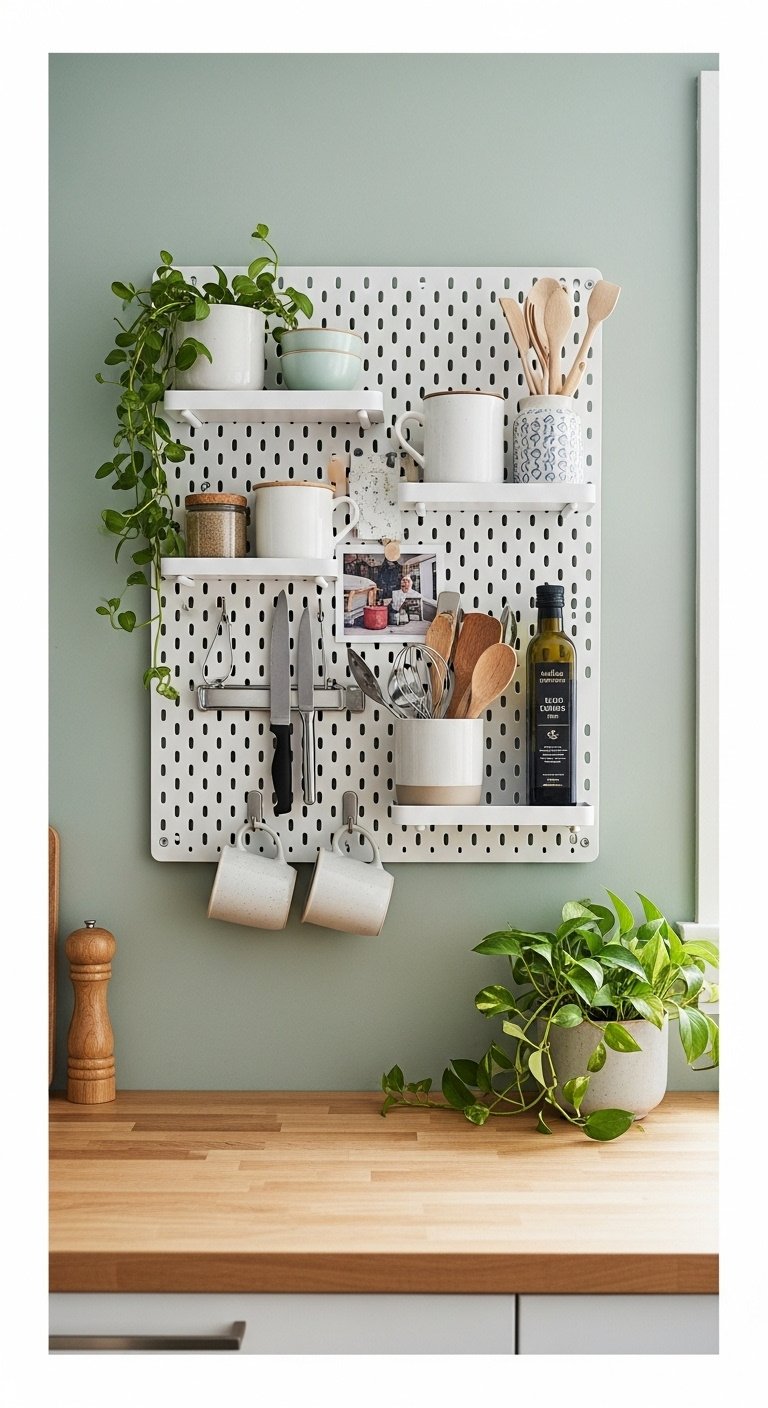
11. Create a Custom Wall Grid with a Damage-Free Pegboard
Pin this ultimate renter-friendly wall storage idea!
For the ultimate in customizable, renter-friendly wall storage, a pegboard mounted with heavy-duty adhesive strips is a game-changer. It allows you to create a modular system of hooks, shelves, and baskets for utensils, mugs, and spices—all without a single hole in the wall.
Supplies Needed:
- One or more lightweight pegboard panels.
- Heavy-duty, damage-free adhesive picture hanging strips (like Command™ strips), ensuring their weight capacity exceeds the pegboard and items.
- A variety of pegboard hooks, baskets, and small shelves.
- A level.
Step-by-Step Directions:
- Plan your layout on a clear wall space, like the area next to your cabinets or a backsplash.
- Clean the wall surface thoroughly with rubbing alcohol and let it dry.
- Following the package instructions, apply the adhesive strips to the back of the pegboard panel, placing one in each corner and a few in the middle for larger panels.
- Use a level to ensure the board is straight, then press it firmly against the wall for at least 30-60 seconds.
- Wait the recommended time (usually one hour) before adding any hooks or weight.
- Arrange your hooks, baskets, and shelves to create a custom storage station for your most-used kitchen tools.
Lesson Learned: The success of this tips depends entirely on using the correct number of high-quality adhesive strips for the weight you plan to hang. Always be conservative and use more strips than you think you need.
Key Takeaways: Your Quick Guide to a Renter-Friendly Kitchen
- Think Vertically: The most underused space in a small kitchen is vertical. Use shelf risers, over-the-door racks, and wall organizers to draw the eye up and store more.
- Use Hidden Surfaces: The sides of your fridge, the backs of doors, and the space under your shelves are prime real estate for storage. Use magnetic and hanging organizers to claim them.
- Choose Damage-Free: Always opt for renter-safe solutions. Tension rods, heavy-duty adhesive hooks, and over-the-door designs provide powerful organization with zero permanent changes.
- Get It Off the Counter: Your primary goal should be to clear your countertops. Use over-the-sink racks and wall-mounted utensil holders to free up precious prep space.
- Make It Accessible: Don’t just store things—make them easy to get to. Turntables and vertical pan organizers prevent deep-cabinet chaos and make cooking more enjoyable.
People Also Ask About Apartment Kitchen Organization
How do you organize a small kitchen with no pantry?
Create a “distributed pantry” using multiple non-traditional spots. Use a slim rolling cart in the gap beside your fridge for oils and cans. Install a large over-the-door organizer on a nearby closet or kitchen door for snacks and dry goods. Finally, dedicate one full cabinet to food, using clear bins and shelf risers to maximize its capacity.
What is the best renter-friendly way to add shelves without drilling?
The best no-drill options are tension rod shelves and adhesive solutions. You can use strong tension rods to create shelves inside cabinets or alcoves. For walls, use heavy-duty adhesive strips to mount lightweight pegboards or small picture ledges, allowing you to create a custom storage display without making any holes.
How can I get more counter space in my small apartment?
Get everything you can off the counter and onto a vertical surface. Use a magnetic rack on your fridge for spices and paper towels. Mount utensils on the backsplash with adhesive hooks. Switch to an over-the-sink dish rack to eliminate a bulky countertop drainer. Store small appliances you don’t use daily in a cabinet.
What is the very first step to organizing a cluttered kitchen?
The first step is always to declutter one small area completely. Do not buy any organizers yet. Choose one cabinet or drawer, take everything out, and sort it into three piles: keep, toss (expired food, broken items), and donate/relocate. Only after you’ve decluttered can you see what you truly need to organize.
Final Thoughts
You don’t need a huge kitchen to create a space that works for you. An organized kitchen is achievable for any renter, regardless of space or budget. Framing organization not as a chore, but as an act of self-care that creates a more peaceful and functional home is the first step. By using a few of these smart, damage-free ideas, you can transform your cramped kitchen into an organized, efficient, and enjoyable space.
Which of these ideas are you excited to try first? Share your favorite small kitchen tips in the comments below
Last update on 2026-01-29 at 17:03 / Affiliate links / Images from Amazon Product Advertising API
