As an Amazon Associate KitchenwareSets.com earns from qualifying purchases.
11 Brilliant Apartment Kitchen Layout Ideas for Small Spaces
Struggling with a kitchen that feels too small? You try to cook a simple meal, but there’s just nowhere to put the cutting board.
An apartment kitchen layout is the arrangement of your counters, appliances, and storage. When this layout is inefficient, even a decent-sized kitchen can feel incredibly cramped and frustrating to use.
The real problem isn’t a lack of space; it’s a layout that ignores your workflow. In this guide, we’ll show you 11 brilliant, renter-friendly ideas to maximize every square inch and create a kitchen you love.
Why Do Most Apartment Kitchens Feel So Cramped?
We’ve all been there. You open one cabinet door, and it blocks a drawer. The refrigerator is miles away from the sink, forcing you to drip water across the floor. You have zero counter space next to the stove, making cooking a chaotic juggling act. These are not just small kitchen frustrations; they’re symptoms of a flawed apartment kitchen layout.
The core issue with most apartment kitchens is an inefficient layout that ignores the “kitchen work triangle,” leading to wasted steps, cluttered countertops, and a lack of functional storage, making the space feel smaller than it is. The kitchen work triangle is a design principle that says the path between your three main work areas—the sink, stove, and refrigerator—should be clear and compact. When this flow is broken, everything takes more effort.
Instead of seeing a lack of square footage, start seeing a lack of a smart layout. The solutions aren’t about knocking down walls; they’re about implementing clever, space-saving kitchen ideas that reclaim lost space and streamline your workflow.
11 Brilliant Apartment Kitchen Layout Ideas to Maximize Your Small Space
Ready to transform your cramped kitchen into a clever, functional space? Each of the following 11 ideas is a proven, high-impact solution designed specifically for small apartment kitchens. We’ve curated these based on expert interior design principles like kitchen zoning and ergonomic design. For every idea, you’ll find out what you need and exactly what to do, making it easy to start today.
1. Install a Vertical Wall Grid System for Utensils and Mugs
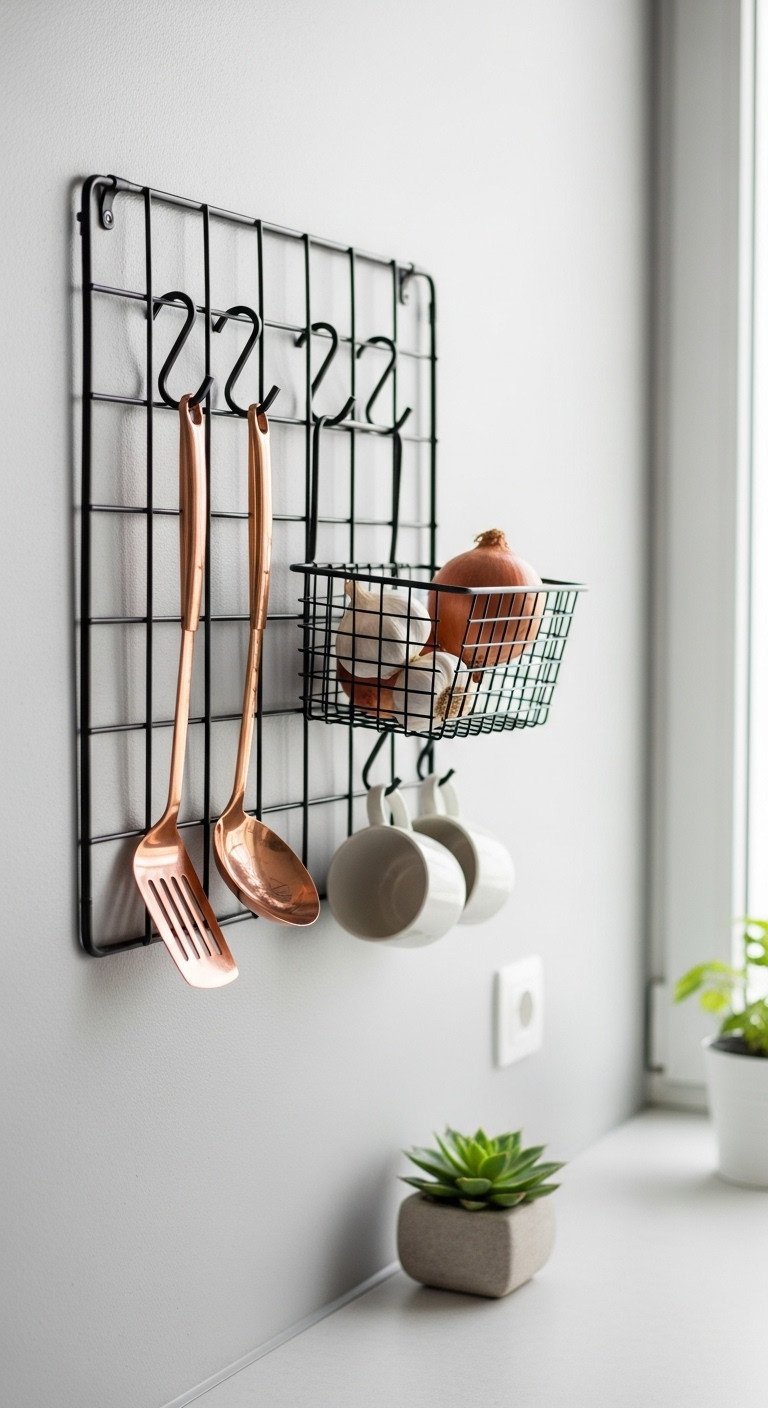
Pin this vertical storage hack to your ‘Small Kitchen Goals’ board!
Your countertops and drawers are prime real estate. A wall grid organizer is a modular, renter-friendly way to use vertical space, getting bulky utensils, mugs, and even small pots off your valuable surfaces. This makes them accessible while cooking and doubles as a stylish display.
Materials Needed:
- Wire wall grid panel (typically 24×24 inches or larger)
- Matching S-hooks for hanging utensils
- Clip-on wire baskets for small items
- Wall-safe adhesive hooks or small nails (check weight capacity)
- A level and tape measure
Step-by-Step Directions:
- Choose Your Spot: Identify an empty patch of wall, perhaps next to the stove or above a small prep area.
- Measure and Mark: Use your tape measure and level to mark where the corners of the grid will go. Ensure it’s straight.
- Install Securely: For renters, use several heavy-duty adhesive hooks designed for the weight of your grid and items. For owners, use small nails or screws for a more permanent hold.
- Hang and Organize: Attach your S-hooks and baskets. Hang your most-used utensils, mugs, and even a small herb pot to free up counter and drawer space.
Pro-Tip: Choose a grid system with a variety of accessories. This allows you to customize your storage and adapt it as your needs change.
2. Create a Mobile Island with a Slim Rolling Cart
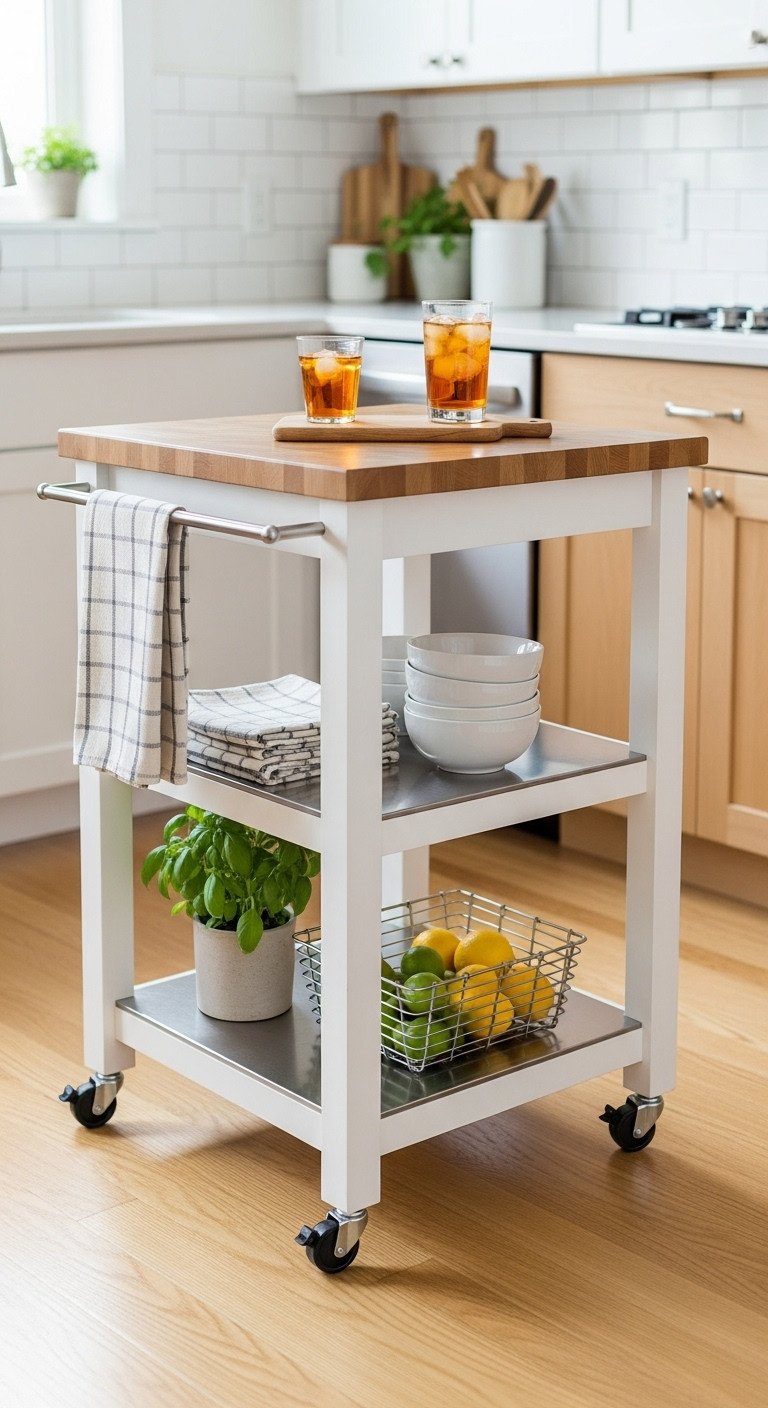
Save this flexible kitchen island idea for your apartment!
If you’re dreaming of a kitchen island but don’t have the square footage, a slim rolling cart is the perfect solution. It provides much-needed extra counter space for meal prep and tiered shelving for storage. Best of all, you can simply roll it out of the way when you need more floor space.
Materials Needed:
- A slim kitchen cart or bar cart (look for one under 18 inches wide)
- Optional: Small baskets or bins that fit the shelves
- Optional: Stick-on hooks for the side to hang towels or oven mitts
Step-by-Step Directions:
- Measure Your Clearance: Before buying, use painter’s tape on the floor to mark the dimensions of a potential cart. Make sure you still have at least 36 inches for a clear walkway, a standard for ergonomic kitchen layouts.
- Assemble the Cart: Follow the manufacturer’s instructions to assemble your rolling cart. Make sure to attach the locking wheels.
- Zone Your Storage: Dedicate each shelf to a specific purpose. Top shelf for bowls and plates, middle for linens or dry goods in canisters, bottom for produce or small appliances.
- Position and Lock: Roll the cart into position when you need extra prep space. Lock the wheels so it’s stable and safe while you’re chopping. Push it against a wall when not in use.
Lesson Learned: A cart with a built-in knife block or towel bar on the side is a game-changer for maximizing its utility.
3. Utilize the Refrigerator Side with Magnetic Storage
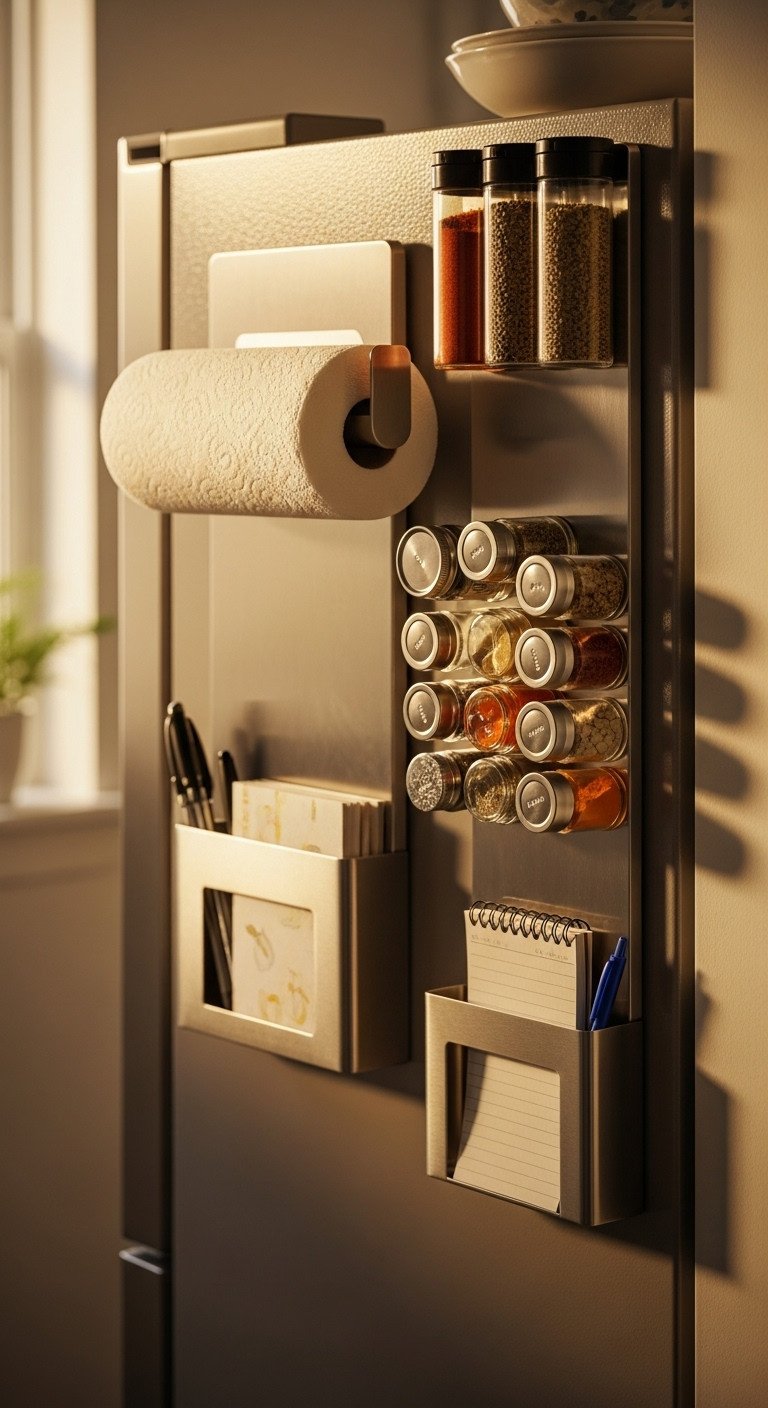
Pin this genius no-drill storage solution!
The side of your refrigerator is one of the most overlooked storage opportunities in an apartment kitchen. This metal surface is perfect for strong magnetic organizers. You can move your entire spice collection, paper towels, and even oven mitts here, instantly clearing a significant amount of counter and cabinet space.
Materials Needed:
- A high-quality magnetic spice rack system
- A magnetic paper towel holder
- Optional: Magnetic hooks for hanging oven mitts or measuring spoons
- Optional: Magnetic caddy for pens and shopping lists
Step-by-Step Directions:
- Clear and Clean: Wipe down the side of your refrigerator with a cleaner to ensure a strong magnetic connection.
- Test Your Magnets: Before filling anything, test the strength of your magnetic accessories to make sure they can hold the weight you intend.
- Arrange by Use: Place the most frequently used items, like paper towels and common spices (salt, pepper, garlic powder), at the most accessible height.
- Decant and Fill: For a clean, uniform look, decant your spices into matching magnetic tins or jars. Be sure to label them on the top or bottom.
Pro-Tip: The side of the fridge is often overlooked vertical real estate. It’s the perfect renter-friendly solution because it requires zero installation and leaves no marks.
4. Double Your Workspace with an Over-the-Sink Rack
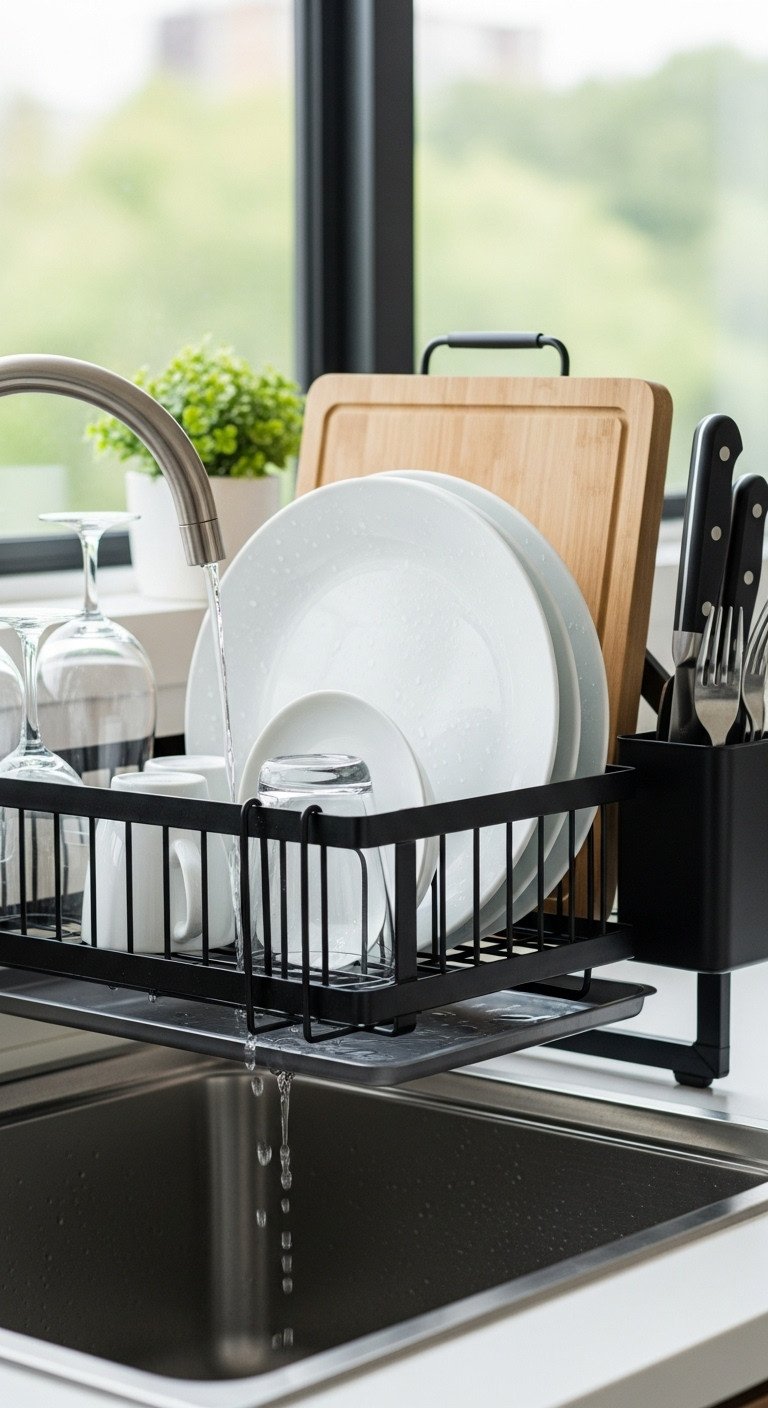
Save this amazing space-saving dish rack idea!
A traditional dish drainer can occupy two square feet of precious counter space. An over-the-sink dish rack is a brilliant alternative that utilizes the empty space above your sink basin. Water drips directly into the sink, and you instantly get your countertop back for meal prep.
Materials Needed:
- An adjustable over-the-sink dish rack OR a roll-up silicone-coated steel drying rack
- Tape measure
Step-by-Step Directions:
- Measure Your Sink: Before purchasing, carefully measure the width of your sink basin and the height between your countertop and any upper cabinets to ensure the rack will fit.
- Choose Your Style: A large, multi-tier rack offers maximum storage for dishes, utensils, and even soap. A simple roll-up rack is more minimalist and can be stored away easily.
- Assemble and Place: Assemble the large rack according to instructions and position it over your sink. For a roll-up rack, simply unroll it across the sink basin.
- Utilize for More Than Dishes: Use the roll-up rack as a place to rinse vegetables or as a temporary cooling rack for hot pans, effectively adding a new functional surface to your kitchen.
Pro-Tip: This trick essentially gives you back an entire section of your countertop that is normally taken up by a clunky dish drainer. Water drips directly into the sink, keeping your counters dry.
5. Implement a Pegboard Backsplash for Versatile Storage
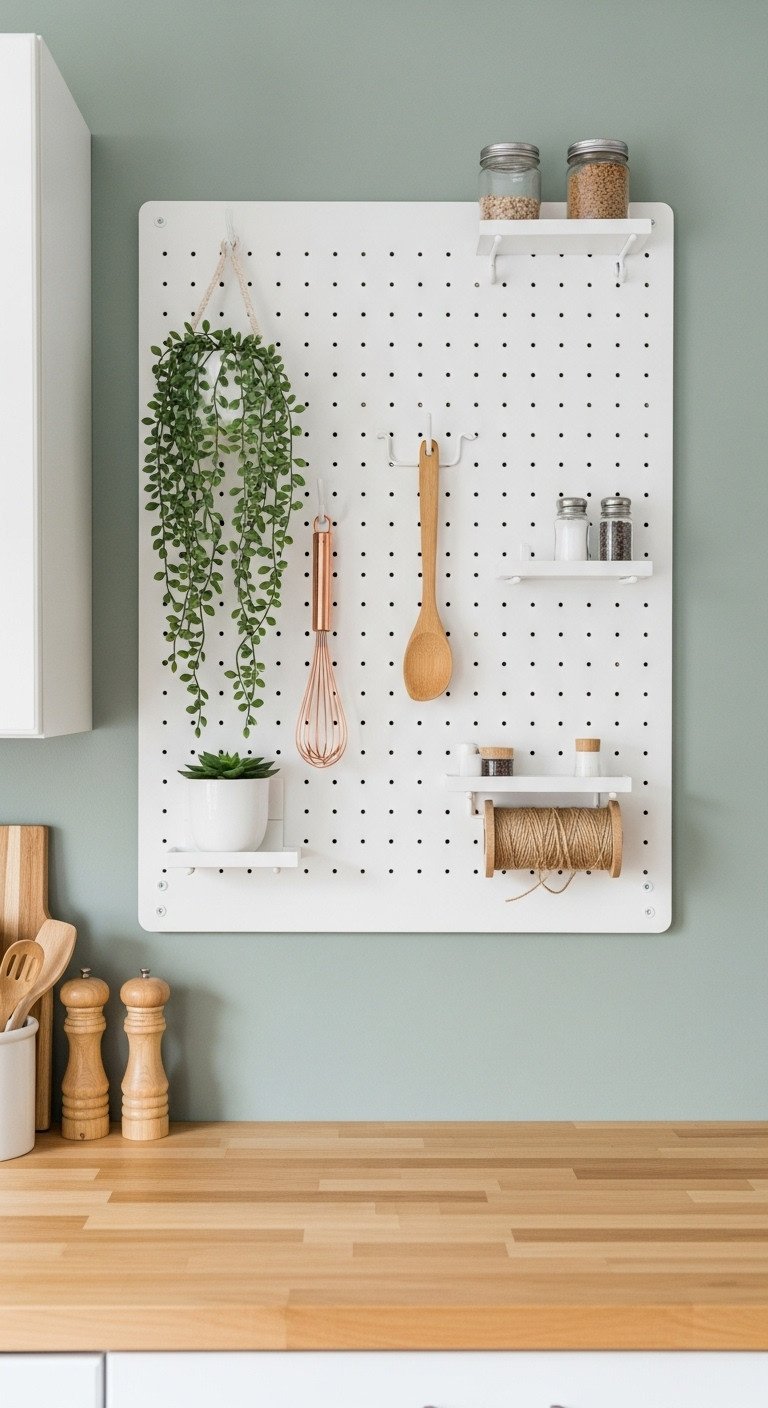
Pin this brilliant pegboard organization idea for your kitchen!
A pegboard is the ultimate in customizable, modular storage. By installing one as a backsplash, you create an entire wall of flexible organization. With a variety of hooks, baskets, and small shelves, you can hang everything from pans and measuring cups to spices and fresh herbs, all within easy reach.
Materials Needed:
- A large pegboard panel, cut to the size of your backsplash area
- 1×2 inch wood strips for creating a frame (spacers)
- Screws and wall anchors
- A pegboard accessory kit (hooks, shelves, baskets)
- Drill and a level
Step-by-Step Directions:
- Measure and Cut: Measure the height and width of your backsplash area. Have your pegboard cut to size at a hardware store.
- Create Spacers: Cut the 1×2″ wood strips to create a frame for the back of the pegboard. This is crucial as it creates the space needed for the hooks to fit in. Screw this frame onto the back of the pegboard.
- Mount to the Wall: Use a level to position the pegboard. Drill pilot holes through the pegboard and frame into the wall. Use wall anchors to secure it firmly. For a renter-friendly version, use several heavy-duty Command strips to attach a smaller, lightweight pegboard.
- Customize Your Layout: Insert your hooks, shelves, and baskets to create a custom layout for your tools, spices, and decor. Rearrange anytime!
Lesson Learned: The beauty of a pegboard is its infinite flexibility. Unlike a fixed shelf, you can move components around in seconds as your needs or your tools change.
6. Build a Slim, Rolling Pantry for Awkward Gaps
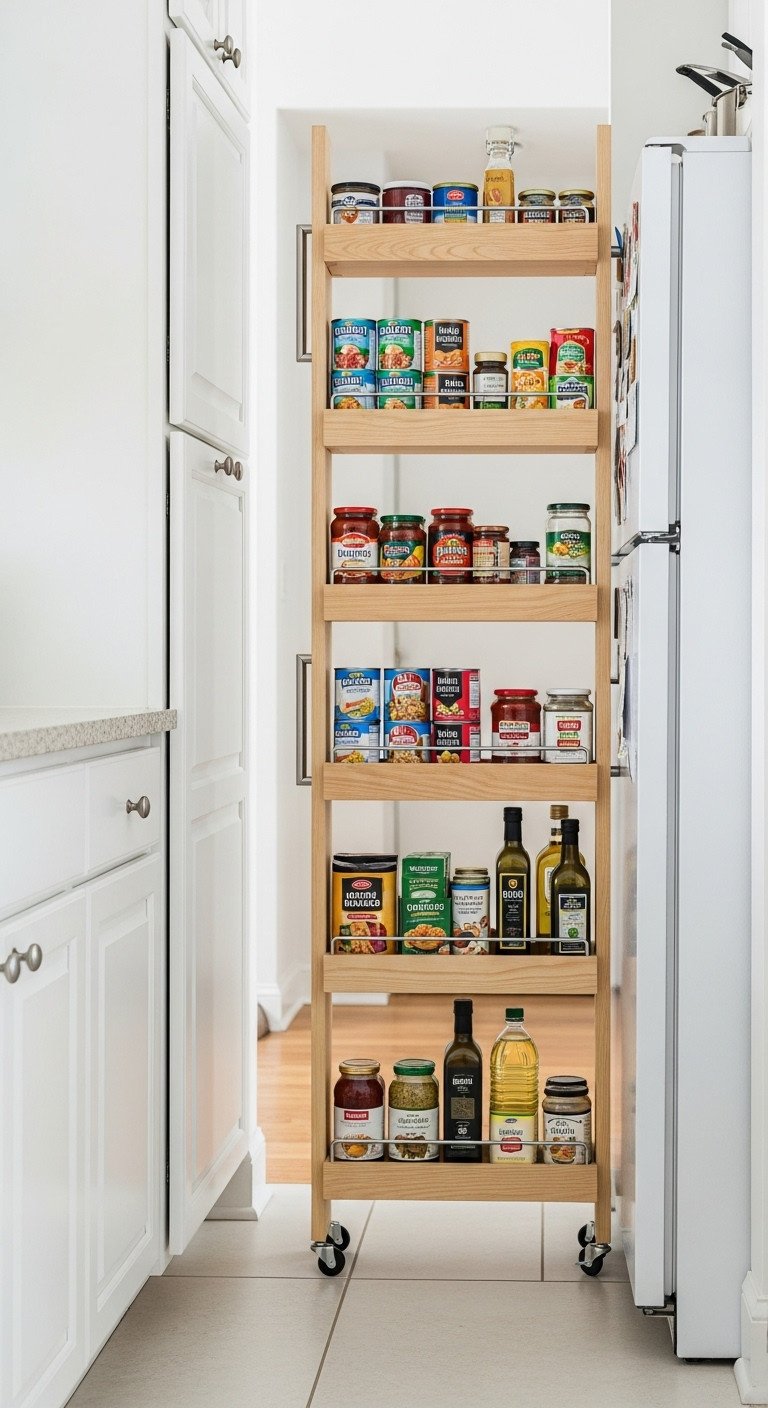
Save this incredible space-saving pantry idea!
That awkward 6-inch gap between your refrigerator and the wall isn’t useless space—it’s a hidden pantry waiting to happen. A slim, slide-out storage rack is designed to fit perfectly in these narrow gaps, providing accessible pull-out storage for canned goods, oils, spices, and other pantry staples.
Materials Needed:
- A pre-made slim rolling storage cart (usually 5-6 inches wide)
- OR for DIY: 1×4 lumber, thin plywood for the back, caster wheels, wood screws, paint
Step-by-Step Directions:
- Measure Your Gap: Carefully measure the width and depth of the gap between your fridge and the wall or cabinet. Buy or build a cart that is at least 1/2 inch narrower than the gap.
- Assemble or Build: If you bought a cart, assemble it following the instructions. If building, construct a simple box frame with shelves using the 1x4s, attach the plywood back, and screw the caster wheels to the bottom.
- Paint and Personalize: Paint the cart to match your cabinets for a seamless, built-in look. Add a small handle or knob to the front for easy pulling.
- Load and Roll: Fill the shelves with canned goods, spices, oils, and vinegars. Simply roll it into the gap to hide it away and pull it out when you need something.
Pro-Tip: This is one of the most effective ways to add a significant amount of storage. That 6-inch gap you thought was useless can suddenly hold 20-30 cans and bottles.
7. Upgrade to a Workstation Sink to Create New Prep Space
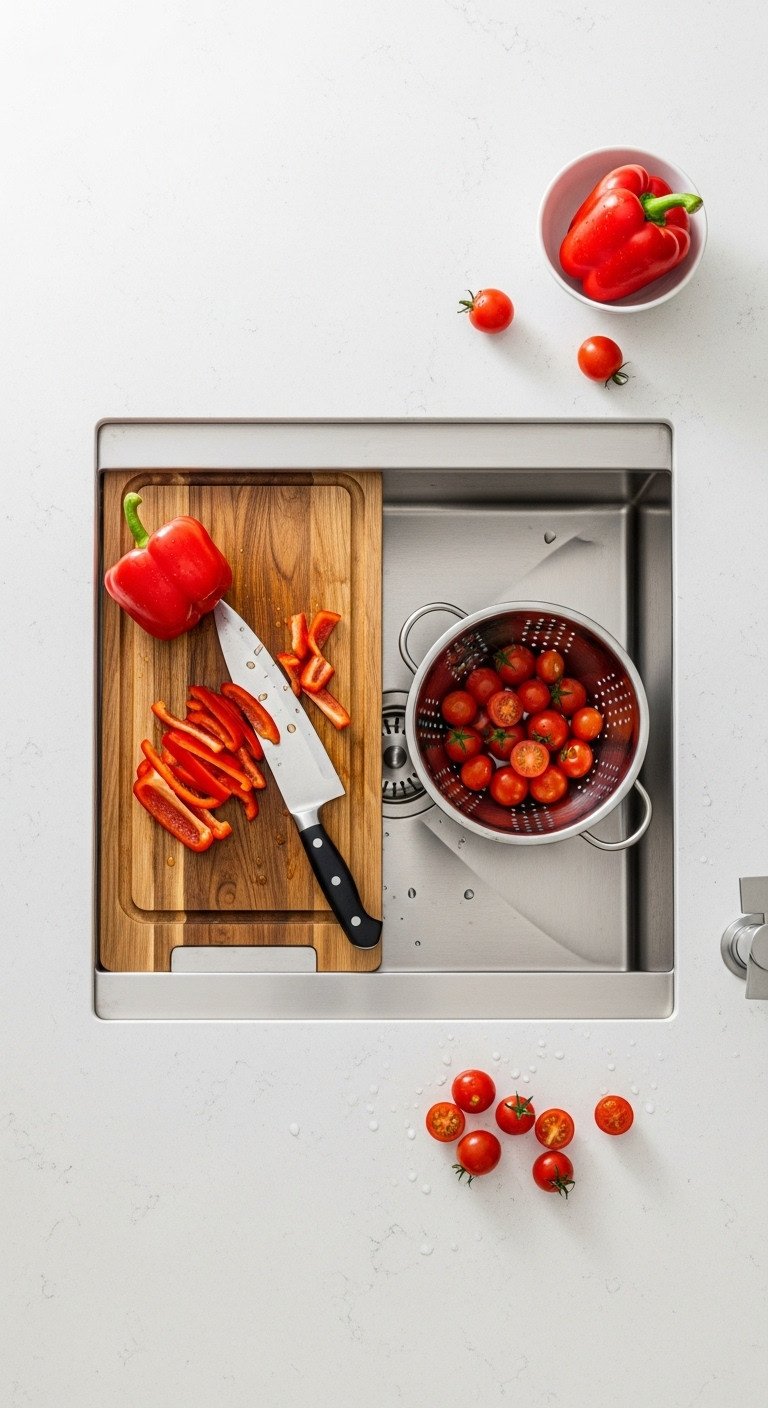
Pin this game-changing sink idea for small kitchens!
A workstation sink is an innovative design that features an integrated ledge for sliding accessories like a cutting board, colander, and drying rack. This emerging trend effectively transforms your sink into a multi-functional prep station, giving you an entirely new work surface without taking up any additional counter space.
Materials Needed:
- Workstation sink sized to your cabinet base
- Plumber’s putty and silicone sealant
- Basic plumbing tools (wrenches, bucket)
- Faucet (often purchased separately)
Step-by-Step Directions:
- Confirm Sizing: This is a more involved project. Measure your existing sink and the cabinet base it sits in. Purchase a workstation sink that will fit the opening.
- Turn Off Water & Remove Old Sink: Shut off the water supply valves under the sink. Disconnect the drain and supply lines. Cut the sealant around the old sink and lift it out.
- Install New Sink: Clean the countertop surface. Apply a bead of plumber’s putty or silicone around the sink drain hole and install the new drain. Apply silicone sealant around the edge of the sink cutout on the counter. Carefully lower the new sink into place and secure it with the provided clips from below.
- Reconnect Plumbing: Reconnect the faucet, water supply lines, and drain pipe. Turn the water back on and check carefully for leaks. Now, enjoy your new, multi-functional prep station!
Pro-Tip: While this is more of a renovation for homeowners, it’s one of the most impactful upgrades for a tiny kitchen, effectively adding two square feet of highly functional workspace.
8. Mount a Fold-Down Wall Table for Flexible Dining
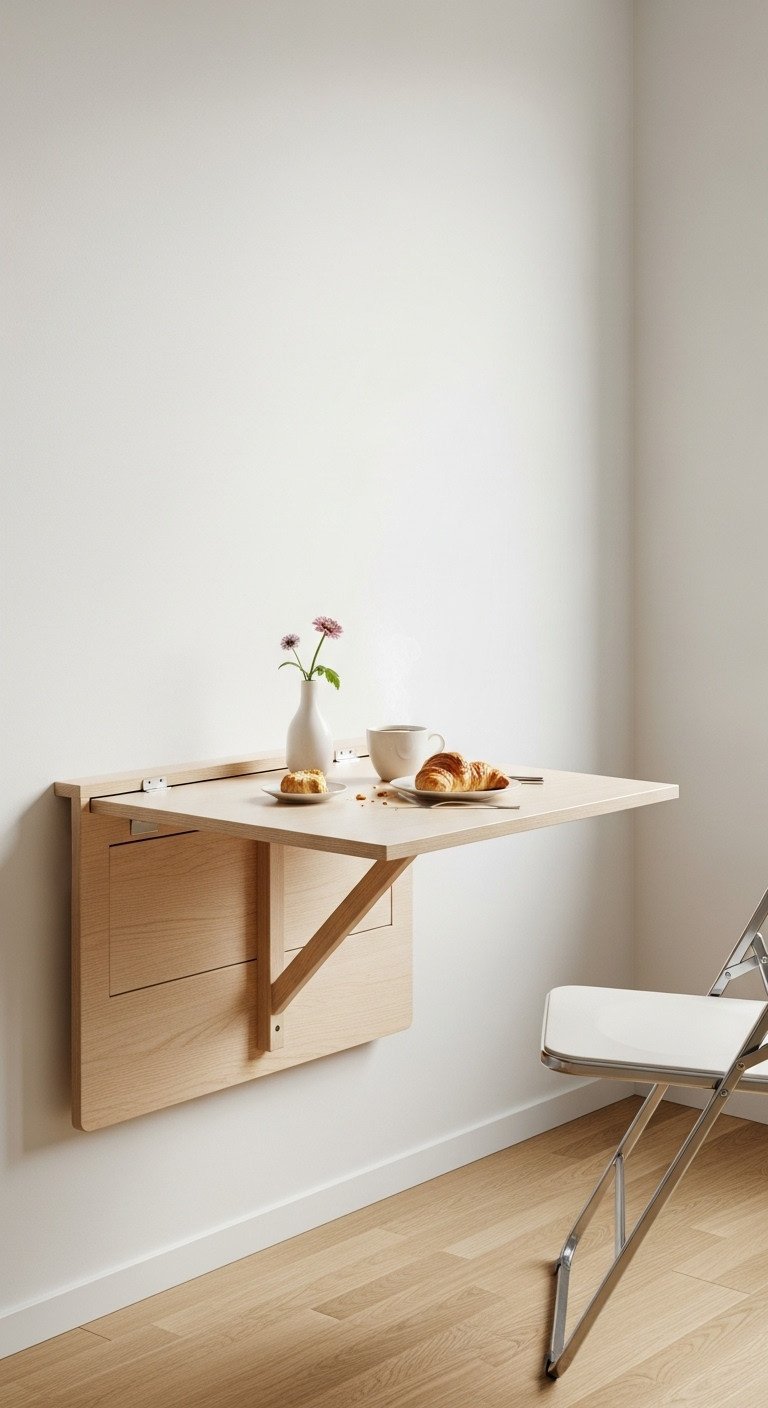
Save this brilliant space-saving table idea for your apartment!
When there’s no room for a dining table, a wall-mounted drop-leaf table is the answer. This clever piece of furniture serves as a dining spot for one or two, an extra prep surface, or a small workspace. When you’re done, it folds down flat against the wall, taking up virtually no floor space.
Materials Needed:
- A pre-made wall-mounted drop-leaf table kit
- A stud finder
- A power drill and level
- Heavy-duty wall anchors or lag bolts
Step-by-Step Directions:
- Find the Studs: This is critical for safety and stability. Use a stud finder to locate the vertical wood studs in your wall where you plan to mount the table. Mark their locations.
- Position and Level: Hold the table’s mounting bracket against the wall. Use a level to ensure it’s perfectly straight. Mark the drill holes directly over the stud locations you found.
- Drill and Mount: Drill pilot holes into the studs. Securely attach the mounting bracket to the wall using the provided hardware (or stronger lag bolts for extra security).
- Attach the Tabletop: Follow the kit’s instructions to attach the tabletop and the folding support bracket. Test the folding mechanism several times to ensure it’s smooth and secure.
Lesson Learned: Always mount this type of furniture into wall studs. Drywall alone is not strong enough to support the weight of the table, especially when you lean on it.
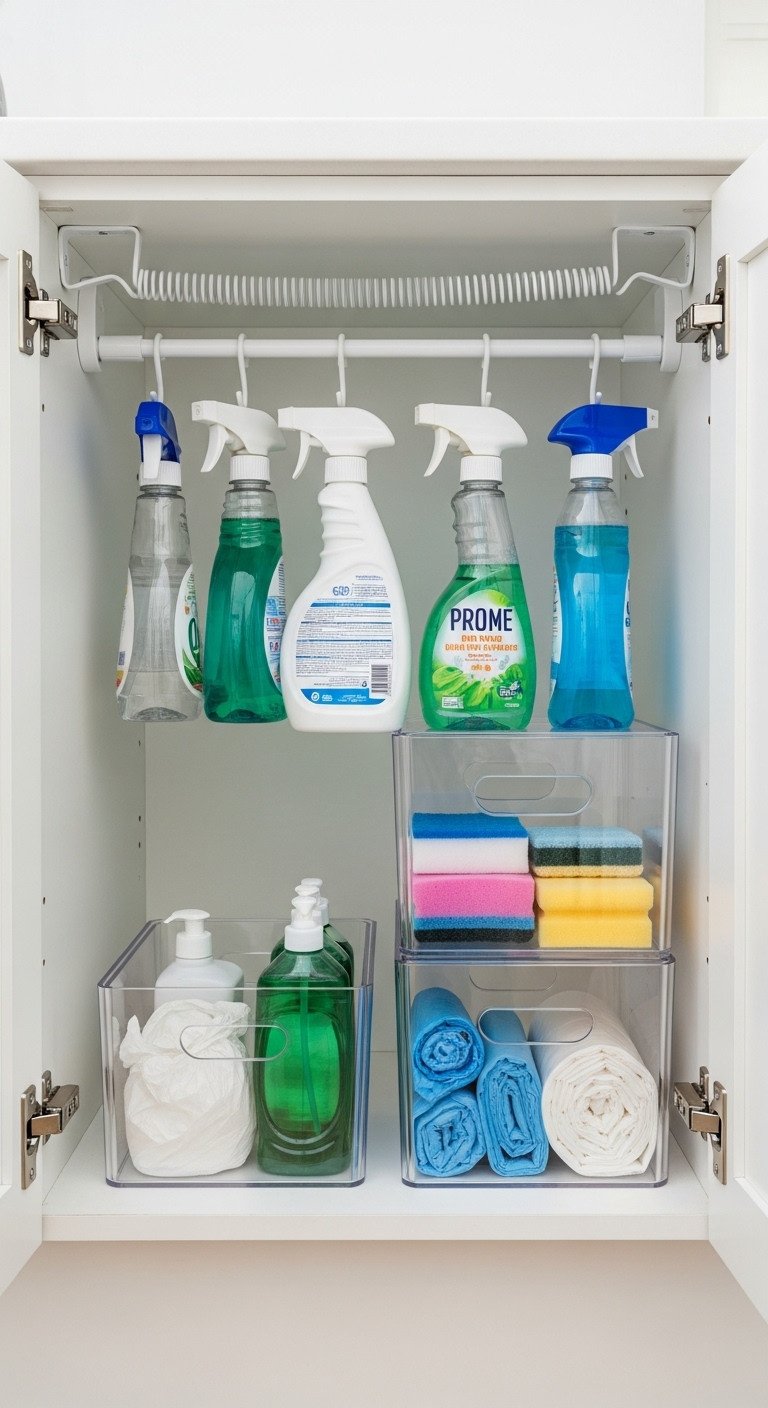
9. Tame Under-Sink Chaos with Tension Rods
Pin this simple but genius organization hack!
The cabinet under the sink often becomes a jumbled mess of cleaning supplies. A simple, spring-loaded tension rod is a damage-free hack that can instantly restore order. By installing it near the top of the cabinet, you can hang spray bottles by their triggers, freeing up the entire cabinet floor for bins and other items.
Materials Needed:
- A small, adjustable spring-loaded tension rod
- Stackable clear bins or a sliding under-sink organizer
- Cleaning cloths
Step-by-Step Directions:
- Empty and Clean: Take everything out from under the sink. Give the cabinet a thorough wipe-down.
- Install the Rod: Adjust the tension rod so it’s slightly longer than the cabinet width. Compress it and fit it into place near the top of the cabinet, in front of the pipes. The spring tension will hold it securely.
- Hang Spray Bottles: Hang all of your spray bottles from the rod by their trigger handles. This frees up the entire floor of the cabinet.
- Organize the Bottom: Use clear bins or a sliding organizer on the bottom of the cabinet to neatly store sponges, dishwasher pods, trash bags, and other supplies.
Pro-Tip: This hack utilizes the wasted vertical space in the top half of the cabinet, effectively doubling your usable storage area. It’s a must-do for every apartment kitchen.
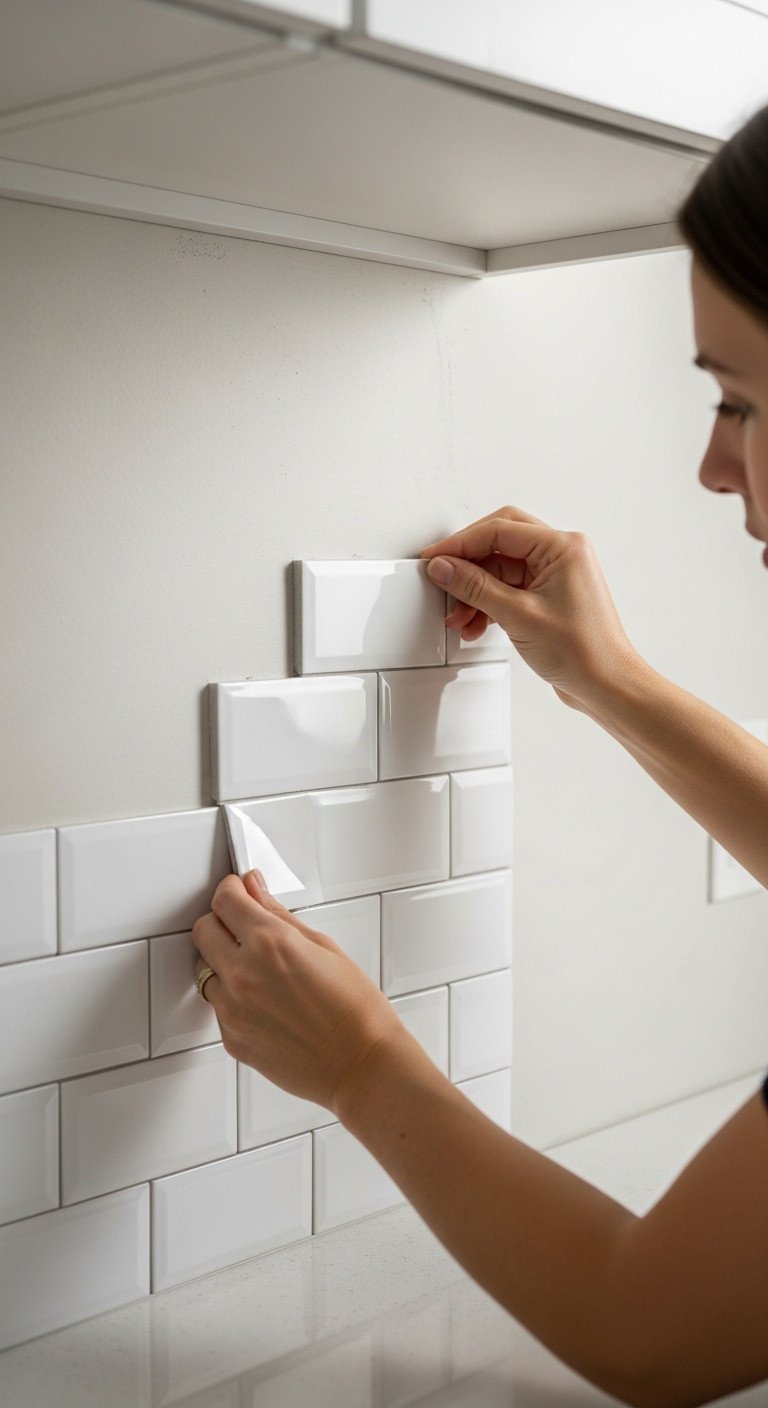
10. Add Personality with a Peel-and-Stick Backsplash
Save this easy DIY backsplash idea for your rental!
A boring or dated backsplash can drag down the entire look of your kitchen. High-quality peel-and-stick tiles are a revolutionary renter-friendly solution that can dramatically transform your space in just a few hours. They are easy to install, affordable, and completely removable when it’s time to move out.
Materials Needed:
- High-quality peel-and-stick tile sheets
- A tape measure and pencil
- A sharp utility knife or box cutter
- A ruler or straight edge
- A cleaning solution (like TSP or rubbing alcohol)
Step-by-Step Directions:
- Prep the Wall: This is the most important step. Thoroughly clean the wall with a degreasing cleaner to remove any grease or grime. Let it dry completely. The tiles will not stick to a dirty surface.
- Measure and Plan: Measure the area and plan your layout. It’s often best to start in a corner and work your way out.
- Cut Your Tiles: Use the utility knife and a straight edge to carefully cut tiles to fit around outlets and at the end of rows. Pro-tip: score the tile first, then snap for a clean break.
- Peel and Stick: Carefully peel back a corner of the adhesive backing. Align the tile sheet with your starting line or the previous tile, ensuring the “grout lines” overlap as directed. Press firmly from the center out to remove any air bubbles.
Lesson Learned: Not all peel-and-stick tiles are created equal. Invest in a quality brand with thick, 3D textures for a look that’s almost indistinguishable from real tile.
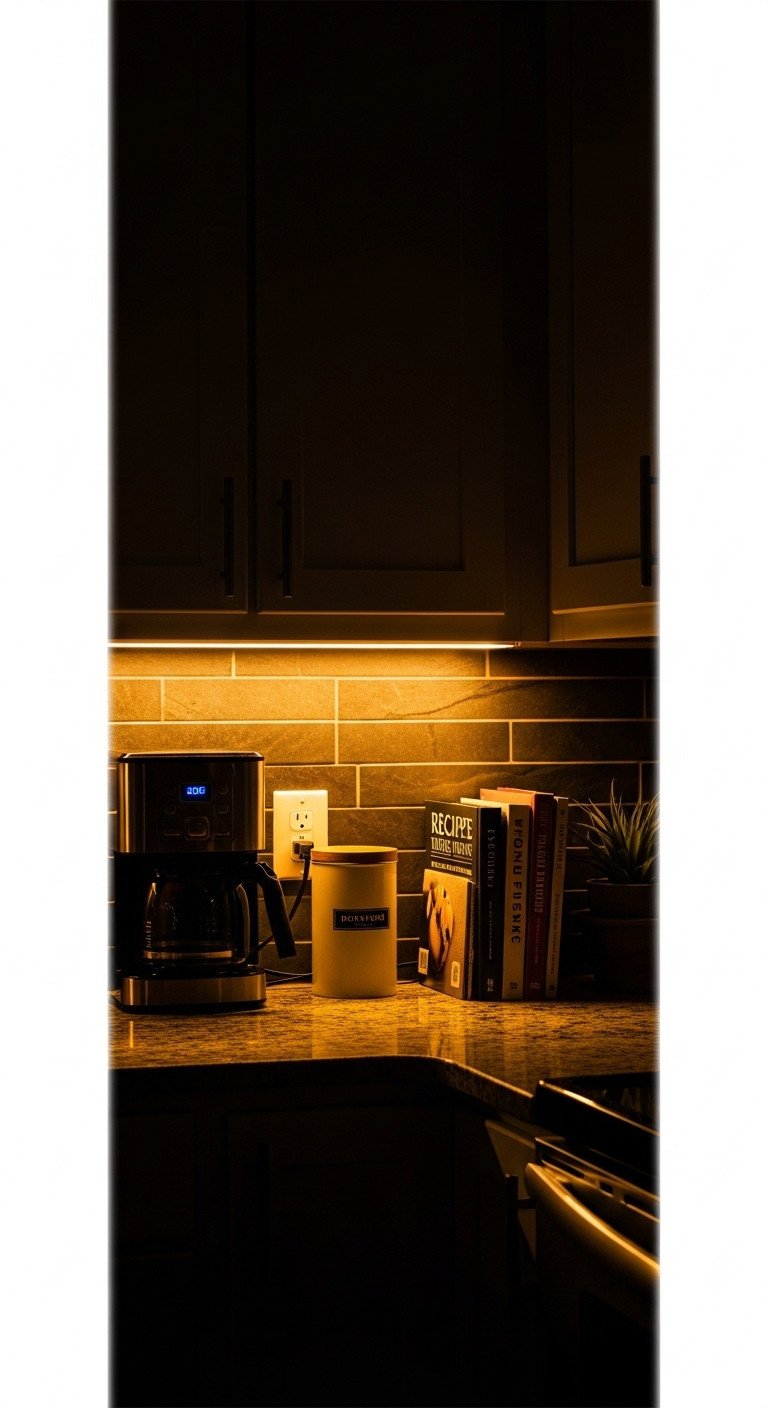
11. Brighten Everything with Under-Cabinet LED Lighting
Pin this essential kitchen lighting upgrade!
Poor lighting is a common problem in apartment kitchens. A single overhead fixture casts shadows on your countertops, making prep work difficult and the space feel gloomy. Easy-to-install peel-and-stick under-cabinet LED lighting is a game-changer. It provides essential task lighting that illuminates your workspace, improves safety, and adds a high-end, ambient glow.
Materials Needed:
- A plug-in or battery-operated under-cabinet LED light kit (strip or puck style)
- Rubbing alcohol and a cloth
- Small, clear adhesive clips for managing wires
Step-by-Step Directions:
- Choose Your Light Type: LED strips provide even, continuous light. Battery-operated puck lights are even easier to install but require battery changes.
- Clean the Surface: Wipe down the entire underside of your cabinets with rubbing alcohol to ensure the adhesive backing sticks properly.
- Stick and Connect: Peel the backing off the light strips and press them firmly into place, usually near the front edge of the cabinet for best results. If using puck lights, stick each one where you need focused light.
- Manage Wires: If using a plug-in kit, run the wire along the back corner of the countertop. Use small, clear adhesive clips under the cabinets and along the wall to hide the wire for a clean, professional look.
Pro-Tip: This is the single most impactful, non-structural change you can make to a kitchen. Good task lighting not only improves safety but also makes the entire kitchen feel brighter, bigger, and more expensive.
Key Takeaways: Your Quick Guide to a Better Apartment Kitchen
- Think Vertically: The most underused space in an apartment kitchen is the wall. Use grids, pegboards, and magnetic racks to get clutter off your counters.
- Embrace Flexibility: Mobile solutions like rolling carts provide extra workspace and storage that can be moved out of the way, which is essential in a small footprint.
- Maximize Every Inch: Awkward gaps next to the fridge and the unused space over and under your sink are prime real estate for clever storage solutions.
- Lighting is Everything: Adding under-cabinet task lighting is the fastest way to make your kitchen feel bigger, brighter, and more functional.
- Focus on Renter-Friendly: Non-permanent upgrades like peel-and-stick tiles, tension rods, and magnetic organizers can completely transform your space without risking your security deposit.
FAQs About Apartment Kitchen Layout Ideas
What is the most efficient layout for a small apartment kitchen?
For long, narrow kitchens, the galley layout is the most efficient as it creates a tight work triangle with everything just a step away. For more open-concept apartments, an L-shaped layout is extremely versatile, provides good workflow, and keeps the kitchen from feeling closed off from the rest of the living space.
How can I add counter space to my apartment kitchen without renovating?
Use a rolling kitchen cart or a sturdy microwave cart to create a mobile island. You can also place a large, fitted cutting board over your sink or stove (when not in use) to create a temporary prep surface. Over-the-sink dish racks also free up valuable counter space.
What are the best renter-friendly kitchen upgrades?
The best renter-friendly upgrades are non-permanent and high-impact. Top choices include applying peel-and-stick backsplashes, swapping out cabinet hardware (and storing the originals), adding plug-in under-cabinet lighting, and using tension rods or magnetic organizers for damage-free storage.
How can I make my small kitchen look bigger and brighter?
Use light colors on walls and even cabinets (you can use removable contact paper). Ensure you have excellent, layered lighting, especially under-cabinet task lighting. Keep countertops as clear as possible and use reflective surfaces like a glossy backsplash or stainless steel appliances to bounce light around the room.
Final Thoughts
A small apartment kitchen doesn’t have to be a dysfunctional one. As you’ve seen, the limitations of your space are often an invitation for creativity. By focusing on a smart layout that prioritizes workflow and by using clever, multi-functional storage solutions, you can turn a cramped and frustrating room into a space you genuinely love to cook in. It’s not about the size of your kitchen; it’s about how you use it.
What’s the one kitchen layout hack you’re most excited to try first? Let us know in the comments below
Last update on 2025-10-29 at 14:32 / Affiliate links / Images from Amazon Product Advertising API
