As an Amazon Associate KitchenwareSets.com earns from qualifying purchases.
Genius Kitchen Wall Decor Ideas And How To Arrange Them
Staring at that big, blank kitchen wall again? It feels like it should be simple, but the pressure to get it right is overwhelming.
Kitchen wall decor is any item you use to add personality and style to your kitchen’s empty spaces. The real challenge is turning a purely functional room into the warm, inviting heart of your home. You know it needs something, but analysis paralysis is real.
Kitchen wall decor ideas are creative solutions, from gallery walls to functional shelving, that transform empty walls into stylish focal points. In this guide, you’ll discover 9 genius ideas you can actually do. We’ll show you not just what to hang, but exactly how to arrange it like a pro.
Why Does Your Blank Kitchen Wall Feel So Intimidating?
That boring kitchen wall can feel like a final exam you didn’t study for. It’s often the last piece of the puzzle in a room that’s already packed with functional necessities like cabinets and appliances. The struggle is common: you want to add personality, but you’re afraid of making a mistake, creating clutter, or choosing something that doesn’t fit. This “decorating paralysis” happens because the kitchen is the heart of the home, and you want it to feel just right—a reflection of you.
The great news is that you don’t need a degree in interior design to conquer that empty space. The solution is about finding decor that speaks to your personal style and then applying a few simple design principles to arrange it. This guide is built to give you both the inspiration for what to put on kitchen walls and the confidence to place it perfectly, turning that intimidating blank canvas into your favorite part of the room.
9 Genius Kitchen Wall Decor Ideas You Can Actually Do
Ready for some real inspiration? We’ve curated a list of nine standout kitchen wall decor ideas that work for any style, budget, or skill level. From a classic gallery wall to functional-chic pot racks, each idea comes with simple instructions to help you bring it to life. Forget the guesswork; these are beautiful, achievable solutions for your boring kitchen walls.
1. Create a Timeless & Personal Gallery Wall
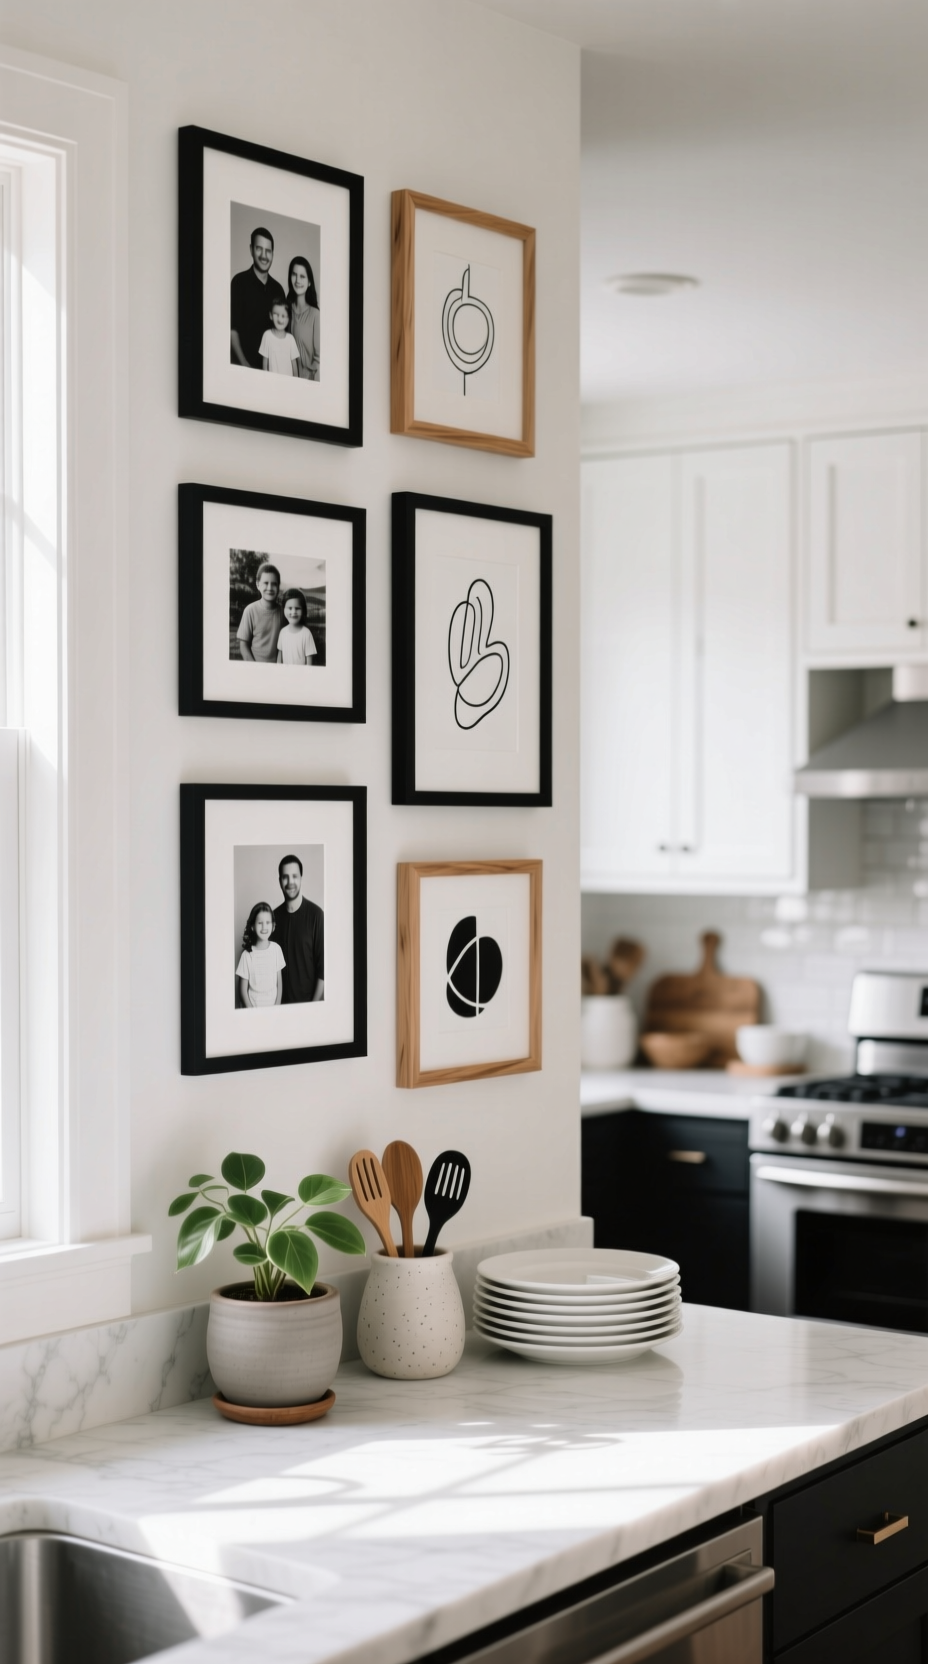
Pin this classic decor idea to your ‘Home Inspiration’ board!
A gallery wall is a curated collection that tells your story. It’s the perfect way to display family photos, abstract art prints, or even small objects in a way that feels cohesive and personal.
Materials Needed:
- A curated set of frames (e.g., a gallery wall frame set with 7-9 frames of various sizes)
- Art, photos, or objects to frame
- Kraft paper or newspaper for templates
- Painter’s tape
- Hammer and picture hanging nails/hooks
- A laser level or measuring tape and a standard level
Step-by-Step Directions:
- Choose a Theme: Select a unifying element. This could be a consistent frame color (all black, all wood), a color palette for the art (black and white, pastel tones), or a subject matter (family photos, travel pictures, botanical prints).
- Create Templates: Trace each frame onto kraft paper and cut it out. This allows you to plan your layout without making any holes.
- Plan on the Floor: Arrange the paper templates on the floor, moving them around until you find a balanced composition you love. A good starting point is to place your largest piece slightly off-center and build around it.
- Tape to the Wall: Once you have a layout, use painter’s tape to affix the paper templates to the wall. Keep a consistent spacing of 2-3 inches between each frame.
- Level and Hang: Use your level to ensure the templates are straight. Mark where the nail for each frame should go directly on the paper. Hammer in the nails, remove the paper, and hang your frames.
A gallery wall looks best when it includes a variety of frame sizes and orientations. Don’t be afraid to mix and match vertical and horizontal pieces. Adding a small, non-frame item like a mirror can add a lot of visual interest.
2. Install Stylish & Functional Floating Shelves
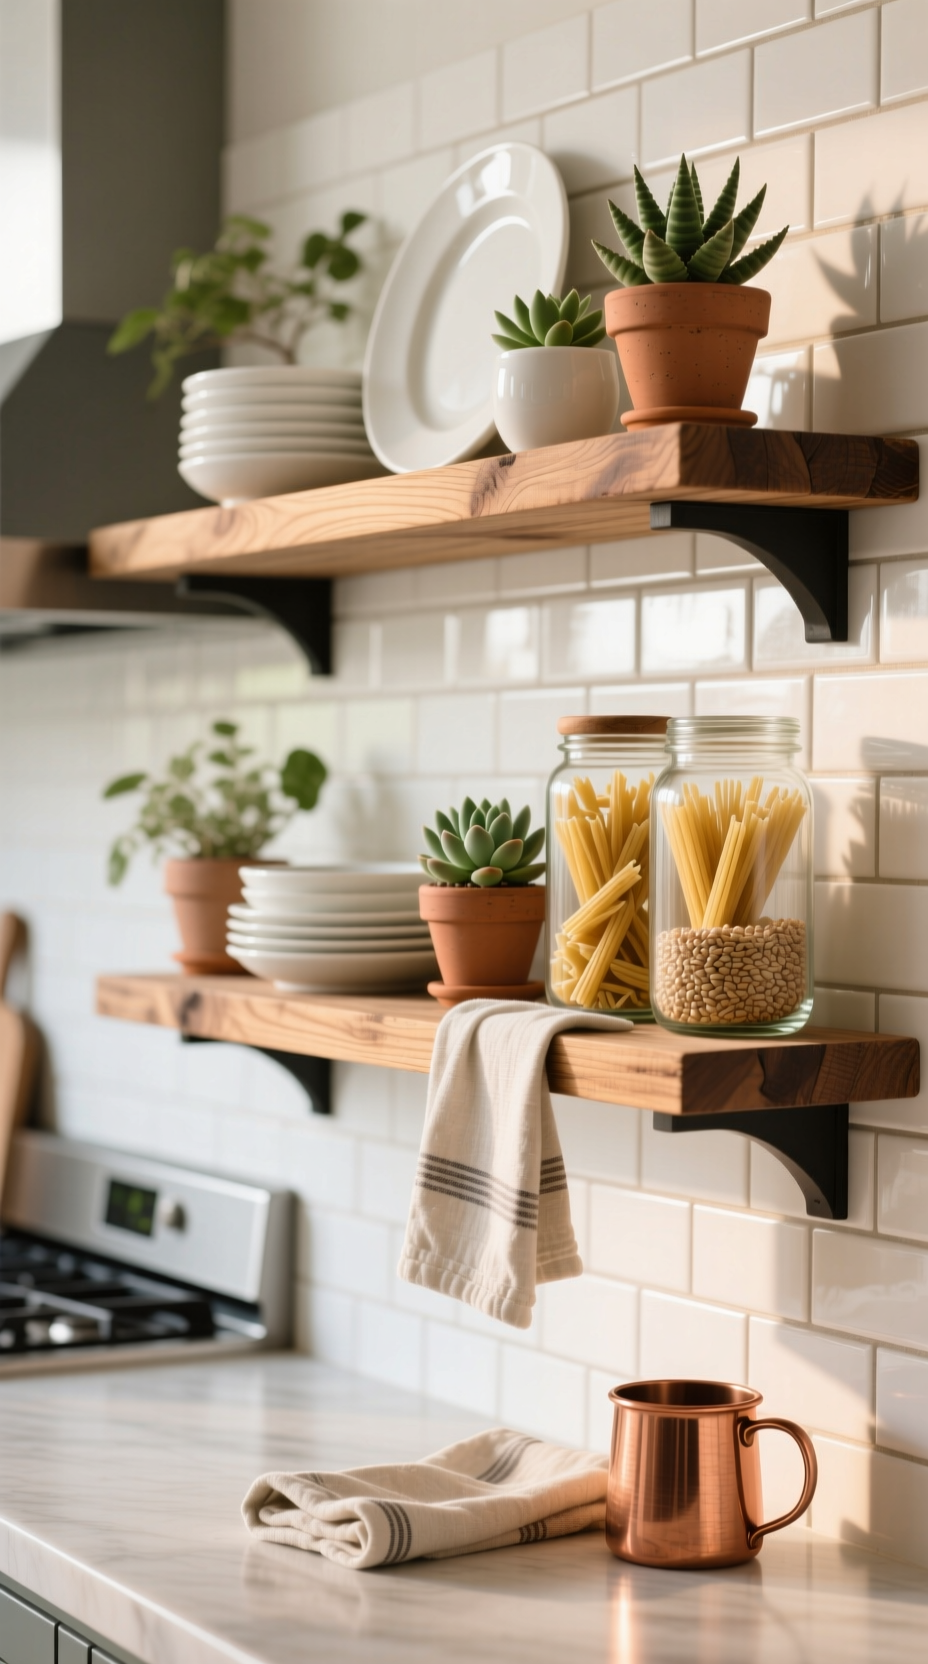
Save this functional decor idea for your kitchen refresh!
Floating shelves are a brilliant example of functional decor. They provide valuable storage and display space for your favorite dishware, cookbooks, and plants, turning everyday items into a beautiful, styled feature.
Materials Needed:
- Floating shelf kit (including shelves and brackets, ensure it’s rated for heavy duty use)
- Electronic stud finder
- Laser level
- Drill with appropriate bits
- Pencil
- Measuring tape
Step-by-Step Directions:
- Locate Studs: Use the stud finder to locate the wooden studs in your wall. Mark their locations with a pencil. Securely mounting shelves to studs is crucial for safety and stability.
- Mark Your Line: Decide on the height for your bottom shelf. Use the laser level to project a straight line on the wall at that height.
- Position Brackets: Align the shelf bracket with your level line, ensuring the screw holes line up with the stud locations you marked. Mark the drill holes.
- Drill and Mount: Drill pilot holes into the studs on your marks. Then, securely screw the brackets into the wall. Repeat for the second bracket, ensuring they are perfectly level with each other.
- Attach Shelf: Slide the floating shelf onto the mounted brackets and secure it according to the manufacturer’s instructions.
- Style with Purpose: Arrange your items. Stack everyday dishes for easy access. Add decorative elements like small plants or art. Mix heights and textures for visual interest.
For a high-end look, consider installing under-shelf puck lights. They provide excellent task lighting and highlight your displayed items beautifully.
3. Make a Bold Statement with Oversized Art
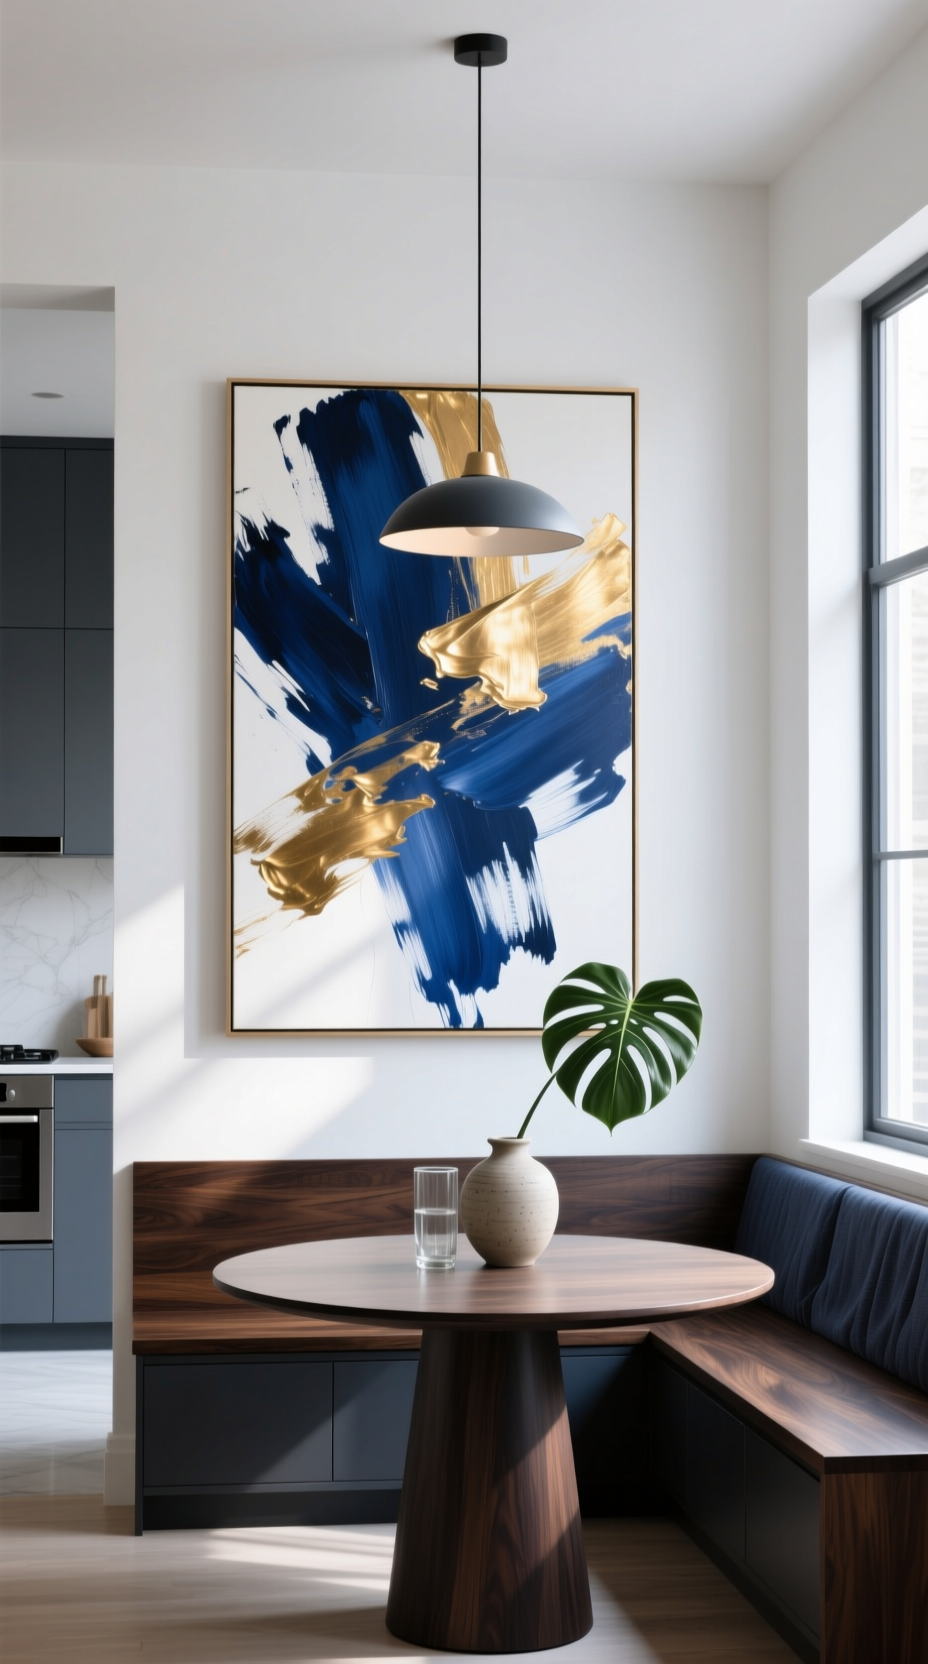
Love this high-impact look? Pin it for your dream kitchen!
If you want to create an immediate focal point, nothing works better than a single piece of oversized kitchen wall art. This is a simple but incredibly impactful solution for a large blank wall, instantly adding color, texture, and a modern feel.
Materials Needed:
- One large piece of canvas art or a framed print
- Heavy-duty picture hanging hardware (e.g., French cleat, or wall anchors and D-rings rated for the art’s weight)
- Stud finder
- Level
- Measuring tape and pencil
Step-by-Step Directions:
- Choose the Right Size: The art should take up about two-thirds of the width of the wall space it’s hanging over. This large scale is what creates the “wow” factor.
- Find the Center: Measure the width of your wall space and mark the center point.
- Determine the Height: The center of the artwork should be at eye level, which is typically 57 inches from the floor. Mark this height on your center line.
- Install Hardware: Based on your art’s weight and your wall type, install the hanging hardware. For very heavy pieces, it’s best to secure hardware directly into wall studs.
- Hang and Level: Carefully hang the art on the hardware. Step back and use a level on the top edge of the frame to make sure it’s perfectly straight.
To be sure you love the scale before buying, use painter’s tape to outline the art’s dimensions on your wall. This simple trick helps you visualize its impact in the room.
4. Display a Warm Collection of Cutting Boards
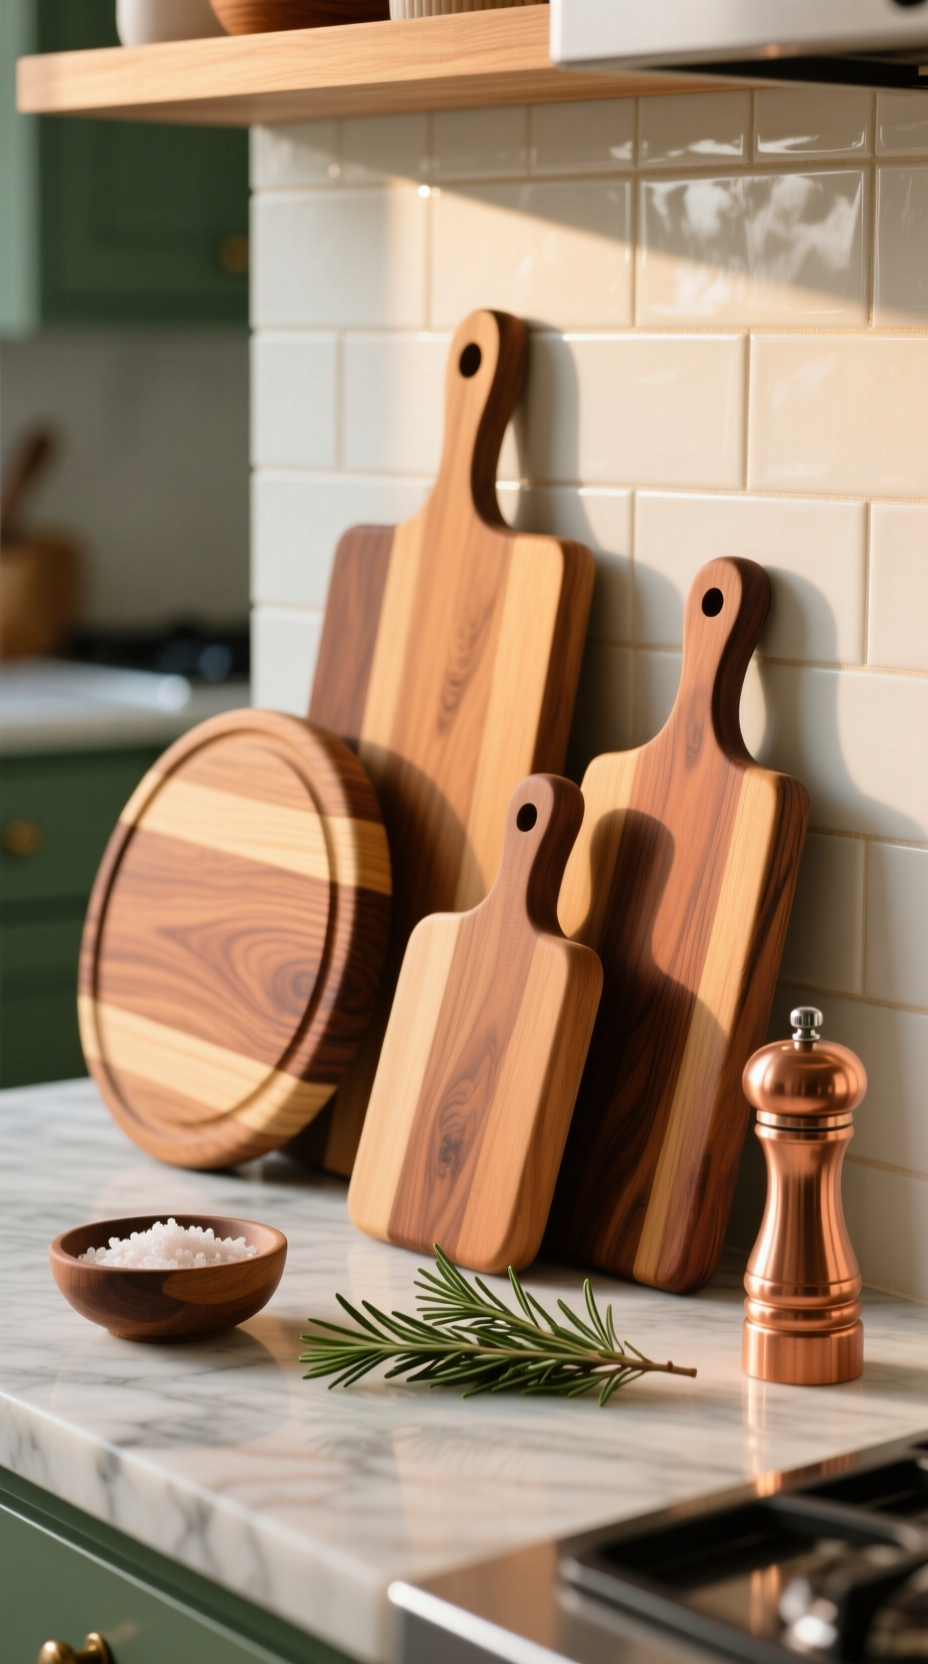
Save this simple, rustic idea to your ‘Kitchen Styling’ board!
For a simple, no-nails approach, a collection of decorative cutting boards adds instant warmth and natural texture. This is a perfect way to fill that empty space on your countertop against the backsplash.
Materials Needed:
- A collection of 3-5 cutting boards in various shapes, sizes, and materials (e.g., a mix of wood and marble)
- Mineral oil or board butter for conditioning
Step-by-Step Directions:
- Gather Your Collection: Collect boards with visual interest. Look for different wood grains, unique shapes, or a mix of materials.
- Condition the Wood: Before displaying, clean your wooden boards and apply a food-safe mineral oil. This brings out the rich color and protects the wood.
- Start with the Largest: Find a spot on your counter and place your largest board at the back as the anchor.
- Layer Forward: Place the next largest board in front of the first, slightly off-center so both are visible. Continue layering with smaller boards.
- Mix Shapes and Orientations: Contrast a round board with a rectangular one for a more dynamic, country kitchen look.
- Add a Finishing Touch: Place a small crock of utensils or a plant next to the collection to complete the vignette.
This is one of the easiest decorating ideas because it requires zero commitment or holes in the wall. The key is the layering—it’s what makes it look intentional and styled rather than just stored.
5. Embrace Farmhouse Charm with a Vintage Sign
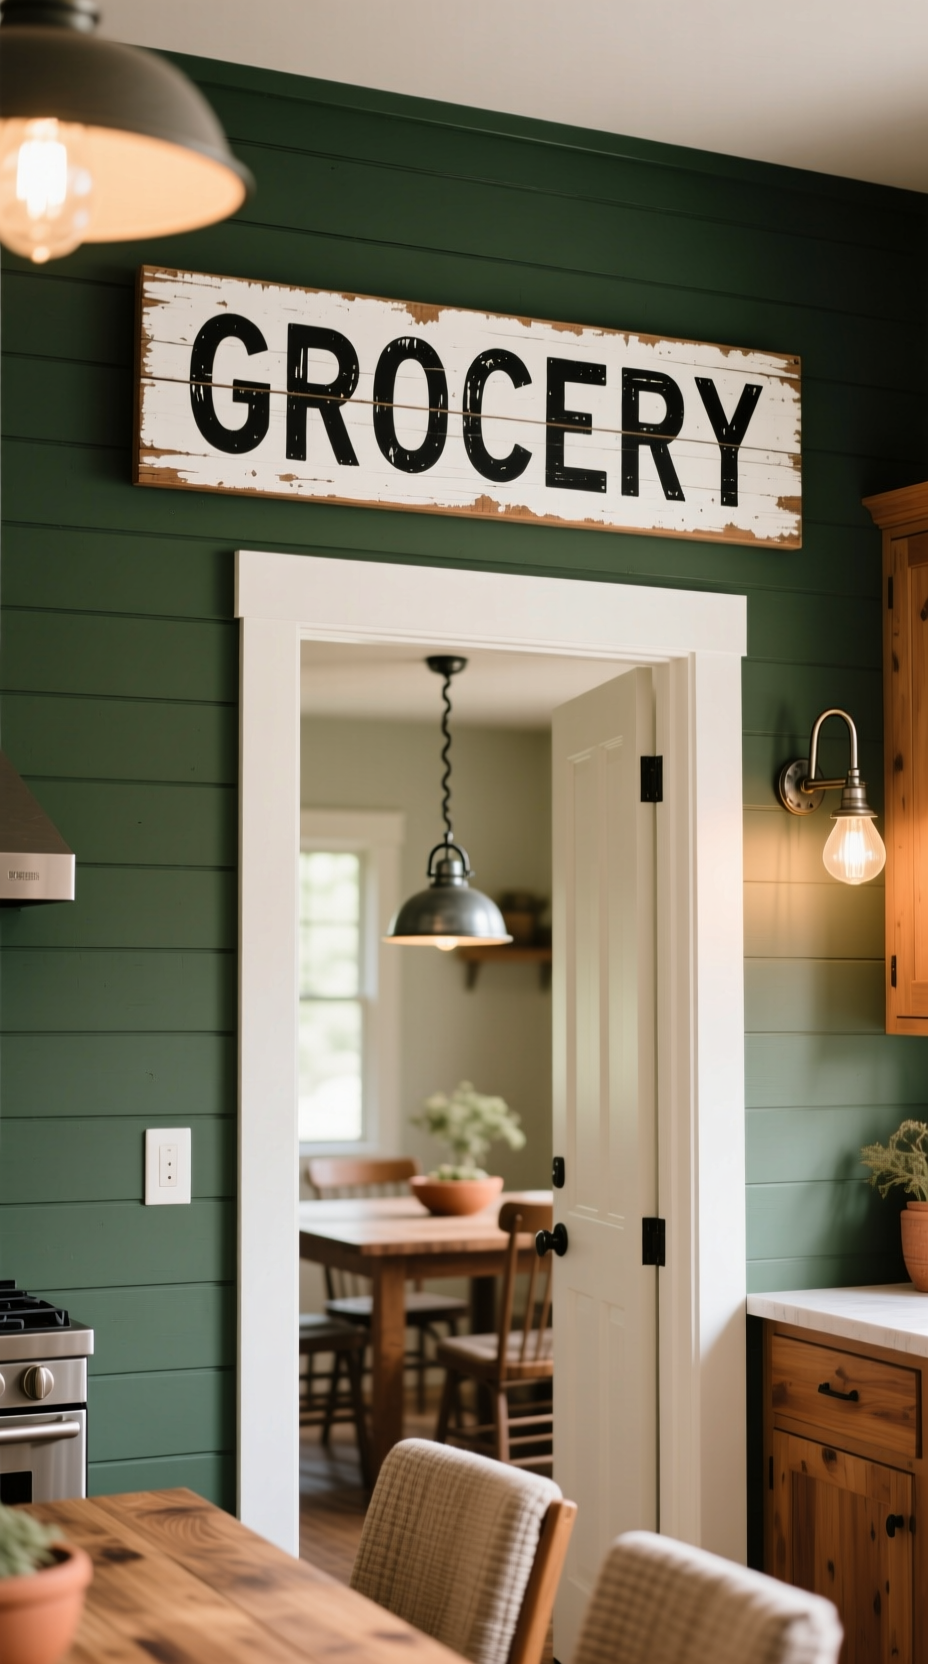
Pin this perfect farmhouse touch for your kitchen!
A large kitchen sign is a hallmark of farmhouse kitchen decor. Whether it’s a vintage-inspired piece or a personalized sign with your family name, it adds instant character and a nostalgic feel.
Materials Needed:
- One large farmhouse-style sign (wood or metal)
- Heavy-duty hanging hardware appropriate for the sign’s weight and your wall type
- Level
- Measuring tape and pencil
Step-by-Step Directions:
- Find the Perfect Spot: Signs look great on a large blank wall, above a pantry door, or over a wide window. Choose a location where it can be the star.
- Choose Your Sign: Select a sign that fits your kitchen’s personality. Popular options include words like “Groceries,” “Market,” or “Bakery.”
- Measure and Center: Measure the width of your wall space and the width of the sign to find the exact center point so the sign will be perfectly balanced.
- Determine Height: If hanging on a blank wall, use the 57-inch rule (center of the sign at 57″ from the floor). If hanging above a door, aim for 4-6 inches of space above the frame.
- Mark and Install: Hold the sign up to the wall at your desired location and use a level. Lightly mark the wall where the hangers are. Install your anchors and screws.
- Hang Securely: Carefully hang the sign and double-check that it is level and secure.
The level of “distress” on the sign matters. For a modern farmhouse look, choose a sign with clean lines. For a more rustic style, a sign with weathered paint works better.
6. Create an Elegant Wall of Decorative Plates
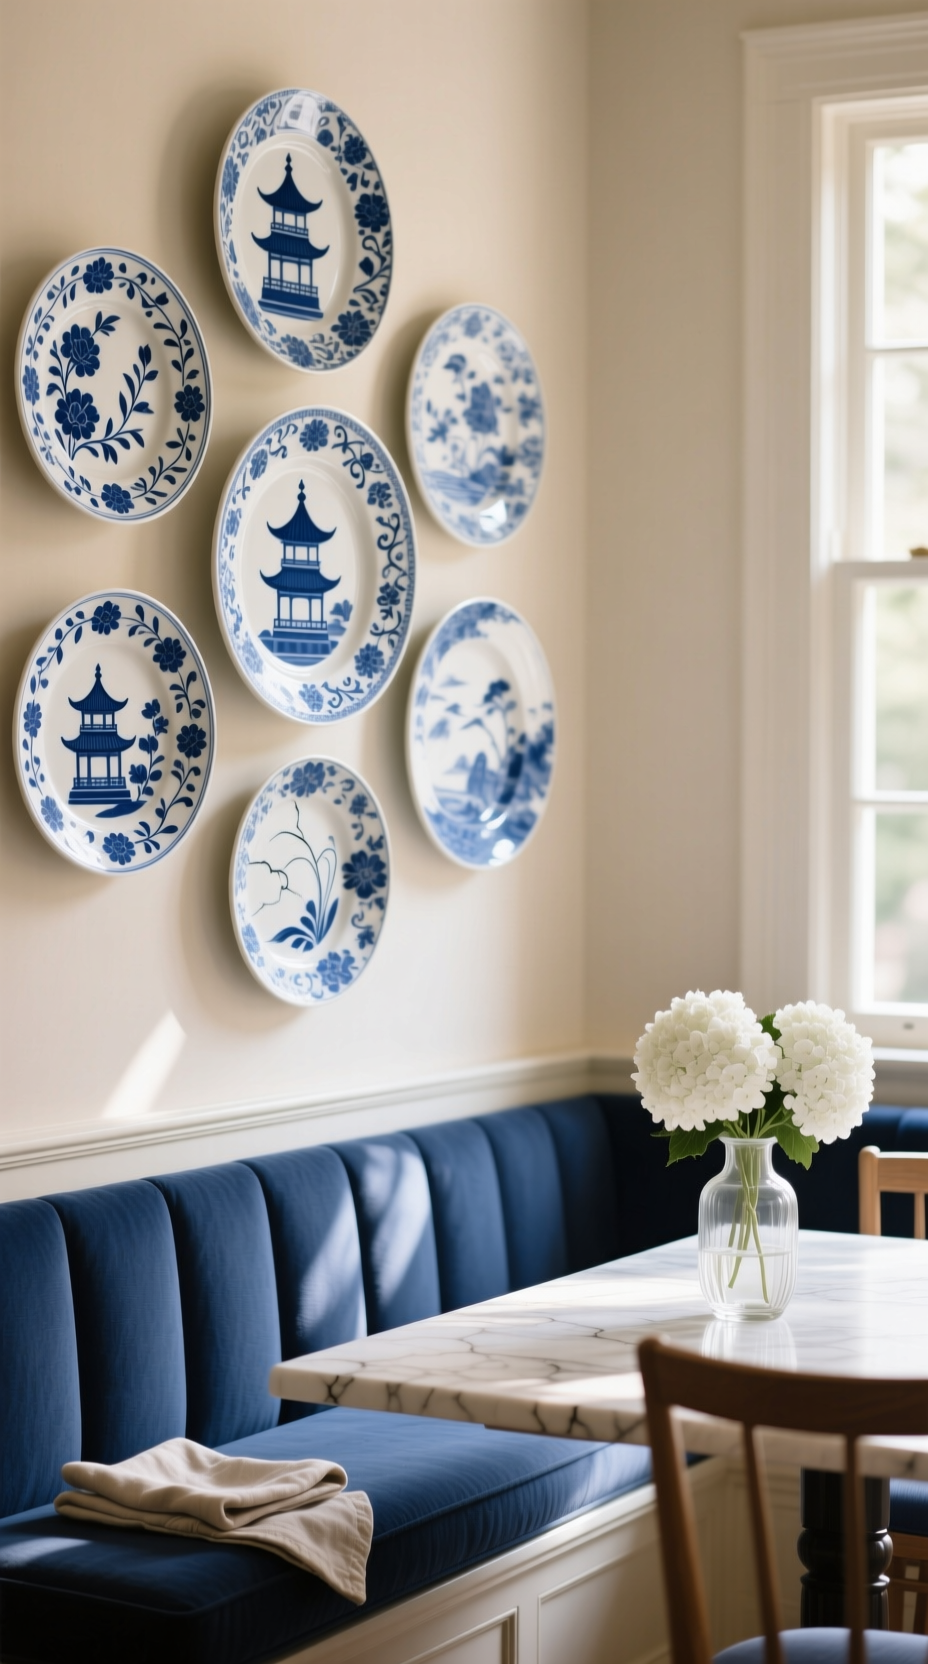
Save this timeless and elegant idea for a classic kitchen!
Hanging decorative plates is a classic way to add three-dimensional interest, color, and pattern to a kitchen or dining nook. You can find beautiful plates at thrift stores and flea markets to create an affordable and unique collection.
Materials Needed:
- A collection of 5-9 decorative plates of various sizes
- Paper for templates
- Spring-style wire plate hangers or adhesive plate hangers
- Picture hanging hooks and nails
- Measuring tape and pencil
Step-by-Step Directions:
- Select Your Plates: Choose plates that share a common element, like a color scheme (e.g., all blue and white) or a theme (e.g., botanical). A mix of sizes adds visual interest.
- Plan Your Layout: Just like a gallery wall, trace your plates onto paper and cut them out. Arrange the paper circles on the floor to perfect your composition.
- Attach Hangers: Securely attach your chosen hangers to the back of each plate. For valuable plates, adhesive hangers are a great no-damage option. For heavier plates, traditional spring-style hangers are more secure.
- Mark and Hang: Following your paper template layout, mark the spot for each hook and install the picture hanging hooks.
- Display Your Collection: Remove the paper templates and carefully hang each plate, starting with the largest or most central plate in your design.
To create a more modern look, try using plates that are all one solid color but in various sizes and shades. A collection of matte black and white plates can look incredibly chic.
7. Hang a Chic & Functional Pot Rack
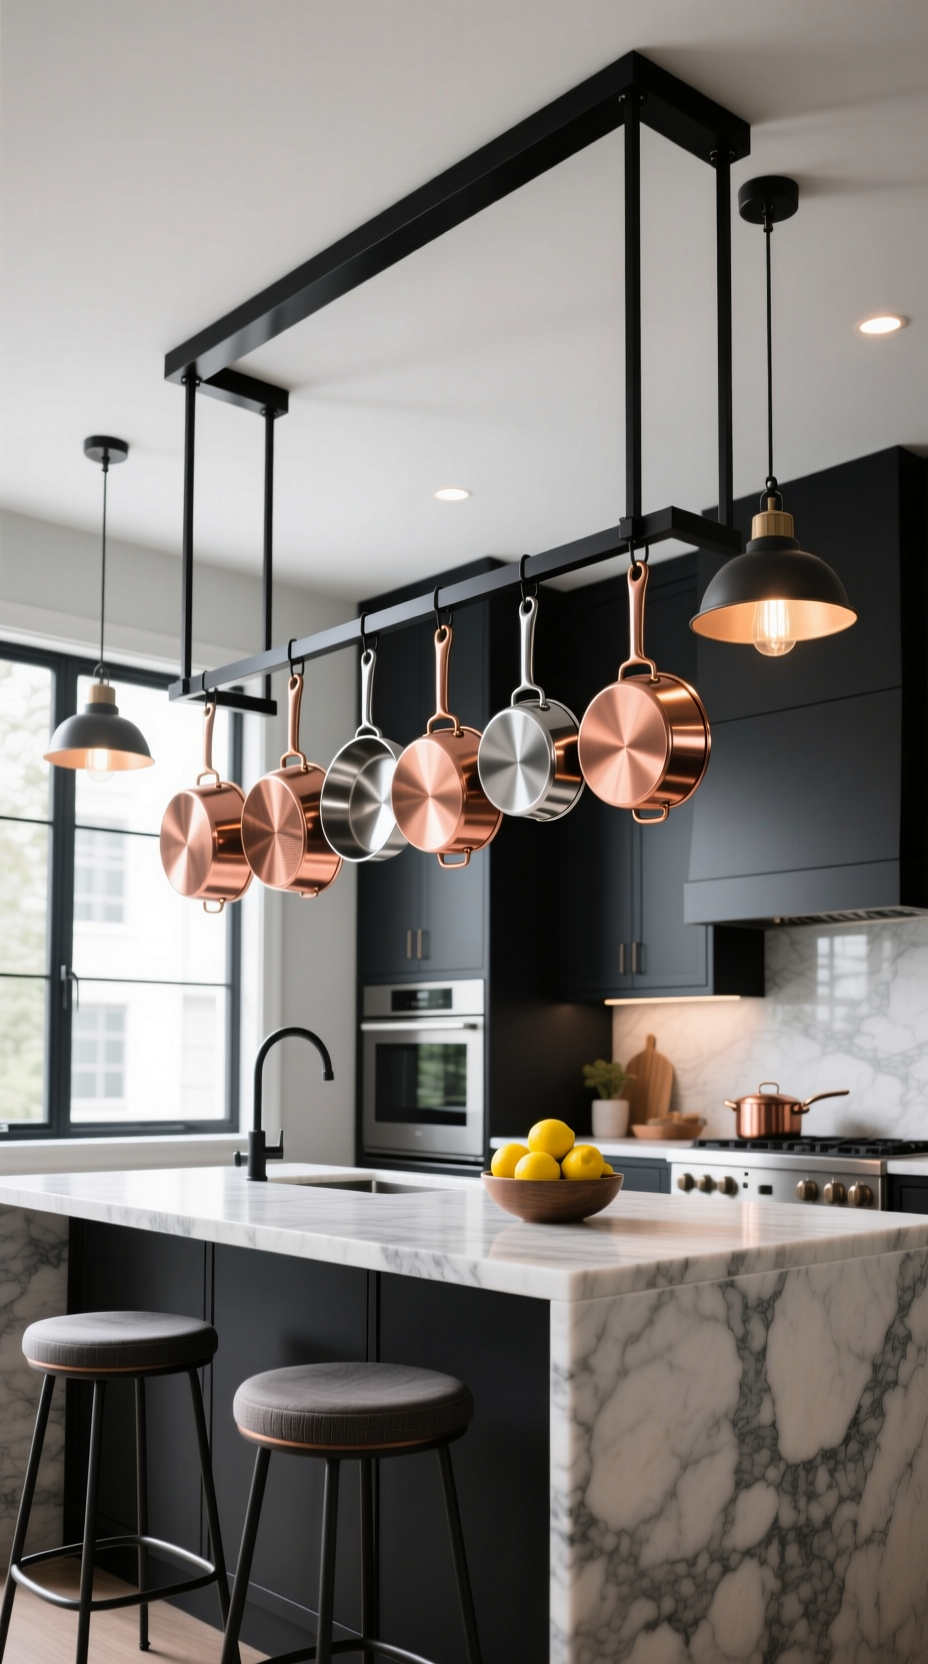
Pin this ultimate functional decor for a stylish kitchen!
A pot rack is the ultimate marriage of form and function. It frees up precious cabinet space while adding a professional, industrial-style element to your kitchen. Displaying beautiful cookware like copper or stainless steel turns your tools into art.
Materials Needed:
- A wall-mounted or ceiling-mounted pot rack kit
- High-quality S-hooks
- Stud finder
- Drill
- Heavy-duty toggle bolts or lag screws
- Level and measuring tape
Step-by-Step Directions:
- SAFETY FIRST: Pot racks must be installed into ceiling joists or wall studs. They will be holding a lot of weight. There are no exceptions to this rule.
- Find Your Support: Use a stud finder to locate the joists or studs where you plan to hang the rack. Mark them clearly.
- Position the Rack: Hold the rack in place and mark where the mounting holes are. Ensure the marks align perfectly with the center of the studs/joists. Use a level.
- Drill Pilot Holes: Drill pilot holes that are slightly smaller than your lag screws.
- Securely Mount: Firmly screw the pot rack’s mounting hardware into the studs or joists. Tug on it to ensure it is completely secure before hanging anything.
- Hang Your Cookware: Use S-hooks to hang your most-used (and best-looking!) pots and pans. Distribute the weight evenly.
Only hang your best cookware. A pot rack is a display piece. Scratched, dented, or mismatched pans will make it look cluttered, not chic.
8. Create a Living Wall with Hanging Herbs
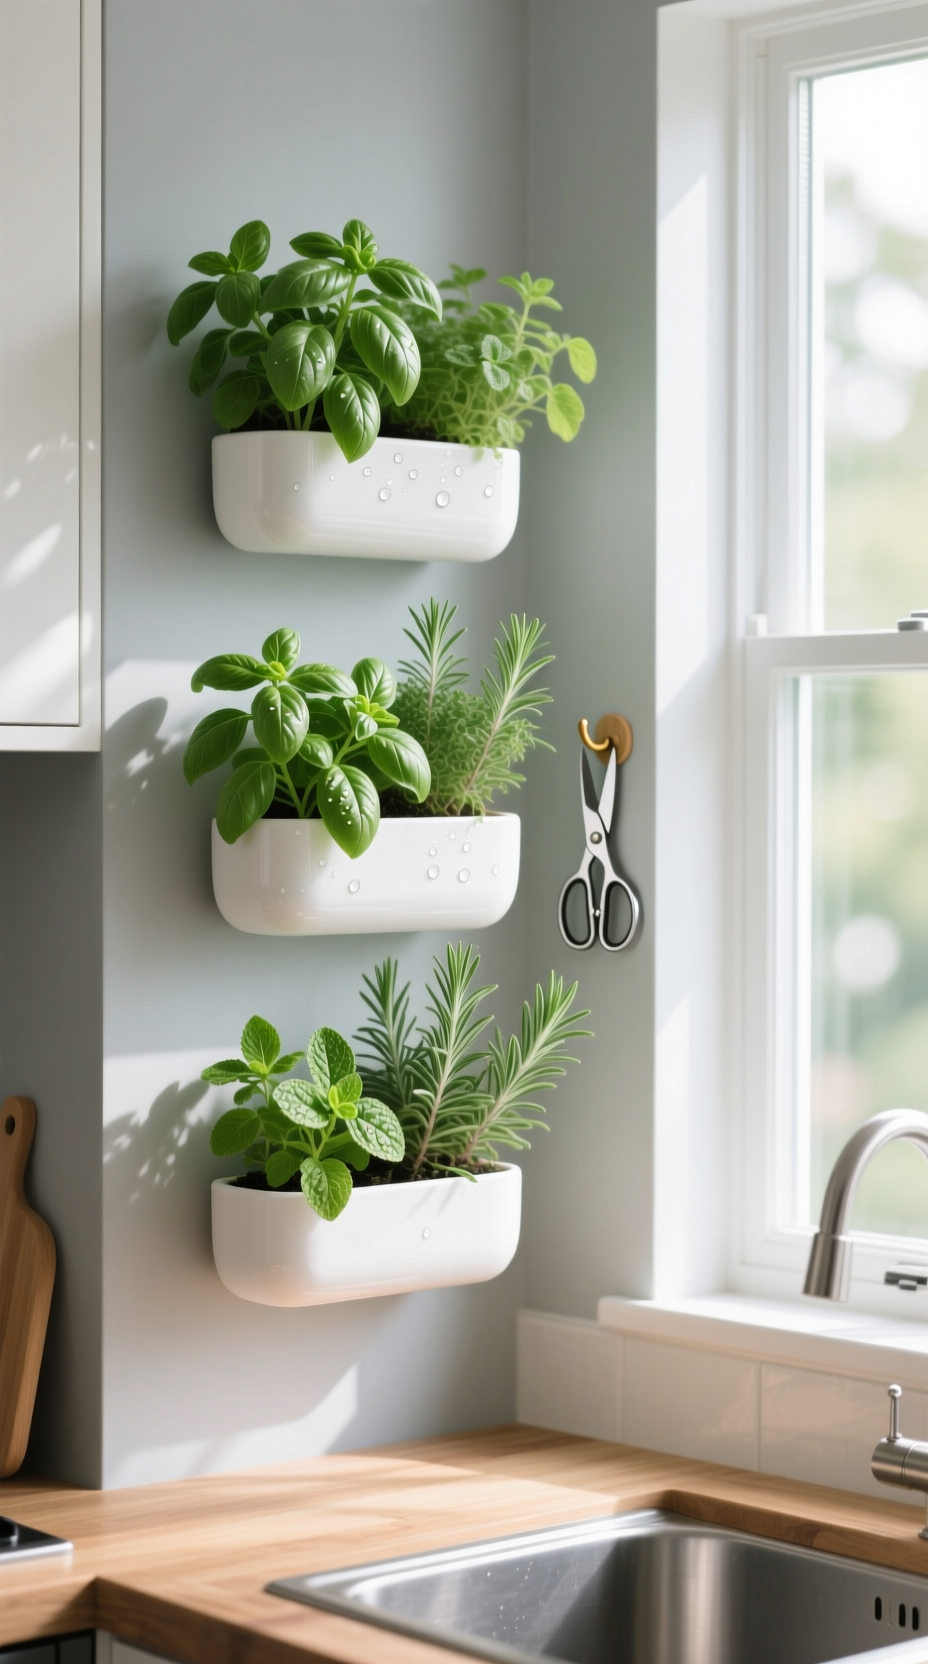
Add some life to your kitchen! Pin this fresh idea.
Bring a touch of nature inside with a living wall. A vertical kitchen herb garden is a beautiful, fragrant, and functional way to decorate. It adds life and fresh flavor to your space.
Materials Needed:
- A set of 3-5 wall-mounted planters with good drainage
- Wall anchors and screws appropriate for your wall type
- Drill and level
- Small potted herbs (basil, mint, parsley, rosemary, and chives are great for beginners)
- High-quality potting mix
Step-by-Step Directions:
- Pick a Sunny Spot: Most herbs need at least 6 hours of sunlight per day. Choose a wall near a bright window.
- Plan Your Arrangement: Decide on your planter layout. A simple vertical column or a staggered pattern both look great.
- Mount the Planters: Use a level to ensure your planters will be straight. Mark your drill holes, install wall anchors if not drilling into studs, and securely screw the planters to the wall.
- Plant Your Herbs: Gently remove the herbs from their nursery pots and plant them in the wall planters using fresh potting mix.
- Water and Enjoy: Water your herbs thoroughly after planting. Snip fresh herbs as needed for your cooking!
If your kitchen doesn’t get enough natural light, you can install a small, full-spectrum LED grow light above your herb garden to keep your plants healthy.
9. Add Natural Texture with Woven Baskets
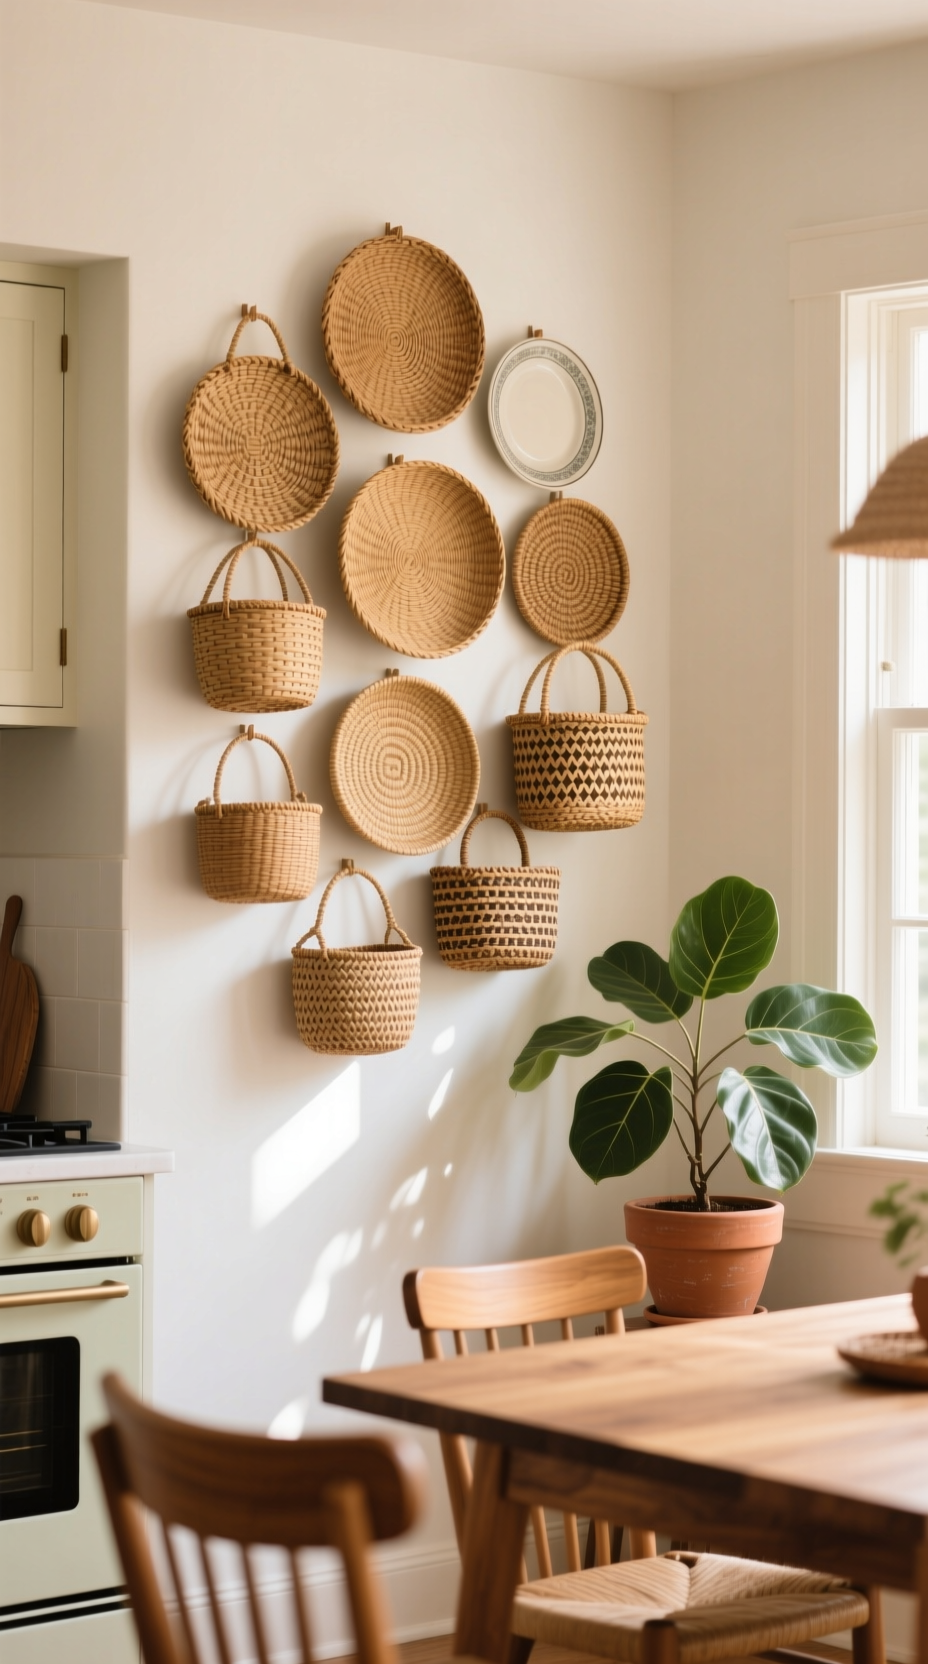
Love this boho-chic texture? Save it to your ‘Decor Ideas’ board!
For a budget-friendly and trendy way to add texture, a basket wall is a fantastic option. A collection of shallow woven baskets made from seagrass or rattan adds a warm, bohemian, and global-inspired feel to any kitchen.
Materials Needed:
- A collection of 5-9 shallow, lightweight woven baskets or trivets
- Small finishing nails
- Hammer
- Measuring tape
Step-by-Step Directions:
- Gather Your Baskets: Source flat, decorative baskets. Look for a mix of tones, weaves, and sizes to create a collected, interesting look.
- Plan the Layout: Arrange the baskets on the floor to create a composition you love. Start with the largest basket and build outwards, overlapping the edges of some for a layered effect.
- Start Hanging: Once you’re happy with the layout, take a photo with your phone for reference. Begin by hanging your main, largest basket.
- Use Small Nails: Because the baskets are lightweight, you don’t need heavy hardware. Simply find a tight spot in the weave on the back and hang it on a small finishing nail.
- Build Out Your Design: Referring to your photo, add the rest of the baskets one by one, recreating your composition on the wall.
The key to a great basket wall is variety. Mix in at least one or two baskets with a different color or a bold pattern to act as an accent and keep the arrangement from looking flat.
How to Arrange Your Decor: 3 Core Design Principles
Now that you have plenty of kitchen wall ideas, let’s cover the simple rules that will help you arrange them flawlessly. Understanding these three core interior design principles is the secret to making your chosen decor look intentional and professional, not random.
Principle 1: Get the Scale Right
The most common decorating mistake is choosing wall decor that’s too small for the wall. A tiny picture on a huge, empty wall will look lost and insignificant.
A great guideline is the “two-thirds rule”: a piece of art (or a gallery wall grouping) should be about two-thirds the width of the furniture it’s hanging over, like a breakfast nook bench or a console table. For a completely blank wall, don’t be afraid to go big. Large-scale art makes a confident statement and balances the space correctly.
Principle 2: The 57-Inch “Eye-Level” Rule
This is the museum and gallery standard for a reason. The rule is to hang art so that the center of the piece is 57 inches from the floor. This places the art at the average human eye level, making it feel perfectly integrated into the room rather than floating too high or sinking too low.
This 57-inch mark should be the center point of a single large piece or the center of an entire gallery wall grouping. The main exception is when hanging art above furniture; in that case, the bottom of the frame should be 4-8 inches above the furniture’s edge.
Principle 3: Create Visual Balance
Visual balance is about arranging your decor so it feels stable and pleasing to the eye. Every object has “visual weight” based on its size, color, and shape. A large, dark frame has more weight than a small, light one.
You can achieve this in two ways:
* Symmetrical Balance: This is a formal look where one side of the arrangement mirrors the other. For example, two identical prints on either side of a larger central piece.
* Asymmetrical Balance: This is a more casual and dynamic look. Here, a large, heavy item on one side can be balanced by a group of several smaller items on the other. This principle is key to creating a gallery wall that feels interesting and curated, not chaotic.
FAQs About kitchen wall decor ideas
What can I put on a large blank kitchen wall?
For a large blank kitchen wall, think big to create a strong focal point. The best options are an oversized piece of statement art, a large and cohesive gallery wall, a series of floating shelves for functional display, or a wall-mounted pot rack. The key is to choose something that is proportional to the wall’s size to avoid a cluttered or underwhelming look.
How can I decorate my kitchen walls on a budget?
Decorating on a budget is easy with a little creativity. Create your own DIY kitchen wall decor by painting a simple abstract design on a canvas. Frame beautiful tea towels, wallpaper scraps, or even your children’s artwork. Visit thrift stores and flea markets to find unique plates, baskets, or vintage cutting boards to display.
What is the rule for hanging pictures in a kitchen?
The main rule is to hang art with its center at eye level, which is about 57 inches from the floor. This ensures it’s at a comfortable viewing height. Also, avoid hanging delicate prints or canvases directly above a stove or sink where they could be damaged by heat or moisture. Using frames with glass can help protect them.
What do you put on the wall above kitchen cabinets?
The space above cabinets is perfect for displaying decorative items you don’t need to access often. Popular choices include collections of woven baskets, large pottery or vases, high-quality faux plants for a touch of green, or large wooden letters spelling a word like “EAT.”
How do I decorate around a thermostat?
The best strategy is to incorporate the thermostat into your decor. You can easily make it part of a gallery wall by arranging frames and other objects around it, which helps it blend in. A clever trick is to hang a small, empty, ornate frame directly around the thermostat, treating it like a piece of art itself.
Final Thoughts
Your kitchen walls are a blank canvas waiting for your story. Decorating them isn’t about following strict rules but about expressing your personality and creating a space that feels uniquely yours. Whether you choose a personal gallery wall, a functional pot rack, or a simple collection of cutting boards, the goal is to add warmth and character to the heart of your home. Remember to plan first, hang at eye level, and never underestimate the power of decor that is both beautiful and functional.
Which one of these ideas are you excited to try first? Let us know in the comments below
Last update on 2026-01-13 at 18:33 / Affiliate links / Images from Amazon Product Advertising API
