As an Amazon Associate KitchenwareSets.com earns from qualifying purchases.
13 Genius Boho Kitchen Wall Decor Ideas You Can Style
Struggling with bland, boring kitchen walls? You’re not alone. We’ve all stared at that blank space, wishing it had more personality.
Your kitchen should feel warm and inviting, but it’s hard when it lacks that personal touch. This is where the Bohemian (Boho) style comes in, a design approach focused on creating a cozy, eclectic, and lived-in atmosphere.
Boho kitchen wall decor is an interior design style focused on creating a warm, eclectic, and personal atmosphere. It utilizes natural materials like wood and rattan, layered textures from textiles and woven baskets, and a curated mix of art, plants, and vintage items to make a kitchen feel cozy and lived-in. In this guide, you’ll discover 13 genius ideas to transform your space. Let’s add that warmth and character you’ve been craving.
Are Your Kitchen Walls Missing That Cozy, Personal Touch?
We’ve all been there, standing in a kitchen that’s perfectly functional but feels a little… sterile. Those blank kitchen walls can make the heart of your home feel impersonal and cold. You want a cozy kitchen vibe, a space that reflects your unique personality and creativity, but it can be hard to know where to start.
The Bohemian (Boho) style is the perfect antidote to boring walls. It’s not about following strict rules; it’s about mixing textures, incorporating natural materials, and displaying things you love. It’s about transforming your kitchen from a simple cooking area into a warm, soulful space. This guide is packed with 13 specific, achievable boho kitchen decor ideas that will add warmth, character, and a touch of your own spirit to your walls.
13 Genius Boho Kitchen Wall Decor Ideas You Can Style Today
Ready to get inspired? This list of 13 boho kitchen wall decor ideas is designed to be both beautiful and practical. Each idea is based on core interior design principles of texture, balance, and scale, but simplified so you can easily apply them today. We’ve covered a range of styles, from minimalist boho to eclectic, ensuring there’s a perfect fit for your taste and budget. Let’s dive in.
1. Create a Woven Basket Gallery Wall
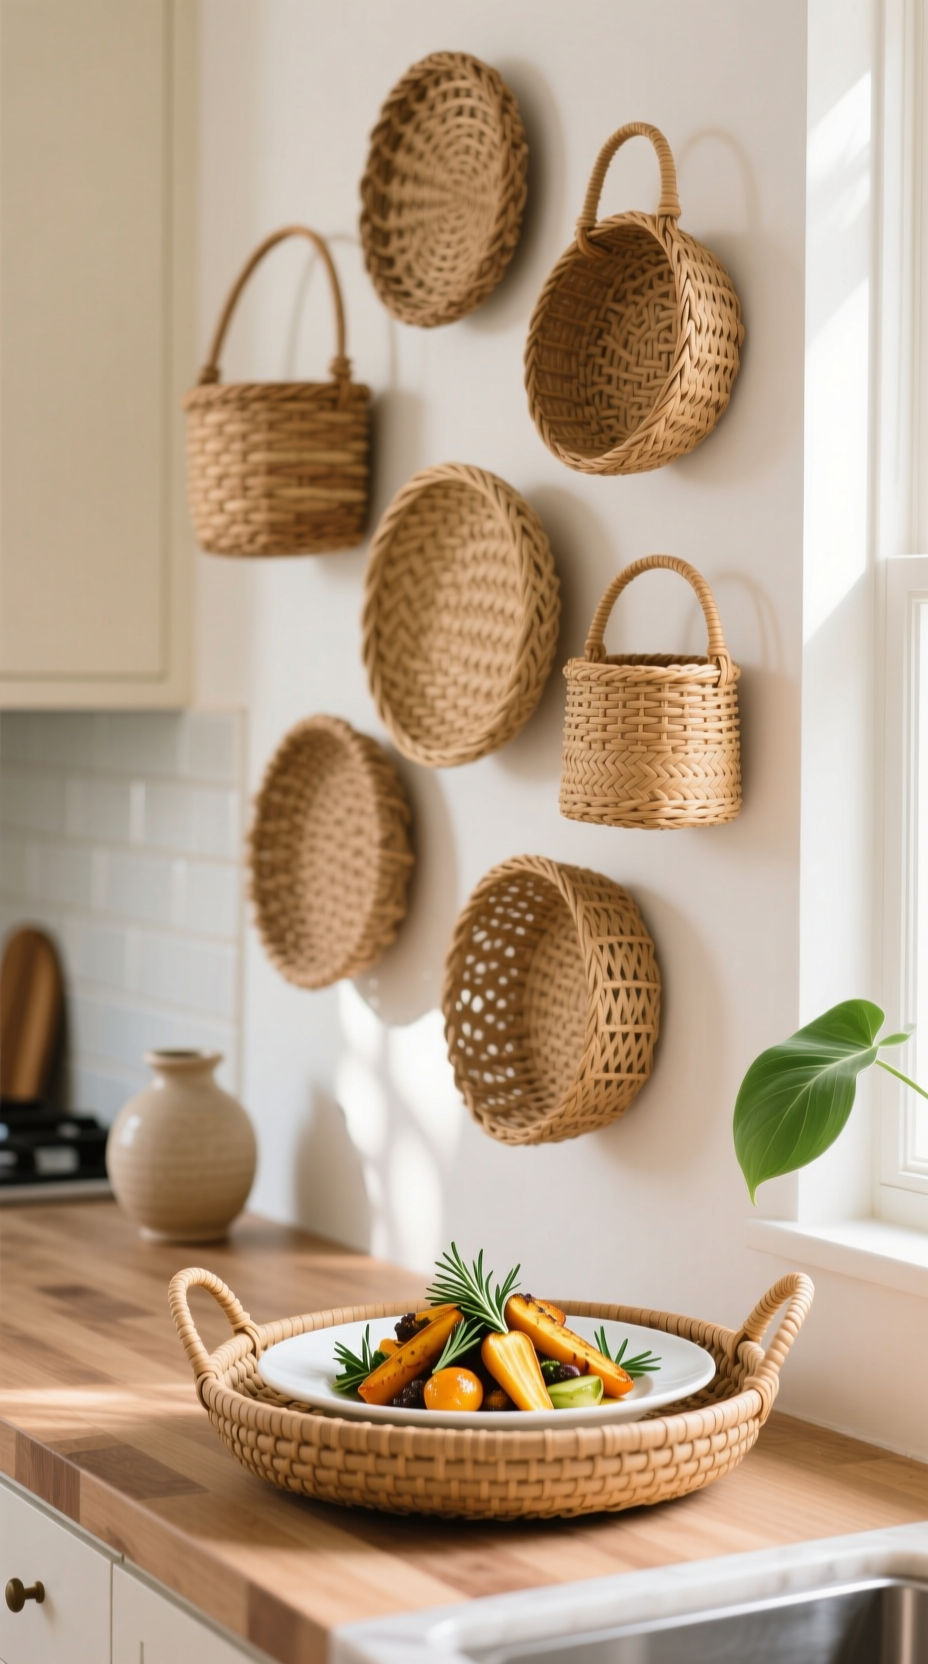
Pin this textured wall idea to your ‘Boho Home’ board!
A gallery wall made of shallow woven baskets is a cornerstone of boho kitchen decor. It’s a budget-friendly way to fill a large blank space with incredible texture and natural, earthy tones. The mix of seagrass, rattan, and wicker baskets creates an effortlessly curated and dimensional look.
Materials Needed:
- 5-7 shallow, decorative woven baskets in various sizes (look for seagrass, rattan, or wicker)
- Small finishing nails (1-inch)
- Hammer
- Measuring tape
- Pencil
Step-by-Step Directions:
- Lay your baskets on the floor and arrange them until you find a composition you love. Start with the largest basket in the center and build outwards.
- Take a quick photo of your final layout on your phone for reference.
- Starting with the largest basket, measure its position on the wall and lightly mark the top center with a pencil.
- Hammer a small nail into the wall at your mark, angled slightly downwards.
- Hang the basket by slipping the nail through the weave. Ensure it’s secure.
- Repeat for the remaining baskets, using your reference photo to guide placement, keeping spacing relatively consistent.
Pro-Tip: Mix in one or two baskets with a dark pattern or color to create a focal point and add visual depth to your arrangement.
2. Style Floating Shelves with Greenery & Decor

Save this beautiful shelf styling idea for later!
Floating shelves made from natural wood are both functional and beautiful, serving as the perfect stage for your boho decor. The key is to style them with a mix of everyday items and decorative pieces, creating a display that feels curated yet lived-in. This approach connects storage with aesthetics, a core principle of thoughtful design.
Materials Needed:
- 2-3 natural wood floating shelves with low-profile brackets
- A mix of functional and decorative items: small plants (pothos, snake plant), ceramic mugs or bowls, small framed art, favorite cookbooks.
- Varied textures: wood, ceramic, paper, and greenery.
Step-by-Step Directions:
- Install Shelves: Follow the manufacturer’s instructions to securely install your floating shelves. Use a level for a professional finish.
- Start with Anchors: Place your largest items first, like a stack of cookbooks or a medium-sized plant, at opposite ends of the shelves to create visual anchors.
- Add Height: Incorporate items of varying heights to create visual interest. A tall vase or a framed print can break up the horizontal line.
- Group in Threes: Arrange smaller items like spice jars or small ceramics in groups of three. This design trick, known as the “Rule of Three,” is more visually appealing than even numbers.
- Layer In/Out: Place some items closer to the front edge and others towards the back to create depth. Lean a small piece of art against the wall behind other objects.
- Edit: Step back and look at your arrangement. If it feels too busy, remove one or two items. Negative space is important!
Lesson Learned: Always mix functional items (like your favorite mugs) with purely decorative ones. This makes the shelves feel authentic to a real, working kitchen.
3. Hang a Statement Macrame Piece
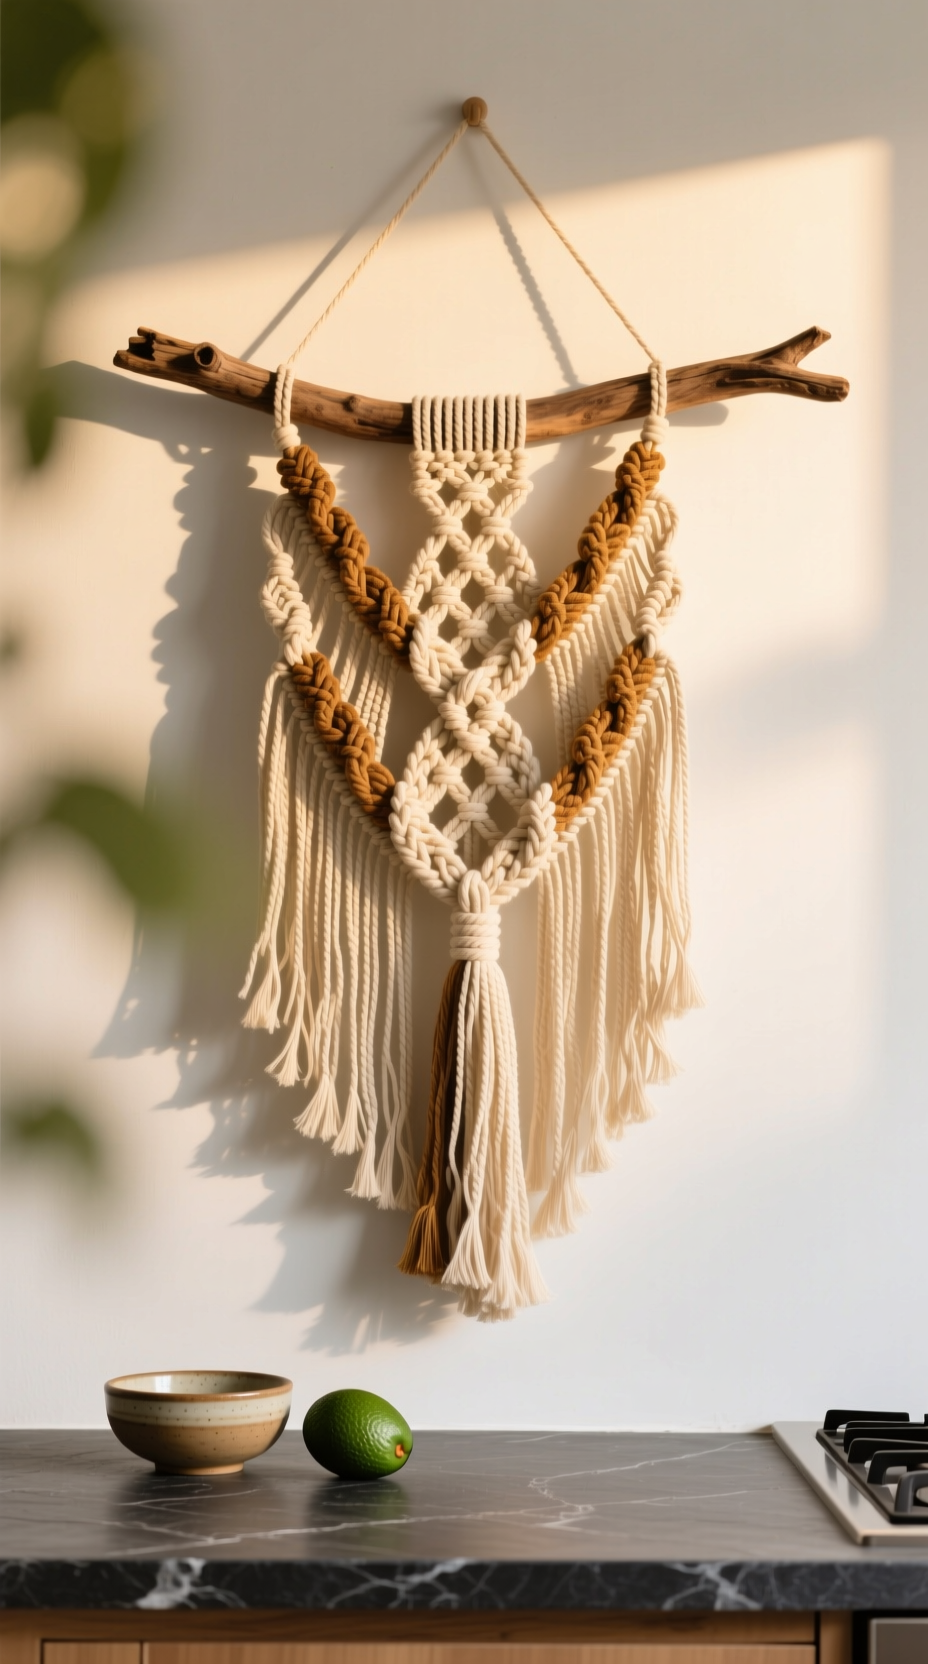
Pin this cozy textile art for instant warmth!
Nothing says “boho” quite like macrame. A single, large statement piece can instantly add a massive dose of soft texture and organic artistry to your kitchen. The intricate knots and flowing cotton fringe provide a beautiful contrast to the hard surfaces of countertops and cabinets, creating an immediate focal point.
Materials Needed:
- One large, high-quality macrame wall hanging (look for 100% cotton cord and a natural wood dowel or branch)
- Wall anchor and screw appropriate for your wall type (drywall, plaster)
- Drill
- Level
Step-by-Step Directions:
- Choose Your Spot: Identify a blank wall that needs a focal point. Avoid hanging directly over a stove or sink where it could get stained by food or steam. A wall behind a small dining nook or a large entryway is perfect.
- Mark the Height: Hold the macrame hanging up to the wall to determine the ideal height. A good rule of thumb is to have the center of the piece at eye level (around 57-60 inches from the floor). Mark the hanging point with a pencil.
- Install the Anchor: If you’re not drilling into a stud, drill a pilot hole and insert a drywall anchor. This will ensure your hanging is secure.
- Secure the Screw: Screw your hook or screw into the anchor, leaving it out about 1/4 inch from the wall.
- Hang and Adjust: Hang your macrame piece and use a level on the dowel to make sure it’s straight. Gently comb out the fringe with your fingers if needed.
Pro-Tip: If you have high ceilings, choose a macrame piece with a long, vertical design to draw the eye upward and make the space feel even taller.
4. Design a Symmetrical Botanical Print Grid

Save this fresh and clean art idea!
For those who love the warmth of boho but crave a bit more order, a symmetrical grid of botanical prints is the perfect solution. This approach, a key component of ‘Minimalist Boho’ style, brings a touch of nature indoors in a clean, organized way. Using identical light wood frames creates a cohesive look that feels both calming and sophisticated.
Materials Needed:
- A set of 4, 6, or 9 matching botanical prints (herb or leaf motifs are perfect for a kitchen)
- Identical, simple frames (light wood or thin black metal work well)
- Measuring tape
- Level
- Pencil
- Picture hanging strips or nails
Step-by-Step Directions:
- Frame Your Prints: Carefully place each print into its frame, ensuring they are centered and clean.
- Plan Your Grid: Lay the framed prints on the floor to determine your spacing. A gap of 2-3 inches between each frame is standard.
- Measure the Total Area: Calculate the total height and width of your entire grid, including the gaps.
- Find Your Center: Mark the center point of the wall area where you want the grid to hang.
- Hang the First Piece: Start with the top-center (or center-most) frame. Measure carefully and hang it first. This will be your anchor for the rest of the grid.
- Build Outwards: Using your level and measuring tape, hang the remaining frames, ensuring your 2-3 inch spacing is consistent both vertically and horizontally. Using picture hanging strips can make adjustments easier.
Pro-Tip: For a super budget-friendly option, find public domain vintage botanical illustrations online, print them on high-quality cardstock, and frame them yourself.
5. Install a Wall-Mounted Hanging Herb Garden
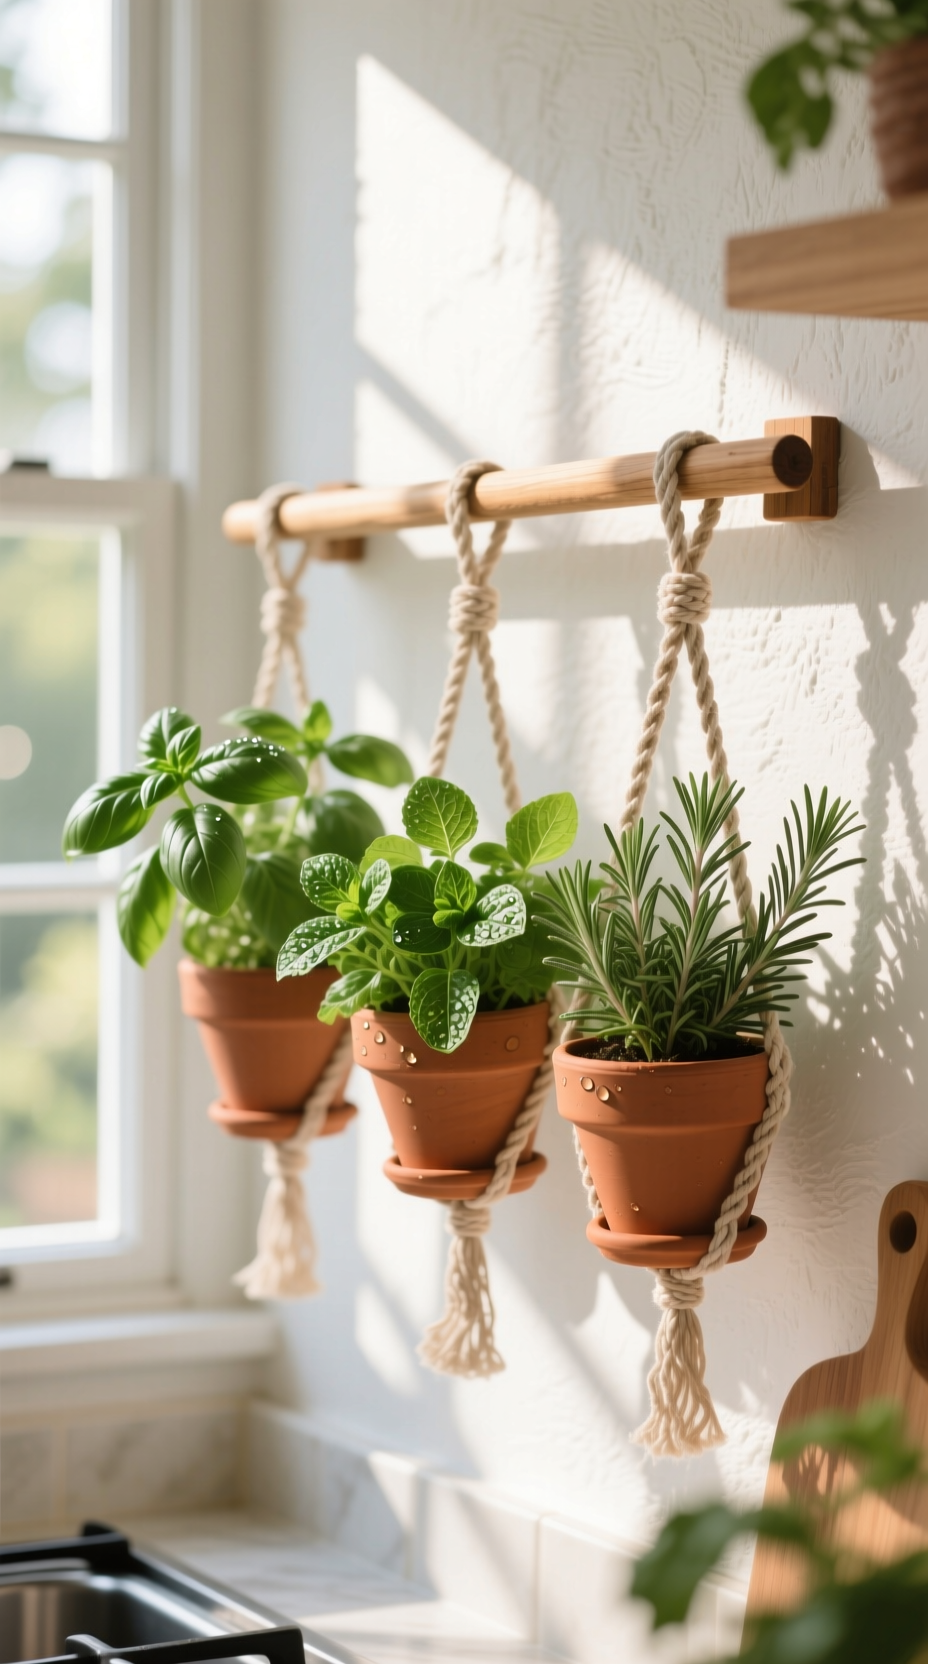
Pin this living wall decor idea for a fresh kitchen!
Incorporate something living into your decor with a beautiful and functional hanging herb garden. This idea perfectly embodies the boho spirit by connecting your home to nature. The combination of earthy terracotta pots, natural jute macrame hangers, and vibrant green herbs creates a piece of living decor that’s as useful as it is beautiful.
Materials Needed:
- 1 wooden dowel or copper pipe (approx. 24 inches long)
- 2 wall-mounted curtain rod brackets or leather straps
- 3 small macrame plant hangers
- 3 small terracotta pots with drainage holes
- Potting soil and 3 of your favorite herbs (basil, mint, rosemary, thyme)
- Wall anchors and screws
Step-by-Step Directions:
- Install Brackets: Securely mount the two brackets to the wall, using a level to ensure they are straight. Choose a spot that gets plenty of natural light.
- Place the Rod: Rest the wooden dowel or copper pipe across the brackets.
- Pot Your Herbs: Fill each terracotta pot with potting soil and plant one herb in each. Water them lightly.
- Assemble Hangers: Place each potted herb into a macrame plant hanger.
- Hang and Arrange: Loop the top of each macrame hanger over the rod. Adjust their spacing and height for a balanced, staggered look.
Lesson Learned: Make sure to use pots with drainage holes and place small saucers inside the macrame hangers if possible to catch excess water and protect your floors.
6. Use a Round Mirror to Add Light and Softness
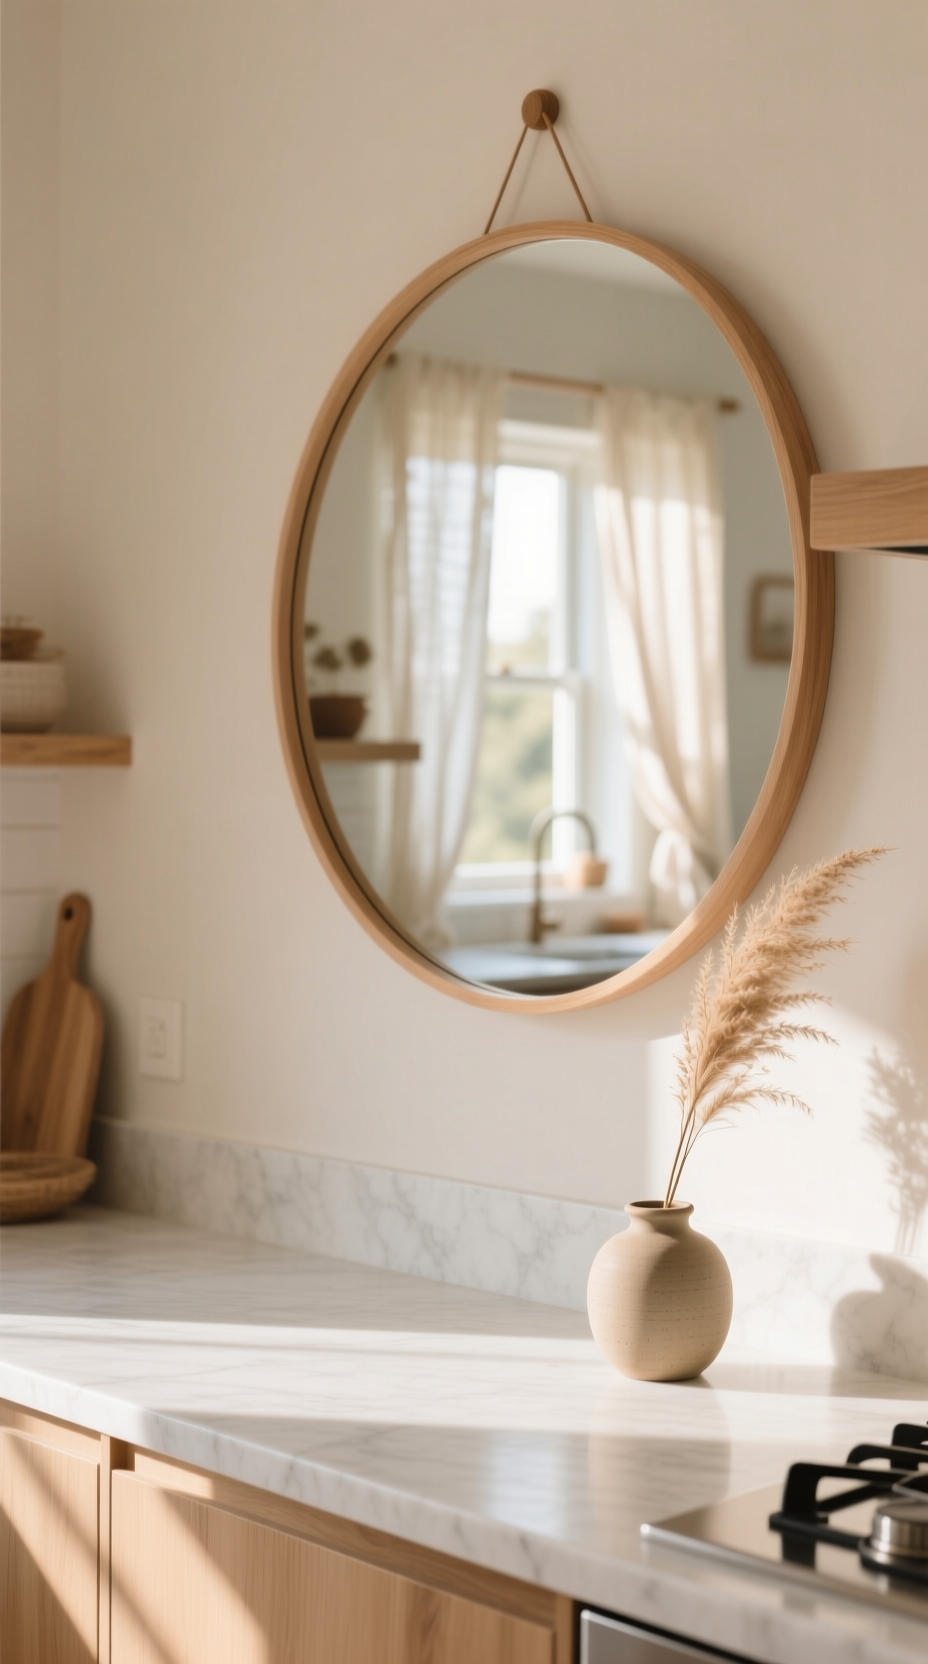
Save this bright idea to make your kitchen feel bigger!
A mirror is a fantastic tool in any kitchen, especially smaller ones. It reflects light, making the space feel brighter and more open. A round mirror, in particular, is a perfect fit for the boho style. Its soft, organic shape provides a welcome contrast to the sharp, straight lines of cabinetry and tile, adding a gentle, calming element to the room.
Materials Needed:
- One round mirror with a simple frame (natural wood, thin brass, or rattan are great choices)
- Heavy-duty wall anchor and screw capable of supporting the mirror’s weight
- Drill
- Measuring tape and pencil
Step-by-Step Directions:
- Find the Right Spot: The best place for a mirror is on a wall opposite a window to maximize reflected natural light.
- Check the Weight: Before purchasing, check the weight of the mirror and buy a wall anchor that is rated to hold at least twice that weight for safety.
- Mark Your Spot: Hold the mirror against the wall and determine the right height. Mark where the hook on the back of the mirror will sit.
- Install the Anchor: Drill a pilot hole and install your heavy-duty anchor according to the package instructions.
- Hang Securely: Screw in the hanging screw and carefully hang the mirror, ensuring it is securely seated on the screw.
Pro-Tip: A round mirror is perfect for breaking up all the straight lines and sharp angles of kitchen cabinets and countertops, adding a soft, organic element to the room.
7. Drape a Decorative Wood Bead Garland
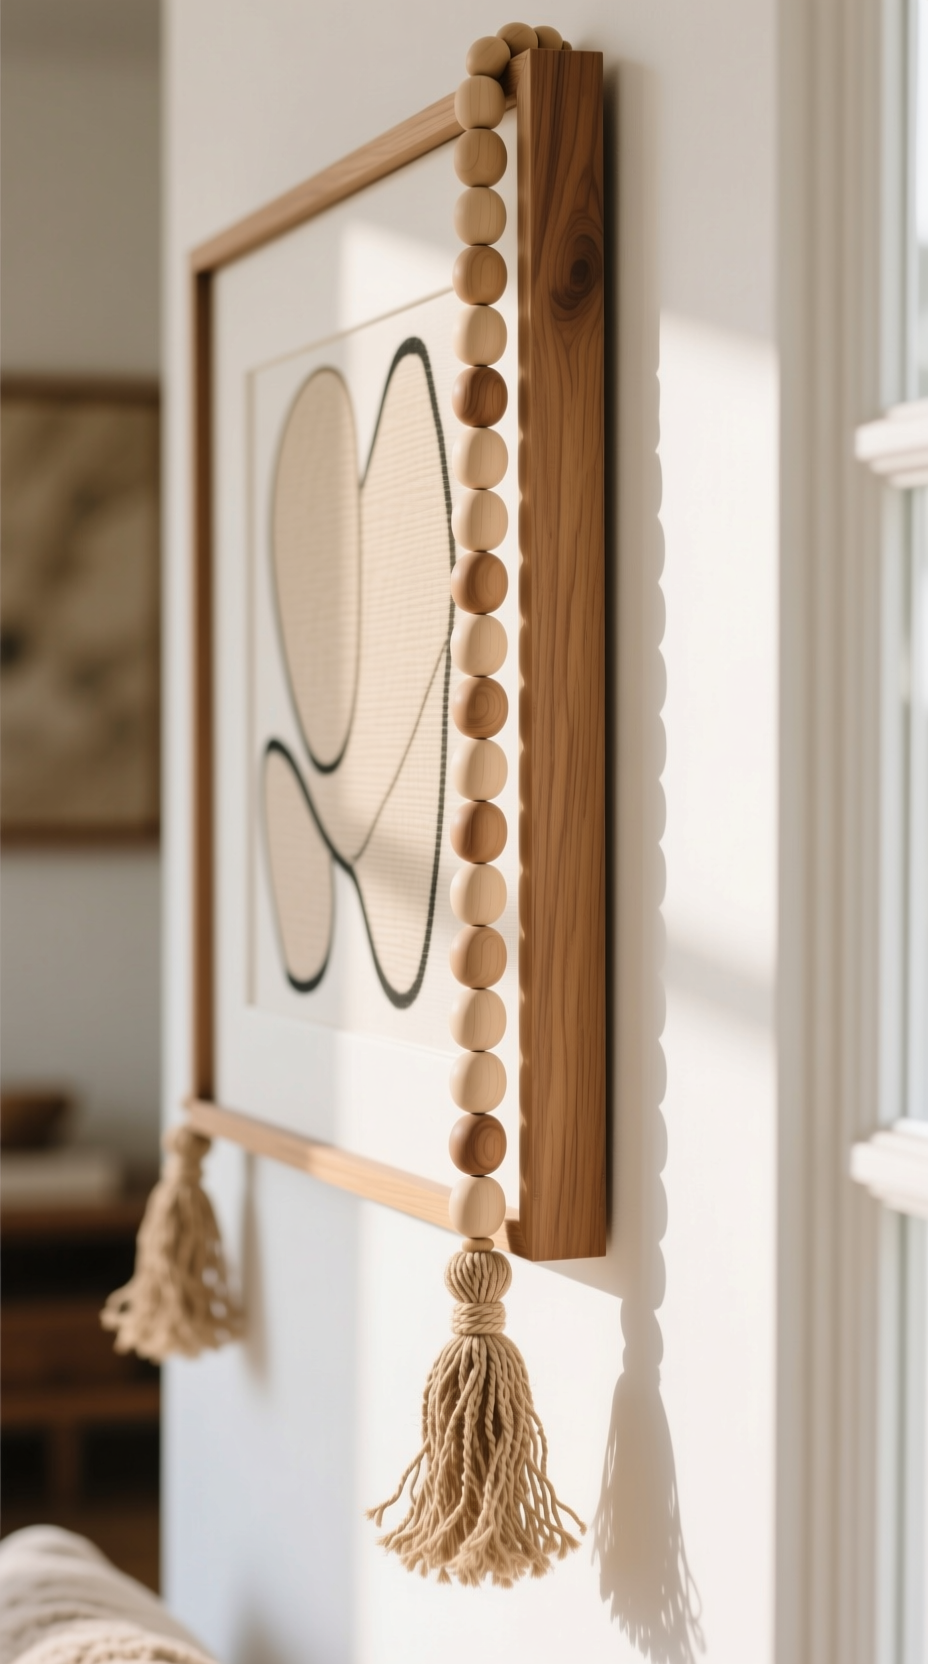
Pin this simple styling trick for a touch of texture!
Sometimes the smallest details make the biggest impact. A wood bead garland is a simple, inexpensive accent that adds a final layer of natural texture and a perfectly styled touch. It’s incredibly versatile and can be used to add dimension to existing wall decor, from picture frames to floating shelves.
Materials Needed:
- One long wood bead garland (look for one with jute or cotton tassels for extra texture)
- Existing wall decor to drape it on (a picture frame, mirror, or shelf)
Step-by-Step Directions:
- Drape Over Art: Simply drape the center of the garland over the top corner of a large framed piece of art. Let the ends hang down asymmetrically.
- Accent a Shelf: Lay the garland along the front edge of a floating shelf, letting one tassel hang down over the side. Weave it gently between other decor items.
- Frame a Mirror: Use two small, clear adhesive hooks on the wall at the top corners of a mirror and swag the garland across the top.
- Hang on its Own: Use a single nail to hang the garland by its center loop, letting it form a ‘V’ shape on a small, empty patch of wall.
Pro-Tip: This is one of the easiest and most versatile boho decor items. Don’t overthink it—the beauty is in its casual, imperfect drape.
8. Arrange an Eclectic, Mismatched Plate Wall
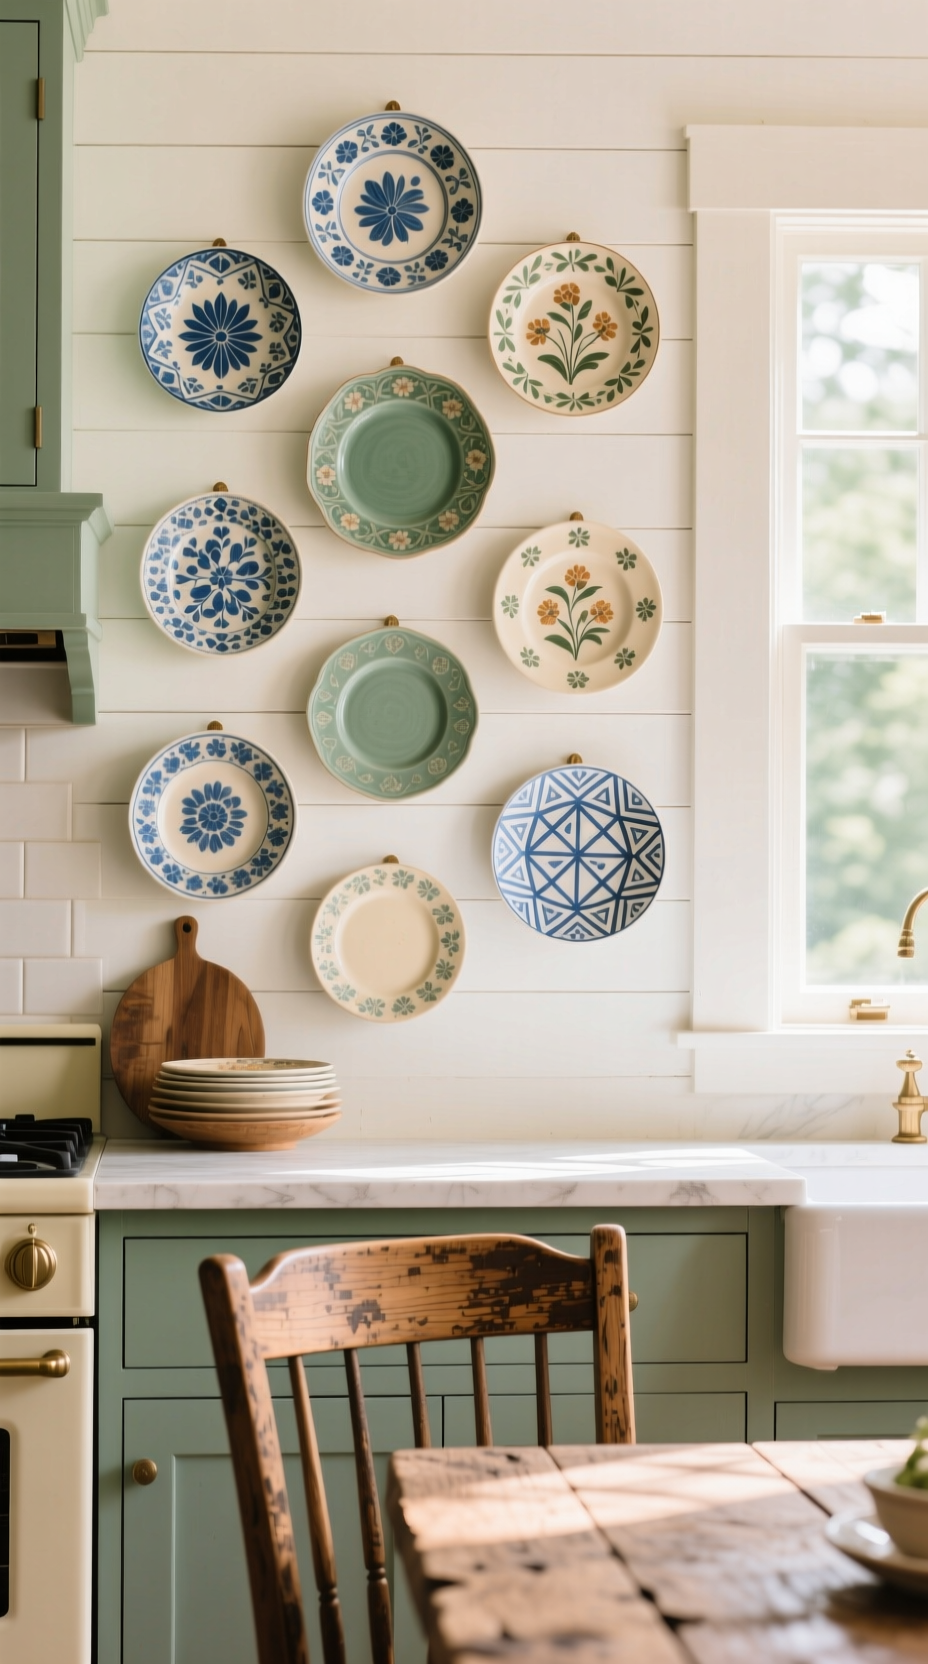
Save this charming idea for a touch of vintage personality!
A plate wall is a classic way to add charm and personality, and it fits perfectly with the eclectic, “collected-over-time” feel of boho design. Hunt for mismatched vintage ceramic plates at thrift stores or flea markets to create a display that is completely unique to you. It’s a fantastic way to introduce color and pattern in an unexpected way.
Materials Needed:
- 5-9 decorative plates of varying sizes and patterns
- Adhesive plate hangers or spring-style wire plate hangers for each plate
- Hammer and nails
- Paper for tracing
- Scissors and painter’s tape
Step-by-Step Directions:
- Collect Your Plates: Find interesting plates at thrift stores, flea markets, or antique shops. Look for a common thread, like a color palette or theme (e.g., all florals), to keep the collection feeling cohesive.
- Create Templates: Trace each plate onto paper and cut it out.
- Plan Your Layout: Use painter’s tape to arrange the paper templates on your wall. This lets you perfect the layout without making unnecessary nail holes.
- Attach Hangers: Follow the instructions to attach the adhesive or wire hangers to the back of each plate. Make sure they are secure.
- Hang the Plates: Once you’re happy with the paper layout, hammer a nail through the center of each paper template. Remove the paper and hang your plate. Repeat for all plates.
Lesson Learned: Start with your largest plate in a central position and build your cluster around it. This helps anchor the whole arrangement.
9. Frame a Beautiful Vintage or Global Textile

Pin this unique art idea for a personal touch!
For a truly personal and high-impact piece of art, consider framing a beautiful textile. This could be a vintage scarf, a souvenir from your travels, or a small, intricately patterned rug. Framing fabric elevates it to the level of fine art, adds sophisticated texture, and allows you to display something that tells a meaningful story.
Materials Needed:
- A piece of meaningful textile (a vintage scarf, a remnant from travels, a small rug, or even a beautiful tea towel)
- A shadow box frame or a custom-sized large frame
- Acid-free foam core board cut to the size of the frame
- Straight pins
- Heavy-duty picture hanging wire and hooks
Step-by-Step Directions:
- Prepare the Textile: Gently iron your fabric on a low setting if needed to remove any wrinkles.
- Mount the Fabric: Lay the fabric over the foam core board. Wrap the edges around to the back and secure them tightly with straight pins pushed directly into the side of the foam core. Ensure the fabric is taut and smooth on the front.
- Frame It: Carefully place the mounted textile into your shadow box frame and secure the backing.
- Hang Securely: Install a heavy-duty picture hanging wire on the back of the frame and hang it on a securely anchored wall hook. This method is best for large or heavy frames.
Pro-Tip: A floating acrylic frame is a beautiful, modern way to display a textile with interesting edges, making the fabric itself the complete focus.
10. Display a Collection of Rattan or Straw Hats
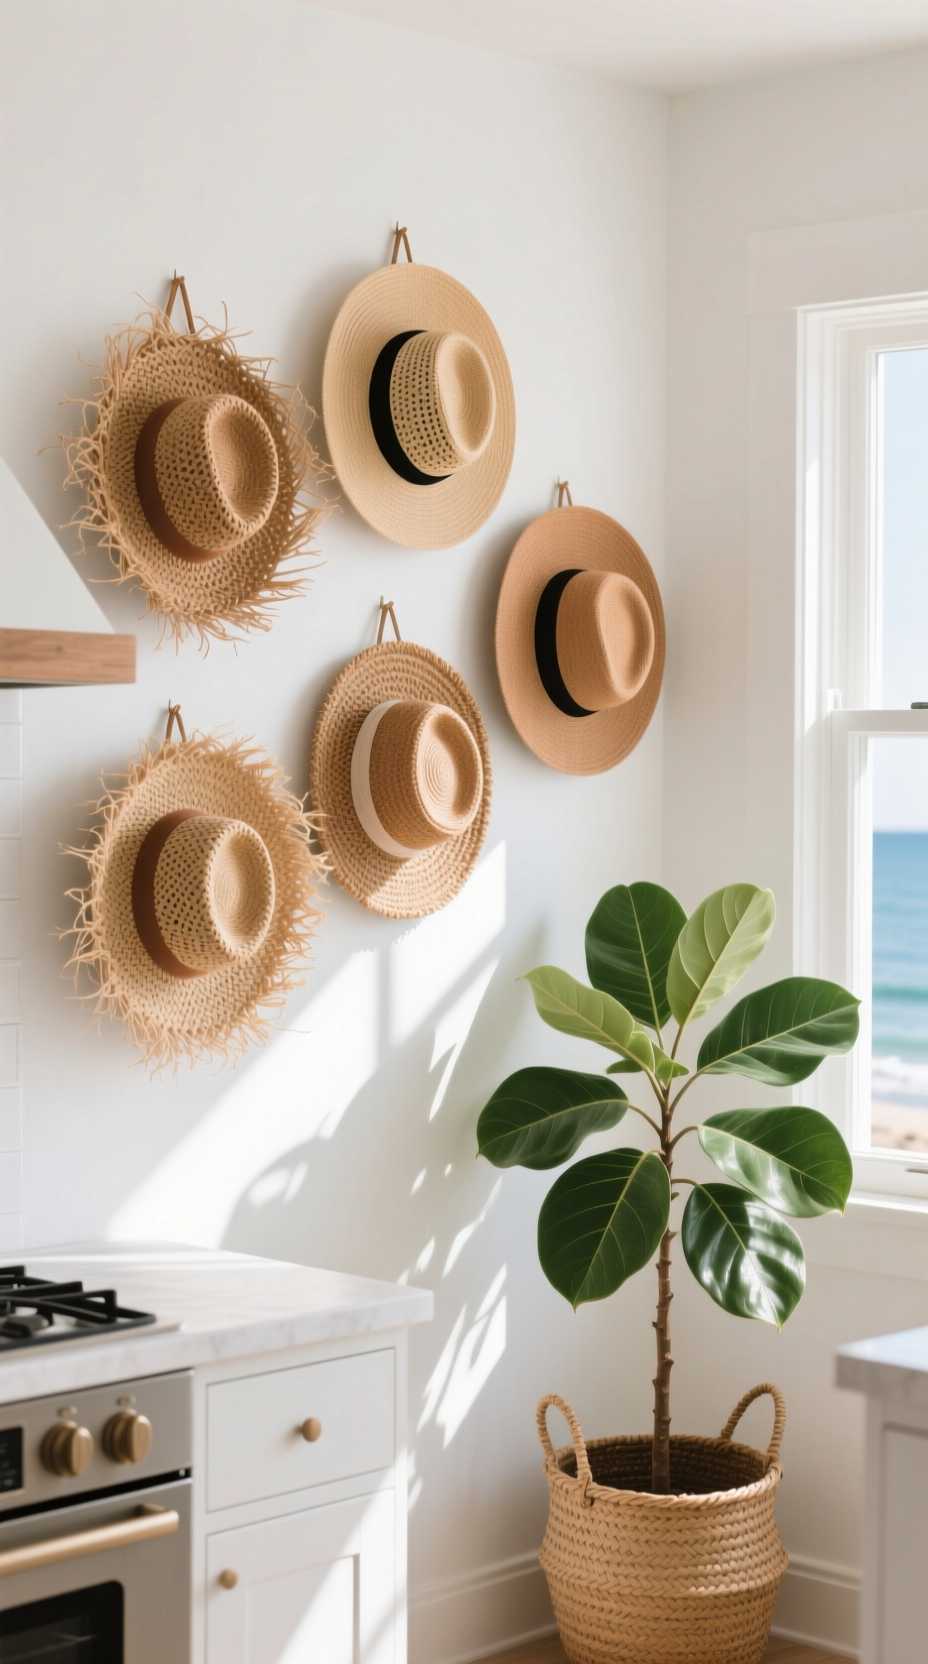
Save this breezy and budget-friendly wall decor idea!
Looking for a creative, dimensional, and incredibly budget-friendly way to fill a large wall? Look no further than your collection of sun hats. Grouping straw and rattan hats together creates a 3D gallery wall that is full of natural texture and has a light, airy, coastal vibe. It’s functional art that you can literally take off the wall and wear.
Materials Needed:
- A collection of 3-7 straw, rattan, or felt hats in varying shapes and sizes
- Small, clear self-adhesive hooks or tiny nails
- Measuring tape
Step-by-Step Directions:
- Gather Your Hats: Collect a few of your favorite sun hats. If you don’t have any, they are easy to find at thrift stores for a very low cost.
- Plan the Layout: Just like with the baskets, arrange your hats on the floor first to create a pleasing, slightly overlapping composition.
- Start in the Middle: Place a clear hook or a tiny nail on the wall for your centermost hat. Hang it.
- Build Your Cluster: Add hooks or nails for the surrounding hats, tucking the brim of one slightly behind another to create a layered, casual look.
- Easy to Change: The best part of this idea is that you can easily grab a hat off the wall to wear, and the display still looks great with one missing!
Pro-Tip: Mix in hats of slightly different shades of tan, beige, and cream to create more visual interest and a collected-over-time feel.
11. Add a Functional and Stylish Pegboard Organizer
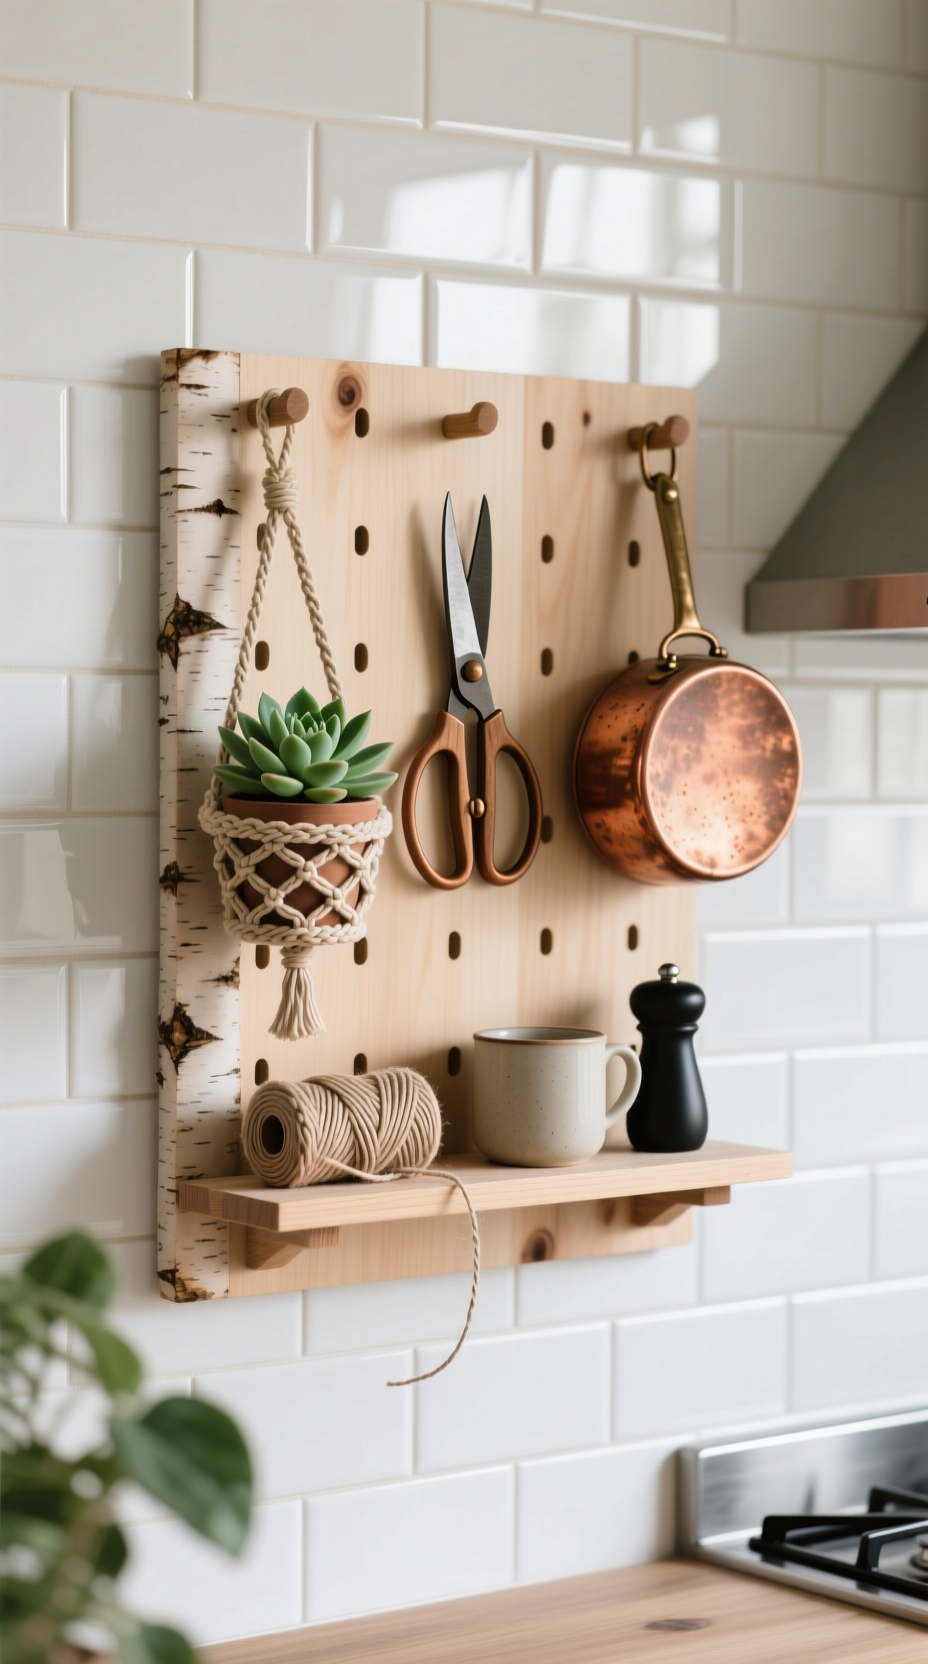
Pin this idea for stylish and functional kitchen organization!
For a decor solution that tackles storage problems, a plywood pegboard is a perfect choice. It perfectly merges the clean lines of Scandinavian design with the natural wood tones of the boho aesthetic. This modular system provides stylish vertical storage that you can customize to hold everything from your favorite mug to small plants and utensils.
Materials Needed:
- One birch plywood pegboard panel
- A set of wooden pegs and shelves designed for the pegboard
- Wall mounting hardware (often included with the pegboard)
- Drill, level, and measuring tape
- A curated selection of items to display: a small plant, favorite mug, nice kitchen shears, etc.
Step-by-Step Directions:
- Install the Pegboard: Follow the manufacturer’s instructions to securely mount the pegboard to the wall. It usually involves creating a small gap behind the board for the pegs to fit into.
- Arrange Your Pegs: Start placing your pegs and shelves into the board. Think about what you want to store and display.
- Create Zones: Designate different areas for different functions. For example, a corner for a small herb plant, a shelf for your coffee mug, and pegs for hanging utensils.
- Style with Purpose: Choose your most beautiful and most-used items to display. This keeps the board from looking cluttered while remaining highly functional.
- Re-arrange Anytime: The beauty of a pegboard is its flexibility. You can change the layout whenever you need to accommodate new items or just want a fresh look.
Pro-Tip: Paint the pegboard the same color as your wall for a subtle, textural look, or leave it as natural plywood to add warmth.
12. Paint a Warm, Earthy Arch Accent
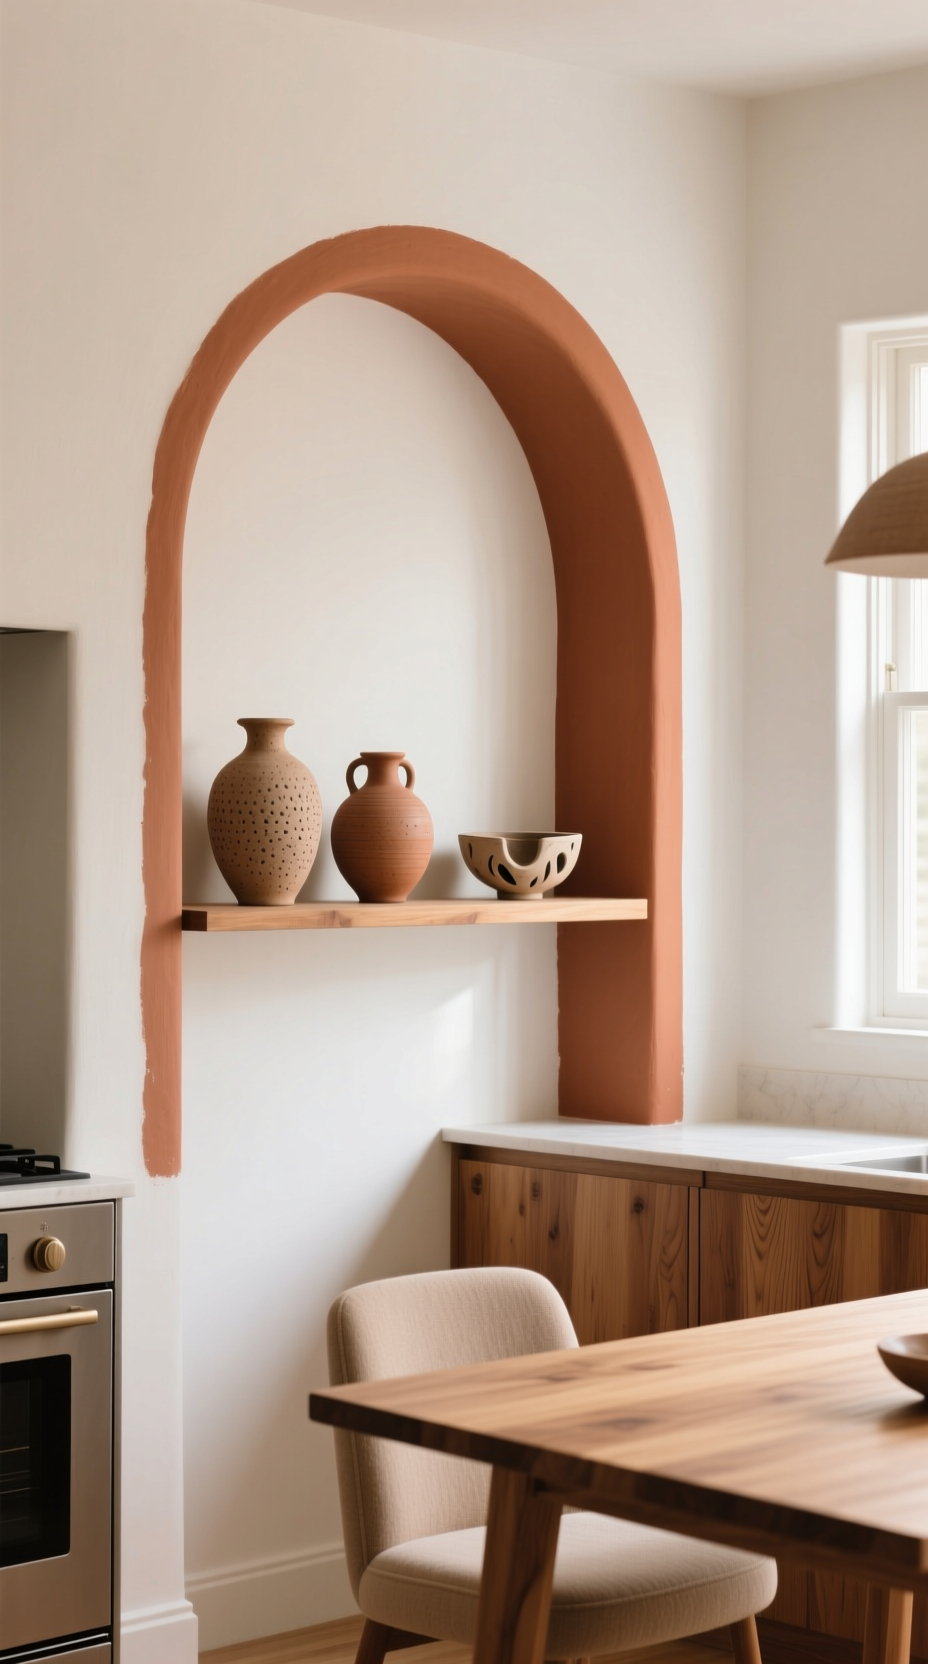
Save this high-impact, low-cost paint idea!
Want to create a major architectural statement without any construction? A painted arch is a high-impact, low-cost DIY project that has become a staple of modern boho and desert boho styles. This simple shape, painted in a warm, earthy color like terracotta, can create a stunning focal point and define a specific zone, like a coffee bar or breakfast nook.
Materials Needed:
- A sample pot of paint in an earthy tone (terracotta, beige, olive green)
- Painter’s tape
- String
- A thumbtack or pin
- A pencil
- A small paint roller and a detail brush
Step-by-Step Directions:
- Decide on Size: Determine the width and height you want your arch to be.
- Tape the Sides: Use painter’s tape to create the two vertical sides of your arch.
- Create a Compass: Cut a piece of string that is half the width of your arch. Tie one end to a pencil and the other to a thumbtack.
- Draw the Arch: Place the thumbtack on the wall at the center top of your taped lines. Pull the string taut and draw the semi-circle top of your arch with the pencil.
- Paint the Edges: Carefully paint the edges of your arch with the detail brush.
- Fill It In: Use the small roller to fill in the rest of the arch. Apply a second coat if needed.
- Peel the Tape: Remove the painter’s tape while the paint is still slightly tacky for the crispest lines.
Lesson Learned: This is a perfect way to define a small zone in your kitchen, like a coffee bar area or a small dining nook.
13. Craft a Simple and Soft DIY Yarn Wall Hanging
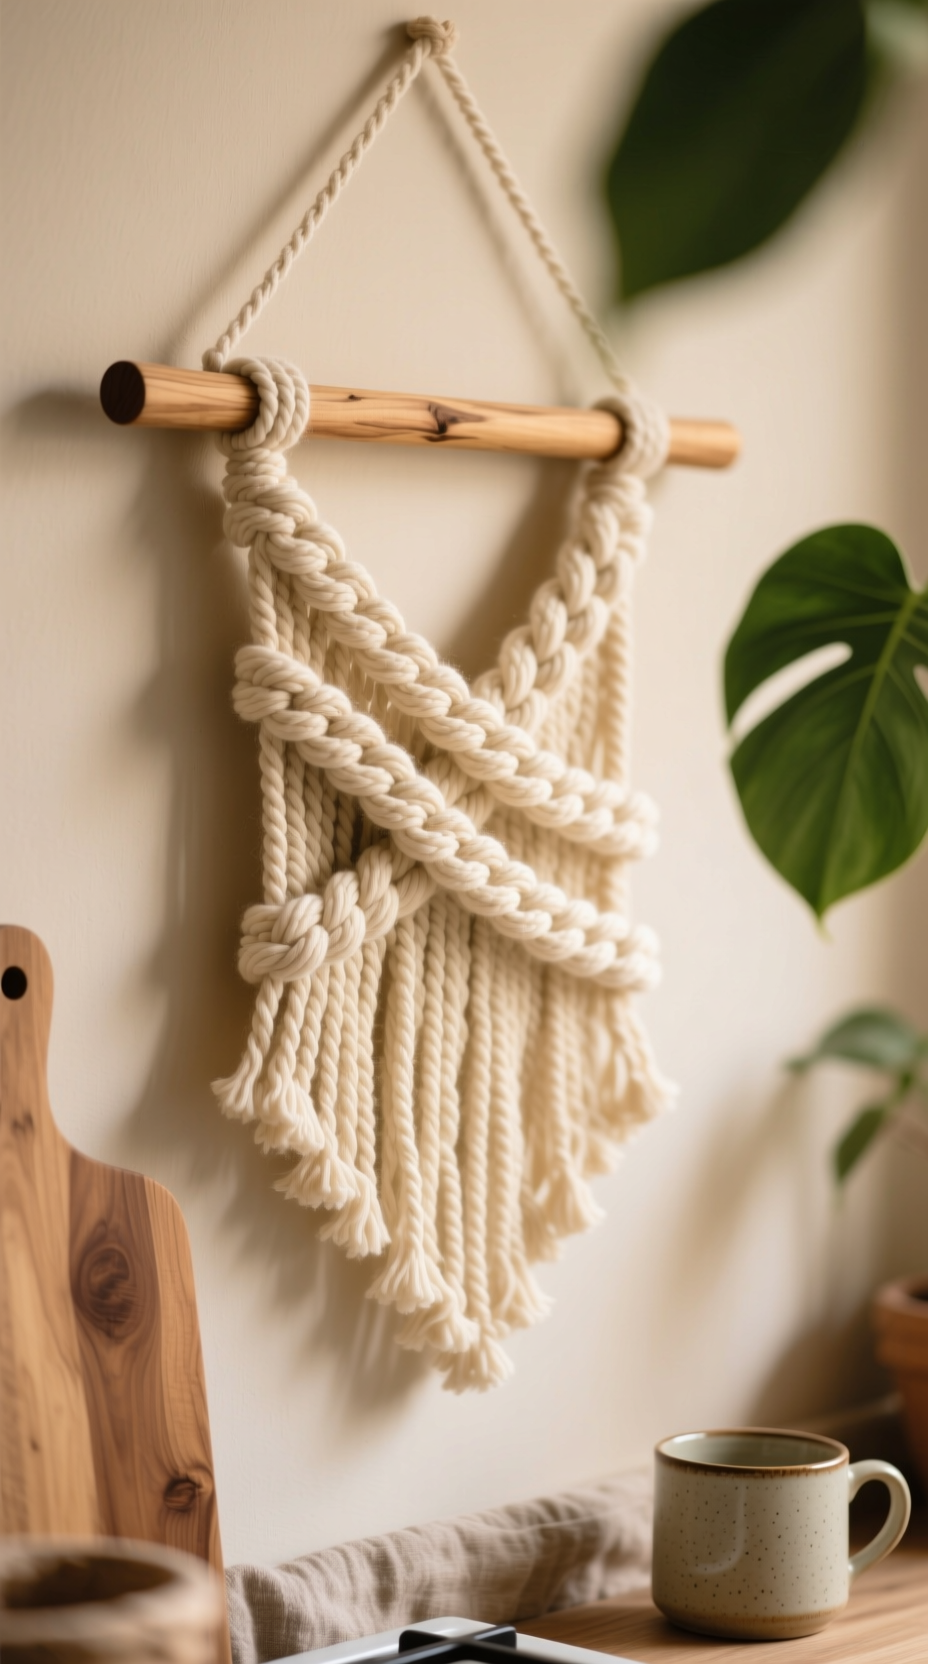
Pin this super easy DIY project for a cozy afternoon!
If you love the look of textile art but macrame feels too complicated, a simple DIY yarn wall hanging is the perfect project. Using chunky, soft yarn and a simple knot, you can create a custom piece of soft, textural art in under an hour. It’s an incredibly easy and affordable way to get that handmade, boho on a budget look.
Materials Needed:
- One skein of thick, chunky yarn in a neutral color
- One 12-inch wooden dowel
- Sharp scissors
- A piece of twine for hanging
Step-by-Step Directions:
- Cut Your Yarn: Decide on the desired length of your hanging. Cut pieces of yarn that are twice that length, plus a couple of inches. You’ll need many pieces.
- Attach Yarn to Dowel: Take one piece of yarn, fold it in half to create a loop at the top. Place the loop behind the dowel. Pull the two ends of the yarn through the loop and tighten to create a lark’s head knot.
- Fill the Dowel: Repeat this process, sliding the knots close together, until the entire dowel is filled with yarn.
- Trim the Bottom: Once all yarn is attached, use sharp scissors to trim the bottom. You can cut it straight across, in a ‘V’ shape, or at a dramatic angle for a modern look.
- Add a Hanger: Tie a piece of twine to both ends of the dowel to create a hanger.
Pro-Tip: Use two or three different yarn colors or textures and alternate them on the dowel to create a more complex, multi-dimensional piece.
Key Takeaways: Your Quick Guide to a Cozy Boho Kitchen
- Focus on Texture: The number one rule of boho is to mix and layer textures. Combine woven baskets, soft textiles like macrame, smooth ceramics, and natural wood.
- Incorporate Nature: Every boho kitchen needs a touch of green. Add live plants, a wall-mounted herb garden, or framed botanical art prints to bring the outdoors in.
- Make It Personal: The best boho spaces tell your story. Display unique items from your travels, cherished thrift store finds, or your own handmade pieces.
- Start with a Neutral Base: Use warm whites, creams, and beiges on your walls. This calm backdrop allows your colorful and textured decor to be the star.
- Don’t Fear the Mix: Combine vintage and modern pieces, different patterns, and various materials. Cohesion comes from a consistent color palette, not from matching sets.
FAQs About kitchen wall decor boho
What is the difference between boho and farmhouse style?
The main difference is that farmhouse style is rustic, clean, and rooted in American country tradition, often using shiplap and vintage signs. Boho style is more eclectic, global, and free-spirited, focusing on a mix of patterns, textures like macrame, and items collected from around the world.
How can I make my kitchen look boho on a budget?
Focus on DIY projects like yarn hangings or painted arches, thrift for unique plates and baskets, and use plants as inexpensive decor. You can also print free public domain botanical art online and frame it yourself for a beautiful, low-cost gallery wall.
How do I keep my boho kitchen from looking cluttered?
To avoid a cluttered look, stick to a defined color palette of 3-4 colors. Ensure there is “negative space” or breathing room on your walls and shelves—don’t fill every inch. Finally, choose decor that is also functional, like a beautiful pegboard or stylish shelves for storage.
What are the key materials in boho design?
The key materials in boho design are natural and textural. This includes things like rattan, wicker, seagrass, and bamboo for baskets and furniture. You’ll also see a lot of natural wood, 100% cotton and jute for textiles like macrame, and earthy ceramics.
Final Thoughts
Your kitchen is the heart of your home—it deserves to be a space that truly reflects you. Creating a warm, cozy, and personal kitchen is easier than you think. The core of the boho style isn’t about perfection; it’s about self-expression, creativity, and surrounding yourself with things that bring you joy.
I hope these 13 ideas have sparked your imagination and shown you that you can easily transform your own kitchen walls. Whether you start with a single hanging plant or a full basket gallery wall, the most important step is simply to begin.
Which idea are you most excited to try first? Let me know in the comments below
Last update on 2026-01-13 at 21:15 / Affiliate links / Images from Amazon Product Advertising API
