As an Amazon Associate KitchenwareSets.com earns from qualifying purchases.
Cozy Rustic Kitchen Wall Decor Ideas To Add Instant Charm
Staring at your blank kitchen walls again? It feels like the one room that should be warm and full of life is just… there.
You have a functional kitchen, but it lacks that cozy, personal charm. Rustic kitchen wall decor is the design concept of using natural, aged, and organic elements to create an inviting atmosphere. You’re struggling to find ideas that feel both beautiful and achievable.
Rustic kitchen wall decor uses natural materials like distressed wood and metal to add instant warmth and character. In this guide, you’ll discover 9 beautiful and easy ideas. You’ll learn how to transform your kitchen into the true heart of your home.
Is Your Kitchen Lacking a Cozy, Personal Touch?
Does your kitchen feel more like a sterile workspace than a welcoming hub for your family? If you’re staring at boring kitchen walls, you’re not alone. Many modern kitchens, with their clean lines and simple surfaces, can end up feeling a bit cold or impersonal. The challenge is figuring out how to warm up a kitchen and inject some personality without a full-scale renovation. This is where the charm of rustic farmhouse kitchen decor comes in.
In my experience, a few well-chosen pieces of rustic decor can completely transform a kitchen from just a place to cook into a space you truly love to live in. We’ve gathered our absolute favorite ideas to help you do just that. The solution is often simpler than you think. It’s about layering in natural textures, vintage-inspired pieces, and items that tell a story, making your kitchen walls a reflection of you.
9 Cozy Rustic Kitchen Wall Decor Ideas for Instant Charm
Ready to banish those blank walls for good? We’ve curated a list of our favorite rustic kitchen wall decor ideas to bring instant charm and warmth to your space. These ideas are selected based on timeless design principles—like texture, scale, and balance—and what we’re seeing resonate with home decor enthusiasts in 2026. Whether you have a large, empty wall crying out for a statement piece or a small nook that needs a touch of personality, you’ll find inspiration here that’s both beautiful and easy to implement.
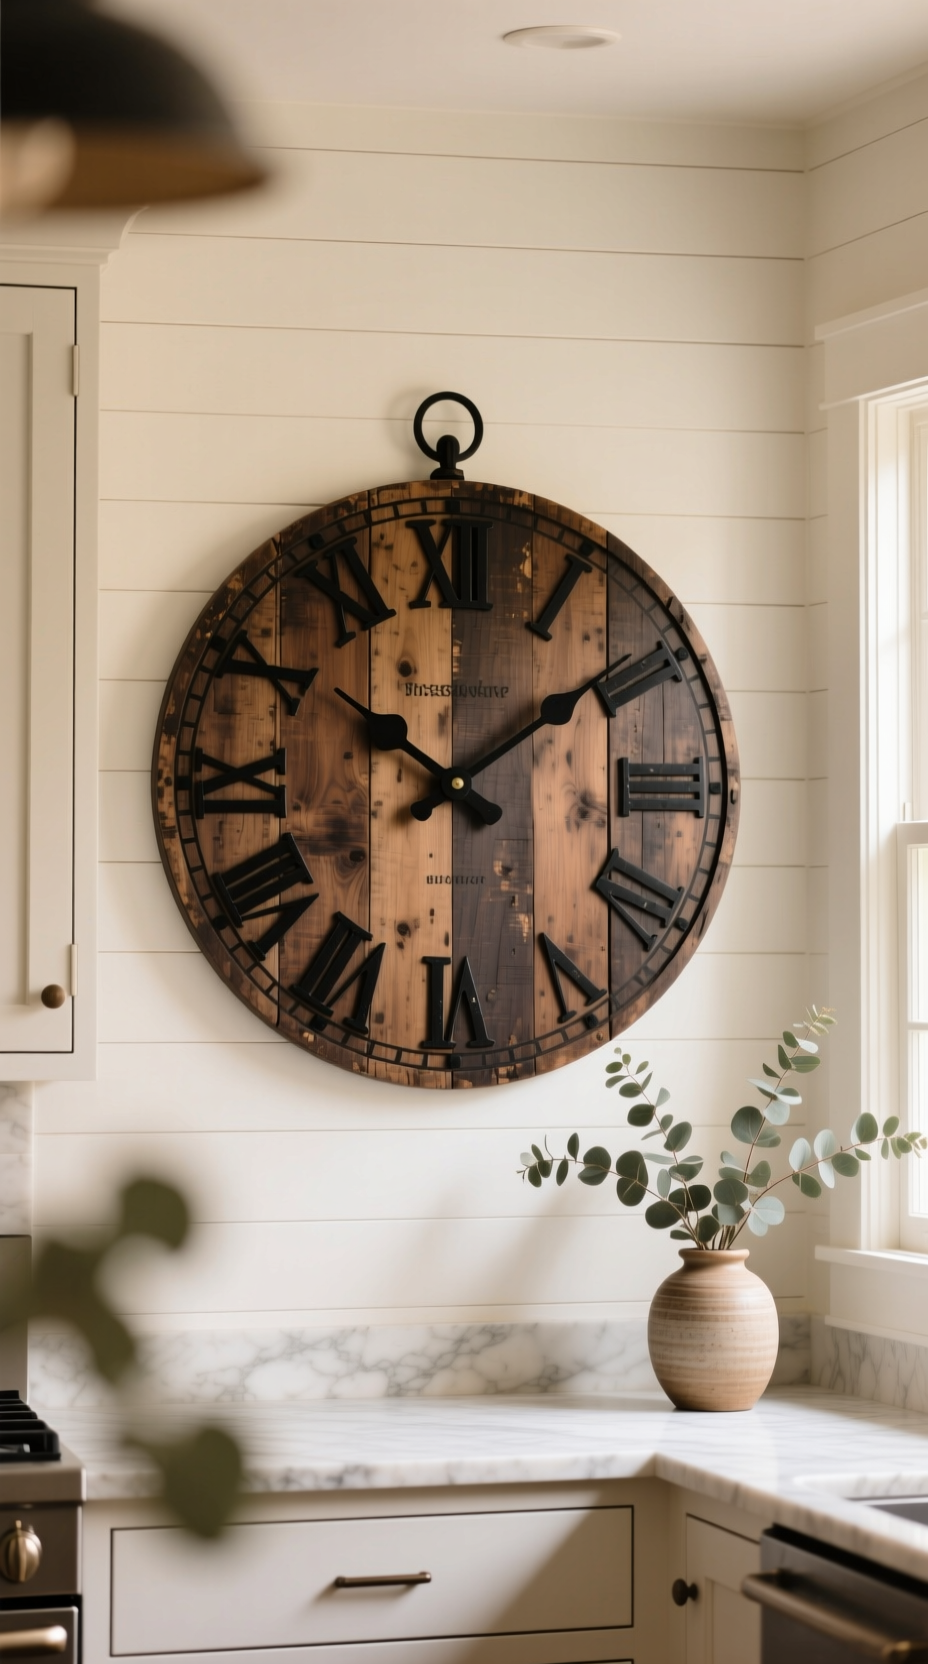
1. Make a Statement with an Oversized Rustic Wall Clock
Pin this timeless idea to your ‘Kitchen Goals’ board!
An oversized clock is more than just a way to tell time; it’s a piece of art that can anchor an entire wall. This is a perfect solution for large rustic kitchen wall decor, creating an immediate focal point that feels both grand and grounded.
Key Elements for this Look:
- Oversized Clock: Look for a clock at least 24-36 inches in diameter with a frame made of distressed or reclaimed wood and metal numerals.
- Prominent Wall Space: Choose a large, blank wall, such as the one above a dinette or a main entryway into the kitchen.
- Secure Hanging Hardware: Ensure you have a heavy-duty wall anchor and screw rated to hold at least twice the weight of the clock.
How to Style It:
- Center as a Focal Point: Hang the clock so its center is at eye level (approximately 57-60 inches from the floor). This will make it the undisputed star of the wall.
- Keep it Simple: Allow the clock to be the main feature. Avoid cluttering the wall around it with too many other small items.
- Add Subtle Complements: Place a simple decor item on the counter or table below it, like a vase of greenery or a stack of antique cookbooks, to ground the look.
Pro-Tip: Before you buy, use painter’s tape to mark out the clock’s diameter on your wall. This helps you visualize the scale and ensure it doesn’t overwhelm your space.
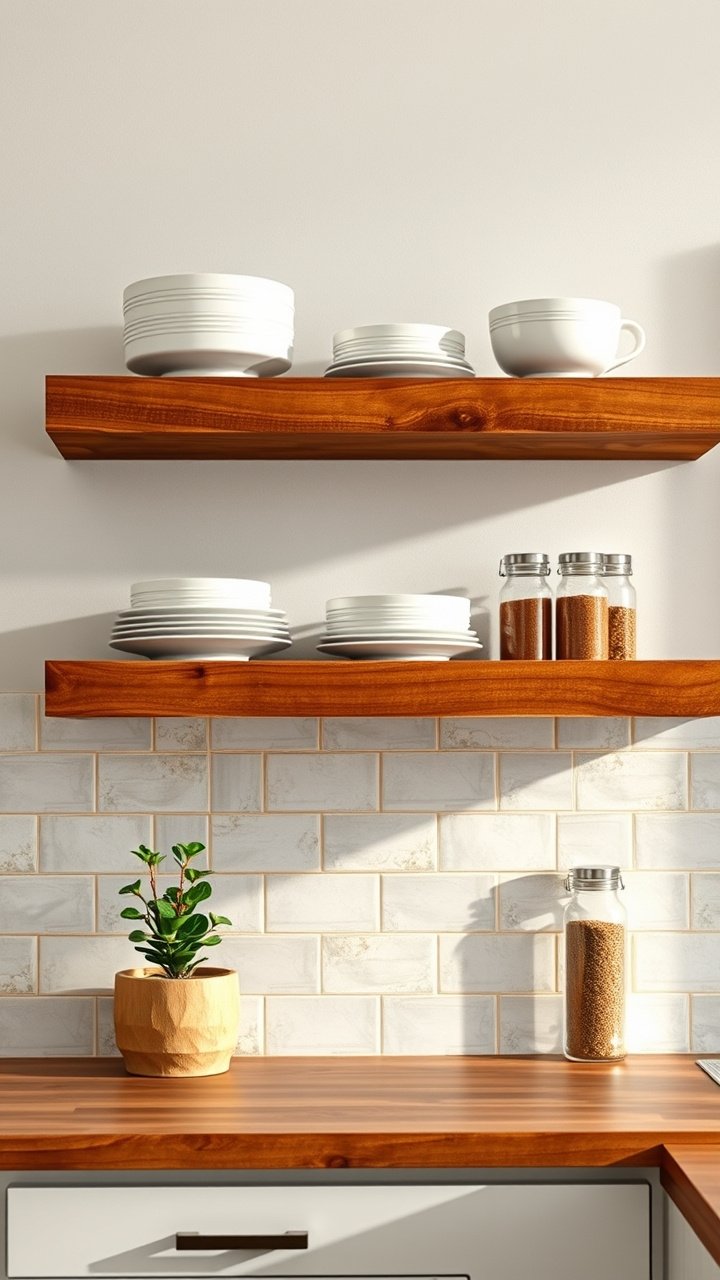
2. Add Warmth and Storage with Reclaimed Wood Floating Shelves
Save this beautiful and practical storage idea!
Rustic wood kitchen wall decor doesn’t get more practical than this. Reclaimed wood floating shelves offer the perfect blend of form and function, providing a place to display your favorite dishes while adding the essential natural texture that defines the rustic style.
Materials Needed:
- Reclaimed Wood Shelves: Two or three thick-cut shelves (1.5-2 inches thick) with a natural, rustic finish.
- Heavy-Duty Floating Shelf Brackets: Ensure the brackets are rated to support the weight of the wood plus your dishes. Look for invisible or industrial pipe-style brackets.
- Wall Stud Finder & Level: Essential tools for a secure and professional-looking installation.
- Ceramics & Greenery: A small collection of white or cream-colored dishes, mugs, a small potted plant, and glass jars for styling.
Step-by-Step Directions:
- Locate Studs: Use a stud finder to mark the location of the wall studs where you plan to hang your shelves. This is crucial for stability.
- Install Brackets: Securely mount the floating shelf brackets into the wall studs using the provided screws. Use a level to ensure they are perfectly straight.
- Slide on Shelves: Slide the wooden shelves onto the brackets until they are flush with the wall.
- Style with Layers: Arrange your decor using the “Rule of Three.” Group items in odd numbers, vary their height, and mix textures (e.g., smooth ceramic, a leafy plant, and a wooden bowl).
Lesson Learned: For small kitchens, floating shelves are a game-changer. They provide storage and decor without the visual bulk of traditional upper cabinets, making the room feel more open.
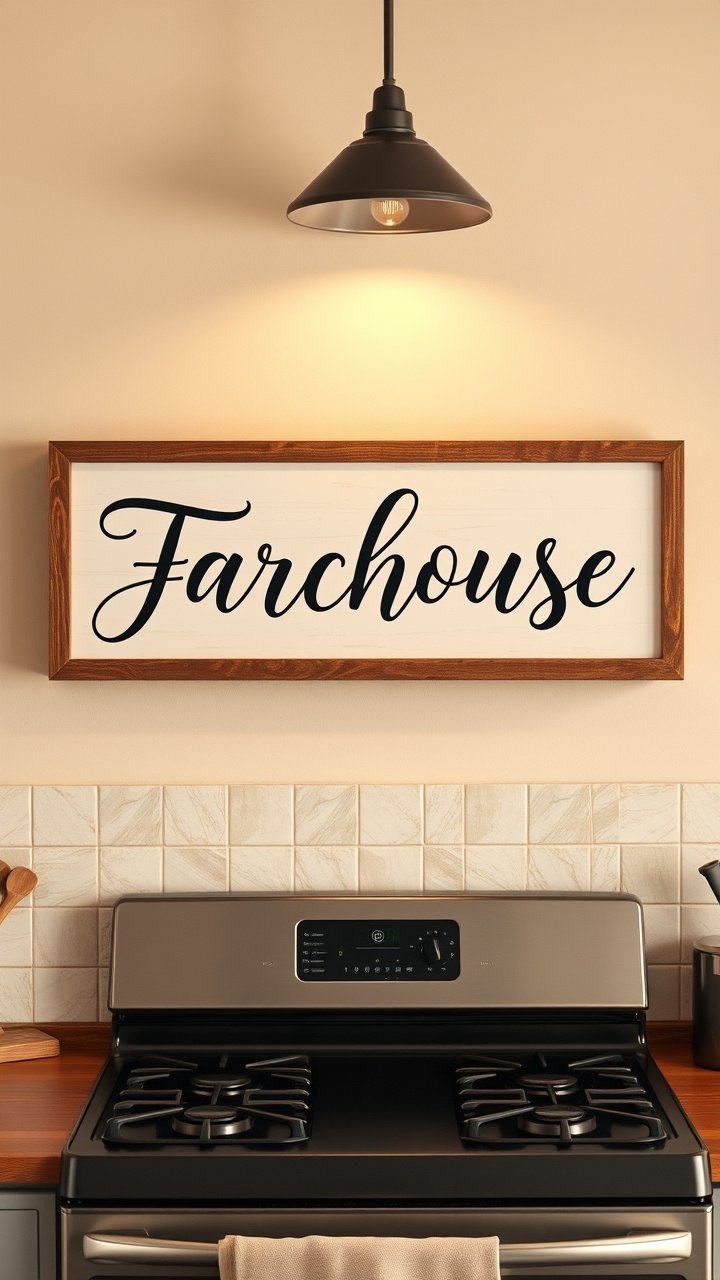
3. Display a Charming Hand-Painted Farmhouse Sign
Pin this charming sign idea for a personal touch!
Nothing adds personality quite like a sign with a meaningful or witty message. Farmhouse kitchen signs are a staple of the style because they bring a handmade, personal quality to the space.
Key Elements for this Look:
- Wooden Sign: A sign with a simple, heartfelt, or witty quote about food, family, or the home. Look for one with a distressed finish and a simple wood frame.
- Contrasting Lettering: Classic black or charcoal gray lettering on a white or cream background offers the best readability and timeless appeal.
- Meaningful Location: A spot where it will be seen daily, like over the stove, sink, or coffee bar.
How to Style It:
- Choose Your Message: Select a sign that reflects your family’s personality. Popular choices include “Gather,” “The Kitchen is the Heart of the Home,” or your family name and established date.
- Center Above a Feature: Hang the sign centered above a key kitchen feature like the range hood, a window, or a doorway to create a sense of balance.
- Pair with Greenery: For a softer look, flank the sign with small wall-mounted planters or place a wreath above it during the holidays.
Pro-Tip: If you’re hanging a sign above the stove, ensure it’s high enough to be safe from heat and splatters, and check if the material is easy to wipe clean.
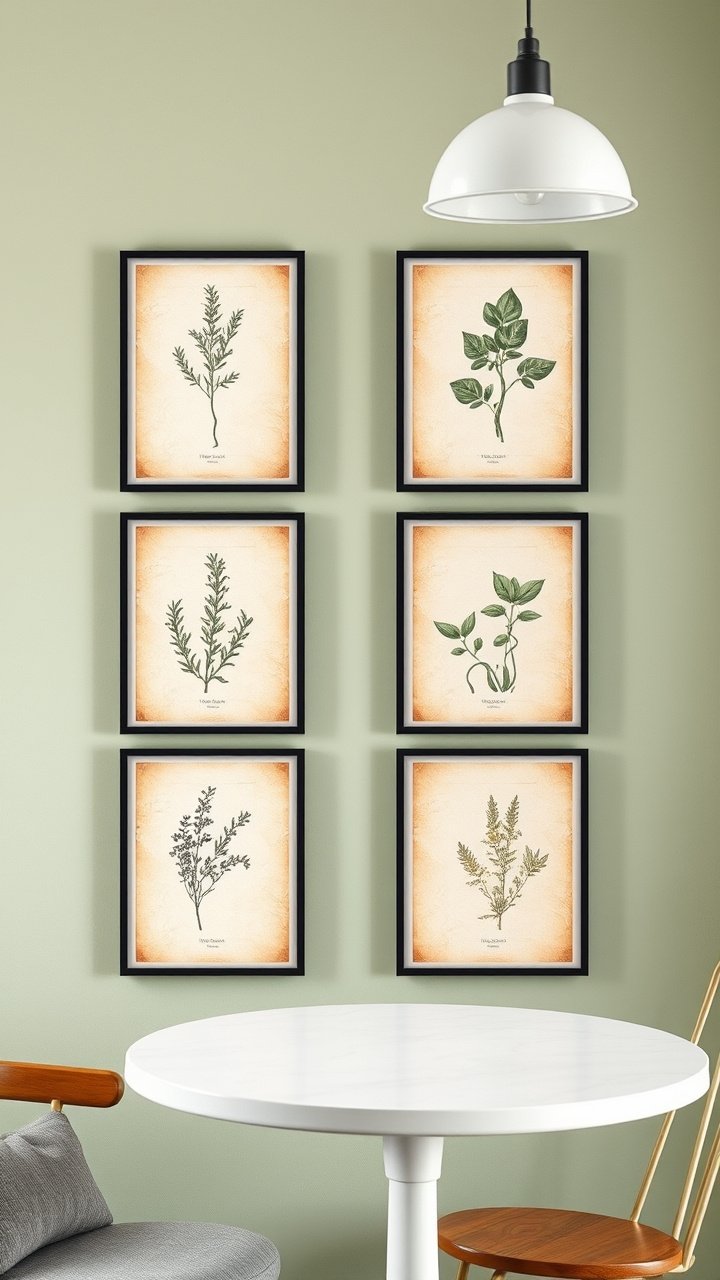
4. Create a Gallery Wall of Vintage-Inspired Botanical Prints
Save this elegant gallery wall idea for your breakfast nook!
Bring the outdoors in with a sophisticated gallery wall of rustic kitchen wall art. Vintage botanical prints, especially those of culinary herbs or vegetables, are a perfect theme for the kitchen. They add a touch of color and elegance while reinforcing the natural, organic feel of the rustic style.
Materials Needed:
- Set of Botanical Prints: A curated set of 4 to 6 prints with a cohesive theme (e.g., culinary herbs, garden vegetables, or local wildflowers). Look for prints on aged-looking paper.
- Matching Frames: Simple frames in the same color and style. Thin black metal or natural wood frames work best for a rustic look.
- Picture Hanging Kit: Includes nails, hooks, and wire for secure mounting.
- Paper & Tape: For creating templates to plan your layout on the wall.
Step-by-Step Directions:
- Plan Your Layout: Cut out paper templates the size of each of your frames. Arrange them on the floor until you find a layout you love (e.g., a simple grid or an asymmetrical cluster).
- Transfer to Wall: Tape the paper templates to the wall. Use a level and a measuring tape to ensure even spacing (typically 2-3 inches between frames).
- Install Hangers: Place a nail or hook at the marked spot on each paper template.
- Hang Your Art: Remove the paper templates and hang your framed prints. Step back and admire your beautiful, nature-inspired gallery wall.
Pro-Tip: For a budget-friendly option, search for high-resolution public domain botanical illustrations online, print them at a local print shop, and frame them yourself.
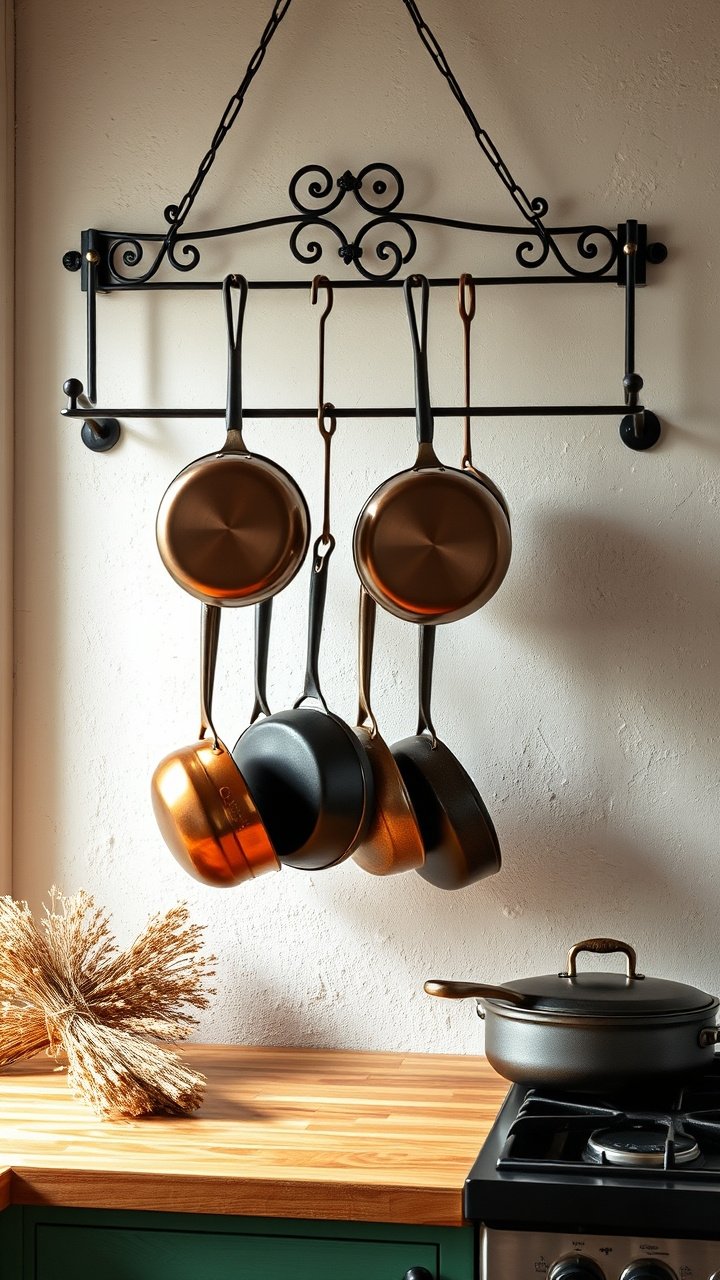
5. Install a Functional Wrought Iron Pot Rack
Pin this space-saving functional decor idea!
The best rustic decor is often hardworking. A wall-mounted wrought iron pot rack is a classic piece of functional kitchen decor that saves precious cabinet space and looks fantastic doing it. The combination of dark metal and hanging cookware like copper and cast iron adds instant history and an industrial farmhouse touch.
Materials Needed:
- Wrought Iron Pot Rack: Choose a style that fits your space—a simple bar, a half-round rack, or a grid-style rack with a top shelf.
- Heavy-Duty Lag Bolts: The hardware included with pot racks is often insufficient. Purchase lag bolts long enough to go deep into your wall studs.
- Set of S-Hooks: For hanging pots, pans, and utensils.
- Stud Finder & Power Drill: Non-negotiable tools for a safe installation.
Step-by-Step Directions:
- Identify a Strong Location: Choose a wall space with accessible studs, typically over a countertop or kitchen island where it won’t be a head-bumping hazard.
- Mark Stud Locations: Use a stud finder to locate at least two studs. Mark the drill holes for your pot rack, ensuring they align with the center of the studs.
- Drill Pilot Holes: Drill pilot holes that are slightly smaller than your lag bolts into the studs.
- Secure the Rack: Firmly attach the pot rack to the wall using a socket wrench to tighten the lag bolts. Tug on it to ensure it’s completely secure before hanging anything.
- Arrange Your Cookware: Hang your most-used (and most attractive) pots and pans, mixing metals like copper and cast iron for visual interest.
Lesson Learned: Safety first! A pot rack full of cast iron is incredibly heavy. Never, ever mount it using only drywall anchors. It MUST be secured into solid wood studs.
6. Brighten the Space with an Architectural Windowpane Mirror
Save this brilliant idea to make your kitchen feel bigger and brighter!
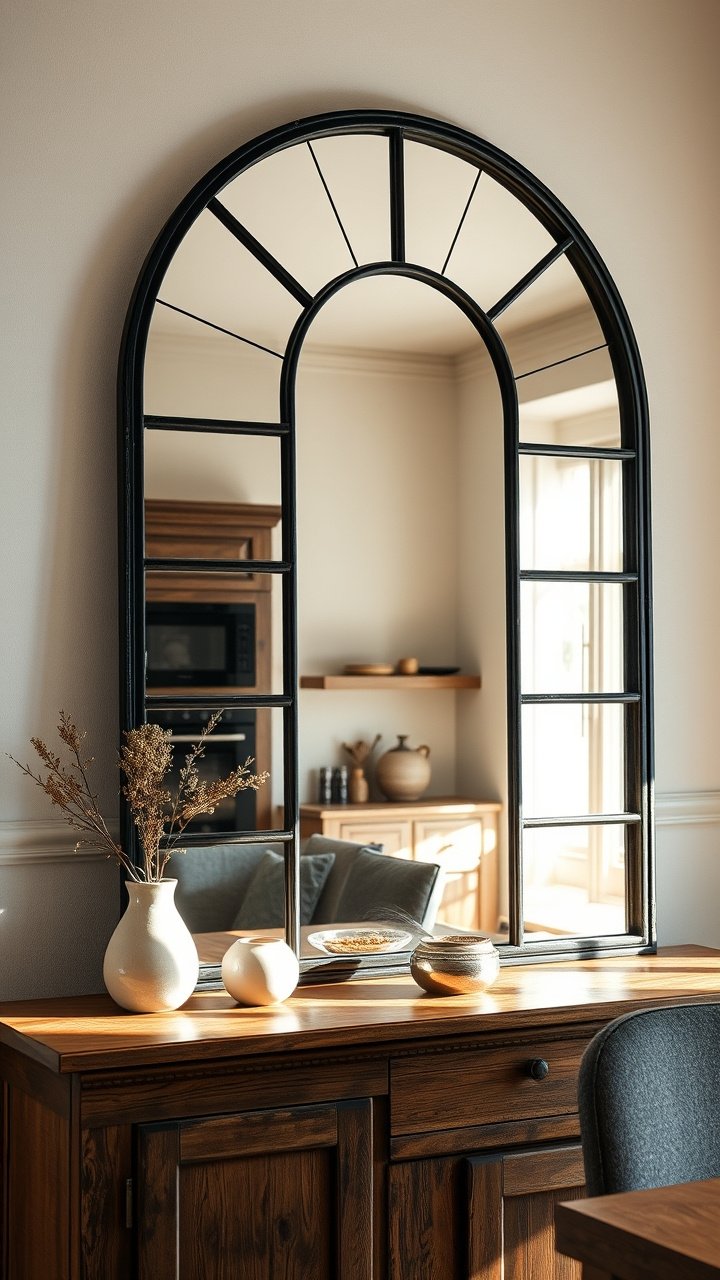
A large rustic mirror, especially one designed to look like a window, is a designer’s secret weapon. It’s a farmhouse windowpane mirror that does double duty: it acts as a beautiful piece of architectural decor and it makes your kitchen feel larger and brighter by reflecting light around the room.
Key Elements for this Look:
- Windowpane Mirror: A large mirror with a frame divided into smaller “panes,” resembling an old window. Arched or rectangular shapes are both popular.
- Frame Material: Look for frames made of distressed wood or dark, matte metal for an authentic rustic feel.
- Reflective Placement: Position the mirror on a wall opposite a window to maximize the amount of natural light it reflects back into the room.
How to Style It:
- Hang or Lean: For a formal look, hang the mirror securely on the wall. For a more casual, modern farmhouse vibe, lean a large mirror against the wall on top of a console table or sideboard.
- Reflect Something Beautiful: Be mindful of what the mirror reflects. Position it to capture a view of a pretty light fixture, a piece of art, or a window.
- Create a Vignette: If leaning the mirror on a surface, create a small, styled arrangement in front of it with items of varying heights, like a lamp, a stack of books, and a plant.
Pro-Tip: A windowpane mirror is a perfect solution for a small or dark kitchen. It tricks the eye into perceiving more space and light than is actually there.
7. Organize with Galvanized Metal Wall Baskets
Pin this clever and stylish organization tips!
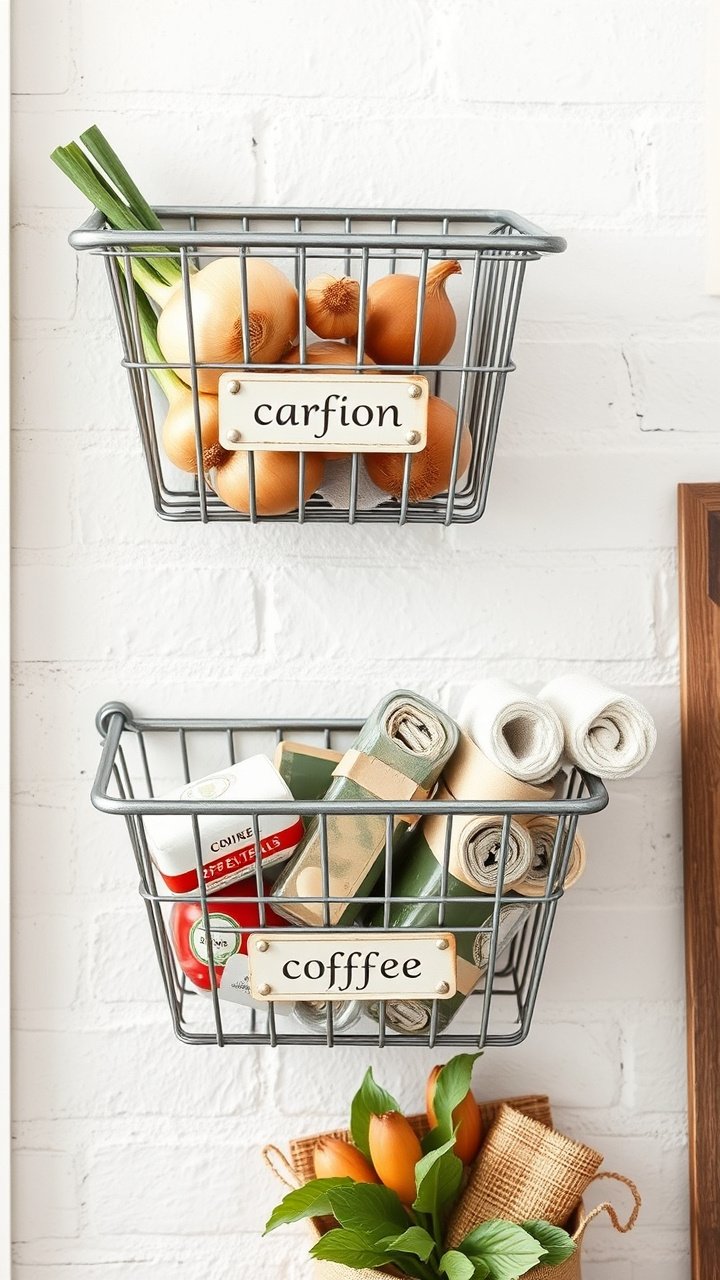
Add texture and tame clutter at the same time with a set of rustic wall baskets. Galvanized metal or wire baskets provide a touch of industrial farmhouse style and act as a perfect kitchen wall organizer for everything from mail and keys to fresh produce and linens.
Materials Needed:
- Set of Wall Baskets: Two or three matching baskets made of galvanized metal or black wire. Look for sets that are designed to be mounted.
- Mounting Hardware: Screws and wall anchors suitable for your wall type (drywall, plaster, or tile).
- Optional Labels: Small chalkboard tags or metal label holders to identify the contents of each basket.
Step-by-Step Directions:
- Determine Function: Decide what you’ll store in the baskets first. This will help you choose the best location (e.g., near the door for mail, near the counter for produce, by the coffee machine for pods).
- Arrange & Mark: Hold the baskets on the wall to determine your preferred arrangement (vertical stack, horizontal row). Use a pencil to mark where the screws will go. Use a level for a straight installation.
- Mount Securely: Install wall anchors if you are not drilling into studs. Screw the baskets firmly to the wall.
- Fill and Label: Fill your baskets with their intended items. Add labels for a final, ultra-organized touch.
Pro-Tip: Use wall baskets to store non-refrigerated produce like onions, garlic, and potatoes. It keeps them handy, allows for air circulation, and frees up precious pantry space.
8. Design a Fun and Functional DIY Chalkboard Menu Wall
Save this fun DIY project for a more organized kitchen!
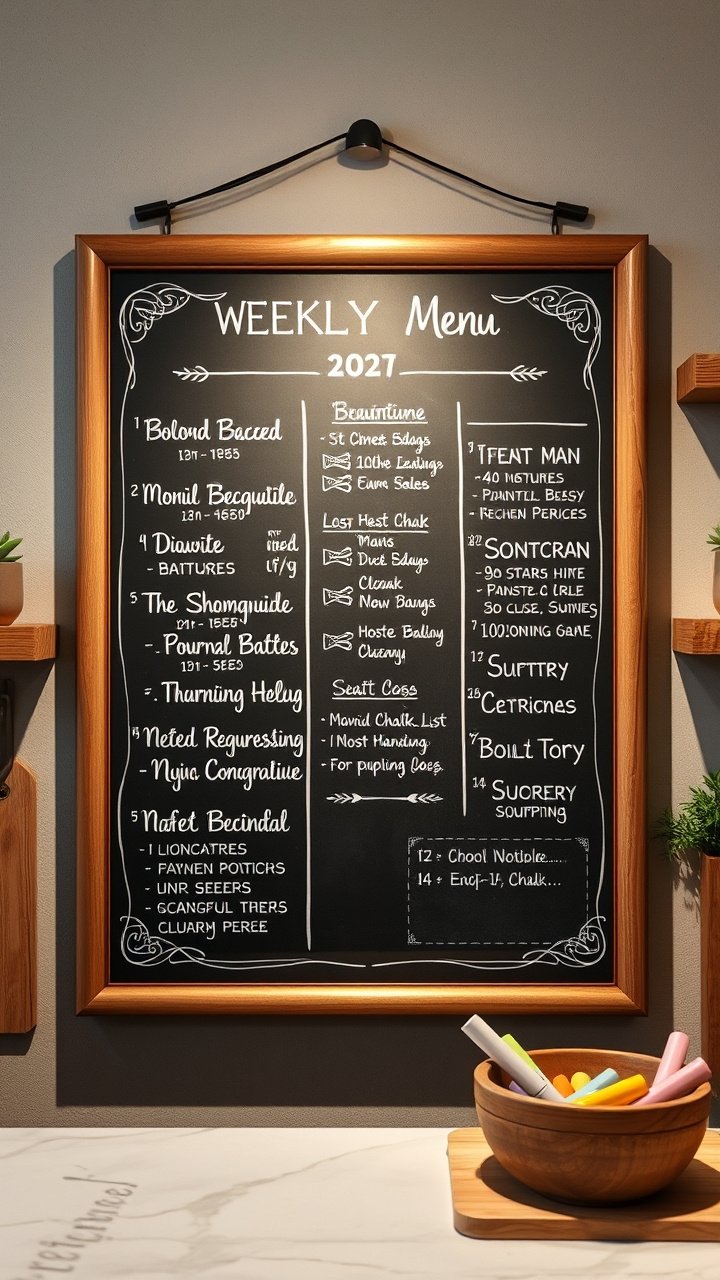
A large chalkboard is the ultimate piece of interactive DIY kitchen wall decor. Whether you use it for a weekly menu, a running grocery list, or just a place for the family to leave notes and doodles, a rustic chalkboard wall brings a fun, cafe-like vibe to your kitchen.
Materials Needed:
- Large Framed Chalkboard: Or, a can of chalkboard paint and painter’s tape to create a custom-sized section on your wall.
- Rustic Wood Frame (for paint): If painting a section of the wall, frame it out with rustic wood trim for a finished look.
- Liquid Chalk Markers: They provide vibrant color and crisp lines that are much cleaner than traditional chalk.
- Chalkboard “Seasoning” Chalk: One stick of regular, old-fashioned white chalk.
Step-by-Step Directions:
- Prepare Your Surface: If using chalkboard paint, tape off your desired area and apply 2-3 coats according to the manufacturer’s instructions. Let it cure completely (this can take a few days).
- “Season” the Chalkboard: This is a crucial step! Rub the side of a piece of regular chalk over the entire surface, then erase it. This prevents your first writings from being permanently “ghosted” onto the board.
- Frame it Out: If you painted the wall, measure and cut your rustic wood trim to create a frame. Attach it to the wall around your chalkboard section.
- Design Your Board: Use liquid chalk markers to create sections for each day of the week, a grocery list, and fun doodles. Get the whole family involved!
Pro-Tip: For perfect lettering, design your layout on a computer, print it out, rub the back of the paper with chalk, tape it to the board, and trace the letters. The chalk will transfer a perfect outline for you to fill in.
9. Create a Textured Display with Layered Cutting Boards
Save this simple and sophisticated styling idea!
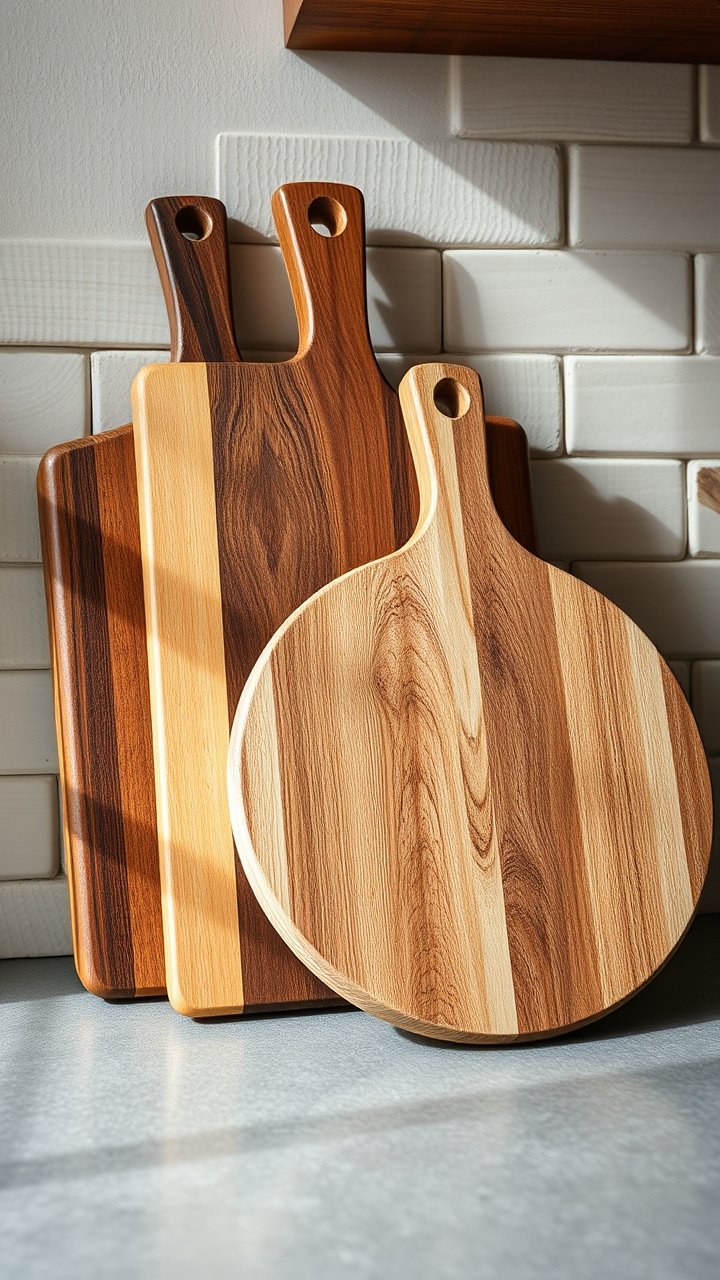
Sometimes the best decor isn’t meant for the wall at all. Decorating with cutting boards is an incredibly easy and affordable way to add layers of rustic texture to your kitchen. Simply leaning a collection of varied wooden boards against your backsplash fills that awkward gap and adds instant warmth.
Key Elements for this Look:
- A Collection of Cutting Boards: Gather 3-5 wooden cutting boards. The key is variety: mix different shapes (rectangular, round, paddle), sizes, and wood tones (light maple, warm cherry, dark walnut).
- A Leaning Spot: All you need is a bit of empty counter space against a backsplash.
- One “Hero” Board: Choose one board to be the star—perhaps one with a unique shape, a live edge, or a beautiful grain.
How to Style It:
- Start with the Largest: Place your largest cutting board leaning against the backsplash first. This will be your anchor.
- Layer Forward: Place a medium-sized board in a contrasting wood tone or shape in front of the first one, slightly off-center.
- Add the Smallest: Finish with your smallest or most interesting board in the very front.
- Accessorize: Complete the vignette by placing a small crock of utensils, a bottle of olive oil, or a small plant next to your layered display.
Lesson Learned: This is one of the easiest ways to get a high-end, designer look for very little effort. The secret is the variation in shape, size, and color, which creates instant visual depth.
Key Takeaways: Your Quick Guide to a Cozier Kitchen
Feeling inspired? Here are the core principles to remember as you start your rustic kitchen transformation:
- Embrace Natural Textures: The foundation of rustic decor is the use of materials like reclaimed wood, metal, and natural fibers.
- Focus on a Statement Piece: To avoid a cluttered look, start with one large focal point like an oversized clock or a beautiful sign.
- Mix Beauty with Function: The best rustic kitchens incorporate decor that also serves a purpose, such as floating shelves or a pot rack.
- Layer for Depth: Create visual interest by layering items, like cutting boards on a counter or creating a gallery wall of prints.
- Don’t Forget Greenery: A touch of nature, whether from botanical prints or a real plant, is the perfect finishing touch.
People Also Ask About Rustic Kitchen Decor
What is the difference between rustic and farmhouse kitchen decor?
Farmhouse is a subtype of rustic. Think of rustic as the broader category focused on raw, natural, and rugged materials (like logs and stone). Farmhouse is a lighter, brighter, and more refined version that uses whitewashed woods, vintage accessories, and a cleaner aesthetic inspired by practical farm life.
How can I make my modern kitchen look rustic without a full renovation?
Focus on adding warm, natural textures. You can instantly add a rustic feel to a modern kitchen by introducing elements like reclaimed wood floating shelves, a vintage-style wool runner on the floor, a collection of wooden cutting boards leaned against the backsplash, and some simple botanical art prints.
What materials are essential for a rustic kitchen look?
Reclaimed or distressed wood is the most important material. Beyond wood, key materials include wrought iron or galvanized metal, natural stone, and textiles like burlap, cotton, and jute. The goal is to use materials that feel organic, aged, and connected to nature.
Is rustic decor going out of style in 2026?
No, the core principles of rustic design are timeless. While specific trends evolve (for example, the shift from pure farmhouse to “modern rustic”), the desire for warm, cozy, and nature-inspired spaces remains incredibly popular. Rustic decor’s emphasis on natural materials and comfort ensures its lasting appeal.
Final Thoughts
Transforming your kitchen from a plain room into a cozy, charming space is all about expressing your personal style and creating a place that truly feels like home. You don’t need a huge budget or a major overhaul; as you’ve seen, a few thoughtfully chosen pieces of rustic wall decor can make all the difference. By focusing on natural materials, functional beauty, and a touch of personality, you can easily create a kitchen that’s as inviting as it is inspiring.
Your kitchen is waiting for its warm, rustic transformation! Which of these ideas are you most excited to try first? Let us know in the comments below
Last update on 2026-01-20 at 23:02 / Affiliate links / Images from Amazon Product Advertising API
