As an Amazon Associate KitchenwareSets.com earns from qualifying purchases.
13 Minimalist Kitchen Wall Decor Ideas For Every Style
Staring at that big, blank kitchen wall again? You know it has potential, but it just feels… empty.
Minimalist kitchen wall decor is the art of turning that awkward, unfinished space into a calm and beautiful focal point. It’s not about having nothing on your walls; it’s about choosing each piece with intention to create a serene environment.
Minimalist kitchen wall decor is the art of using restraint and intention to turn a blank space into a calm, beautiful focal point. This guide will show you 13 simple, beautiful design solutions to transform your kitchen from sterile to serene.
That Big, Blank Kitchen Wall? Here’s How to Make It Beautiful
That large, empty kitchen wall can be intimidating. It’s a common design challenge that can make the entire room feel unfinished or sterile. Many people struggle with what to do, fearing they’ll make it look cluttered or choose the wrong thing. The solution isn’t to fill the space with random items, but to approach it with a clear, minimalist mindset.
This isn’t about creating an empty, cold room. It’s about making intentional choices that bring beauty and calm. We’ll explore simple kitchen wall art and decor ideas that work even if you have no upper cabinets. Think of your empty wall not as a problem, but as a canvas for creating a peaceful and beautiful kitchen space.
The 3 Pillars of Minimalist Decor: Intention, Space, and Cohesion
Before jumping into specific ideas, understanding the “why” behind minimalist decor is key to success. This isn’t about following strict rules but about adopting a mindset. According to interior design best practices, three foundational design principles guide every great minimalist space: Intention, Negative Space, and Cohesion. Mastering these core concepts elevates your decor from just “simple” to truly sophisticated.
The core principles of minimalist decor are:
1. Intention: Every item has a purpose and a place. The focus is on “less, but better”—choosing one high-quality, meaningful piece over ten generic ones.
2. Negative Space: This is the empty space around an object. Treat this “breathing room” as an active and crucial design element. It creates calm, reduces visual clutter, and gives more importance to the items you choose to display.
3. Cohesion: This is the harmony that ties the room together. It’s achieved by using a limited and consistent color palette, repeating materials (like light wood or black metal), and maintaining a consistent style throughout the space.
13 Minimalist Kitchen Wall Decor Ideas For Every Style
Now that you understand the principles, let’s explore the possibilities. Here are 13 distinct and achievable minimalist kitchen wall decor ideas, ranging from classic Nordic-style art to functional Japandi-inspired decor. Each example is designed to inspire you and comes with actionable tips to bring the look to life in your own home, no matter your style.
1. Hang a Single, Oversized Abstract Canvas
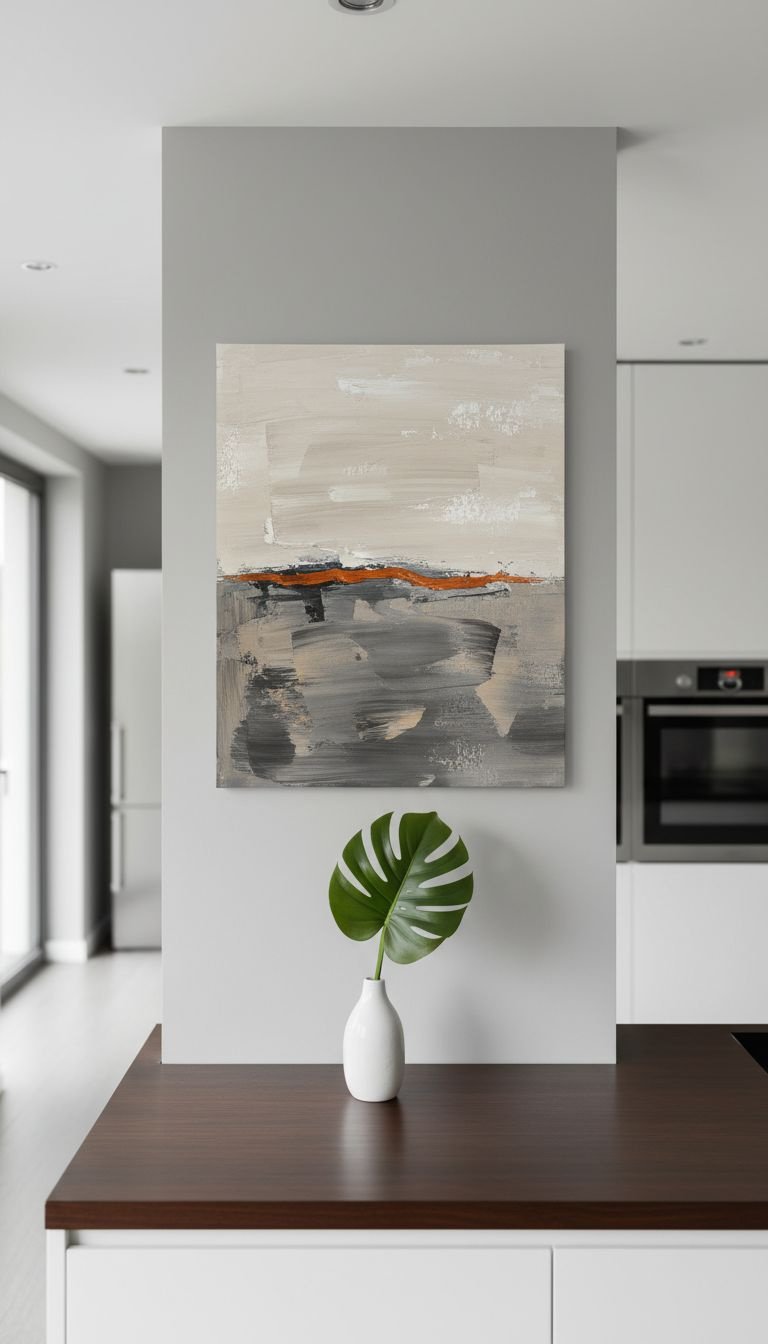
Save this bold statement piece to your ‘Dream Kitchen’ board!
Nothing says “intentional” like a single, impactful focal point. An oversized abstract canvas with a neutral palette is the perfect solution for a large, blank kitchen wall. This approach creates a high-end, gallery-like feel, making the art the undisputed star of the room. It’s a simple yet powerful way to add sophistication and personality to your modern kitchen.
Materials Needed:
- One oversized abstract canvas print (look for sizes 36″x36″ or larger)
- Heavy-duty picture hanging kit rated for the canvas’s weight
- Tape measure
- Laser level
- Pencil
Step-by-Step Directions:
- Measure Your Wall: Determine the center point of the wall space you want to fill. The center of your art piece should hang at average eye level, around 57-60 inches from the floor.
- Position the Art: Lightly mark the wall where the top of the canvas will be. Use your level to ensure your marks are straight.
- Install Hardware: Following the instructions on your picture hanging kit, install the hardware into the wall. Use wall anchors if you are not drilling into a stud.
- Hang and Adjust: Hang your canvas and use the level to make any final adjustments until it is perfectly straight.
Pro-Tip: The art should be about two-thirds the width of any furniture or counter space it hangs above. This ensures the scale feels intentional and balanced, not random.
2. Install a Single, Curated Floating Shelf
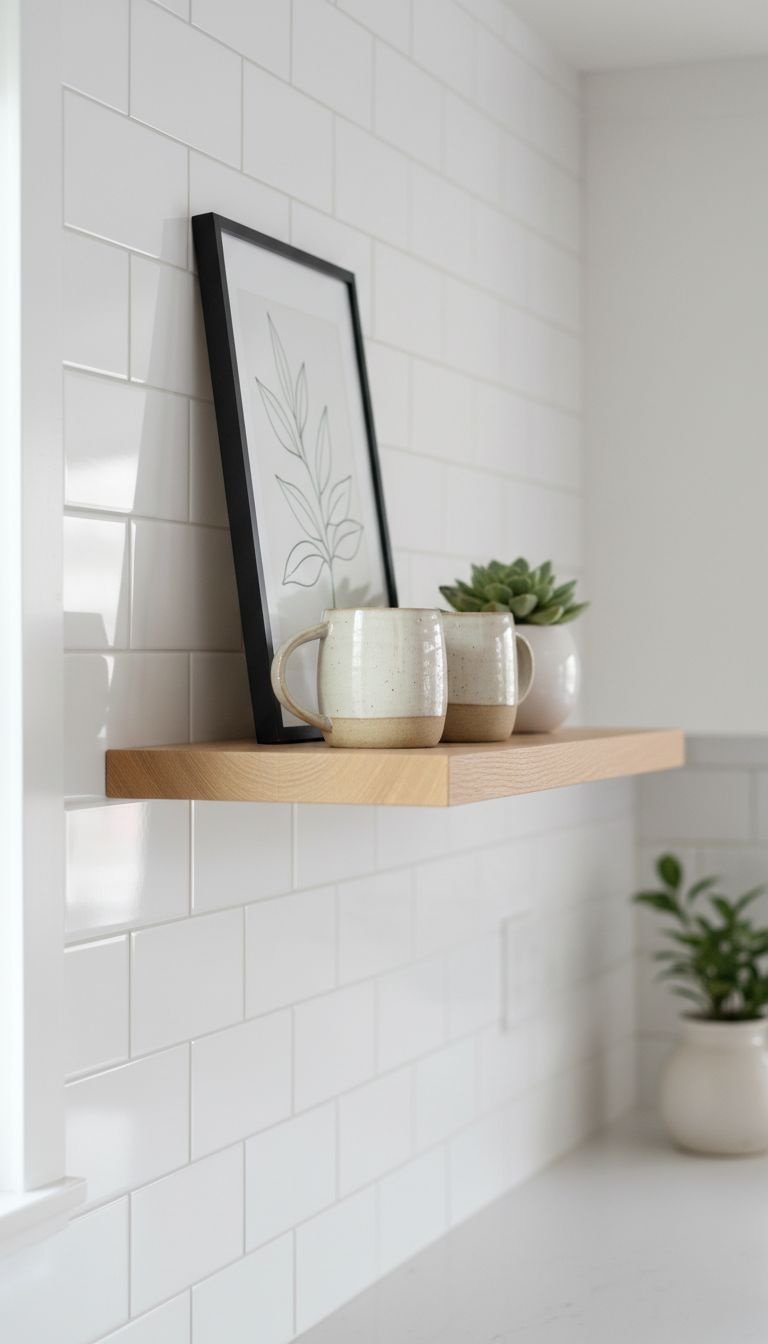
Pin this perfect blend of style and function for your kitchen!
Minimalism often embraces functionality. A single floating shelf, made from a natural material like light oak, is the perfect example of functional kitchen decor. It breaks up a blank wall while providing a small, curated space to display your most beautiful and practical items—think handmade ceramic mugs, a small plant, and a favorite cookbook. It’s an ideal solution for a small kitchen wall where every inch counts.
Materials Needed:
- One high-quality floating shelf with hidden brackets (light oak or white is ideal)
- A curated selection of 3-5 objects (e.g., favorite mugs, a small plant, a cookbook)
- Stud finder
- Drill with appropriate bits
- Level and tape measure
Step-by-Step Directions:
- Choose Location: Decide on the placement for your shelf. It’s great above a coffee station or on a smaller, empty wall.
- Find Studs: Use a stud finder to locate the wall studs. Installing shelves into studs provides the most secure support. Mark the stud locations.
- Mount Bracket: Hold the shelf’s mounting bracket against the wall, using a level to ensure it’s straight. Mark the drill holes over the studs.
- Drill and Attach: Drill pilot holes, then securely screw the mounting bracket to the wall.
- Style the Shelf: Slide the shelf onto the bracket. Arrange your 3-5 curated items, grouping them in a visually pleasing way. Remember to leave some empty “breathing” space.
Lesson Learned: The key to a minimalist shelf is ruthless editing. Only display your most beautiful and meaningful items. If it feels cluttered, remove one thing.
3. Create a Botanical Line Art Grid
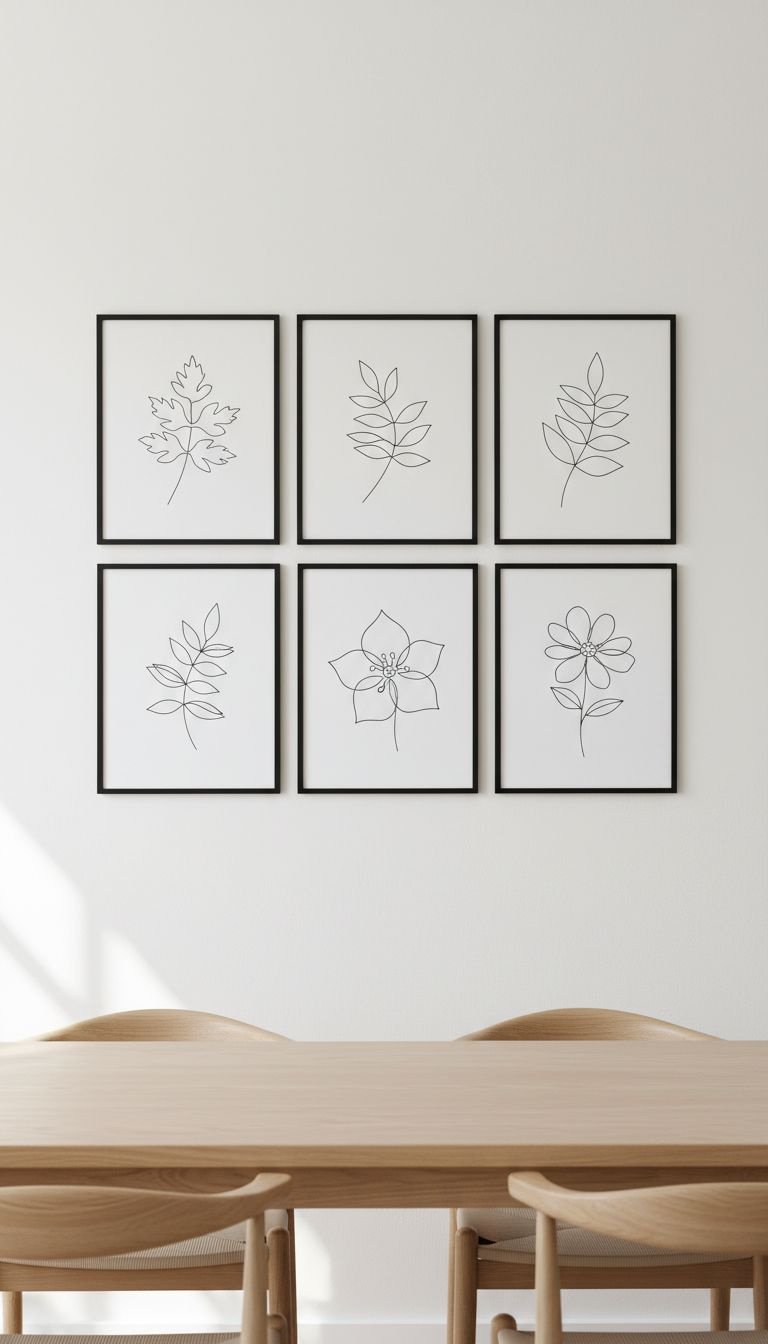
Love this simple, elegant look? Save it for later!
A gallery wall can be minimalist if done with precision and restraint. Creating a symmetrical grid of simple botanical line art prints is a perfect way to achieve this. Using identical thin, black metal frames and maintaining consistent spacing creates a single, cohesive unit that feels organized and calm, not cluttered. This black and white kitchen print idea brings a touch of nature indoors without overwhelming the space.
Materials Needed:
- A set of 4, 6, or 9 matching botanical line art prints
- Identical thin-profile frames for each print
- Laser level
- Measuring tape
- Removable picture hanging strips or small nails
Step-by-Step Directions:
- Plan Your Layout: Lay the framed prints on the floor to determine your ideal spacing. A consistent 2-3 inch gap between each frame works well for a clean look.
- Measure Total Dimensions: Measure the total height and width of your planned grid, including the gaps.
- Mark the Center: Find the center point on your wall where the entire grid will be placed.
- Hang the First Piece: Start by hanging the top-center (or top-left) frame. Use your level to ensure it’s perfectly straight.
- Build Out the Grid: Use your measuring tape and level to hang the remaining frames, maintaining your planned spacing meticulously. Using removable strips allows for easy adjustments.
Pro-Tip: For a truly professional look, use a paper template for each frame. Tape the templates to the wall first to visualize the entire layout before making any holes.
4. Lean a Large Framed Print on the Counter
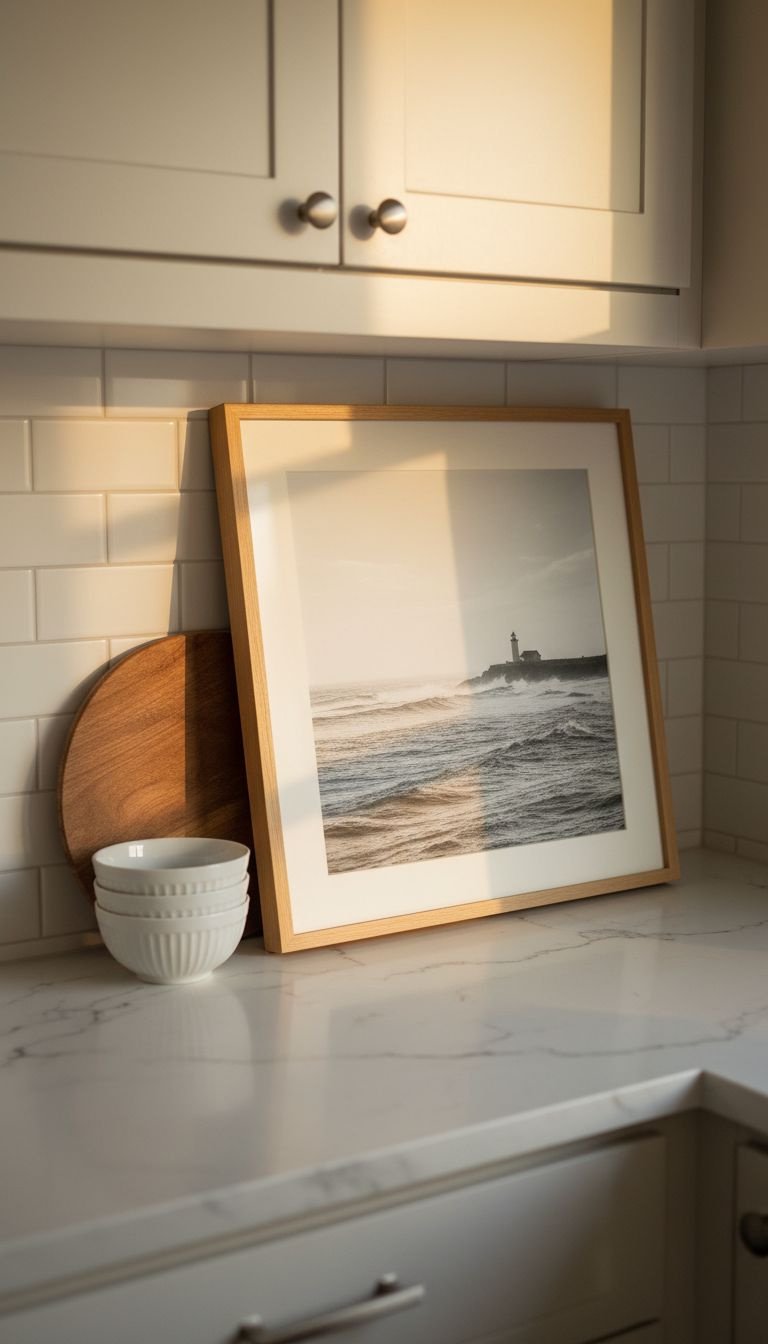
An effortlessly chic idea for renters! Pin it now.
Who says art has to be hung? For an effortlessly casual and layered look, lean a large framed print directly on your countertop against the backsplash. This is a perfect damage-free decorating solution for renters or for anyone who likes to change their decor frequently. It adds an artistic touch to an often-overlooked space and allows you to play with layering objects like cutting boards and vases.
Pieces Needed:
- One large framed print or photo (18″x24″ or larger works well)
- A clear and uncluttered section of countertop
- 2-3 supporting objects for layering (e.g., a cutting board, a vase)
- Small, clear rubber feet for the bottom of the frame (optional, for grip)
Styling Tips:
- Select Your Spot: Choose a corner or a section of your countertop that doesn’t see heavy daily use. Against the backsplash is perfect.
- Create a Base Layer: Place a larger, flat object like a beautiful wooden or marble cutting board against the backsplash first.
- Lean the Art: Rest the bottom of your framed print on the counter, leaning it securely against the cutting board and wall.
- Add Depth: Place a smaller object, like a vase with a single stem or a salt cellar, slightly in front of the frame to create a layered, dimensional look.
Pro-Tip: This technique works best with a substantial frame. A thin, flimsy frame might look lost. Choose a frame with a bit of weight and presence to anchor the look.
5. Embrace Functional Art with a Wooden Pegboard
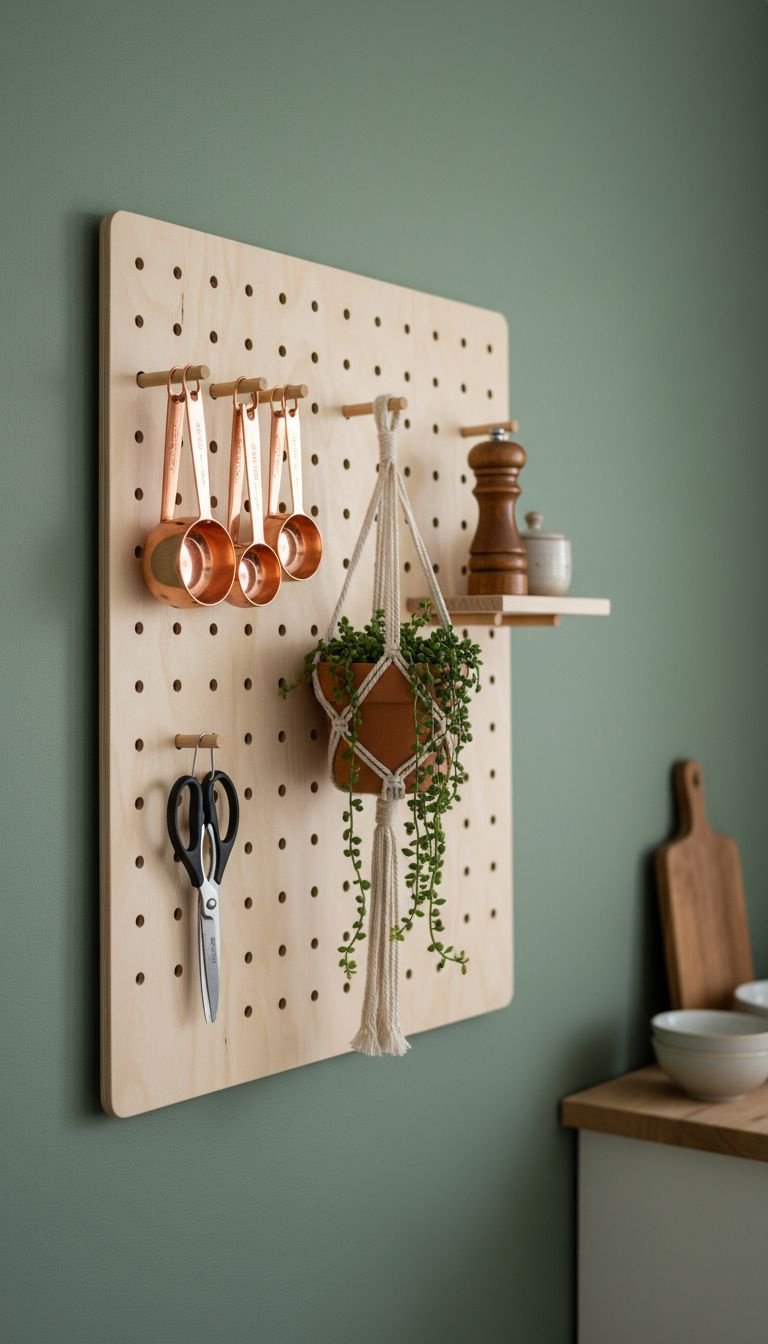
Organization that looks like art? Yes, please! Pin this idea.
Embodying the “form follows function” principle, a wooden pegboard turns everyday kitchen tools into a modular art display. This Japandi-style solution combines the warmth of natural wood with ultimate customizability. By carefully curating your most beautiful and functional items—like copper measuring cups or wooden-handled utensils—you create a living piece of functional art that is both practical and beautiful.
Materials Needed:
- One high-quality plywood pegboard panel
- A set of wooden pegs and small shelves designed for the pegboard
- Wall mounting hardware (included with most pegboards)
- Drill, level, and stud finder
- A curated set of your most attractive utensils and tools
Step-by-Step Directions:
- Mount the Panel: Follow the manufacturer’s instructions to securely mount the pegboard to your wall. Use a level and find studs for the strongest installation.
- Arrange the Pegs: Begin placing pegs and shelves into the board. Think about balance and visual weight. Group similar items together.
- Hang Functional Items: Hang your most-used (and best-looking) items, like measuring cups, scissors, or a small pan.
- Add Decorative Touches: Add one or two purely decorative items, like a small trailing plant or a tiny framed photo, to soften the look.
- Edit and Refine: Step back and edit. The goal is to look artfully arranged, not like a crowded hardware store display. Remove anything that feels out of place.
Pro-Tip: Choose a theme for the items you display. For example, use all copper and wood utensils, or stick to a black and stainless steel theme for a cohesive, intentional aesthetic.
6. Use a Diptych or Triptych for a Wide Wall
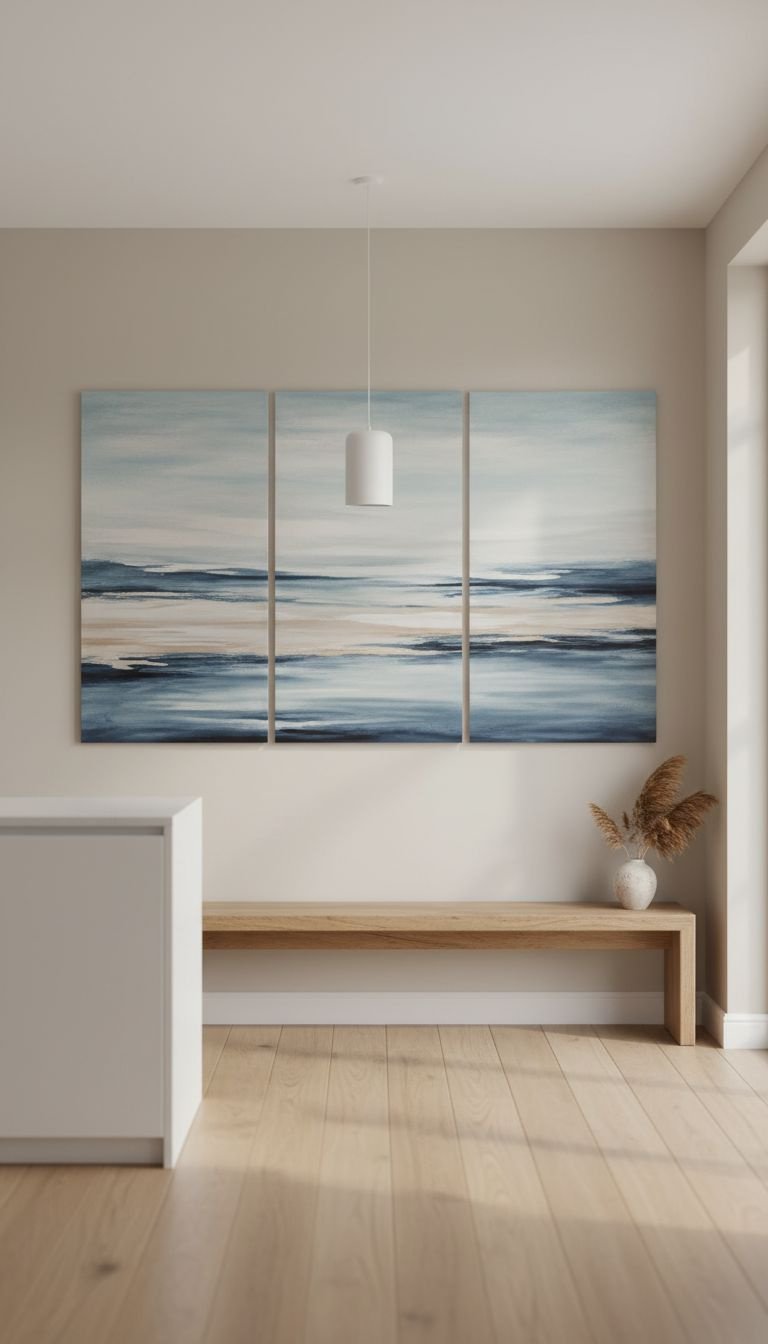
The perfect solution for a long, empty wall. Pin this idea!
A long or wide kitchen wall can be especially tricky to decorate. A diptych (two panels) or a triptych (three panels) is an elegant solution. This multi-panel canvas art fills the space in a structured, intentional way. Look for a continuous abstract landscape or a cohesive set of prints. The separation between the panels maintains a sense of order and rhythm, making it feel less like one massive object and more like a curated installation.
Materials Needed:
- A two-panel (diptych) or three-panel (triptych) art set
- Laser level
- Tape measure
- Pencil
- Hanging hardware appropriate for the art’s weight
Step-by-Step Directions:
- Plan Spacing: The key to a successful multi-panel piece is consistent spacing. A gap of 1.5 to 3 inches between each panel is standard.
- Find the Center: Measure the total width of the art including the gaps. Find the center point on your wall.
- Hang the Center Panel: If using a triptych, hang the center panel first. Use your level to ensure it is perfectly straight.
- Hang Side Panels: Measure your desired gap distance out from the center panel on both sides. Mark and hang the left and right panels.
- Double Check with Level: Use your level across the tops of all panels to ensure they are perfectly aligned.
Pro-Tip: Before making any holes, lay all the panels face-down on the floor with the correct spacing. Measure the distance from the top of the canvas to the hanging hook on the back. Use this measurement to place your nails/screws accurately on the wall.
7. Display a Single, Sculptural Wall Sconce

Let your lighting be the art. Save this brilliant idea.
Sometimes the most beautiful decor is also the most practical. A single, sculptural wall sconce can act as a piece of art on its own. Choose a modern wall light with an interesting shape and high-quality materials, like matte black metal or brass. When placed on an otherwise empty wall, it becomes a focal point that also adds warm, ambient accent lighting to your kitchen, enhancing the mood in the evenings.
Materials Needed:
- One design-forward, sculptural wall sconce (ensure it is UL listed)
- Warm-tone LED bulb (approx. 2700K color temperature)
- Potentially, an electrician for hardwiring
- For plug-in option: A plug-in sconce model, cord clips
Step-by-Step Directions:
- Choose Your Sconce: Select a sconce that looks like a piece of art even when it’s off. Look for interesting shapes and high-quality materials like brass or matte black metal.
- Determine Placement: Sconces are perfect for flanking a window, a doorway, or for adding light to a dark corner or breakfast nook.
- Installation (Hardwired): We strongly recommend hiring a licensed electrician for this. They will safely run wiring and install a junction box to mount your light.
- Installation (Plug-in): If you choose a plug-in model, simply mount the sconce to the wall with the included hardware. Use subtle cord clips or a cord cover to neatly run the wire down the wall to an outlet.
- Add the Right Bulb: Screw in a warm LED bulb. The quality of the light is as important as the fixture itself for creating a cozy atmosphere.
Lesson Learned: Many beautiful hardwired sconces can be converted to plug-in models using a simple lamp kit from a hardware store. This is a great renter-friendly tips.
8. Hang a Simple, Modern Wall Clock

Timeless design, literally. Save this functional decor idea.
A clock is a kitchen essential, so why not make it a beautiful one? A large, minimalist wall clock with no numbers and elegant hands can serve as a stunning piece of functional art. Look for designs made from interesting materials like concrete, natural wood, or metal. When hung on a prominent wall, it acts as a simple, graphic focal point that is both useful and aesthetically pleasing.
Materials Needed:
- One large, design-forward minimalist wall clock (at least 15″ in diameter)
- AA battery
- Picture hook or screw and anchor suitable for the clock’s weight
- Tape measure and pencil
Step-by-Step Directions:
- Select the Right Clock: Look for clocks with simple faces, no numerals (or very minimal ones), and high-quality materials like wood, metal, or concrete. The design itself should be the main feature.
- Choose the Perfect Spot: A clock works well on a central wall, high above a doorway, or on a wall in the kitchen’s dining area. Ensure it’s easily visible from most of the room.
- Measure and Mark: Decide on the hanging height. Unlike art, clocks are often hung higher than eye level for better visibility. Mark where the hook will go.
- Install Hook and Hang: Install your hook or screw securely into the wall. Insert the battery into your clock, set the time, and hang it.
Pro-Tip: Consider the sound. If you’re sensitive to noise, look specifically for clocks with a “silent sweep” or “non-ticking” mechanism for a truly serene environment.
9. Create Your Own Textured Plaster Art
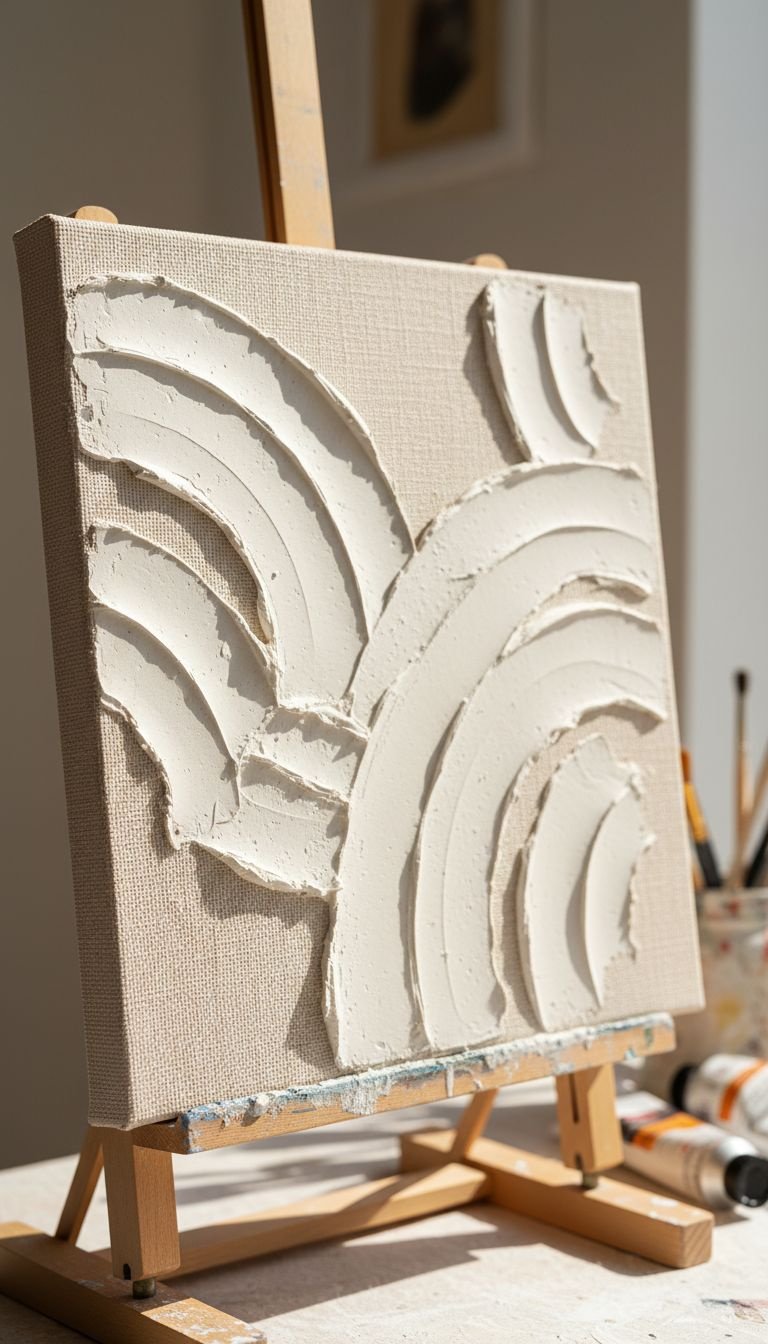
DIY high-end decor on a budget. You have to try this!
One of the biggest trends in minimalist decor is textured art, and it’s surprisingly easy to make yourself. This budget-friendly DIY project lets you create a custom, high-end looking piece with just a canvas and some joint compound. The beauty is in the monochromatic, sculptural quality. The simple texture creates depth and catches the light beautifully, adding a sophisticated, handmade touch to your kitchen.
Materials Needed:
- A blank artist’s canvas (any size)
- Pre-mixed joint compound or drywall spackle
- A putty knife or old credit card
- Optional: A notched trowel for creating lines
- Optional: White or beige acrylic paint and a paintbrush
Step-by-Step Directions:
- Prep Your Surface: Lay down newspaper or a drop cloth to protect your workspace.
- Apply the Compound: Scoop a generous amount of joint compound onto your canvas.
- Create Texture: Use your putty knife to spread the compound across the canvas. Create sweeping arches, straight lines, or organic patterns. Experiment with different tools to create varied textures.
- Let It Dry: Allow the compound to dry completely. This can take 24-48 hours depending on the thickness. It will lighten in color as it dries.
- Optional – Paint: Once dry, you can leave the natural white color or paint over it with a single, uniform color like beige or cream for a cohesive look.
Lesson Learned: Don’t overthink it! The beauty of this project is in its organic, imperfect nature. The less you try to make it perfect, the more artistic it will look.
10. Hang a Woven Textile or Wall Hanging
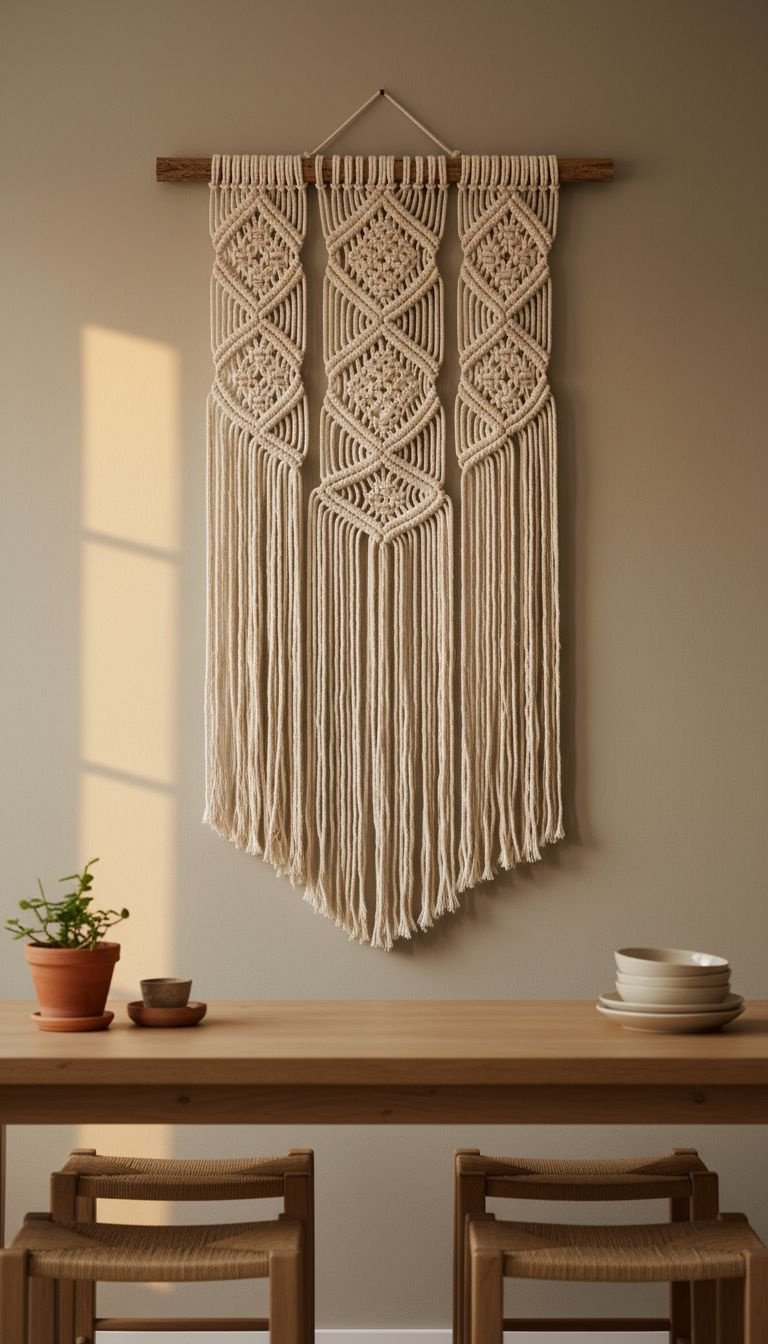
Add instant warmth and texture with this idea. Pin it!
A common concern with minimalist design is that it can feel cold. The easiest way to combat this is by introducing texture. A woven or macrame wall hanging in a neutral color is a perfect way to add instant warmth, softness, and a touch of boho or hygge style to your kitchen. The natural fibers and handmade quality provide a beautiful contrast to the sleek, hard surfaces of a modern kitchen.
Materials Needed:
- One woven or macrame wall hanging
- A picture hook or nail
- Hammer
- Tape measure
Styling Tips:
- Choose the Right Textile: For a minimalist look, choose a wall hanging in a neutral color like cream, beige, or charcoal. Focus on interesting textures and simple geometric patterns rather than loud colors.
- Consider the Location: Textiles are perfect for a dining nook wall or any area away from direct splashes from the sink or stove.
- Hang Simply: These pieces typically hang from a single nail or hook at the center of the dowel. Measure to find your center point on the wall and hang.
- Let It Breathe: A textile piece makes a strong statement on its own. Don’t crowd it with other decor. Let it be the sole textural feature on that wall.
Pro-Tip: If the textile arrives folded or creased, gently steam it with a handheld garment steamer or hang it in a steamy bathroom for an hour to release the wrinkles.
11. Use a Trio of Small Bud Vases
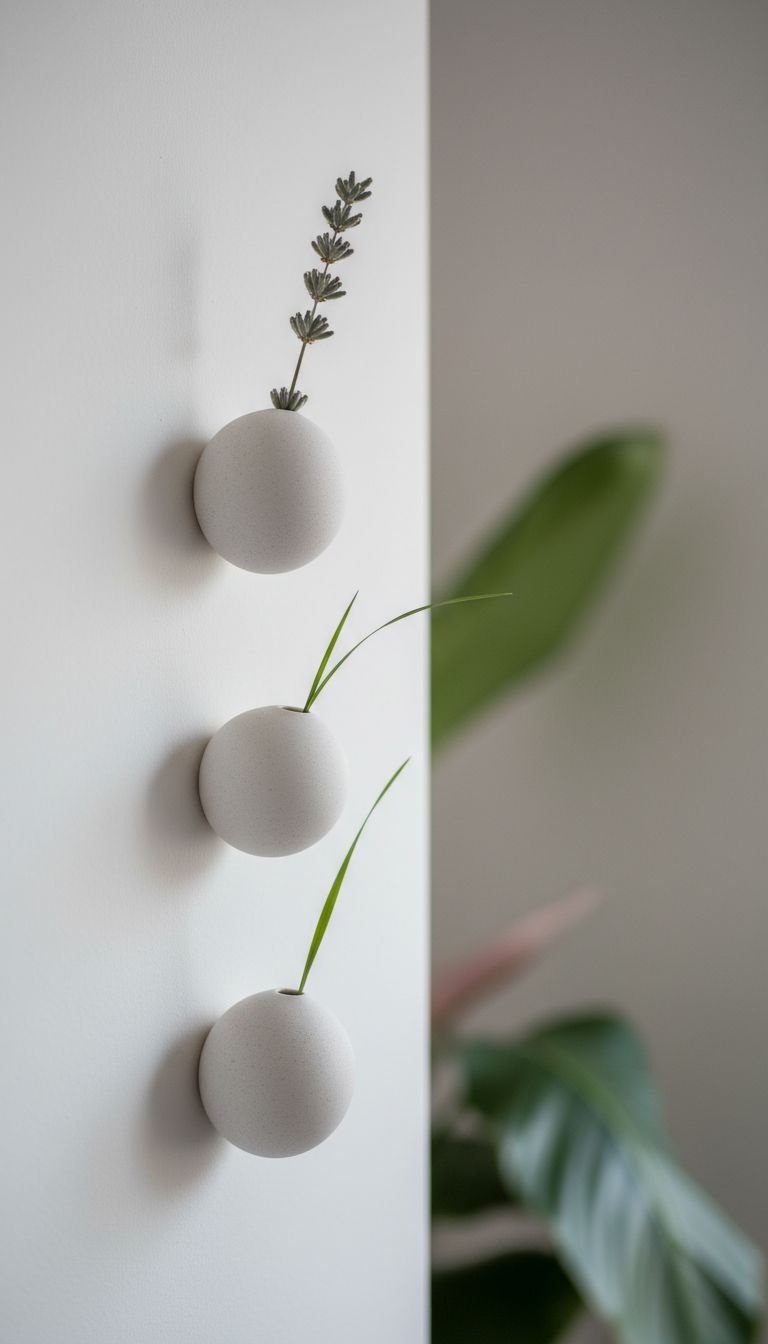
A tiny touch of nature makes all the difference. Save this delicate idea.
Minimalism is often about celebrating small, beautiful details. For a narrow or awkward strip of wall—like the space next to a window or cabinet—a trio of small, wall-mounted ceramic bud vases is a delicate and unique solution. This organic modern decor idea allows you to bring in a tiny touch of nature with a single sprig of dried lavender or eucalyptus. It’s a subtle accent that makes a big impact.
Materials Needed:
- A set of 3 matching small, wall-mounted bud vases
- Small wall anchors and screws (often included)
- A few sprigs of dried flowers or faux greenery
- Level and tape measure
Step-by-Step Directions:
- Plan the Arrangement: Decide if you want to hang them in a vertical line, a horizontal line, or a small, staggered cluster. A vertical line is excellent for narrow walls.
- Mark Your Spots: Use a tape measure and level to mark where each vase will go. Aim for about 4-6 inches of space between them.
- Install Hardware: Drill small pilot holes, insert the wall anchors, and then screw the vases’ mounting hardware into place.
- Add a Single Stem: Place one single, delicate stem of dried eucalyptus, lavender, or a blade of faux grass into one or two of the vases. Leave at least one empty to embrace negative space.
Pro-Tip: This idea is about extreme simplicity. Resist the urge to put a full bouquet in the vases. The beauty comes from a single, sculptural stem.
12. Mount a Magnetic Wooden Knife Strip
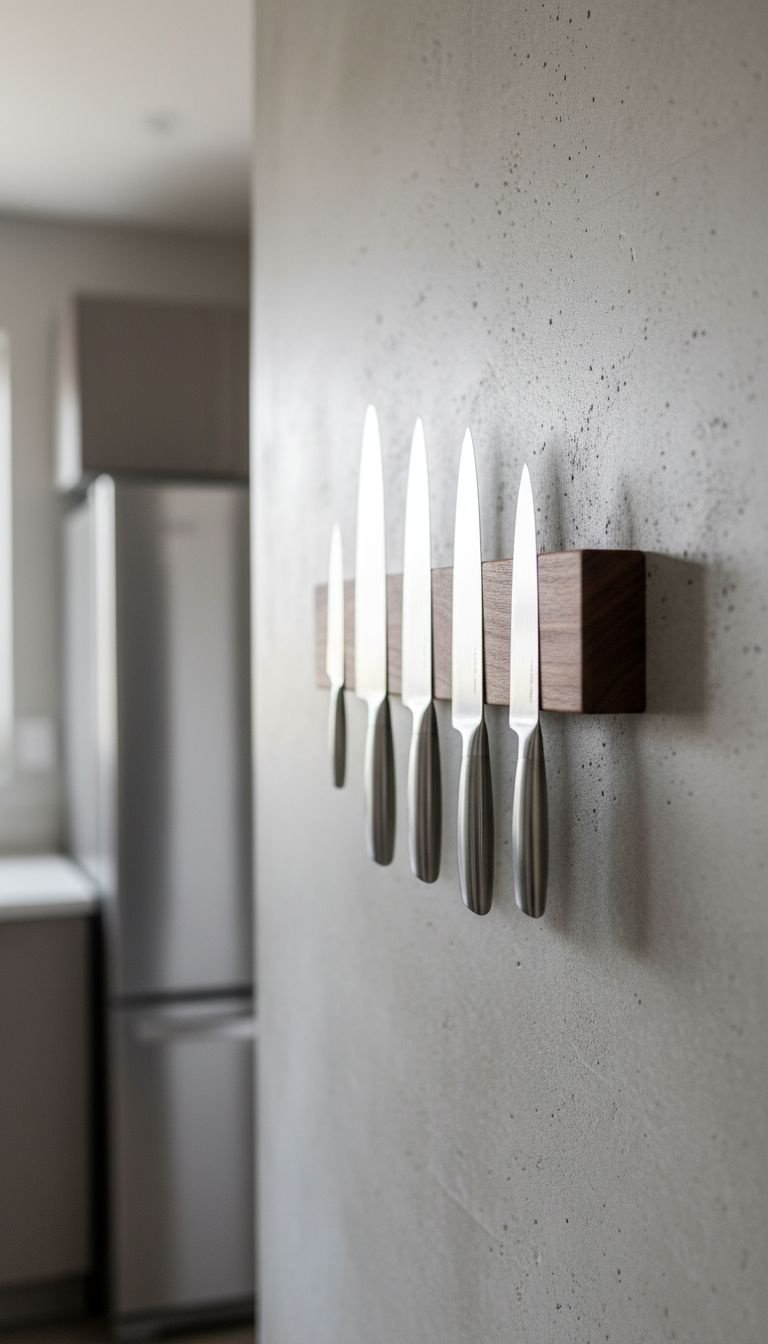
The ultimate in form and function. Pin this sharp idea!
One of the best ways to achieve a minimalist kitchen is to clear your countertops. A magnetic knife strip is a perfect alternative to a bulky knife block. When you choose a strip made from a beautiful material like walnut or oak, it becomes a piece of functional decor. Your set of high-quality knives is transformed into a clean, organized, and surprisingly artful wall display.
Materials Needed:
- High-strength magnetic knife strip (wood finishes like oak or walnut look best)
- Mounting hardware (screws and anchors included)
- Drill
- Level, pencil, and tape measure
- A good quality set of knives
Step-by-Step Directions:
- Choose a Safe Location: Mount the strip on a wall over a counter where you have clear space, away from high-traffic areas and out of reach of children.
- Mark for Mounting: Hold the strip against the wall and use a level to get it straight. Mark the locations for the mounting screws with a pencil.
- Drill and Mount: Drill pilot holes and insert wall anchors for a secure fit. Screw the knife strip firmly to the wall.
- Arrange Your Knives: Place your knives on the strip, leaving a small, even space between each one. Arrange them by size for a clean, professional look.
Lesson Learned: Invest in a strip with a very strong magnet. A weak magnet is not only frustrating but also a safety hazard. Read reviews to ensure it can hold your heaviest knives securely.
13. Paint a Simple Geometric Accent Shape
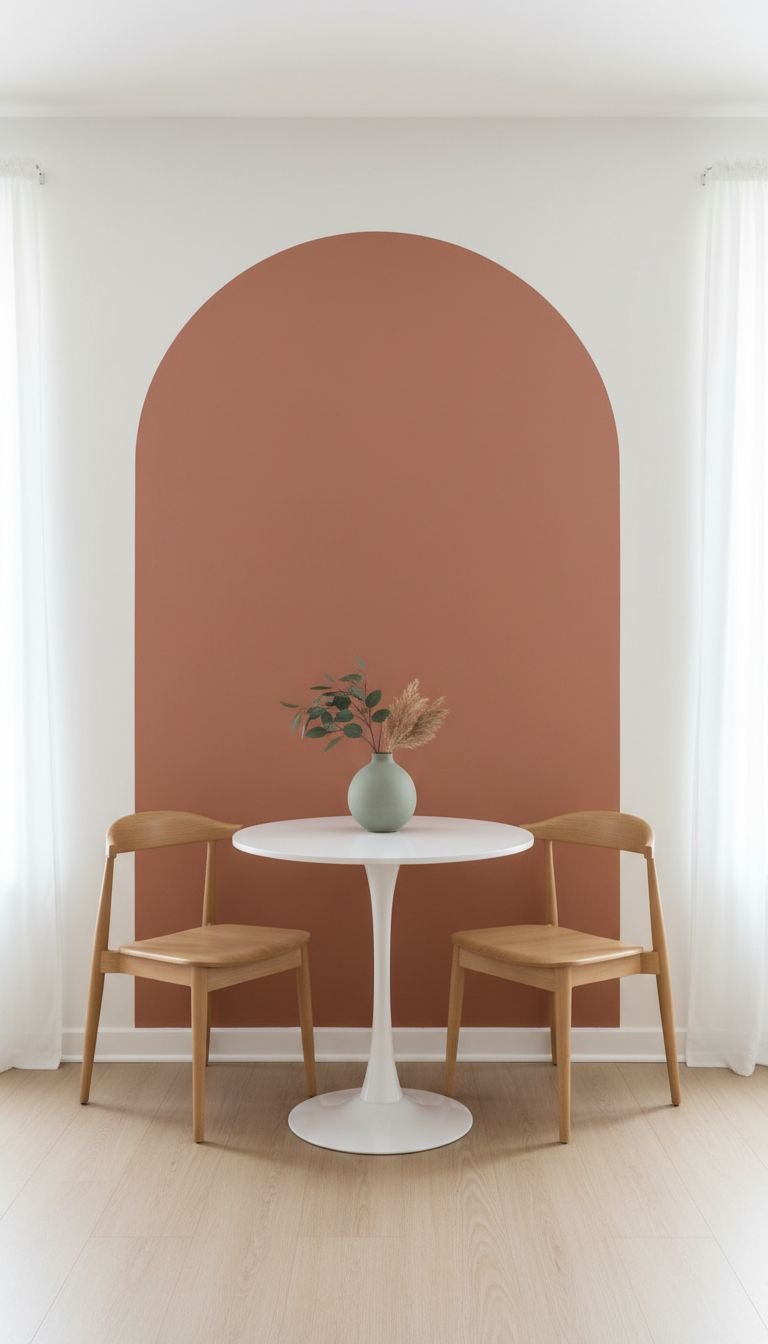
High impact, low cost. Save this amazing paint tips!
Sometimes the simplest decor isn’t an object at all—it’s paint. Creating a geometric accent shape, like a large painted arch or a simple color-blocked circle, is a high-impact, low-cost way to create a focal point. This DIY kitchen accent wall technique defines a space, like a breakfast nook, and adds a pop of personality and color without adding any physical clutter. It’s the ultimate budget kitchen decor tips.
Materials Needed:
- A sample pot of interior wall paint in an accent color
- High-quality painter’s tape (like FrogTape)
- Pencil, string, and a thumbtack (for drawing an arch)
- Small paint roller and tray
- A small angled paintbrush for cutting in
Step-by-Step Directions:
- Design Your Shape: Decide on your shape. A large half-circle or arch behind a small table is a popular choice.
- Draw the Outline (for an arch): To draw a perfect arch, tie a string to a pencil. Pin the other end of the string to the wall at the center-bottom of your desired arch. Keeping the string taut, draw the curve. Use a level to draw the straight vertical sides.
- Tape the Edges: Carefully apply painter’s tape along the outside of your pencil lines. Press the edges down firmly to prevent bleeding.
- Paint the Shape: Use your small brush to “cut in” along the tape line first. Then, use the small roller to fill in the rest of the shape. Apply a second coat if needed.
- Remove the Tape: Peel off the painter’s tape while the paint is still slightly wet, pulling it away from the painted area at a 45-degree angle for the crispest line.
Pro-Tip: Before you start, test your paint color by painting a small swatch on the wall and letting it dry. Colors can look very different on the wall than they do in the can.
Key Takeaways: Your Quick Guide to Minimalist Kitchen Decor
- Embrace “Less, But Better”: Start by choosing one single focal point for your wall rather than trying to fill it with many small things.
- Scale is Everything: Ensure your art is properly scaled to the wall. A common guideline is to aim for art that is about two-thirds the width of any furniture below it.
- Texture Adds Warmth: In a neutral, minimalist space, use natural materials like wood, woven textiles, and textured plaster to prevent the room from feeling cold or sterile.
- Function Can Be Beautiful: Don’t overlook functional items as decor. A beautiful modern clock, a sculptural light, or a wooden knife strip can be stylish and purposeful.
- DIY for a Personal Touch: Budget-friendly projects like creating your own textured plaster art or painting a geometric arch can have the biggest and most personal impact.
FAQs About kitchen wall decor minimalist
What can I put on my kitchen walls besides pictures?
Beyond pictures, minimalist kitchen walls look great with functional items. Consider installing a single floating shelf for curated mugs, a sculptural wall sconce for ambient lighting, a large modern clock, or a beautiful wooden magnetic knife strip. These items add style while serving a purpose.
How do I make my minimalist kitchen not look boring or cold?
The key to a warm minimalist kitchen is texture and natural materials. Introduce elements like a woven wall hanging, a wooden cutting board, or art with visible texture like a plaster canvas. Adding a small plant or a few stems of dried botanicals also brings life and organic softness to the space.
What is the rule for hanging art in a kitchen?
Hang art at eye level, with the center of the piece about 57-60 inches from the floor. This standard design rule ensures the art feels connected to the human scale of the room. If hanging above a counter, leave at least 5-8 inches of space between the counter and the bottom of the frame.
Can you put canvas art in a kitchen?
Yes, you can absolutely hang canvas art in a kitchen. It’s best to place it away from direct sources of high heat, steam, or grease, such as directly over the stove. A wall in a breakfast nook or on the far side of the kitchen is a perfect location.
Final Thoughts
Decorating a minimalist kitchen isn’t about filling empty space; it’s about creating a feeling of calm, order, and intentional beauty. By choosing one idea that truly resonates with you and executing it thoughtfully, you can transform that one blank wall and change the entire feel of your space. Remember the principles of intention, space, and cohesion, and you’ll create a kitchen you love spending time in.
Your kitchen is the heart of your home. Which of these ideas felt most like “you”?
Last update on 2026-01-15 at 12:33 / Affiliate links / Images from Amazon Product Advertising API
