
As an Amazon Associate KitchenwareSets.com earns from qualifying purchases.
Santa Maria Built-In Wood Burning Grill: Master Outdoor Cooking for Home Chefs
Are you dreaming of an outdoor kitchen that delivers restaurant-quality wood-fired flavor right in your backyard? A Santa Maria built-in wood burning grill might be exactly what you’re looking for — but choosing the right one can feel overwhelming with all the material and installation details.
A Santa Maria built-in wood burning grill is a live‑fire cooking appliance featuring a height‑adjustable grate system operated by a hand‑crank, designed to be permanently installed into a masonry island. It runs on wood or charcoal, giving you authentic wood‑fired flavor and precise heat control that no standard gas grill can match.
Drawing from years of outdoor kitchen design and live‑fire cooking expertise, this guide breaks down every essential feature — from firebox materials to ventilation requirements — so you can confidently plan your custom build. You’ll learn what separates a high‑performance grill from a mediocre one, and discover how to get the most out of your investment.
Contents
show
What Is a Santa Maria Built‑In Wood Burning Grill? A Complete Guide for Home Chefs
A Santa Maria built‑in wood burning grill is a drop‑in outdoor cooking appliance with a height‑adjustable grate, designed for permanent installation into a masonry island. Its defining feature is a hand‑crank mechanism that lets you raise or lower the cooking grate over an open wood fire. This gives you incredible control over heat intensity — sear steaks by lowering the grate, then lift it for slow‑roasting without adding fuel. Unlike gas grills, the fuel is wood (traditionally red oak) or charcoal, producing a distinctive smoky flavor that home chefs crave.
The grill’s origins trace back to California’s Central Coast, where rancheros and cowboys cooked tri‑tip over open pits. Modern versions incorporate heavy‑duty materials like 10‑gauge carbon steel or 304 stainless steel, ceramic firebrick linings, and ratcheting hand wheels. They’re built to last decades and integrate seamlessly into custom outdoor kitchens. If you’re serious about live‑fire cooking and want a permanent setup that becomes the centerpiece of your patio, this grill type is worth serious consideration.
9 Essential Features of a Santa Maria Built‑In Wood Burning Grill for Your Outdoor Kitchen
Your outdoor kitchen deserves a grill that performs as good as it looks. Every feature matters — from the metal that contains the fire to the grates that hold your tri‑tip. Below we dive into the nine critical components that separate a premium Santa Maria built‑in wood burning grill from an ordinary one. Whether you’re comparing models or planning your masonry island, these details will help you make the right call.
1. The Firebox: Stainless Steel vs 10‑Gauge Carbon Steel

Pin this firebox comparison to your Outdoor Kitchen Inspiration board!
The firebox is the heart of your grill — it holds the fire and determines heat retention, longevity, and overall cooking performance. Here’s where you’ll choose between stainless steel and 10‑gauge carbon steel.
What You Need
- Carbon steel firebox (10‑gauge, 3/16″ thick)
- Stainless steel firebox (304 grade, 14‑gauge)
- Refractory firebricks (high‑heat ceramic)
- Firebox mounting flange (for drop‑in installation)
- High‑temperature gasket (for air‑tight seal)
Steps to Evaluate
- Weigh the heat retention: carbon steel holds heat longer for slow cooking.
- Check corrosion resistance: stainless steel is better for humid or coastal areas.
- Compare weight: carbon steel is heavier, requiring sturdier masonry support.
- Check warranty: many carbon steel fireboxes come with a lifetime guarantee against burn‑through.
- Consider aesthetics: brushed stainless matches modern outdoor kitchens; carbon steel develops a patina.
| Feature | Stainless Steel (304) | 10‑Gauge Carbon Steel |
|---|---|---|
| Heat retention | Moderate (radiates quickly) | Excellent (stores heat) |
| Corrosion resistance | Very high | Low (needs seasoning) |
| Weight | Lighter (easier install) | Heavier (needs strong island) |
| Lifespan | 15–20 years | 20+ years with care |
| Cost | Higher | Moderate |
Pro‑Tip: In my experience building custom islands, carbon steel fireboxes paired with ceramic brick lining outperform stainless in retaining searing heat for tri‑tip, but require quarterly seasoning to prevent rust.

2. The Hand‑Crank Adjustable Grate System

Save this hand‑crank close‑up for your outdoor kitchen planning!
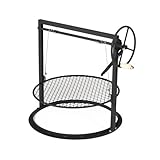
The hand‑crank mechanism is what makes a Santa Maria grill unique. It allows you to adjust the grate height from 4 inches (for searing) up to 12 inches (for gentle roasting) with a simple turn of a ratcheting wheel.
What You Need
- Ratcheting hand wheel (stainless steel or zinc‑plated)
- Stainless steel aircraft cable or chain
- Grate lifting brackets (weld‑on or bolt‑on)
- Greaseable pivot pins
- Locking pawl mechanism
Steps to Adjust Grate Height
- Turn the hand wheel counter‑clockwise to raise the grate (lift away from heat).
- Turn clockwise to lower the grate (closer to flames).
- Use the ratcheting click to lock in place – never rely on friction alone.
- Adjust after the fire has settled (5–10 minutes) for best heat control.
- Clean the mechanism regularly to prevent jamming from grease buildup.
Pro‑Tip: I’ve seen many drop‑in grills use a simple chain system; upgrade to a stainless steel aircraft cable for smoother operation and longer life. Test the range of motion before finalizing your masonry cut‑out.
3. V‑Grates vs Round Bar Grates: Why Grease Management Matters

Save this grease‑management hack to your BBQ tips board!
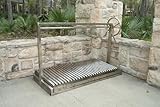
Grease drips onto hot coals cause flare‑ups that burn food and create uneven cooking. The grate design plays a huge role in preventing that. Santa Maria grills typically come with either V‑shaped channel grates or traditional round bar grates.
What You Need
- V‑shape stainless steel grates (4–6 mm thick bars)
- Round bar grates (common alternative)
- Grease drip tray (if not integrated)
- Grill brush with stiff bristles
- Drop‑in cooking griddle (optional interchangeable)
Steps to Choose
- Decide if flare‑up prevention is your top priority – V‑grates are superior.
- Evaluate clean‑up: V‑grates are harder to brush than round bars.
- Consider sear marks: V‑grates produce deep, professional grill marks.
- Check compatibility with your firebox dimensions.
- If you cook delicate foods (fish, vegetables), choose a finer V‑pattern or add a griddle top.
| Feature | V‑Grates | Round Bar Grates |
|---|---|---|
| Grease drainage | Excellent (channels to sides) | Poor (drips straight down) |
| Flare‑up reduction | High | Low |
| Sear marks | Deep, beautiful | Round, uneven |
| Cleaning effort | Higher | Easier |
| Best for | Fatty meats (tri‑tip, pork) | Lean cuts, veggies |
Pro‑Tip: I recommend V‑grates for anyone cooking high‑fat meats like tri‑tip or pork shoulder – the angled channels route grease to the sides, drastically reducing flare‑ups. Remember to season new V‑grates with oil before first use.
4. Brasero Burn Box: Continuous Embers for Long Cooks

Pin this brasero setup for your next long cook!
A brasero is a separate side chamber that burns wood continuously to produce a steady supply of embers. Instead of constantly adding logs to your main firebox, you scoop embers from the brasero to maintain cooking temperature. This is a game‑changer for low‑and‑slow cooks or when using a rotisserie.
What You Need
- Brasero burn box (separate chamber, typically 12″x12″x8″)
- Stainless steel fire grate inside brasero
- Ash drawer or clean‑out door
- Wood supply (seasoned red oak or hickory)
- Optional rotisserie motor and spit
Steps to Use
- Fill the brasero with kindling and small logs, ignite with a fire starter.
- Let burn for 15–20 minutes until consistent embers form.
- Use a metal shovel to transfer embers to the main firebox as needed.
- Close the brasero door to slow burn, leaving a small air gap.
- Add more wood every 30–40 minutes to maintain ember production.
- Use the brasero to sear steaks directly on its grate for extra smoky flavor.
Pro‑Tip: The brasero is a game‑changer for extended cooks. I always tell clients to include one – it turns a standard grill into a multi‑zone cooking station. Just ensure a 6″ clearance behind the brasero for ventilation.

5. Counter Drop‑In vs Full Masonry Insert: Choosing Your Installation Type

Save this installation guide to your Outdoor Kitchen Build board!
Most Santa Maria grills sold today are “drop‑in” units designed to be set into a pre‑framed opening in a masonry countertop. The grill’s flange sits flush with the surface for a clean look. A full masonry insert, on the other hand, includes a separate firebox shell that you build into the island. Drop‑in is simpler and more common for DIY projects.
What You Need
- Drop‑in grill insert with firebox
- Stainless steel counter flange (included with most units)
- Masonry block or concrete frame for island
- High‑temperature silicone sealant
- Ventilation louver or hood (if enclosed)
Steps to Install a Drop‑In Grill
- Frame the island and pour a concrete countertop that overhangs the opening by 2″.
- Cut a rough opening that matches the grill’s outer dimensions + 1/4″ clearance.
- Run gas line (if using a gas assist) or prepare a wood storage drawer below.
- Apply a bead of high‑temp silicone around the opening edge.
- Lower the grill into place, ensuring the flange sits flush on the counter.
- Secure with screws into the flange (if provided) or use weight of the grill.
- Install a back cover or ventilation panel per local fire codes.
Pro‑Tip: For a truly seamless look, use a flange‑less drop‑in design and tile over the metal edge. But leave at least 1/8″ gap for thermal expansion – trust me, you don’t want cracked tile on the first hot cook.
6. Ceramic Brick‑Lined Firebox vs Bare Steel

Save this firebox upgrade to your grilling perfection board!
Adding a layer of ceramic refractory brick inside your firebox dramatically improves heat retention. The bricks absorb heat and radiate it back, stabilizing cooking temperature and reducing wood consumption. Bare steel radiates heat away quickly and can cause hot spots.
What You Need
- Ceramic refractory bricks (standard 9″x4.5″x2.5″) or pre‑formed panels
- High‑temperature mortar (rated 2000°F+)
- Firebox shell (carbon or stainless steel)
- Angle grinder with masonry blade (for cutting bricks)
- Heat‑resistant gloves
Steps to Line a Firebox
- Measure the interior dimensions of the firebox and plan brick layout.
- Dry‑fit bricks to ensure a snug fit; cut if necessary.
- Mix high‑temperature mortar according to manufacturer’s instructions.
- Apply a 1/4″ layer of mortar to the firebox wall.
- Press each brick into place, leaving a 1/8″ mortar joint between bricks.
- Let cure for 48 hours before lighting the first fire.
- Season the bricks with a low fire (300°F) for 2 hours before full‑temperature use.
Pro‑Tip: Don’t skip the curing step! A friend of mine lit a full fire after only 12 hours and the bricks cracked. Patience here saves you from relining the whole box in a year.

7. S‑Shape Meat Hooks: For Hanging Cuts & Churrascaria Style

Save this hook setup for your next churrascaria night!
S‑shape meat hooks allow you to hang cuts directly above the fire, a technique borrowed from Argentine asado. The meat cooks by radiant heat, fat renders evenly, and the results are incredibly juicy. This works beautifully for tri‑tip, picanha, flank steak, and chicken.
What You Need
- 4–6 S‑shape stainless steel hooks (12″–18″ long)
- Grilling tongs (long handle)
- Butcher’s twine (for extra security)
- Marinated or dry‑rubbed meat cuts (tri‑tip, picanha, flank, chicken)
- Instant‑read meat thermometer
Steps to Cook with Meat Hooks
- Build a hot fire (400–500°F) and let coals settle.
- Hook the meat at a balance point – the hook should pierce through the thickest part.
- Hang the hook from the top grate bar so meat hangs vertically, 6″–8″ above coals.
- Rotate the meat every 5 minutes for even cooking.
- For larger cuts (2‑lb tri‑tip), cook 20–30 minutes, flipping orientation halfway.
- Use a thermometer to check internal temp (130°F for medium‑rare).
- Let rest 10 minutes before unhooking and slicing.
Pro‑Tip: Always hang meat with the thicker end closer to the coals – that’s where the most heat is. I also double‑loop the hook with twine for heavy cuts, just in case the hook slips.

8. Ash Removal & Grease Management: Keeping Your Grill Clean

Pin this cleaning hack to make grill maintenance a breeze!
Wood‑fired grills produce ash and grease that need regular removal to maintain performance and safety. A built‑in Santa Maria grill should have a removable ash pan and V‑grates that channel grease into a collection point. Without good grease management, flare‑ups become a constant battle.
What You Need
- Ash pan (removable, stainless steel)
- Grease drip tray (if separate from V‑grates)
- Grill brush (stiff brass bristles)
- Stainless steel cleaner and polish
- High‑heat cooking oil (for seasoning steel parts)
Steps to Clean After Grilling
- Wait until firebox is completely cool (6–8 hours).
- Remove the cooking grate and set aside.
- Pull out the ash pan and dispose of ash in a metal container.
- Scrape grease channels of the V‑grates with a putty knife into the drip tray.
- Wash grates with warm soapy water, rinse, and dry immediately.
- Wipe the firebox interior with a damp cloth; do not use soap inside.
- Season carbon steel parts with a thin layer of oil before covering.
- Brush the hand‑crank mechanism and lubricate pivot points annually.
Pro‑Tip: Never use water to clean a hot firebox – the thermal shock can warp the steel. I keep a dedicated ash vacuum (shop vac with a HEPA filter) for deep cleaning after every 5 cooks.

9. Ventilation & Safety Clearances for Built‑In Wood Grills

Save this safety guide to your outdoor kitchen planning board!
A wood‑burning grill produces smoke, heat, and embers that require proper ventilation and clearance from combustible materials. Even in an open‑air patio, you need a hood or at least a non‑combustible back wall to direct smoke away. Local building codes often dictate minimum clearances, so always check before building.
What You Need
- Masonry or stainless steel ventilation hood
- Back and side walls (non‑combustible materials – stucco, stone, brick)
- Heat‑shield panels for nearby combustible walls
- Fire extinguisher (class ABC, rated for grease fires)
- Local building permit (required for any wood‑burning appliance)
Steps to Ensure Safe Installation
- Measure the grill’s output – plan for a hood width equal to grill width + 6″ each side.
- Install a hood with a minimum face velocity of 100 fpm.
- Maintain 36″ clearance from the cooking surface to any combustible ceiling.
- Use only non‑combustible countertop materials (stone, concrete, tile) within 12″ of the grill.
- Provide a dedicated 20‑amp GFCI outlet nearby for accessories and lighting.
- Install a fire extinguisher within 10 feet of the grill, not inside an enclosed cabinet.
- Schedule an inspection before first use.
Pro‑Tip: Even in open‑air kitchens, wind can blow smoke toward the house. Install a simple back‑wall that rises 18″ above the grill, angled slightly outward – it deflects smoke better than you’d think.

Key Takeaways: Your Quick Guide to Santa Maria Built‑In Wood Burning Grills
- Choose your firebox material based on climate and cooking style – stainless steel resists corrosion in humid areas, while carbon steel holds heat better for slow cooks. The adjustable height hand‑crank system is the defining feature of a Santa Maria grill.
- V‑grates are superior for grease management – they channel fat away from the fire, drastically reducing flare‑ups and making cleanup easier than round bar grates.
- A ceramic brick‑lined firebox improves heat retention – the thermal mass stabilizes cooking temperature and reduces wood consumption by up to 30%. Worth the extra investment if you cook often.
- Drop‑in installation is the most common method – it requires a precise rough opening in a masonry island, but the flange gives a clean, counter‑level finish. Full masonry inserts are heavier and need custom block work.
- Always include a side brasero for long cooks – it provides a continuous supply of embers, enabling authentic low‑and‑slow techniques without stopping the cook to relight wood.
- S‑shape meat hooks open up churrascaria‑style cooking – hanging cuts above the fire renders fat evenly and creates an impressive presentation. Use with tri‑tip, picanha, or chicken for best results.
- Proper ventilation is non‑negotiable – even in open‑air kitchens, install a hood that exceeds the grill width by 6 inches on each side and maintain at least 36″ clearance to combustible surfaces.
People Also Ask About Santa Maria Built‑In Wood Burning Grills
What is a Santa Maria built‑in wood burning grill?
A Santa Maria built‑in wood burning grill is a drop‑in outdoor cooking appliance with a height‑adjustable grate, designed to be installed permanently into a masonry island. It uses wood or charcoal as fuel, and the grate is raised or lowered via a hand‑crank mechanism to control heat, offering authentic wood‑fired flavor. Unlike standard gas grills, it requires a non‑combustible enclosure and proper ventilation.
How does a Santa Maria grill work?
The grill uses a firebox (usually steel) where you burn wood or charcoal to create embers. A hand‑crank adjusts the height of the cooking grate above the fire – closer for searing, higher for slow cooking. The open flame and radiant heat cook the food, and the live‑fire technique imparts a distinct smoky flavor. Some models include a side brasero for continuous ember supply.
What is the difference between Argentine and Santa Maria grills?
Both use similar height‑adjustable grates and wood fires, but Argentine grills (parrillas) often have a separate brasero and are usually freestanding, while Santa Maria grills are typically built‑in and originated in California. Argentine grills emphasize hanging meat on hooks (churrascaria style), while Santa Maria grills often use a flat grate for tri‑tip and steaks. Many modern builds combine both features.
Can you use charcoal in a Santa Maria wood grill?
Yes, most Santa Maria grills can use charcoal, but the authentic experience calls for wood – typically red oak. Charcoal burns hotter and cleaner, but you miss the wood smoke flavor. Some users mix both: start with charcoal for heat and add wood chunks for smoke. Check your grill’s manual; some fireboxes are designed specifically for wood and may not have the airflow for pure charcoal.
What kind of wood is best for Santa Maria BBQ?
Red oak is the traditional choice for Santa Maria style – it burns hot, produces a sweet smoke, and complements tri‑tip beautifully. Other hardwoods like hickory, mesquite, or apple can be used for stronger or fruity flavors. Avoid softwoods (pine, fir) as they produce creosote and bad taste. Always use well‑seasoned wood (moisture below 20%) for the best experience.
How to install a built‑in Santa Maria grill?
Installation involves framing a masonry island, cutting a precise rough opening, and lowering the drop‑in grill so its flange rests on the counter. You must follow the manufacturer’s clearance specifications, provide ventilation, and ensure a non‑combustible surround. Some units require a fire‑rated back wall. Always consult local building codes and consider hiring a professional installer for the gas/electrical connections.
How do you control heat on a Santa Maria grill?
Heat control is achieved by adjusting the height of the grate using the hand‑crank mechanism. Lowering the grate increases heat; raising it reduces heat. You also control the fire size by adding or restricting wood. The side brasero (if available) allows you to add fresh embers without disturbing the main coals. Practice with the crank to find the sweet spot for different foods.
Are Santa Maria grills worth the money?
For serious outdoor cooks who value authentic live‑fire flavor and the ritual of wood‑fired cooking, yes – the investment is justified by the durability and results. Top‑tier models with 10‑gauge steel and ceramic brick lining can last a lifetime with proper care. The price range ($2,000–$10,000+) reflects the quality of materials (stainless vs carbon steel, firebrick, etc.) and the brand. Compare features against your cooking frequency and budget.
How to clean a stainless steel Santa Maria grill?
Cleaning is straightforward: after cooling, remove the ash pan, scrape grease from V‑grates, and wash grates with warm soapy water. Wipe the stainless steel exterior with a dedicated stainless steel cleaner to prevent fingerprints and corrosion. Never use harsh abrasives on the firebox interior. Season carbon steel parts with a light coat of oil after cleaning. Perform a deep clean of the firebox and crank mechanism every 3 months.
What are the dimensions of a standard built‑in Santa Maria grill?
Standard built‑in Santa Maria grills come in widths of 24″, 36″, and 48″. A typical 36″ model has an outer drop‑in dimension of 36″W x 24″D x 12″H, with a firebox depth of 18″–20″. The rough opening required is usually the outer dimensions minus the flange (e.g., 34.5″ x 22.5″). Always check the exact specifications of the model you’re buying, as they vary by brand.
Final Thoughts on Santa Maria Built‑In Wood Burning Grills
Building a custom outdoor kitchen around a Santa Maria built‑in wood burning grill is an investment in your culinary passion. The live‑fire ritual connects you to centuries of cooking tradition while letting you control every variable with the simple turn of a hand wheel. From the firebox material to the grate design and the brasero, every component matters. We’ve covered the essential features – now it’s time to measure your space, consult with a fabricator, and choose the model that fits your vision.
Remember, the best grill is the one you’ll actually use. Whether you’re searing tri‑tip for a family gathering or slow‑smoking pork shoulders for a block party, a properly installed Santa Maria grill will repay its cost many times over in unforgettable meals. Have you started planning your build yet? Drop a comment below with your biggest question – I’d love to help you get that fire started.
Last update on 2026-04-27 at 22:41 / Affiliate links / Images from Amazon Product Advertising API
