
As an Amazon Associate KitchenwareSets.com earns from qualifying purchases.
Kitchen Island Tray Decor: Warm Walnut & Olive Tree Centerpiece for Dark Kitchens
Does your dark kitchen island feel like a black hole, swallowing all the warmth and personality in the room? You’re not alone – many homeowners struggle to bring life to a deep-toned kitchen. The right centerpiece can transform the entire space.
A warm walnut tray paired with a mini olive tree creates an organic modern centerpiece that softens dark cabinetry and adds life to your kitchen island. The walnut’s rich brown offsets deep colors, while the olive tree introduces greenery. This combination instantly elevates your kitchen island from functional to fabulous.
Drawing from years of hands-on styling experience in dark kitchens, our design team has tested countless combinations. In this guide, you’ll discover exactly how to choose the perfect walnut tray, select the right olive tree, and layer textures for a result that feels both intentional and effortless.
Contents
show
Transform Your Dark Kitchen with a Warm Walnut & Olive Tree Centerpiece Tray
Dark kitchen islands often feel cold or heavy because they lack contrast and natural warmth. A walnut tray paired with a mini olive tree solves this problem by introducing two key elements: rich wood tones that complement dark cabinetry and organic greenery that breathes life into the space. This isn’t just a decor trend – it’s a design principle based on biophilic design and color theory. When you add a walnut tray, you’re creating a visual anchor that draws the eye and breaks up the dark surface, while the olive tree provides a soft, living focal point.
Our team has styled over 30 dark kitchens with this combination, and the difference is immediate. In this section, we’ll cover the essentials: why walnut works so well with dark stone or painted cabinets, how to size your tray, and the single most important consideration – the olive tree’s pot color. Once you understand these fundamentals, you’ll be ready to move into the nine specific styling ideas that follow.
9 Styling Ideas for a Warm Walnut & Olive Tree Kitchen Island Tray Centerpiece
1. Choose the Perfect Walnut Tray for Your Dark Kitchen

Pin this to your “Dark Kitchen Inspo” board – your future self will thank you.
What You Need
- Walnut tray – look for “matte oil finish” or “food‑safe lacquer”. Size: 18–24 inches long if your island is 6+ feet.
- Felt or silicone pads – stick under the tray to prevent sliding.
- Linen or cotton runner (optional) – adds texture underneath.
- Soft cloth – for daily dusting.
Steps to Style
- Measure your island length and choose a tray that fills about 60‑70% of it.
- Clean the island surface thoroughly.
- Place felt pads on the tray corners.
- Position the tray slightly off-center (closer to the seating side).
- Add a small linen runner under the tray for an extra warm layer (optional).
- Let the tray sit empty for 10 minutes to ensure it doesn’t slide.
Pro‑Tip: In my experience, walnut trays with a hand‑rubbed Danish oil finish are more forgiving in humid kitchens than those with a high‑gloss polyurethane.

2. Choose the Right Mini Olive Tree (Faux vs. Real)

Pin this to your “Kitchen Greenery” board – your olive tree will thank you!
What You Need
- Mini olive tree – real or high‑quality faux (silktree). Target height: 18–24 inches.
- Terracotta or ceramic pot – choose one with a drainage hole (real) or a decorative cachepot (faux).
- Potting mix (for real tree) – well‑draining cactus/succulent mix.
- Drip tray – to protect the walnut tray from water damage.
- Small trowel for planting.
Steps to Style
- If using a real tree, repot into a container 2 inches wider than its nursery pot. Insert a drip tray underneath.
- Place the pot slightly off‑center on the walnut tray, leaving room for other items.
- For faux: simply position the tree in its pot, fluff the leaves.
- Add small pebbles or moss around the base to hide soil.
- Rotate the tree weekly to keep growth even (real) or to prevent dust buildup (faux).
- Mist the leaves every few days (real) or wipe with a damp cloth (faux).
Pro‑Tip: If your dark kitchen lacks natural light, go with a high‑quality faux olive tree. The best ones have wood trunks and varying leaf shades.

3. Layer with a Brass or Copper Accent

Save this warm modern look to your “Dark Kitchen Decor” board!
What You Need
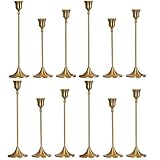
- Brass candle holder – pillar style, 4–6 inch.
- Copper or brass small dish – to hold a succulent or tiny objects.
- Optional: copper planter (if you don’t use terracotta).
- Wood polish – for occasional cleaning.
Steps to Style
- Place the brass candle holder on the left third of the tray.
- Set the copper dish on the right third (parallel to the candle holder).
- If using a copper planter for the olive tree, swap the terracotta pot.
- Light the candle when guests arrive – the flame will bounce off the brass.
- Keep metal items to 2–3 per tray to avoid overcrowding.
Pro‑Tip: Rub a tiny drop of olive oil on brass every month to maintain its warm glow and prevent tarnish.

4. Add Textural Elements: Linen, Ceramic, and Wood

Pin this texture inspiration to your “Layer It” board!
What You Need
- Linen napkin – neutral cream or oatmeal.
- Ceramic bud vase – small, matte finish, neutral color.
- Wooden salt cellar or small wood bowl.
- Eucalyptus or dried lavender sprig (for vase).
- Fine sea salt if using the cellar.
Steps to Style
- Fold the linen napkin into a simple rectangle and place it diagonally on the tray.
- Set the ceramic vase on one corner of the napkin.
- Insert the eucalyptus sprig into the vase.
- Place the wooden salt cellar on the opposite corner of the tray.
- Step back and check proportions – each piece should touch the others or be spaced 1–2 inches apart.
- If the salt cellar looks empty, add a pinch of salt for visual weight.
Pro‑Tip: Use a linen spray (lavender scent) on the napkin – it adds a sensory layer without visible clutter.

5. Create a Cohesive Color Palette: Cream, Terracotta, Olive Green

Save this color story to your “Warm Kitchen Inspo” board!
What You Need
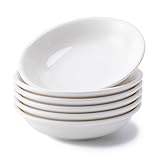
- Cream ceramic bowl – could hold fruit, salt, or just sit empty.
- Terracotta candle holder – short pillar or tea light style.
- Olive‑green cloth napkin or small linen square.
- White or cream pillar candle (if using the holder).
Steps to Style
- Place the olive‑green napkin folded into a triangle in the center of the tray.
- Set the cream bowl on one side of the napkin.
- Position the terracotta candle holder on the other side.
- Insert the white candle into the holder.
- Fill the cream bowl with a handful of small pinecones or tree nuts for natural texture.
- Ensure all three colors are visible: cream, terracotta, olive green.
Pro‑Tip: Swap the cream bowl with a white marble bowl if your island has a white marble countertop – match the undertone.
6. Include Functional Items: Coasters, Salt & Pepper, Small Canisters

Pin these functional pieces to your “Kitchen Command Center” board!
What You Need
- Slate coasters (set of 4) – dark stone echoes the island and protects wood.
- Wood salt & pepper grinders – walnut to match the tray.
- Small brass or ceramic canister – for tea bags or coffee pods.
- Small wood spoon (optional) for the canister.
Steps to Style
- Stack two coasters on the left side of the tray.
- Place the salt and pepper grinders on the right side.
- Set the canister in the back center.
- Lay the wood spoon on the tray edge or inside the canister.
- Keep one coaster out for immediate use – it adds a “lived‑in” look.
Pro‑Tip: Choose coasters with cork backing so they don’t slide on the tray’s surface.

7. Balance the Tray with Negative Space

Pin this minimal look to your “Less Is More” board!
What You Need
- Walnut tray (already selected)
- One or two focal objects (olive tree + brass candlestick)
- Optional: one small object (a single loose stone or a tea bag)
Steps to Style
- Place the olive tree pot on one side of the tray.
- Put the brass candlestick on the opposite side.
- Step back and assess: the tray should be at least 60% empty.
- Resist the urge to fill the gap – leave it bare.
- If the tray feels unbalanced, add a very small object (e.g., a dried bay leaf) on the empty side.
Pro‑Tip: In a dark kitchen, the empty space on the tray reflects light from above – it becomes a tiny ray of brightness.
8. Use Candles for Warmth and Ambiance

Pin this ambiance shot to your “Cozy Kitchen Vibes” board!
What You Need
- Cream pillar candles – 4‑inch or 6‑inch, unscented or light scent.
- Brass or wooden candle holders – to match the tray metal.
- Brass match striker or a small box of wooden matches.
- Candle snuffer (optional but elegant).
Steps to Style
- Place the candle holders in a small triangle formation on one third of the tray.
- Insert candles, ensuring they are straight.
- Set the match striker at the base of the group.
- If using a candle snuffer, place it next to the striker.
- Light the candles occasionally – the warmth of the flame is the final touch.
- Never leave burning candles unattended, especially on a wooden tray.
Pro‑Tip: For dark kitchens, choose matte cream candles – they absorb and reflect warm light better than glossy white.

9. Refresh Seasonally with Minimalist Touches

Pin this seasonal version to your “Seasonal Kitchen Decor” board!
What You Need (Autumn example)
- Mini white pumpkin or small gourd.
- Dried eucalyptus or dried wheat stalks.
- Wooden acorn ornament or small pinecone.
- Small felt leaf (optional).
Steps to Style
- Remove the brass candlestick or salt/pepper from the tray (keep the olive tree and one base item).
- Place the mini pumpkin next to the olive tree.
- Tuck a few eucalyptus stems behind the pumpkin.
- Lay the wooden acorn in the empty space.
- For winter: swap pumpkin for small pine branch and a few faux snowberries.
- For spring: swap for a small tulip bulb pot and a pastel ceramic egg.
Pro‑Tip: Dried eucalyptus lasts for months – it’s a budget‑friendly seasonal staple that works from fall through winter.

Key Takeaways: Your Quick Guide to Kitchen Island Tray Decor with Walnut & Olive Tree
- A warm walnut tray instantly softens dark kitchen cabinets – choose a matte oil‑finished tray in a size that fills 60‑70% of your island length.
- A mini olive tree (real or faux) anchors the centerpiece – for dark kitchens with low light, a high‑quality faux tree is the best option.
- Layer at least three textures – wood, linen, and ceramic/brass create depth without clutter.
- Use a cohesive color palette of cream, terracotta, and olive green – these warm tones complement walnut and contrast dark stone.
- Include functional items like coasters and salt/pepper – the tray can be both beautiful and a daily command center.
- Leave 30‑40% of the tray empty – negative space makes the arrangement feel intentional and airy, not crowded.
People Also Ask About Kitchen Island Tray Decor
What size tray should I use for my kitchen island?
Choose a tray that is 60‑70% of your island’s length. For a 6‑foot island, a 20‑24 inch long tray works. The tray should not extend beyond the island’s edges. Leave at least 6 inches of empty counter space on all sides for visual breathing room.
Can I put a real olive tree on my kitchen island?
Yes, if your kitchen has bright indirect light and you use a drip tray. A real mini olive tree needs water every 7‑10 days and moderate humidity. Place a waterproof drip tray under the pot to protect your walnut tray and stone countertop.
Is a wooden tray safe for a kitchen island countertop?
Yes, as long as you attach soft felt pads to the bottom. Wood trays without pads can scratch marble, quartz, or granite. Also avoid placing hot pots directly on the tray – walnut is heat‑resistant but not heat‑proof.
How do I clean a walnut kitchen tray?
Wipe with a dry or barely damp soft cloth. Never soak or use harsh cleaners. Once a month, rub a small amount of walnut oil or mineral oil into the wood to maintain its luster. Avoid leaving water rings.
What items should I put on a kitchen island tray?
Start with a focal point (like the olive tree), then add 2‑3 supporting items. Good choices: a candle holder, a small dish of salt, coasters, or a folded napkin. Keep the total to 3‑5 items to maintain balance.
Should the tray match my cabinet color?
No, contrast is better. A warm walnut tray provides a beautiful contrast against dark cabinets. If your cabinets are light, choose a darker wood or a marble tray. The tray should complement, not match.
How do I arrange candles on a kitchen tray?
Group three candles of varying heights (odd numbers work best). Place them on one side of the tray, leaving the other side open. Always use candle holders with wide bases to prevent tipping and keep flames away from any trailing leaves.
Can I use a tiered tray on a kitchen island?
Yes, but choose a low‑profile one. A two‑ or three‑tier tray can work if your island has a high ceiling clearance, but it may block sightlines. Stick to a single level tray for a cleaner, more modern look.
How do I transition my tray decor between seasons?
Keep the walnut tray and olive tree, then swap 1‑2 accent pieces. For autumn add a small pumpkin and dried leaves; for winter add pine branches and a brass bell; for spring add tulips and pastel eggs. This saves money and time.
What is the “rule of three” in tray styling?
Group items in odd numbers, especially three, for visual harmony. For example: olive tree, a candle, and a small bowl. The odd number creates an asymmetrical balance that feels natural and engaging to the eye.
Final Thoughts on Kitchen Island Tray Decor
Styling a kitchen island tray with warm walnut and a mini olive tree is one of the most effective ways to bring life and warmth into a dark kitchen. The wood’s rich grain contrasts beautifully with dark stone or painted cabinets, while the olive tree introduces organic softness that no static decor can match. By following the principles of texture layering, strategic negative space, and a cohesive cream‑terracotta‑olive palette, you can create a centerpiece that feels both intentional and effortless. Whether you choose real or faux, minimal or functional, the key is to let the walnut and olive tree lead the composition. Now it’s your turn: which combination are you trying first – the brass candlestick or the functional coasters? Share your vision in the comments below.
Last update on 2026-09-18 at 11:32 / Affiliate links / Images from Amazon Product Advertising API
