As an Amazon Associate KitchenwareSets.com earns from qualifying purchases.
9 Insanely Easy No Bake Desserts
Craving a delicious, homemade dessert but the very thought of preheating your oven makes you break a sweat? Whether you’re battling a summer heatwave, your oven is on the fritz, or you’re simply short on time, the desire for a sweet treat doesn’t just disappear. It’s a universal dilemma: you want the satisfaction of a homemade dessert without the heat, the hassle, and the long baking times.
We’ve all been there. Staring into the pantry, wishing a decadent chocolate cake or a creamy cheesecake would magically appear. You want something more special than a scoop of ice cream from the carton, but the effort required for traditional baking feels like a monumental task. You need a solution that’s quick, easy, and, most importantly, oven-free.
The solution is the glorious world of no bake desserts, which are sweet treats that require no oven time and typically set in the refrigerator or freezer. They are the ultimate answer for satisfying your sweet tooth with minimal effort. From luscious cheesecakes and layered delights to quick bars and pies, these recipes prove you don’t need to be a pastry chef or turn your kitchen into a sauna to enjoy an impressive, homemade dessert.
Craving a Sweet Treat But Can’t Stand the Heat?
The best no bake desserts are sweet treats that require no oven time, making them perfect for hot weather or when you’re short on time. These recipes usually rely on simple, accessible ingredients and minimal prep work, offering a foolproof way to create delicious desserts like cheesecakes, pies, and layered bars that set in the refrigerator or freezer. In my experience, having a few go-to no-bake recipes is a lifesaver for last-minute gatherings or sudden sweet cravings.
There’s a special kind of magic in creating something so decadent and satisfying without ever turning on the oven. It feels like you’ve discovered a brilliant kitchen secret. These recipes are designed for simplicity and success, delivering all the “wow” factor of a traditional baked good with a fraction of the effort. Get ready to discover a curated list of my absolute favorite, insanely easy no bake desserts that will become staples in your recipe collection.
9 Insanely Easy No Bake Desserts to Satisfy Your Sweet Tooth
Here’s the deal: you’re about to unlock a treasure trove of the easiest and most delicious no bake dessert recipes, ranging from classic crowd-pleasers to lightning-fast 5-minute wonders. This list is your new secret weapon for potlucks, parties, or any random Tuesday when you deserve a treat. We’ve got creamy cheesecakes, rich chocolate bars, fruity layered delights, and even a fun project for the kids. Each recipe comes with simple, step-by-step instructions to guarantee a perfect result every time.
1. Classic No-Bake Oreo Cheesecake
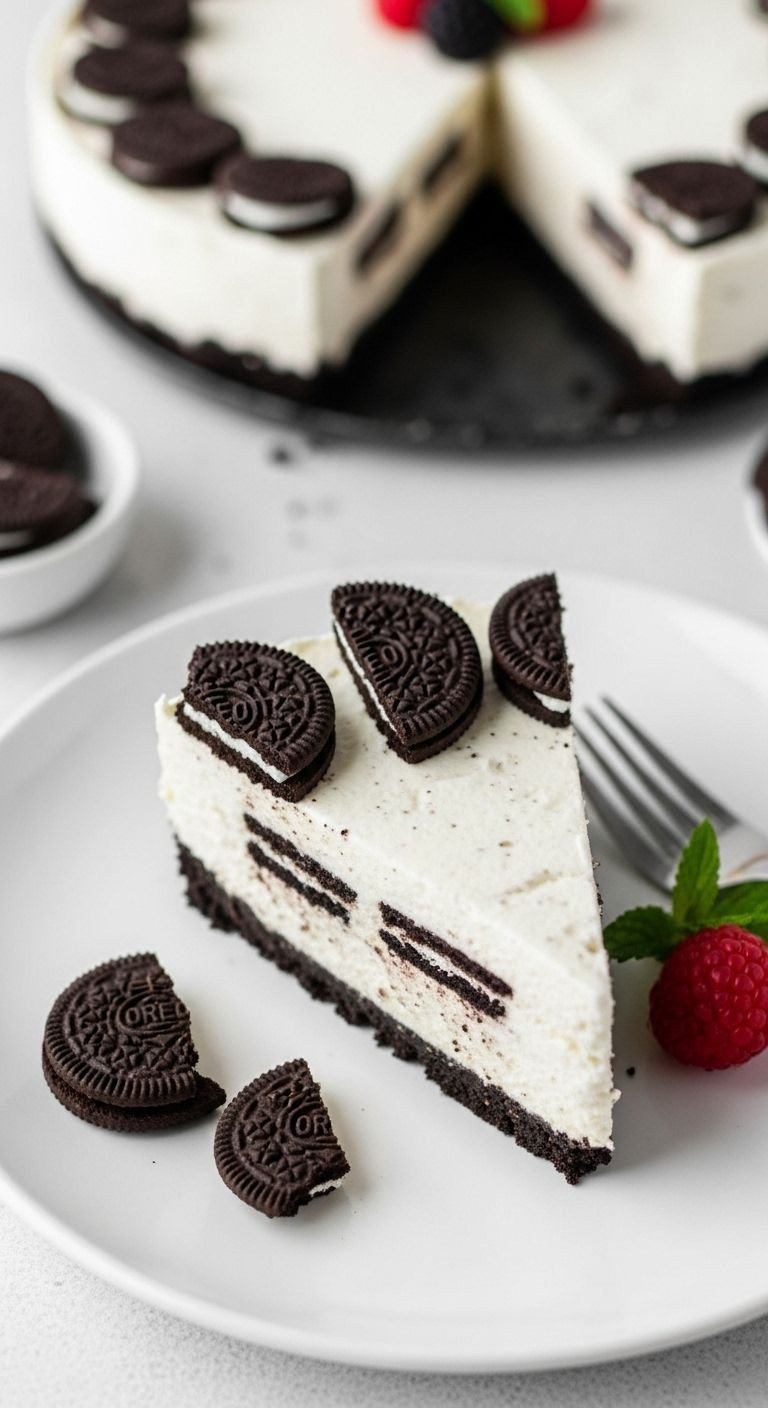
The quintessential no-bake dessert is a Classic No-Bake Oreo Cheesecake, featuring a buttery Oreo cookie crust and a light, creamy cheesecake filling that sets up perfectly in the fridge. This recipe is a guaranteed hit for any occasion because it combines the beloved flavor of Oreos with a rich, tangy cheesecake texture, all without the fuss of a water bath or fears of a cracked top.
It’s the first no-bake dessert I ever mastered, and it remains my go-to for potlucks and family gatherings. It looks impressive, tastes even better, and the hardest part is waiting for it to chill!
Ingredients:
- 24 Oreo cookies, crushed + 8 for garnish
- 1/4 cup unsalted butter, melted
- 8 oz cream cheese, softened to room temperature
- 1/2 cup granulated sugar
- 1 tsp vanilla extract
- 8 oz container whipped topping (like Cool Whip), thawed
Instructions:
- Create the Crust: In a medium bowl, combine the crushed Oreo cookies with the melted butter. Mix until the crumbs are evenly moistened. Press the mixture firmly and evenly into the bottom of an 8-inch springform pan.
- Make the Filling: In a large bowl, use a hand mixer or stand mixer to beat the softened cream cheese, granulated sugar, and vanilla extract until completely smooth and creamy, with no lumps remaining.
- Fold and Combine: Gently fold the thawed whipped topping into the cream cheese mixture using a spatula. Be careful not to overmix; fold just until it’s combined and no white streaks remain.
- Assemble and Chill: Spread the cheesecake filling evenly over the prepared Oreo crust. Smooth the top with the back of a spoon or an offset spatula.
- Set and Serve: Cover the cheesecake and refrigerate for at least 6 hours, or preferably overnight, until firm. Before serving, garnish with the remaining whole or chopped Oreos.
Pro Tip: For the cleanest, most professional-looking slices, dip a long, sharp knife in hot water and wipe it dry between each cut. This simple trick prevents the creamy filling from sticking and dragging, ensuring every piece looks perfect.
Pin this classic recipe for your next party!
2. 5-Minute Chocolate Eclair Cake
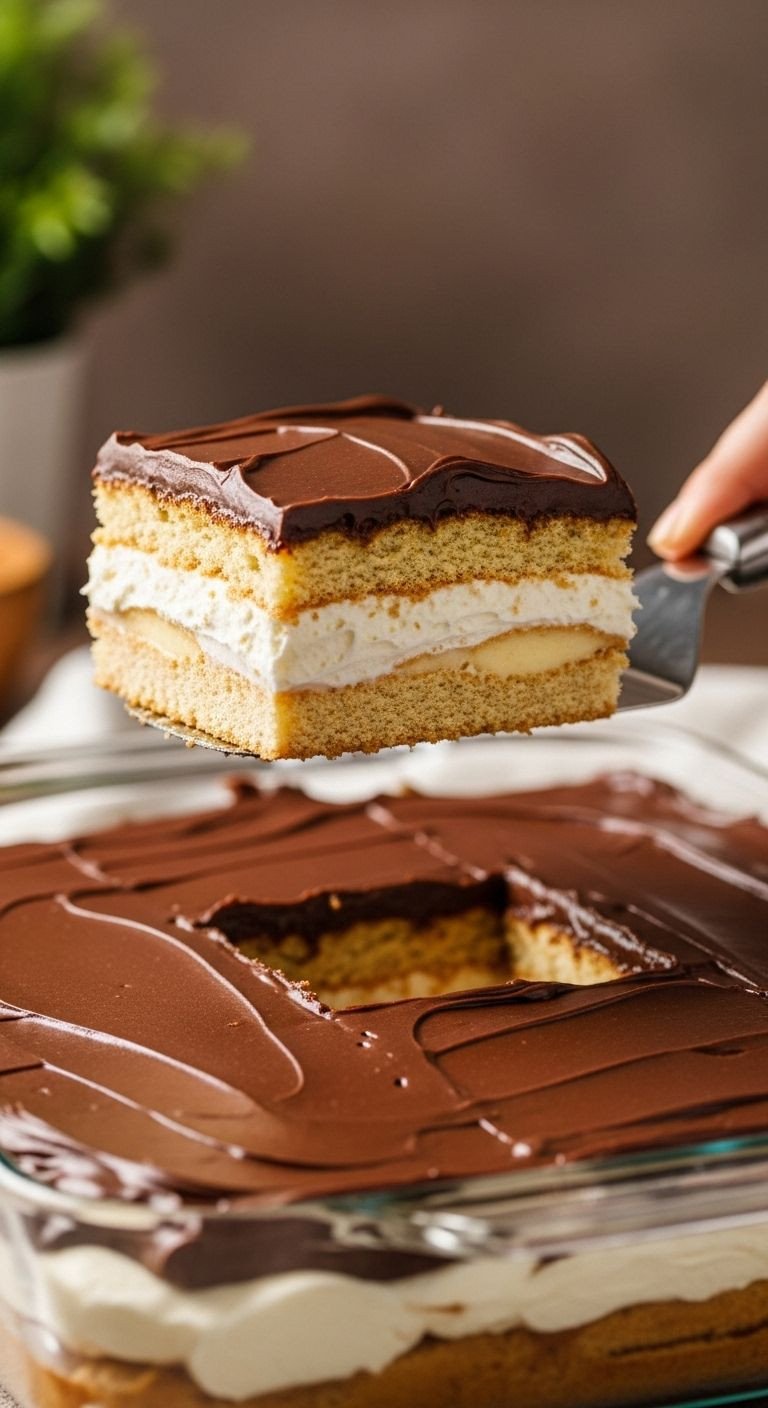
This dessert is a layered icebox cake made with graham crackers, vanilla pudding, and a rich chocolate frosting that comes together in just 5 minutes of active prep time. It’s the ultimate dessert tips when you need to feed a crowd something delicious with virtually zero effort. The magic happens in the fridge, where the graham crackers soften into a surprisingly cake-like texture.
This recipe is legendary in my family for being the “emergency dessert.” It’s saved me on countless occasions when I needed something impressive in a hurry.
Ingredients:
- 2 (3.4 oz) packages instant vanilla pudding mix
- 3 cups cold milk
- 8 oz container whipped topping, thawed
- 1 box of honey graham crackers
- 1 (16 oz) container prepared chocolate frosting
Instructions:
- Prepare the Pudding: In a large bowl, whisk together the two packages of instant vanilla pudding mix and the cold milk. Keep whisking for about 2 minutes until it begins to thicken. Gently fold in the thawed whipped topping.
- Layer One: Arrange a single, even layer of graham crackers to cover the bottom of a 9×13 inch pan.
- Add Pudding: Spread half of the pudding mixture evenly over the layer of graham crackers.
- Layer Two: Add another complete layer of graham crackers on top of the pudding, followed by the remaining pudding mixture. Top it all off with a final layer of graham crackers.
- Frost It: Remove the foil lid from the chocolate frosting and microwave it for about 15-20 seconds. This makes it soft and pourable. Pour the warmed frosting over the top layer of crackers and spread it evenly to cover the entire surface.
- Chill Out: Cover the pan and refrigerate for at least 4 hours, but overnight is even better. This allows the crackers to soften and the flavors to meld.
Lesson Learned: Don’t stress if there are small gaps between the graham crackers as you layer them. As the cake sets in the fridge, the pudding will seep into the spaces and the crackers will expand and soften, creating a perfect, cake-like consistency. It’s very forgiving!
Save this 5-minute crowd-pleaser for later!
3. Easy No-Bake Peanut Butter Bars
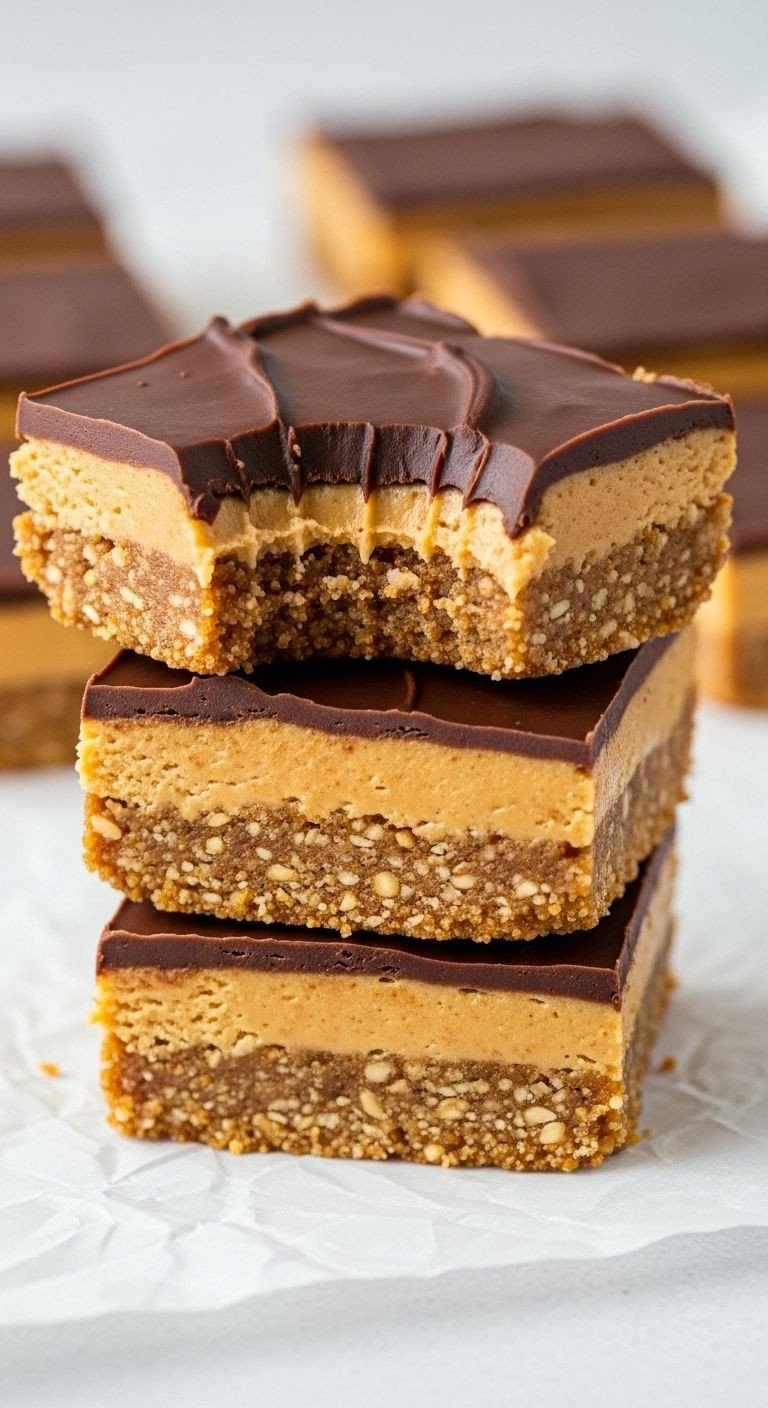
These are candy bar-like treats with a dense, sweet peanut butter and graham cracker base, topped with a smooth layer of melted chocolate and peanut butter. They taste remarkably like a Reese’s Peanut Butter Cup but in bar form. This is the perfect no-bake dessert when you need a quick treat with just a few pantry staples.
I make these whenever I need a guaranteed win. They disappear from the dessert table in minutes, and people always ask for the recipe, shocked at how simple it is.
Ingredients:
- 1 cup unsalted butter, melted
- 2 cups graham cracker crumbs
- 2 cups powdered sugar
- 1 cup creamy peanut butter
- 1.5 cups semi-sweet chocolate chips
Instructions:
- Make the Base: In a medium bowl, thoroughly mix the melted butter, graham cracker crumbs, and powdered sugar. The mixture will be thick and crumbly. Press this mixture firmly and evenly into an ungreased 9×13 inch pan.
- Melt the Topping: In a separate microwave-safe bowl, combine the peanut butter and semi-sweet chocolate chips. Microwave in 30-second intervals, stirring well after each one, until the mixture is completely melted and smooth.
- Pour and Spread: Pour the melted chocolate and peanut butter mixture over the prepared crust. Use a spatula to spread it into a smooth, even layer.
- Chill to Set: Refrigerate the pan for at least 1 hour, or until the chocolate topping is completely firm. Once set, cut into bars to serve.
Pro-Tip: For that professional, bakery-style look, create a decorative swirl. Before the main topping sets, melt an additional 1/4 cup of creamy peanut butter and drizzle it in lines over the chocolate. Then, drag a toothpick or skewer through the lines to create a beautiful marbled effect.
Need a quick treat? Pin these easy bars now!
4. No-Bake Strawberry Cheesecake Lasagna
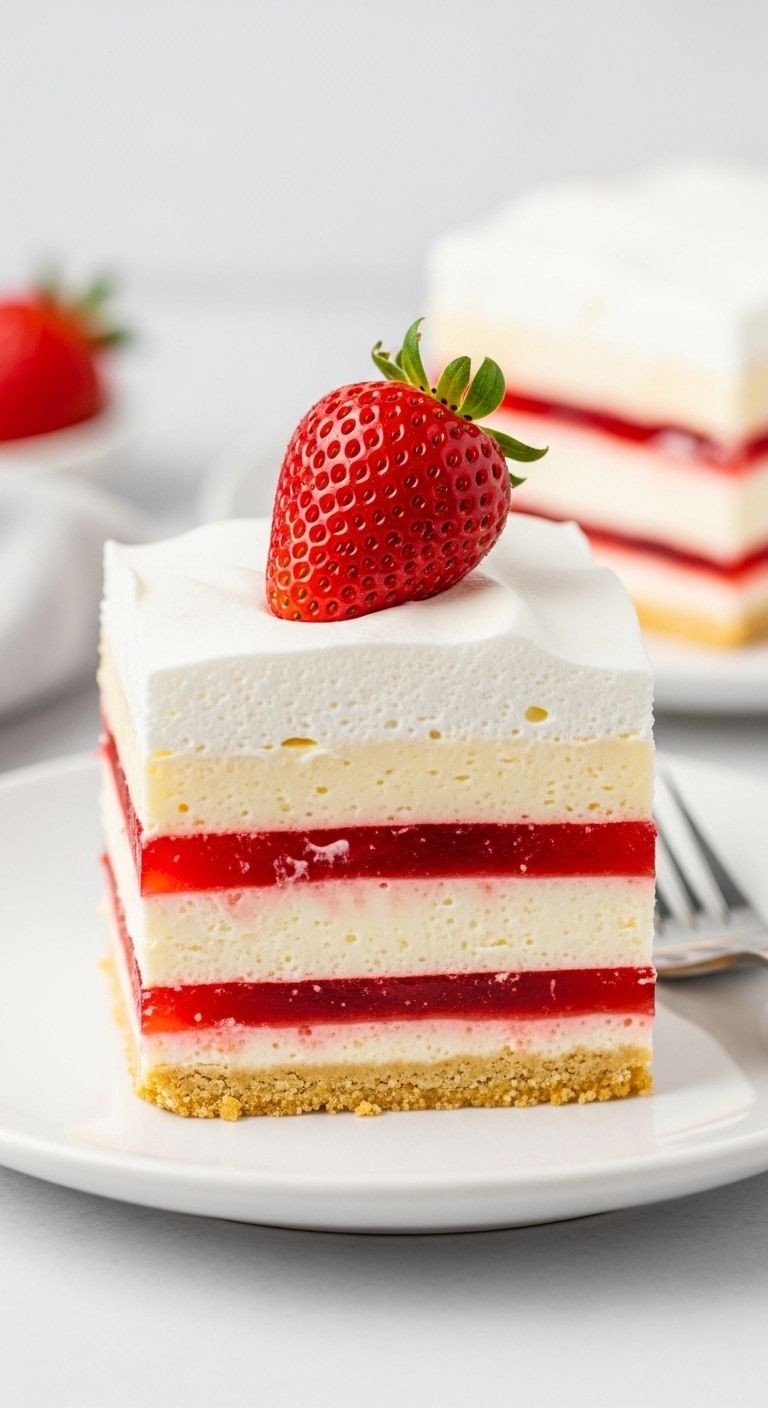
This dessert is a stunning layered creation featuring a Golden Oreo crust, a creamy cheesecake layer, a bright strawberry Jell-O layer filled with fresh fruit, and a fluffy whipped topping. It’s a visually impressive dessert that’s surprisingly easy to assemble, making it a showstopper for any potluck or summer party.
I love making this “dessert lasagna” because it looks so intricate, but it’s really just a simple process of layering. The vibrant red from the fresh strawberries makes it look incredibly fresh and inviting.
Ingredients:
- 1 package (about 14.3 oz) Golden Oreos, crushed
- 1/2 cup unsalted butter, melted
- 8 oz cream cheese, softened
- 1 cup powdered sugar
- 1 (16 oz) container whipped topping, divided
- 1 (3 oz) package strawberry Jell-O
- 1 cup boiling water
- 1/2 cup cold water
- 2 cups fresh strawberries, sliced
Instructions:
- Crust Layer: Mix the crushed Golden Oreos with the melted butter. Press firmly into the bottom of a 9×13 inch dish.
- Cheesecake Layer: In a bowl, beat the softened cream cheese and powdered sugar with a mixer until smooth. Fold in half of the whipped topping. Spread this mixture evenly over the crust.
- Strawberry Layer: In a separate bowl, completely dissolve the strawberry Jell-O powder in 1 cup of boiling water. Stir in 1/2 cup of cold water. Let the mixture cool down for about 10-15 minutes, then gently stir in the sliced fresh strawberries.
- Assemble and Chill: Carefully pour the slightly cooled Jell-O and strawberry mixture over the cream cheese layer. Refrigerate for 3-4 hours, or until the Jell-O layer is fully set and firm.
- Final Touch: Just before serving, spread the remaining whipped topping over the set Jell-O layer.
Lesson Learned: It is crucial to ensure the Jell-O mixture is cool to the touch before you pour it over the cream cheese layer. If it’s even slightly warm, it can start to melt the cheesecake layer, causing them to blend together and ruin the beautiful, distinct layers. Patience is key here!
Pin this stunning dessert for your next summer gathering!
5. 3-Ingredient Lemon Icebox Pie
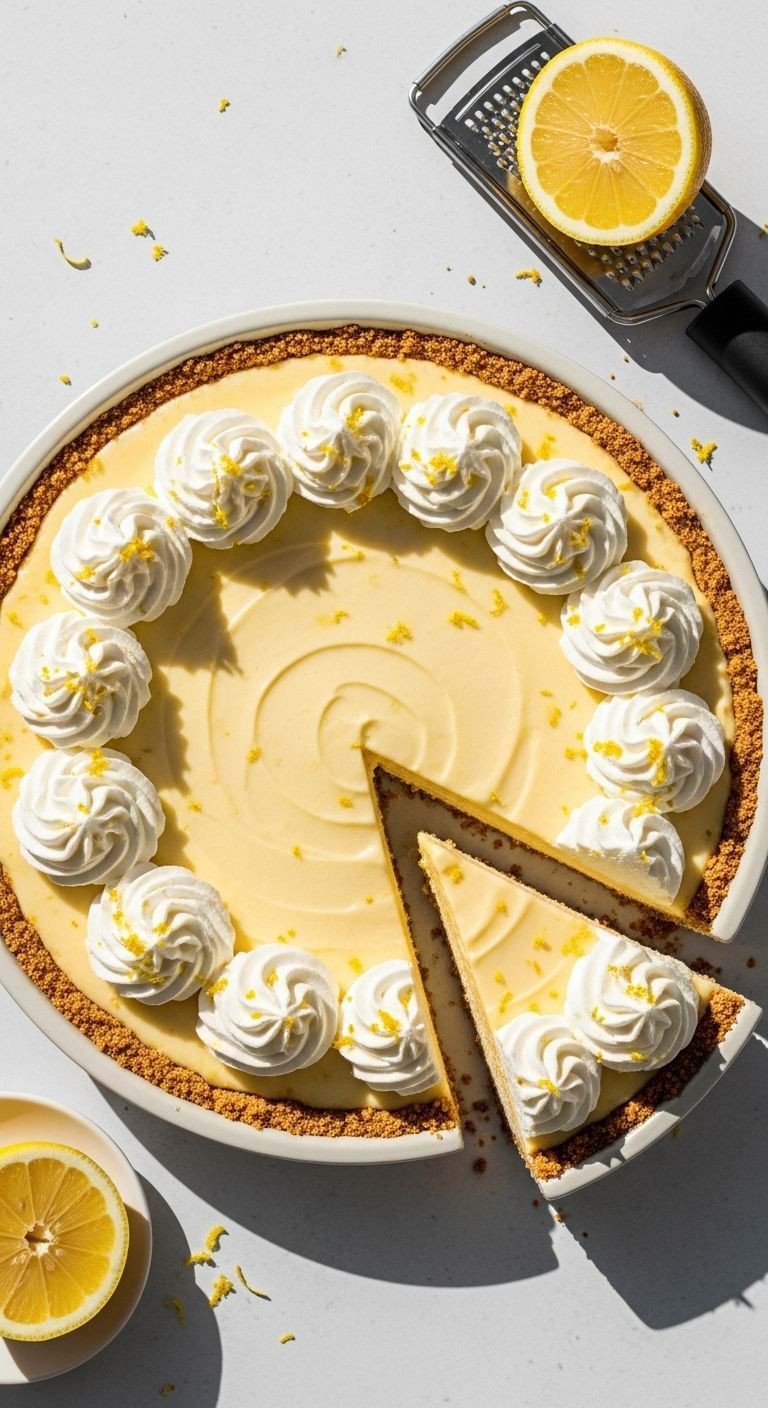
This is a magically simple pie made from just sweetened condensed milk, lemon juice, and a pre-made graham cracker crust. The magic is in the chemistry: the acid from the lemon juice reacts with the proteins in the milk, causing it to thicken into a perfect, creamy pie filling without any heat.
This recipe is my proof that you don’t need a long list of ingredients to make something amazing. It’s shockingly easy and has a wonderfully bright, tart, and sweet flavor that’s incredibly refreshing.
Ingredients:
- 1 (14 oz) can sweetened condensed milk
- 1/2 cup fresh lemon juice
- 1 pre-made 9-inch graham cracker crust
Instructions:
- Mix the Filling: In a medium bowl, whisk together the sweetened condensed milk and the fresh lemon juice. As you whisk, you’ll feel the mixture thicken almost instantly. Continue whisking for about a minute until it’s smooth and thick.
- Fill the Pie: Pour the lemon filling into the pre-made graham cracker crust and use a spatula to spread it evenly.
- Chill Until Firm: Refrigerate for at least 3 hours, or until the pie is completely firm and set.
- Serve: For an extra touch, garnish with dollops of whipped cream and a sprinkle of fresh lemon zest before serving.
Pro-Tip: While bottled lemon juice will work in a real pinch, I’ve found that using freshly squeezed lemon juice gives a much brighter, more authentic citrus flavor. It elevates the pie from “good” to “unforgettable” and is absolutely worth the tiny extra effort.
3 ingredients? Pin this easy pie recipe now!
6. Tiramisu Truffles
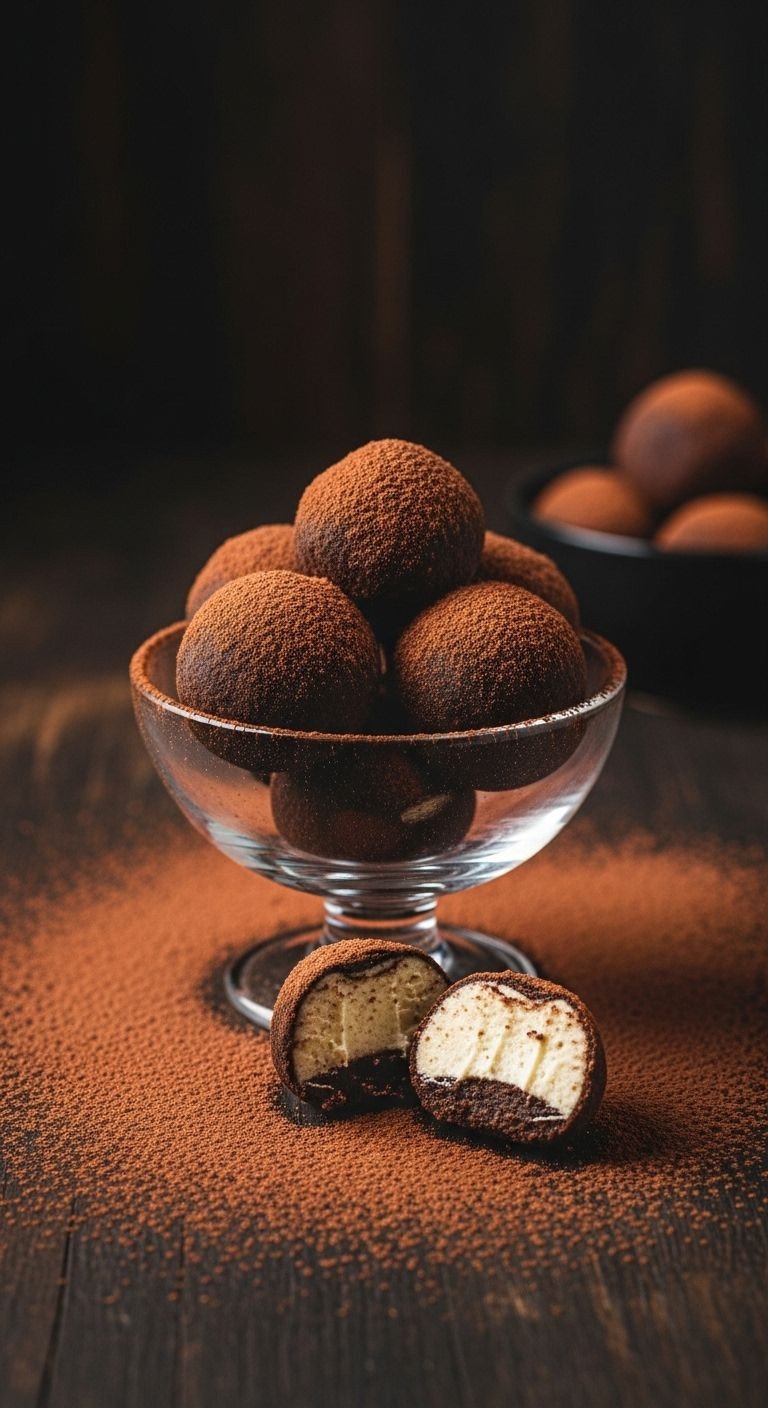
These are bite-sized treats that capture all the classic flavors of Tiramisu—espresso, mascarpone, and cocoa—by combining crushed ladyfingers with a creamy, coffee-infused filling, then rolling them in cocoa powder. They offer a sophisticated, elegant dessert experience that is surprisingly simple to make.
This is my favorite recipe for when I want to bring something a little fancy to a dinner party. They look and taste gourmet, but they’re secretly a breeze to whip up.
Ingredients:
- 1 (7 oz) package of crisp ladyfingers, finely crushed
- 8 oz mascarpone cheese, at room temperature
- 1/4 cup powdered sugar
- 2 tablespoons strong brewed espresso, cooled
- 1/4 cup unsweetened cocoa powder, for dusting
Instructions:
- Combine Ingredients: In a bowl, combine the finely crushed ladyfingers, room temperature mascarpone cheese, powdered sugar, and cooled espresso. Mix with a spatula or your hands until everything is well combined into a thick, dough-like consistency.
- Chill the Mixture: Cover the bowl and chill the mixture in the refrigerator for 30 minutes. This will make it much less sticky and easier to roll.
- Roll into Balls: Scoop out the chilled mixture and roll it between your palms into 1-inch balls. Place the finished balls on a baking sheet lined with parchment paper.
- Coat in Cocoa: Place the unsweetened cocoa powder in a shallow dish or bowl. Roll each truffle gently in the cocoa powder until it is completely coated.
- Store: Store the finished truffles in an airtight container in the refrigerator. They are best served chilled.
Lesson Learned: One thing I learned quickly is not to oversaturate the mixture with espresso. You want a concentrated coffee flavor, not a soggy texture. Using strong, cooled espresso (or even espresso powder dissolved in a tiny bit of hot water) provides the best coffee kick without making the truffles wet.
Pin this elegant dessert for a touch of fancy!
7. No-Bake Key Lime Pie Cereal Treats
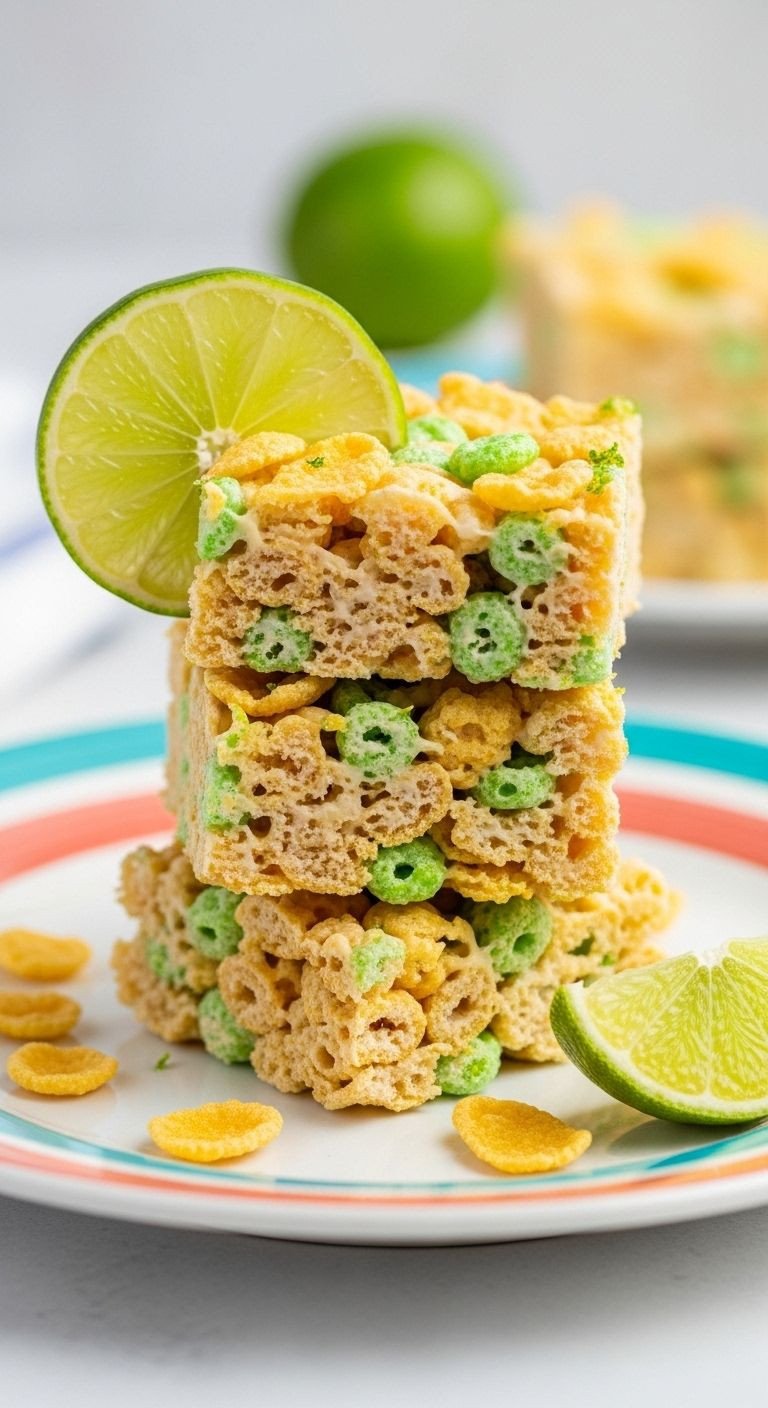
This recipe is a zesty and creative twist on classic marshmallow cereal bars, using cornflakes and infusing them with the tart flavor of key lime juice and zest. It’s a fun, unexpected dessert that combines the chewy, gooey texture of a cereal treat with the bright, summery taste of key lime pie.
I came up with this on a whim when I was craving both cereal treats and key lime pie, and it was a smash hit! The cornflakes provide a fantastic crunch that works perfectly with the tangy lime flavor.
Ingredients:
- 6 tablespoons unsalted butter
- 1 (16 oz) bag mini marshmallows
- Zest of 2 key limes (or 1 regular lime)
- 1/4 cup key lime juice
- 6 cups cornflake cereal
Instructions:
- Prep Your Pan: Grease a 9×13 inch pan with butter or non-stick spray.
- Melt Marshmallows: In a large pot or Dutch oven, melt the butter over low heat. Once melted, add the entire bag of mini marshmallows. Stir continuously until the marshmallows are completely melted and smooth.
- Add Flavor: Remove the pot from the heat. Immediately stir in the key lime zest and key lime juice until well combined.
- Mix in Cereal: Working quickly, fold in the cornflake cereal. Stir gently until all the cereal is evenly coated with the lime-marshmallow mixture.
- Press into Pan: Transfer the mixture to your prepared pan. Use a greased spatula or a piece of wax paper to press the mixture down firmly and evenly.
- Cool and Cut: Let the treats cool completely at room temperature for at least an hour before cutting into squares.
Pro-Tip: To give these treats an extra flavor dimension and a true “key lime pie” vibe, create a simple crust. Before you press the cereal mixture into the pan, sprinkle a mixture of crushed graham crackers and a tablespoon of sugar on the bottom of the greased pan. It adds a delicious textural surprise.
Add a zesty twist to your treats! Pin this now.
8. 5-Minute Chocolate Avocado Mousse
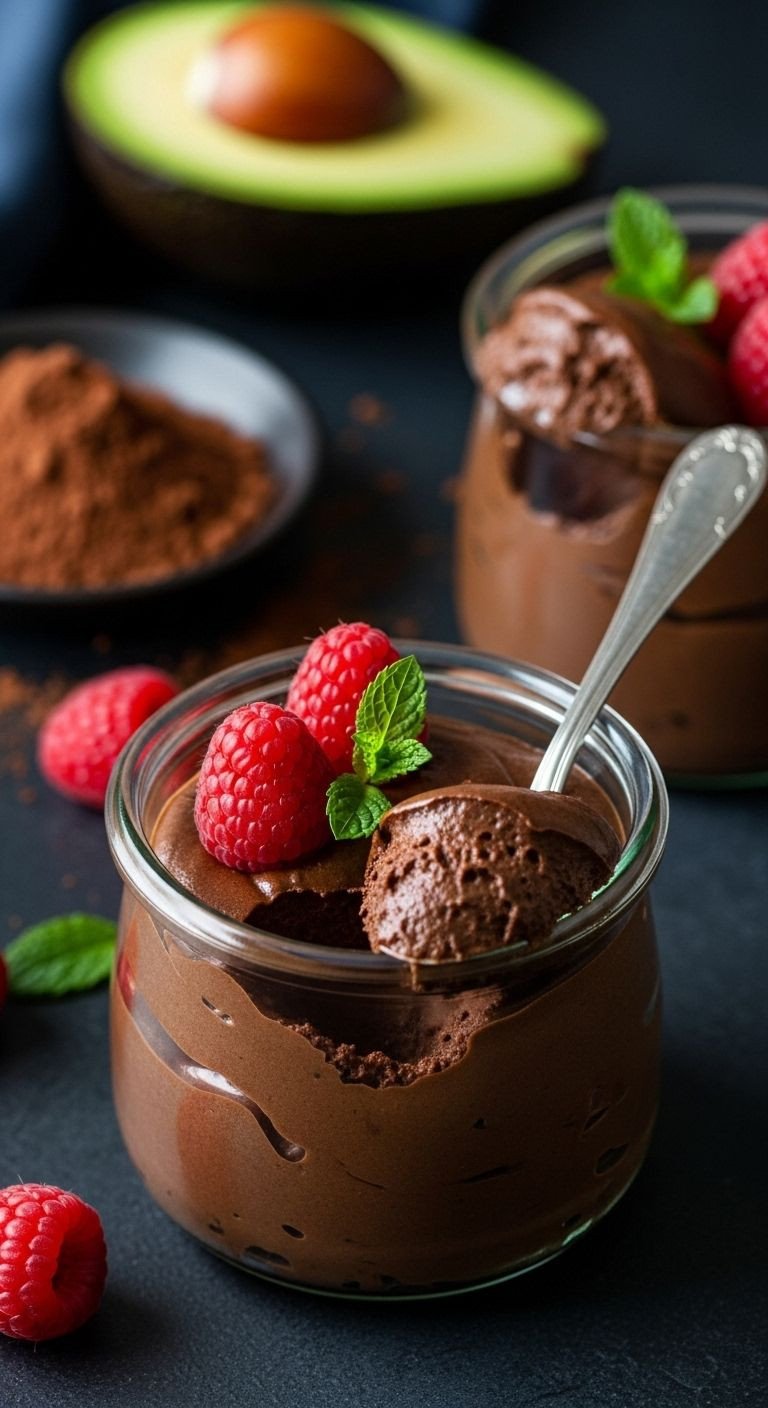
This is a deceptively rich and creamy chocolate mousse made from avocados, cocoa powder, a liquid sweetener, and non-dairy milk, all blended together in minutes. It’s a surprisingly healthy, vegan, and dairy-free dessert that tastes incredibly decadent. You genuinely cannot taste the avocado!
The first time I served this, I didn’t tell anyone what was in it. They were shocked to learn the secret ingredient was avocado! It’s my favorite way to serve a “guilt-free” dessert that still feels indulgent.
Ingredients:
- 2 ripe avocados, pitted and scooped
- 1/2 cup unsweetened cocoa powder
- 1/2 cup maple syrup (or agave nectar)
- 1/4 cup non-dairy milk (like almond or soy milk)
- 1 tsp vanilla extract
Instructions:
- Combine: Place all ingredients—avocado flesh, cocoa powder, maple syrup, non-dairy milk, and vanilla—into a high-speed blender or food processor.
- Blend: Blend on high speed until the mixture is completely smooth, silky, and creamy. You may need to stop and scrape down the sides of the blender a couple of times to ensure there are no lumps.
- Taste and Adjust: Give it a quick taste. If you prefer it sweeter, add a little more maple syrup and blend again.
- Chill and Serve: Spoon the mousse into individual serving dishes, like small glasses or ramekins. Chill in the refrigerator for at least 30 minutes to allow it to firm up slightly. Garnish with fresh berries, chocolate shavings, or a sprinkle of sea salt before serving.
Lesson Learned: The absolute key to a delicious mousse with no detectable avocado taste is using perfectly ripe avocados (they should be soft to the touch but still green, with no brown spots) and a high-quality, dark cocoa powder. Blending until it’s absolutely, positively silky smooth is non-negotiable for achieving that perfect, velvety mousse texture.
Pin this secretly healthy dessert for a guilt-free treat!
9. Ice Cream in a Bag (For Kids & Kids-at-Heart)
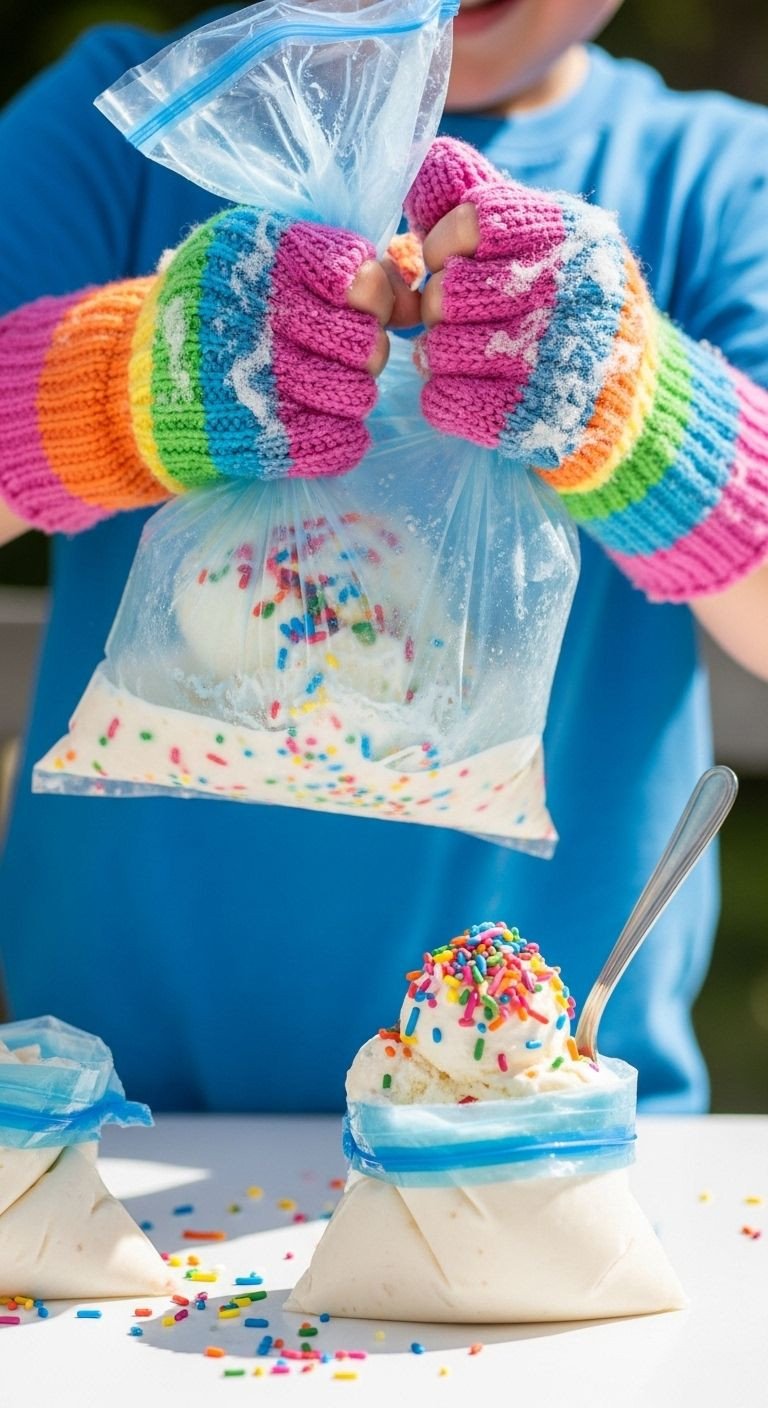
This is a fun, interactive science experiment that results in real, edible ice cream made by shaking a few simple ingredients in plastic bags with ice and salt. It’s the perfect no-bake activity for kids on a hot summer day, teaching them a little chemistry while creating a delicious treat.
This isn’t just a recipe; it’s a core memory waiting to happen. I’ve done this with my nieces and nephews, and their amazement when the liquid turns into ice cream is priceless. It’s pure fun.
Materials Needed:
- 1/2 cup half-and-half (or whole milk)
- 1 tbsp granulated sugar
- 1/4 tsp vanilla extract
- 3 cups ice
- 1/3 cup rock salt (or coarse sea salt)
- 1 quart-sized sealable plastic bag
- 1 gallon-sized sealable plastic bag
Step-by-Step Directions:
- Mix the Base: In the small (quart-sized) bag, combine the half-and-half, sugar, and vanilla. Press as much air out as you can and seal it very tightly. Double-check the seal!
- Prepare the Ice Bath: In the large (gallon-sized) bag, combine the ice and the rock salt.
- Combine the Bags: Place the small, sealed bag of cream mixture inside the large bag of ice and salt. Seal the large bag tightly.
- Shake it Up! Now for the fun part. Shake the bag vigorously for 5 to 10 minutes. It’s a good idea to wear gloves or wrap the bag in a towel, as it will get extremely cold. You’ll see the mixture in the small bag start to thicken and freeze.
- Enjoy! Once the mixture has reached an ice cream consistency, carefully remove the small bag. Wipe off any salt from the outside before opening it. You can eat it right out of the bag with a spoon!
Pro-Tip: In my experience, rock salt works significantly better than table salt. Its large crystals melt the ice more slowly and create a super-cold brine. This drastic drop in temperature is what freezes the ice cream mixture quickly and smoothly, preventing large ice crystals from forming.
Save this fun activity for a hot summer day!
Key Takeaways: Your Quick Guide to no bake desserts
Let’s recap the essentials. When you need a dessert without the drama, keep these key points in mind.
- Beat the Heat: The number one reason to love no-bake desserts is enjoying a delicious homemade treat without turning your kitchen into a sauna. They are the undisputed champions of summer.
- Embrace Simplicity: Most of these recipes rely on common, easy-to-find pantry staples and involve minimal, straightforward steps. For the ultimate in ease, look for recipes with keywords like “5-minute” or “3-ingredient.”
- Chill Time is Key: The real magic of no-bake desserts happens in the refrigerator or freezer. Always remember to factor in the required chilling time—which can range from 1 hour to overnight—for your dessert to set properly and for the flavors to meld.
- Get Creative: Think of these recipes as templates. No-bake cheesecakes, bars, and mousses are incredibly versatile. Don’t be afraid to swap out the type of fruit, use a different cookie for the crust, or add a new flavor extract to make the recipe uniquely yours.
People Also Ask About no bake desserts
What are some good no-bake desserts?
Some of the best and most popular no-bake desserts include classic No-Bake Cheesecake (especially Oreo or fruit-topped), layered desserts like Chocolate Eclair Cake or Dessert Lasagna, quick No-Bake Peanut Butter Bars, and simple cream pies like Lemon Icebox Pie. These are loved for their simple preparation, creamy textures, and delicious results without any oven time.
What dessert can I make in 5 minutes?
You can make several surprisingly delicious desserts in about 5 minutes of prep time. A Chocolate Avocado Mousse comes together instantly in a blender. A No-Bake Eclair Cake involves simply layering crackers and a quick pudding mix. And for a fun activity, you can shake up Ice Cream in a Bag in just 5-10 minutes. These options are perfect for last-minute sweet cravings.
What desserts can I make without a lot of ingredients?
Many fantastic no-bake desserts require very few ingredients. A classic Lemon Icebox Pie can be made with just 3 ingredients: sweetened condensed milk, lemon juice, and a pre-made crust. Similarly, many no-bake energy bites, simple chocolate truffles, and fruit and yogurt parfaits can be made with 5 ingredients or less, making them both easy and budget-friendly.
Final Thoughts
As you can see, turning your oven on is not a prerequisite for creating a truly impressive and satisfying dessert. The world of no-bake treats is rich with creamy, crunchy, fruity, and chocolatey possibilities that are accessible to everyone, regardless of your skill level in the kitchen. From elegant truffles to kid-friendly ice cream, there’s a simple, oven-free recipe waiting to solve your next sweet craving.
Now I’d love to hear from you! What’s your go-to dessert when you want to avoid the oven? Share your favorites in the comments below
