As an Amazon Associate KitchenwareSets.com earns from qualifying purchases.
Genius Tiny Kitchen Design Hacks That Create More Space
Do you ever feel like your tiny kitchen is stifling your culinary creativity, turning cooking from a joy into a cramped chore? You’re not alone if you’ve found yourself wishing for more counter space, better storage, or just enough room to comfortably chop vegetables without elbowing the toaster. It’s frustrating when your passion for food bumps up against the reality of limited square footage.
The struggle is real when every inch counts, and disorganization creeps in, making your small kitchen feel even smaller and less functional. From overflowing drawers to an endless search for that one elusive spice jar, the challenges of a compact kitchen can make you want to order takeout every night. But what if your tiny kitchen isn’t a limitation, but rather an exciting canvas for innovative design and smart solutions?
Transforming a tiny kitchen involves maximizing vertical space, integrating multi-functional elements, and employing visual tricks like light colors and reflective surfaces. Clever storage, smart layouts, and strategic decluttering can turn any small kitchen into an efficient and stylish hub. This comprehensive guide, updated for 2025, will empower you with genius hacks and practical insights to unlock the full potential of your compact cooking space, making it a place you truly love to be.
Is Your Tiny Kitchen Limiting Your Culinary Dreams? Not Anymore!
Transforming a tiny kitchen involves maximizing vertical space, integrating multi-functional elements, and employing visual tricks like light colors and reflective surfaces. Clever storage, smart layouts, and strategic decluttering can turn any small kitchen into an efficient and stylish hub, making cooking and entertaining enjoyable again. It’s a common misconception that a small kitchen inherently means a compromised culinary experience. In reality, the most impactful transformations often occur in these compact spaces, where every design decision is intentional and every solution is a testament to ingenuity.
For years, I’ve seen countless kitchens, from sprawling gourmet setups to charming, pint-sized nooks. The universal challenge of small spaces is real, whether you’re a seasoned chef or a beginner cook. You might feel like you’re constantly battling clutter, struggling to find ingredients, or simply lacking the elbow room to prepare a meal with ease. Perhaps your kitchen feels more like a storage locker than a heart of the home. But here’s the exciting part: these pain points are precisely what clever design is designed to solve.
This blog post isn’t just about fitting more things into a small area; it’s about reimagining your space to flow better, function smarter, and look more expansive. We’ll delve into actionable, inspiring solutions that go beyond basic organization, drawing from expert design principles and real-world success stories. We’ll explore how to create more space, improve functionality, and elevate the style of your kitchen, proving that size doesn’t have to limit your potential. By the end, you’ll see your tiny kitchen not as a problem, but as an opportunity for innovative transformation.
The Hidden Potential in Every Inch
Even the smallest kitchens harbor untapped potential in overlooked areas like vertical walls, inside cabinet doors, and above appliances, which can be transformed into valuable storage and functional zones. Many people look at their small kitchen and immediately see limitations: limited counter space, not enough drawers, or no room for a proper dining area. The frustration is palpable when you’re trying to prep a meal and have nowhere to put your cutting board, or when your pantry is overflowing, yet you can’t find anything.
But what if I told you that your kitchen, no matter how small, is brimming with hidden opportunities? In my experience, the biggest mistake people make is only looking at the obvious horizontal surfaces. The real magic happens when you start looking up, down, and inside. Think about the empty wall space above your sink, the often-forgotten area above your refrigerator, or the inside of your cabinet doors. These are not dead zones; they are prime real estate just waiting to be activated.
The principle that “every inch counts” is a core tenet of professional organizers and minimalist living experts for a reason. It’s about shifting your perspective from scarcity to possibility. We’ll uncover how strategic thinking can turn these seemingly insignificant areas into highly efficient and accessible storage, making your compact kitchen work harder for you. This isn’t just about tidiness; it’s about creating an intuitive and enjoyable cooking environment where everything has a place and is easy to reach.
7 Genius Tiny Kitchen Design Hacks That Create More Space
Discover top tiny kitchen design hacks: 1. Maximize Vertical Space, 2. Optimize Cabinetry, 3. Embrace Multi-Functional Furniture, 4. Implement Smart Countertop Solutions, 5. Use Light & Reflection, 6. Master Strategic Lighting, 7. Prioritize Decluttering & Organization. These are not just theoretical concepts; these are actionable, visually inspiring ideas that I’ve seen successfully implemented in countless small kitchens, transforming them from cramped quarters into highly functional and aesthetically pleasing culinary hubs. The key to success in a small kitchen lies in intentional design and creative problem-solving.
Each of these hacks focuses on addressing specific pain points common in compact spaces, whether it’s the perennial lack of storage, the desire for more prep area, or the need to make the room feel larger and more inviting. We’ll break down each hack with detailed instructions, practical tips, and the kind of “Pro-Tip” insights that come from real-world application. My goal is to equip you with the knowledge to significantly improve the functionality and perceived size of your kitchen, making it a space you genuinely enjoy. These tips are designed for both homeowners looking to renovate and renters seeking impactful, non-permanent changes.
1. Go Vertical: Unlock the Power of Your Walls and Ceilings
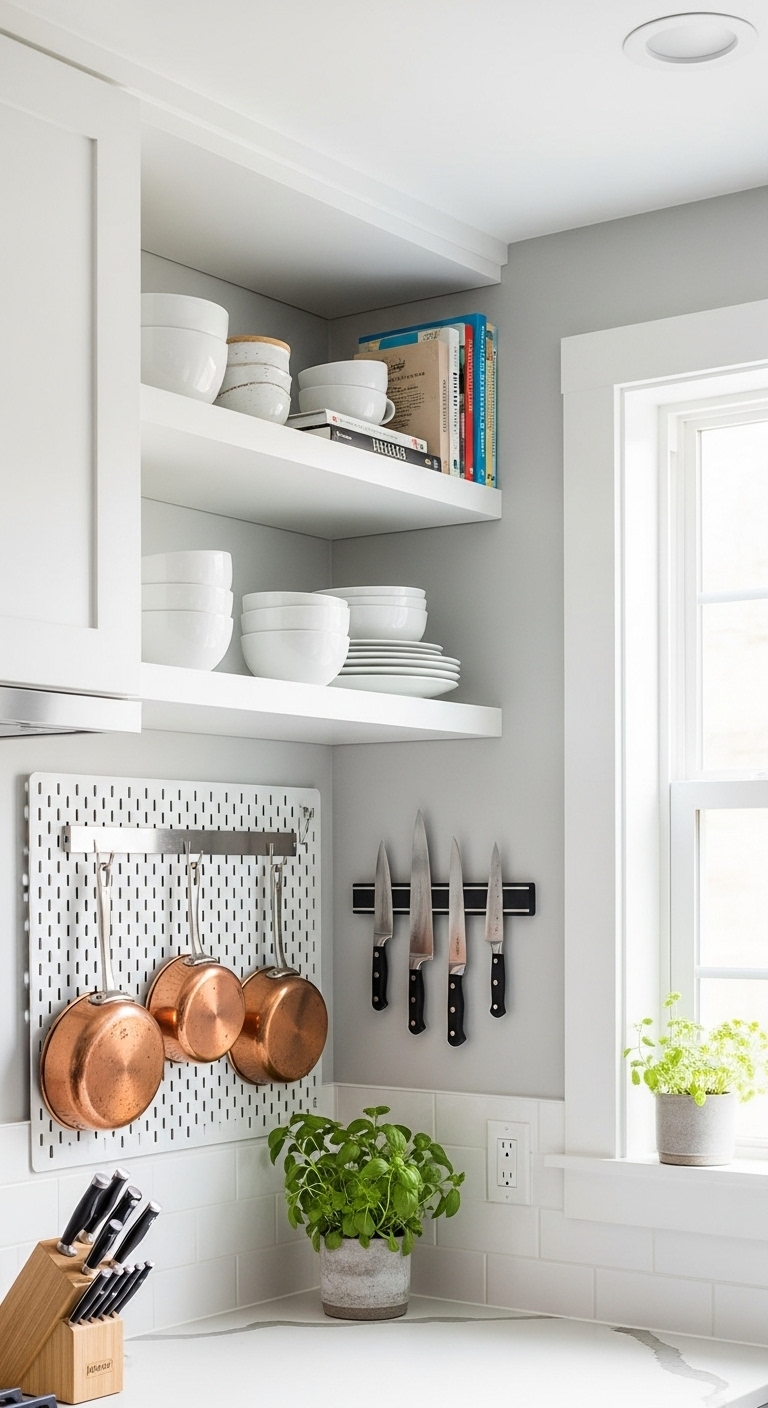
Utilizing vertical space is a cornerstone of tiny kitchen design, transforming unused wall and ceiling areas into prime storage for everything from pots and pans to spices and knives, freeing up precious counter and drawer space. This strategy is a game-changer for anyone feeling suffocated by a lack of storage. When you can’t expand horizontally, you must expand vertically. This means looking beyond standard cabinets and considering every inch of wall space as potential storage gold.
Materials Needed:
* Wall-mounted shelves (floating or bracketed)
* Pegboard kit (with various hooks)
* Magnetic knife strip
* Drill, level, tape measure, anchors/screws
Step-by-Step Directions:
- Assess & Plan: Begin by taking a critical look at your kitchen walls. Identify any unused vertical space above counters, near the sink, or even extending high up towards the ceiling. Consider the items that currently clutter your countertops or overflow from drawers. Map out which of these items could be stored vertically. For example, frequently used utensils might go on a pegboard, while seldom-used serving dishes could reside on high open shelves.
- Install Open Shelving: Open shelving is a visual space expander. For items you use less frequently or for decorative storage (think attractive glassware or cookbooks), install shelves closer to the ceiling. For daily essentials like plates or mugs, place shelves within easy, safe reach. Floating shelves offer a sleek, minimalist look, while bracketed shelves can add a touch of industrial charm.
- Mount Pegboards/Hooks: A pegboard is incredibly versatile for flexible storage. Install it on an empty wall section, perhaps even behind a door if space is truly at a premium. Use a variety of hooks to hang pots, pans, lids, strainers, and cooking utensils. Alternatively, strategically place individual hooks for frequently used items like oven mitts or dish towels, keeping them off the counter but always accessible.
- Add Magnetic Strips: A magnetic strip is a revelation for knife storage, freeing up valuable drawer space and keeping sharp blades safely out of reach. Beyond knives, consider using magnetic strips for spice jars (if they have magnetic bottoms or you transfer spices to magnetic containers) or small metal utensils like whisks and peelers. Place it conveniently above your prep area.
- Utilize Cabinet Tops: Don’t let the space above your existing upper cabinets go to waste! After a good cleaning, this area can be used for decorative storage of seldom-used items, attractive baskets filled with overflow pantry goods, or even a row of small potted herbs. Just ensure items are stable and won’t fall.
Pro-Tip: “When installing open shelving, ensure it’s high enough not to obstruct counter use, but low enough for safe access. Consider the visual weight – too many items can feel cluttered, so curate what you display. A mix of functional and decorative items works best for visual appeal and practicality.”
Pin this clever storage idea to your “Small Kitchen Reno” board!
2. Smart Cabinetry & Drawer Magic: Optimize Inside Out
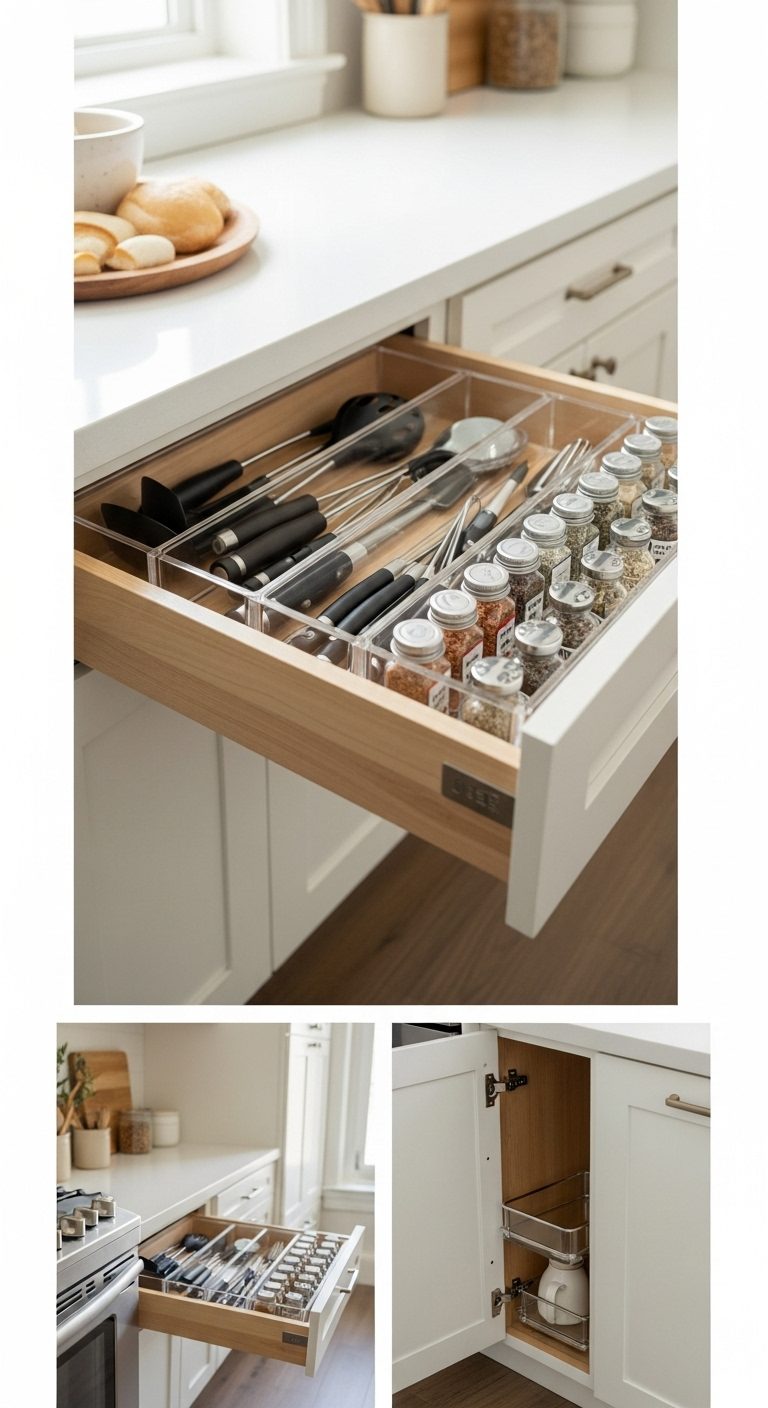
Optimizing the interior of your cabinets and drawers with smart organizers, pull-out solutions, and clever dividers can dramatically increase usable storage space and improve accessibility in a tiny kitchen. It’s not just about having cabinets; it’s about making every cubic inch within them work efficiently for you. Many kitchens, even small ones, have deep, dark cabinets where items get lost or become inaccessible. This hack is about bringing order and maximizing retrieval.
Materials Needed:
* Pull-out shelves/drawers (retrofit kits available)
* Lazy Susan inserts (single or double-tiered)
* Adjustable drawer dividers or custom inserts
* Vertical dividers (for baking sheets, cutting boards)
* Spice drawer organizer or tiered shelf insert
* Measuring tape
Step-by-Step Directions:
- Measure & Map: Before you buy anything, meticulously measure the interior dimensions of all your cabinets and drawers. This is crucial for selecting organizers that fit perfectly. Then, take stock of your kitchen items. Which ones are hard to reach? Which drawers are perpetually messy? Plan out which items will go where, aiming to group similar items together.
- Install Pull-Out Solutions: For deep base cabinets, fixed shelves are a nightmare. Replace them with pull-out shelves or full-extension drawers. This brings items from the back of the cabinet right to you, eliminating the need to rummage and allowing you to utilize the full depth of the space. They are particularly useful for heavy pots and pans or small appliances.
- Integrate Lazy Susans: Corner cabinets are notorious for being black holes. A lazy Susan (turntable) is the perfect solution for these awkward spaces, especially for spices, oils, condiments, or even small pantry items. They allow full rotation, making every item easily visible and accessible with a spin. You can also use smaller ones inside regular deep cabinets.
- Divide & Conquer Drawers: Instead of a jumbled mess, use adjustable drawer dividers to create compartments for utensils, cutlery, and kitchen gadgets. For spices, a tiered drawer organizer allows you to lay bottles flat or at an angle, keeping labels visible. For cooking tools, consider vertical dividers within deep drawers to keep spatulas, whisks, and ladles neatly separated.
- Add Vertical Dividers: Narrow cabinets are ideal for vertical storage. Install simple tension rods or custom vertical dividers to neatly store baking sheets, cutting boards, platters, and even muffin tins upright. This prevents them from toppling over and makes them easy to grab without disturbing other items.
- Consider Slimline/Corner Units (for renovations): If you’re undertaking a more extensive renovation, explore specialized cabinetry. Slimline pantry units can squeeze into narrow gaps (as little as 6 inches wide!) for spice or canned good storage. “Magic” corner units are ingenious pull-out systems that utilize every inch of a blind corner cabinet, bringing hidden shelves out into the open.
Pro-Tip: “Prioritize accessibility for your most frequently used items. Storing them on pull-out shelves or in easily visible drawer organizers will save you time and frustration daily. If you find yourself frequently bending or reaching, it’s time to rethink that item’s placement.”
Re-pin this for your ultimate kitchen organization goals!
3. Multi-Functional Marvels: Furniture & Appliances That Do More
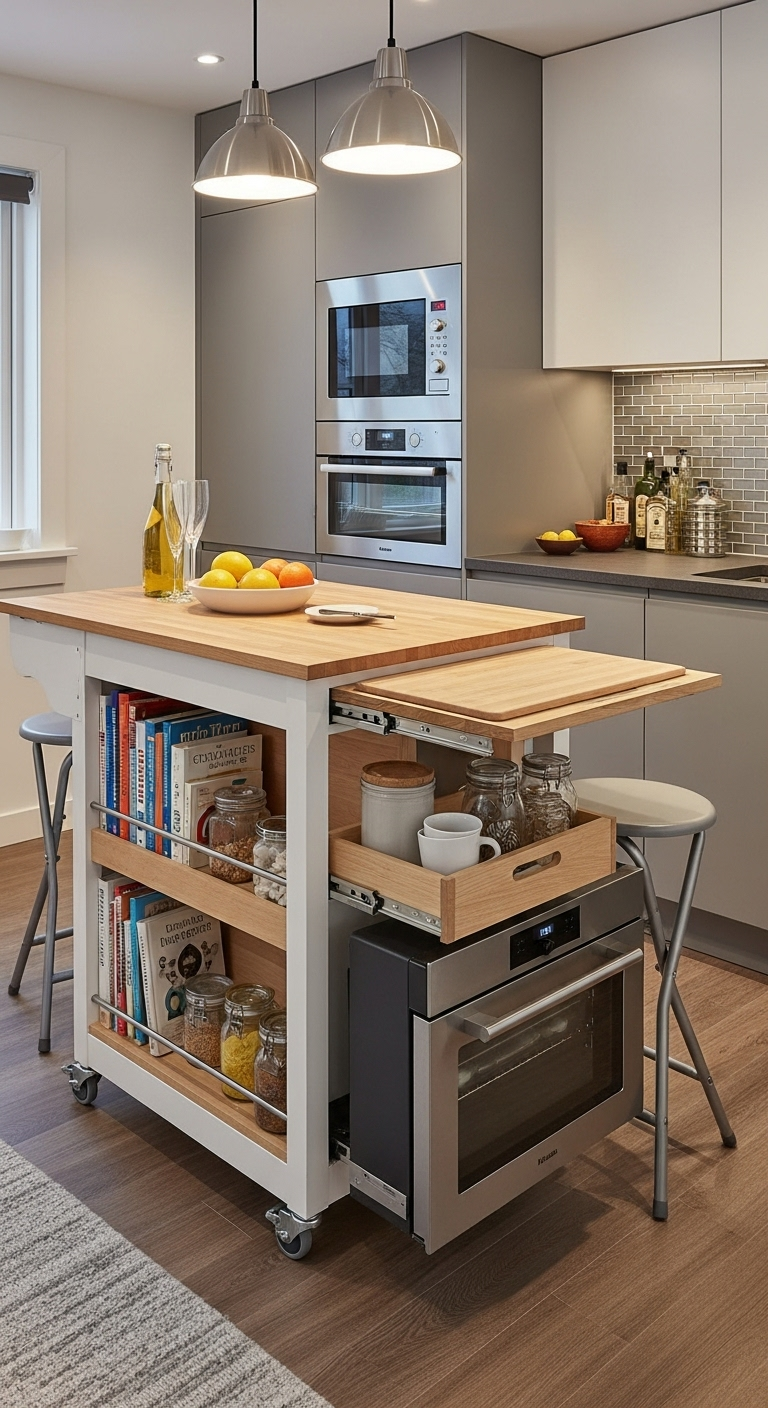
Embracing multi-functional furniture and compact appliances is essential for tiny kitchens, as these items serve multiple purposes, thereby saving valuable floor and counter space. In a small kitchen, every item needs to earn its place. This means looking beyond single-purpose tools and investing in pieces that can adapt and perform various roles, maximizing efficiency and minimizing clutter.
Materials Needed:
* Multi-functional kitchen island/cart (with storage, possibly on wheels)
* Foldable or extendable dining table/wall-mounted drop-leaf table
* Compact or combination appliances (e.g., microwave/convection oven combo, 5-in-1 oven, mini dishwasher)
Step-by-Step Directions:
- Assess Needs: Before purchasing, consider what functions your kitchen currently lacks or where you experience bottlenecks. Do you need more prep space? A dining area? Extra storage? This assessment will guide your choices for multi-functional items.
- Choose a Multi-Functional Island/Cart: A small kitchen island or cart is a workhorse. Look for one that includes built-in storage like shelves, drawers, or even a towel bar. It can serve as an extra prep area, a casual dining spot, or even a portable serving station. If you need maximum flexibility, opt for one on wheels that can be moved out of the way when not in use.
- Opt for Foldable/Extendable Tables: A fixed dining table can consume a lot of space. Instead, choose a wall-mounted foldable table that can be dropped down when not in use, or an extendable table that collapses to a smaller size. This allows you to have a dining area only when you need it, freeing up floor space for daily activities.
- Invest in Combination Appliances: Modern appliances are increasingly designed for efficiency. Look for units that perform multiple tasks, reducing the number of individual appliances you need to store. Examples include a microwave that also functions as a convection oven, a toaster oven that air-fries, or compact 5-in-1 ovens that can bake, broil, toast, and more. Even a small, countertop dishwasher can be a space-saver compared to a full-sized unit.
- Consider Built-In Appliances: If you’re renovating, integrating appliances seamlessly into your cabinetry creates a streamlined, less cluttered look. Built-in refrigerators, dishwashers, and ovens blend into the design, making the kitchen feel larger and more cohesive. Even a range hood that doubles as a spice rack or utensil holder is a clever touch.
Pro-Tip: “When selecting multi-functional items, prioritize quality and ease of use. A wobbly foldable table or a clunky combination appliance will hinder rather than help your small space efficiency. Read reviews and consider how often you’ll be switching its function.”
Tap to save this smart space-saving furniture idea!
4. Countertop Cleverness & Hidden Storage Solutions
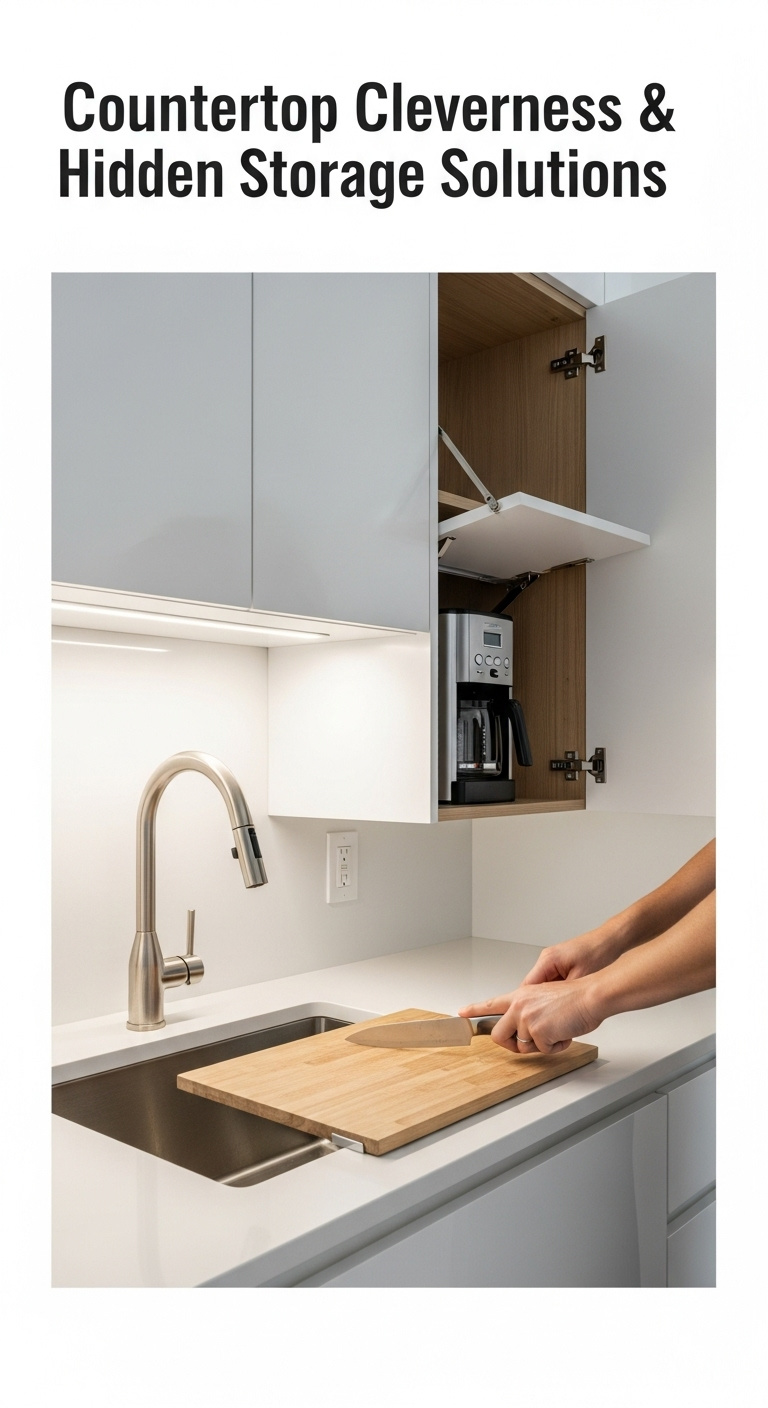
Implementing clever countertop solutions and hidden storage strategies is crucial for maintaining an uncluttered look and maximizing functional prep space in a tiny kitchen. Countertop space is often the most coveted and limited resource in a small kitchen. This hack focuses on ingenious ways to temporarily expand your prep area and ensure that small appliances and tools are out of sight when not in use, creating visual calm and improving workflow.
Materials Needed:
* Over-the-sink cutting board/drying rack (roll-up or fitted)
* Small appliance garage (can be a dedicated cabinet or corner unit)
* Rolling butcher block cart (if not covered by multi-functional)
* Adhesive hooks or shallow bins for inside cabinet doors
* Shelf risers/expanders
Step-by-Step Directions:
- Utilize Over-the-Sink Solutions: Your sink area can double as prep space. Purchase an over-the-sink cutting board that fits snugly over your sink basin, instantly creating an additional work surface. Alternatively, a roll-up drying rack can serve as both a dish dryer and a temporary trivet or prep area. These are easily storable when not needed.
- Create an Appliance Garage: Small appliances like toasters, coffee makers, blenders, and stand mixers can quickly clutter a countertop. Designate a specific cabinet or a corner space as an “appliance garage.” This can be a pull-out shelf within a cabinet or a dedicated corner unit with a roll-down door. Storing these items here when not in use keeps your counters clear and visually appealing.
- Invest in a Rolling Butcher Block: While similar to a multi-functional island, a dedicated rolling butcher block cart is specifically for prep. It provides a durable, extra cutting surface that can be moved wherever you need it – next to the stove, by the sink, or even into an adjacent room for serving. When not in use, it can be tucked away in a corner or a pantry.
- Inside Cabinet Doors: Don’t forget the inside of your cabinet doors! These are perfect for shallow storage. Attach adhesive hooks for measuring spoons or oven mitts, or install thin shelves or wire racks for spice jars, cleaning supplies, or aluminum foil/plastic wrap boxes. This keeps frequently used items accessible without taking up drawer or counter space.
- Above the Fridge/Sink: These often-overlooked spaces can be surprisingly useful. Install narrow open shelves above the kitchen sink for decorative items or frequently used glasses. For the space above your refrigerator, consider a custom-built cabinet or a rolling pantry unit that fits snugly next to it, providing extra storage for bulk items or seldom-used appliances.
Pro-Tip: “The key to countertop cleverness is ‘out of sight, out of mind.’ If an appliance isn’t used daily, find a dedicated spot for it off the counter. This creates visual calm and functional space, making your kitchen feel larger and less chaotic.”
Save this pin for your ultimate kitchen efficiency!
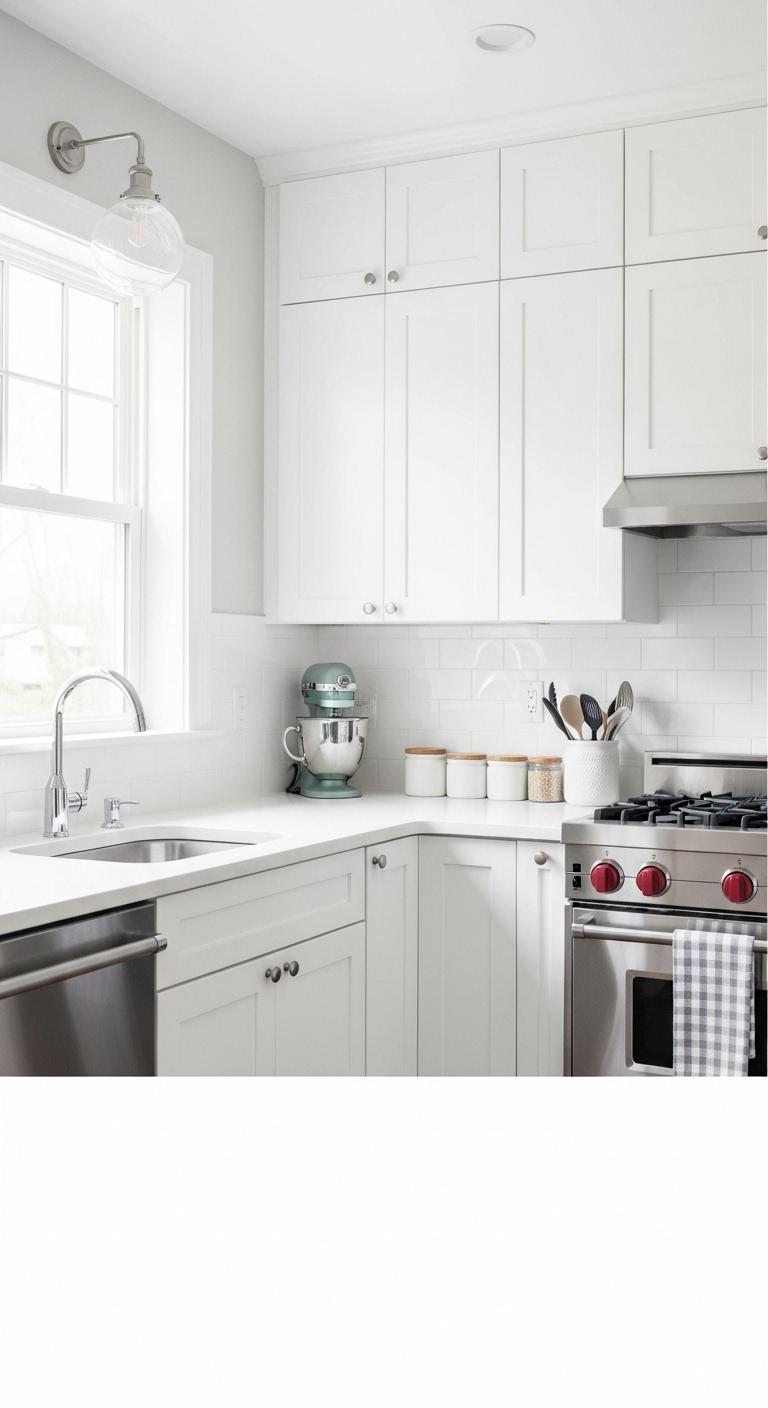
5. The Illusion of Space: Light Colors & Reflective Surfaces
Employing light color palettes and incorporating reflective surfaces is a powerful visual trick to make a small kitchen feel significantly larger, brighter, and more expansive. Color and light play a crucial psychological role in how we perceive space. By strategically choosing certain hues and finishes, you can make your compact kitchen feel airy and open, rather than cramped and enclosed.
Materials Needed:
* Light-colored paint (white, off-white, pale gray, soft pastels like very light blue or green)
* Glossy or polished tiles (subway, large format, ceramic, porcelain)
* Stainless steel appliances
* Glass-front cabinet doors (or glass inserts for existing doors)
* Mirror (for backsplash or wall accent, optional)
Step-by-Step Directions:
- Choose a Light Color Palette: The most impactful change you can make is to paint your walls, cabinets, and even the ceiling in light, bright hues. White, off-white, pale grays, and soft pastels reflect light, pushing the walls visually outward and creating an immediate sense of openness and airiness. A monochromatic scheme (different shades of the same light color) can also create a seamless, expansive look.
- Incorporate Glossy Surfaces: Opt for materials with a polished or glossy finish. Glossy subway tiles for backsplashes, polished quartz or marble countertops, and shiny floor tiles (like large format porcelain) all reflect light, bouncing it around the room and enhancing the perception of space. This sheen adds a touch of elegance while serving a practical purpose.
- Select Reflective Appliances: Stainless steel appliances are not just modern and sleek; their reflective qualities are excellent for bouncing light. They act like subtle mirrors, reflecting the surrounding space and contributing to the overall brightness and openness of the kitchen. If stainless steel isn’t your preference, consider appliances with a high-gloss finish.
- Consider Glass-Front Cabinets: Replacing solid cabinet doors with glass-front ones can significantly reduce visual bulk. These cabinets allow your eye to see through to the back wall, creating a sense of depth and making the kitchen feel less closed-in. Just remember to keep the contents neatly organized, as they will be visible!
- Experiment with Mirrored Backsplash (Bold Move): For a truly dramatic effect, consider installing a mirrored backsplash. This can make the kitchen feel dramatically larger by reflecting the entire room, essentially doubling your perceived space. It’s a bold choice that requires careful consideration but can yield stunning results in a tiny kitchen. Ensure it’s tempered glass for safety.
Pro-Tip: “While light colors are key, don’t shy away from subtle textures or a single, well-placed dark accent. A dark island base or a dark accent wall in a natural shadow area can actually make a room feel longer or deeper without overwhelming it, adding depth and character.”
Transform your kitchen’s feel – pin this visual trick!
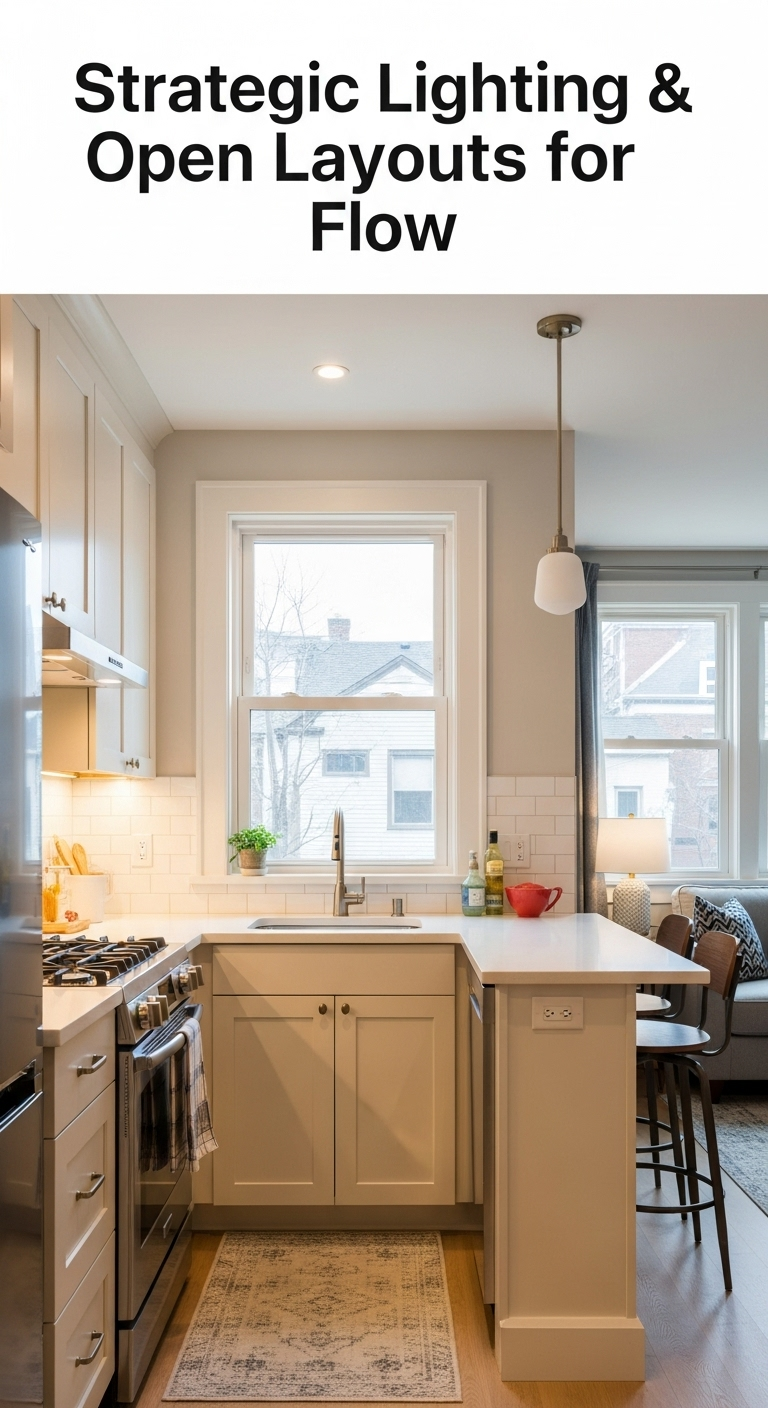
6. Strategic Lighting & Open Layouts for Flow
Strategic layering of artificial lighting and, where feasible, opening up the kitchen layout can significantly enhance the perception of space, improve functionality, and create a more inviting flow in a small kitchen. Light, both natural and artificial, is a powerful design tool. It can brighten, highlight, and visually expand a space, while an open layout can break down barriers and create a seamless connection with adjacent rooms.
Materials Needed:
* Various light fixtures (recessed lights, pendant lights, under-cabinet LED strips, sconces)
* Professional assistance for structural changes (if pursuing open layout)
* Sheer or minimal window treatments
Step-by-Step Directions:
- Maximize Natural Light: The easiest way to make any room feel bigger is to let in more natural light. If possible, consider enlarging existing windows or even adding a skylight. Keep window treatments minimal – think sheer blinds, light curtains, or no treatments at all – to avoid blocking precious light. Position mirrors opposite windows to reflect and amplify natural light.
- Layer Artificial Lighting: A single overhead light fixture is rarely enough for a small kitchen. Implement a layered lighting scheme:
- General Illumination: Recessed lighting or flush-mount fixtures provide overall brightness without taking up visual space.
- Task Lighting: Crucial for safety and efficiency. Install under-cabinet LED strip lights to illuminate countertops where you prep food. Consider small spot lights over the sink or stove.
- Accent Lighting: A stylish pendant light over a small island, peninsula, or even just the sink can add a focal point and draw the eye upward, enhancing the feeling of height.
- Consider Open Layouts (Homeowners): If feasible and your home’s structure allows, consult with a professional (architect or contractor) about removing non-load-bearing walls or sections of walls to create an open flow between the kitchen and adjacent living or dining areas. This creates a much larger, more integrated living space and makes the kitchen feel less isolated and cramped.
- Remove Upper Cabinet Doors (Renter-Friendly): For renters who can’t make structural changes, a simple yet effective trick is to carefully remove upper cabinet doors (and store them safely for reinstallation later!). This instantly creates a more open, visually lighter upper half of the kitchen, mimicking the feel of open shelving. Just ensure the contents are neatly arranged.
- Maintain Clean Lines: Regardless of your layout, choose simple, classic cabinet designs with minimal ornamentation. Handle-less cabinets or integrated pulls contribute to a seamless, less visually busy look. Integrate appliances where possible to maintain a cohesive, streamlined space, preventing visual clutter that can make a small kitchen feel even smaller.
Pro-Tip: “Good lighting is paramount. It not only brightens the space but also highlights design features and makes tasks safer and more enjoyable. For renters, battery-operated stick-on LED lights are a game-changer for under-cabinet illumination and can be removed without damage.”
Light up your small kitchen – save this pin for inspiration!
7. The Art of Decluttering & Organization
The foundational step for any successful tiny kitchen transformation is the ruthless art of decluttering and implementing a systematic organization strategy. No amount of clever design or smart storage solutions will truly optimize a small kitchen if it’s filled with unused, duplicate, or unnecessary items. Decluttering creates space, and organization ensures that every item has a designated, accessible place, preventing future chaos.
Materials Needed:
* Donation bags, trash bags, recycling bins
* Various drawer organizers, shelf risers, storage bins/baskets (clear ones are great for visibility)
* Label maker (optional, but highly recommended)
Step-by-Step Directions:
- Purge Ruthlessly (The “Empty Everything” Method): This is the most crucial step. Start by removing everything from your cabinets, drawers, and countertops. Seriously, every single item. Lay it all out on a large table or floor. Then, go through each item individually and ask yourself: “Have I used this in the last year? Do I have a duplicate? Is it broken or chipped? Does it bring me joy or serve a clear, regular purpose?” Be honest. Donate, sell, or discard anything that doesn’t meet your criteria. This process is surprisingly liberating.
- Clean Thoroughly: With your cabinets and drawers empty, take the opportunity to deep clean all surfaces. Wipe down shelves, vacuum out crumbs, and scrub away any spills. Starting with a fresh, clean slate is incredibly motivating for the next steps.
- Implement Zoning: Once you have only the items you truly need and use, it’s time to put them back strategically. Group like items together (e.g., all baking supplies in one area, breakfast items in another, pots and pans near the stove). Store items in close proximity to where they will be used – this is called “zoning” and it streamlines your workflow. For instance, dishes should be near the dishwasher or sink, and cooking utensils near the stove.
- Prioritize Accessibility: Place your most-used items at eye level and within easy reach. The less frequently used items can go on higher shelves, in deeper cabinets, or in less convenient spots. Think about your daily routine: where do you grab your coffee mug? Your everyday plate? Make those items the easiest to access.
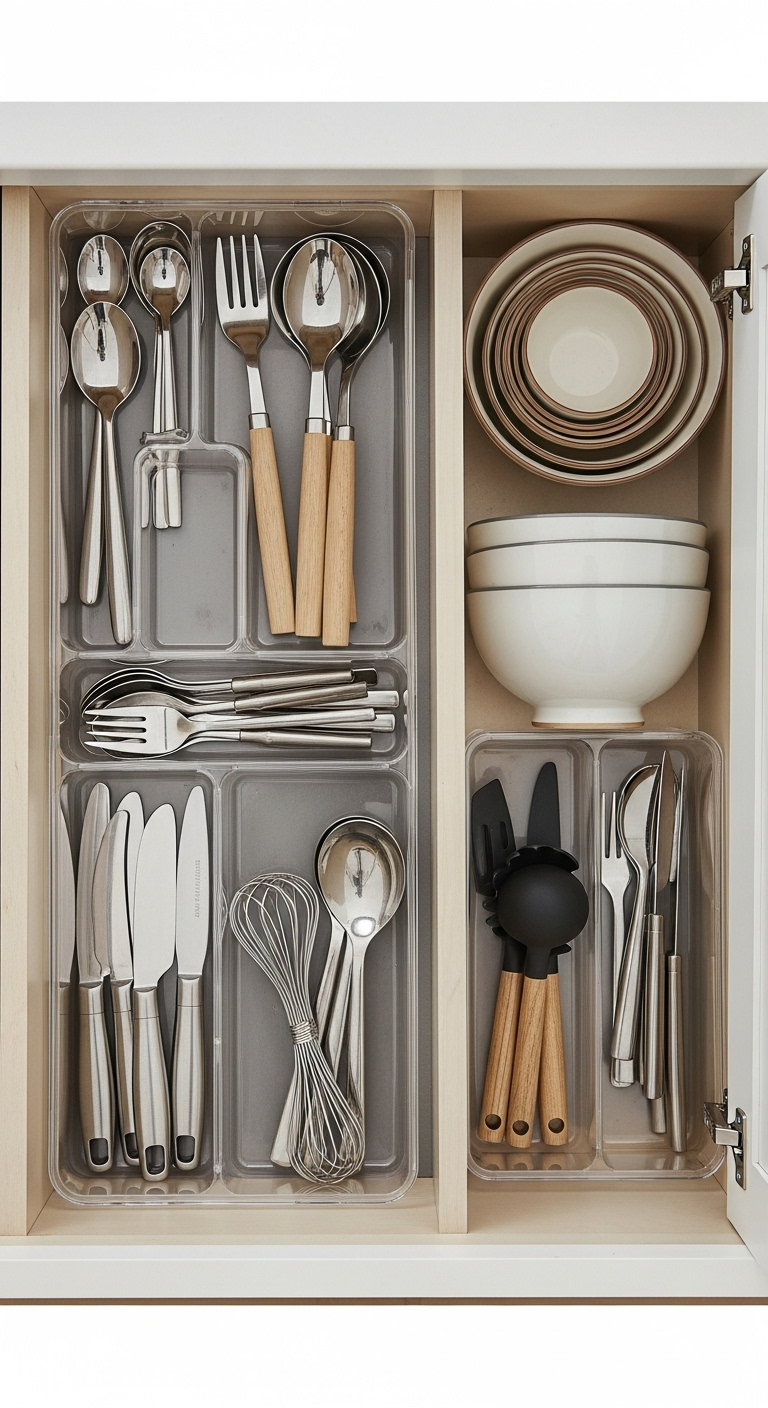
- Utilize Organizers: Now that you know what you’re keeping and where it’s going, invest in appropriate organizers. Drawer organizers keep cutlery and gadgets tidy. Shelf risers double your vertical storage within cabinets. Clear storage bins or baskets are excellent for corralling oddly shaped items or creating mini-pantries within larger cabinets. These tools ensure everything has a designated place and prevent items from migrating and creating new clutter.
- Maintain Regularly: Organization isn’t a one-time event; it’s an ongoing practice. Schedule a quick 15-minute decluttering and tidy-up session once a month. This prevents new clutter from accumulating and ensures your systems are still working for you. A daily “reset” (wiping counters, putting things away) also goes a long way.
Pro-Tip: “Don’t underestimate the power of a good purge. It’s not just about tidiness; it’s about creating mental space and revealing the true potential of your kitchen before you even buy a single organizer. You might be surprised how much ‘space’ you already have once the excess is gone.”
Start your decluttering journey today – save this guide!
Key Takeaways: Your Quick Guide to Tiny Kitchen Design
Transforming a tiny kitchen into a functional and stylish space doesn’t require a complete overhaul or a massive budget. It’s about smart choices and creative solutions. Here’s a quick recap of the most impactful strategies:
- Maximize Every Inch: Look up! Utilize vertical space with wall-mounted shelves, pegboards, and magnetic strips to free up precious counter and drawer space.
- Smart Storage Solutions: Optimize the inside of your cabinets and drawers with pull-out shelves, lazy Susans, and custom dividers to improve accessibility and make every cubic inch count.
- Multi-Functional Magic: Invest in furniture and appliances that serve multiple purposes, like a kitchen island with built-in storage or a combination oven, to save valuable floor space.
- Visual Illusions: Employ light color palettes (whites, pale grays), reflective surfaces (glossy tiles, stainless steel), and strategic lighting to make your small kitchen feel larger, brighter, and more inviting.
- Declutter First: Before any design project, begin with a ruthless purge to remove unused items. Commit to ongoing organization and zoning to maintain a tidy, efficient kitchen.
By implementing these core principles, you can turn your small kitchen from a source of frustration into a hub of efficiency and enjoyment.
People Also Ask About Tiny Kitchen Design
How can I make my small kitchen look bigger?
To make a small kitchen appear larger, focus on light color palettes (whites, pale neutrals), incorporate reflective surfaces like glossy tiles or stainless steel, and maximize natural light. Strategic artificial lighting, an open layout where possible, and minimalist design with clean lines also contribute significantly to an expansive feel. Removing visual clutter and ensuring good flow are also key.
What are the best storage solutions for a small kitchen?
The best storage solutions for small kitchens prioritize vertical space and internal organization. Think wall-mounted open shelving, pegboards, and magnetic strips for walls. Inside cabinets, utilize pull-out shelves, lazy Susans, and drawer organizers. Multi-functional furniture like islands with built-in storage and over-the-sink accessories also provide invaluable space, as do pantry doors with shallow shelving.
Are there budget-friendly tiny kitchen renovation ideas?
Absolutely! Budget-friendly tiny kitchen renovations can include painting existing cabinets a lighter color, adding peel-and-stick backsplash tiles, installing affordable open shelving, or updating hardware. Focusing on smart organization tools, decluttering, and DIY countertop resurfacing (like painting or contact paper) can also make a significant impact without a full remodel. Small changes like adding under-cabinet lighting can also transform the space.
How can renters improve their small kitchen without permanent changes?
Renters can transform their small kitchens with non-permanent changes like adding temporary wall-mounted shelving (using strong adhesive hooks if permitted), utilizing freestanding multi-functional carts, and investing in drawer and cabinet organizers. Over-the-sink solutions, removable wallpaper for accents, portable appliances, and even carefully removing upper cabinet doors (if you can store them) are also great options. Focus on anything that can be removed without damage.
Final Thoughts
Your tiny kitchen is not a sentence to culinary confinement; it’s an exciting opportunity for innovation. As we’ve explored, with thoughtful design and a strategic approach, even the most compact cooking spaces hold immense potential for functionality, efficiency, and undeniable style. From embracing the power of vertical storage to conjuring illusions of grandeur with light and reflection, every hack is a step towards a kitchen that truly serves your needs and sparks your joy.
Remember, the goal isn’t just to fit more things in, but to create a space that feels good to be in, where cooking is a pleasure, not a puzzle. By decluttering with purpose, organizing with intention, and designing with cleverness, you can transform your small kitchen into a place that feels spacious, inviting, and uniquely yours.
Which hack are you most excited to try first in your own home?
