As an Amazon Associate KitchenwareSets.com earns from qualifying purchases.
Measuring Cups for Liquids vs. Dry Ingredients: Why They’re Different, When to Use Each, and Common Mistakes
Are measuring cups the same for liquids and dry ingredients? If you’ve ever wondered why your recipes don’t always turn out as expected, the answer might lie in how you’re measuring your ingredients. While liquid and dry measuring cups do hold the same volume, they are designed differently to ensure precision for their specific uses.
Confused about whether you can use one type of cup for both liquids and dry ingredients? Discover the essential differences between dry and liquid measuring cups, why using the right one matters, and how this affects your baking and cooking outcomes. I’ll guide you through the nuances of these kitchen tools, including common mistakes to avoid and practical tips for perfect measurements every time. Keep reading to ensure your recipes turn out exactly as you intend, and learn how to master your measuring techniques.
Key Facts:
1. Dry and liquid measuring cups hold the same volume but have different designs.
2. Using the wrong type of measuring cup can lead to inaccurate measurements.
3. Dry measuring cups are designed to be filled to the brim and leveled off.
4. Liquid measuring cups have a spout and extra space to prevent spills.
5. Accurate measurements are crucial for successful baking and cooking outcomes.
Contents
show
What Are Measuring Cups?
Measuring cups are essential kitchen tools that help ensure accuracy in cooking and baking. These handy devices come in various sizes and are designed to measure specific amounts of ingredients, whether they’re dry or liquid. But what exactly are measuring cups, and why do we need different types?
Definition and History of Measuring Cups
Measuring cups are standardized containers used to measure the volume of ingredients in cooking and baking. They’ve been around for centuries, evolving from simple household items to precise measuring tools. The concept of standardized measurements dates back to ancient civilizations, but the modern measuring cup as we know it today gained popularity in the late 19th century.
In the United States, Fannie Farmer, often called the “Mother of Level Measurements,” played a crucial role in popularizing standardized measuring cups. She introduced the concept of level measurements in her 1896 Boston Cooking-School Cook Book, revolutionizing home cooking and baking.
Types of Measuring Cups
There are two main types of measuring cups: dry measuring cups and liquid measuring cups. Let’s take a closer look at each:
Dry Measuring Cups
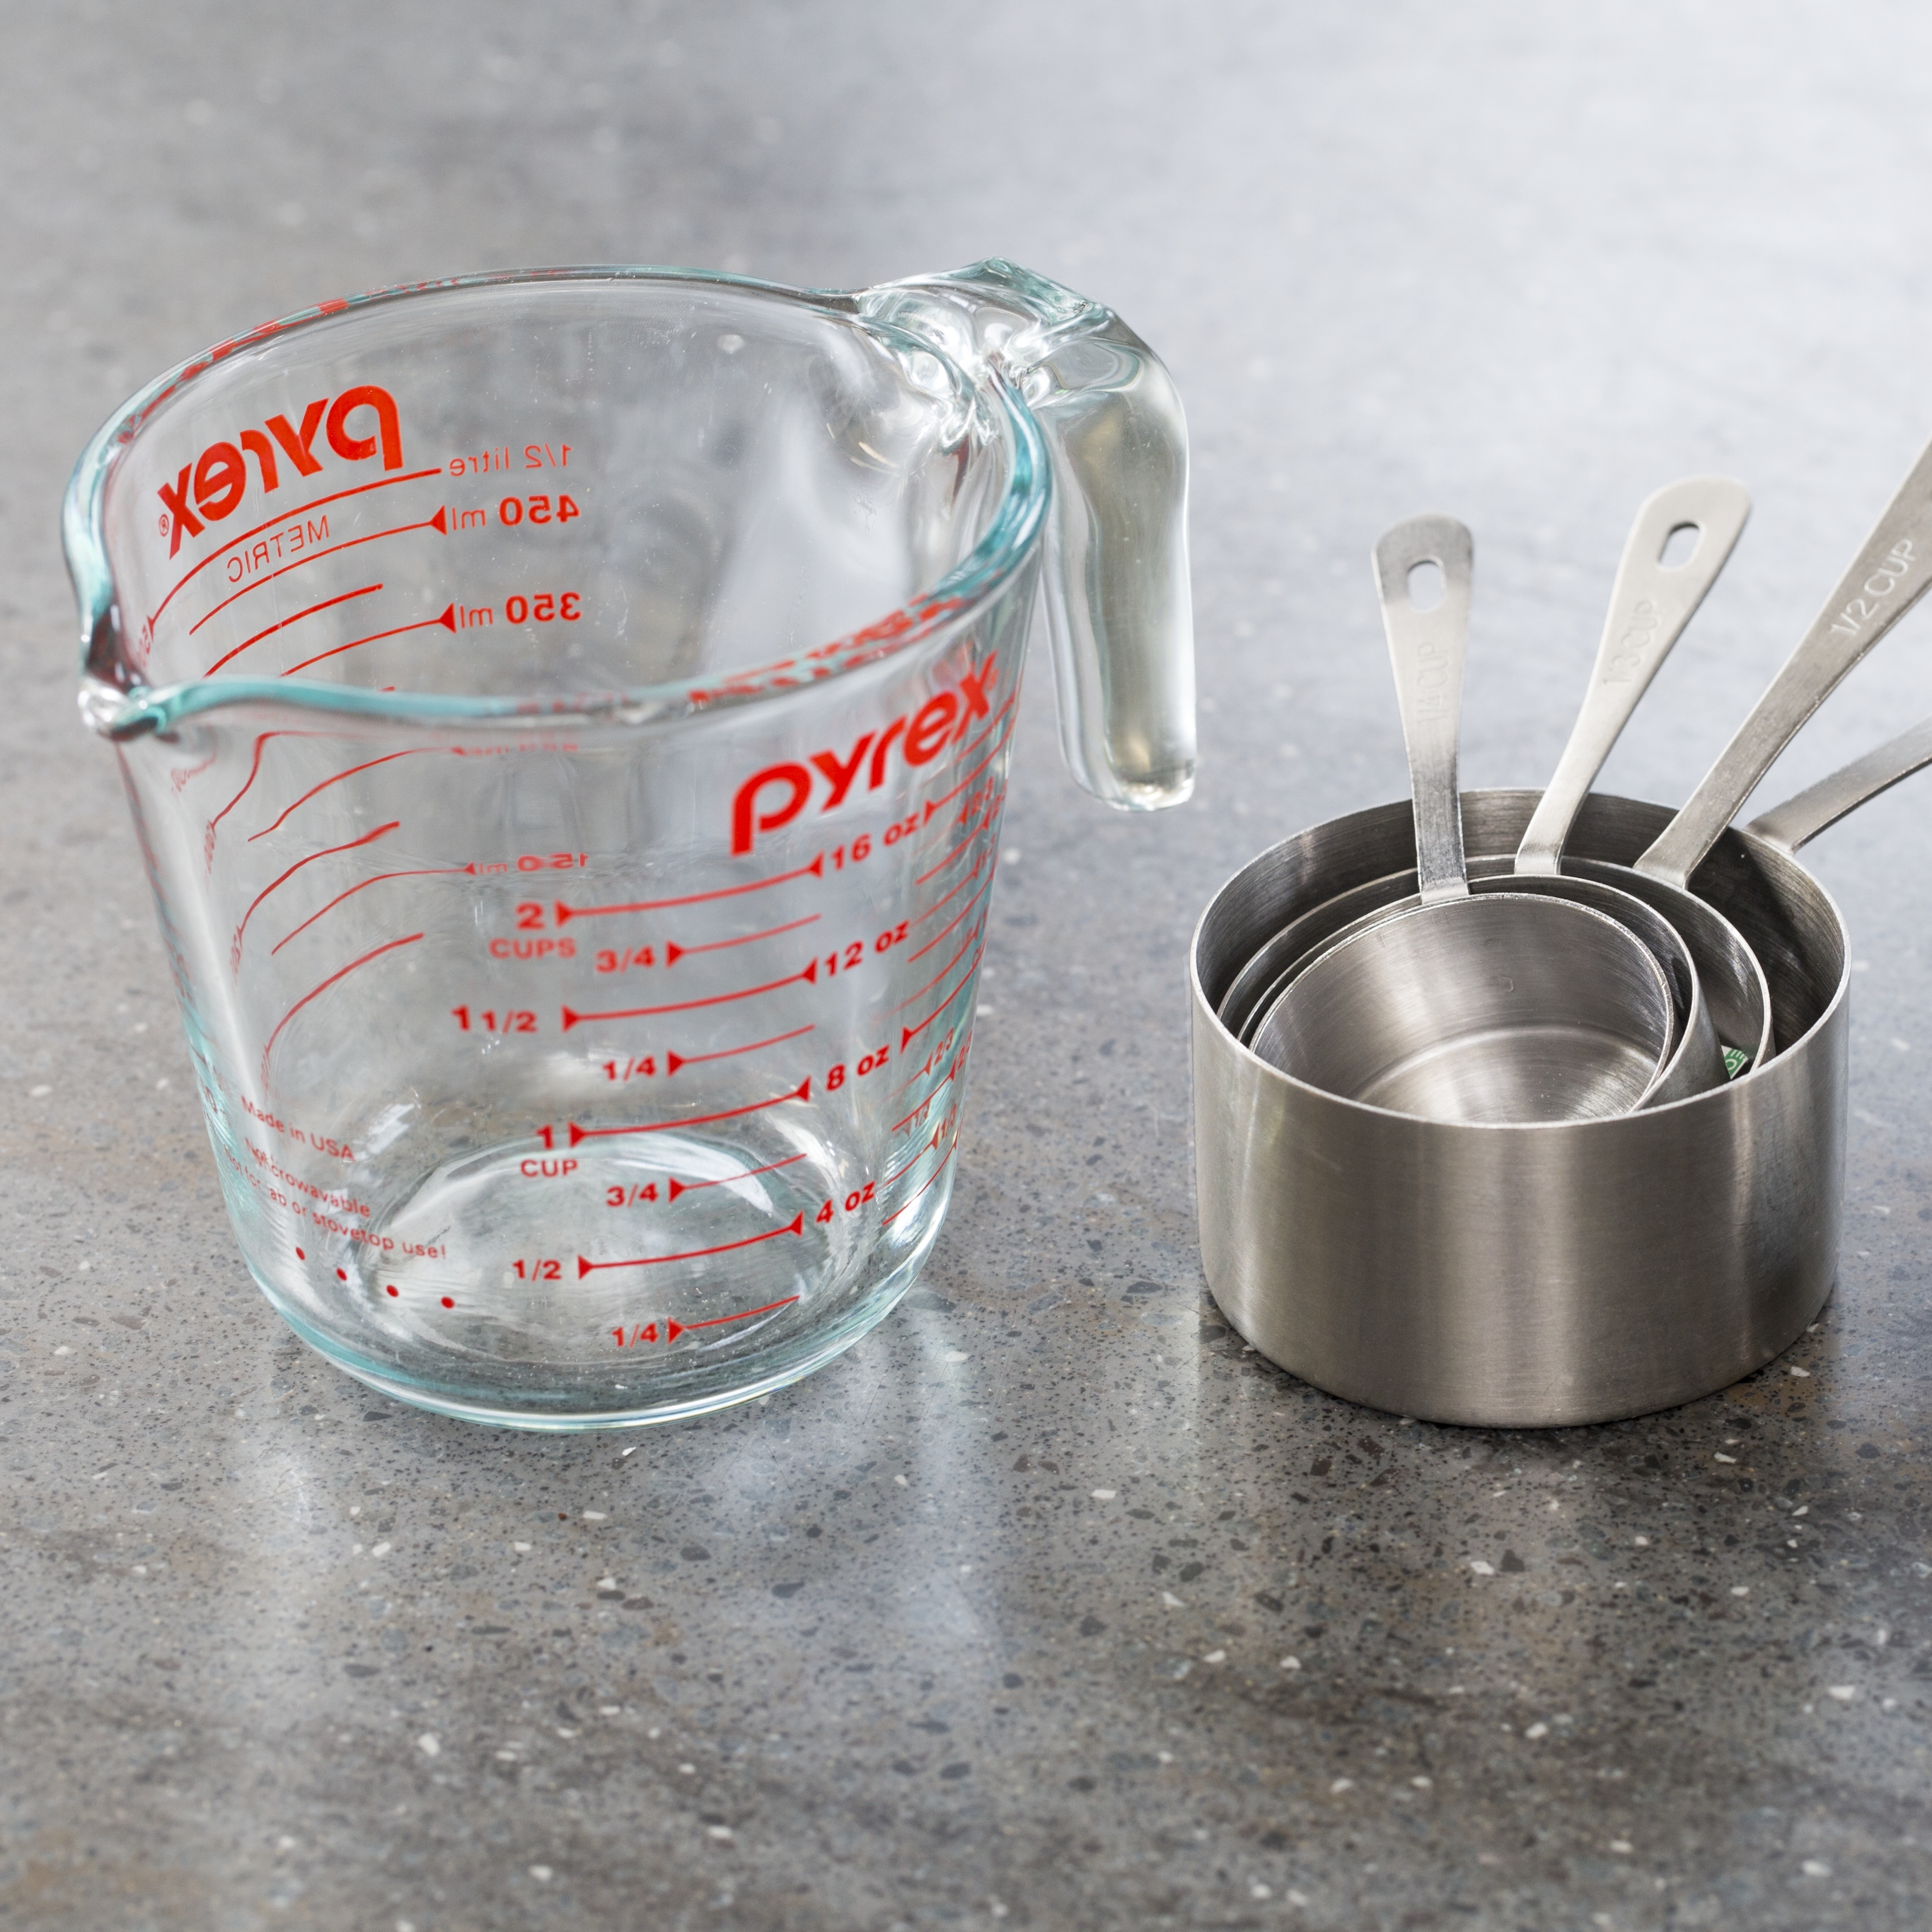
Dry measuring cups are designed specifically for measuring dry ingredients like flour, sugar, rice, and nuts. They typically come in sets with various sizes, including 1/4 cup, 1/3 cup, 1/2 cup, and 1 cup. These cups are meant to be filled to the brim and leveled off with a straight edge for accurate measurements.
A set of dry measuring cups for precise ingredient measurement – source
Liquid Measuring Cups
Liquid measuring cups, on the other hand, are designed for measuring liquids such as water, milk, and oil. They usually have a spout for easy pouring and are marked with graduated measurements on the side. Liquid measuring cups often have extra space above the highest measurement line to prevent spills.
Common Materials Used in Measuring Cups
Measuring cups come in various materials, each with its own advantages:
- Plastic: Lightweight, durable, and affordable. Ideal for everyday use but may absorb odors over time.
- Glass: Transparent, allowing for easy reading of measurements. Heat-resistant and doesn’t absorb odors or stains.
- Metal: Durable and long-lasting. Often used for dry measuring cups due to their sturdy construction.
- Silicone: Flexible and heat-resistant. Easy to clean and store.
When choosing measuring cups, consider factors like durability, ease of cleaning, and your specific cooking needs. For instance, if you frequently work with hot liquids, glass or metal cups might be a better choice than plastic ones.
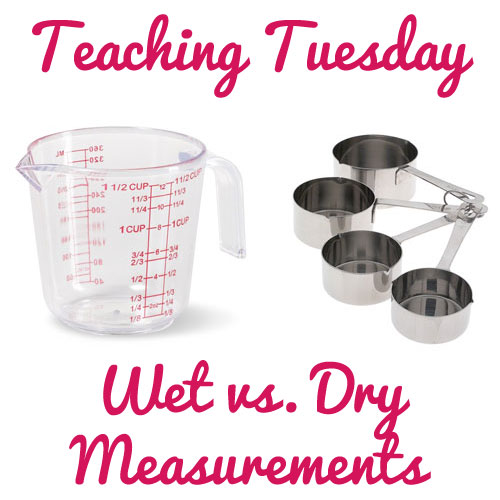
Are Measuring Cups the Same for Liquids and Dry Ingredients?
This is a common question among home cooks and bakers, and the answer might surprise you. While both types of measuring cups are designed to measure volume, they are not interchangeable due to their specific designs and intended uses.
Do Dry and Liquid Measuring Cups Hold the Same Volume?
Technically, yes. A cup is a cup, whether it’s designed for dry or liquid ingredients. Both types of measuring cups are calibrated to hold the same volume. For example, a 1-cup dry measuring cup and a 1-cup liquid measuring cup both hold 8 fluid ounces or 237 milliliters.
However, the key difference lies in how these cups are designed to be used and how accurately they can measure different types of ingredients. According to America’s Test Kitchen, while the volume is the same, the functionality differs significantly.
Why Design and Functionality Differ for Dry and Liquid Cups
The design differences between dry and liquid measuring cups are not arbitrary. They’re carefully crafted to ensure accurate measurements for different types of ingredients:
- Dry Measuring Cups:
- Designed to be filled to the brim and leveled off
- Usually come in sets with various sizes
- Have straight sides for easy leveling
- Often made of metal or plastic
- Liquid Measuring Cups:
- Have a spout for easy pouring
- Include extra space above the highest measurement line
- Usually transparent (glass or clear plastic) for easy reading
- Often have multiple measurement scales (cups, ounces, milliliters)
These design differences are crucial for accuracy. For instance, trying to measure a cup of flour in a liquid measuring cup could lead to significant inaccuracies. The flour might settle or compact, leading to overmeasuring. Conversely, measuring water in a dry measuring cup could result in spills and inaccurate measurements.
How to Identify Dry vs. Liquid Measuring Cups
Knowing how to distinguish between dry and liquid measuring cups is essential for accurate cooking and baking. Here are some key features to look out for:
Key Design Features
- Shape and Structure:
- Dry measuring cups: Usually have a flat top for easy leveling and come in a set of different sizes.
- Liquid measuring cups: Typically have a spout and handle, with measurement markings on the side.
- Material:
- Dry measuring cups: Often made of metal or opaque plastic.
- Liquid measuring cups: Usually made of clear glass or plastic for easy reading of measurements.
- Capacity:
- Dry measuring cups: Come in standard sizes like 1/4 cup, 1/3 cup, 1/2 cup, and 1 cup.
- Liquid measuring cups: Often larger, with capacities of 1 cup, 2 cups, 4 cups, or more.
Visual Indicators
Visual comparison of dry and liquid measuring cups – source
- Markings:
- Dry measuring cups: Usually only marked for their specific size (e.g., “1 cup” or “1/2 cup”).
- Liquid measuring cups: Have multiple measurement lines, often including cups, ounces, and milliliters.
- Rim Design:
- Dry measuring cups: Have a smooth, flat rim for leveling off ingredients.
- Liquid measuring cups: Feature a spout for pouring liquids without spills.
By understanding these differences, you can easily identify which type of measuring cup you’re dealing with and use it appropriately for the best results in your cooking and baking endeavors.
Understanding the Key Differences Between Dry and Liquid Measuring Cups
Now that we’ve established that dry and liquid measuring cups are indeed different, let’s dive deeper into the key differences that make each type unique and essential in the kitchen.
Design and Functionality
The design and functionality of dry and liquid measuring cups are tailored to their specific purposes, ensuring accurate measurements for different types of ingredients.
Structure of Dry Measuring Cups
Dry measuring cups are designed with precision in mind for powdery or granular ingredients. Here are their key features:
- Flat Top: The rim is perfectly flat, allowing you to level off excess ingredients easily.
- Stackable Design: They often come in sets that nest together for easy storage.
- Sturdy Construction: Usually made of metal or durable plastic to withstand the pressure of packing ingredients.
- No Spout: The absence of a spout prevents spillage when leveling off dry ingredients.
DessArts explains that these features make dry measuring cups ideal for ingredients like flour, sugar, and grains, where precise measurements are crucial for recipe success.
Structure of Liquid Measuring Cups
Liquid measuring cups have a distinct design that caters to the fluid nature of their contents:
- Spout: Allows for easy, controlled pouring of liquids.
- Clear Material: Usually made of transparent glass or plastic for easy reading of measurements.
- Extra Space: Includes room above the highest measurement line to prevent spills when moving the cup.
- Handle: Provides a secure grip when pouring hot or cold liquids.
- Multiple Measurement Scales: Often includes markings for cups, ounces, and milliliters.
These features make liquid measuring cups perfect for accurately measuring and pouring various liquids without spills or messes.
Measurement Accuracy
The accuracy of measurements is where the difference between dry and liquid measuring cups becomes most apparent. Each type is designed to maximize precision for its intended use.
The Role of Meniscus in Liquid Measurements
When measuring liquids, you’ll notice a curved surface at the top of the liquid, known as the meniscus. For accurate measurements, you should read the measurement at the bottom of this curve, at eye level. Liquid measuring cups are designed with this in mind, allowing you to see the meniscus clearly and measure accurately.
“The meniscus is crucial for accurate liquid measurements. Always read the measurement at the bottom of the curve, with the measuring cup placed on a level surface and viewed at eye level.” – Julia Child, renowned chef and author
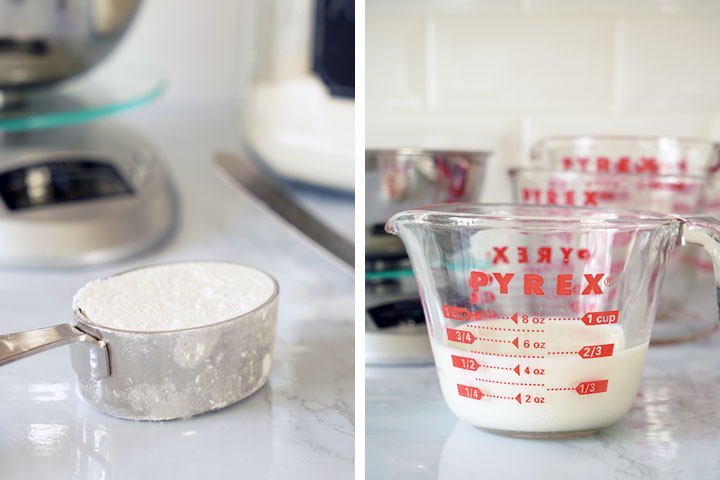
Why Packing Affects Dry Ingredient Measurements
For dry ingredients, especially flour, the way you fill the measuring cup can significantly affect the amount you’re actually using. Axiom Products USA explains that packing or compressing dry ingredients can lead to using up to 25% more than the recipe calls for.
To measure dry ingredients accurately:
- Spoon the ingredient into the measuring cup.
- Fill it until it’s heaping over the top.
- Level it off with a straight edge, like the back of a knife.
This method, known as the “spoon and level” technique, ensures consistent measurements across recipes.
How Each Cup Affects the Outcome in Baking and Cooking
Using the wrong type of measuring cup can have a significant impact on your cooking and baking results:
- Using a Liquid Cup for Dry Ingredients:
- May lead to overmeasuring, as it’s difficult to level off dry ingredients in a liquid cup.
- Can result in dense, heavy baked goods due to excess flour.
- Using a Dry Cup for Liquids:
- Can lead to spills and inaccurate measurements.
- May result in recipes that are too dry or lack proper consistency.
For example, using a liquid measuring cup for flour could lead to using up to 30% more flour than needed, resulting in dry, dense cakes or bread. Conversely, measuring oil in a dry measuring cup could lead to spills and under-measuring, affecting the texture and flavor of your dish.
Understanding these differences is crucial for achieving consistent, delicious results in your cooking and baking endeavors.
Why the Difference Between Measuring Cups Matters
The distinction between dry and liquid measuring cups isn’t just a matter of kitchen organization—it can significantly impact the success of your recipes. Let’s explore why using the right measuring cup is crucial for achieving consistent, delicious results in your cooking and baking.
Impact on Baking Precision
Baking is often described as a science, and for good reason. The precise balance of ingredients is crucial for achieving the desired texture, flavor, and appearance in baked goods. Using the wrong type of measuring cup can throw off this delicate balance.
Common Baking Errors Due to Wrong Measurements
- Dense or Heavy Baked Goods: Overmeasuring flour by using a liquid measuring cup can lead to dense cakes, tough cookies, or heavy bread.
- Dry or Crumbly Textures: Undermeasuring liquids can result in dry, crumbly textures in cakes and pastries.
- Inconsistent Results: Using different measuring methods each time can lead to inconsistent results, even when following the same recipe.
Food Network’s baking guide emphasizes that these errors can be the difference between a perfect cake and a baking disaster.
How to Ensure Accurate Flour Measurements
Flour is particularly prone to measurement errors due to its tendency to compact. Here’s a step-by-step guide to measuring flour accurately:
- Fluff the flour in its container with a spoon.
- Spoon the flour into your dry measuring cup, overfilling slightly.
- Level off the excess with a straight edge, like the back of a knife.
- Never pack or tap the measuring cup to compress the flour.
By following this method, you’ll ensure consistent measurements and better baking results.
Flexibility in Cooking vs. Precision in Baking
While precise measurements are crucial in baking, cooking often allows for more flexibility. However, using the right measuring tools is still important for consistent results.
| Cooking | Baking |
|---|---|
| Often allows for ingredient adjustments | Requires precise measurements |
| Recipes can be easily modified | Changes can significantly affect the outcome |
| Measurements are sometimes approximate | Exact measurements are crucial |
In cooking, you might be able to adjust flavors and textures as you go, but in baking, the chemical reactions that occur during the baking process rely on precise ratios of ingredients. This is why bakers often weigh their ingredients for even greater accuracy.
Practical Tips for Choosing the Right Cup
To ensure you’re using the right measuring cup for the job, consider these practical tips:
- Invest in Both Types: Have a set of dry measuring cups and at least one liquid measuring cup in your kitchen.
- Consider the Ingredient: Always use dry cups for dry ingredients and liquid cups for liquids.
- Read the Recipe Carefully: Pay attention to whether the recipe specifies “1 cup sifted flour” or “1 cup flour, sifted”—it makes a difference!
- Use the Right Technique: For dry ingredients, use the spoon and level method. For liquids, place the cup on a flat surface and read at eye level.
- When in Doubt, Weigh: For the most accurate measurements, especially in baking, consider using a kitchen scale.
By following these tips and understanding the importance of using the right measuring cup, you’ll be well on your way to more consistent and successful cooking and baking experiences.
Common Mistakes and Tips for Using Measuring Cups
Even with the right tools at hand, it’s easy to make mistakes when measuring ingredients. Let’s explore some common errors and provide tips to ensure you’re getting the most accurate measurements every time.
Common Errors When Using Dry Measuring Cups
- Scooping Directly from the Container: This can compact the ingredient, leading to overmeasuring.
- Not Leveling Off: Failing to level off dry ingredients can result in inconsistent measurements.
- Packing Ingredients: Some recipes call for “packed” ingredients (like brown sugar), but most don’t. Packing when not specified can lead to using too much of an ingredient.
- Using Wet Measuring Cups: Using liquid measuring cups for dry ingredients can lead to inaccurate measurements.
To avoid these errors, always use the spoon and level method for dry ingredients, and make sure you’re using the appropriate type of measuring cup.
Common Errors When Using Liquid Measuring Cups
- Not Checking at Eye Level: Reading the measurement from above or below can lead to inaccuracies.
- Overfilling: Trying to fill the cup to the brim can result in spills and inaccurate measurements.
- Not Placing on a Flat Surface: Holding the cup while measuring can lead to tilting and inaccurate readings.
- Using for Dry Ingredients: Attempting to measure dry ingredients in a liquid measuring cup can result in overmeasuring.
To ensure accuracy when using liquid measuring cups, always place the cup on a flat surface and read the measurement at eye level, looking at the bottom of the meniscus (the curved surface of the liquid).
Measuring Sticky Ingredients: Tips and Tricks
Sticky ingredients like honey, molasses, or peanut butter can be challenging to measure accurately. Here are some tips to make the process easier:
- Grease the Cup: Lightly coat the measuring cup with oil or cooking spray before measuring sticky ingredients. This will help the ingredient slide out easily.
- Use a Spatula: After measuring, use a rubber spatula to scrape out all the sticky ingredient from the cup.
- Measure Oil First: If your recipe calls for both oil and a sticky ingredient, measure the oil first. The residual oil in the cup will help the sticky ingredient release more easily.
- Consider Measuring by Weight: For the most accurate measurements of sticky ingredients, consider using a kitchen scale.
“When measuring sticky ingredients, I always grease my measuring cup first. It’s a game-changer for accuracy and ease!” – Ina Garten, cookbook author and TV host
How to Properly Level Dry Ingredients
Proper leveling is crucial for accurate measurements of dry ingredients. Here’s how to do it right:
- Overfill the measuring cup slightly with the dry ingredient.
- Hold the cup over the ingredient container or a piece of parchment paper.
- Use a straight edge (like the back of a knife or a spatula) to sweep across the top of the cup, removing the excess.
- Make sure the ingredient is level with the top edge of the measuring cup.
This technique ensures you’re getting the exact amount the recipe calls for, without compacting the ingredient.
Best Practices for Reading Liquid Measurements at Eye Level
Accurate liquid measurements are all about perspective. Follow these best practices:
- Place the measuring cup on a flat, level surface.
- Pour the liquid into the cup, stopping just below the desired measurement line.
- Bend down so your eyes are level with the measurement markings.
- Slowly add more liquid until the bottom of the meniscus (the curved surface of the liquid) aligns with the measurement line.
- Read the measurement at eye level for the most accurate reading.
Proper technique for measuring liquid ingredients – source
By following these tips and being mindful of common mistakes, you’ll significantly improve the accuracy of your measurements, leading to more consistent and successful cooking and baking results.
Related Topics and FAQs
As we delve deeper into the world of measuring cups and kitchen precision, several related questions often arise. Let’s address some of these frequently asked questions to further enhance your understanding of proper measuring techniques.
Can I Use a Liquid Measuring Cup for Dry Ingredients?
While it’s possible to use a liquid measuring cup for dry ingredients, it’s not recommended for precise measurements. Here’s why:
- Difficulty in Leveling: Liquid measuring cups don’t have a flat rim, making it challenging to level off dry ingredients accurately.
- Risk of Overmeasuring: Without the ability to level off, you’re likely to use more of the dry ingredient than needed.
- Inaccurate Volume: Dry ingredients can settle or compress in a liquid measuring cup, leading to inconsistent measurements.
For the most accurate results, always use dry measuring cups for dry ingredients and liquid measuring cups for liquids.
What Are the Consequences of Using the Wrong Measuring Cup?
Using the wrong type of measuring cup can have significant impacts on your cooking and baking outcomes:
- Baking Disasters: In baking, where precision is crucial, using the wrong measuring cup can lead to dense cakes, tough cookies, or bread that doesn’t rise properly.
- Inconsistent Results: You might find that the same recipe yields different results each time you make it.
- Altered Textures: Too much flour can make baked goods dry and crumbly, while too little can make them gummy or undercooked.
- Flavor Imbalances: In cooking, incorrect measurements can throw off the balance of flavors in a dish.
Southern Living emphasizes that these seemingly small differences in measurement can have a big impact on your final dish.
Are There Universal Measuring Cups That Can Be Used for Both?
While some manufacturers claim to offer universal measuring cups suitable for both dry and liquid ingredients, it’s generally best to use separate tools for optimal accuracy. However, if you’re looking for a versatile option:
- Angled Measuring Cups: These have measurements visible from above, making them easier to use for both dry and liquid ingredients.
- Push-Up Measuring Cups: These allow you to adjust the volume and push out ingredients easily, working well for both dry and sticky ingredients.
Remember, while these options can be convenient, they may not provide the same level of accuracy as dedicated dry and liquid measuring cups.
How to Convert Measurements Between Dry and Liquid
Converting between dry and liquid measurements can be tricky because they measure different properties (volume vs. weight). However, here’s a general guide:
| Dry Measure | Liquid Measure |
|---|---|
| 1 cup | 8 fluid ounces |
| 1/2 cup | 4 fluid ounces |
| 1/3 cup | 2 2/3 fluid ounces |
| 1/4 cup | 2 fluid ounces |
Note that this conversion works for water and similarly dense liquids, but may not be accurate for all ingredients. For precise conversions, especially in baking, it’s best to use weight measurements.
Alternatives to Measuring Cups: Using Scales for Precision
For the ultimate precision in cooking and baking, many professionals recommend using a kitchen scale. Here’s why:
- Consistency: Weighing ingredients eliminates variations that can occur with volume measurements.
- Accuracy: Scales provide exact measurements, crucial for recipes that require precision.
- Ease of Use: Weighing ingredients can often be faster and create less mess than using measuring cups.
- Versatility: Scales can easily switch between different units of measurement (grams, ounces, etc.).
If you’re serious about baking or want to try recipes from different countries (which often use weight measurements), investing in a good kitchen scale is worth considering.
By understanding these related topics and frequently asked questions, you’ll be better equipped to handle various measuring scenarios in your kitchen, ensuring more consistent and successful cooking and baking results.
FAQs About Are Measuring Cups the Same for Liquids and Dry?
Q: Are liquid and dry measuring cups interchangeable?
A: No, liquid and dry measuring cups are not interchangeable. While they hold the same volume, their designs are optimized for different types of ingredients. Dry measuring cups are designed to be filled to the brim and leveled off, while liquid measuring cups have a spout and extra space to prevent spills.
Q: Can I use a liquid measuring cup for flour?
A: It’s not recommended to use a liquid measuring cup for flour. Dry ingredients like flour can settle and compact in a liquid measuring cup, leading to inaccurate measurements. For precise measurements, always use a dry measuring cup for flour and other dry ingredients.
Q: Why can’t you use a liquid measuring cup for dry ingredients?
A: Liquid measuring cups aren’t ideal for dry ingredients because they lack a level rim for accurate leveling. This can lead to overmeasuring dry ingredients, which can significantly affect your recipe’s outcome, especially in baking where precision is crucial.
Q: How do you measure dry ingredients correctly?
A: To measure dry ingredients correctly:
1. Use a dry measuring cup.
2. Spoon the ingredient into the cup until it’s overflowing.
3. Level off the excess with a straight edge, like the back of a knife.
4. Don’t pack the ingredient unless the recipe specifically calls for it (e.g., “packed brown sugar”).
Q: What’s the difference between a dry cup and a liquid cup?
A: The main differences are:
1. Design: Dry cups have a flat rim for leveling; liquid cups have a spout for pouring.
2. Usage: Dry cups are filled to the brim; liquid cups have space above the highest measurement to prevent spills.
3. Material: Dry cups are often opaque; liquid cups are usually transparent for easy reading.
4. Accuracy: Each is designed for optimal accuracy with its intended ingredient type.
Summary
Are measuring cups the same for liquids and dry ingredients? While they may hold the same volume, their designs and uses are distinctly different. Dry measuring cups are designed to be filled to the brim and leveled off, making them ideal for ingredients like flour and sugar. Liquid measuring cups, on the other hand, have a spout and extra space to prevent spills, perfect for measuring water, milk, and other liquids.
Throughout this article, we’ve explored the key differences between these two types of measuring cups, from their design features to their impact on cooking and baking outcomes. We’ve learned that using the right measuring cup is crucial for recipe success, especially in baking where precision is key. Common mistakes, such as using a liquid cup for flour or not reading liquid measurements at eye level, can significantly affect your culinary results.
Remember, the choice between dry and liquid measuring cups isn’t just about convenience—it’s about accuracy. By understanding and respecting these differences, you’re setting yourself up for more consistent, delicious results in your kitchen.
So, the next time you’re whipping up a recipe, take a moment to consider which measuring cup you’re reaching for. Are you using the right tool for the job? With the knowledge you’ve gained from this article, you’re now equipped to make informed decisions that will elevate your cooking and baking to new heights of precision and deliciousness.—
