
As an Amazon Associate KitchenwareSets.com earns from qualifying purchases.
Covered Patio Kitchen Ideas: Stunning Outdoor Cooking Space for Home Cooks
You step onto your patio, grill tongs in hand, and the sky opens up. Again. You’ve had enough of weather dictating your cookouts, and you’re ready for a change.
A covered patio kitchen is an outdoor cooking and dining space protected by a roof, pergola, awning, or canopy structure, designed to shield cooking equipment and people from rain, sun, and wind while enabling year-round entertaining. Unlike an uncovered grill station, a covered patio kitchen integrates countertops, appliances, and seating under a permanent or semi-permanent shelter.
Drawing from extensive research into structural best practices, appliance performance data, and real-world installation insights, this guide walks you through nine distinct design concepts. You’ll discover which cover types work best for your climate, how to safely integrate gas and electrical lines, and what materials actually stand up to weather over time. Whether you’re planning a weekend DIY project or a full contractor-built space, these ideas will help you create a stunning outdoor cooking area that delivers real value for your home and lifestyle.
Contents
show
9 Covered Patio Kitchen Ideas to Transform Your Outdoor Cooking Space
The path from “wishing for a better outdoor kitchen” to “actually cooking in one” starts with seeing what’s possible. Each of these nine ideas represents a complete design concept — cover type, architectural style, appliance package, and practical implementation steps that move you from inspiration to planning.
1. Rustic Stone Island with Pergola Cover

Pin this cozy rustic kitchen setup to your ‘Outdoor Entertaining Ideas’ board!
There’s something timeless about a natural stone outdoor kitchen tucked beneath a wooden pergola draped in climbing vines. This look works because it feels like the kitchen grew there organically rather than being dropped in by a contractor. The warm terracotta and sage green palette blends seamlessly with garden surroundings, making it ideal for homes with established landscaping or a cottage-style aesthetic.
What You Need
- Stone veneer panels (cultured or natural ledger stone, approximately 40-60 sq ft for a 6-foot island)
- Granite countertop slab (3cm thickness, sealed, with cutout for grill and sink)
- Built-in gas grill (36-inch width, 304 stainless steel, with rotisserie burner)
- Outdoor-rated prep sink (16-gauge stainless steel, single basin, 15-inch depth)
- Pergola kit (10×12 feet, pressure-treated pine or cedar, with 4×4 posts set in concrete)
- Weather-rated electrical outlet (GFCI protected, for grill ignition and lighting)
- Mortar and grout for stone veneer application
- Concrete blocks for island base framing
Steps
- Prepare the foundation by pouring a concrete slab (4-inch thickness, reinforced with wire mesh) measuring at least 8×4 feet for the island footprint
- Frame the island base using concrete blocks or metal stud framing, leaving openings for the grill cutout and sink plumbing
- Route gas and water lines through conduit before closing up the frame (hire a licensed plumber for gas connections)
- Apply stone veneer using mortar, staggering seams for natural appearance, working from bottom up
- Install the granite countertop with construction adhesive, ensuring the grill cutout aligns perfectly
- Mount the pergola by setting 4×4 posts in concrete footers (48 inches deep for frost protection) and attaching beams with galvanized hardware
- Finish with string lights woven through pergola beams on a dimmer switch for ambient evening cooking
Pro-Tip: In my experience designing outdoor kitchens for humid climates, sealing the granite countertop annually with a penetrating sealer prevents staining from marinades and wine spills that can ruin the look permanently.
2. Modern Linear Kitchen with Louvered Pergola Roof

Save this sleek modern design to your ‘Dream Backyard’ board!
If your home leans toward clean lines and minimalist architecture, a modern linear kitchen with an adjustable louvered roof is your match. The motorized aluminum louvers give you total control over sunlight and rain — tilt them open for a bright afternoon cookout, close them fully when a storm rolls in, or set them to auto-close when rain sensors trigger. This is the smartest way to get flexible weather protection without sacrificing the open-air feel.
What You Need
- Adjustable louvered pergola roof (12×14 feet, aluminum with powder-coated finish, motorized louvers)
- Built-in gas grill (42-inch width with infrared sear burner, 304 stainless steel)
- Single side burner (outdoor-rated, 15,000 BTU, for sauces and sides)
- Polished concrete countertop (precast or poured in place, 2-inch thickness, sealed)
- Outdoor refrigerator drawer (under-counter, 24-inch width, 316 stainless steel for coastal areas)
- Porcelain tile pavers (24×24 inch, matte finish, for patio floor)
- LED strip lighting (RGBW, weather-rated, for under-counter and louvered roof perimeter)
- Undermount sink (18-inch, 16-gauge stainless steel, with pull-down faucet)
Steps
- Install the louvered roof structure first, attaching to the home’s ledger board or mounting on independent posts with concrete footers (engineered for wind load)
- Run electrical conduit for motorized louvers, under-counter lighting, and GFCI outlets before pouring the concrete countertop
- Plumb gas and water lines from the house, trenching 18 inches deep with gas line in separate conduit from electrical
- Pour or install the concrete countertop as a single continuous slab with integrated backsplash, ensuring cutouts for grill, sink, and side burner
- Mount the appliances starting with the grill (use insulated grill jacket for heat protection), then refrigerator drawer and sink
- Install the tile pavers over compacted gravel base with polymeric sand joints for weed prevention
- Program the louvered roof system so louvers auto-close when rain sensors detect precipitation
Pro-Tip: Motorized louvered roofs cost 20-30% more than fixed pergolas but pay off by extending your cooking season by 8-10 weeks per year in temperate climates — you can cook in a light drizzle with louvers partially closed without losing the open-air feel.
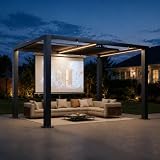
3. Small Covered Patio Kitchen with Wall-Mounted Grill

Pin this space-savvy setup to your ‘Small Space Solutions’ board!
Not everyone has a sprawling backyard, and that’s okay. A wall-mounted grill paired with a small roof extension turns an unused corner of your patio into a highly functional cooking zone. This setup proves that a covered patio kitchen doesn’t require a massive footprint — it just requires smart planning. By going vertical with the grill mount and keeping the countertop compact, you reclaim valuable floor space while still getting all the benefits of a covered cooking area.
What You Need
- Wall-mount gas grill (30-inch width, fold-down side shelves, 304 stainless steel, with mounting bracket)
- Stone veneer panels (thin-cut, 10-15 sq ft for the accent wall behind grill)
- Compact roof extension (6×8 feet, polycarbonate or metal, attached to existing house roof)
- Small countertop ledge (precast concrete or granite remnant, 18×24 inches, wall-supported)
- Outdoor-rated mini refrigerator (under-counter, 2.6 cu ft, single zone)
- Bar table and two stools (space-saving, foldable or nesting)
- Grill cover (custom-fit, weatherproof, for the specific wall-mount model)
- Exterior-grade electrical outlet (GFCI, for grill ignition and mini fridge)
Steps
- Select the wall location ensuring the wall is structural (not drywall alone) and has non-combustible surface behind the grill (stone, brick, or cement board)
- Install the stone veneer on the chosen wall section, extending 4 feet wide and 3 feet tall behind the grill area
- Mount the wall-mount grill bracket into wall studs using structural lag bolts, checking with a level
- Attach the roof extension to the house ledger board with proper flashing to prevent leaks (pitch 2 inches per foot minimum)
- Build the countertop ledge using wall-mounted corbels and a granite or concrete remnant with construction adhesive
- Install the mini refrigerator in a recessed space or freestanding beside the ledge
- Run a dedicated gas line from the house to the grill connection point behind the stone veneer (licensed professional required)
Pro-Tip: For small covered patios, place the grill close to an exterior wall so you can run the gas line through the wall from an existing interior gas stub — this eliminates the need for trenching and saves hundreds in installation costs.
4. Covered Patio Kitchen with Pizza Oven and Seating

Save this pizza lover’s paradise to your ‘Outdoor Kitchen Dreams’ board!
If cooking is your love language, a wood-fired pizza oven changes everything. The dome-shaped brick oven becomes the heart of your outdoor kitchen, drawing people in as they watch flames lap at the crust. This setup works best under a solid pavilion roof with proper chimney ventilation — the smoke needs somewhere to go, and the roof keeps you cooking in any weather. The bar seating wraps around the island, turning pizza-making into a social event where guests sit, sip wine, and watch you work.
What You Need
- Wood-fired pizza oven kit (pre-cast refractory concrete dome, 36-inch interior diameter, with flue pipe)
- Pavilion structure (14×16 feet, wooden posts and beam roof, 10-foot minimum ceiling height)
- Outdoor-rated countertop island (tile or granite, 8×3 feet, with bar overhang on one side)
- Built-in refrigerator (under-counter, outdoor-rated, 4.4 cu ft)
- Prep sink (single basin, 15-inch, with gooseneck faucet)
- Bar stools (4-6, weather-resistant, ideally with backs for comfort)
- Fireproof backing board (cement board behind oven area)
- Outdoor exhaust fan (ceiling-mounted, for smoke management under solid roof)
Steps
- Construct the pavilion roof first using structural posts set in concrete, ensuring 36-inch overhang on all sides for rain protection
- Pour a concrete pad for the pizza oven island (8×4 feet, 6-inch thick, reinforced for heavy oven weight)
- Assemble the pizza oven kit per manufacturer instructions on a firebrick base, insulating with ceramic blanket then covering with stucco or tile
- Build the island surround using concrete block frame, leaving space for refrigerator and sink cutouts
- Install the countertop with 12-inch bar overhang on the seating side, using heat-resistant tile or granite near the oven
- Mount the ceiling exhaust fan with ducting terminating outside the pavilion (critical for solid roof enclosures)
- Apply a curing fire (small, incremental fires over 5-7 days) to dry the refractory dome before full cooking use
Pro-Tip: Never skip the chimney chase. A wood-fired pizza oven under a solid roof without proper flue ventilation will fill your covered patio with smoke in under 3 minutes. I’ve seen this ruin more backyard pizza setups than any other mistake.
5. Covered Patio Kitchen with Outdoor Fireplace

Pin this cozy combination to your ‘Year-Round Outdoor Living’ board!
Pairing a covered outdoor kitchen with a fireplace creates a dual-zone entertaining space that works in three seasons — sometimes four. The fireplace radiates warmth that takes the chill off autumn evenings, while the grill station keeps the cook engaged and social. By positioning them on opposite ends of the covered area, you create distinct cooking and lounging zones that naturally guide guests from grabbing a drink near the fire to watching you flip steaks at the grill.
What You Need
- Outdoor fireplace kit (pre-cast stone or brick, gas or wood-burning, with chimney termination 2 feet above roof peak)
- Built-in gas grill (36-inch, 304 stainless steel, with rotisserie)
- Outdoor-rated countertop (granite or soapstone, 6×3 feet, with L-shape design)
- Under-counter refrigerator (outdoor-rated, 4.4 cu ft)
- Outdoor sofa set (weather-resistant wicker or aluminum frame, with Sunbrella cushions)
- Coffee table (stone or powder-coated aluminum)
- Ceiling fan (damp-rated, for smoke management)
- Fireplace surround stone (ledger stone or stacked stone veneer, 100+ sq ft)
Steps
- Position the fireplace and kitchen on opposite ends of the covered area to create distinct cooking and lounging zones
- Pour a unified concrete foundation (6-inch thick) spanning the entire covered area for fireplace and kitchen island weight
- Install the fireplace first, running gas line (if gas) or building a chase for wood-burning chimney through the roof
- Frame and construct the kitchen island using concrete block, with cutouts for grill and refrigerator
- Run electrical and plumbing between the two zones with dedicated circuits for fireplace ignition, grill lighting, and appliance outlets
- Install stone veneer on both fireplace and kitchen island for a cohesive look using matching stone
- Furnish the seating zone with sofas positioned 6-8 feet from the fireplace, facing the kitchen for social cooking interaction
Pro-Tip: For covered patios with both a fireplace and grill, install a ceiling-mounted exhaust fan on a variable speed switch. Running it on low during cooking clears occasional smoke without creating a draft that messes with grill temperature or fireplace flame.

6. Covered Deck Kitchen with Bar Seating and TV

Save this game-day setup to your ‘Outdoor Entertainment Ideas’ board!
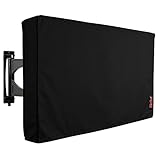
Game day takes on a whole new meaning when you’ve got a covered deck kitchen with bar seating and a weatherproof TV. The long granite countertop bar creates a natural gathering spot where guests pull up a stool, grab a beverage from the under-counter fridge, and watch the big play while you flip burgers. This is the setup that turns your backyard into the neighborhood’s favorite spot for Sunday football or summer cookouts.
What You Need
- Composite decking (for existing deck resurface or new build, 12×16 feet)
- Granite countertop (3×8 feet, polished, with 12-inch bar overhang)
- Bar stools (4, swivel, with weather-resistant cushions)
- Built-in gas grill (36-inch, with side burner and rotisserie)
- Outdoor-rated TV (55-inch, weatherproof, with anti-glare screen, or weatherproof enclosure for indoor TV)
- Under-counter beverage fridge (outdoor-rated, 24-inch, glass door)
- Weatherproof TV mount (full-motion, stainless steel, with lock)
- Deck structural support system (adjustable posts or jack posts for under-deck bracing)
Steps
- Assess deck load capacity — consult a structural engineer if adding a granite-topped island (weights 250-400 lbs per linear foot)
- Add support posts beneath the deck area where the island will sit, transferring weight directly to concrete footings below
- Build the island frame directly on the deck using treated lumber or steel studs, accounting for grill and fridge cutouts
- Install the granite countertop with bar overhang extending 12 inches on the seating side, using corbel supports every 24 inches
- Mount the TV on the covered wall using a full-motion weatherproof mount, ensuring the TV is recessed enough to stay dry under the roof overhang
- Run electrical through the deck substructure for TV, grill lighting, and beverage fridge on a dedicated GFCI circuit
- Install weatherproof cable management for TV cords within the wall or covered raceway
Pro-Tip: If your deck can’t support a full granite island, use a lightweight alternative like sintered stone (1/3 the weight of granite) or a concrete overlay on foam core — both hold up to weather and look identical to solid stone.
7. Budget-Friendly Covered Patio Kitchen with Awning

Pin this budget-friendly setup to your ‘DIY Backyard Ideas’ board!
You don’t need a massive construction budget to get the benefits of a covered patio kitchen. A retractable awning paired with a quality freestanding grill and a rolling prep cart gives you a fully functional cooking space for under $2,000. The awning extends when you need shade or rain protection and retracts when you want open sky — no permits required, no foundation work. This approach is perfect for renters or homeowners who want to test the waters before committing to a permanent build.
What You Need
- Retractable awning (10×8 feet, manual crank or motorized, fabric with UV protection)
- Freestanding gas grill (4-burner, with side burner and enclosed cart, 304 stainless steel)
- Outdoor prep table (stainless steel, with shelf below and locking casters)
- Outdoor rolling cart (for tool and accessory storage)
- Bistro table and two chairs (foldable or nesting for storage)
- Outdoor mat (10×8 feet, polypropylene, to define the space)
- Grill heat shield (magnetic or freestanding, between grill and house wall if close)
- Outdoor LED string lights (battery-powered or solar, for evening ambience)
Steps
- Install the retractable awning following manufacturer instructions, mounting brackets to wall studs with lag bolts (check for 6-foot minimum extension over grill area)
- Position the grill under the awning center, ensuring the grill’s back is at least 18 inches from the house wall
- Place the heat shield between grill and house if clearance is less than 36 inches
- Set up the prep table beside the grill on the dominant hand side for natural food prep flow
- Arrange the bistro set facing the grill for a casual cooking interaction zone
- Lay the outdoor mat to visually anchor the space and catch any grease drips or spills
- Hang string lights from the awning frame or adjacent structure for evening cooking visibility
Pro-Tip: For fabric awnings, maintain a minimum 12-foot vertical clearance between grill grates and awning fabric. Also, never use a charcoal grill under a fabric awning — the upward heat and sparks will degrade the fabric in one season and pose a fire risk.

8. Year-Round Covered Patio Kitchen with Glass Enclosure

Pin this convertible space to your ‘Year-Round Patio Goals’ board!
This is the ultimate evolution of the covered patio kitchen — a glass-enclosed room that blurs the line between indoors and out. Floor-to-ceiling sliding glass door panels stack completely to one side, opening the kitchen to the garden on nice days. When the weather turns cold, you close the panels, turn on the mini-split heat pump, and keep cooking in a comfortable, climate-controlled space. A ducted exhaust hood handles smoke and cooking odors, so the glass stays clean and the air stays fresh.
What You Need
- Folding or sliding glass door system (NanaWall or similar, 3-4 panels, 8-10 feet opening width)
- Permanent roof structure (insulated, with tongue-and-groove or drywall ceiling)
- Full-size outdoor kitchen island (custom, with granite countertop, 10×3 feet)
- Built-in gas grill (42-inch, with rotisserie and infrared sear)
- Outdoor-rated refrigerator (full-size, 36-inch width, with freezer drawer)
- Ceiling-mounted exhaust hood (ducted through roof, 600+ CFM for enclosed space)
- Mini-split heat pump (ducted or ductless, for heating and cooling the enclosure)
- Engineered wood or tile flooring (rated for outdoor conditions but indoor appearance)
Steps
- Pour a continuous concrete slab for the enclosure that matches the existing house foundation depth (frost line depth)
- Construct the roof structure with proper insulation (R-30 minimum), incorporating a ceiling-mounted exhaust hood ducted to roof termination
- Install the glass door system as a wall between house and enclosure, ensuring proper flashing and drainage at the threshold
- Build the kitchen island within the enclosure, ensuring all appliances are rated for exterior use (important for humidity in enclosed space)
- Run all utilities (gas, water, electrical, data for TV/audio) through conduit in the slab before finishing
- Install the mini-split heat pump for year-round comfort, sized appropriately for the enclosure’s square footage
- Finish with interior-grade ceiling and walls (tongue-and-groove cedar or moisture-resistant drywall) with recessed lighting
Pro-Tip: A glass enclosure turns an outdoor kitchen into a true indoor-outdoor space, but you must install a commercial-grade exhaust hood if the space has full walls and a ceiling. I’ve seen homes where cooking smoke filled the entire glass room because of inadequate ventilation — it rendered the space unusable for grilling.

9. Luxury Covered Patio Kitchen with Full Appliances

Save this dream kitchen to your ‘Ultimate Outdoor Luxury’ board!
This is the no-compromise outdoor kitchen — every appliance you’d find indoors, but built to live outside. A massive L-shaped stone island houses a 48-inch grill, dual side burners, a wood-fired pizza oven, refrigerator drawers, wine cooler, and ice maker. The timber-framed pavilion with coffered ceiling and chandelier turns the entire space into an outdoor great room. This is a serious investment, but for homeowners who entertain frequently and want the absolute best, it transforms how you live outdoors.
What You Need
- Custom timber-framed pavilion (20×24 feet, with coffered tongue-and-groove ceiling and chandelier)
- L-shaped stone island (natural stone veneer, with marble countertops, 12×8 feet total)
- Built-in gas grill (48-inch, with infrared rotisserie, ceramic burner)
- Wood-fired pizza oven (built into island end, 40-inch dome)
- Side burner (dual, 30,000 BTU each)
- Outdoor refrigerator drawers (dual 30-inch, under-counter)
- Wine cooler (under-counter, 24-bottle capacity)
- Outdoor ice maker (under-counter, 50 lbs/day capacity)
- Pot filler faucet (wall-mounted, pot filler style, over grill area)
- Travertine flooring (honed, 18×18 inch tiles, with radiant heating)
Steps
- Hire a structural engineer to design the timber pavilion, accounting for roof load with coffered ceiling and chandelier weight
- Excavate and pour a reinforced concrete slab (8-inch thick) for the entire kitchen pavilion footprint, with in-floor radiant heat tubing and conduit for all utilities
- Frame the island with steel studs and concrete backer board, creating zones: cooking (grill + side burner), wood-fired (pizza oven prep), wet (sink + pot filler), and bar (wine + ice)
- Run a 1-inch gas line from the house main (or install a dedicated propane tank) to service grill, side burner, and pizza oven simultaneously
- Install all appliances sequentially: grill with insulated jacket, pizza oven with firebrick base, refrigerator drawers, wine cooler, and ice maker
- Apply stone veneer to island and pavilion columns, then install marble countertops with integrated drip edge
- Install the chandelier and pendant lights on dimmers, ceiling fan for air movement, and in-floor radiant heating thermostat
Pro-Tip: When running multiple gas appliances off a single line, calculate total BTU demand and size the line accordingly. A 48-inch grill (120,000 BTU) + side burner (30,000 BTU) + pizza oven (50,000 BTU) = 200,000 BTU total — requiring a 1-inch gas line minimum for runs over 50 feet.

Key Takeaways: Your Quick Guide to Covered Patio Kitchen Ideas
Key Takeaways:
- Start with the roof structure, not the appliances — The type of cover (pergola, solid roof, awning, glass enclosure) dictates everything else, from ventilation requirements to appliance selection. Choose a permanent solid roof for year-round use, louvered pergola for flexible sun control, or retractable awning for budget-friendly shade.
-
Ventilation is the #1 safety concern for covered outdoor kitchens — Under a solid roof, you need a ducted exhaust hood rated for outdoor use (600+ CFM) or at least a high-powered ceiling fan. For grills under fabric awnings or open pergolas, ensure minimum 12-foot vertical clearance from grill grates to the cover material.
-
Material selection determines longevity — Use 304 stainless steel for inland kitchens, 316 stainless steel for coastal areas. Choose granite, soapstone, or sintered stone countertops over marble near cooking zones. Stone veneer outperforms stucco for island finishes in freeze-thaw climates.
-
Permits and fire safety clearances are non-negotiable — Most covered outdoor kitchens require building permits for gas lines, electrical work, and structural roofs. Maintain 36-inch minimum clearance between grill and combustible walls. Non-combustible surfaces (stone, tile, cement board) are required within 12 inches of the cooking area.
-
Design for the cooking flow, not just the look — Position the grill on the dominant hand side of the prep area with 24 inches of counter space on each side. Place the sink between the grill and refrigerator, and run gas and water lines in conduit before finishing the island.
-
Heating and lighting extend usability into every season — A mini-split heat pump or infrared patio heater paired with task lighting over the grill and ambient string lights transforms a covered kitchen from a summer-only space to a 3-4 season room.
-
Your budget range determines your approach — Under $2,000: freestanding grill under a retractable awning with a rolling prep cart. $5,000-$15,000: custom stone island with built-in grill under a pergola. $20,000+: fully enclosed glass room with full appliance suite and timber pavilion.
People Also Ask About Covered Patio Kitchens
How much does a covered outdoor kitchen cost?
A covered outdoor kitchen typically costs between $3,000 and $50,000 depending on size, materials, and appliance quality. A basic DIY setup with a freestanding grill under an awning runs $1,500-$3,000. A mid-range custom island with built-in grill under a pergola costs $8,000-$15,000 installed. A luxury full-appliance setup with a timber pavilion or glass enclosure can exceed $40,000 including permits, gas line trenching, and electrical work.
How to build a covered outdoor kitchen
Start by selecting your cover type (pergola, solid roof, or awning), then build outward. Pour a concrete slab foundation, frame the island with concrete block, run gas and electrical conduit before finishing, install stone veneer, then add countertops and appliances. Always obtain permits for gas and electrical work. The most common mistake is installing appliances before ventilation is properly designed for the specific cover type.
What is the best roof for an outdoor kitchen?
A solid roof extension from the house offers the best weather protection and usability for year-round covered outdoor kitchens. Louvered pergolas are a strong second choice for homeowners who want adjustable sunlight control. Retractable awnings work well for budget builds but limit appliance options due to lower clearance and reduced durability in high winds. For fully enclosed spaces, an insulated roof allows for heating and cooling.
How do I protect my outdoor kitchen from rain?
Use weather-rated stainless steel appliances (304 or 316 grade), seal all countertops with a penetrating sealer annually, and install a roof with at least 24-inch overhang. For extra protection, add custom-fit grill covers when not in use, use weatherproof electrical covers on all outlets, and slope the patio floor away from the kitchen island at 1/8 inch per foot. Outdoor-rated cabinetry with sealed edges prevents moisture damage.
Can you put a pergola over an outdoor kitchen?
Yes, a pergola is one of the most popular covers for outdoor kitchens, especially louvered roof models. Open-beam pergolas provide partial sun protection but limited rain shelter, making them best for dry climates. Louvered roof pergolas offer adjustable protection that can be closed for light rain and fully opened for sun. Ensure pergola beams are at least 10 feet above the grill surface for safe operation.
How to vent a grill under a covered patio
For solid roofs, install a ducted range hood (600+ CFM minimum) terminating through the roof with a weatherproof cap. For louvered pergolas, natural ventilation is usually sufficient if the grill has side clearance of 24 inches and the roof is at least 10 feet high. For open-beam pergolas, no additional ventilation is needed. Never use a charcoal grill under any solid roof structure without an exhaust hood.
Do I need a permit for a covered outdoor kitchen?
Yes, permits are typically required for gas line installation, electrical work, structural roof additions, and concrete slabs over 120 square feet. Check your local building department for specific requirements. Failing to pull permits can result in fines, insurance issues, and mandatory removal of unpermitted structures. A licensed contractor can often handle the permit process as part of their quoted price.
How to winterize an outdoor kitchen
Disconnect and drain all water lines, shut off gas at the main valve, remove LP tanks, and cover stainless steel appliances with breathable covers. Drain the sink trap and add RV antifreeze if plumbing won’t be used for 3+ months. Remove temperature-sensitive items like wine coolers. For built-in refrigerators, leave doors slightly ajar to prevent mold. In freezing climates, insulate exposed water pipes with heat tape and foam insulation.
Can you have a fire pit under a covered patio?
Only if the covered patio has a minimum 12-foot ceiling height, the fire pit is at least 36 inches from any combustible surface, and the roof material is non-combustible. For gas fire pits, ensure proper ventilation for combustion byproducts. Never place a wood-burning fire pit under a solid roof or fabric awning due to smoke accumulation and fire risk. Open-sided pavilions with high ceilings are the safest choice.
How to light a covered outdoor kitchen
Use three layers of lighting: task lighting over the grill and prep area (LED under-counter strips or puck lights), ambient lighting for the seating zone (pendant lights or chandelier), and accent lighting to highlight architectural features (uplighting on stone columns). All fixtures must be rated for outdoor use (damp-rated for covered areas). Put task lights on a dimmer switch for flexibility between cooking and entertaining.
Final Thoughts on Covered Patio Kitchen Ideas
Whether you’re dreaming of a simple weekend grilling station under a retractable awning or a luxury full-appliance kitchen beneath a timber-framed pavilion, the key to a successful covered patio kitchen is planning from the roof down. Start with your cover structure, then design your layout, select weather-rated appliances, and always prioritize ventilation and fire safety. The investment in a covered outdoor kitchen pays dividends in expanded living space, increased home value, and countless meals shared under shelter from sun and rain.
The 9 ideas in this guide cover the full spectrum from budget-friendly to luxury, from rustic stone to modern glass, from basic grilling to pizza-making and full entertaining. Each approach can be customized to your specific patio size, climate, and cooking style. The only wrong choice is not taking the first step.
What’s the biggest question you still have about building your covered patio kitchen? Drop it in the comments below — I personally answer every question from readers planning their outdoor cooking spaces.
Last update on 2026-09-13 at 11:30 / Affiliate links / Images from Amazon Product Advertising API
