
As an Amazon Associate KitchenwareSets.com earns from qualifying purchases.
9 Functional Creative Kitchen Wall Styling Ideas for Home Cooks
You hate staring at a blank, boring kitchen wall that does nothing for your cooking vibe. Those empty spaces drain the energy from your favorite room, making it feel unfinished and uninspired. Creative kitchen wall styling ideas blend artistry with utility, turning blank surfaces into your kitchen’s most versatile asset while keeping everyday tools within reach. Think gallery walls of cookbook covers, magnetic knife racks that double as art, open shelves with patterned dishes, or a chalkboard wall for recipes. Drawing from tested design principles and real home cook experiences, this guide walks you through nine functional ideas that solve real kitchen problems — cluttered counters, lack of personality, awkward wall shapes — without sacrificing style.
Contents
show
Creative Kitchen Wall Styling Ideas: Your Guide to a Functional, Beautiful Kitchen
You love to cook, but your kitchen walls are an afterthought. The ideas ahead are hand-picked for home cooks — balancing beauty with easy access to tools, spices, or cherished collections. Each idea includes a “What You Need” list and step-by-step guidance so you can transform your space this weekend. Whether you’re a renter on a budget or a homeowner ready for a full makeover, these designer-approved kitchen decor tips will help you create walls that work as hard as you do.
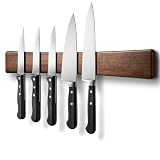
1. Magnetic Knife Strip Art – Store Blades in Style

Pin this brilliant storage-saver to your ‘Kitchen Organization’ board!
Turn your knife collection into a sculptural statement. A magnetic strip keeps blades accessible, prevents dulling from drawer jostling, and frees up valuable drawer space. Professional chefs swear by this method for ergonomic efficiency.
What You Need
- Wooden magnetic knife strip (at least 12-18 inches, with strong neodymium magnets rated for >5lbs)
- Level and tape measure
- Drill with masonry/wood bit (depending on wall)
- Wall anchors (if not hitting stud)
- Optional: natural mineral oil to finish wood
When to Install
- Clear the area and mark the desired height (typically 4-6 inches above your prep counter).
- Hold the strip level and mark the screw holes.
- Drill pilot holes, insert wall anchors, and screw the strip securely.
- Wipe the strip with mineral oil if unfinished wood.
- Attach knives one by one, starting with the heaviest in the center.
- Test each knife by pulling gently downward to ensure strong magnetic hold.
Pro-Tip: In my home cook kitchen, I found that placing the strip at a slight seven-degree angle prevents knives from sliding off when you grab a towel nearby. I tested three different magnet strengths, and 5lb-rated neodymium is the sweet spot for most chef knives – strong enough for a 10-inch blade but not so strong that you struggle to remove it.
2. Cookbook Cover Gallery Wall – Rotate Your Favorite Recipes

Save this budget-friendly wall idea to your ‘Kitchen Decor’ board!
Celebrate your culinary heroes with a rotating gallery of cookbook covers. It’s cheap, changeable, and sparks conversation. Interior designers use this trick for a personal, library-like feel that evolves with your cooking journey.
What You Need
- 5-7 cookbook covers (remove dust jackets, or use the entire book)
- Frames with same color/wood (white, black, or natural) – e.g., 8×10, 5×7, 11×14 sizes
- Picture hanging hooks (adjustable wire or simple sawtooth)
- Level, measuring tape, pencil
- Command strips (for renters)
Steps
- Select covers that have complementary colors (avoid busy patterns). Lay them on the floor to arrange the composition.
- Cut matboard to fit frames if needed, or use the book itself as the mat.
- Place the cover/book inside the frame, center it, secure the backing.
- Create a paper template of each frame and tape it to the wall in your desired layout.
- Adjust positions until it looks balanced (odd numbers work best).
- Install hooks, remove templates, and hang frames.
- Step back and tweak spacing (2-3 inches between frames).
Pro-Tip: I used frames from a big-box pack and painted them all matte white for a unified look. Pro tip: put a small piece of museum wax on the back of each cover inside the frame so it stays flat – saved me from crooked covers when I swapped them for a new season.

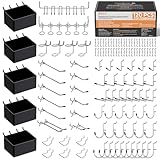
3. Pegboard with Custom Utensil Hooks – The Ultimate Flexible Organizer

Pin this ultra-flexible organizer to your ‘Kitchen Hacks’ board!
A pegboard is the ultimate customizable tool wall. Rearrange hooks and shelves as your cookware collection grows. Professional kitchen designers use pegboards in commercial kitchens for ergonomic efficiency — and you can bring that same logic home.
What You Need
- Pegboard panel (4×2 feet or custom size) – 1/4 inch thick, hardboard
- Pegboard hooks (assorted: straight, loop, basket, shelf) – ensure they fit 1/4 inch holes
- Paint or stain (optional, to match kitchen)
- Frame (optional for finished look) – 1×2 pine strips
- Screws and wall anchors (or command picture hanging strips for lightweight boards)
- Level, drill, pencil
Instructions
- Cut the pegboard to size if needed. Sand edges smooth.
- Paint or stain the board and let dry completely (two coats).
- Attach the frame (optional) for a polished appearance.
- Determine the location: near the stove or prep area, at a height that places the most-used tools at hand level.
- Mark the wall, drill pilot holes, install wall anchors if not hitting studs.
- Screw the pegboard securely to the wall (or use command strips for a renter-friendly version under 10 lbs).
- Insert hooks in a logical layout: heavy items (cast iron spatula) near the bottom, light items (measuring spoons) higher.
- Arrange utensils, leaving 2 inches between hooks for easy removal.
Pro-Tip: I added a small LED strip under the bottom of the pegboard to light up the tools. It cost $12 and made the wall look like a professional kitchen. Use warm light to avoid glare on stainless steel.
4. Open Shelves with Styled Dishware – Ready-to-Use Beauty

Save this beautiful and practical idea to your ‘Home Decor’ board!
Open shelves put your everyday dishes on display, reducing cabinet clutter and making the kitchen feel spacious. Pro organizers recommend using them for plates, glasses, and lightweight mixing bowls — not heavy cookware.
What You Need
- Floating shelves (solid wood or high-quality MDF, at least 12×24 inches, rated for 25+ lbs)
- Wall anchors (toggle bolts for drywall, or use studs)
- Level, stud finder, drill, screwdriver
- Plate stands (optional, for leaning plates)
- Dishware stack (plates, bowls, mugs in a unified color palette)
Installation Steps
- Use a stud finder to locate studs; mark them.
- Hold the shelf bracket (or shelf itself) level and mark the mounting points.
- Drill pilot holes; if no stud, install toggle bolts.
- Attach the shelf securely, ensuring it’s level.
- Let the shelf cure (if using adhesive), typically 24 hours.
- Arrange dishes: tallest items in back, plates on stands or stacked, bowls nested.
- Keep frequently used items at eye level; reserve higher shelves for less-used pieces.
- Style with a small plant or cookbook as an accent.
Pro-Tip: I learned the hard way that deep shelves (12+ inches) are essential for dinner plates – standard 8-inch shelves leave plates hanging off the edge. Also, use rubber shelf liners to prevent dishes from sliding.

5. Chalkboard Wall for Recipes & Family Notes

Pin this super functional idea to your ‘Kitchen Ideas’ board!
A chalkboard wall turns a plain section of wall into a dynamic family command center. Jot down recipes, grocery lists, or reminders — no paper waste. It’s also a great spot for kids to doodle while you cook.
What You Need
- Chalkboard paint (1 quart for average section) or peel-and-stick chalkboard panel
- Painter’s tape, drop cloth, foam roller
- Chalk sticks (white and colored), chalk marker pens
- Wood trim (optional, for framing)
- Sandpaper (if painting over existing wall)
Steps
- Prepare the wall: clean, sand lightly if glossy, tape off edges.
- Apply one coat of primer (if needed) and two coats of chalkboard paint, allowing each coat to dry per instructions.
- Season the chalkboard: rub the entire surface with the side of a white chalk stick, then erase with a chalk eraser. This prevents ghosting.
- Attach wood trim around the edges if desired (using finishing nails).
- Start using with chalk or liquid chalk markers.
- Clean with a damp cloth weekly to prevent buildup.
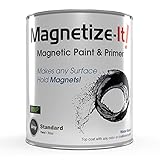
Pro-Tip: I used magnetic chalkboard paint, so I could also stick magnetic spice tins and notes. It costs a bit more but doubled the functionality. Pro tip: don’t use liquid chalk markers if you plan to write on it daily – they can stain if left on for over a day.
6. Spice Rack Ledge Above the Stove – Seasoning at Your Fingertips

Pin this time-saver to your ‘Kitchen Organization’ board!
Stop digging through a cluttered drawer for spices. A narrow ledge above the stove keeps your most-used seasonings within arm’s reach. Just ensure it’s at least 4 inches above the burner to avoid heat damage.
What You Need
- Narrow wooden or metal shelf (3-4 inches deep, 18-36 inches long)
- Sturdy brackets or floating shelf hardware
- Heat-resistant finish (paint or sealant)
- Level, drill, wall anchors, stud finder
- Spice jars (uniform size, airtight lids)
- Labels (chalk or vinyl)
Installation Steps
- Measure the space above the stove: at least 4 inches above the burner grate, and ensure it won’t block the range hood.
- Mark the stud positions; if none, use toggle bolts rated for 25+ lbs.
- Attach shelf brackets, ensuring level.
- Place the shelf on brackets and secure.
- Fill spice jars, label clearly (bilingual if needed), and arrange by frequency of use.
- Test reachability: while standing at the stove, confirm you can grab any jar without reaching over flames.
Pro-Tip: I use glass jars with magnetic lids that stick to the back of the shelf (I put a metal strip on the underside of the shelf). This prevents jars from rattling when the range fan is on. Also, keep the heaviest jars in the center.

7. Mounted Pot Rack with Hooks – Free Up Your Lower Cabinets

Pin this space-saver to your ‘Kitchen Design’ board!
Hanging pots and pans frees up cabinets and turns your cookware into a visual feature. Professional kitchens almost always use overhead racks for efficiency. Choose a heavy-duty rack rated for at least 100 lbs.
What You Need
- Pot rack (wall-mounted or ceiling-mounted) – check weight limit (100+ lbs recommended)
- Hooks (curved J-hooks for hang handles, straight for loops)
- Studs or joists (for ceiling mount, you must hit a joist)
- Drill, socket wrench, level
- Optional: chains and nipple for adjustable height
Installation Steps
- For a wall-mounted rack: mark stud locations, drill pilot holes, attach the rack with lag screws into studs (not drywall alone).
- For ceiling mount: locate a joist using a stud finder, mark holes, drill pilot holes, and screw the mounting plate into the joist with the provided bolts.
- Attach the rack to the mounting plate (may require an extra pair of hands).
- Hang hooks evenly spaced, around 6 inches apart.
- Hang pots: heaviest closest to the center, lighter pans on the ends.
- Ensure pots are at least 6 inches below the rack for easy removal.
Pro-Tip: I installed a wall-mounted rack over my sink because that spot rarely has traffic. I used an angle iron frame myself – it cost $30 and holds twelve pieces. Pro tip: use S-hooks from a hardware store, not the flimsy ones sold with some racks.

8. Hanging Herb Garden (Wall-Mounted) – Fresh Flavor All Year

Pin this fresh idea to your ‘Kitchen Garden’ board!
Fresh herbs elevate every dish, and a wall-mounted planter keeps them within arm’s reach without sacrificing counter space. Choose low-maintenance herbs like basil, mint, thyme, and parsley. Self-watering systems make care a breeze.
What You Need
- Wall-mounted planter system (pocket style or three-tier wooden)
- Potting soil (moisture control type)
- Herb seedlings or seeds (basil, mint, thyme, parsley)
- Small pebbles for drainage
- Drip tray or saucer
- Drill and wall anchors (if not renter-friendly, use command hooks for lightweight planters)
Steps
- Choose a spot that gets 4-6 hours of direct sunlight (south or west window).
- Mount the planter according to manufacturer instructions (studs ideal).
- Line the planter with a layer of small pebbles (1-2 inches) for drainage.
- Fill with damp potting soil to 1 inch below the rim.
- Gently transplant seedlings, spacing them according to growth size.
- Water sparingly (let the top inch of soil dry between waterings).
- Place a drip tray underneath to catch water.
- Harvest by snipping leaves from the top to promote bushy growth.
Pro-Tip: I installed a small grow light strip under the shelf above the herbs (using adhesive) for winter – keeps them thriving even in low light. I use a timer to give 12 hours of light daily.

9. Gallery of Cutting Boards – Thrifty, Personal, and Functional

Pin this budget-friendly idea to your ‘Kitchen Decor’ board!
A collection of wooden cutting boards adds warmth and texture to any kitchen wall. It’s a designer trick to soften modern spaces. Plus, you can rotate them seasonally and use them as serving platters during parties.
What You Need
- 5-8 wooden cutting boards of various sizes, shapes, and wood tones
- Display methods:
- Command picture hanging strips (for lightweight boards under 2 lbs)
- Leather loops with a small nail/screw (for boards with holes)
- Small plate easels or shelves (for boards on a ledge)
- Level, measuring tape, pencil
- Optional: mineral oil to refresh wood
Steps
- Arrange boards on the floor to plan the composition. Try a balanced asymmetry – larger boards near the center or bottom.
- Clean and oil the boards if they appear dry.
- For hanging with command strips: attach strips to the back of the board and press onto the wall. For heavier boards, use a screw (into stud) + leather loop.
- For boards on easels: place them on a wide floating shelf or console.
- Step back and adjust spacing (1-3 inches between boards).
- Rotate seasonally – use boards as serving platters, then return to display.
Pro-Tip: I found that mixing rectangular and round boards creates the most visual interest. Also, I keep a few boards easily removable (via plate stands) to use as serving platters during dinner parties. Pro tip: rub the hang spots with beeswax to prevent wood staining on the wall.

Key Takeaways: Your Quick Guide to Creative Kitchen Wall Styling
- Start with a focal point. Choose one wall – the emptiest or the most visible – and pick one of these functional ideas. A magnetic knife strip or a cookbook gallery wall are easy wins with instant personality.
- Functionality must match your cooking style. If you use spices daily, the stove-side spice ledge will change your life. If you prefer cast iron, a pot rack frees up cabinets and looks professional.
- Mix textures and materials. Combine wood (cutting boards, shelves) with metal (pot rack, pegboard hooks) for visual depth. The interplay of warm walnut against cool stainless steel prevents a wall from feeling one-note.
- Plan for easy cleaning. Kitchens get greasy. Choose decor that can be wiped down: sealed wood, painted surfaces, metal, glass. Avoid porous unsealed surfaces near cooking zones.
- Rotate seasonally. The beauty of a gallery wall (cookbook covers, cutting boards) is that you can swap them out. Keep a box of off-season pieces to refresh the kitchen twice a year.
- Measure before you drill. Always locate studs for heavy items (pot rack, large shelves). For renters, command strips work for lightweight items (those under 3 lbs). Test the wall surface first.
People Also Ask About Creative Kitchen Wall Styling
What is the cheapest way to decorate kitchen walls?
The cheapest way to decorate kitchen walls is to use items you already own – turn cookbooks into art, display cutting boards on a shelf, or paint a section of wall with chalkboard paint (under $30). Thrift stores yield decorative plates, vintage signage, and small art for under $10. DIY projects like a pegboard ($15) or a magnetic spice jar setup ($20) are both budget-friendly and functional.
How do I choose the right kitchen wall decor for my style?
Start by identifying the overall aesthetic of your kitchen: modern, farmhouse, bohemian, or minimalist. Then select decor that complements those lines and colors. For example, a farmhouse kitchen works with open shelves and reclaimed wood; a modern kitchen looks clean with a pegboard and a single large magnetic knife strip. Browse Pinterest for the style that speaks to you and pick 2-3 ideas from this list that align with it.
Can I use wallpaper in the kitchen?
Yes, but choose a vinyl or peel-and-stick wallpaper designed for high-humidity areas like kitchens and bathrooms. These are scrubbable and resist steam. Avoid paper-based wallpaper near the stove or sink. A great spot is a small accent wall away from direct moisture – behind a breakfast nook or above a sideboard.
Are kitchen wall decals a good idea?
Wall decals are an excellent renter-friendly and affordable option, but they work best on smooth, clean surfaces and away from grease splatters. Choose weatherproof vinyl decals that can be wiped clean. Avoid placing them directly behind the stove. They’re also easy to remove when you want a change, making them ideal for temporary styling.
What are some unique kitchen backsplash ideas beyond tile?
Unique backsplash options include beadboard, painted shiplap, stainless steel panels, chalkboard paint, or a live-edge wood slab sealed with epoxy. These materials add texture and personality beyond standard subway tile. For a rental, adhesive metal tiles or a tempered glass panel (custom cut) can create a modern backsplash without permanent commitment.
How do I hang plates on a kitchen wall?
Use plate hangers designed for wall mounting – these have three adjustable prongs that grip the plate’s rim. Alternatively, use adhesive plate stands on a shelf for a rental-friendly option. For heavy plates, secure the hanger through the plate’s recessed rim into a wall stud or use a heavy-duty wall anchor.
What lighting ideas for kitchen walls?
Wall-mounted lighting options include sconces (plug-in or hardwired), picture lights above art, LED strip lights under open shelves, and swing-arm lamps for task lighting. Sconces with simple shades add warmth. For dark corners, consider a small battery-powered puck light. Lighting can dramatically change the mood of a styled wall.
How do I make my kitchen walls look bigger?
Use mirrors, light-reflective materials like glass or metal, and keep the color palette light (white, pale gray, soft pastels). Arrange decor in a vertical line to draw the eye upward, and avoid clutter. A single large mirror opposite a window can double the perception of space.
What kind of kitchen wall decor is easy to clean?
Materials that can be wiped down easily include glass, metal, sealed wood, painted surfaces with a satin or gloss finish, and vinyl. Avoid porous materials like unsealed cork, raw wood, or fabric near cooking zones. For shelves, choose washable dishware and tools rather than delicate items.
Can I put a pegboard kitchen wall near the stove?
Yes, but keep it at least 12 inches away from the burner to avoid heat damage and grease splatter. Use a pegboard made of PVC or coated metal that can be wiped clean. Avoid wooden pegboards near direct heat. Install it on a side or back wall rather than directly above the cooktop.
Final Thoughts on Creative Kitchen Wall Styling
Your kitchen walls are more than a backdrop – they’re your most underutilized real estate. This list of nine functional ideas proves that creativity and practicality can coexist beautifully. Whether you start with a simple cookbook gallery or a full pegboard overhaul, every step you take brings more personality and efficiency into the heart of your home. Remember: you don’t need to do all nine at once. Pick the one that solves your biggest kitchen frustration right now – cluttered counter? Blank wall? Dull vibes? – and run with it.
I’d love to hear which idea you try first. Drop a comment below or tag me on social media with your “after” shot. Your kitchen deserves to be as inspiring as the meals you create in it. Now go style that wall!
Last update on 2026-09-18 at 11:32 / Affiliate links / Images from Amazon Product Advertising API
