
As an Amazon Associate KitchenwareSets.com earns from qualifying purchases.
Dining Room Gallery Wall Decor: Charming Bohemian Ideas for Dining and Kitchen
Does your dining room wall feel like a forgotten space, just a blank canvas waiting for personality? That empty wall can make the whole room feel unfinished and uninspired. A dining room gallery wall is a curated collection of art, photos, and objects arranged on a dining room or kitchen wall to create a focal point. Bohemian style is perfect for this, as it embraces an eclectic mix of frames, textures, and personal treasures for a warm, inviting look. Drawing from tested design principles and current boho trends, this guide gives you nine charming ideas that blend visual inspiration with pro-level execution, turning your dining space into a conversation-starting sanctuary.
Contents
show
9 Charming Bohemian Dining Room Gallery Wall Ideas For A Cozy, Eclectic Space
1. Curate an Eclectic Mix of Vintage Art Prints and Personal Photos

Pin this charming eclectic gallery wall idea to your ‘Boho Dining Room Decor’ board!
What You Need
- 5-7 vintage art prints (botanical, landscape, anatomical) in varied sizes (8×10, 11×14, 5×7)
- 3-5 personal photos in black and white or sepia
- Mixed frame set: warm wood, black metal, distressed gold (Ikea Ribba, Amazon Basics, thrifted)
- Acid-free mat boards for framing prints
- Picture hanging hardware (drywall anchors and hooks for heavy frames)
- Paper, scissors, painter’s tape for templates
Steps
- Gather your art and photos: Select your vintage prints and personal photos. Print your photos in black and white or sepia for a cohesive, timeworn feel.
- Choose your frames: Select frames in varying styles but a limited color palette—warm wood, black metal, and maybe one distressed gold for an accent.
- Arrange on the floor: Lay out your framed pieces on the floor in an asymmetrical cluster. Play with height and size until the visual weight feels balanced.
- Create and tape paper templates: Trace each frame onto paper, cut it out, and tape the templates to the wall. This lets you adjust the layout without making extra holes.
- Hang the focal piece first: Start with your largest or most eye-catching vintage art print as the anchor.
- Hang the rest using your templates: Space frames 2-3 inches apart. Use a level to ensure they’re straight, but don’t be afraid of a slight, organic asymmetry.
Pro-Tip: To protect vintage prints from dining room humidity, always use acid-free mats and frames with a backer board. This is an archival-quality standard that extends the life of your art.

2. Design a Layered Picture Ledge Display

This easy picture ledge idea is perfect for renters! Save it to your ‘Renter Friendly Decor’ board.
What You Need
- 1-3 wooden picture ledges (Ikea Mosslanda or similar, 45-85 cm)
- 6-8 small to medium frames (assorted sizes like 4×6, 5×7, 8×10)
- Small decorative objects (ceramic vase, dried flowers, small sculpture)
- Level, stud finder, drill, screws
- Paper, pencil for layout planning
Steps
- Choose your ledges: Select narrow picture ledges that match your boho aesthetic (natural wood, painted white, or dark stained).
- Plan your ledge placement: Decide on single or stacked ledges. A single long ledge above a sideboard is a classic boho look.
- Mount the ledges: Use a level and stud finder to ensure they are securely mounted to the wall.
- Curate your frames: Select a mix of small frames—boho prints, personal photos, postcards.
- Layer frames and objects: Lean larger frames against the wall. Place smaller frames in front. Intersperse with a small vase, a stack of books, or dried flowers for texture.
- Step back and adjust: Make final adjustments to the layering and spacing.
Pro-Tip: To create depth, use frames of different thicknesses and lean them at slightly different angles. A 15-20 degree angle is visually pleasing and stable.

3. Anchor with an Oversized Statement Mirror

An oversized mirror makes a stunning (and functional) statement! Pin it to your ‘Dining Room Focal Point’ board.
What You Need
- One large arched or round wooden mirror (at least 24×36 inches)
- French cleat hanging system for heavy mirrors (safest)
- 3-5 small, eclectic art prints to cluster around it
- Frames for the small prints (light wood, bamboo)
- Level, stud finder, pencil
Steps
- Select your hero mirror: Choose an oversized, arched wooden mirror for a truly boho feel. A round rattan mirror also works beautifully.
- Determine the placement: Center the mirror over your sideboard or buffet table. The bottom of the mirror should be 4-6 inches above the furniture.
- Hang the mirror securely: Use a French cleat system to safely anchor the heavy mirror into wall studs.
- Curate the surrounding art: Choose 3-5 small prints that complement the mirror’s aesthetic—a botanical, a celestial chart, a vintage map.
- Cluster art around the mirror: Arrange the small prints in an asymmetrical cluster around the top and sides of the mirror. Use the same spacing rules (2-3 inches apart).
- Step back and balance: Ensure the arrangement feels balanced and doesn’t make the mirror look crowded.
Pro-Tip: A mirror is one of the best ways to create a focal point without overwhelming a small space. It reflects light and views, making the room feel instantly larger and more open.

4. Create a Cohesive Botanical Print Grid

Love a clean, organized look? Pin this botanical grid idea to your ‘Boho Meets Minimalist’ board!
What You Need
- Set of 4-6 botanical art prints in a cohesive theme (e.g., ferns, herbs, or tropical leaves)
- Matching frames (all same color and style—cream, light oak, or black is best for boho)
- Acid-free mat boards
- Level, measuring tape, pencil, hammer, nails
- Paper, scissors for templates
Steps
- Select a botanist’s palette: Choose a set of botanical prints that share a similar color scheme (e.g., muted greens on off-white backgrounds).
- Choose uniform frames: Use all matching frames for a clean, contemporary look within the boho aesthetic. Light wood or cream frames are great choices.
- Measure your wall space: Decide if you want a 2×2, 2×3, or 3×3 grid.
- Calculate spacing: Use the formula: (Wall width available – (Frame width x number of frames in a row)) / (number of frames in a row + 1) to find your exact spacing.
- Create and hang templates: Cut paper templates to frame size. Use a level and measuring tape to mark their positions on the wall.
- Hang the frames: Hammer a nail at the top center of each template, then remove the template and hang your frame.
Pro-Tip: A grid layout is surprisingly boho when the art itself has a natural, organic theme. The contrast of structured frames with wild botanical illustrations is very charming.

5. Weave in Woven Wall Art and Macrame

Texture is everything in boho decor! Save this to your ‘Boho Wall Texture’ board for inspiration.
What You Need
- One large macrame wall hanging (natural cream or white cotton)
- One or two smaller woven wall hangings or dream catchers
- A wooden dowel or branch for the woven pieces
- Decorative tassels or pom-pom trim (optional)
- Command hooks or a small nail for the macrame
Steps
- Select your textile art: Choose a large macrame wall hanging as a statement piece. Add smaller woven textiles to create a cluster.
- Choose a wall color: Macrame pops beautifully against a warm terracotta, dusty rose, or sage green wall.
- Cluster with other small items: Place the macrame as the focal point. Surround it with a few smaller frames or a woven dreamcatcher.
- Hang your macrame: Use a strong Command hook or a small nail as dowels often light.
- Hang the woven pieces: If using a wooden dowel, secure a simple picture wire or a piece of jute rope on the back.
- Step back and adjust layers: Experiment with the layering. The textiles should add depth and a soft, tactile element to the gallery.
Pro-Tip: To secure a macrame hanging without a traditional frame, use a clear Command hook rated for the hanging’s weight. For heavier pieces, a small nail is more reliable.

6. Build an Asymmetrical “Salon Style” Cluster

Maximalist boho at its best! Pin this to your ‘Salon Style Gallery Inspiration’ board for future planning.
What You Need
- A large collection of frames (15+ pieces of various sizes and styles)
- Art prints, photos, postcards, small objects (plates, mirrors)
- A large piece of butcher paper or craft paper
- Painter’s tape, level, hammer, assorted nails and hooks
- Pencil, measuring tape
Steps
- Gather your collection: This is the time to use everything you’ve collected. Set aside at least 15 pieces of art in all shapes, sizes, and styles.
- Layout on the floor: Arrange all pieces on the floor in the shape of your desired wall cluster. Start with a large, anchor piece (a mirror or vintage painting) and cluster smaller pieces around it.
- Trace and cut paper templates: Trace each frame onto craft paper, cut it out, and label it with the frame’s name.
- Tape templates to the wall: Using painter’s tape, arrange the paper templates on the wall. Step back often to check the overall shape and balance.
- Hang the anchor piece first: Remove the anchor template and hang the frame. Then, work outward from this focal point.
- Hang the rest: One by one, remove a paper template and hang the corresponding frame. Keep a level handy to ensure things aren’t wildly crooked.
Pro-Tip: Use a laser level to project a straight line for the bottom row of your cluster. Even in an asymmetrical layout, a consistent baseline (or top line) prevents visual chaos.

7. Add a Rustic Plate Rack or Collection of Plates

Vintage plates on a rustic rack = the ultimate boho charm! Pin this to your ‘Farmhouse Boho Decor’ board.
What You Need
- A rustic wooden plate rack (with 3-5 shelves)
- A collection of 6-10 vintage-style or mismatched dinner plates
- Plate hangers or plate stands for secure display
- Small decorative items (dried lavender, small frames, a candle)
- Level, stud finder, drill, screws
Steps
- Select your plate rack: Choose a rustic wooden piece that matches your boho aesthetic.
- Curate your plates: Source vintage plates (thrift stores, Etsy, family heirlooms) that share a color story or theme (e.g., all blue-and-white, or all floral).
- Mount the plate rack: Use a level and stud finder to securely mount the rack to the wall.
- Arrange the plates: Place the plates on the rack using stands or hangers. Vary the plate sizes for visual interest.
- Add layers: Nestle small framed photos, a sprig of dried lavender, or a small votive candle between the plates for a layered, lived-in boho look.
- Step back and balance: Ensure the overall display feels balanced and not too crowded.
Pro-Tip: For the best farmhouse boho look, mix plate styles—a floral plate next to a blue-and-white one, next to a solid terracotta one. The contrast is visually compelling.

8. Embrace a Dark, Moody Boho Palette

Moody and dramatic boho is a whole vibe! Pin this to your ‘Dark Boho Dining Room’ board for evening entertaining inspiration.
What You Need
- 5-7 art prints with dark, moody themes (dark landscapes, botanical studies, black and white portraits)
- Frames in black, dark wood, or matte brass
- A deep navy or charcoal accent wall paint
- One or two adjustable picture lights with warm LED bulbs
- Level, stud finder, hammer, appropriate wall anchors
Steps
- Paint an accent wall: Choose a deep, dramatic color like navy blue, charcoal, or even a deep terracotta.
- Select your dark art: Curate art that feels rich and moody—a dark landscape, a botanical in dark tones, a hauntingly beautiful portrait.
- Choose dark frames: Use frames in black, dark wood, or matte brass. Avoid light woods or gold that might feel out of place.
- Plan your layout: A more intimate and focused cluster, rather than a sprawling one, works best for a moody wall.
- Hang your frames: Use a level to keep frames straight. Consider a more structured, symmetrical arrangement for a formal feel.
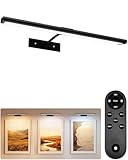
- Install picture lights: Position a picture light above your main piece. This is the key to making the moody palette work—it creates a focal point and adds warmth.
Pro-Tip: To create a truly dramatic look, choose a single large, dark painting and surround it with smaller, complementary pieces. The contrast of a large, dark focal piece with smaller ones is very sophisticated.
9. Create a “Gathered” Display with Rattan and Natural Elements

Natural textures make the most charming boho gallery! Save this to your ‘Natural Boho Decor’ board.
What You Need
- A large rattan or bamboo mirror
- A small round seagrass or woven basket (for wall mounting)
- A bamboo or wood frame with a botanical print
- One or two dried palm leaves or pampas grass stems
- A natural jute or cotton macrame wall hanging (optional)
- Strong adhesive hooks or small nails
- Picture wire or jute rope for hanging baskets
Steps
- Gather your natural pieces: Find a rattan mirror, a small wall basket, a bamboo frame, and a dried palm leaf. The more natural textures, the better.
- Plan your arrangement: This display is about texture, not symmetry. Plan a loose, organic cluster that feels like nature has arranged it.
- Hang the rattan mirror: Use a secure hook or nail at the top center.
- Hang the basket: Use a small nail or an adhesive hook designed for baskets, or tie a piece of jute rope around the basket’s rim and hang it.
- Hang the bamboo frame: Use a small nail. Angle it slightly for a casual feel.
- Display the dried palm: Place the stem in a small, wall-mounted vase or simply lean it from a ledge.
- Bring it all together: Add a final touch, like a small macrame piece, to unify the cluster.
Pro-Tip: For a truly boho feel, don’t be afraid to lean some pieces against a picture ledge instead of nailing them all. This adds to the casual, nature-inspired aesthetic.

Key Takeaways: Your Quick Guide to Dining Room Gallery Wall Decor
Key Takeaways:
- Embrace an eclectic mix of styles – Don’t be afraid to pair vintage art prints with personal photos, or a modern grid with a rustic plate rack. The charm of boho is in the unexpected combination.
- Start with a strong anchor piece – Whether it’s an oversized mirror, a large vintage painting, or a macrame wall hanging, every great gallery wall has a focal point around which the rest of the display is organized.
- Use paper templates before you hammer – This professional designer trick (tracing your frames onto craft paper) is the single best way to plan your layout and avoid making unnecessary holes in your wall.
- Consider your dining room’s function – Protect your art from humidity by using acid-free mats and avoid direct sunlight to prevent fading. A picture light is an excellent investment for moody schemes.
- Texture is as important as color – Incorporate woven wall art, macrame, rattan mirrors, and baskets to add a layer of tactile interest that flat frames can’t match.
- Master the spacing rules – For a formal grid, use precise 2-inch spacing. For an eclectic cluster, keep frames 2-3 inches apart to prevent the wall from feeling cluttered or chaotic.
- Personalize, personalize, personalize – The best boho gallery walls tell a story. Include personal photos, travel souvenirs, and pieces that mean something to you to create a space that’s truly charming and unique.
People Also Ask About Dining Room Gallery Wall Decor
How high should I hang a gallery wall in my dining room?
The industry standard is to hang the center of your gallery wall at 57-60 inches from the floor, which is considered average adult eye level. For a dining room, if you’re grouping art above a sideboard, a good rule is to leave 4-6 inches between the top of your furniture and the bottom of your lowest frame. When hanging above a dining table, consider the view from a seated position, and lower your art slightly, centering it at around 55-58 inches for a more intimate feel.
How do I plan a dining room gallery wall layout?
Start by measuring your wall space and gathering your chosen frames. Then, create paper templates the exact size of each frame. Arrange these templates on the wall using painter’s tape. This “zero-commitment” method lets you step back, adjust spacing, and perfect your layout before you make a single hole. Once you’re happy, simply remove the template, mark the nail point, and hang your frame. This is the most professional and mistake-free way to plan a layout.
What is the best spacing for a dining room gallery wall?
For a cohesive, professional look, space all frames 2 to 3 inches apart from each other. This rule of thumb applies to both symmetrical grids and asymmetrical salon-style clusters. In a grid, use a consistent measurement for both horizontal and vertical gaps. In an eclectic layout, aim for 2-3 inches between the edges of most frames. Sticking to this narrow margin prevents the wall from looking sparse or cluttered.
Can I use mirrors in my dining room gallery wall?
Absolutely, mirrors are a wonderful and functional addition to a dining room gallery wall. An oversized mirror can act as a stunning focal point, making the room feel larger and brighter. A smaller, arched or round mirror can be clustered alongside other art to add variety and reflect light. The key is to treat the mirror as another art piece. Place it thoughtfully within your layout to reflect a nice view or your dining table setting for maximum effect.
Do all frames in a gallery wall have to match?
No, they absolutely do not, especially for a bohemian gallery wall where mismatched frames are the hallmark of the look. To keep a mismatched collection from looking chaotic, create subtle cohesion through a limited color palette (sticking to wood, black, and gold, for example) or a shared art theme. The key is to ensure the frames feel intentional, not random. A salon-style wall with mismatched frames can be the most charming and personal display possible.
How do I hang a gallery wall without damaging my walls?
For renter-friendly or damage-free hanging, use high-quality adhesive strips and hooks designed for your frame’s weight. Products like Command picture hanging strips are excellent for lightweight to medium-weight frames. For heavier mirrors or large frames, traditional nails are more secure, but you can minimize damage by using picture hanging hooks that require only a single, small nail. Always test the adhesive on a small, inconspicuous area first.
What type of art is best for a dining room?
The best art for a dining room is personal and conversation-starting, but it should also be durable. Avoid very delicate pieces that could be damaged by humidity or cooking grease. Classic choices include botanical prints, landscape paintings, personal photos, and antique maps. An eclectic mix of personal photos and vintage prints is perfect for a bohemian look. The most important thing is that the art makes you and your guests feel welcome and inspired.
Should my gallery wall be centered over a sideboard or buffet?
Yes, as a general design rule, the gallery wall should be visually centered over the sideboard or buffet piece below. The total width of your gallery wall cluster should ideally be equal to or slightly less than the width of the furniture below. Over-centering creates a strong, balanced focal point and grounds the art. This rule applies to symmetrical grids and the general weight distribution of eclectic clusters, with the largest pieces usually centered.
How do I mix different frame styles on one gallery wall?
To mix frame styles successfully, find a unifying thread such as color (e.g., all warm wood or all black metal) or a dominant art theme. For a charming boho look, you can mix a thick gold frame, a simple black one, and a rustic wood one, as long as the colors relate. A second unifying trick is to use the same mat color for all the art. This creates a visual connection between the wildly different frames, making the arrangement feel cohesive.
Is a gallery wall outdated in modern dining rooms?
Not at all; the gallery wall is a timeless classic that has evolved, not become outdated. In modern dining rooms, the gallery wall is often more curated and intentional than its maximalist predecessor. A cohesive grid of botanical prints or a perfectly planned asymmetrical cluster of black-and-white photos can be incredibly modern and chic. The key is to plan the layout carefully and choose art that reflects your personal style and the room’s overall aesthetic.
Final Thoughts on Your Dining Room Gallery Wall
Creating a charming bohemian gallery wall for your dining room is one of the most rewarding home decor projects you can undertake. It’s a chance to curate your own personal art collection, tell a story, and transform a blank wall into a warm, inviting focal point that sparks conversation. By blending the expert design principles you’ve learned—like the 57-inch eye-level rule, intentional frame spacing, and a focus on texture and natural materials—with your own unique and personal art collection, you’re guaranteed to create a space that feels authentically you.
Don’t feel pressured to complete it all at once. The beauty of a bohemian gallery wall is that it’s a living project. Start with a single anchor piece you love, build out your layout using the paper template method, and trust your instincts. Remember that slight asymmetry and a mix of styles are not mistakes—they’re the hallmarks of a charming, collected-over-time aesthetic. With the right planning and a bit of creativity, your dining room gallery wall will become a source of daily joy for you and your guests.
Now, we want to hear from you. What’s the one piece of art or object you’d start your dream gallery wall with? Share your ideas in the comments below
Last update on 2026-04-27 at 22:41 / Affiliate links / Images from Amazon Product Advertising API
