
As an Amazon Associate KitchenwareSets.com earns from qualifying purchases.
DIY Wood Deck Outdoor Kitchen: Best Blackstone Griddle Setup
Do you dream of cooking in a stunning custom backyard space? Building a DIY wood deck outdoor kitchen often feels impossible due to weight and heat concerns. You are not alone in worrying about structural deck failure or serious fire hazards.
Yes, you can absolutely build an outdoor kitchen on a wood deck by properly addressing two critical factors: structural load capacity and strict fire safety regulations. A successful project requires reinforcing the deck’s framing to support the heavy weight and using non-combustible materials to construct the cooking island.
Drawing from comprehensive analysis of current building code compliance and proven load-bearing calculations, this guide reveals the ultimate construction roadmap. You will discover exactly how to safely integrate heavy BBQ appliances into your existing raised deck structure. Get ready to transform your backyard into the ultimate outdoor culinary space.
Contents
show
Can You Build an Outdoor Kitchen on a Wood Deck?
Building an outdoor kitchen on a wooden deck is highly feasible when you proactively address the structural limitations and fire risks inherent to wood structures. Before you begin planning your deck top kitchen ideas, you must understand that standard residential decks are not built to hold the extreme weight of concrete, masonry, and heavy stainless steel appliances. A successful outdoor kitchen build requires targeted deck joist reinforcement to prevent dangerous structural sag over time.
Beyond the weight limit and structural support considerations, fire safety is the second non-negotiable factor. Because you are constructing a high-heat cooking station on top of combustible materials, building a deck kitchen mandates the use of non-combustible materials for the island’s framework. By combining a heat-shielded metal frame with proper load-bearing calculations, you can safely integrate a custom BBQ station without compromising the integrity of your home. As of August 2026, adopting these strict safety measures represents the gold standard for any outdoor kitchen on wooden deck projects.
7-Step Roadmap to Building Your DIY Wood Deck Outdoor Kitchen
Embarking on a comprehensive DIY deck build requires a logical, phased approach to ensure structural integrity and aesthetic success. This step by step build process transforms a complex engineering challenge into manageable, actionable stages. From initial load-bearing calculations to the final application of waterproof cabinetry finishes, every phase relies on the correct sequence of operations.
To safely execute outdoor kitchen projects on an existing raised wooden deck, you will follow a professional-grade workflow. We will guide you through crucial techniques like joist sistering for maximum load capacity, crafting a non-combustible substrate, and precisely installing your BBQ options for deck spaces. Follow this step-by-step roadmap to guarantee your custom deck outdoor kitchen is both breathtaking and structurally sound.
1. Planning and Sketching Your Deck Kitchen Layout

Pin this essential planning phase to your “Backyard Projects” board!
A successful wood deck kitchen layout requires balancing your culinary desires with the physical footprint of your patio. When developing an outdoor kitchen design for small deck spaces, you must optimize the traffic flow between your grill, sink, and storage zones. Every custom outdoor kitchen requires a meticulous blueprint that accounts for utility runs, safety clearances, and ergonomic design. Before buying a single piece of lumber, always verify your local utility permit requirements and ensure your plan aligns with strict building code compliance guidelines.
What You Need
- Measuring Tape
- Graph Paper & Pencil
- Level
- Manufacturer manuals for all appliances
- Local building code contact information
Steps
- Measure Your Space: Accurately measure the total available footprint on your raised wooden deck, noting the locations of doors, windows, and stairs.
- Create a Zone Plan: Map out a hot zone for the grill, a cold zone for the refrigerator, and a wet zone for the sink. Arrange them in a functional triangle layout.
- Check Clearances: Consult your Blackstone griddle’s manual for the mandatory safety clearance guide regarding proximity to combustible materials.
- Plan Utility Runs: Sketch the most direct paths for your natural gas line, water pipes, and electrical conduits.
- Finalize the Sketch: Draw the final layout to scale, including cabinet dimensions, 36-inch countertop height, and exact appliance locations.
What most guides miss: Always design your custom outdoor kitchen with advanced ventilation in mind. If your cooking station sits under a pergola or roof extension, ensure there is ample vertical space to prevent dangerous heat and smoke buildup. Failure to address this ventilation issue is a leading cause of property damage in DIY builds.

2. Reinforcing Your Deck to Support the Kitchen’s Weight

Save this crucial structural step – it’s the foundation of a safe build!
Learning how to reinforce a deck for an outdoor kitchen is the single most important safety phase of this project. You must perform substantial deck joist reinforcement to safely manage the extreme weight of concrete countertops and heavy appliances. Without upgrading the load-bearing capacity, your structure will eventually suffer from severe structural sag. Understanding the difference between dead load (the permanent weight of the kitchen) and live load (people and moving furniture) is critical. For complex layouts, always consult a structural engineer approved plan.
Tools & Materials Needed
- Pressure-treated lumber matching your existing joists
- 6×6 pressure-treated posts
- Concrete mix and tube forms
- Post-hole digger or auger
- Heavy-duty structural screws
- Impact driver and socket set
- Level and string line
Step-by-Step Directions
- Calculate the Load: Estimate the total dead load of your kitchen frame, cement board, concrete countertop, and appliances.
- Inspect Existing Structure: Check your current ledger board attachment, joists, and posts for any signs of rot or weakness.
- Add Support Posts: Directly beneath the planned kitchen footprint, dig and pour new concrete footings below the frost line. Install new 6×6 posts to support a new parallel beam, transferring the structural point load to the ground.
- Sister the Joists: Double up the joists beneath the cooking station by attaching a new piece of lumber directly to the side of each existing one. This joist sistering dramatically increases the overall deck load capacity.
- Add Blocking: Install solid wood blocks between the joists every four to six feet to prevent them from twisting under the heavy equipment.
Expert insight: When fastening new reinforced joists, use a staggered screw pattern alternating high and low every 12 to 16 inches for maximum shear strength. Never use standard construction nails for this critical structural load-bearing task.

3. Framing the Outdoor Kitchen Island with Metal Studs

This is where it takes shape! Pin this metal framing guide for later.
Building a DIY metal stud outdoor kitchen on deck structures provides unparalleled safety compared to traditional lumber. When comparing wood vs metal framing, metal is mandatory because it is non-combustible and actively protects against fire hazards caused by grill heat transfer. If you want to know how to build a BBQ island with metal studs, the process closely mirrors wood framing but requires specialized cutting tools and fasteners. Utilizing 20-gauge galvanized metal studs ensures your exterior wood kitchen station remains completely resistant to both rot and extreme high temperatures.
Tools & Materials Needed
- 20-gauge galvanized metal studs and track
- Aviation snips (tin snips)
- C-clamp locking pliers
- Impact driver with magnetic bit holder
- #8 or #10 self-tapping framing screws
- Speed square and level
Step-by-Step Directions
- Build the Base: Lay down the metal track on your deck to form the bottom rectangle of your island. Screw it directly into the deck boards securely.
- Cut the Studs: Use aviation snips to cut your vertical studs to the desired countertop height, accounting for the final countertop thickness.
- Assemble the Walls: Fit the vertical studs into the bottom track at each corner and every 12 to 16 inches on center. Use locking pliers to hold them steady while driving screws.
- Add the Top Track: Place the top track over the vertical studs and screw it down into each piece to finalize the rigid wall frames.
- Frame Appliance Openings: Construct rectangular frames for your grill, drawers, and access doors according to strict manufacturer specifications.
Pro-Tip: Wear thick protective gloves and safety glasses when working with galvanized metal framing. The freshly cut edges are razor-sharp. A high-quality pair of straight-cut aviation snips will be your most valuable tool during this assembly phase.

4. Cladding with Cement Board and Installing Vents

Safety first! Pin this guide to cladding and venting your grill island.
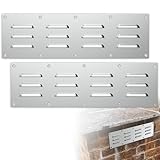
Applying cement board siding acts as a robust, non-combustible substrate that protects against fire while creating a flat surface for your final stone veneer. Cladding your metal frame with a fire-rated substrate is a critical step that cannot be skipped or substituted with standard drywall. Furthermore, cutting designated openings for stainless steel island venting is required by NFPA safety standards to prevent dangerous gas buildup inside the hollow cabinet structure. Proper cross-ventilation mitigates severe fire hazard risks associated with trapped propane or natural gas.
Tools & Materials Needed
- 1/2-inch cement board panels
- Cement board screws designed for steel studs
- Jigsaw with a carbide blade
- Stainless steel island vents
- Impact driver
Step-by-Step Directions
- Cut the Board: Measure each panel of your island frame and cut the cement board to size. Use a score-and-snap knife for straight cuts and a jigsaw for precise appliance openings.
- Attach the Cement Board: Fasten the heavy boards to the metal studs using specialized screws spaced every six to eight inches along the perimeter.
- Install Vents: You must install at least two vents for proper cross-ventilation. For heavier propane gas, place one vent low to the ground. For lighter natural gas, place the vent higher up on the cladding.
- Tape the Seams: Apply alkali-resistant fiberglass mesh tape to all panel joints and cover them with a thin layer of waterproof thin-set mortar.
Pro-Tip: Always cut cement board outdoors while wearing a high-quality respirator mask. The material creates thick silica dust that is harmful to inhale. Achieving perfectly taped and mudded seams ensures a professional, waterproof base for your exterior masonry.
5. Pouring DIY Concrete Countertops for a Modern Finish

Get this high-end look yourself! Pin these steps for DIY concrete counters.
When comparing granite vs concrete counters for DIY outdoor kitchen projects, concrete offers unmatched customization and budget-friendly appeal. Creating stain-resistant countertops requires forming, pouring, and finishing the surface directly on your completed island frame. To successfully manage the immense dead load on your wood structure, we highly recommend utilizing a lightweight, perlite-based concrete mix. This advanced material approach provides the industrial durability of traditional concrete while significantly reducing the strain on your newly reinforced deck joists.
Tools & Materials Needed
- Melamine board for building the concrete form
- Silicone caulk
- Rebar or wire mesh for reinforcement
- High-strength, lightweight countertop concrete mix
- 5-gallon bucket and mixing paddle
- Trowel and straight screed board
- Orbital sander with multiple grit pads
- Food-grade concrete sealer
Step-by-Step Directions
- Build the Form: Construct a mold for your countertop directly on top of the island frame using smooth melamine boards. Caulk all inside seams with silicone to create sharp, clean edges.
- Add Reinforcement: Place a wire mesh or rebar grid inside the form, suspending it on small plastic spacers so it rests directly in the middle of the slab’s thickness.
- Mix and Pour: Mix the specialized concrete to a thick, peanut butter consistency and pour it into the form, pushing it firmly into all corners.
- Screed and Vibrate: Level the wet surface using a straight screed board. Tap the outside of the melamine form with a hammer to vibrate out trapped air bubbles.
- Cure Slowly: Trowel the top surface smooth, cover it with plastic sheeting, and allow it to cure undisturbed for 48 to 72 hours.
- De-mold and Finish: Remove the side forms and use an orbital sander to polish the cured surface to your desired aesthetic sheen.
- Seal Thoroughly: Apply multiple coats of a penetrating, food-grade sealer to create an impenetrable, waterproof barrier against grease and outdoor elements.
An often-overlooked strategy: If you want a truly custom aesthetic, add liquid or powder pigment directly to the wet concrete mix to achieve colors like charcoal black or pristine white. Always pour a small, separate test batch first to verify how the pigment will look once fully cured.

6. Installing Your Blackstone Griddle and Connecting Utilities

The main event! Pin this guide for installing your Blackstone griddle.
Installing a built-in gas grill requires meticulous attention to heat management and utility safety. Before mounting your heavy appliance, you must install a zero-clearance grill liner, also known as an insulated jacket. This vital metal sleeve completely protects against fire by blocking high temperatures from transferring to your island’s structure. While you can DIY the physical mounting of the griddle and drop-in stainless sink, all wiring for GFCI outlets and plumbing for the natural gas line must be handled by licensed professionals to prevent catastrophic gas leaks or electrical fires.
Tools & Materials Needed
- Blackstone griddle unit
- Insulated jacket (zero-clearance liner)
- Drop-in stainless sink and exterior faucet
- PVC and PEX pipes for plumbing connections
- Outdoor-rated GFCI outlets and waterproof boxes
- Wrench set and specialized pipe sealant
- Professional plumber and licensed electrician
Step-by-Step Directions
- Install the Insulated Jacket: Lower the zero-clearance grill liner into your framed countertop opening. This mandatory heat shield contains the intense heat and is your primary defense against fire hazards.
- Mount the Griddle: Carefully lower the main Blackstone griddle body into the secured insulated jacket, following all manufacturer alignment instructions.
- Install Sink and Faucet: Drop the stainless steel sink into its dedicated cutout, secure the mounting clips underneath, and install your outdoor-rated faucet.
- HIRE A PROFESSIONAL for Gas: Contract a licensed plumber to run the natural gas line or hardwire the propane regulator. A certified gas install ensures total safety and code compliance.
- HIRE A PROFESSIONAL for Electrical: Have a licensed electrician install all wiring and waterproof GFCI outlets near your sink and refrigeration zones.
- Complete the Plumbing: While professionals handle the dangerous utilities, you can safely connect the PEX water supply lines and route the PVC sink drain to an appropriate runoff area.
Expert insight: Always mandate a professional pressure test. After your licensed plumber connects the natural gas line, have them perform a specialized pressure test to mathematically certify that the entire system is 100% leak-free before you ignite the burners for the first time.

7. Applying Finishes, Sealing Wood, and Installing Cabinetry

The final reveal! Pin this for outdoor kitchen finishing ideas.
Applying the final visual finishes and sealing your surrounding deck protects your investment from severe weather and water damage. Cladding the island in stone veneer panels creates a luxurious, built-in appearance that instantly boosts home value. When installing storage components, utilize only weather-resistant stainless door cabinets to ensure heavy-duty waterproof cabinetry performance. Finally, generously applying a premium exterior sealant to the surrounding wood prevents wood rot, ensuring your entire culinary ecosystem passes the long-term durability test.
Tools & Materials Needed
- Stone veneer panels or outdoor-rated stucco
- Polymer-modified thin-set mortar
- Grinder with a masonry diamond blade
- Weather-resistant stainless steel finishes (doors, drawers)
- High-quality waterproof deck stain and sealant
- Paint brushes, rollers, and notched trowel
Step-by-Step Directions
- Apply the Finish: Mix your polymer-modified thin-set mortar and apply it directly to the cement board. Press your stone veneer panels firmly into the mud, using a grinder to make precision cuts around corners.
- Install Cabinetry: Insert and mount your stainless steel access doors, trash pull-outs, and utility drawers into the pre-framed openings. Tight-fitting doors provide essential rodent proofing for your storage areas.
- Seal the Deck: Thoroughly clean the existing wood deck boards surrounding the new island. Apply a heavy coat of waterproof deck sealant, focusing intensely on the seams where the metal track meets the wood to block moisture intrusion.
- Final Sealing: Once the stone veneer mortar is fully cured, apply a specialized penetrating stone sealer to protect the porous rock from grease splatters and rain.
Pro-Tip: Do not compromise on hardware materials. Choose 304-grade stainless steel for all your exterior access doors and drawer inserts. This professional grade material boasts superior rust and corrosion resistance compared to cheaper alloys, which is absolutely vital if you live in a high-humidity or coastal climate.

Key Takeaways: Your Quick Guide to a DIY Deck Kitchen
Before finalizing your deck top kitchen ideas, it is helpful to review the most critical safety and construction principles required for this advanced project. Navigating a full DIY wood deck outdoor kitchen build involves juggling structural engineering concepts alongside high-end aesthetic finishes.
To ensure your backyard transformation remains safe, fully functional, and legally compliant, keep these non-negotiable best practices at the forefront of your planning process.
Key Takeaways:
- Weight is Your #1 Concern: Before anything else, ensure your deck’s structure is heavily reinforced with extra support posts and sistered joists to confidently handle the immense dead load of the completed kitchen island.
- Frame with Metal, Not Wood: A galvanized metal stud frame is entirely non-combustible, actively protecting your vulnerable wood deck from the primary fire hazard posed by a hot griddle.
- Insulate and Ventilate: Installing a zero-clearance grill liner (insulated jacket) and proper cross-ventilation vents are non-negotiable safety requirements dictated by strict NFPA safety standards.
- Hire Pros for Utilities: Never attempt to DIY natural gas or complex electrical connections. A certified gas install and a licensed electrician are mandatory for family safety and maintaining building code compliance.
- Use Outdoor-Rated Materials: From the fire-rated cement board and stainless steel doors to the penetrating concrete sealer, every component must be highly weather-resistant to prevent structural wood rot and rapid degradation.
- Concrete Counters are a Smart DIY: Pouring your own custom countertops is a budget-friendly way to achieve a durable, heavy-duty finish that perfectly compliments a modern outdoor culinary space.
People Also Ask About DIY Deck Kitchens
Building a permanent cooking structure on top of a raised wooden deck introduces complex variables that standard patio builds never face. Because safety and structural longevity are paramount, it is common to have highly specific questions regarding materials, framing techniques, and load limits.
This FAQ section directly addresses the most common deck kitchen queries to help you navigate the intricacies of weight distribution, fire safety regulations, and smart material selection.
Can I build an outdoor kitchen on an existing deck?
Building on an existing deck is entirely possible, but it universally requires significant structural reinforcement before construction begins. You must add new support posts directly beneath the kitchen’s footprint and sister the existing joists to manage the concentrated heavy weight of concrete counters and steel appliances.
Is a metal frame better than wood for deck kitchens?
For any kitchen built on a combustible wood deck, a metal frame is unquestionably safer and superior. Galvanized steel studs are completely non-combustible, eliminating the severe fire risk from grill heat transfer. Furthermore, metal is impervious to outdoor rot and destructive insects.
How much weight can a wooden deck hold?
Standard residential wood decks are typically engineered to hold a live load of 40 to 50 pounds per square foot (PSF), which is insufficient for a heavy stone and concrete island. You must consult a structural engineer and implement targeted reinforcement techniques to create a dedicated cooking zone capable of supporting 100+ PSF.
Do I need a permit for a deck outdoor kitchen?
In nearly all residential municipalities, you will absolutely need a permit for this project. Because an outdoor kitchen involves adding substantial structural point loads, as well as complex electrical and plumbing utility work, local building authorities require strict inspections to guarantee the work meets current building codes.
What kind of countertop is best for a wood deck kitchen?
While both granite and concrete are exceptional choices, DIY lightweight concrete offers a distinct structural advantage. By utilizing a specialized lightweight aggregate mix, you can achieve a durable, high-end stone aesthetic while drastically reducing the overall dead load placed on your deck’s underlying joist framework.
How do you protect the deck surface under the kitchen?
The most effective protection strategy is building the metal kitchen island directly on its own dedicated structural frame while heavily sealing the surrounding wood. You must apply a high-quality, waterproof deck sealant before and after installation. Placing a fire-rated grill mat directly in front of the station prevents permanent grease stains.
Do I need an insulated jacket for my grill?
An insulated jacket, or zero-clearance liner, is a mandatory safety device for any grill installed within a custom enclosure. This heavy-duty metal sleeve creates a protective thermal air gap, completely preventing the extreme high temperatures of the grill from transferring to the island’s interior framing materials.
How do you run gas lines to a deck?
Natural gas or hardwired propane lines must only be run by a fully licensed, insured professional plumber or certified gas fitter. They will properly size and route dedicated black iron or flexible CSST piping from your home’s main supply, legally certifying that all connections are leak-free and code-compliant.
How can I build an outdoor kitchen on a budget?
The absolute best way to lower costs is to DIY the framing, cladding, and concrete countertop pouring yourself. By utilizing affordable metal studs, mixing your own lightweight concrete, and opting for a high-value drop-in Blackstone griddle rather than a massive luxury grill head, you can save thousands on labor and materials.
What are the required clearances for outdoor grills on decks?
You must strictly adhere to the grill manufacturer’s exact specified clearances to combustible materials. This generally requires maintaining a 12 to 24-inch gap between the back of the grill and your home’s vinyl siding or wooden deck railings to prevent accidental melting or radiant heat fires.
Final Thoughts on Your Outdoor Culinary Space
Transforming a basic patio into a breathtaking DIY wood deck outdoor kitchen is an incredibly rewarding undertaking that merges advanced carpentry with culinary passion. By prioritizing structural integrity through proper joist reinforcement and safeguarding your home with non-combustible metal framing, you can achieve a professional-grade backyard deck kitchen DIY build without compromising safety.
Success ultimately relies on meticulous planning, adhering to strict NFPA safety standards, and utilizing heavy-duty, weather-resistant materials designed to withstand the elements. When you respect the engineering requirements of a raised wooden deck and hire licensed professionals for sensitive utility connections, your new outdoor culinary space will deliver decades of reliable entertainment value.
Are you ready to sketch your dream layout and pull your first utility permits, or will you start by analyzing your deck’s current load-bearing capacity?
Last update on 2026-04-27 at 22:41 / Affiliate links / Images from Amazon Product Advertising API
