
As an Amazon Associate KitchenwareSets.com earns from qualifying purchases.
Dream Kitchen Hidden Fridge: 7 Seamless Cabinet Ideas
Have you ever designed a stunning open-concept space only to have a bulky metallic refrigerator ruin the aesthetic? Achieving a dream kitchen hidden fridge eliminates this exact visual clutter and elevates your entire home.
A dream kitchen hidden fridge is a fully integrated or panel-ready refrigerator designed to disappear seamlessly into custom cabinetry. By utilizing zero-clearance articulation hinges and exact flush inset reveal dimensions, the appliance mimics surrounding cabinet doors perfectly. This specialized installation method completely camouflages heavy appliances to maintain an uninterrupted, minimalist architectural flow.
Drawing from comprehensive analysis of current architectural guidelines and proven methodologies, this guide reveals professional trade integration secrets. You will discover actionable installation steps, DIY retrofitting options, and precise hardware requirements. Implementing these tested frameworks ensures you can execute a flawless, handleless design in September 2026.
Achieving a flawless luxury open concept kitchen demands absolute technical precision. When you conceal massive cooling units behind custom millwork, you must address heavy panel sagging and door clearance problems immediately. Following National Kitchen and Bath Association standard guidelines ensures your precision engineering tolerance meets exact appliance ventilation clearance requirements. Before analyzing your kitchen layout golden triangle, it is essential to understand the core differences between appliance camouflage techniques.
Your choice of integration fundamentally dictates your budget, hardware needs, and final aesthetic. A standard built-in refrigerator differs significantly from a fully camouflaged unit. To successfully plan your seamless appliance integration, you must evaluate the structural realities of your chosen configuration. Below is a detailed breakdown comparing the three primary methods for masking your refrigeration unit.
| Configuration | Door Alignment Strategy | Hardware Requirements | Aesthetic Result |
|---|---|---|---|
| Fully Integrated | Flush inset cabinets | Zero-clearance articulation hinges | Completely invisible, seamless wall |
| Panel-Ready | Sits slightly proud of frame | Heavy-duty cup hinges | High-end, mimics traditional cabinetry |
| Overlay | Rests in front of cabinet box | Standard heavy-duty hinges | Built-in look, visibly noticeable depth |
Now that we understand the structural basics, let us explore seven distinct pathways for executing these concealed kitchen appliances across different budgets and layouts.
Contents
show
1. Installing a Flush Mount Integrated Fridge in Custom Cabinetry

Pin this seamless custom integration to your “Dream Kitchen Layouts” board!
Installing a flush mount integrated fridge represents the highest-tier luxury option for home renovators. This method utilizes specialized custom cabinetry options to hide a premium Sub-Zero refrigerator or similar high-end appliance. Because the unit sits entirely flush with the adjacent doors, it requires exceptional custom carpentry and exact dimensional planning. You must calculate the flush overlay door profile clearance perfectly to prevent the panels from binding during door swings.
Materials Needed
- Custom-built wood appliance panels matching surrounding cabinetry
- Heavy-duty 3D adjustable cup hinges rated for appliance weight
- Heavy-duty solid brass appliance pulls (minimum 18-inches long)
- Flush inset alignment brackets
- Panel-ready integrated refrigerator unit (e.g., Sub-Zero or Thermador appliances)
- Cabinet maker’s scribe tool and template
Installation Steps
- Measure the exact rough opening according to the manufacturer installation manual, ensuring absolute plumb and level lines.
- Install the anti-tipping brackets to the structural studs behind the refrigeration unit.
- Slide the integrated cold storage unit into the cavity, adjusting the leveling legs until the appliance face is exactly flush with the frameless cabinet boxes.
- Mount the heavy-duty 3D adjustable cup hinges to the custom wood appliance panels.
- Attach the custom panels to the refrigerator door brackets, using the leveling screws to achieve a perfect 1/8-inch flush inset reveal dimension across all gaps.
- Install the oversized solid brass appliance pulls to ensure smooth opening against the strong magnetic door seals.
What most guides miss: According to custom carpentry standards, always allow the new panel-ready fridge to run and reach operating temperature for 24 hours before finalizing the flush overlay door profile clearance. The cold temperatures cause appliance door seals to contract and adjust slightly, which will ruin your meticulously measured 1/8-inch gaps if you align them while the unit is warm.

2. Retrofitting Existing Kitchen Cabinets for a Panel-Ready Fridge

Save this genius budget-friendly retrofitting hack to your DIY Kitchen Remodel board!
Retrofitting existing kitchen cabinets for an integrated fridge allows budget-conscious DIYers to achieve a high-end look without custom cabinet maker costs. By modifying modular systems like IKEA Sektion, you can successfully disguise a counter-depth refrigerator. This process requires a specialized panel-ready conversion kit and clever DIY trim solutions to bridge the gaps between standard cabinet boxes and the appliance chassis. You must reinforce the modular walls properly, as standard flat-pack furniture cannot handle heavy custom appliance doors without structural modification.
Materials Needed
- Counter-depth panel-ready refrigerator
- Panel-ready conversion kit and mounting extrusions
- IKEA Sektion cabinet frames (or existing cabinet boxes)
- Custom painted Shaker door panels (e.g., from Semihandmade)
- Heavy-duty reinforced cabinet hinges
- Filler strips and edge banding
- Sherwin Williams cabinet-grade enamel paint
Installation Steps
- Remove your existing freestanding fridge and modify the surrounding cabinet framing to accept a standard counter-depth unit.
- Reinforce the modular cabinet walls using 3/4-inch plywood to handle the structural weight capacity limitations of heavy custom doors.
- Attach the panel-ready conversion kit extrusions to the edges of the new counter-depth refrigerator doors.
- Measure and cut filler strips to close any dimensional gaps between the existing cabinetry and the new appliance footprint.
- Mount the custom painted panels directly to the conversion extrusions, ensuring the stiles and rails perfectly align with your adjacent pantry doors.
- Adjust the sliding door hinges to correct any unaligned cabinet doors and ensure a smooth, soft-close action.
An often-overlooked strategy: When retrofitting existing cabinets, always address the compressor intake exhaust airflow path first. Most DIY retrofits fail because homeowners block the bottom airflow with standard baseboards, leading to an overheating refrigerator. You must install a vented toe-kick to prevent rapid compressor burnout.

3. Mounting Panel-Ready Refrigerator Drawers in a Kitchen Island

Pin these sneaky hidden refrigerator drawers to your “Kitchen Organization Ideas” board!
Installing refrigerator drawers creates a brilliant hidden counter-depth refrigerator in a kitchen island without disrupting visual sightlines. This approach is perfect for decluttering kitchen countertops while optimizing the layout’s golden triangle. By tucking cooling zones or an undercounter ice maker directly into the island, you provide supplementary cold storage for produce and beverages. This allows you to rely on a smaller primary fridge or distribute your kitchen workflow more efficiently.
Materials Needed
- Integrated panel-ready refrigerator drawer unit (dual zone)
- Custom cabinet drawer faces matching the kitchen island profile
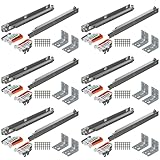
- Heavy duty undermount soft close drawer slides
- Anti-condensation heating elements (if required by manufacturer)
- Stainless steel appliance handles
- Ventilation grille for island base
- Leveling shims
Installation Steps
- Frame the rough opening within the kitchen island base cabinets, ensuring access to a dedicated 115V electrical outlet.
- Slide the dual zone refrigeration drawer unit into the cavity, adjusting the leveling feet to bring the unit completely flush with the underside of the island countertop.
- Secure the appliance to the adjacent cabinet walls using the provided anti-tipping side brackets.
- Measure and drill the custom drawer faces to match the mounting templates provided in the manufacturer installation manual.
- Attach the matching wood appliance panels to the drawer fronts, ensuring the reveal matches the surrounding standard storage drawers.
- Install the base ventilation grille to ensure the compressor intake exhaust airflow path remains unobstructed.
Expert insight: If you are installing an undercounter ice maker alongside refrigerator drawers, certified kitchen designers recommend adding an inline water filter in the adjacent sink base cabinet. This provides incredibly easy maintenance access, allowing you to change water filters without pulling heavy, integrated appliances out of their tight custom enclosures.
4. Building a Hidden Pantry Door That Disguises a Refrigerator

Save this brilliant walk-in hidden fridge pantry idea to your “Home Renovation” board!
Constructing hidden pantry doors that look like kitchen cabinets offers an excellent alternative to buying expensive panel-ready appliances. By treating the space like a butler pantry or oversized appliance garage, you create completely concealed food storage. This architectural buildout allows you to hide a standard, lower-cost stainless steel refrigerator behind a massive structural door. The primary challenge involves managing the structural weight capacity limitations of floor-to-ceiling doors using commercial-grade pivot hardware.
Materials Needed
- Standard freestanding or built-in stainless steel refrigerator
- Floor-to-ceiling custom cabinet doors (solid core)
- Heavy-duty invisible pivot hinges (rated for 150+ lbs)
- Touch-to-open magnetic latches or dummy pulls
- Framing lumber (2x4s) and drywall for the alcove
- Cabinet-grade plywood for the enclosure interior
- Door gap weatherstripping (for sound and light dampening)
Installation Steps
- Frame a recessed alcove or butler pantry extension deep enough to house a full-size freestanding refrigerator, allowing 2 inches of rear clearance for proper airflow.
- Install a dedicated exhaust fan or passive ceiling vent inside the alcove to prevent an overheating refrigerator scenario.
- Mount the heavy-duty invisible pivot hinges to the floor and top door header, ensuring perfect plumb alignment with a laser level.
- Hang the massive floor-to-ceiling custom cabinet doors on the pivot hinges, checking that the swing path clears all adjacent kitchen elements.
- Install the smart touch-to-open servo drive mechanism or heavy magnetic latches to keep the doors flush when closed.
- Roll the freestanding refrigerator into the concealed larder space and plug it in.
Safety Warning: Standard built-in versus freestanding refrigerators emit heat differently. If you hide a freestanding unit behind heavy architectural doors, you must install an active thermal-switched exhaust fan in the enclosure ceiling. Trapped ambient heat will void appliance warranty compliance and inevitably cause complete compressor burnout.

5. Aligning an Integrated Column Refrigerator with Frameless Cabinetry

Save this ultra-modern frameless column fridge design to your “Minimalist Kitchens” board!
Installing an integrated column refrigerator represents the pinnacle of modern design, particularly when paired with sleek frameless European cabinetry cabinets. This setup typically involves separating tall fridge and freezer columns to distribute visual weight. Because frameless designs lack forgiving face frames, avoiding unaligned cabinet doors requires intense precision engineering tolerance. You must master incredibly tight flush inset reveal dimensions to ensure these seamless kitchen cabinets look flawlessly monolithic.
Materials Needed
- Integrated column refrigerator and separate column freezer
- Frameless European cabinetry boxes
- Zero-clearance articulation hinges
- Heavy MDF or solid wood custom panels
- Refrigerator gap correction joining kits
- Scribe line and filler piece trims
- Laser level and precise measuring calipers
Installation Steps
- Install the frameless European cabinetry boxes, utilizing a laser level to ensure the entire wall is perfectly plumb—frameless designs have zero tolerance for unlevel floors.
- Join the separate refrigerator and freezer columns using the manufacturer’s specific dual-compressor integrated design joining kit to create one unified, massive appliance block.
- Maneuver the joined columns into the cabinet opening, securing the anti-tip brackets to the masonry or wall studs.
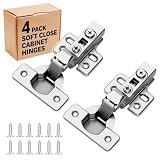
- Mount the heavy custom panels using zero-clearance articulation hinges, which allow the thick panels to swing open without binding against the adjacent frameless doors.
- Use the micro-adjustment screws on the articulation hinges to perfectly align the flush inset reveal dimensions to exactly 1/8-inch horizontally and vertically.
- Install matching push-to-open hardware to maintain a completely handleless, stealth kitchen storage aesthetic.
Professional Trade Secret: When executing a scribe line and filler piece execution for frameless cabinets, expert cabinet maker guidelines dictate painting the visible edges of the appliance’s metal chassis matte black before installing the panels. This incredibly simple trick makes the tiny 1/8-inch shadow lines look infinitely deep and flawless.
6. Integrating a Double Door Refrigerator with Custom Wood Panels

Pin this beautiful custom wood double-door fridge integration for your remodel inspiration!
Properly disguising a wide double-door or french-door refrigerator requires specialized structural support. When you apply custom cabinet matching stain lacquer wood fronts to these expansive models, the primary enemy is heavy panel sagging. You must secure large, heavy wood panels securely to prevent long-term stress on the appliance’s integrated hinges. This process coordinates closely with your dishwasher panels, requiring you to exactly match the cabinetry grain horizontally across multiple appliance faces.
Materials Needed
- Panel-ready French-door refrigerator unit
- Custom cabinet matching stain lacquer wood panels (three separate pieces: two doors, one bottom freezer drawer)
- Heavy duty appliance panel mounting brackets
- Wood glue and cabinet screws
- Clamping system
- Z-clip hanging hardware
- Extended-length appliance pulls
Installation Steps
- Weigh your custom wood panels before installation to ensure they do not exceed the appliance panel weight restrictions outlined in the manufacturer’s manual (typically 40-50 lbs per door).
- Attach the heavy duty Z-clip appliance panel mounting brackets to the back of the custom wood panels using cabinet screws, ensuring perfectly centered alignment.
- Slide the custom wood panels down onto the refrigerator door receiving brackets, allowing the hardware to interlock securely.
- Adjust the X, Y, and Z axis leveling screws on the receiving brackets to ensure the two French doors align perfectly in the center gap.
- Secure the bottom freezer drawer panel, adjusting the pitch angle so it sits flush against the appliance frame when closed.
- Install extended-length appliance pulls, drilling completely through the wood panel into the structural metal frame of the refrigerator door to prevent heavy panel sagging over time.
Crucial Consideration: Custom wood panels versus stainless steel weight differences are significant. To prevent broken integrated hinges on double-door setups, always use lightweight MDF core panels wrapped in real wood veneer rather than solid hardwood slabs.

7. Ventilating a Camouflaged Fridge with a Toe-Kick Grille

Don’t let your hidden fridge overheat! Pin this vital ventilation grille solution.
Understanding exact toe-kick ventilation grille specs is the single most critical aspect of preserving your luxury appliance. You must protect the compressor intake exhaust airflow path to ensure the unit does not succumb to severe ventilation issues. A camouflaged fridge generates massive amounts of heat; failing to route that heat away from the enclosed cabinetry will void warranties and destroy compressors. Learning how to properly mill a wooden vent disguises the ugly mechanical grilles while keeping your food perfectly chilled.
Materials Needed
- Base model appliance metal ventilation grille
- Decorative custom wooden toe kick vent cover
- Precision router or table saw
- Cabinet-matching paint or stain
- Magnetic catches or velcro strips for easy removal
- Vacuum cleaner (for post-installation maintenance)
Installation Steps
- Measure the exact square inch airflow requirements in your manufacturer installation manual (usually around 200 square inches of unobstructed airflow).
- Route out horizontal slots in a solid piece of cabinet-matching wood baseboard to create a custom toe-kick grille that meets the airflow requirements.
- Sand, prime, and apply custom cabinet matching stain lacquer to the new wooden grille.
- Remove the ugly factory-provided metal louvered grille from the bottom front of the appliance compressor housing.
- Attach heavy-duty magnetic catches to the appliance frame and the back of your custom wooden toe-kick grille.
- Snap the custom grille onto the magnetic catches, ensuring the compressor intake exhaust airflow path is completely clear while perfectly disguising the mechanical components.
Pro-Tip: Never permanently nail or glue your decorative toe-kick panels into place. Certified kitchen designers mandate that this grille must be easily removable without tools so you can vacuum the compressor coils every six months to prevent the expensive refrigerator from overheating.

Planning a seamless kitchen fridge installation requires balancing beautiful design with strict technical parameters. Before you hire a contractor or purchase custom hardware, it is critical to review the foundational rules of appliance camouflage. These core insights synthesize the most important structural, aesthetic, and financial considerations for your remodel. By keeping these rules in mind, you will protect your home renovation resale value data while optimizing your kitchen layout golden triangle. Review these essential points to ensure your integrated refrigerator cabinet design remains flawless and fully functional.
- Panel-Ready vs. Fully Integrated Matters – A panel-ready fridge accepts wood fronts but may protrude slightly, while a fully integrated refrigerator sits perfectly flush with surrounding cabinetry using advanced zero-clearance articulation hinges.
- Protect the Compressor Intake Airflow – The most common cause of hidden fridge failure is poor airflow; always design a removable toe-kick ventilation grille that meets manufacturer square-inch airflow requirements.
- Monitor Panel Weight Restrictions – Custom cabinet matching solid wood panels are incredibly heavy; always verify the appliance door hinges are rated to support the weight to prevent long-term heavy panel sagging.
- Utilize 3D Adjustable Hardware – Achieving flawless 1/8-inch flush inset reveal dimensions requires heavy-duty 3D adjustable cup hinges to perfectly align panels across the X, Y, and Z axes.
- Retrofitting is Possible on a Budget – You can disguise an existing counter-depth appliance using IKEA Sektion cabinets and an aftermarket panel-ready conversion kit, saving thousands on bespoke carpentry.
- Consider Island Drawers for Supplementary Storage – Integrated under-counter refrigerator drawers provide hidden, seamless cooling zones that optimize your layout without dominating visual space.
- Factor in the Door Swing Clearance – Always calculate the flush overlay door profile clearance before finalizing cabinetry, ensuring adjacent oven doors or island corners don’t block the hidden fridge from fully opening.
Navigating the technical and financial realities of concealed kitchen appliances can feel overwhelming. Homeowners frequently encounter conflicting information regarding panel-ready vs integrated setups, retrofitting limitations, and structural hardware requirements. To clarify your planning process, we have compiled the most common hidden fridge queries and questions about integrated refrigerators. These answers reflect current National Kitchen and Bath Association standards and professional cabinet maker guidelines. Reviewing these essential hidden refrigerator FAQs will help you bridge the gap between design inspiration and successful technical execution.
A complete hidden refrigerator cabinet installation requires a premium investment, factoring in both the specialized panel-ready appliance and custom carpentry. The panel-ready appliance itself commands luxury pricing. Custom cabinet maker fabrication for the wood panels, heavy-duty hinges, and professional installation usually adds significantly to the total depending on the complexity of your integrated refrigerator cabinet design.
What is the difference between integrated and panel ready fridge?
A panel-ready fridge can accept custom wood doors but usually sits slightly proud of the cabinets, whereas a fully integrated fridge is engineered to sit completely flush with the surrounding cabinetry. Fully integrated models feature specialized ventilation systems and zero-clearance articulation hinges that allow them to disappear completely into frameless European cabinetry without any visible chassis or gaps.
Can you put a panel on any refrigerator?
No, you cannot put a custom wood panel on a standard freestanding refrigerator. You must purchase an appliance specifically manufactured as “panel-ready” or “integrated.” Standard refrigerators lack the heavy-duty hinges required to support heavy wood panels, and they lack the structural mounting brackets needed to securely attach cabinet faces to the appliance doors.
To build a hidden fridge cabinet, you must frame a dedicated alcove, install a panel-ready refrigerator, mount specialized 3D-adjustable hinges, and attach custom-milled wood panels to the appliance face. It requires exact precision measuring, ensuring proper compressor ventilation at the toe-kick, and utilizing flush inset alignment brackets to make the appliance look indistinguishable from surrounding pantry doors.
You can buy kitchen cabinets with hidden fridge options from high-end custom cabinet makers, semi-custom brands like KraftMaid or MasterBrand, and even modular systems like IKEA. If using IKEA Sektion, you must purchase third-party custom doors and specific panel-ready appliance conversion kits to achieve the seamless appliance integration look on a budget.
You ventilate a hidden fridge by routing airflow from the bottom front of the cabinet (the toe-kick) up through the appliance’s front-facing compressor, utilizing a slotted, removable wooden grille. Fully integrated units are designed to draw fresh air in and exhaust hot air out exclusively from the front base, eliminating the need for rear or side cabinet clearances and preventing overheating.
Can you retrofit a panel ready fridge into existing cabinets?
Yes, you can retrofit a panel-ready fridge into existing cabinets if your current cabinet opening matches standard counter-depth dimensions. You will need to remove the existing freestanding fridge, reinforce the cabinet side panels to handle the extra structural weight, and have custom wood panels milled and painted to perfectly match your existing kitchen cabinet doors.
Hidden fridge hinges utilize zero-clearance articulating technology that pivots the appliance door out and away from the adjacent cabinetry before swinging open. This specialized engineering prevents the thick custom wood panels from binding against or striking neighboring frameless cabinet doors, allowing for incredibly tight 1/8-inch flush inset reveal dimensions when the doors are closed.
What is a flush inset refrigerator design?
A flush inset refrigerator design is an installation method where the custom wood panels on the front of the appliance sit perfectly level and flush with the surrounding cabinet frames. Unlike overlay designs where the doors sit slightly in front of the cabinet box, flush inset creates a completely flat, unbroken, seamless kitchen cabinet wall that epitomizes luxury open-concept design.
Hidden refrigerators are highly worth the money for luxury homes and open-concept floor plans because they dramatically elevate the aesthetic, eliminate visual clutter, and consistently increase home resale value. While the initial custom panel costs and specialized hardware are a significant investment, the resulting camouflaged fridge creates a cohesive, high-end architectural look that standard stainless steel appliances cannot match.
Designing a dream kitchen hidden fridge is the ultimate way to achieve a flawlessly integrated, luxury open-concept space. By choosing to conceal your large appliances behind custom cabinetry, you immediately elevate the visual flow of your home, eliminating the bulky, metallic visual interruption that standard refrigerators create. Whether you are investing in a fully integrated column refrigerator with custom walnut panels or retrofitting existing modular cabinets with a clever DIY panel kit, the result is a beautifully cohesive, uncluttered culinary environment.
However, executing this seamless kitchen aesthetic requires more than just beautiful wood. As we’ve detailed, true architectural success relies on respecting the technical realities of appliance integration. From ensuring proper compressor ventilation through a custom toe-kick grille, to utilizing heavy-duty 3D articulating hinges that handle massive panel weight limits, the magic of a camouflaged fridge lies entirely in the precision of the underlying hardware.
When planning your upcoming remodel, take these structural guidelines to your custom cabinet maker or architect. Prioritize flush inset reveals and zero-clearance door swings, and your hidden refrigerator will provide decades of both stunning design and reliable functionality.
Which hidden fridge style are you planning to integrate into your upcoming kitchen renovation? Are you opting for the ultra-modern frameless column look, or a traditional French-door with classic Shaker panels? Let us know in the comments below!
Last update on 2026-09-17 at 11:31 / Affiliate links / Images from Amazon Product Advertising API
