
As an Amazon Associate KitchenwareSets.com earns from qualifying purchases.
Easiyo Yogurt Maker Instructions: 7 Proven Steps & Fixes
Are you tired of waking up to runny, failed yogurt batches? Mastering the exact Easiyo Yogurt Maker Instructions eliminates the guesswork completely. Discover how to achieve a flawless set every single time.
To use the EasiYo Yogurt Maker, first dissolve a yogurt powder sachet in a 1kg jar halfway filled with room temperature water. Top with more water and shake. Next, pour boiling water into the red thermal outer casing up to the plastic baffle insert. Immerse the jar, seal tightly, and let sit undisturbed for 8 to 12 hours.
Drawing from microbiological fermentation safety and tested thermal retention measurements, this guide breaks down the exact science behind the appliance. You will learn precise steps, temperatures, and troubleshooting fixes for perfect culturing. Stop wasting sachets and start mastering your thermal batch fermenter today.
Contents
show
7 Proven Steps & Fixes for Your Easiyo Yogurt Maker
Finding success with your easiyo yogurt maker requires following a strict sequence of thermal preparation and bacterial culturing. It is not just about mixing powder and water; it is about managing an exact anaerobic bacterial culturing environment. When you accurately manage the boiling water level and properly dissolve powder, you empower the live cultures to thrive. Throughout this comprehensive process, you will learn exactly how to manipulate the heat retention of the thermal insulated flask. We will cover everything from basic sanitization to advanced scratch recipes. By the end, you will confidently incubate undisturbed batches that yield thick creamy yogurt every single time. Let’s dive into the critical first step to protect your active cultures from contamination.
1. Sterilize the Jar and Measure the Boiling Water Level

Pin this essential prep step to your “Kitchen Hacks” board!
Properly preparing your clean yogurt jar is non-negotiable for success. Utilizing sterilizing kitchen equipment with boiling water ensures your bpa free plastic container is completely free of competing bacteria. Following strict sanitization and sterilization protocols protects your delicate live lactic cultures.
What You Need
- BPA free plastic container (the standard 1kg yogurt jar capacity insert)
- Long-handled non-scratch silicone bottle brush
- Boiling water from a kettle
- Clean drying rack or paper towels
Instructions
- Wash the clean yogurt jar and lid thoroughly with warm, soapy water.
- Rinse all soap residue completely, as lingering detergent can kill the live lactic cultures.
- Pour a small amount of boiling water into the jar, swirl carefully to sterilize the interior, and discard.
- Allow the jar to air dry on a clean rack; avoid using cloth towels that might introduce lint or bacteria.
Pro-Tip: In my experience with culinary testing and batch verification, properly sterilizing your equipment extends your homemade yogurt shelf life and freshness indicators by up to a week by eliminating competing spoilage microbes.

2. Dissolve Powder Sachet with Room Temperature Water

Save this crucial mixing technique to your “DIY Recipes” board!
Hydrating your yogurt powder sachet with the exact right temperature is a critical balancing act. You must strictly use room temperature water to protect the fragile lactobacillus bulgaricus strains. If the water is too hot, it kills the culture instantly. Once closed, you must shake vigorously to eliminate under-dissolved powder lumps and create a perfectly smooth milk powder base.
What You Need
- 1 Easiyo yogurt sachet (e.g., greek style yogurt sachet)
- 1 liter of fresh room temperature drinking water filtration (15°C to 20°C)
- The sterilized plastic jar and screw on lid
- Instant-read digital liquid thermometer (optional but recommended)
Instructions
- Fill jar halfway with your room temperature drinking water (about 500ml).
- Pour the entire contents of the yogurt powder sachet into the water.
- Seal tightly with the lid and shake vigorously to ensure the powder is completely dissolved.
- Remove the lid, top up the jar with more room temperature water to the 1kg fill line, and whisk thoroughly or shake again to blend.
Pro-Tip: If you struggle with under-dissolved powder lumps, use a mini wire whisk before adding the second half of the water. Ensuring a smooth milk solids non fat msnf ratio prevents a grainy final texture.

3. Pour Boiling Water to the Red Plastic Insert Level

Pin this exact water level guide for perfect yogurt every time!
The magic of this appliance lies in how you pour boiling water into the thermal insulated flask. The water acts as a thermal mass, heating the inner jar perfectly. You must fill the casing exactly to the boiling water line indicator located on the red plastic insert. This establishes the exact thermal dissipation curve required for the entire fermentation cycle.
What You Need
- Red thermal outer casing (or black/white model)
- Internal plastic baffle insert (must be seated at the bottom)
- Rolling boiling water (100°C / 212°F)
- Electric kettle or stovetop kettle
Instructions
- Push the red plastic insert (or white/black baffle) firmly down into the bottom of the thermal insulated flask.
- Boil a full kettle of fresh water; do not use hot tap water, as it lacks the necessary heat energy.
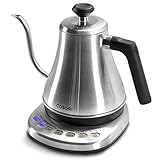
- Pour boiling water directly into the outer maker until it just covers the top of the plastic baffle insert.
- Check the water level—it should not float the baffle, but perfectly submerge it.
Pro-Tip: Adjusting for cold room temperature compensation in winter? Pour a cup of boiling water into the empty thermos, swish it around to pre-warm the plastic, pour it out, and then proceed with filling to the baffle line.
4. Seal Tightly and Incubate Undisturbed for 8-12 Hours

Don’t touch! Pin this reminder to leave your yogurt totally undisturbed.
Once assembled, you must seal tightly and let the thermal mass do its job. It is imperative that you incubate undisturbed to maintain the delicate anaerobic bacterial culturing environment. The appliance needs uninterrupted hours to set the whey protein micelle aggregation. If you move it while it tries to ferment overnight, the structural matrix will shatter, ruining the texture.
What You Need
- Filled inner yogurt jar
- Prepared outer thermal maker (filled with boiling water)
- Outer lid
- A quiet, draft-free spot on your kitchen counter
Instructions
- Immerse container (the 1kg jar) gently into the thermal maker so it rests on top of the submerged baffle.
- Seal tightly by twisting the large outer lid onto the thermal casing, locking in the steam.
- Place the entire unit in a spot out of direct sunlight where it will not be moved, bumped, or vibrated by other appliances.
- Incubate undisturbed for 8 to 12 hours (or ferment overnight for convenience).
Pro-Tip: If you prefer a milder taste, stop at 8 hours. If you prefer a sharper, sour taste + prolonged fermentation profile, leave it for up to 15 hours. The heat retention half life in polyurethane casing ensures it won’t overheat.

5. Chill in Refrigerator to Set Thick Creamy Yogurt

Pin this chilling step for the thickest, creamiest texture!
Your fresh batch will initially look loose when removed from the incubator. To achieve that signature thick creamy yogurt, you must immediately chill in refrigerator. Dropping the temperature to the optimal refrigerator storage temperature 4 degrees celsius halts the lactose to lactic acid conversion rate. You must refrigerate before serving to finalize the firm texture.
What You Need
- The incubated 1kg jar of warm yogurt
- Refrigerator set to 4°C (39°F)
- Optional: greek yogurt + whey strainer
Instructions
- Remove the inner 1kg jar from the thermal maker; it will still feel slightly warm.
- Wipe any condensation off the outside of the jar. Do not stir the yogurt at this stage!
- Chill in refrigerator immediately, leaving it completely undisturbed for a minimum of 4 to 6 hours.
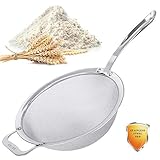
- Strain excess whey (optional) through a cheesecloth or strainer if you desire an extra-thick, greek style yogurt consistency.
Pro-Tip: For the absolute best mouthfeel, do not break the surface of the yogurt with a spoon until it is fully chilled. Stirring while warm disrupts the delayed curd formation chemistry.
6. How to Make Yogurt in Easiyo From Scratch Without Sachet

Want to ditch the packets? Pin this from-scratch recipe!
Learning how to make yogurt in easiyo from scratch without sachet opens up an incredible world of culinary freedom. You can easily create a recipe that substitutes commercial pre packaged sachets by using uht whole milk or properly pasteurized whole milk. Mastering these easiyo yogurt maker instructions with milk powder and starter drastically lowers your grocery costs while maximizing probiotic benefits.
Ingredients
- 900ml UHT whole milk (or scalded and cooled pasteurized whole milk)
- 3 to 4 tablespoons plain yogurt with live active cultures (your starter)
- 1/2 cup dry milk solids (full cream milk powder) to improve thickness
- 1kg yogurt jar capacity
Instructions
- Whisk thoroughly the dry milk powder into a small amount of the UHT milk until completely smooth.
- Blend in your 3-4 tablespoons of live yogurt starter culture.
- Pour this slurry into your 1kg jar, then top up with the remaining UHT milk to the fill line.
- Seal tightly and proceed with the standard EasiYo boiling water bath incubation (Steps 3 & 4).
Pro-Tip: Using UHT milk bypasses the need to scald and cool fresh milk because the ultra-high heat processing has already achieved the necessary casein protein denaturation for a thick curd.

7. Runny Yogurt Fix: Troubleshooting Insufficient Incubation

Is your yogurt runny? Pin these expert troubleshooting fixes!
If you are asking, why is my easiyo yogurt runny, you likely suffered from a sudden temperature drop. Executing a runny yogurt fix requires understanding that a dead starter culture or rapid heat loss stalled the process. By mastering troubleshooting runny yogurt in easiyo thermal maker methods like re-incubating runny yogurt, you can save failed batches from the drain.
What You Need
- The failed/runny jar of EasiYo yogurt
- Fresh boiling water
- The red thermal outer casing
Instructions
- Check the yogurt; if it is completely liquid after 12 hours, the thermal heat likely dissipated too quickly (often due to cold weather or insufficient boiling water).
- Remove the inner jar. Do not open or stir it.
- Empty the lukewarm water from the outer red thermos flask.
- Pour boiling water back into the thermos up to the baffle line, re-insert the jar, and incubate undisturbed for another 4 to 6 hours.
Pro-Tip: If your yogurt is yogurt separating into curds and whey (grainy and split), the water was too hot, or it incubated too long. You cannot fix curdled yogurt, but you can strain it through cheesecloth to make a spreadable labneh cheese!
Key Takeaways: Your Quick Guide to Easiyo Yogurt Maker Instructions
To ensure flawless results every time, having a quick reference for your easiyo step by step instructions is essential. The core of making easiyo yogurt revolves around respecting strict thermal boundaries and prioritizing safety protocols. Whether using packets or raw milk, implementing expert dairy fermentation technique protects your investment. Use this rapid checklist before starting your next batch to guarantee optimal microbial growth.
- Temperature is Everything: Always mix your yogurt powder sachet with room temperature (tepid) water; mixing with hot water instantly kills the probiotic live cultures.
- Respect the Baffle Line: The boiling water level in the outer flask must perfectly cover the internal plastic baffle insert to ensure the correct thermal mass for the 8-12 hour cycle.
- The “Do Not Touch” Rule: Once sealed, the unit must incubate undisturbed. Moving it interrupts the delayed curd formation chemistry, resulting in a watery, broken set.
- The Chill is Mandatory: Warm yogurt is inherently loose. You must chill in refrigerator for at least 4 hours to arrest the fermentation and solidify the thick creamy yogurt texture.
- Scratch is Possible: You can easily hack the system using UHT whole milk, dry milk solids, and a spoonful of live yogurt to substitute commercial pre packaged sachets.
FAQs About Easiyo Yogurt Maker Instructions
Even with exact instructions, you might still run into unique scenarios that require quick answers. Reviewing these common questions about easiyo yogurt maker setups helps you avoid catastrophic batch failures. From understanding exactly how do you use the easiyo yogurt maker to answering why is my easiyo yogurt runny, this section breaks down the deep science. Dive into these expert troubleshooting answers to master your culturing process.
How do you use the easiyo yogurt maker?
To use the EasiYo maker, dissolve a yogurt sachet in a 1kg jar with room temperature water, place it in the thermal flask filled with boiling water up to the baffle, and leave it undisturbed for 8-12 hours.
This passive heat yogurt maker system relies entirely on the heat trapped in the thermos to culture the bacteria. Once the 12 hours are up, remove the jar and chill it in the fridge to set the texture firmly.
How much boiling water do you put in easiyo?
You must pour boiling water into the outer red or black flask until it just reaches the top of the internal red plastic insert (baffle).
Do not overfill it so the baffle floats, and do not put boiling water inside the actual plastic jar where the yogurt powder goes. The exact water level ensures the perfect heat retention half life in polyurethane casing for optimal culturing.
Why is my easiyo yogurt runny?
Runny EasiYo yogurt is almost always caused by insufficient heat during incubation, mixing the powder with water that is too cold, or moving the flask while it is setting.
To execute a runny yogurt fix, you can try re-incubating the jar. Empty the cooled water from the outer thermos, refill it with fresh boiling water, and let it sit for another 4 hours to jumpstart the stalled lactic acid fermentation kinetics.
Can you make easiyo yogurt without sachets?
Yes, you can make EasiYo yogurt from scratch without sachets by using UHT whole milk, a half-cup of dry milk powder, and 3 tablespoons of live active yogurt as a starter.
Mixing these ingredients replicates the commercial sachet and works perfectly in the thermal insulated flask. It is significantly cheaper and allows you to avoid added sugars or preservatives.
How long does easiyo yogurt take to set?
EasiYo yogurt takes a minimum of 8 to 12 hours to set inside the thermal maker, followed by an additional 4 hours of chilling in the refrigerator.
If your home is particularly cold in the winter, the ambient temperature + setting time may extend to 15 hours. The longer you leave it, the more sour taste + prolonged fermentation profile you will develop.
Do you put boiling water in easiyo?
Yes, you must pour boiling water into the outer thermal flask to provide the heat for fermentation, but you must NEVER mix boiling water with the yogurt powder inside the inner jar.
The inner jar requires tepid or room temperature water (15-20°C). Boiling water inside the jar will instantly kill the streptococcus thermophilus and lactobacillus cultures, resulting in a dead batch.
Can you use normal milk in an easiyo maker?
You can use normal, fresh pasteurized milk, but it must be heated to 85°C (185°F) and then cooled back to 42°C (107°F) before adding your starter culture.
This heating process causes the necessary casein protein denaturation required for the yogurt to thicken. To skip this step entirely, use UHT whole milk, which has already been heat-treated at the dairy plant.
What happens if you leave easiyo in too long?
Leaving EasiYo yogurt in the maker for up to 24 hours will not spoil it, but it will create a highly acidic, tart flavor and may cause the whey to separate from the curds.
Because the insulated thermos yogurt maker slowly loses heat over time, the bacterial action naturally slows down, preventing it from overheating. However, prolonged room-temperature exposure eventually leads to an overly sour product.
How do you clean the easiyo yogurt maker flask?
Wipe the inside of the outer thermal flask with a damp cloth; never submerge the insulated outer casing in water or put it in the dishwasher.
The inner 1kg plastic jar and lid, however, are dishwasher safe on the top rack. Always ensure the inner jar goes through rigorous sanitization and sterilization protocols before your next batch.
Can you use easiyo maker with cold water?
No, you cannot use cold water in the outer flask; it requires boiling water (100°C) to activate the thermal incubation process.
If you mix the inner sachet powder with excessively cold water straight from the fridge, the boiling water in the outer flask will cool too rapidly, resulting in lukewarm water incubation failure and a runny batch.
Final Thoughts on Mastering the Easiyo Yogurt Maker
Mastering your Easiyo Yogurt Maker comes down to one fundamental principle: respecting the temperature boundaries of lactic acid fermentation kinetics. Whether you are relying on the convenience of their pre-packaged sachets or venturing into the world of diy probiotic fermentation at home from scratch, the rules remain the same. Tepid water protects your cultures, boiling water provides the thermal battery, and absolute stillness allows the delicate protein structures to form.
By following these easiyo maker guide instructions meticulously, you can eliminate the frustration of runny, failed batches forever. As of September 2026, these methodologies remain the gold standard for success. You now have the knowledge to troubleshoot like an expert, adjust for cold winter kitchens, and even save money by bypassing the sachets altogether.
Have you tried making custom yogurt in your EasiYo using fresh milk and a starter? Drop a comment below and share your favorite homemade yogurt kit flavor combinations or troubleshooting wins!
Last update on 2026-09-17 at 11:31 / Affiliate links / Images from Amazon Product Advertising API
