
As an Amazon Associate KitchenwareSets.com earns from qualifying purchases.
Homemade Yogurt Recipes: 7 Secrets to Thick, Creamy Batches
Have you ever waited hours for yogurt to set, only to find a watery mess? Nothing is more frustrating than pulling out a runny, stringy batch. Mastering homemade yogurt recipes solves this common struggle.
To make the perfect homemade yogurt recipe, heat whole milk to 180°F to denature the proteins, cool it to 110°F, and whisk in a live active culture. Incubate the mixture undisturbed in a warm environment for 8 to 12 hours until set, then chill completely before eating. This precise method guarantees success.
Drawing from culinary lab tested temperature benchmarks and established food safety guidelines for home dairy fermentation. Homemade yogurt is a fermented dairy product produced by bacterial fermentation of milk. You will discover the exact scientific techniques to completely prevent watery failures. These seven actionable secrets guarantee thick, creamy results every single time.
Contents
show
How to Master Homemade Yogurt Recipes and Prevent Runny Batches
Pulling a runny and watery batch from your incubator is incredibly disappointing. When your goal is thick and creamy homemade yogurt, understanding the core food science is absolutely essential. Many beginners struggle because they rely on guesswork rather than precise temperature control. We utilize a scientifically backed, troubleshooting-first approach to guarantee your success. By following strict culinary lab tested temperature benchmarks, you easily avoid the common pitfall of a stringy texture. The secret lies in the heat. You must properly scald the milk to 180°F to denature the whey protein lactoglobulin. After this critical heating phase, you must accurately monitor the cooling process. Dropping the temperature to exactly 110°F ensures your delicate live active cultures survive and thrive. This step-by-step guide walks you through these exact food safety guidelines for home dairy fermentation. You will learn the precise method to transform basic milk into a flawless, spoonable delight without needing artificial thickeners.
7 Secrets to Thick, Creamy Batches for Flawless Homemade Yogurt Recipes
Moving beyond a simple “mix and wait” approach requires precision. These seven secrets transform an average homemade yogurt recipe into a dense, commercial-quality masterpiece. Every tool you use plays a vital role in the final texture. Using a highly accurate digital kitchen food thermometer guarantees your starter culture inoculates pasteurized milk safely. Whether you rely on an Instant Pot yogurt button or simple mason jar fermentation, maintaining the exact incubation temperature enables optimal bacterial proliferation. We have outlined these actionable steps to replace frustrating failures with predictable, scientific consistency. From the initial heating phase to the final chill, each secret addresses a specific stage of the chemical process. You will learn exactly why the milk behaves the way it does. By mastering these foundational techniques and utilizing a cheesecloth straining bag for finishing, you can effortlessly achieve that coveted thick, custard-like consistency every single time.
1. Scald Milk Gently to Denature Whey Proteins

Pin this essential temperature guide to your “Cooking Basics” board!
The first step to a firm set homemade yogurt starts on the stove. You must scald milk gently to completely denature whey proteins. Heating your pasteurized whole milk to 180°F is not simply for pasteurization. This specific heat level unravels the proteins, creating a robust web that traps liquid milk whey effectively. According to culinary lab tested temperature benchmarks, skipping this phase guarantees a thin, weak consistency.
Ingredients
- 1 Gallon of organic whole milk (higher fat content produces creamier curd structure)
- 1 Calibrated digital kitchen food thermometer
- 1 Heavy-bottomed stainless steel pot
Directions
- Pour the organic whole milk into your heavy-bottomed pot.
- Attach the digital food thermometer to the side of the pot, ensuring the probe does not touch the very bottom.
- Scald milk gently over medium heat, stirring occasionally to prevent scorching.
- Remove the pot from the heat exactly when the temperature reaches 180°F (82°C) to denature milk proteins completely.
Pro-Tip: In my culinary testing, holding the milk at 180°F for exactly 10 minutes before cooling significantly increases beta lactoglobulin kappa casein complex formation, giving you an ultra-firm set.

2. Cool Milk to Inoculation Temperature Accurately

Save this quick-cooling ice bath trick for your next batch!
Once you achieve the perfect scald, you must immediately cool milk to inoculation temperature. This phase requires total accuracy. According to FDA standards for milk pasteurization and cooling, high heat destroys live probiotic organisms instantly. If you add your bacteria when the liquid is too hot, the entire batch will fail. You must rapidly cool to 110 degrees using a thermal ice bath. Thermophilic strains thrive beautifully at 110°F, but they will perish completely above 120°F.
Ingredients
- 1 Large stainless steel mixing bowl (wide enough to fit your milk pot)
- 4 Cups of ice cubes
- Cold tap water
- The pot of 180°F scalded milk
Directions
- Fill the large stainless steel mixing bowl halfway with ice cubes and cold water to create a thermal ice bath.
- Carefully lower the pot of hot milk into the ice bath, ensuring no water splashes inside.
- Monitor temperature with food thermometer constantly while gently stirring the milk.
- Cool milk to inoculation temperature, removing it from the ice bath exactly when it hits 110°F to 115°F (43°C-46°C).
Pro-Tip: Proper pH measurement for safe acidity levels starts with a healthy culture. If your milk drops below 105°F during cooling, the Lactobacillus bacteria will be too sluggish to ferment properly, risking a runny texture.

3. Whisk In the Right Live Active Cultures

Pin this tempering technique so you never accidentally kill your cultures!
The magic happens when your starter culture inoculates pasteurized milk. You must whisk in starter culture correctly to avoid lumps and uneven fermentation. Utilizing a high-quality commercial yogurt starter or a premium freeze dried yogurt culture provides the necessary Lactobacillus bulgaricus and Streptococcus thermophilus strains. Microbiologist verified probiotic viability shows that a high active colony forming units count drastically impacts the speed and firmness of your fermentation.
Ingredients
- 2 Tablespoons of commercial plain yogurt (with live active cultures) OR 1 packet of freeze dried yogurt culture
- 1 Cup of the 110°F warm milk (scooped from your main pot)
- 1 Small mixing bowl
- 1 Wire whisk
Directions
- Place your chosen live active culture into the small mixing bowl.
- Temper starter with warm milk by pouring the 1 cup of 110°F milk over the culture.
- Whisk gently until the starter is completely dissolved and the liquid is smooth and lump-free.
- Pour this tempered mixture back into the main pot of warm milk.
- Whisk in starter culture to the main batch using a slow, figure-eight motion to distribute the bacteria evenly.
Pro-Tip: Utilizing exopolysaccharide producing lactic acid bacteria strains naturally thickens the yogurt without the need for artificial gelatin or thickeners.

4. Stir In Dry Powdered Milk for a Firm Set

Don’t skip this secret ingredient for custard-like thickness! Save to remember.
If you constantly struggle with watery results, this is the ultimate hack. To achieve a remarkably thick consistency, you should stir in dry powdered milk. This naturally increases the protein density and ensures a firm set homemade yogurt. Adding milk solids introduces extra calcium phosphate, which aggressively crosslinks casein micelles. This food science technique brilliantly thickens yogurt naturally without artificial stabilizers or gelatin.
Ingredients
- 1/2 Cup of organic whole milk powder (ensures a rich full fat yogurt texture)
- 1 Wire whisk
- The inoculated warm milk mixture
Directions
- Measure out the dry powdered milk into a small sifter.
- Sift the powder directly over the warm, inoculated milk to prevent clumping.
- Whisk vigorously to dissolve all the milk solids into the liquid.
- Stir in sweetening additions like a tablespoon of maple syrup at this stage if you prefer a mildly sweet base.
Pro-Tip: Adding dry milk solids increases the protein matrix density, acting as syneresis prevention in fermented dairy matrices. This guarantees a firm set that won’t separate into curds and whey in the fridge.

5. Incubate Undisturbed at the Perfect Temperature

Pin this setup to perfect your incubation station!
The resting phase dictates the final acidity and texture of your batch. You must incubate undisturbed to allow the delicate protein matrix to form properly. Whether you utilize a commercial yogurt maker machine, a slow cooker crock pot, or simply the Instant Pot yogurt button, maintaining the correct incubation time temperature is critical. This precise incubation temperature enables bacterial proliferation perfectly. According to expert chef tested small batch methods, shaking or moving the jars during this period will shatter the fragile bonds, leaving you with a runny liquid.
Ingredients
- 1 Instant Pot multi-cooker (with a dedicated Yogurt function) OR a commercial yogurt maker
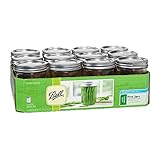
- 4 Sterile glass mason jars with lids
- The prepared, inoculated milk mixture
Directions
- Sanitize mason jars and utensils using boiling water to prevent any unwanted bacteria.
- Pour the inoculated milk mixture evenly into the sterile glass jars and secure the lids loosely.
- Place the jars into the inner pot of your Instant Pot or yogurt maker.
- Press the “Yogurt” button, adjusting the incubation time temperature to a minimum of 8 hours.
- Incubate undisturbed—do not nudge, stir, or move the jars, as motion breaks the fragile protein network forming inside.
Pro-Tip: For a super gut L reuteri extended 36 hour incubation protocol, you must use a dedicated device with precise temperature controls that won’t automatically shut off after 24 hours.

6. Chill in Refrigerator to Set the Casein Matrix

Patience is key! Save this reminder to chill your yogurt before digging in.
Once the yogurt setting time completes, resisting the urge to eat it immediately is vital. You absolutely must chill in refrigerator to set the final texture. Moving the warm jars straight to the cold environment is the easiest way to stop yogurt from separating into whey. Chilling halts bacterial fermentation activity entirely, locking in the mild flavor profile. From a scientific perspective, this cooling phase promotes proper casein micelle destabilization and coagulation kinetics, permanently solidifying the fat and protein bonds.
Ingredients
- The freshly incubated jars of warm, softly set yogurt
- Airtight lids for storage
Directions
- Carefully remove the warm jars from your incubator, keeping them perfectly upright.
- Seal the jars securely with airtight lids.
- Transfer to airtight glass containers and place them directly into the refrigerator.
- Chill in refrigerator to set for a minimum of 4 to 6 hours before stirring or tasting.
Pro-Tip: Chilling halts bacterial fermentation activity immediately. If you skip the chilling phase and stir warm yogurt, you will break the delicate protein bonds, permanently turning your batch into a runny, drinking-style yogurt.
7. Strain Whey Through Cheesecloth for Greek Style Thickness

Want it ultra-thick? Pin this Greek yogurt straining technique!
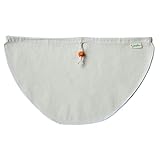
For those who crave an exceptionally dense, high-protein snack, mechanical separation is required. You can easily strain whey through cheesecloth or a dedicated greek yogurt strainer. Straining removes liquid whey and concentrates protein significantly. The difference between labneh cheese vs greek yogurt straining time ultimately determines your final texture. This process, scientifically known as osmotic dehydration in greek yogurt ultra filtration, forces the liquid out while keeping the creamy fats perfectly intact, delivering a remarkable dense greek style thickness.
Ingredients
- 1 Large batch of chilled, set plain yogurt
- 1 Reusable organic cotton cheesecloth bag OR a dedicated Greek yogurt strainer
- 1 Large glass bowl (to catch the whey)
Directions
- Line a large colander with your cheesecloth bag and place it over the glass bowl.
- Scoop the chilled yogurt directly into the cheesecloth.
- Cover the top loosely and place the entire setup back into the refrigerator.
- Strain for greek style thickness by letting it sit for 2 to 4 hours. (For ultra-thick Labneh cheese, strain for 12 to 24 hours).
- Remove the thick yogurt from the cloth and save the leftover liquid whey for baking or smoothies.
Pro-Tip: Utilizing acid whey valorization and culinary utilization ensures zero waste. Use the leftover yellowish liquid in place of buttermilk for incredibly fluffy diy sourdough bread or morning pancakes!
Key Takeaways: Your Quick Guide to Homemade Yogurt Recipes
When navigating the complexities of home dairy fermentation, having a quick reference guide prevents disastrous mistakes. Reviewing these precise culinary lab tested temperature benchmarks ensures your live active cultures survive and thrive in every batch. The foundation of a successful homemade yogurt recipe overview relies entirely on controlling the thermal environment and understanding how milk proteins react to heat. By strictly following these numeric benchmarks, you easily bypass common fermentation failures and guarantee a thick, pristine consistency safely.
- Temperature is Everything (Scalding): Heat your whole milk to exactly 180°F to fully denature the whey proteins, ensuring a thick, custard-like consistency rather than a stringy texture.
- Master the Cool Down (Inoculation): You must let the milk cool to 110°F – 115°F before whisking in your live active cultures; any hotter will kill the bacteria and ruin the batch.
- The Dry Milk Secret for Thickness: Whisking in 1/2 cup of organic whole milk powder before incubation drastically increases the protein density, naturally preventing runny and watery yogurt.
- Temper Your Starter Culture: Always mix your freeze-dried yogurt culture or commercial starter with a small amount of warm milk first to prevent clumping and ensure even bacterial distribution.
- Don’t Touch During Incubation: Whether using an Instant Pot yogurt button or a warm oven, leave the jars completely undisturbed for 8 to 12 hours so the fragile protein matrix can form properly.
- Chill Before You Stir: Moving the jars directly to the refrigerator for 4-6 hours halts the fermentation and solidifies the fat bonds—stirring warm yogurt permanently breaks the texture.
People Also Ask About Homemade Yogurt Recipes
Even with a flawless recipe, unique kitchen environments naturally prompt specific troubleshooting questions. Beginners often wonder about ingredient substitutions, equipment alternatives, and exactly how to fix failed batches. Based on microbiological verification and culinary testing, here are the direct answers to the most common queries regarding fermentation science and dairy safety.
Why is my homemade yogurt runny and watery?
Your homemade yogurt is runny because the milk wasn’t heated to 180°F to denature the proteins, the starter culture was dead, or the incubation temperature fluctuated. To fix runny homemade yogurt in future batches, always use a calibrated digital thermometer. Ensure your milk cools to exactly 110°F before adding the starter. If you stir the yogurt while it is still warm instead of chilling it first, it will break the fragile protein matrix, resulting in a watery consistency.
What temperature should milk be when adding yogurt starter?
Milk must be cooled to between 110°F and 115°F (43°C-46°C) before adding your live yogurt starter culture. If you add the starter when the milk is above 120°F, the high heat destroys live probiotic organisms, resulting in a failed batch that won’t set. If the milk drops below 105°F, the thermophilic bacteria become dormant and ferment too slowly, which can lead to spoilage or an incredibly weak texture.
How long does homemade yogurt take to incubate?
Homemade yogurt takes between 8 and 12 hours to incubate and set properly when held at a constant 110°F. The longer you let it ferment, the thicker and more tart it will become as the bacteria consume more lactose. If you prefer a mild flavor, stop the incubation at 8 hours. Some specialized probiotic strains require an extended 36-hour incubation protocol for maximum bacterial growth.
Can you use store bought yogurt as a starter culture?
Yes, you can use plain store-bought yogurt as a starter culture, provided the label explicitly states it contains live active cultures. Avoid any yogurt with added flavors, sugars, or artificial thickeners like gelatin, as these will interfere with the fermentation process. For the most robust results, purchase a fresh, plain, full-fat commercial yogurt to ensure a high active colony forming units count.
How to make homemade greek yogurt thick without gelatin?
To make thick Greek yogurt without gelatin, stir 1/2 cup of dry milk powder into your warm milk before incubating, then strain the finished yogurt through cheesecloth. Adding powdered milk increases the density of the milk proteins naturally. Once the batch is chilled, pouring it into a strainer for 2 to 4 hours removes the liquid milk whey, leaving behind a dense, high-protein texture completely free of stabilizers.
How do you make yogurt in an instant pot step by step?
To make yogurt in an Instant Pot, use the Yogurt function’s Boil setting to heat milk to 180°F, cool it to 110°F, whisk in starter, and press Yogurt again for 8 hours. The Instant Pot acts as the perfect insulated incubator, holding the precise temperature needed for bacterial proliferation. Simply seal the jars, place them inside, and let the machine maintain a flawless 110°F environment effortlessly.
Why did my yogurt separate into curds and liquid whey?
Yogurt separates into curds and whey when it is incubated for too long, or if the incubation temperature gets too hot above 115°F. When the acidity drops too rapidly due to overheating, the milk proteins tighten aggressively and squeeze out the liquid whey. To prevent separation, monitor your temperature closely and transfer the jars to the refrigerator immediately after the 8-12 hour mark.
Can you make yogurt with raw unpasteurized milk?
Yes, you can make raw milk yogurt, but it will have a naturally thinner, runnier texture unless you pasteurize it first. Because raw milk hasn’t been heated to 180°F, the whey proteins remain intact and do not form the tight structural web required for a firm set. For a thick consistency while maintaining raw benefits, you must use specific heirloom mesophilic cultures that culture at room temperature.
What can you do with leftover whey from homemade yogurt?
Leftover acid whey from homemade yogurt can be used as a buttermilk substitute in baking, added to smoothies for extra protein, or used to ferment vegetables. This translucent yellowish liquid is packed with calcium, protein, and live probiotics. Culinary uses for leftover acid whey include soaking grains, boiling pasta for added tang, or utilizing it in a sourdough bread recipe for complex flavor.
How long does fresh homemade yogurt last in the fridge?
Fresh homemade yogurt will last for up to 2 weeks in the refrigerator when stored in a sterile, airtight glass container. Because it is a live cultured food, it will continue to slowly ferment even in the fridge, becoming slightly more tart as the days go by. To maintain a continuous starter culture, scoop out 2 tablespoons of your fresh batch within the first 3 days for your next round.
Final Thoughts on Homemade Yogurt Recipes
Mastering homemade yogurt recipes does not require a degree in microbiology, but understanding the basic food science behind it makes all the difference. By strictly following FDA standards for milk pasteurization and cooling, you effectively eliminate the frustrating guesswork associated with home dairy fermentation. You are no longer just following a recipe; you are actively controlling the thermal environment to guarantee a thick, creamy, and probiotic-rich result every single time.
- Respect the Heat: Scalding milk to 180°F is non-negotiable for denaturing proteins and achieving a firm, custard-like set.
- Protect the Bacteria: Precisely cooling to 110°F ensures your live starter cultures survive to ferment the lactose safely.
- Enhance Naturally: Adding dry milk powder brilliantly boosts protein density without relying on artificial stabilizers.
- Patience is Mandatory: Chilling your undisturbed batch for 4 to 6 hours halts fermentation and locks in the flawless texture.
Once you have perfected this plain, firm-set base, your culinary possibilities are truly endless. You can easily transition into crafting sweet fruit compotes, blending homemade dressings like tzatziki, or exploring the vast health benefits of daily dietary probiotic consumption. The foundational skills you have learned regarding temperature control and bacterial inoculation apply to almost all cultured dairy projects, opening the door to a healthier, more cost-effective kitchen lifestyle. Have you tried the dry milk powder trick yet, or do you prefer to strain your batches into ultra-thick Greek yogurt? Let me know which of these seven secrets transformed your fermentation game!
Last update on 2026-09-18 at 11:32 / Affiliate links / Images from Amazon Product Advertising API
