As an Amazon Associate KitchenwareSets.com earns from qualifying purchases.
11 Smart Indian Apartment Utility Kitchen Ideas To Maximize Space
Struggling to find a place for everything in your utility area? Does that small corner off the kitchen feel more like a clutter zone than a functional space?
A Kitchen Utility Area is a dedicated spot for chores like laundry and storing cleaning supplies. For many in an Indian apartment, this space-constrained nook quickly becomes a source of daily frustration and mess.
The best Indian apartment utility kitchen ideas focus on maximizing vertical space and using multi-functional, concealed storage. This guide will show you 11 smart, achievable ways to transform your utility area from chaotic to calm, making your daily chores easier and your home more beautiful.
Is Your Apartment Utility Area a Source of Clutter and Frustration?
That tiny balcony off the kitchen, the battle with mops and buckets on the floor, the constant struggle to find a spot for the ironing board—if this sounds familiar, you’re not alone. The utility area in many Indian apartments is a masterclass in compromise, a small, often overlooked space tasked with handling some of our home’s toughest jobs. It’s supposed to be a workhorse, but it often ends up being a source of stress.
This isn’t a design flaw on your part; it’s a common challenge in modern urban living where every square inch is precious. The core problem is that a small utility area often lacks organized, vertical space for laundry, cleaning supplies, and wet work. This leads directly to floor clutter, inefficiency, and a feeling that the space is working against you. But it doesn’t have to be this way. With a bit of smart planning, you can transform this cluttered corner into an organized powerhouse. This guide provides 11 actionable and visually inspiring ideas to help you reclaim your utility space.
11 Smart Indian Apartment Utility Kitchen Ideas To Maximize Space
Each of the following 11 ideas has been specifically chosen for the typical dimensions and needs of an Indian apartment. These are not just pretty pictures; they are practical blueprints you can adapt to create a more functional and beautiful space. Based on proven interior design principles for small spaces, ergonomics, and material science suitable for Indian conditions, these concepts will help you conquer clutter for good.
1. Embrace the Vertical with Floor-to-Ceiling Cabinets
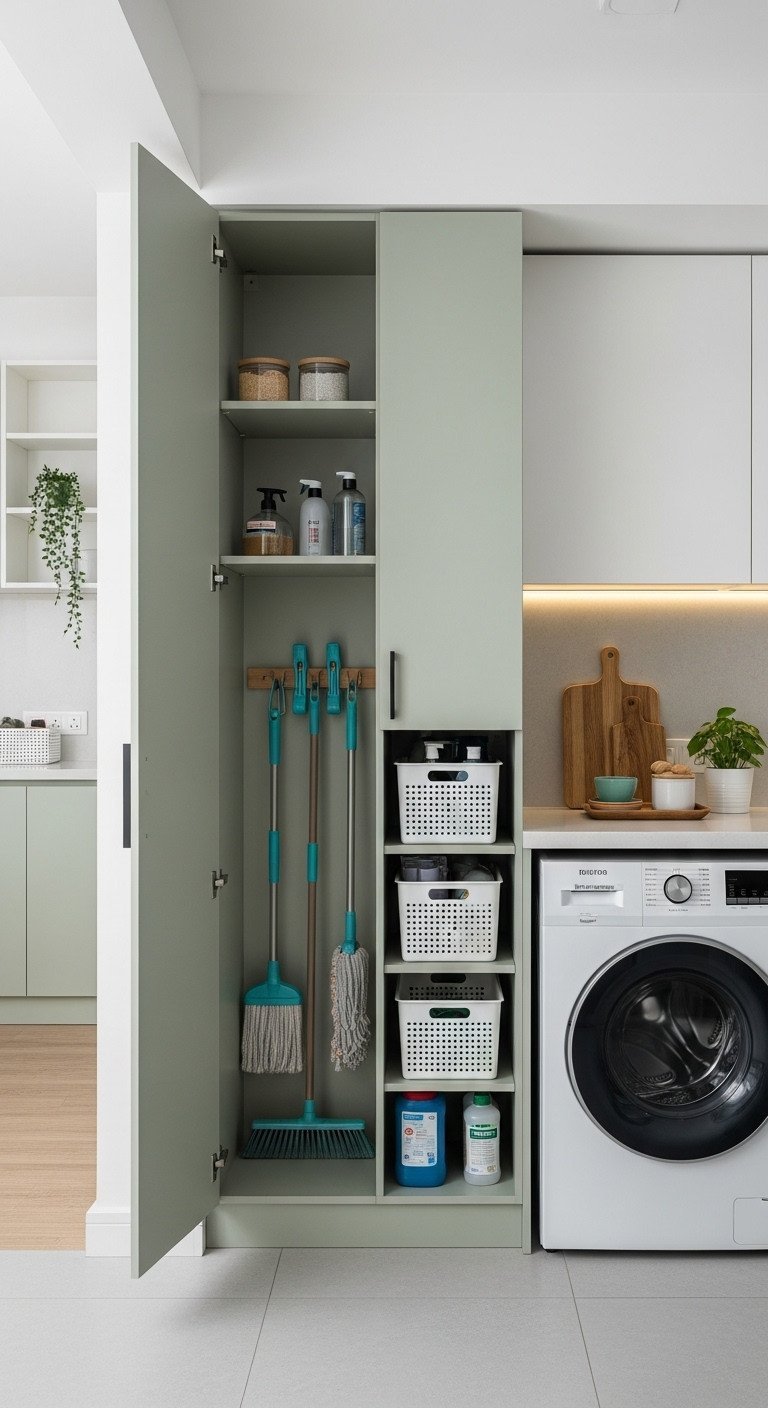
Pin this space-saving cabinet idea for your dream utility room!
Materials Needed:
- Marine-grade or WPC/PVC board for cabinet construction (resists moisture)
- Laminate or acrylic finish matching your kitchen decor
- Wall-mounted broom and mop holders/clips
- Adjustable shelving brackets and shelves
- Uniform storage baskets or bins for smaller items
Step-by-Step Directions:
- Measure: Accurately measure the floor-to-ceiling height and available width in your utility area.
- Design: Plan the cabinet interior. Dedicate one tall, narrow section (at least 5 feet high) for mops and brooms. Use the remaining space for adjustable shelves.
- Construct: Hire a carpenter to build the cabinet using water-resistant board. Ensure it’s securely anchored to the wall for safety.
- Organize: Install the mop holders on the inside wall of the tall section. Place detergents and supplies in baskets on the shelves to keep things tidy.
Pro-Tip: Ask your carpenter to leave a small gap at the bottom of the cabinet (a toe-kick) to prevent water from seeping in during floor cleaning.
2. Stack Your Appliances to Reclaim Floor Space
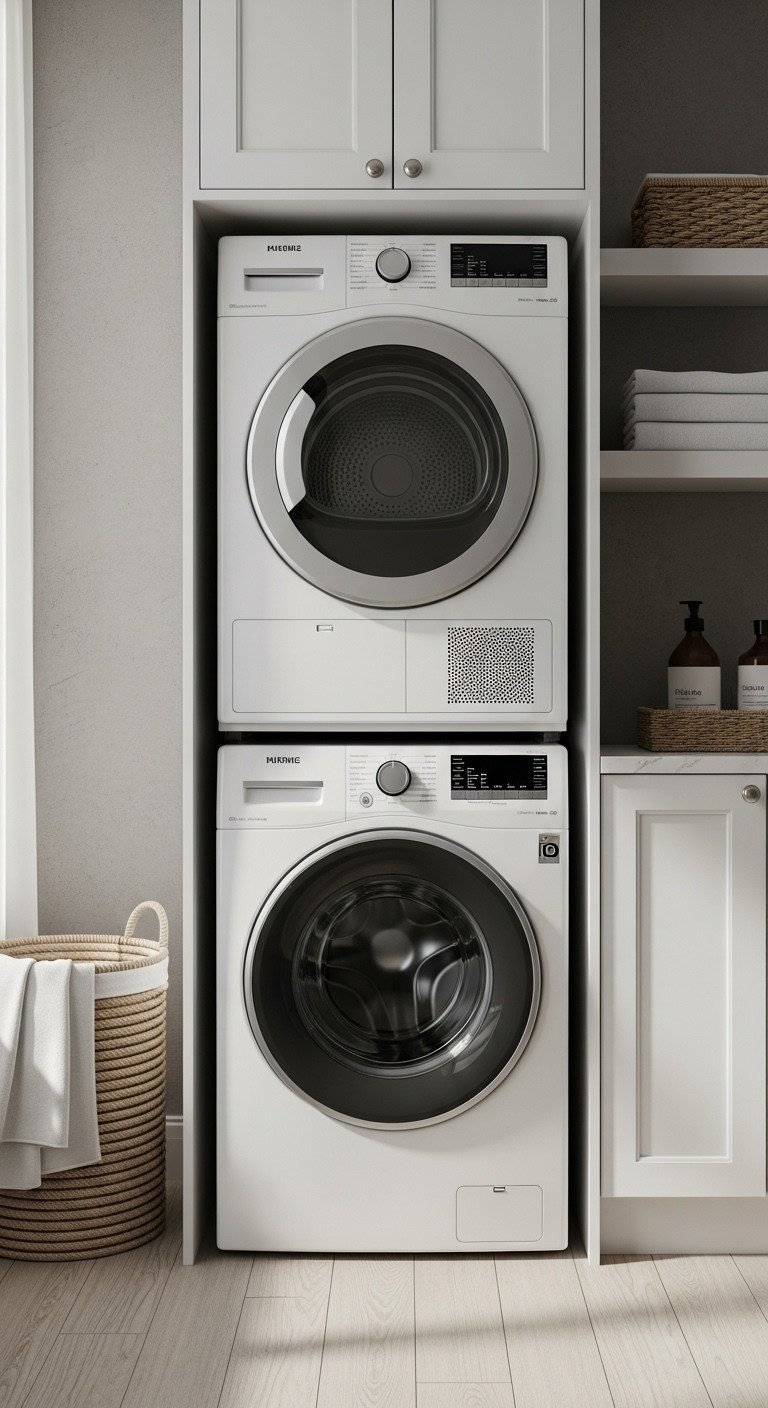
Save this genius idea for small laundry spaces!
Tools & Materials Needed:
- A compatible front-load washing machine and dryer set
- A manufacturer-approved washer/dryer stacking kit with a pull-out shelf
- Spirit level
- Wrench for adjusting appliance feet
- Assistance from another person for lifting
Step-by-Step Directions:
- Position Washer: Place the washing machine in its final location. Use a spirit level to ensure it is perfectly level, adjusting the feet as necessary. This is critical for stability.
- Attach Kit: Following the manufacturer’s instructions, attach the stacking kit components to the top of the washing machine.
- Lift Dryer: With help, carefully lift and place the dryer on top of the washing machine, ensuring its feet lock securely into the stacking kit.
- Secure: Fasten any remaining brackets or straps to secure the dryer in place. Connect the plumbing and electricals.
Lesson Learned: Never stack appliances without the correct, brand-specific stacking kit. It prevents dangerous vibrations and ensures the top appliance is secure.
3. Install a Ceiling-Mounted Retractable Drying Rack
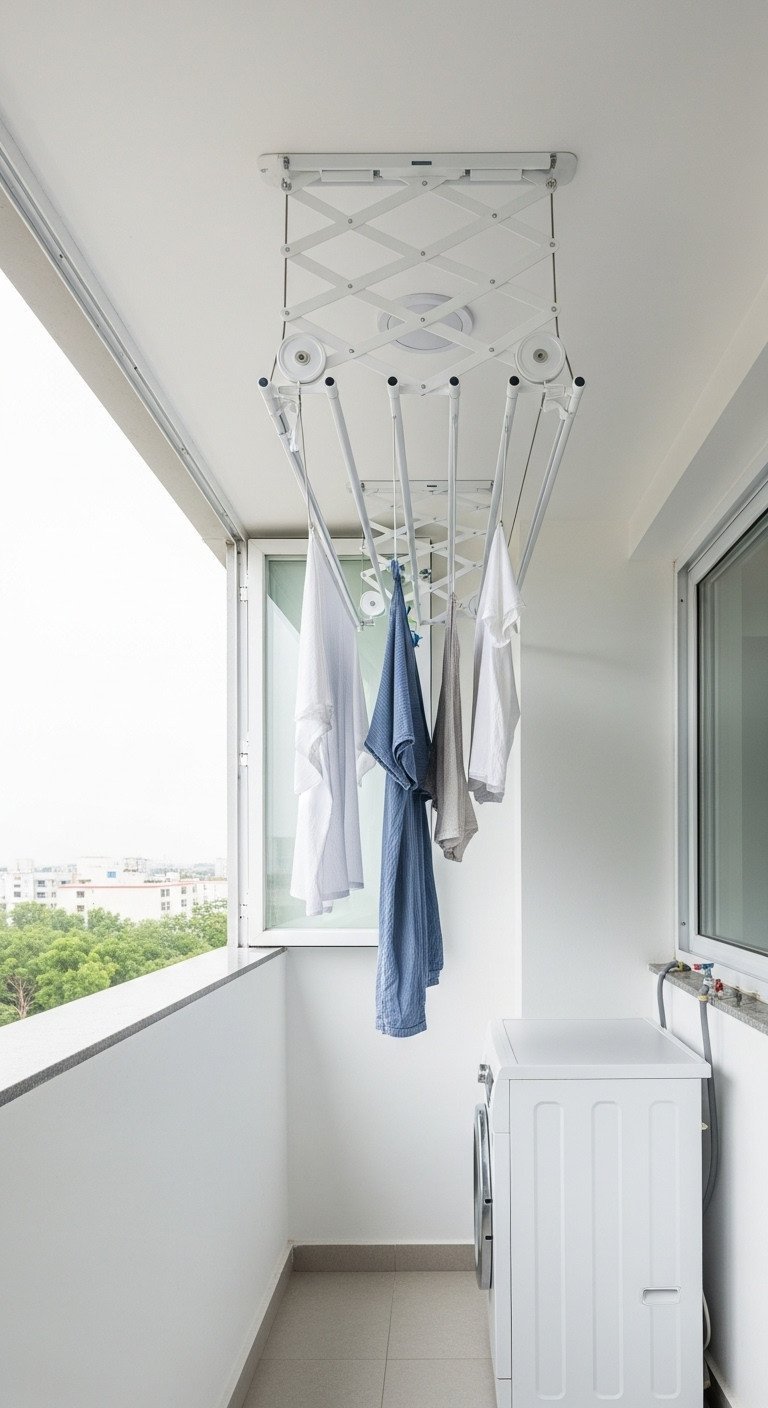
Pin this brilliant tips for drying clothes in small apartments!
Supplies Needed:
- Ceiling-mounted clothes drying rack kit (with pulleys, rods, and nylon rope)
- Heavy-duty ceiling hooks or fasteners suitable for concrete ceilings
- Drill with masonry bit
- Ladder
- Wall cleat for tying off the rope
Step-by-Step Directions:
- Mark Points: Choose a location on your ceiling that doesn’t obstruct movement. Mark the drilling points for the pulley brackets as per the kit’s instructions.
- Drill & Mount: Drill holes into the concrete ceiling and securely install the pulley brackets using heavy-duty fasteners.
- Thread Rope: Thread the nylon rope through the pulleys and attach the drying rods.
- Install Cleat: Mount the wall cleat at a convenient height to tie the rope, allowing you to lock the rack at any desired height.
Pro-Tip: Install the rack over the washing machine or in a corner to keep the main walkway clear, even when the rack is lowered.
4. Create a Concealed Laundry Station with Louvered Doors
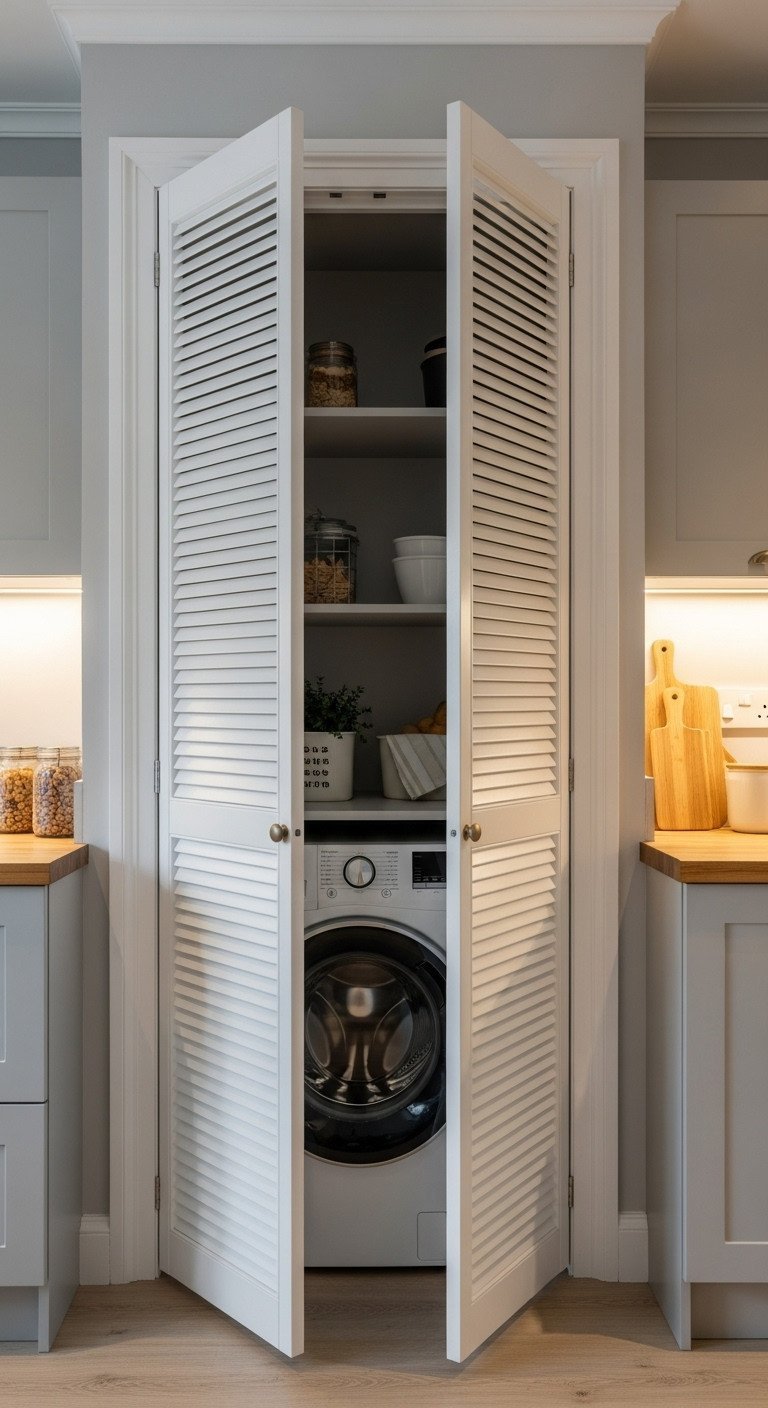
Save this chic idea for hiding your utility area!
Materials Needed:
- Custom-made louvered doors (bi-fold or sliding)
- Door tracks and hardware
- Magnetic door catches
- Paint or finish for the doors
- Basic carpentry tools
Step-by-Step Directions:
- Frame the Niche: Ensure you have a defined nook or alcove for your appliances. If not, a carpenter can build a simple frame with plywood.
- Measure for Doors: Accurately measure the opening of the niche to order or build custom doors.
- Install Tracks: Install the track system for your bi-fold or sliding doors at the top and/or bottom of the opening.
- Hang Doors: Mount the doors onto the tracks, ensuring they open and close smoothly. Install handles and magnetic catches to keep them shut.
Pro-Tip: Louvered doors are perfect for this because they conceal the mess while allowing crucial air circulation, preventing moisture and heat buildup from the appliances.
5. Use a Pegboard for Flexible Wall Organization
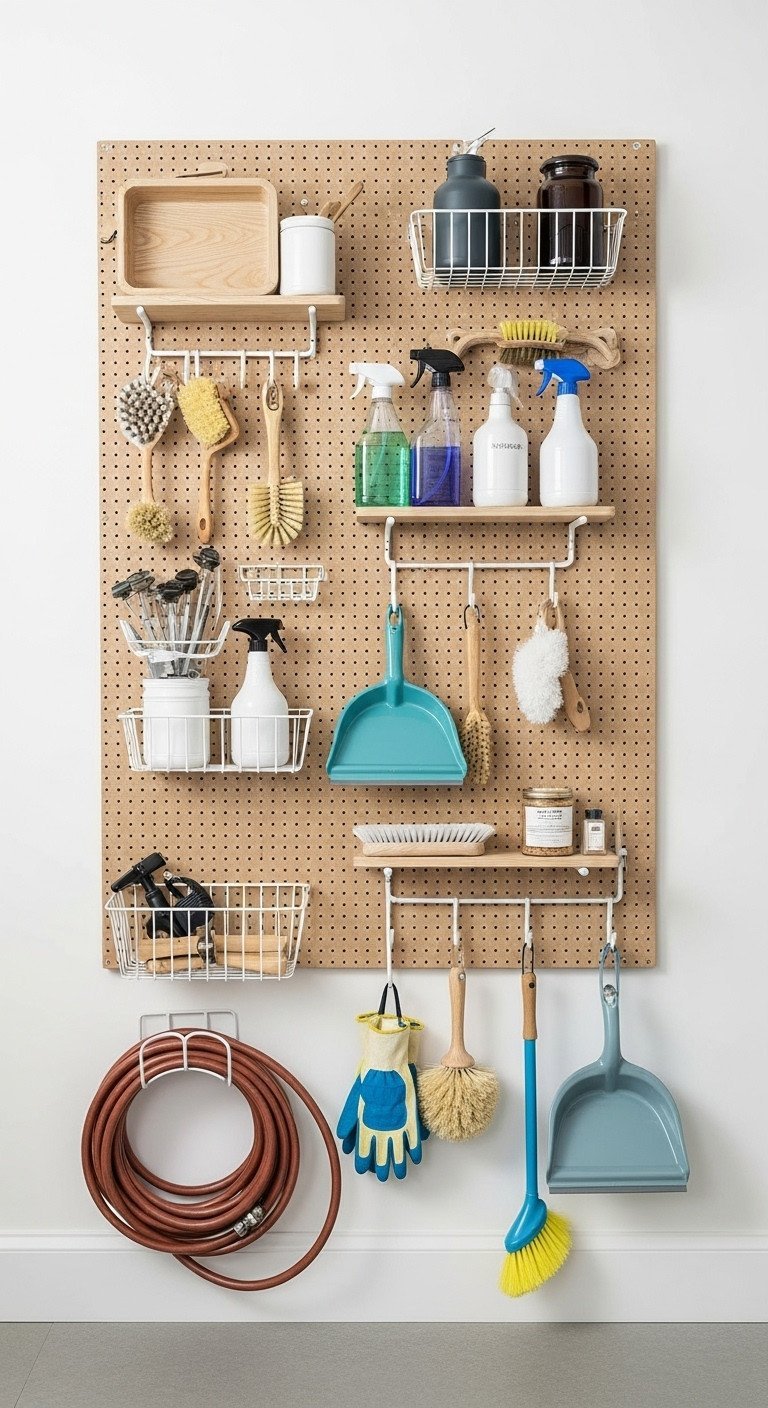
Pin this customizable organization tips for your utility wall!
Materials Needed:
- One sheet of plywood or metal pegboard
- 1×2 inch wooden battens for creating a frame
- Wall screws and anchors
- A variety of pegboard hooks, baskets, and shelf accessories
- Drill and level
Step-by-Step Directions:
- Build Frame: Create a simple rectangular frame using the 1×2 inch wooden battens. This frame creates the necessary space behind the pegboard for the hooks to fit.
- Mount Frame: Securely mount the frame to the utility area wall.
- Attach Pegboard: Screw the pegboard sheet onto the wooden frame.
- Customize: Arrange the hooks, shelves, and baskets on the pegboard to hold all your cleaning supplies, tools, and other small items. Reconfigure anytime your needs change!
Pro-Tip: Paint the pegboard the same color as the wall for a subtle, built-in look, or use a contrasting color to make it a design feature.
6. Build a Slim, Pull-Out Pantry for Detergents
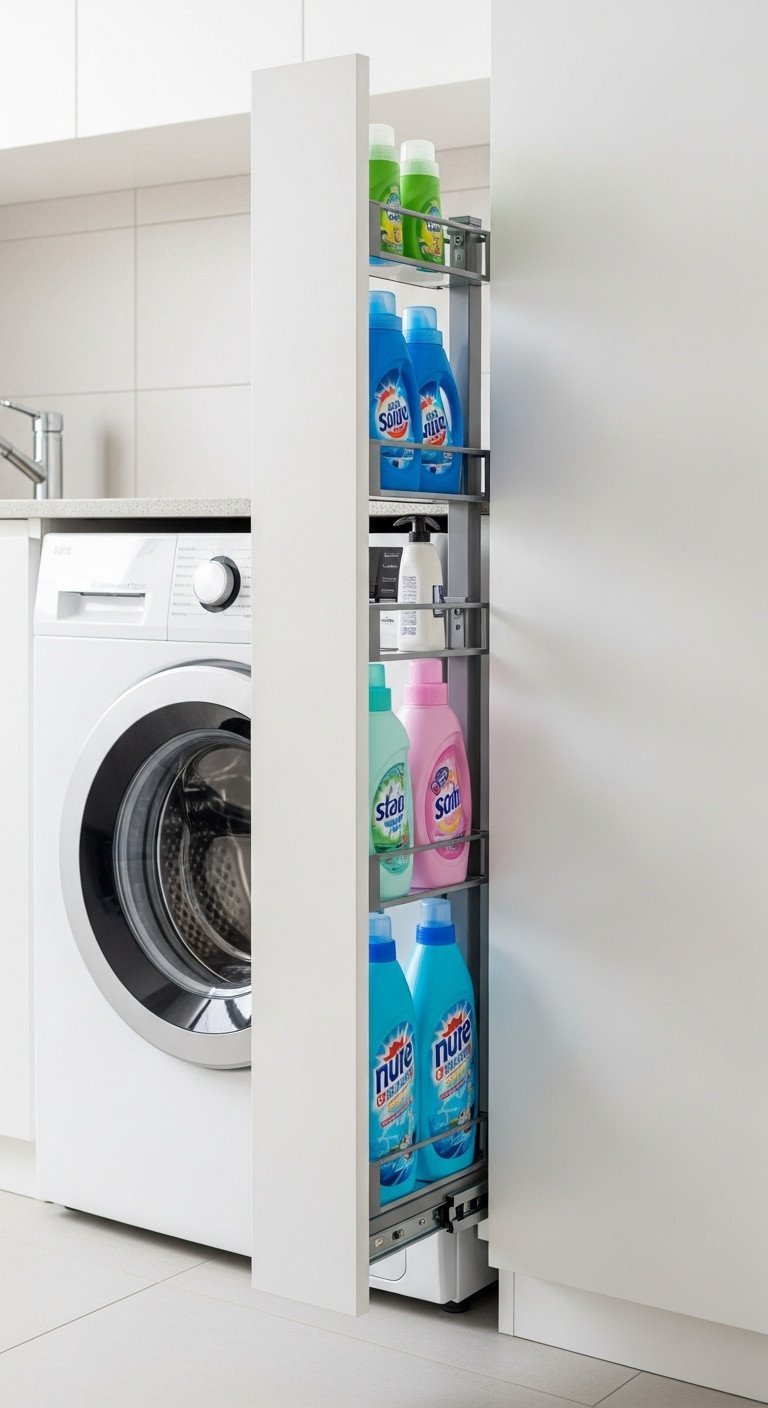
Save this genius idea for using those awkward narrow spaces!
Materials Needed:
- Plywood or water-resistant board for the cabinet box
- Heavy-duty, full-extension drawer slides (bottom and top mounted)
- Thin shelves with railings to prevent items from falling
- A handle or cabinet front that matches your decor
Step-by-Step Directions:
- Measure the Gap: Precisely measure the width, depth, and height of the narrow gap you want to fill.
- Build the Box: Construct a tall, narrow open box (like a vertical drawer) with shelves sized to fit your detergent bottles. Ensure it’s slightly narrower than the gap to allow for the slides.
- Install Slides: Attach one part of the drawer slides to the bottom and top of the inside of the gap (or to the adjacent cabinet/wall) and the other part to the bottom and top of your pull-out box.
- Attach Front: Fix the cabinet front or handle to the box, slide it in, and enjoy your new hidden storage.
Lesson Learned: Invest in high-quality, heavy-duty drawer slides. A tall pantry filled with liquid detergents can be very heavy, and cheap slides will fail.
7. Incorporate a Fold-Down Wall-Mounted Table
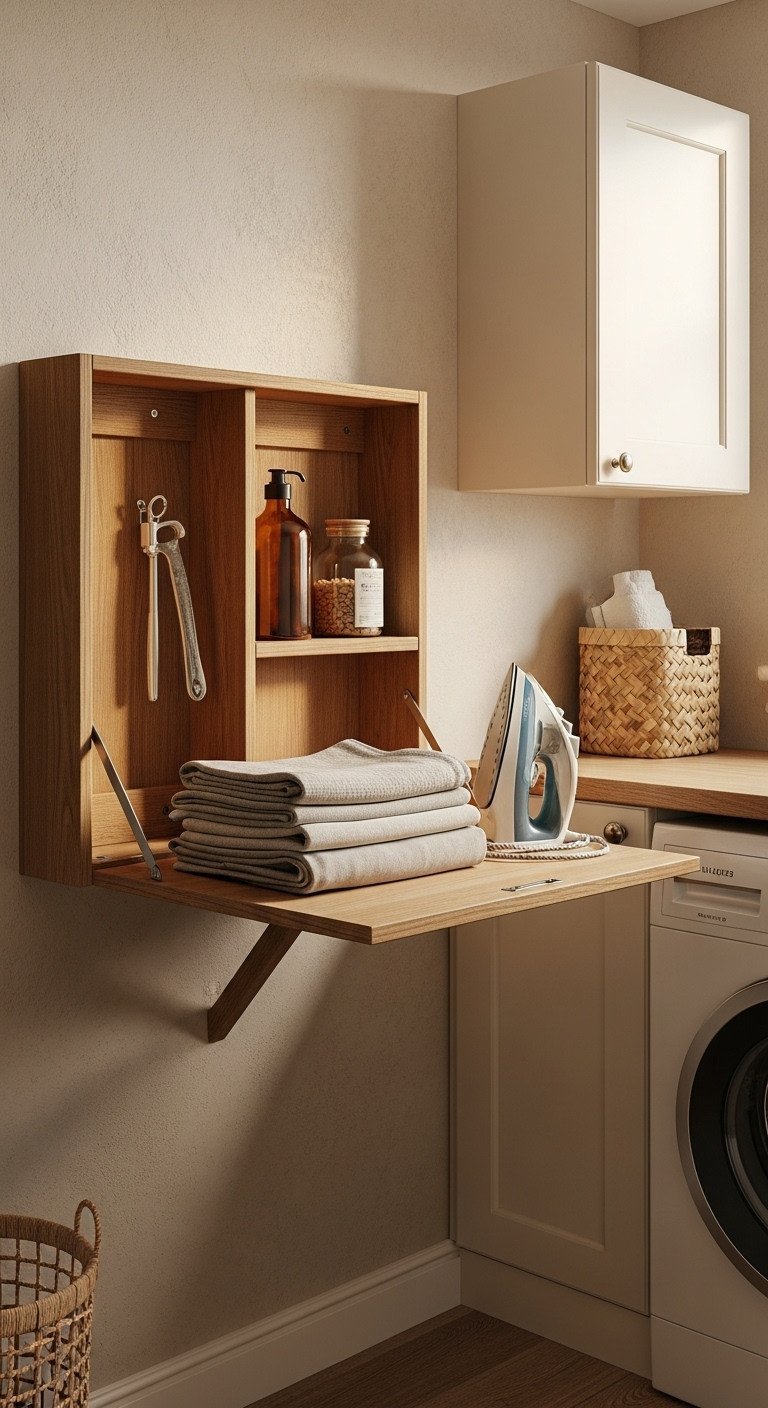
Pin this multi-functional idea for your laundry routine!
Supplies Needed:
- A piece of plywood or solid wood for the tabletop
- 2 heavy-duty folding shelf brackets
- Wall screws and anchors appropriate for your wall type (brick/concrete)
- Sandpaper and varnish/paint
- Drill and level
Step-by-Step Directions:
- Prepare Top: Cut the wood to your desired table size. Sand the edges smooth and apply varnish or paint.
- Attach Brackets: Securely attach the folding brackets to the underside of the tabletop.
- Mark Wall: Hold the table against the wall at your desired height (a comfortable working height for you) and use a level to ensure it’s straight. Mark the drill holes for the brackets.
- Mount to Wall: Drill the holes and mount the table securely to the wall using strong screws and anchors. Test the folding mechanism.
Pro-Tip: Mount the table at a height that is comfortable for you to stand and work at, typically around 34-36 inches from the floor.
8. Utilize the Overlooked Space Above the Door
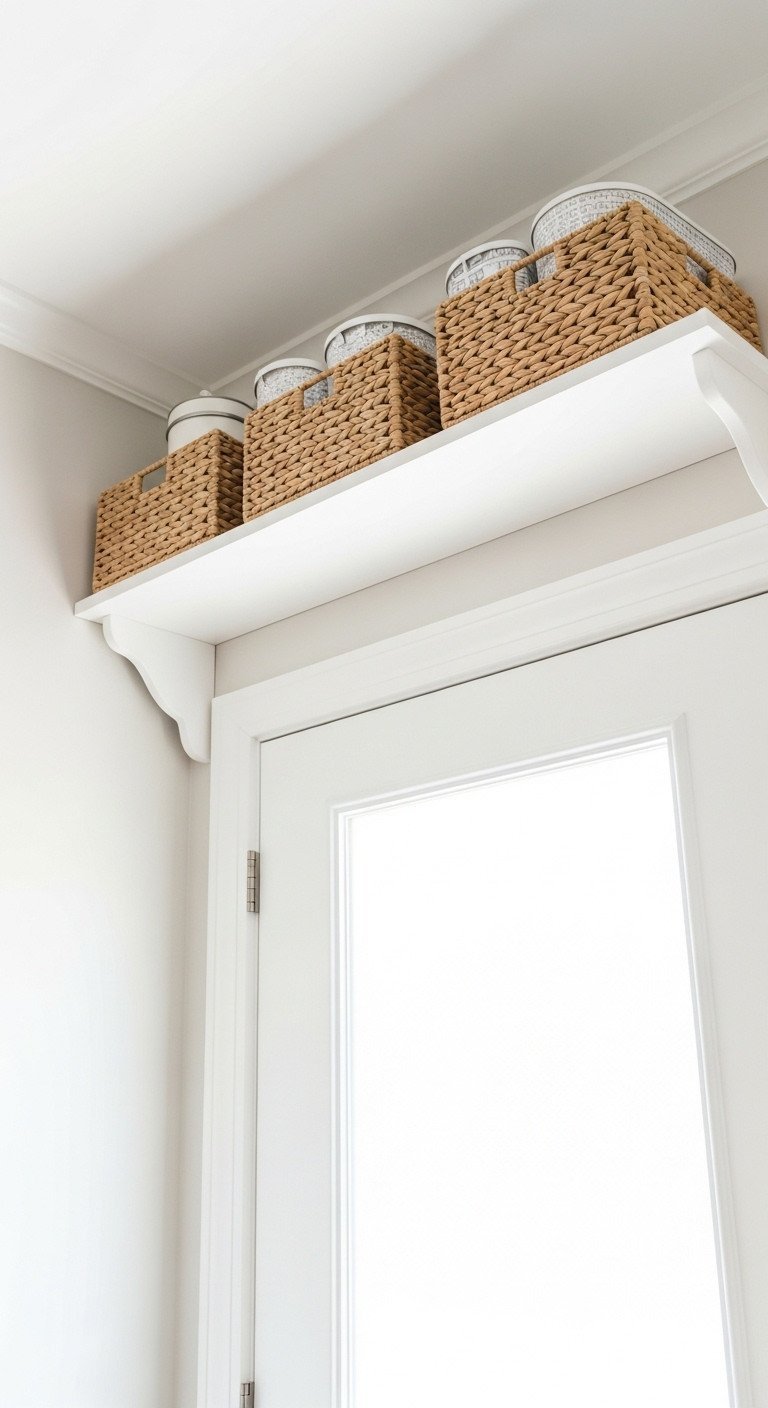
Save this clever storage idea for rarely used items!
Materials Needed:
- One sturdy shelf board (e.g., solid wood or thick plywood)
- 2-3 strong shelf brackets
- Screws and wall anchors
- Drill and level
- Decorative storage boxes or baskets
Step-by-Step Directions:
- Measure: Measure the width above your door frame to determine the length of the shelf.
- Position Brackets: Decide on the placement of your brackets. For a standard door, one on either side about 4-6 inches in from the edge is good. Add a center bracket for longer shelves.
- Mount Brackets: Use a level to ensure the bracket positions are straight, then drill and securely mount them to the wall.
- Attach Shelf: Place the shelf board on top of the brackets and secure it with screws from underneath. Use baskets to store items neatly.
Pro-Tip: This is the perfect place to store things like extra paper towels, bulk detergent refills, or anything you only need to access once a month.
9. Design an Efficient Galley-Style Workflow
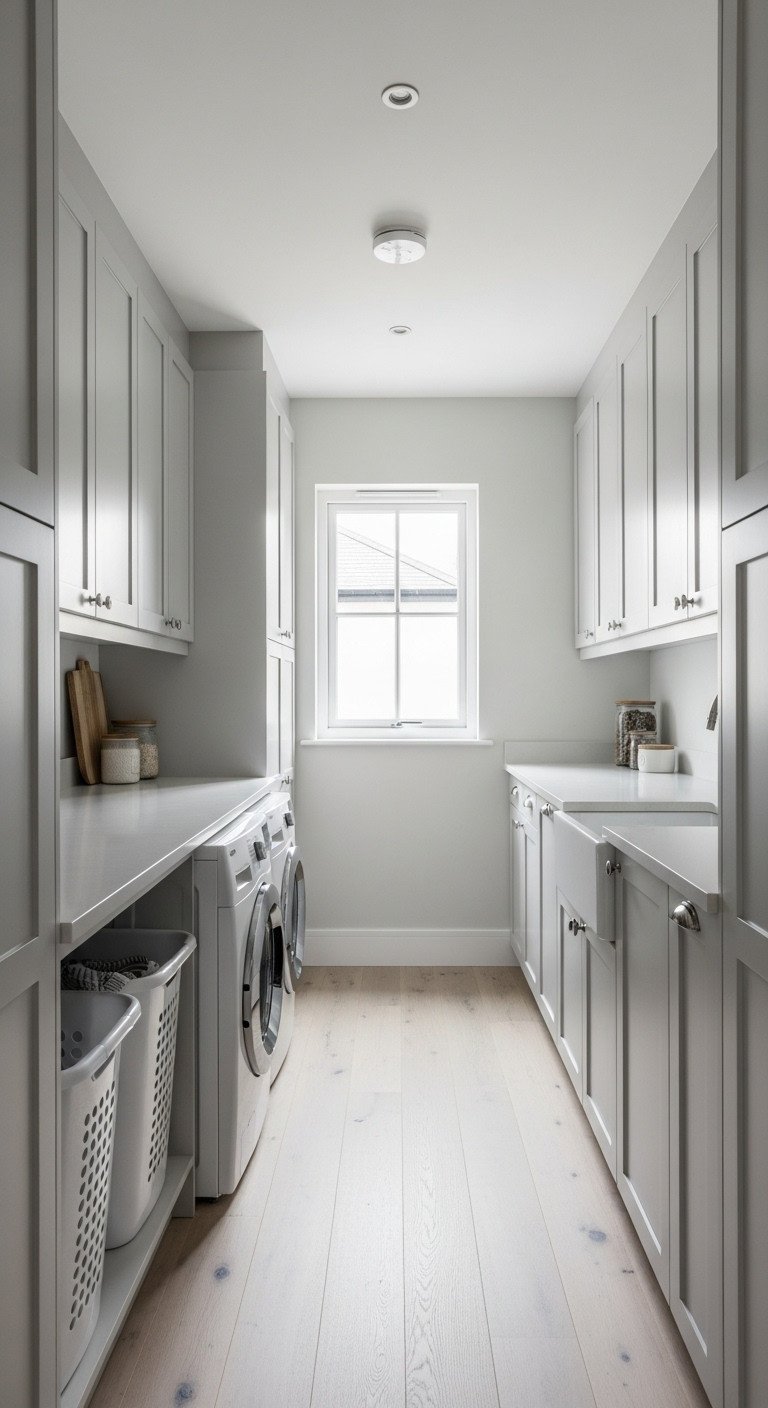
Pin this layout idea for a super-efficient narrow utility space!
Design Principles:
- Main Work Wall: Dedicate one long wall to all your “active” appliances and tasks. Place them in a logical order: laundry hamper -> washing machine -> dryer -> small folding area. A continuous countertop above side-by-side machines is ideal.
- Storage Wall: Use the opposite wall for storage. Opt for shallow cabinets (around 12 inches deep) to maximize storage without cramping the walkway.
- Clearance: Ensure there is a clear walkway of at least 3 feet (36 inches) between the two sides for comfortable movement.
Implementation Steps:
- Plan on Paper: Draw your narrow space and map out the placement of each functional zone on the two parallel walls.
- Plumbing & Electrical: Consolidate all plumbing and electrical outlets along your designated “work wall” to simplify installation.
- Install Cabinetry: Have a carpenter build the shallow cabinets for the storage wall and the countertop for the work wall.
- Place Appliances: Position your appliances in the pre-planned sequence to create your efficient workflow.
Pro-Tip: Use handleless, push-to-open cabinets on the storage wall to maintain a sleek look and avoid catching on clothing as you walk through.
10. Integrate a Compact, Multi-Purpose Utility Sink
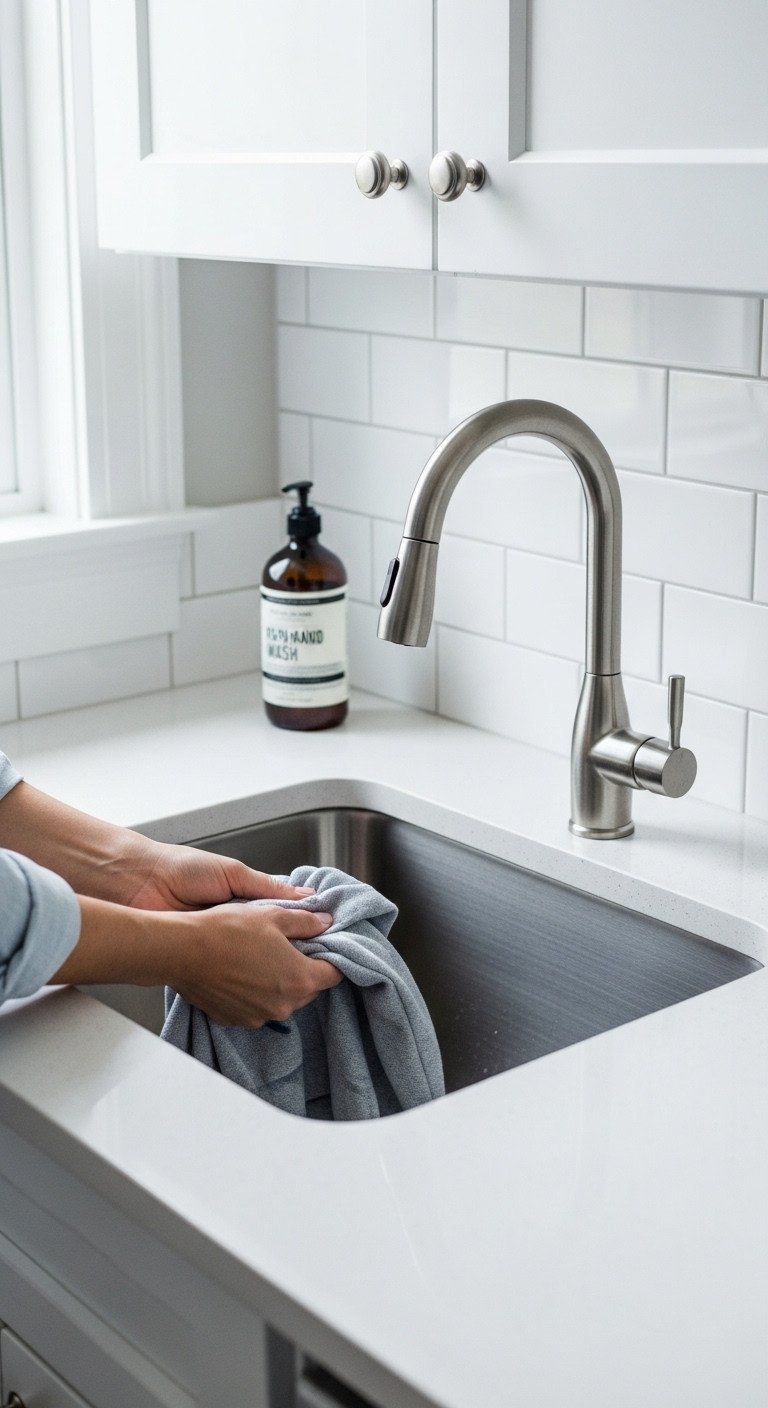
Save this practical idea for a truly functional utility area!
What You Need:
- A compact, deep utility sink (stainless steel or granite composite are durable)
- A high-arc faucet to allow space for filling buckets
- Professional plumber for installation
- A small section of waterproof countertop (granite, quartz)
- Under-sink cabinet for plumbing and storage
Implementation Steps:
- Plan Location: Identify a corner where plumbing (water inlet and drainage) can be easily accessed or extended.
- Build Base: Have a carpenter build a small base cabinet using waterproof material (like PVC board) to support the countertop and sink.
- Install Counter & Sink: A stone mason can cut the countertop to size and create the opening for the sink to be installed.
- Call the Plumber: Have a professional connect the faucet to the water supply and the sink drain to the main drainage line.
Pro-Tip: Choose a sink that is at least 8-10 inches deep. This depth is crucial for pre-soaking stained clothes or washing muddy shoes without splashing water everywhere.
11. Use an Ironing Board Hanger and Iron Rest
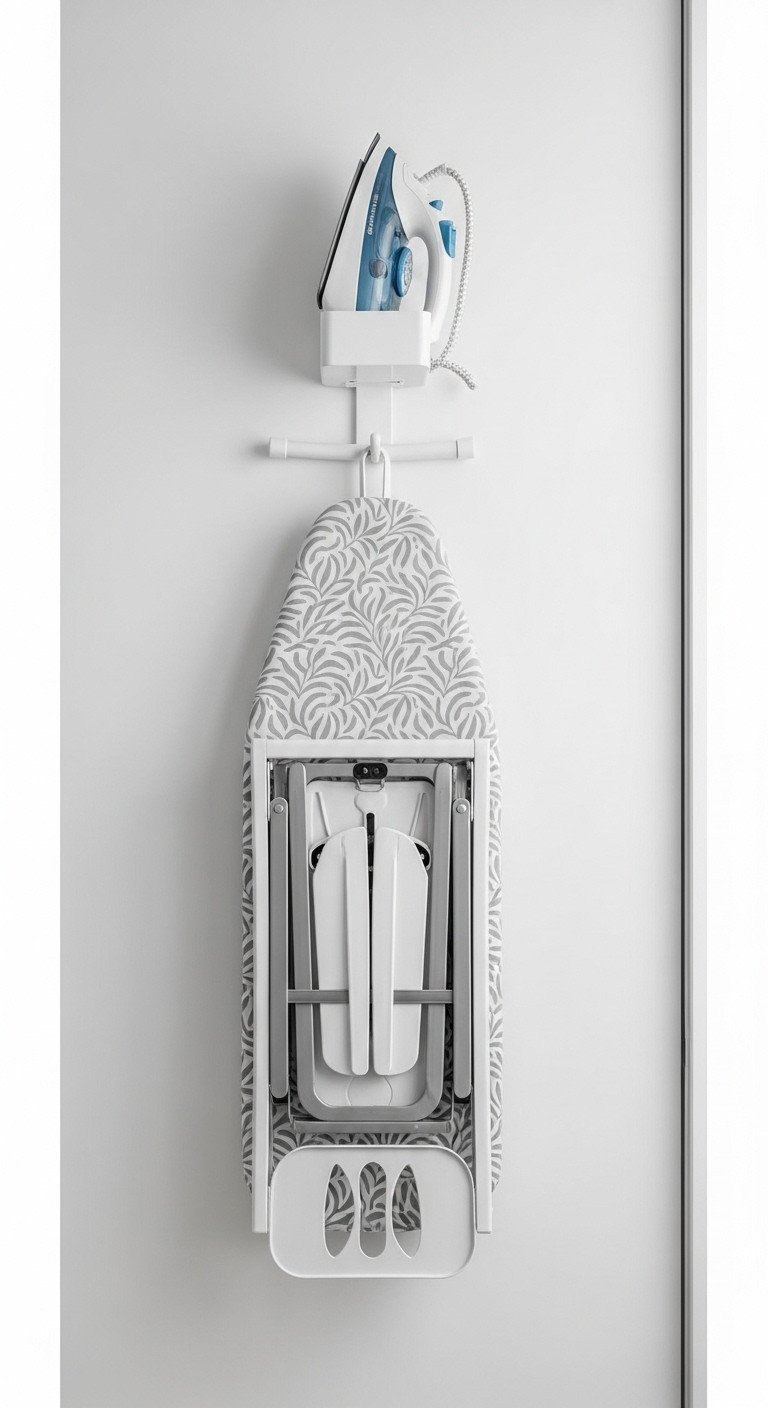
Pin this simple solution for storing that bulky ironing board!
Supplies Needed:
- A wall-mounted ironing board and iron caddy
- Drill
- Screws and wall anchors suitable for your wall type
- Level
Step-by-Step Directions:
- Choose Location: Find a convenient spot on a free wall or, for ultimate space-saving, on the back of the utility area door.
- Mark Holes: Hold the caddy against the wall or door, use a level to make sure it’s straight, and mark the screw holes with a pencil.
- Drill and Mount: Drill the holes and use the provided screws and anchors to securely fasten the caddy to the wall.
- Store: Hang your ironing board on the hooks and place the cool iron in its designated holder.
Lesson Learned: Ensure the iron is completely cool before storing it in the caddy, even if the holder is heat-resistant, to prolong the life of the product and ensure safety.
Key Takeaways: Your Quick Guide to a Smarter Utility Area
- Go Vertical: The most critical principle for small Indian apartments is to use vertical space. Install floor-to-ceiling cabinets and high shelves.
- Conceal and Contain: Hide appliances and clutter behind doors (especially louvered ones for ventilation) to maintain a clean aesthetic.
- Choose Waterproof Materials: Always use water-resistant materials like PVC board, WPC, or marine-grade plywood for cabinetry to prevent damage from moisture.
- Prioritize Workflow: Arrange your space in a logical sequence (e.g., wash, dry, fold) to make chores more efficient.
- Light it Right: Use bright overhead lighting combined with focused task lighting under cabinets to make the space feel larger and more functional.
People Also Ask About Indian Utility Kitchens
What is the best way to organize a small utility area in an Indian kitchen?
The best way is to maximize vertical space. Use floor-to-ceiling cabinets for storing tall items like mops. Install wall-mounted shelves or a pegboard for cleaning supplies. Stack your washer and dryer if possible, and use space-saving solutions like a ceiling-mounted drying rack to keep the floor clear.
What is Vastu for a utility or washing area?
According to Vastu Shastra, the ideal location for a utility area is in the North, East, or North-East. The water inlet for the washing machine should be in the North-East, and the drainage outlet should also flow towards the North-East. Keeping the area clean, dry, and well-lit is also important for positive energy.
How can I hide my washing machine in a small apartment?
Conceal your washing machine behind custom cabinetry that matches your kitchen for a seamless look. Louvered or bi-fold doors are an excellent choice as they hide the appliance while allowing for essential ventilation. Alternatively, you can use a durable curtain or place the machine under a countertop with a fabric skirt.
What is the best flooring for a wet utility area?
Anti-skid vitrified or ceramic tiles are the best flooring choice for a utility area. They are extremely durable, easy to clean, and have very low water absorption. The anti-skid finish is a crucial safety feature to prevent slipping in a space that is often wet.
Final Thoughts
Transforming your utility area is about more than just organization; it’s about reclaiming a part of your home and making it work for you, not against you. Even the smallest, most challenging utility nook has incredible potential. By implementing these Indian apartment utility kitchen ideas, you can create a space that brings more ease, efficiency, and peace to your daily life.
What’s the one utility area challenge you’re struggling with the most? Share in the comments below
Last update on 2026-01-20 at 14:32 / Affiliate links / Images from Amazon Product Advertising API
