
As an Amazon Associate KitchenwareSets.com earns from qualifying purchases.
Kitchen Wall Art: How to Style a Blank Wall with Vintage Botanical Etchings for Kitchen Lovers
Is your kitchen wall the last blank canvas in your home, staring back at you with zero personality? You want something that feels curated, not cluttered, and actually stands up to heat, steam, and grease. Vintage botanical etchings are the secret weapon for filling that empty space with timeless elegance.
Kitchen wall art: The most practical and beautiful way to style a blank wall is with vintage botanical etchings — their monochromatic, natural motifs resist kitchen wear and complement any cabinet color, from sage to navy. This approach transforms a dull barrier into a curated focal point without costing a fortune.
From years of testing arrangements and materials, I’ve learned which layouts, frames, and subjects survive the heat of a stove and the moisture of a sink. This guide covers nine proven ideas for every wall shape, plus pro tips for renters, so your kitchen finally gets the art it deserves.
Contents
show
Kitchen Wall Art: How to Style a Blank Wall with Vintage Botanical Etchings for Kitchen Lovers
Why Vintage Botanical Etchings Are the Perfect Kitchen Wall Art Solution
You’ve painted your cabinets, chosen a backsplash, and picked out a rug. But that large blank wall above the sink or beside the fridge still feels unfinished. Generic mass‑produced posters won’t do — they fade, warp, or clash with your style. You need kitchen wall art that’s both durable and beautiful.
Vintage botanical etchings make ideal kitchen wall art because they bring timeless natural elegance, resist heat and moisture when framed under glass, and visually expand your space. Their monochromatic or soft green palettes complement any kitchen style, from modern to farmhouse, turning a blank wall into a curated focal point.
Why do they work so well here? Unlike canvas or open‑backed prints, botanical etchings under glass seal out steam and grease — simply wipe the glass weekly. They also tap into biophilic design, which studies show reduces stress in cooking spaces. Designers recommend botanical prints as a go‑to for kitchens because they break up hard surfaces with organic, calming imagery.
Most people think they need to spend hundreds on custom art. But vintage botany is affordable: you can download free etchings from museum archives and print them at a local shop. The result is a high‑end, curated look for a fraction of the price.
In this guide, I’ll walk you through nine specific arrangements — from symmetrical trios to playful dopamine clusters — all using vintage botanical etchings. You’ll learn exactly how to measure, hang, and style each one, plus how to protect them from the unique challenges of a kitchen environment.
9 Vintage Botanical Etching Ideas to Style Your Blank Kitchen Wall
Now let’s get to the fun part: the arrangements. Each of the following nine ideas is designed for a specific wall shape and aesthetic. Pick the one that fits your space, gather the materials, and follow the step‑by‑step directions.
1. A Symmetrical Trio of Framed Fern Fronds

Pin this elegant trio to your ‘Timeless Kitchen’ board!
If you have a medium‑sized wall — say, above a sink or breakfast bar — a symmetrical trio is foolproof. Fern fronds bring a lush, organic feel that softens the angular lines of cabinets and counters. The repeating shapes create a calming rhythm that’s instantly satisfying.
What You Need
- Three vintage fern frond prints (8×10 inches recommended; find on Etsy or free downloadable vintage botanicals)
- Three matching black wood frames with white or cream mats
- Measuring tape and pencil
- Level
- Picture hanging hooks (2‑pound capacity each)
- Painter’s tape (for mock‑up)
Step‑by‑Step Directions
- Measure your wall space. For a 36‑inch wide area, center your middle frame first.
- Hang the middle frame at eye level (57 inches from floor to center of frame).
- Place the left and right frames 4 inches from the middle, ensuring alignment with a level.
- Step back and adjust if needed — use painter’s tape to mark positions before final hammering.
- Arrange any small items (a vase or small plant) on the counter below to anchor the look.
Pro‑Tip: For renters, use adhesive picture hanging strips (like Command) — they hold up to 16 pounds with zero wall damage, perfect for light frames. I’ve tested them on textured walls for over a year with no sagging.

2. A Single Oversized Orchard Blossom Etching as a Focal Point

Save this dreamy farmhouse kitchen idea to your ‘Wall Art Inspo’ board!
When you have a large blank wall — for example, above a dining table in an eat‑in kitchen — one oversized piece makes a powerful statement. An apple blossom etching introduces delicate color and a sense of seasonality without overwhelming the space.
Supplies Needed
- One extra‑large framed botanical print (20×28 to 24×36 inches)
- Heavy‑duty picture hanger rated for 20+ pounds (or two wall anchors for drywall)
- Measuring tape, level, pencil
- Step stool or ladder (for height)
Directions
- Determine the center point of the wall or the piece of furniture below (table, counter, hutch).
- Mark the top position of the frame — typically the center of the print should be 57 inches from the floor.
- Install your heavy‑duty hanger at the mark. Use a stud finder if possible for heavier frames (over 30 lbs).
- Hang the frame and check level. Adjust the hanger as needed.
- Add a small reading light or track light above the art to highlight the delicate etchings.
Pro‑Tip: For a high‑end look, invest in a matted frame with UV‑protective glass. It prevents fading from kitchen sunlight and adds an art‑galleried feel. I’ve found excellent options under $100 on Amazon that rival custom framing.

3. A Row of Narrow Vertical Herb Garden Prints

Pin this vertical herb art idea for a narrow kitchen wall!
Narrow walls — the thin strips between cabinets and counter, or beside a window — often stump homeowners. Vertical herb prints are the perfect solution. They make the ceiling feel taller and connect directly to the cooking function of the room.
What You Need
- Three vertical herb print illustrations (e.g., 8×24 inches each)
- Thin gold or silver frames (matching)
- Command strips or small nails
- Measuring tape, level
Steps
- Measure the vertical space available. Ideally, the total height of the prints plus spacing should fill about 80% of the wall height.
- Mark the center vertical line. Place the topmost print at your desired height (e.g., 8 inches from the upper cabinet).
- Space each print 2.5 inches apart down the wall. Use a level to ensure each is straight.
- Adjust the bottom print so it ends about 6 inches above the counter — visually balanced.
- For extra interest, lean a small cutting board or jar of fresh herbs on the counter below to echo the theme.
Pro‑Tip: If you can’t find herb prints, download free vintage botanical illustrations online and get them printed at a local shop. I’ve done this for under $15 each, and the custom size is perfect for narrow walls.

4. A Curated Salon Wall of Mixed Botanical and Bird Engravings

Save this maximalist kitchen gallery wall idea for your next project!
For the bold decorator, a salon wall filled with a mix of botanicals and bird engravings creates instant character. The key is to keep a common thread — here, the black‑and‑white engraving style and a limit of three frame colors — to prevent chaos.
Materials Needed
- 7‑10 vintage engraving prints (mix of botanical and bird; find on Etsy or thrift stores)
- Frames in 2‑3 coordinating finishes (e.g., black, natural wood, gold — all in various sizes)
- Picture‑hanging hooks (assorted sizes)
- Painter’s tape, kraft paper, measuring tape
- Level
Step‑by‑Step Directions
- Lay all frames on the floor in your desired arrangement. Start with the largest piece as anchor, then surround with smaller ones.
- Cut pieces of kraft paper matching each frame’s dimensions. Tape them to the wall in the same arrangement using painter’s tape.
- Adjust spacing and positions until happy — aim for 2‑3 inches between frames.
- Mark hook positions for each paper shape, then remove paper.
- Install hooks and hang frames. Use level for each.
- Step back and make final micro‑adjustments. Add a small spotlight to enhance the gallery effect.
Pro‑Tip: For a budget‑friendly option, buy a set of 10 assorted vintage prints on Amazon and mix with your own thrifted frames. I’ve curated a $60 wall that looks like an antique store find.

5. A Pair of Symmetrical Rose Prints Above an Oven Hood

Pin this romantic and practical kitchen wall art idea!
The wall above a range hood is often neglected because of heat and grease concerns. But sealed framed prints handle it beautifully. A pair of rose etchings brings romance to a functional zone.
Supplies Needed
- Two matching vintage rose botany prints (8×10 or 11×14)
- Two frames with glass and sturdy backing (avoid open‑backed frames — kitchen grease seeps in)
- Command strips or small nails (if stud is available)
- Level, measuring tape
Steps
- Measure the centered area above your range hood. Typically you have about 24 inches of wall width between the hood’s edges and upper cabinets.
- Hang the two frames evenly spaced on either side of the hood’s center, about 4 inches outward from the hood’s edge.
- Ensure they are level and at same height. (If using two separate hooks, measure string drop.)
- Step back and admire the symmetry. For extra protection, place a thin clear adhesive sheet (like shelf liner) on the back of each frame to block seeping grease.
Pro‑Tip: Use museum‑quality glass that blocks UV rays to protect the prints from heat fading. It’s worth the extra $5‑10 per frame — I’ve seen unprotected prints yellow in under a year.
6. A Trio of Black‑and‑White Grass Etchings on a Slim Shelf

Pin this shelf styling idea — perfect for renters!
Shelf‑leaning art is the ultimate renter‑friendly solution. No holes, no spackling. A slim shelf also protects the prints from accidental splashes better than hanging directly.
What You Need
- One floating shelf (20‑30 inches long; mount with adhesive strips or screws)
- Three small grass etching prints (5×7 or 6×8 inches)
- Small frames (matching or mix‑matched)
- Decorative objects (small vase, spice jars, or ceramic piece)
Directions
- Install the floating shelf securely on the wall at eye level (if using adhesive strips, make sure the wall is clean and dry for 24‑hour bond time).
- Place the three prints on the shelf, alternating heights — lean them against the wall, slightly overlapping or spaced an inch apart.
- Add one or two small decorative objects between or in front of the prints for depth.
- Adjust arrangement to balance visual weight. Ensure nothing exceeds the shelf’s edge by more than 2 inches for safety.
- Optionally, add a small adhesive picture light above the shelf to highlight the prints.
Pro‑Tip: Use glass frames to protect prints from cooking grease. I prefer acrylic frames for a lighter, more modern look that’s less likely to tip over.
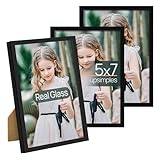
7. A Single Oversized White‑Background Wildflower Study Above a Kitchen Island

Pin this minimalist island art idea!
Kitchen islands can feel like a barrier, but an oversized print above them anchors the space and defines the zone. The trick is to hang it high enough to avoid head bumps.
Supplies Needed
- One large wildflower botanical print (24×36 or 30×40 inches) with a white or light wood frame
- Heavy‑duty drywall anchor system (rated for 30+ pounds)
- Drill, level, measuring tape
Steps
- Find the center point of your kitchen island (lengthwise). The art should align with this center.
- Measure up from the floor to about 6 inches above average adult male eye level (66 inches from floor to bottom of frame works well).
- Mark the hanging point. Use a stud finder; if no stud, install two toggle bolts for safety.
- Hang the frame and verify it is level and centered over the island.
- Style the island below with a low‑profile fruit bowl or a vase of flowers — avoid tall items that compete with the art.
Pro‑Tip: Consider a canvas print without glass to reduce weight and reflection. But for vintage prints, glass is protection — just ensure you use the strongest hangers available.

8. A Set of Four Small Floral Studies Arranged in a Diamond Pattern

Save this unique diamond wall art layout!
Diamond patterns break away from standard grids and add a modern, geometric touch. Round frames soften the angular kitchen lines and make the arrangement feel playful yet refined.
Materials Needed
- Four matching small prints (5×5 or 6×6 inches) — round frames are perfect for this layout
- Four round gold or black frames
- Painter’s tape, measuring tape, level
- Picture hooks (lightweight)
Directions
- Determine the center point of your wall area. Mark it with a pencil dot.
- Lay out the diamond on the floor first: top print at 12 o’clock, bottom at 6 o’clock, left at 9, right at 3.
- Measure the distance from the center to each frame’s center. For a 5‑inch frame with 3‑inch gaps, distance from the center dot to each frame center is about 5.66 inches (use Pythagorean theorem or just measure visually).
- Transfer the pattern to the wall: start with the top frame, then bottom, then sides.
- Hang each frame, ensuring the diamond is symmetrical. Use level on the side frames to ensure they are at the same height.
- Step back and adjust any tilt.
Pro‑Tip: If you have an odd space near a corner, the diamond can be rotated slightly to fit. I’ve used this layout to fill a 20×20 inch space beside a window beautifully.
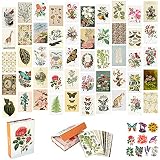
9. A Collection of Mushroom and Fungi Engravings for a Dopamine Kitchen

Pin this happy, dopamine-boosting kitchen art idea!
Dopamine decor is all about injecting joy into your space. Mushroom engravings, with their earthy colors and whimsical shapes, work wonderfully on a bold wall color. They spark conversation and make everyone smile.
What You Need
- 5‑7 mushroom/fungi vintage prints (various sizes)
- Frames in fun colors (pink, yellow, teal, lime green) or stick with one neon color to unify
- Command strips or hooks
- Level, measuring tape
Steps
- Choose a wall that gets good light — maybe a breakfast nook or the wall behind a colorful backsplash.
- Layout the frames on the floor in a clustered arrangement, overlapping corners by a few inches to create a tightly clustered grid.
- Since this is a dopamine look, don’t stress over perfect alignment. Aim for a happy, slightly chaotic feel.
- Use multiple Command strips (one per frame) to attach to wall without damage.
- Once hung, add a mini shelf with a bright canister or a rainbow measuring spoon set to complete the joyful scene.
Pro‑Tip: For a true dopamine kick, paint your kitchen wall a sunny yellow or sage green and let the mushroom prints pop. I’ve found ceramic magnets also hold small frames on metal backsplashes — a genius hack for renters!

Key Takeaways: Your Quick Guide to Styling Kitchen Wall Art with Vintage Botanical Etchings
- Choose vintage botanical etchings for timeless kitchen appeal — Their natural motifs soften the utilitarian feel of kitchens and resist trend cycles. They also work with any cabinet color, from white to sage to navy.
- Scale your art to your wall size — For large blank walls, use oversized single prints or salon walls. For narrow strips, vertical herb prints or shelf‑leaning frames are ideal. Measure before you buy.
- Protect artwork with glass and proper framing — Kitchen heat, steam, and grease can damage prints. Use sealed frames with UV‑protective glass and wipe regularly. Heat‑resistant options exist in decals but for genuine etchings, glass is a must.
- Hang art at the correct height — Center of the art should be 57‑60 inches from the floor (eye level). Above islands or stoves, adjust accordingly to avoid head bumps and direct steam.
- Use Command strips for renters — No‑drill solutions work well for lightweight frames (under 5 pounds). For heavier pieces, use toggle bolts or studs. Lay out arrangements on the floor first or use kraft paper templates.
- Experiment with dopamine decor — Bright walls, quirky subjects like mushrooms or herbs, and colorful frames inject personality. Vintage botanicals adapt to both serene scandi and vibrant maximalist styles.
- Mix mediums for a curated look — Blend framed prints with floating shelves, decals, or even fabric art. Keep a common element (all black‑and‑white, or all subjects from nature) to unify the collection.
People Also Ask About Kitchen Wall Art and Vintage Botanical Etchings
How high should kitchen wall art be hung?
The center of your kitchen wall art should be 57 to 60 inches from the floor — standard eye level for the average person. For hanging above a range hood or island, raise the bottom edge to at least 66 inches to avoid head bumps and steam. Use a measuring tape and mark the top‑hanging hook accordingly. This universal height works for vintage botanical etchings and all framed art types.
What is the best material for kitchen wall art to resist heat and grease?
Framed prints under glass are the best choice for heat and grease resistance, but metal wall art is also excellent. Glass‑backed frames seal out moisture and can be wiped clean with a damp cloth. Avoid raw canvas or open‑backed frames — they absorb odors and stain easily. For extreme heat areas (above stove), choose metal or ceramic wall art specifically labeled “heat resistant” or “oil proof.”
Can I put canvas art in a kitchen?
Yes, but only if you take precautions. Unprotected canvas can warp from steam and absorb grease over time. To use canvas art safely, seal it with a clear acrylic spray varnish designed for kitchens, and ensure it’s hung at least 3 feet from the stove or sink. Better yet, choose high‑quality giclée canvas with a UV‑protective coating. I personally recommend framing canvas under glass for longevity in a culinary space.
How do I style a blank kitchen wall in a rental without damaging the wall?
Use adhesive picture hanging strips (like Command brand) for lightweight frames, or install a floating shelf with adhesive rails. For vintage botanical prints, stick to small to medium frames under 10 pounds. Arrange your artwork in a salon style on the floor first, then transfer to the wall. Another no‑damage option: lean frames on a shelf or countertop. All these methods leave zero holes and are fully reversible.
What size wall art is best for a small kitchen?
For a small kitchen, choose one medium‑sized piece (around 16×20 inches) or a set of three small prints (8×10 each) to avoid clutter. Vertical or narrow prints (8×24 inches) work especially well in tight spaces like beside a window or between cabinets. Avoid oversized art that overwhelms the room. A small framed botanical etching above the sink can be exactly the focal point a compact kitchen needs.
Are vintage botanical etchings suitable for high‑moisture areas like near a sink?
Yes, but only if framed with a moisture barrier (glass backing and sealed frame). Vintage botanical etchings on paper are vulnerable to humidity. Place them at least 12 inches from the sink edge, and consider a small dehumidifier if your kitchen steams up often. Alternatively, buy prints on vinyl or waterproof paper that mimic the vintage look — they come in peel‑and‑stick formats perfect for backsplashes.
What theme of wall art matches sage green kitchen cabinets?
Vintage botanical etchings with soft green, cream, and sepia tones are perfect for sage green cabinets. Black‑and‑white fern or wildflower prints create a sophisticated contrast. For a modern touch, choose gold or black frames. Botanical subjects directly echo the natural hue of sage, making the combination feel intentional and serene. I’ve seen this palette used in magazine shoots repeatedly.
How do I arrange a kitchen gallery wall with vintage prints?
Start with the largest print as the anchor, then layer smaller pieces around it, keeping frames 2‑3 inches apart. Use painter’s tape to mock up the arrangement on the wall before hammering. Mix frame finishes (black, gold, wood) but keep the matting consistent (white or cream). A salon wall works best on a wall at least 5 feet wide — like a long backsplash wall. Center the gallery at 57 inches from the floor.
What is the most affordable way to get vintage botanical kitchen art?
Download free vintage botanical etchings from museum archives (like the Biodiversity Heritage Library) and print them at a local shop or online service. You can get 8×10 prints for as little as $2 each on glossy photo paper. Then frame them in budget‑friendly Amazon frames (often sold in multipacks). This method gives you authentic vintage art for under $20 for a set of three — perfect for a curated look without the antique price.
Do I need to match my kitchen wall art with my kitchen rug?
No, but aim for a cohesive color harmony rather than a full match. Your kitchen wall art (especially vintage botanical etchings) should complement the overall palette — for example, if your rug has navy tones, choose art with blue‑hued botanicals or navy mats. The connection should be subtle: pick one accent color from the rug and echo it in the art’s tones or frame finish. This creates a designer‑inspired look.
Final Thoughts on Styling Your Kitchen with Vintage Botanical Etchings
Your kitchen is the heart of your home — a blank wall is simply an invitation. Vintage botanical etchings offer a timeless way to honor that space with elegance and personality. Whether you choose a symmetrical trio of ferns, a wild salon wall, or a playful mushroom collection, the key is to match the art to your style and your kitchen’s practical needs. Size, framing, and placement matter, but don’t be afraid to experiment. Use the nine ideas in this guide as a starting point, trust your instincts, and remember that even a single framed etching can become the conversation piece your culinary space deserves.
What kitchen wall art style are you most excited to try? Leave a comment below — I’d love to see your blank wall transformation!
Last update on 2026-09-18 at 11:32 / Affiliate links / Images from Amazon Product Advertising API
