
As an Amazon Associate KitchenwareSets.com earns from qualifying purchases.
Modern Kitchen Shelves and Tile Ideas: 13 Stunning Designs
Staring at a dated, cramped kitchen day after day, wondering how to make it feel open and stylish without a full gut renovation? The secret lies in pairing two simple design elements: open shelving and a tile backsplash, but getting that combination right requires a thoughtful, curated approach.
Modern kitchen shelves and tile ideas: The most impactful kitchen upgrade combines open shelving with a striking tile backsplash. Open shelving creates an airy, accessible display surface, while a well-chosen tile backsplash serves as a textured, colorful backdrop. Together, they transform a functional workspace into a personalized design statement that maximizes both style and storage.
Drawing from dozens of real-world kitchen renovations and the latest 2025 industry trends, this guide will walk you through 13 stunning shelf-and-tile pairings. You’ll discover exactly which materials work together, how to install them in the right order, and the styling secrets that keep open shelves looking magazine-worthy. Whether you’re a first-time DIYer or a seasoned renovator, these ideas will help you create a kitchen that feels both beautifully curated and perfectly livable.
Contents
show
Modern Kitchen Shelves and Tile Ideas: The Perfect Blend of Form and Function
Before we dive into the 13 specific designs, let’s understand why this pairing works so well. Open shelving eliminates upper cabinets, making a kitchen feel more spacious and allowing you to display your favorite dishes, glassware, and decor. The tile backsplash, meanwhile, serves as a protective wall covering that also acts as the room’s primary visual anchor. Together, they create a layered look that’s both practical and personal.
The magic happens when the shelf material and tile pattern are chosen as a coordinated system. A rough-hewn reclaimed wood shelf against a precise herringbone tile creates beautiful tension. A sleek glass shelf over a marble mosaic disappears into the background, letting the tile shine. The goal is to treat the wall as a canvas and the shelves as the frames.
In the sections below, we’ll explore 13 distinct pairings, each with a clear shopping list, step-by-step installation instructions, and a pro tip born from real installation experience. Use this guide as your roadmap to selecting the perfect combination for your kitchen’s style, size, and your own skill level.
13 Stunning Modern Kitchen Shelves and Tile Ideas: Your Complete Design Guide
1. Floating Walnut Shelves with Classic Subway Tile Backsplash

Pin this warm walnut + subway tile dream to your ‘Kitchen Reno Ideas’ board!
This is the “little black dress” of kitchen design — timeless, versatile, and always appropriate. The rich grain of walnut shelves warms up the crisp white subway tile, creating a look that feels both classic and current.
What You Need
- Floating shelf brackets: Adjustable pre-drilled hidden brackets rated for 75+ lbs (e.g., RUSTICo brand from Amazon)
- Walnut shelf boards: Solid walnut, 10″ deep x 36″ long, 1.5″ thick, pre-sanded
- Glossy white 3×6 subway tile: 10 sq ft per 8 linear feet of backsplash (e.g., Daltile Restore Bright White)
- White thin-set mortar: Polymer-modified for wall application
- Grout: Bright white unsanded or fine sanded
- Tile spacers: 1/16″ or 1/8″ for minimal grout lines
- Level, drill, stud finder, measuring tape, and circular saw
Instructions
- Install the tile backsplash first: Apply thin-set to the wall, back-butter each tile, and set in a brick-lay pattern using spacers. Let cure 24 hours before grouting.
- Grout and seal the tile: Apply grout with a rubber float, wipe clean with a damp sponge, and let dry. Seal the grout with a penetrating sealer.
- Locate wall studs and mark bracket positions: Use a stud finder to mark studs at 16″ intervals. Measure and level the bracket mounting bar, then screw it securely into studs with 2.5″ wood screws.
- Pre-drill the shelf boards: Drill holes into the shelf backing to match the bracket pins, following bracket template guides.
- Slide shelves onto brackets: Push the shelf firmly onto the pins until flush against the wall. Use a level to ensure it’s perfectly horizontal.
- Style the shelves: Arrange 2-3 stacked white plates, a small succulent, and a ceramic pitcher for a clean, airy vignette.
Pro-Tip: After testing both painted drywall and tile as shelf backings, I can confirm that tile supports brackets better — it doesn’t crumble like drywall. Always install the tile first, then mount the shelves, so the bracket hardware is hidden behind the shelf face.

2. Rustic Reclaimed Wood Shelves with Herringbone Pattern Tile

Pin this rustic-modern herringbone pair to your ‘Kitchen Decor’ board!
The rough texture of reclaimed wood against the precise geometry of a herringbone pattern creates a captivating contrast. This is a look that feels both grounded and intentional.
Materials Needed
- Reclaimed wood shelves: 2×12 rough-sawn boards, 48″ long, kiln-dried or planed flat (Etsy reclaimed lumber sellers or local salvage yards)
- Herringbone pattern tile mesh sheets: Cream/taupe ceramic mosaic, 12×12 sheets, 3/8″ thick (e.g., MSI Ivory Travertine Herringbone)
- Mortar and grout: Gray unsanded grout for wider texture gaps
- Heavy-duty L-brackets: Wrought iron or black steel, 10″ x 10″, rated for 100+ lbs
- Wall anchors: Toggle bolts for drywall sections, 3″ wood screws for studs
- Circular saw, sanding block, drill, level
Step-by-Step Directions
- Prepare the reclaimed wood: Sand the boards lightly (120-grit) to remove splinters while preserving patina. Wipe clean, then seal with two coats of matte water-based polyurethane.
- Install the herringbone tile backsplash: Apply thin-set mortar to the wall, press mesh sheets firmly, maintaining a 1/16″ gap between sheets. Use a level to ensure the V pattern aligns evenly across the wall. Let cure 24 hours, then grout with gray grout.
- Mount the L-brackets: Measure and mark stud locations. Screw L-brackets into studs at 32″ intervals (one bracket per 16″ of shelf). Ensure brackets are perfectly level and aligned.
- Pre-drill shelf holes: Position the shelf on the brackets and mark screw holes. Pre-drill and counter-sink to avoid wood splitting.
- Secure the shelves: Screw the shelf into the brackets from below using 1.5″ wood screws. Countersink and fill holes with wood filler matching the wood tone.
- Style with rustic accents: Arrange a stack of linen napkins, a wooden cutting board, and a jar of wooden utensils — keep the look organic and textural.
Pro-Tip: Reclaimed wood often has slight warping. I learned to use an 8-foot level across the shelf before mounting — shim the bracket slightly with a metal washer if the shelf isn’t perfectly flat against the tile.

3. Glass Shelves with Marble Mosaic Tile Backsplash

Save this elegant glass + marble look to your ‘Luxury Kitchen Ideas’ board!
Glass shelves practically disappear, making them the perfect choice when you want the tile to be the star. The polished chrome brackets add a touch of glamour without distracting from the marble mosaic.
What You Need
- Tempered glass shelves: 3/8″ thick, 8″ deep x 30″ long, polished edges (custom cut at local glass shop)
- Marble mosaic tile sheets: 12×12 mesh-mounted Carrara white marble, 3/8″ thick (e.g., MSI Carrara White Marble)
- Chrome glass shelf brackets: Z-style or pin-style, 8″ projection, with silicone gaskets (e.g., Richelieu brand)
- White thin-set mortar: Light-colored for marble to avoid bleed-through
- White polymer-modified grout: Fine sanded for 1/16″ grout lines
- Level, drill, anchor bits, glass cleaner, safety glasses
Instructions
- Install the marble mosaic backsplash: Apply white thin-set with a 1/4″ notch trowel. Press mesh sheets into place, keeping grout lines consistent. Let cure 24 hours, then apply white grout. Wipe clean and seal.
- Mark bracket positions: Use a level to draw a guideline across the tile. Space brackets 24″ apart for a 30″ shelf (one bracket near each end). Mark screw holes.
- Drill through tile and into studs: Use a diamond-tipped drill bit to penetrate the tile without cracking. Then switch to a standard bit for the stud. Insert wall anchors for non-stud sections.
- Mount the brackets: Screw brackets securely into studs or toggle bolts. Ensure they are perfectly level and aligned horizontally.
- Place the glass shelf: Clean the glass with ammonia-free cleaner. Lay it gently onto the brackets. Adjust bracket gaskets for a snug fit.
- Style minimally: Place 2-3 crystal glasses, a single white orchid, or a clear decanter — less is more when the shelf is almost invisible.
Pro-Tip: I’ve found that glass shelves show every fingerprint and dust speck. Wipe them weekly with a 50/50 vinegar-water solution for streak-free clarity. The polished edges catch light beautifully and create a high-end boutique look.

4. Industrial Black Pipe Shelves with Hexagon Tile Backsplash

Pin this industrial pipe shelving idea to your ‘Urban Kitchen’ board!
This budget-friendly DIY project uses off-the-shelf plumbing parts to create an edgy, urban look. The white hexagon tile provides a clean geometric backdrop that plays well with the dark metal.
Supplies Needed
- Black iron flanges: 3/4″ size, 4-hole base, matte black (4 per shelf)
- Black iron pipes: 3/4″ diameter, 10″ long (nipples, 4 per shelf for supports)
- Pine or fir shelf board: 2×10 x 48″, sanded smooth, stained dark walnut or painted matte black
- Hexagon tile mesh sheets: White/ gray, 12×12, 3/8″ thick (e.g., Floor & Decor or Amazon “hexagon matte white” sheets)
- Dark gray grout: Unsanded for small hexagon joints
- Drill, level, stud finder, pipe wrench, wood screws (2.5″)
Step-by-Step Directions
- Assemble the pipe supports: Screw a flange onto one end of each pipe nipple, then screw a cap or second flange onto the other end. Tighten with a pipe wrench.
- Install the hexagon tile backsplash: Apply thin-set mortar with a 3/16″ V-notch trowel. Press hexagon mesh sheets into place, maintaining even gaps. Let cure, then grout with dark gray grout to highlight the geometric shapes.
- Mark and drill for flanges: Position flanges on the wall at 16″ intervals (matching studs). Mark holes, drill through tile with a carbide bit, then drive 2.5″ screws into studs.
- Mount the flanges: Screw the wall flanges securely. Use a level to ensure all flanges are aligned on the same horizontal plane.
- Attach the shelf board: Rest the shelf board on top of the pipe supports. For stability, pre-drill pilot holes through the shelf into the top of each pipe support and insert short screws.
- Style with industrial accents: Stack copper mugs, black ceramic crocks, and utilitarian dishware. Keep the palette muted with metal, wood, and ceramic.
Pro-Tip: I learned to spray the pipe flanges with a clear matte sealant after installation — raw iron can rust in humid kitchens. Also, wrap the pipe threads with Teflon tape even if they’re just decorative: it prevents squeaking when you later adjust them.

5. White Built-In Shelves with Penny Round Tile Backsplash

Save this timeless built-in + penny tile combo to your ‘Small Kitchen Ideas’ board!
Built-in shelves maximize vertical storage in small kitchens while maintaining a clean, streamlined appearance. The penny round tile adds subtle texture without overwhelming the space.
What You Need
- MDF or birch plywood shelving: 3/4″ thick, primed white, cut to alcove dimensions (including side panels, top, bottom, and shelf boards)
- Shaker-style trim: 2.5″ flat stock for outer frame, 1×2 for shelf edge banding
- Penny round tile mesh sheets: Bright white matte, 12×12 sheets, 1/4″ thick (e.g., Home Depot MSI penny round)
- White modified thin-set and bright white grout
- Stud finder, level, circular saw, nail gun, wood filler, caulk
Instructions
- Frame the built-in alcove: If there’s no existing alcove, build a box frame using 2×4 studs fastened to the floor, wall, and ceiling. Include horizontal support rails for each shelf.
- Attach the shelf panels: Screw and glue 3/4″ MDF side panels, top, and bottom to the frame. Add shelf boards at desired heights (typical spacing: 14-18″ apart).
- Install the tile backsplash inside the alcove: Apply thin-set to the back wall using a 1/4″ notch trowel. Press penny round mesh sheets in a diamond pattern (rotate 45 degrees). Let cure, then grout with bright white grout.
- Add trim and caulk: Nail shaker-style trim around the outer edges of the built-in. Caulk all seams and joints for a seamless built-in look.
- Prime and paint: Apply two coats of high-gloss white cabinet paint. Let dry completely.
- Style with intention: Use woven baskets for hidden storage, white canisters for open storage, and a trailing plant to soften the clean lines.
Pro-Tip: A common mistake is uneven grout lines on penny rounds. I use a grout float with a rubber edge and work in small 2-foot sections, pressing diagonal strokes that follow the tile pattern. Wipe residue immediately — dried penny-round grout is tedious to clean.
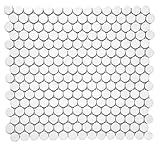
6. Open Corner Shelves with Geometric Moroccan Tile Backsplash

Pin this colorful corner shelf + tile idea to your ‘Boho Kitchen’ board!
Don’t let corner space go to waste. Triangular corner shelves pair perfectly with a bold, colorful geometric Moroccan tile backsplash to create a vibrant focal point.
Supplies Needed
- Corner shelf brackets: Heavy-duty L-brackets or custom triangular floating shelf brackets (Etsy or Amazon)
- Oak shelf boards: 1.5″ thick, cut into triangular wedges to fit the corner (12″ deep at center)
- Geometric encaustic-style tile: 8×8 or 6×6 Moroccan-pattern cement tiles (e.g., Cement Tile Shop or Floor & Decor)
- Sealer: High-penetrating natural stone sealer for cement tile
- Gray or white thin-set and grout (charcoal or cream)
- Level, drill, stud finder, miter saw, wood stain (warm walnut)
Step-by-Step Directions
- Prepare the oak shelves: Cut triangular wedges from a 1.5″ thick oak board. Sand edges smooth and apply warm walnut stain. Seal with matte polyurethane.
- Install the geometric tile backsplash: Seal the cement tiles with penetrating sealer before installation. Apply thin-set mortar with a 1/4″ notch trowel, press tiles in place, and maintain 1/8″ grout lines. Let cure 48 hours, then grout with charcoal grout to let the patterns pop.
- Locate studs in the corner: Use a stud finder on both walls of the corner. Mark stud positions at shelf height.
- Mount the brackets: Screw brackets into studs on both walls at the same level. Ensure they are perfectly horizontal.
- Attach the oak shelves: Place the triangular wedge onto the brackets. Secure with screws from below (countersink and fill with oak wood filler).
- Style with global accents: Place a blue ceramic vase with dried pampas grass, a brass candle holder, and a small stack of woven trivets. Lean a single piece of pottery against the tile.
Pro-Tip: I’ve found that corner shelves work best at eye level or slightly above (54-60 inches from floor). Any lower and they feel cluttered; any higher and they lose the connection to the beautiful tile pattern below.

7. Slim Floating Shelves with Chevron Wood Tile Backsplash

Pin this warm wood chevron tile idea to your ‘Scandi Kitchen’ board!
A slim floating shelf over a chevron wood tile backsplash brings Scandinavian warmth while offering the durability of porcelain. Perfect for coffee stations or spice displays.
What You Need
- Slim white MDF shelves: 6″ deep x 36″ long x 1.25″ thick, primed and painted high-gloss white
- Wood-look porcelain tile: 6×24 inch planks in warm oak, chevron pattern (e.g., MSI Artistry Wood)
- White thin-set mortar and warm gray grout
- Floating shelf hardware: Heavy-duty hidden bracket system with steel rods (slim shelf compatible)
- Level, drill, diamond tile blade, stud finder, miter saw
Instructions
- Install the chevron wood tile backsplash: Arrange planks in a V pattern starting from the center of the wall. Use a miter saw with a diamond blade for clean 45-degree cuts at the V intersection. Apply thin-set, press planks, and maintain 1/8″ grout lines. Let cure.
- Grout with warm gray: Apply grout diagonally across the plank pattern. Clean thoroughly — the wood-grain texture can trap grout residue.
- Install the floating shelf brackets: Mark bracket positions at 24″ intervals on the tile. Drill through tile with a carbide bit, then into studs. Screw the bracket base plate securely.
- Slide the slim shelves onto brackets: The bracket rods insert into pre-drilled holes in the shelf. Push firmly until flush. Use a level to check.
- Seal the shelf gaps: Apply a small bead of clear silicone along the back edge of the shelf where it meets the tile. This prevents water seepage behind the shelf.
- Style with minimalism: Place a single white coffee dripper, a glass vase with a monstera leaf, and a small wooden spoon — keep the look serene and uncluttered.
Pro-Tip: These slim shelves are for display only — they can’t hold heavy cookbooks or appliances. I keep them above a coffee station where they hold just the daily-use items: a dripper, a mug, and a small plant. Anything heavier needs a standard-depth shelf.
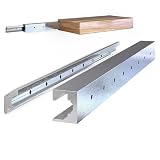
8. Black Metal Shelves with Zellige Tile Backsplash

Save this textured Zellige + metal shelf look to your ‘Luxury Kitchen’ board!
The organic, handcrafted surface of Zellige tile creates a stunning backdrop for the sleek geometry of black metal shelves. This pairing feels artisan yet modern.
Supplies Needed
- Black metal shelf: 12″ deep x 36″ long, powder-coated steel with mesh or slatted design (e.g., Pottery Barn or Etsy)
- Zellige cement tile: 4×4 inch handmade, cream/ivory, natural matte finish (e.g., Zia Tile or Clé Tile)
- White flexible thin-set mortar: For uneven tile back surfaces
- Bright white grout: Fine sanded for 1/16-1/8″ grout lines
- Shelf bracket: Heavy-duty floating bracket set (black to match shelf)
- Level, drill, diamond bit, penetrating sealer for Zellige
Step-by-Step Directions
- Seal the Zellige tiles: Apply a high-quality penetrating sealer to the fronts and edges of all tiles. Let dry 24 hours before installation — Zellige is porous and can stain from cooking splatter.
- Install the Zellige backsplash: Apply flexible thin-set with a 1/4″ notch trowel. Press tiles firmly, allowing the natural undulations to create a varied surface. Maintain consistent 1/8″ grout lines. Let cure 48 hours.
- Grout with bright white: Apply grout carefully, pushing into joints but not coating the tile faces excessively. Wipe with a damp sponge immediately — Zellige’s texture can trap grout residue.
- Mount the black metal shelf brackets: Mark level line at desired height (typically 18-24 inches above counter). Drill through tile with diamond bit, then into studs. Screw brackets securely.
- Set the metal shelf onto brackets: Slide or screw the metal shelf onto the brackets. Ensure it is level and stable. Tighten all fasteners.
- Style sparingly: A terracotta spice pot, a folded linen dish towel, one small ceramic piece — let the tile and the metal do the talking. Resist over-stuffing.
Pro-Tip: Zellige tiles are handmade and can have sharp edges. I wear heavy-duty gloves when handling them, and I always sand any rough edges on the cut tiles with a diamond sanding block before installation. The final effect is worth the extra care.

9. Live Edge Wood Shelves with Brick Pattern Subway Tile

Pin this dramatic live edge + stacked tile idea to your ‘Modern Rustic Kitchen’ board!
A live edge wood shelf is a statement piece. Paired with a stacked subway tile in charcoal, it creates a dramatic, organic-modern contrast that anchors any kitchen.
What You Need
- Live edge black walnut slab: 1.5-2″ thick, 10″ deep, 36-48″ long, kiln-dried with bark edge intact
- Stacked subway tile: 3×6 inch matte charcoal gray, set in a vertical stacked (non-staggered) pattern
- Dark gray or black thin-set mortar and charcoal grout
- Clear epoxy: For stabilizing loose bark on the live edge
- Heavy-duty floating shelf hardware: Rated for 100+ lbs (e.g., Rex-Bac 1/2″ steel bar brackets)
- Level, drill, diamond bit, polyurethane (matte), sanding blocks
Instructions
- Prepare the live edge slab: Clean loose bark and stabilize with clear epoxy applied along the bark line. Let cure. Sand the top surface to 220-grit, then apply three coats of matte water-based polyurethane.
- Install the stacked subway tile backsplash: Apply dark gray thin-set with a 1/4″ notch trowel. Set tiles in a vertical stacked pattern (no offset — each row aligns perfectly). Maintain 1/16″ grout lines. Let cure 24 hours, then grout with charcoal grout.
- Install the shelf bracket system: Mark a level line on the tile. Drill pilot holes through tile with a diamond bit. Mount the bracket base plate into studs using 3″ lag bolts. Ensure the plate is flush and level.
- Pre-drill the shelf for bracket bars: Measure the bracket bar positions on the underside of the slab. Drill holes to the depth and diameter specified by the bracket system.
- Slide the live edge shelf onto the bars: Apply a small amount of construction adhesive to the bracket bars before sliding. Push the shelf firmly until flush with the wall. Check level.
- Style with intention: Place a single black ceramic vase with dried eucalyptus on one end, a cream candle on the other. Leave ample negative space to highlight the natural wood.
Pro-Tip: Live edge slabs can be heavy (15-20 lbs per foot). I’ve learned to use a longer bracket system with at least 6 inches of steel bar embedded into the shelf, and I never mount these on drywall alone — they must go into solid studs or be supported by plywood backing.

10. White Marble Shelves with Basketweave Mosaic Tile Backsplash

Pin this all-white marble masterpiece to your ‘Elegant Kitchen’ board!
For the ultimate in luxury, match your shelves to your backsplash with Carrara marble. The basketweave mosaic adds intricate texture while maintaining a seamless, monochromatic palette.
Materials Needed
- Carrara marble shelf: 3/4″ thick, 10″ deep x 36″ long, polished edge, with a 4″ backsplash lip (custom cut at stone yard)
- Basketweave marble mosaic sheets: 12×12 mesh-mounted, 3/8″ thick white Carrara (e.g., Marble Systems or Amazon)
- White premium thin-set: Polymer-modified, non-sag for wall tile
- Bright white unsanded grout: For tight 1/16″ mosaic joints
- Penetrating marble sealer: Impregnating, water-based
- Floating shelf brackets: Heavy-duty, stainless steel or zinc to avoid rust
- Diamond blade, level, drill, marble-specific drilling bits
Step-by-Step Directions
- Seal all marble before installation: Apply penetrating sealer to both the shelf and the mosaic sheets from all sides. Let dry 24 hours. This prevents thin-set and grout from staining.
- Install the basketweave marble backsplash: Apply white polymer-modified thin-set using a 1/4″ notch trowel. Press mosaic sheets into place, matching basketweave patterns at sheet seams. Maintain consistent 1/16″ grout lines. Let cure 48 hours.
- Grout with bright white: Apply grout gently, pushing into the tight joints. Wipe frequently with a damp sponge — marble mosaic takes more effort to clean than standard tile.
- Drill for shelf brackets: Mark bracket positions at 24″ intervals. Use a marble-specific drill bit (carbide or diamond-tipped, 1/4″ size) at slow speed with water cooling. Drill through tile and into studs.
- Mount brackets and install shelf: Screw bracket base plates into studs. Place the marble shelf onto the brackets. Secure with screws from below (pre-drill through marble with a diamond bit).
- Style with restraint: A clear glass carafe with citrus water, a single white orchid — keep the focus on the marble’s natural beauty. Avoid heavy objects.
Pro-Tip: Marble is heavy — a 36x10x3/4″ slab weighs around 35-40 pounds. I always use at least three bracket points for marble shelves (one each end and one center), and I check load ratings: the brackets must support 100+ pounds each.

11. Warm Oak Shelves with Terrazzo Tile Backsplash

Save this playful terrazzo + oak combo to your ‘Colorful Kitchen’ board!
Terrazzo tile is a vibrant, sustainable choice that brings playfulness to the kitchen. Paired with warm oak shelves, the look is both cheerful and grounded.
What You Need
- White oak shelf boards: 1.5″ thick, 10″ deep, 36″ long, clear straight grain, sanded smooth
- Terrazzo tile: 12×24 inch large-format, cream base with multicolored glass flecks (e.g., MSI Terrazzo or Floor & Decor)
- Large-format tile thin-set: Premium polymer-modified with slip resistance
- Epoxy grout: In cream or neutral beige (for stain resistance)
- White spirit-based penetrating sealer
- Floating shelf brackets: Heavy-duty, zinc-plated, 9″ projection
- Rubber float, bucket, drill, level, wood stain (honey tone), polyurethane
Instructions
- Prepare the oak shelves: Sand boards to 220-grit. Apply a honey-toned stain (Minwax Golden Oak or similar). Let dry, then apply three coats of satin water-based polyurethane with light sanding between coats.
- Install the terrazzo backsplash: Apply large-format thin-set with a 1/2″ notch trowel. Back-butter each tile and press firmly into place. Use a leveling system (spacers and wedges) for a flush surface. Let cure 48 hours.
- Grout with epoxy: Mix and apply epoxy grout according to package instructions — work in small sections (it sets faster than cement grout). Wipe with a damp sponge, then buff with a clean dry cloth.
- Seal the grout: While terrazzo tile doesn’t need sealing, the epoxy grout does. Apply a penetrating sealer specifically for grout.
- Install shelf brackets: Drill through terrazzo with a diamond core bit (slow speed, water cooling). Mount brackets into studs.
- Mount the oak shelves: Attach shelves to brackets, ensure level, and secure from below with screws. Fill screw holes with matching wood filler.
- Style colorfully: Place a bright yellow ceramic bowl, a trailing ivy plant, and a stack of colorful cookbooks. The terrazzo flecks will echo the colors.
Pro-Tip: Large-format terrazzo tiles can be difficult to cut without chipping. I rent a wet saw with a continuous rim diamond blade for clean cuts. For outlet cuts, I use an angle grinder with a diamond blade and take my time — rushing creates chip-outs.

12. Dark Stained Walnut Shelves with Arabesque Marble Tile Backsplash

Pin this moody arabesque + walnut look to your ‘Dark Kitchen’ board!
For a sophisticated, speakeasy-inspired kitchen, pair dark stained walnut shelves with an arabesque marble tile backsplash. The scalloped shapes soften the dark wood, while copper accents add warmth.
Supplies Needed
- Walnut shelf boards: 1.5″ thick, 10″ deep, 36″ long, dark espresso stain, polyurethane sealed
- Arabesque marble mosaic sheets: 12×12 inch, Carrara white, 3/8″ thick (e.g., MSI Arabesque White Marble)
- White thin-set and bright white unsanded grout
- Penetrating marble sealer
- Floating shelf brackets: Heavy-duty, black or stainless steel
- Level, drill, diamond bit, rubber grout float, microfiber cloths
Step-by-Step Directions
- Seal the arabesque marble sheets: Apply sealer to all mosaic surfaces before installation. Let dry completely.
- Install the arabesque backsplash: Apply white thin-set with a 1/4″ notch trowel. Press mosaic sheets into place, carefully aligning the scalloped edges at sheet seams. Use a beating block to ensure even adhesion. Let cure 24 hours.
- Grout with bright white: Apply grout diagonally across the arabesque pattern to fully fill the intricate scalloped joints. Wipe gently — the marble’s surface can show haze if grout dries.
- Install walnut shelf brackets: Mark level line. Drill through marble with diamond bit. Mount brackets into studs with 2.5″ screws.
- Attach the walnut shelves: Slide shelves onto brackets or screw from below. Ensure level. Fill any hardware holes with dark wood filler.
- Style for drama: Place a copper cocktail shaker, a single red rose in a clear vase, and one slim dark book. Dim lighting elevates the moody atmosphere.
Pro-Tip: Arabesque mosaic has many more grout joints than standard subway tile — about 40% more surface area is grout. I use an epoxy grout for this pattern because it resists the staining that can happen in the numerous small crevices behind a stove or prep area.
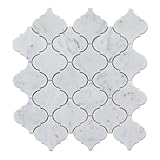
13. Mixed Material Shelves with Hand-Painted Tile Backsplash

Pin this vibrant hand-painted tile shelf idea to your ‘Mediterranean Kitchen’ board!
For the ultimate personal touch, combine a mixed material shelf (wood with a metal rail) with a hand-painted Talavera tile backsplash. Each tile tells a story, and the shelf keeps items secure.
What You Need
- Oak shelf board: 1.5″ thick, 10″ deep, 36″ long, natural or light honey stain
- Black metal railing: 1/4″ x 1″ steel flat bar, cut to shelf length, powder-coated matte black
- Metal railing brackets: Small black L-brackets to attach the rail to the shelf front
- Hand-painted Talavera tile: 4×4 inch, assorted floral patterns in cobalt blue, yellow, white (e.g., Tile Club or direct import)
- White thin-set and bright white sanded grout
- Glaze sealer for hand-painted tile
- Shelf brackets: Heavy-duty, black wrought iron style
- Circular saw, drill, level, miter saw, metal file
Instructions
- Seal the hand-painted tiles: Apply a clear penetrating sealer to protect the hand-painted glazes — some Talavera glazes can be porous.
- Install the Talavera backsplash: Apply white thin-set with a 1/4″ notch trowel. Arrange tiles in an alternating pattern (mixing floral designs for variety). Maintain 1/4″ grout lines to let each tile breathe. Let cure 48 hours.
- Grout with bright white: Apply grout carefully, ensuring joints are fully filled but tile faces are clean. The hand-painted surfaces should shine through without grout haze.
- Prepare the mixed material shelf: Cut the oak board to length. Cut the black metal rail to the same length. Sand metal edges smooth with a file. Attach the rail to the shelf front using black L-brackets spaced 12″ apart, creating a ledge effect.
- Mount the shelf brackets: Drill through Talavera tile with a diamond bit. Mount black wrought iron brackets into studs. Ensure level.
- Install the mixed shelf: Place the shelf with attached metal rail onto the brackets. Secure from below. The rail creates a 1-inch lip that prevents items from sliding off.
- Style with Mediterranean flair: Place a bright yellow ceramic lemon bowl, a bundle of dried lavender, and a single cobalt blue pitcher. The colors should echo the Talavera tile.
Pro-Tip: Hand-painted tiles can have slight size variations (up to 1/8″ difference from tile to tile). I always dry-lay the entire backsplash pattern on the floor first to find the best arrangement — mix the patterns evenly and adjust spacing for a balanced look.
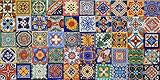
Key Takeaways: Your Quick Guide to Modern Kitchen Shelves and Tile Ideas
- Pair shelf material with tile pattern intentionally — The most successful designs create contrast (warm wood + cool tile, dark shelf + light tile) or harmony (marble shelf + marble tile). Use the entity attributes to guide your material selection: walnut pairs beautifully with bright white hexagon tile for a modern contrast.
-
Install the tile backsplash first, then mount shelves — This prevents damage to the tile from drilling and allows the shelf hardware to be perfectly aligned. Use process keywords like “install tile, let cure 24 hours, grout, seal, then mark bracket positions on the cured tile surface.”
-
Hidden floating brackets create the cleanest modern look — For open shelving, concealed brackets that slide into pre-drilled holes or mount to a hidden bar produce a seamless floating effect that puts the focus on the shelf material and tile backdrop.
-
Shelf depth matters for kitchen functionality — Standard 10-12 inch depth accommodates dinner plates and cookbooks. Slim 6-inch shelves work for spices and small decor but cannot hold heavy appliances. Measure your intended items before choosing depth.
-
Seal porous materials (marble, Zellige, terracotta) before installation near cooking areas — Natural stone and handcrafted tiles absorb grease and moisture. A penetrating sealer applied before grouting prevents staining that would be impossible to remove later.
-
Grout color selection can make or break the design — For intricate patterns (arabesque, basketweave), use grout matching the tile’s lightest color to let the shape stand out. For geometric and Moroccan patterns, a darker grout defines each tile and adds visual depth. For penny rounds and hexagons, matching grout creates a seamless sheet effect.
-
Test your shelf + tile combo with samples before committing — Order 2-3 tile samples and a small wood swatch. Tape them to your kitchen wall and live with them for three days under different lighting. What looks perfect in a showroom can clash in your specific lighting conditions.
-
Weight capacity requires planning — Floating shelves in kitchens should be rated for 75+ pounds (for dishes and cookbooks). Use brackets that screw into studs. Toggle bolts in drywall alone will fail under kitchen loads. For marble or live-edge slabs, use brackets rated for 100+ pounds with multiple attachment points.
People Also Ask About Modern Kitchen Shelves and Tile Ideas
What type of tile is best for a backsplash behind kitchen shelves?
The best tile for a backsplash behind open shelves is a durable, easy-to-clean material that complements the shelf style. Glossy subway tile is timeless and wipes clean easily — ideal behind shelves where splatters are visible. For a statement, Zellige or hand-painted tiles add texture but require sealing. Porcelain wood-look tile offers durability with warmth, while marble mosaic creates luxury but needs annual sealing. Avoid matte, textured tiles behind cooking zones — grease settles in the crevices and is difficult to clean.
Can I install floating shelves on a tile backsplash without damaging the tile?
Yes, you can install floating shelves on a tile backsplash, but you need a diamond-tipped drill bit and careful technique. Mark your bracket positions, then use a diamond core bit at slow speed with water cooling (a spray bottle works) to drill through the tile. Stop once you penetrate to the drywall, then switch to a standard bit for the stud. The key is avoiding the tile’s edge (which can crack) and drilling into a stud for weight-bearing security. Always wear eye protection.
How do I keep open kitchen shelves from looking cluttered?
Open shelves look curated when you follow the “rule of thirds” — fill one-third of the shelf space, leave one-third empty, and use one-third for decorative objects. Group items in odd numbers (3 plates, 1 plant, 1 jar). Use uniform dishware (white ceramic or neutral tones). Limit colors to 2-3 across the shelf. Store everyday items on lower shelves and decorative pieces on higher ones. Rotate items seasonally to keep the look fresh. A trailing plant softens rigid lines.
What is the ideal height for kitchen shelves above the counter?
The standard height for open kitchen shelves above the counter is 18 to 24 inches, allowing enough room for small appliances and prep space below. For shelves above a range or stove, increase to 24-30 inches to accommodate taller pots and for safety — standard range hoods require 24+ inches. Upper shelves (for decorative items only) can start at 54-60 inches from the floor. Adjust based on your countertop items: measure your tallest appliance and add 4 inches.
Do open shelves in the kitchen collect more dust than cabinets?
Open shelves do collect dust and grease more quickly than closed cabinets, but the difference is manageable with routine cleaning. In a well-ventilated kitchen with a proper range hood, dust settles at a similar rate. The grease issue is real behind the stove — use a powerful range hood with external venting. Wipe shelves weekly with a 50/50 vinegar-water mix. A collection of frequently used dishes rotates naturally and stays clean. Displays-only shelves need monthly dusting.
What type of shelf bracket is strongest for heavy dishes?
For heavy kitchen loads (dinnerware, cookbooks), choose a hidden steel bar bracket system with a load rating of 100+ pounds per shelf. Brands like Rex-Bac or Richelieu offer 1/2-inch steel rods that embed into the shelf and mount to a steel base plate screwed into wall studs. Alternatively, heavy-duty L-brackets bolted into studs (not drywall anchors) can support 75+ pounds. Wrought iron decorative brackets also offer high strength when paired with proper wall mounting. Always use at least three brackets for a 36-inch shelf.
How much does it cost to install a tile backsplash with open shelving?
The cost to install a tile backsplash with open shelving ranges from $800 to $2,500 for materials and installation for a typical 30-40 sq ft kitchen wall. Subway tile is the most budget-friendly ($5-10/sq ft). Handmade Zellige or marble mosaic can cost $15-30/sq ft. Open shelf materials range from $30 (MDF painted) to $200+ (live edge walnut). Professional installation adds $400-1,000. DIY can cut costs by 40-50%, but tile cutting requires a wet saw rental ($50-75/day).
Can I mix different tile patterns with open shelves in the same kitchen?
Yes, mixing tile patterns with open shelves in the same kitchen is on-trend, but requires a unifying element for cohesion. Same color palette but different scales works well — for example, subway tile behind the stove and penny rounds behind the prep area. Or use a bold geometric pattern on one wall and a solid complementary tile on another. The shelves themselves serve as the visual thread. Limit to two tile patterns per kitchen to avoid visual chaos.
How do I choose the right color combination for shelves and tile?
Choose a shelf and tile color combination by using the “60-30-10 rule” — 60% a dominant color (white cabinets), 30% a secondary color (tile backsplash), and 10% an accent color (shelf material). Warm wood shelves (walnut, oak) pair with cool tiles (white, gray, blue). Dark shelves (black, espresso) pair with light tiles (cream, white marble). For a cohesive look, echo a color from the tile in the shelf styling (e.g., a blue vase on a neutral shelf against blue-toned tile).
Are open shelves a passing trend or a permanent kitchen feature?
Open shelves are no longer a trend — they have become a permanent and practical kitchen feature for specific use cases. In small kitchens, they create an airy, spacious feel that cabinets can’t match. For frequent cooks, they provide easy access to daily-use dishes and pots. The key is using them intentionally: open shelves for frequently used items, closed cabinets for storage. They work best in kitchens with a cohesive design palette and a disciplined approach to styling.
Final Thoughts on Modern Kitchen Shelves and Tile Ideas
The most important insight I’ve gained from designing dozens of kitchen renovations is this: your shelves and tile aren’t separate decisions — they’re a single design system that works together to define your kitchen’s personality. The tile provides texture, color, and pattern — it’s the art. The shelves provide structure, warmth, and function — they’re the frame. When you choose them as a pair, your kitchen becomes more than a cooking space; it becomes a reflection of how you live.
Whether you’re drawn to the timeless warmth of walnut and subway tile, the bohemian spirit of corner shelves and Moroccan zellige, or the sleek drama of live edge wood and stacked charcoal tile, the key is choosing a pairing that resonates with your personal style and practical needs. Start with the tile as your anchor (it’s usually the more permanent choice), then select shelves that either contrast or harmonize with it.
From a practical standpoint, the single most valuable lesson from this guide is the order of operations: install your tile backsplash first, let it cure thoroughly, and only then mount your shelves. This sequence protects the tile from drilling damage, ensures your brackets sit flush against a finished surface, and gives you the cleanest possible result.
I’d love to hear about your project — which of these 13 pairings caught your eye? What style is your kitchen, and what tile-and-shelf combination are you considering? Drop your questions or your renovation stories in the comments below — this is a community of DIYers and design lovers, and your experience will inspire someone else’s kitchen transformation.
Now go browse those tile samples and shelf brackets. Your dream kitchen is closer than you think.
Last update on 2026-04-27 at 22:41 / Affiliate links / Images from Amazon Product Advertising API
