As an Amazon Associate KitchenwareSets.com earns from qualifying purchases.
13 Genius Open Concept Apartment Ideas To Create Perfect Flow
Struggling to make your open concept apartment feel right? You have all this space, but none of it feels connected.
An open concept layout is a floor plan that combines rooms like the kitchen and living room into one large, multi-functional space. But without walls, it’s easy for your apartment to feel chaotic and undefined, rather than spacious and airy.
The solution is to create “invisible walls” using strategic furniture placement, cohesive color, and layered lighting. This guide will show you 13 genius, designer-approved ideas to create perfect flow and transform your apartment from awkward to amazing.
Why Does My Open Concept Apartment Feel So… Off?
You’re not alone. Many people with open concept apartments struggle with the same issues. Does your furniture seem to float aimlessly in a void? Does the unavoidable mess from the kitchen create constant anxiety in your living space? Without walls to guide the eye and define function, an open layout can quickly feel disjointed, cluttered, and smaller than it actually is. The problem isn’t the layout itself; it’s the lack of clear, visual cues that tell you how to use the space.
An open concept apartment can feel ‘off’ when it lacks defined zones, a cohesive color palette, and proper furniture scale. Without these guiding principles, the space can feel jumbled and chaotic rather than open and airy. The secret is to create intentional “invisible walls” using strategic layout and decor. In this post, we’ll walk you through 13 specific strategies to solve these common problems and finally make your open concept apartment feel like a cohesive, functional, and beautiful home.
13 Genius Open Concept Apartment Ideas To Create Perfect Flow
Creating a harmonious open-plan apartment is about applying fundamental interior design principles of space planning, color theory, and visual balance. Each of the following 13 ideas is a complete playbook, detailing what you need and how to implement it. From simple decor tricks to more involved layouts, you’ll find solutions for every budget, skill level, and renter situation. These are the designer-approved methods to turn your open space into a perfectly flowing home.
1. Define the Living Zone with a Large Area Rug
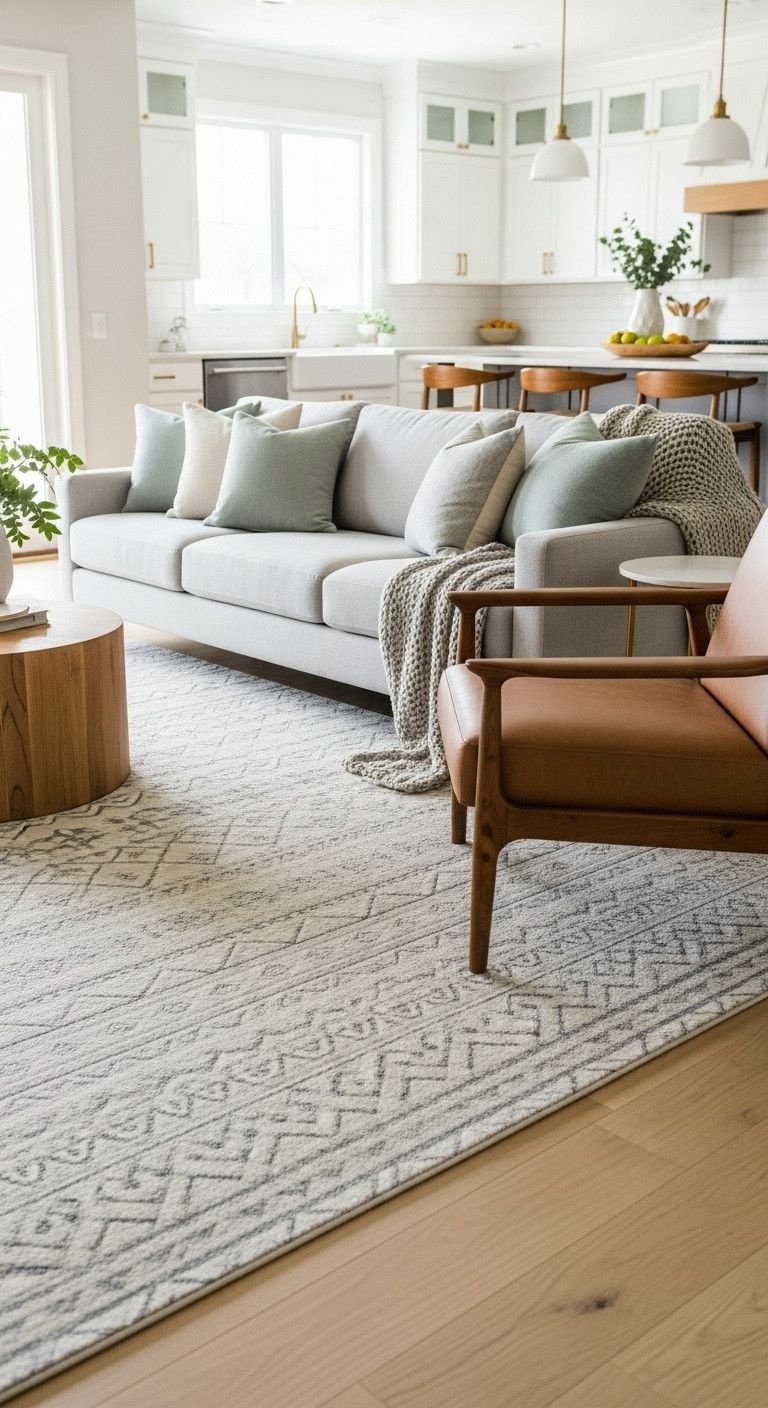
Pin this simple zoning trick to your ‘Apartment Decor’ board!
An area rug is the single most effective tool for creating a defined, cozy living zone within a larger space. It acts as a visual anchor, grounding your furniture and signaling that this specific area is for conversation and relaxation. By grouping your seating on a rug, you create a distinct “room” without a single wall.
Key Elements Needed:
- Large Area Rug: Choose a size (e.g., 8×10 or 9×12) where at least the front legs of all your main seating furniture can rest on it. A low-pile wool or synthetic rug is durable and easy to clean.
- Rug Pad: A non-slip rug pad to keep the rug in place and add cushioning.
- Painter’s Tape: To test the placement and size before committing.
Step-by-Step Implementation:
- Position Your Sofa: Decide on the primary location for your sofa.
- Tape the Outline: Use painter’s tape to mark the ideal rug size on the floor. Ensure it’s large enough to connect your sofa and any accent chairs.
- Lay the Rug: Place the rug pad and then unroll the rug within your taped area.
- Anchor the Furniture: Move your sofa and chairs so their front legs are firmly on the rug by at least 6-8 inches. This visually “groups” them into a single, cohesive zone.
Pro-Tip: In a smaller apartment, letting the rug define the entire seating area can make the space feel larger than trying to squeeze a tiny rug just under a coffee table.
2. Use a Console Table as a Subtle Divider
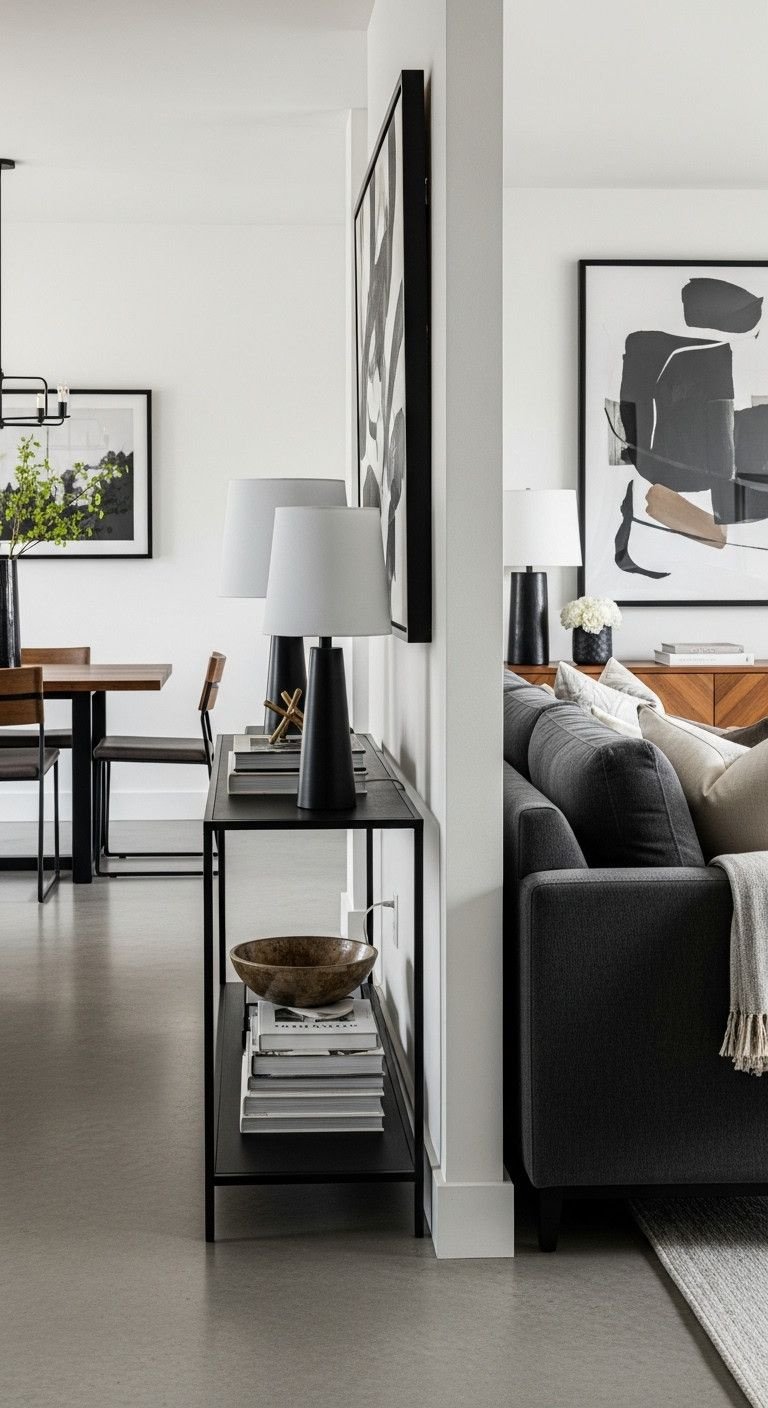
Save this smart furniture tips for creating separation!
A console table placed behind a sofa is a classic interior designer trick for separating a kitchen or dining area from the living room without a wall. It provides a stylish, functional, and subtle visual divider that doesn’t block light or sightlines, while also creating a clear path for foot traffic.
Key Elements Needed:
- Narrow Console Table: Look for a table that is slightly shorter than the height of your sofa’s back and no wider than the sofa itself. Models with open legs feel less bulky.
- Decorative Items: A pair of matching table lamps, a low bowl or tray, and a stack of coffee table books.
- Optional: Two small ottomans or stools that can be tucked underneath for extra seating.
Step-by-Step Implementation:
- Float the Sofa: Pull your sofa away from the wall, creating a primary seating area in the middle of the room.
- Position the Console: Place the console table directly against the back of the sofa. It should look like a single, intentional unit.
- Style Symmetrically: Place a lamp on each end of the table to create balance. Fill the middle space with your books and decorative bowl.
- Define the Path: This setup naturally creates a walkway behind the sofa, clearly directing foot traffic without a wall.
Lesson Learned: Ensure the console table has at least one outlet nearby if you plan to use lamps, or choose a model with built-in USB charging ports for ultimate functionality.
3. Anchor the Space with a Kitchen Island or Peninsula
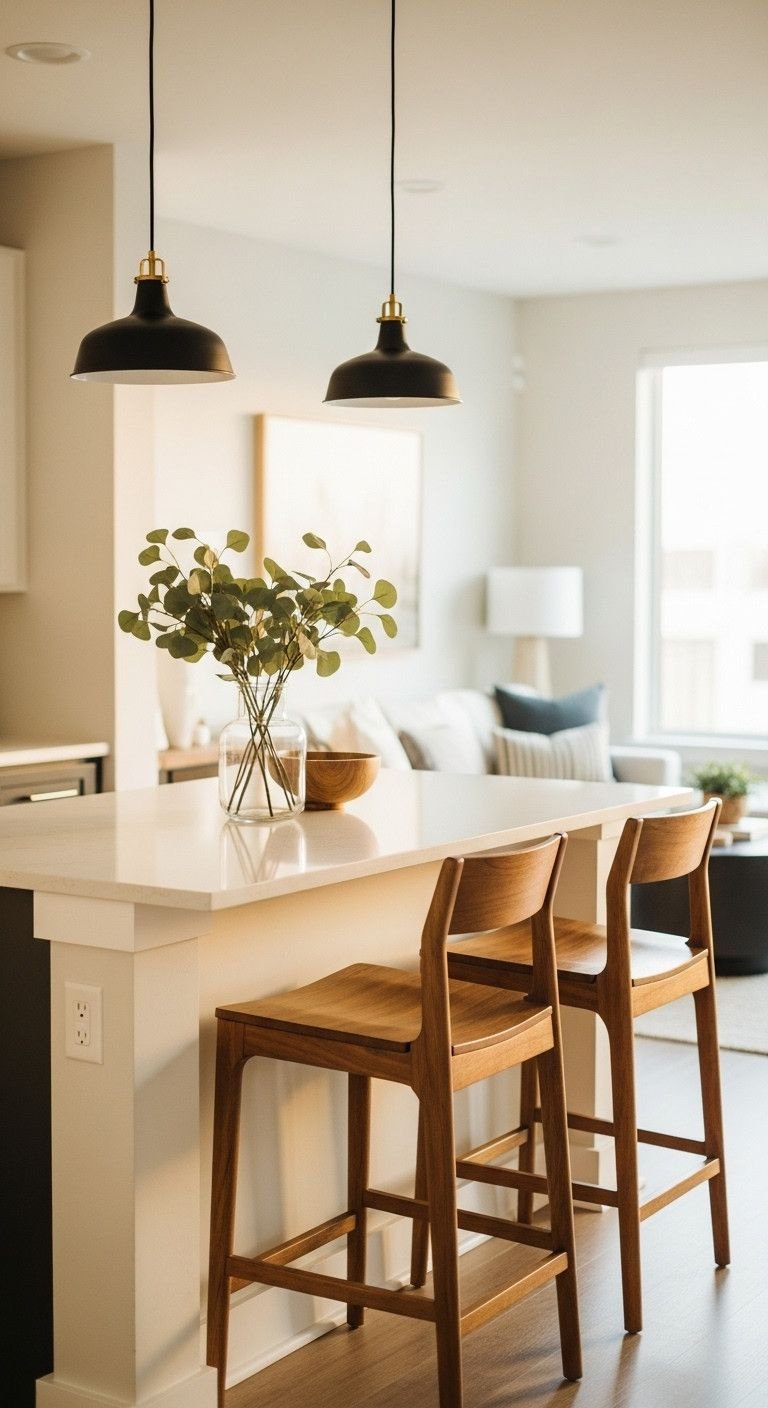
Pin this dream kitchen island idea for your future renovation!
A kitchen island or peninsula is the ultimate anchor and functional hub in an open concept layout. It physically defines the kitchen’s workspace while serving as a social bridge to the living area. With seating, it becomes a casual spot for dining, working, or chatting with guests while you cook.
Key Elements Needed:
- Kitchen Island/Peninsula Unit: Can be a custom-built fixture or a freestanding kitchen cart for a renter-friendly option. Ensure it has an overhang of at least 10-12 inches for comfortable knee space.
- Counter-Height Stools: Choose backless stools to tuck away neatly or low-back stools for more comfort. Measure to ensure they fit the height of your island.
- Statement Pendant Lighting: One large or 2-3 smaller pendant lights to hang above the island, providing task lighting and a visual focal point.
Step-by-Step Implementation:
- Measure for Clearance: Ensure you have at least 36-42 inches of clear walkway space on all functional sides of the island. A peninsula, which is attached to a wall on one side, is often better for smaller apartments.
- Center the Fixture: Position the island to create a natural boundary for the kitchen’s work zone. It should feel like the central hub of the entire open space.
- Install Lighting: Hang pendant lights so the bottom is 30-36 inches above the countertop. This illuminates the workspace without blocking sightlines.
- Add Seating: Place your counter stools along the overhang. This creates a casual dining spot and social hub, inviting interaction between the kitchen and living areas.
Pro-Tip: Before committing to a built-in island, use a large cardboard box or painter’s tape to mock up its size and position. Live with it for a few days to test the flow.
4. Unify with a Cohesive 3-Color Palette
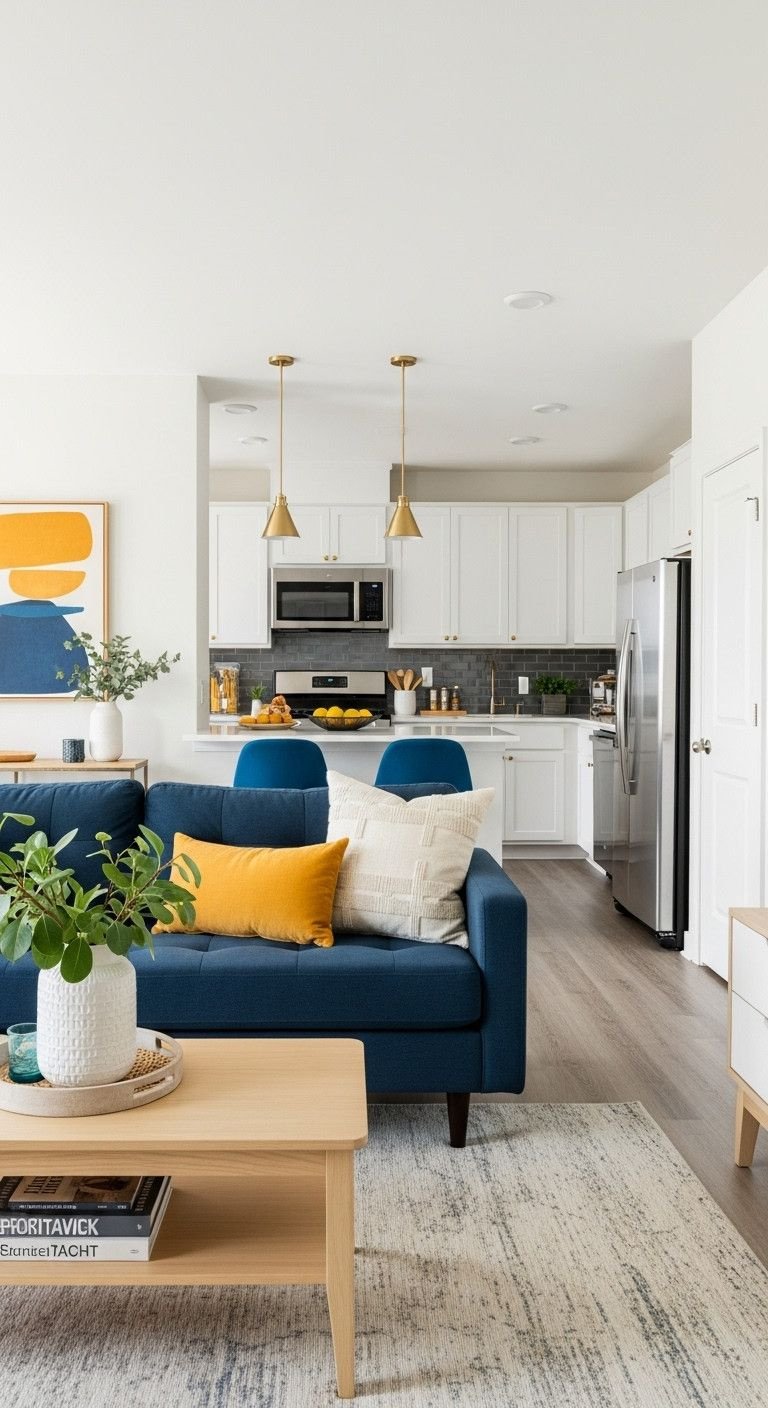
Save this color palette inspiration for a cohesive home!
In an open concept space, a consistent color palette is crucial for creating a cohesive, unified look. The 60/30/10 rule is a simple but powerful design principle that prevents the space from feeling chaotic. By repeating colors across different zones, you create a visual thread that ties everything together.
Key Elements Needed:
- Primary Color (60%): A light neutral paint for all walls (e.g., soft white, light gray, warm beige).
- Secondary Color (30%): A richer color for large furniture pieces, rugs, or kitchen cabinets (e.g., navy blue, olive green, charcoal gray).
- Accent Color (10%): A bright, bold color for small decor items (e.g., mustard yellow, terracotta, teal).
- Paint Swatches & Fabric Samples: To test colors in your space’s lighting.
Step-by-Step Implementation:
- Choose Your Hero: Start by selecting your accent color, perhaps from a piece of art or a pillow you love.
- Find a Supporting Partner: Select a secondary color that complements your accent. This will be for big items like your sofa.
- Select a Neutral Backdrop: Choose a primary neutral wall color that makes your other two colors pop. Paint the entire open concept area this one color to create a seamless canvas.
- Sprinkle the Accent: Distribute your accent color in small doses across all zones—a throw pillow in the living area, a vase on the kitchen island, a hand towel in the kitchen. This repetition is what ties the whole space together.
Pro-Tip: Use an online color palette generator. Upload a photo you love, and it will extract the primary colors, giving you a designer-approved palette to start with.
5. Create Seamless Flow with Consistent Flooring
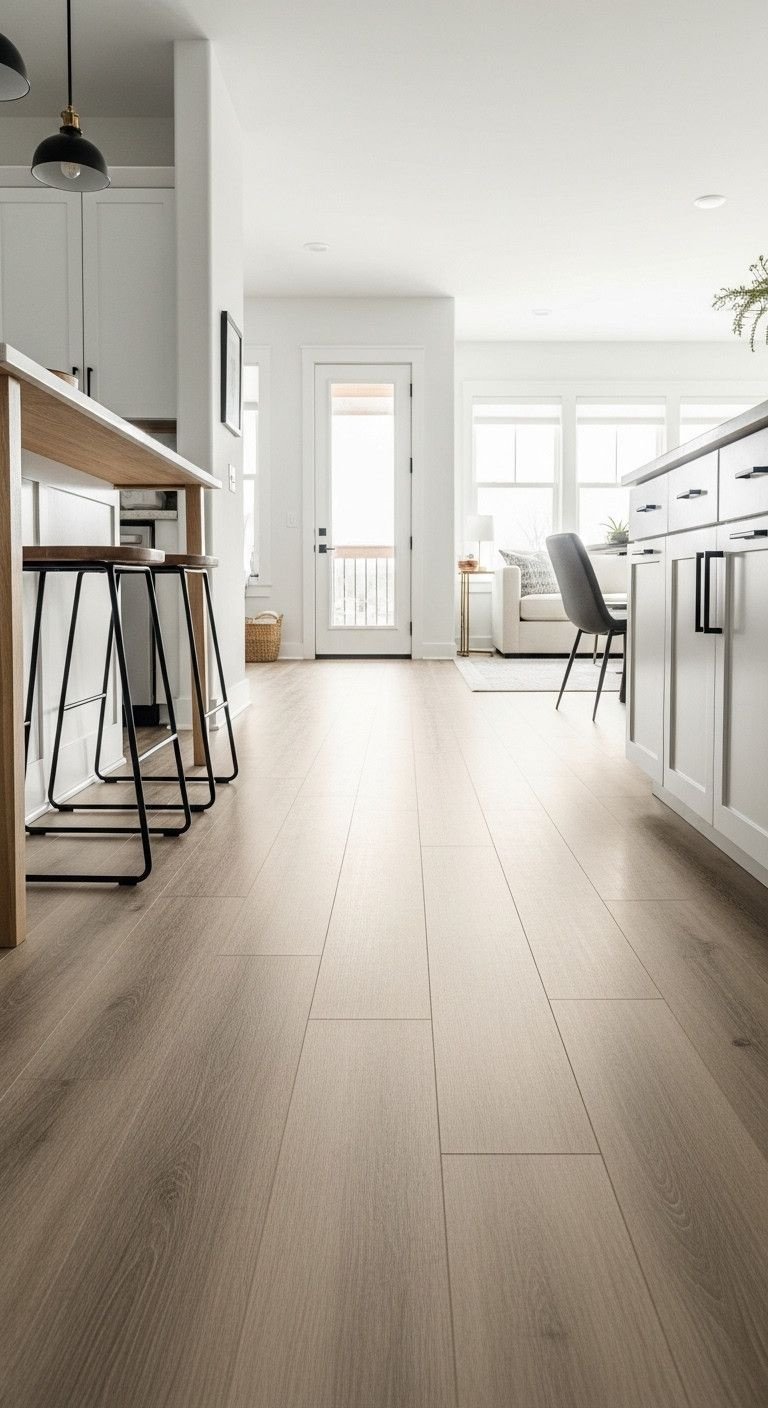
Pin this essential tip for making any open space feel bigger!
Using one type of flooring throughout the entire open concept area is the number one rule for creating flow and making a space feel larger. An unbroken floor creates a seamless visual foundation, tricking the eye into seeing one large, expansive room instead of several chopped-up zones.
Key Elements Needed:
- Continuous Flooring Material: Choose one type of flooring for the entire space.
- Good: Engineered Hardwood (durable but can be damaged by water).
- Better: Laminate (scratch-resistant but not waterproof).
- Best: Luxury Vinyl Plank (LVP) (highly durable, 100% waterproof, and mimics wood beautifully).
- Matching Transition Strips: Only needed if connecting to a different flooring type in a hallway or bathroom.
Step-by-Step Implementation:
- Choose One Material: Select a single flooring material that can handle the demands of both the kitchen (spills, traffic) and the living room (comfort, style). LVP is the top choice for this.
- Run Planks Longways: Install the flooring planks so they run parallel to the longest wall in the room. This enhances the feeling of length and spaciousness.
- Eliminate Thresholds: Avoid using transition strips or thresholds between the kitchen and living areas. A single, unbroken floor is the goal.
- Define with Rugs: Once the continuous floor is down, use area rugs (as in Idea #1) to define the different zones on top of this cohesive base.
Lesson Learned: Using different flooring (like tile in the kitchen and wood in the living room) visually chops the space in half and makes it feel smaller. A single flooring type is the number one rule for creating flow.
6. Float Your Furniture Away From the Walls
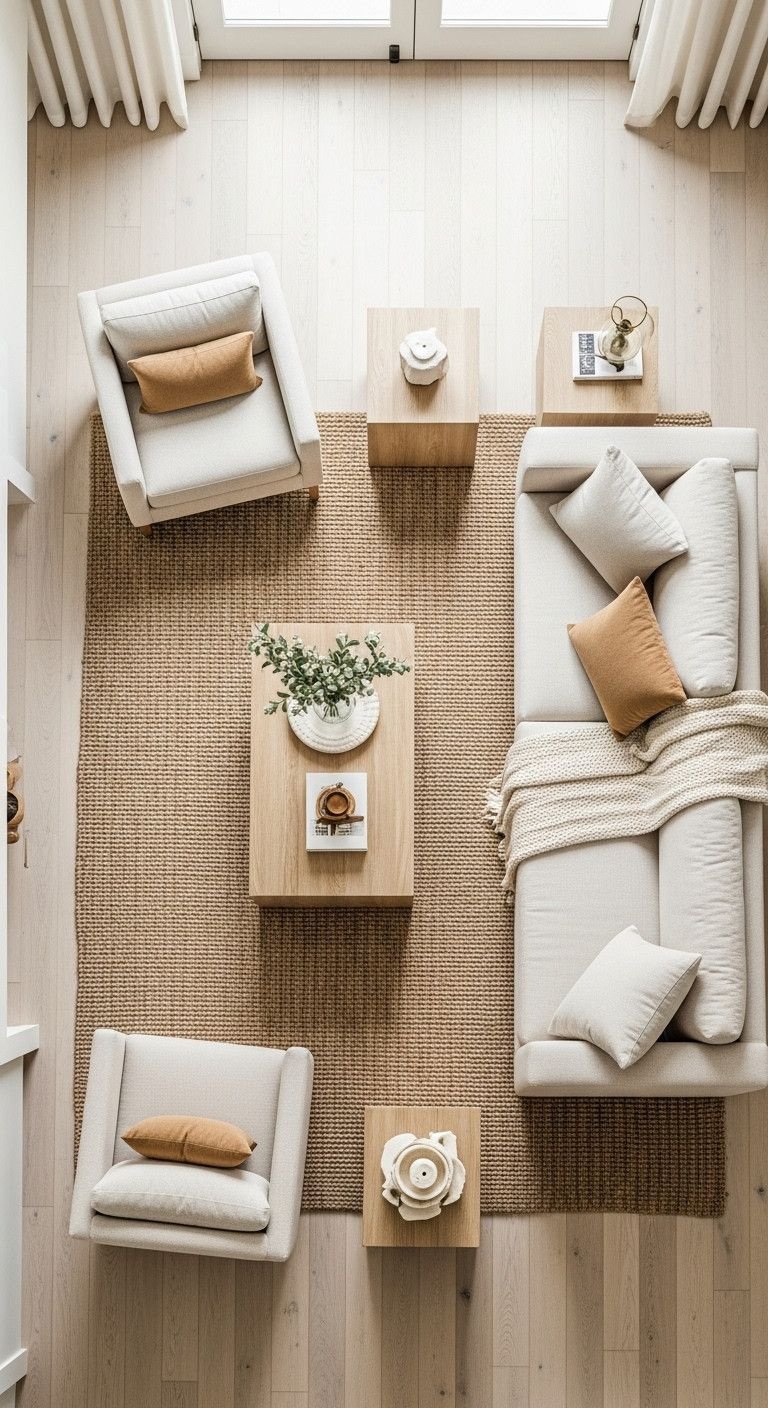
Save this layout secret that interior designers use!
A common mistake in open concept decorating is pushing all the furniture against the walls. This creates an awkward empty space in the middle and poor conversation areas. Instead, “float” your furniture by creating an intimate grouping in the center of a zone, which creates better flow and a more intentional design.
Key Elements Needed:
- Your Existing Furniture: Sofa, accent chairs, coffee table.
- An Area Rug: To act as the anchor for your floating arrangement.
- Felt Furniture Sliders: To make moving heavy pieces easy and protect your floors.
Step-by-Step Implementation:
- Find Your Anchor: First, place your area rug in the desired location for your living zone. This is your foundation.
- Pull the Sofa Off the Wall: Move your largest piece, the sofa, onto the rug. Even pulling it off the wall by 6-12 inches creates breathing room and makes the space feel more intentional.
- Create a Conversation Group: Arrange your accent chairs opposite or adjacent to the sofa, with all pieces oriented towards a central point (like the coffee table). The ideal distance between seats for conversation is about 8 feet.
- Establish Traffic Paths: Ensure you leave clear, intuitive walkways (at least 30-36 inches wide) around your furniture grouping. This is the “flow” everyone talks about.
Pro-Tip: If the back of your sofa is now exposed, this is the perfect opportunity to use Idea #2 and place a console table behind it.
7. Layer Your Lighting for Mood and Function
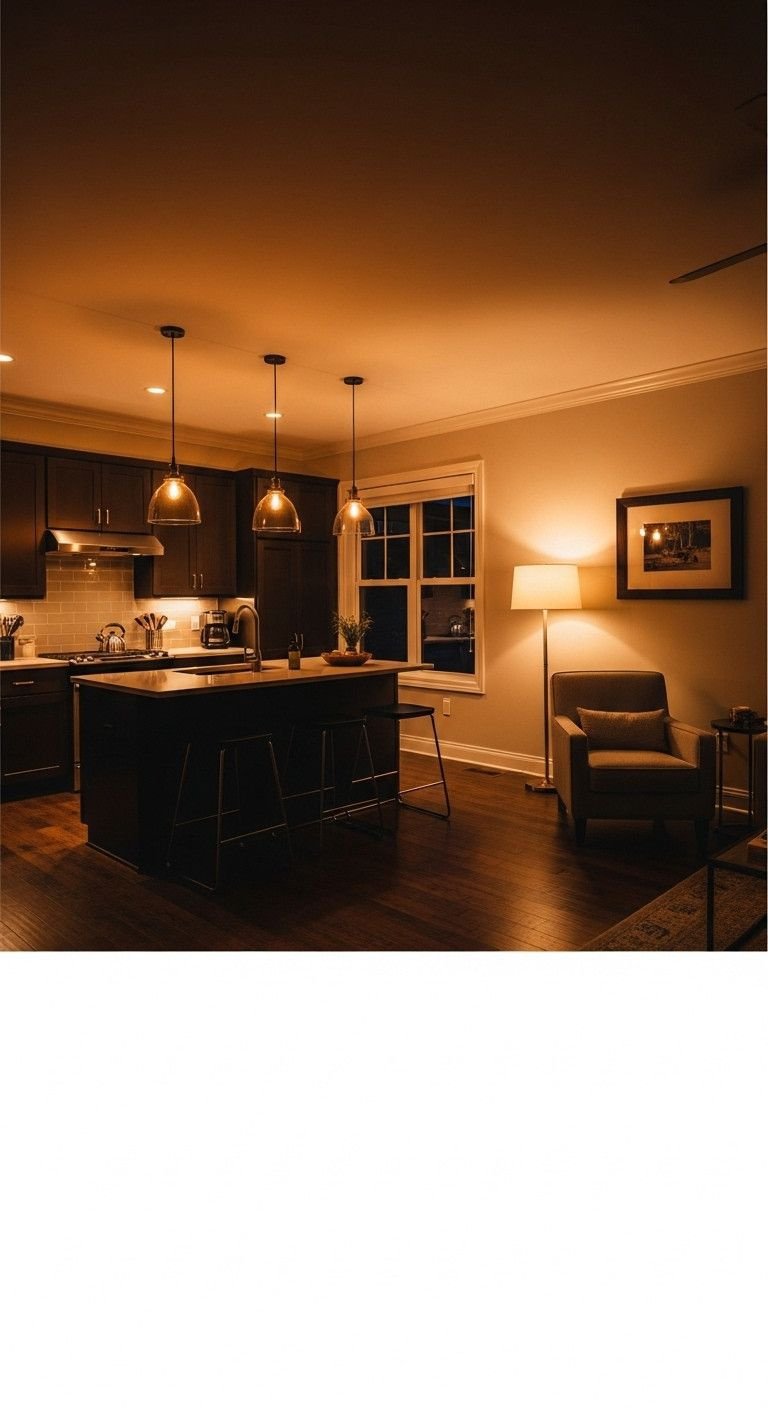
Pin this lighting guide to create the perfect ambiance!
A single, harsh overhead light is the enemy of a cozy open concept space. A layered lighting design, which combines ambient (overall), task (functional), and accent (dramatic) lighting, is essential for creating both mood and functionality. It allows you to tailor the light to any activity, from bright food prep to a dim movie night.
Key Elements Needed:
- Ambient Lighting (Overall): Recessed ceiling lights, a central flush-mount fixture, or track lighting on dimmer switches.
- Task Lighting (For Activities): Pendant lights over the kitchen island/peninsula, under-cabinet LED strips for counter prep, and a floor or table lamp for reading in the living area.
- Accent Lighting (For Drama): A spotlight aimed at a piece of art, an uplight behind a large plant, or picture lights over a bookcase.
Step-by-Step Implementation:
- Start with the Foundation (Ambient): Ensure the entire space has good, dimmable overhead lighting. This is your general illumination. If you’re a renter, swap the generic “boob light” for a modern flush mount or semi-flush mount fixture.
- Light Your Tasks: Identify activity zones. Add focused lighting directly where you need it: pendants over the island for cooking prep and dining, and a reading lamp next to your favorite chair. Under-cabinet lighting is a game-changer in the kitchen.
- Add the Sparkle (Accent): Choose one or two features in your space to highlight. Aim a small, focused light at your favorite piece of art or the texture on a brick wall. This creates depth and visual interest.
- Use Dimmers Everywhere: Install dimmer switches on as many lights as possible. This gives you complete control to transition from bright and functional to low and cozy.
Lesson Learned: A common mistake is using only overhead lighting, which casts unflattering shadows. The key to a high-end look is having light sources at different heights.
8. Employ Multi-Functional Storage Furniture
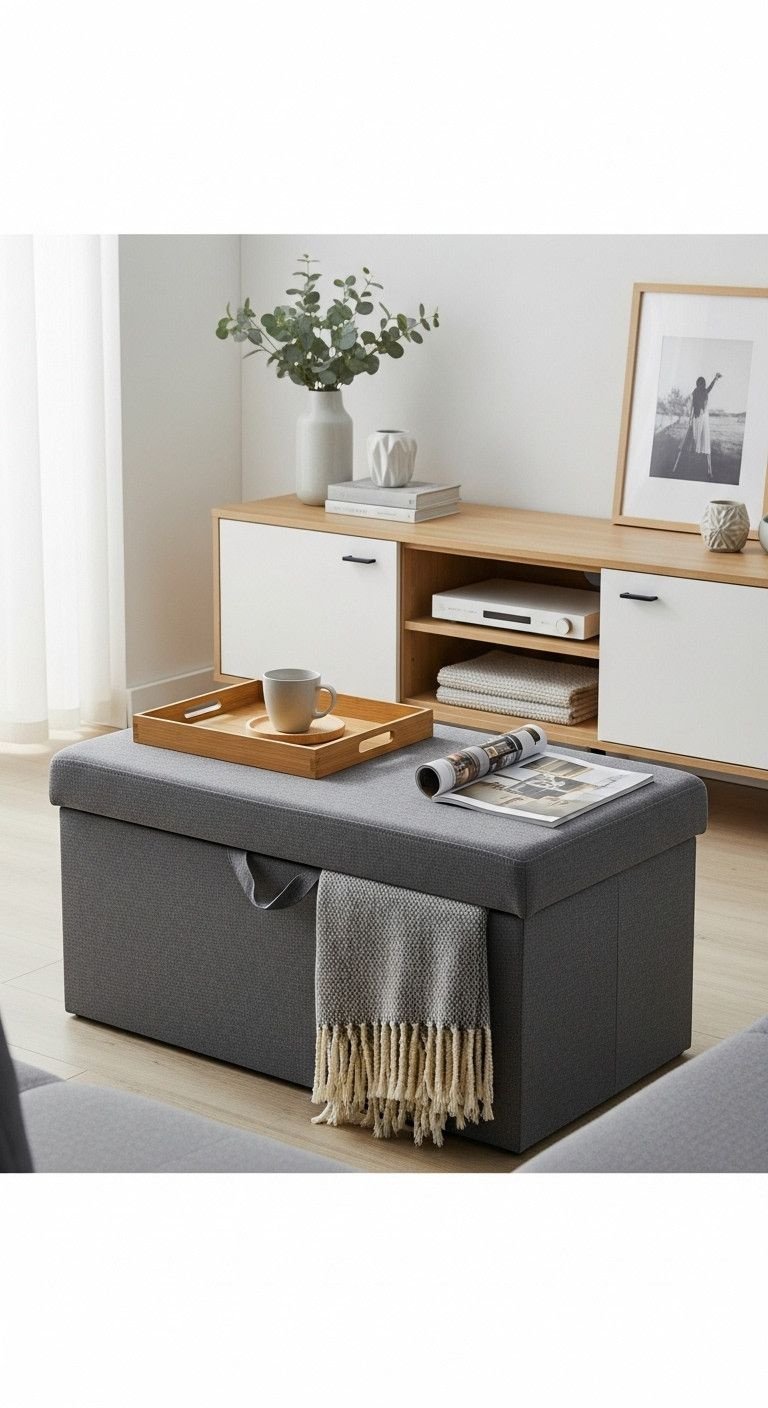
Save this clutter-busting idea for small spaces!
In an open concept apartment, clutter is always on display. Multi-functional furniture with hidden storage is your best defense against visual mess. These clever pieces work double-duty, providing the function you need while concealing the items you don’t want to see.
Key Elements Needed:
- Storage Ottoman or Coffee Table: An ottoman that opens to store blankets and games, or a coffee table with drawers or a lift-top.
- Media Unit with Doors: A TV stand with closed cabinets is essential for hiding messy cables, consoles, and media.
- Kitchen Island with Cabinets: If you have an island, prioritize one with deep drawers or cabinets on the living room side for extra storage.
- Sideboard or Buffet: Can be used in the dining area to store dishes, linens, and other items.
Step-by-Step Implementation:
- Assess Your Clutter: Identify your primary sources of visual mess. Is it blankets, kids’ toys, mail, or electronics?
- Replace a Key Piece: Swap a standard coffee table for a storage ottoman. This one change can hide multiple bulky items. Add a decorative tray on top to provide a hard surface for drinks.
- Conceal Electronics: Choose a media console that is at least as wide as your TV and has doors, not open shelves. This creates a clean, streamlined look.
- Create a ‘Drop Zone’: Use a stylish sideboard or a small cabinet with doors near the entrance to your apartment to hide mail, keys, and bags, preventing them from landing on the kitchen counter.
Pro-Tip: In an open concept, furniture with legs makes a space feel larger because you can see the floor underneath. Look for storage pieces that are elevated on legs for the best of both worlds.
9. Go Vertical to Maximize Wall Space
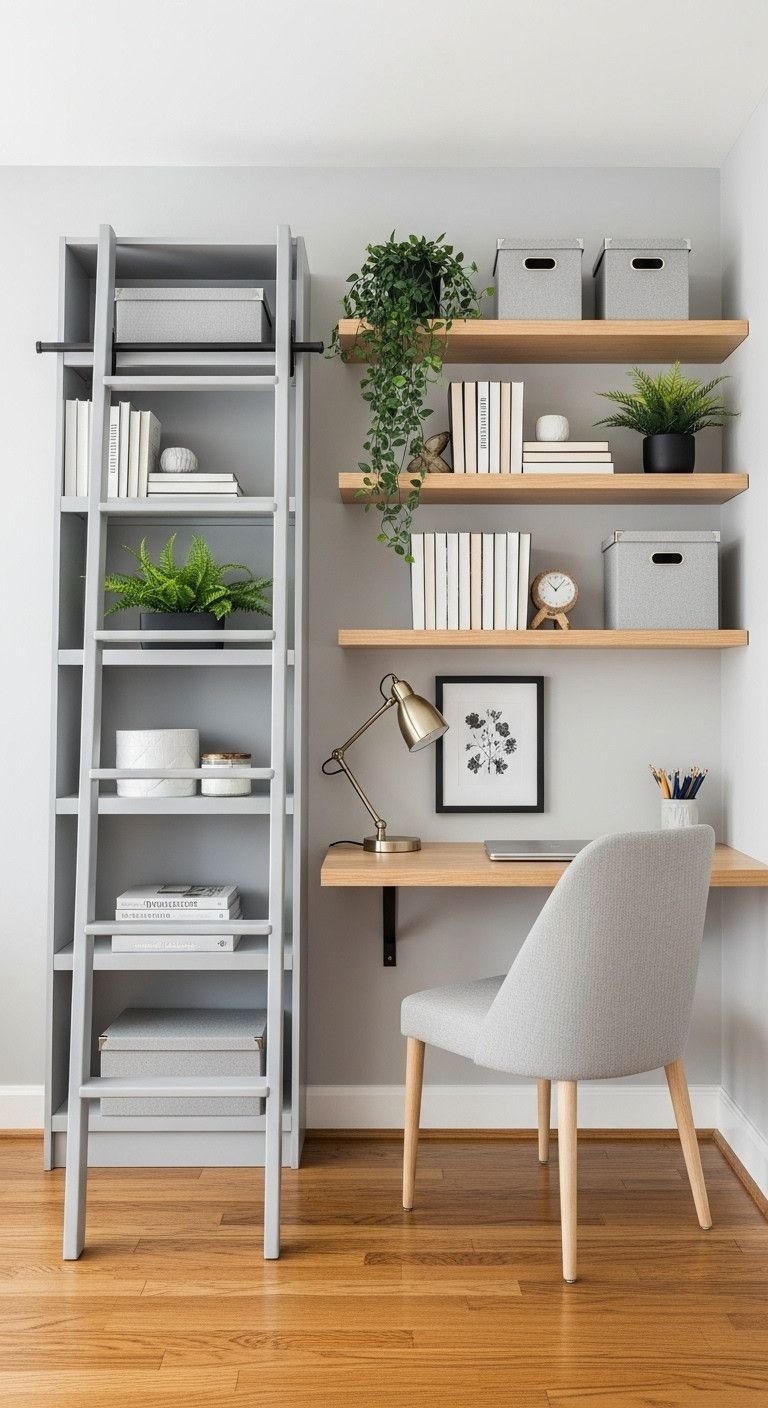
Pin this space-saving trick for any small room!
When floor space is limited, the only way to go is up. Using vertical storage draws the eye upward, making ceilings feel higher and the room feel larger. It’s a smart way to add much-needed storage and display space without taking up a large footprint.
Materials Needed:
- Tall, Narrow Bookcase: A ladder or étagère-style bookcase has a small footprint but offers significant vertical storage.
- Floating Shelves: Choose shelves that match your decor. Thick, rustic wood or sleek, white shelves are popular.
- Heavy-Duty Wall Anchors: Crucial for safely mounting shelves, especially if you can’t drill into a stud.
- Stud Finder & Level: Essential tools for proper installation.
Step-by-Step Directions:
- Identify Your Vertical Real Estate: Look for empty wall space above your TV, desk, or sofa, or in a narrow corner.
- Draw the Eye Up: Install a tall bookcase or a series of floating shelves stacked vertically. This encourages the eye to travel upward, making the ceiling feel higher.
- Install Floating Shelves: Use a stud finder to locate studs for the most secure installation. If no studs are available, use appropriate heavy-duty drywall anchors. Use a level to ensure they are perfectly straight.
- Style with Intention: Mix books, plants, and decorative objects on your shelves. Don’t overcrowd them. Leave some empty space to avoid a cluttered look. Group items in odd numbers (1, 3, 5) for a balanced composition.
Lesson Learned: Always check your lease agreement before drilling holes. For renters, tall, freestanding bookcases are a better option than wall-mounted shelves.
10. Designate an “Entryway” Zone, Even Without a Foyer
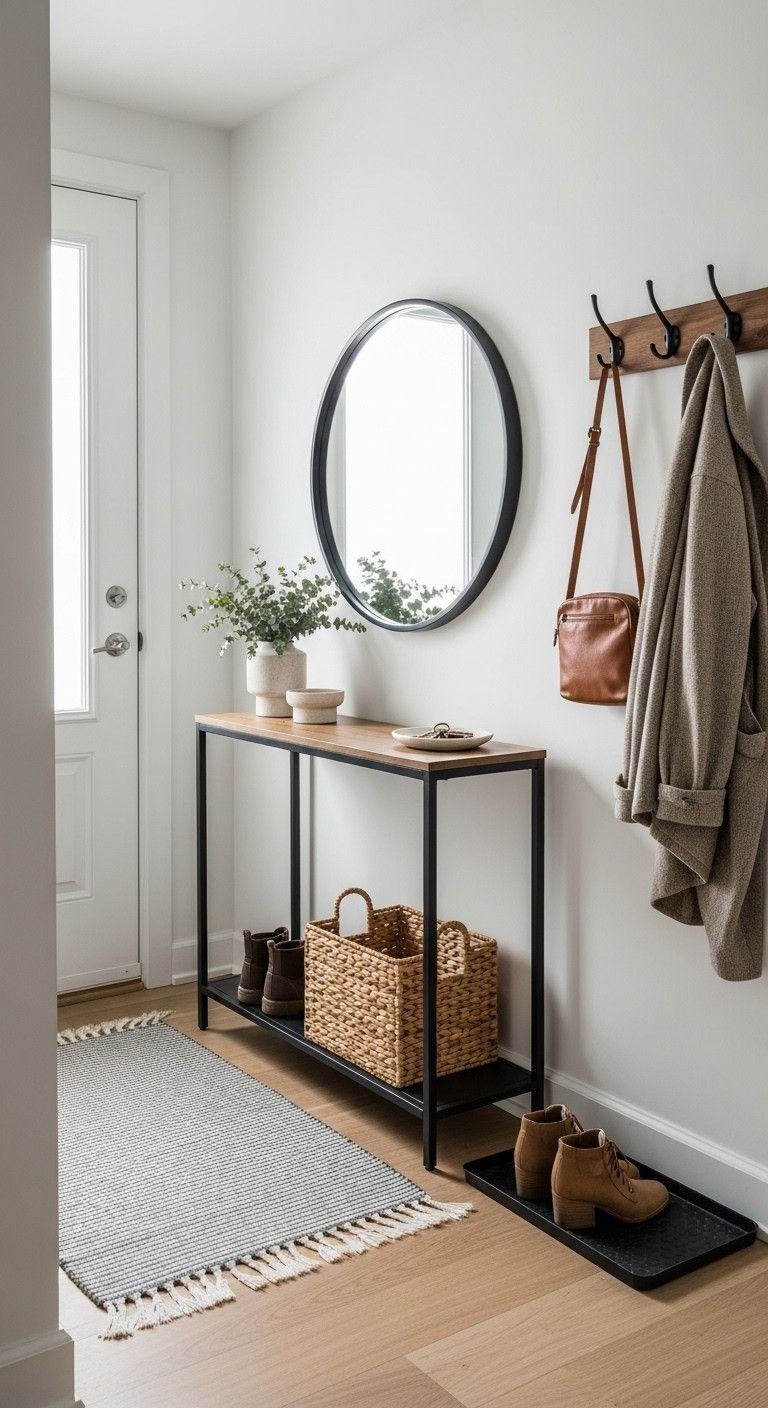
Save this genius idea for creating a proper entrance!
One of the biggest challenges in open concept apartments is the lack of a formal entryway. This often leads to the kitchen counter becoming a dumping ground for keys, mail, and bags. By creating a designated “drop zone” right by the door, you can contain the clutter and create a welcoming transition into your home.
Key Elements Needed:
- A Small Runner Rug: To visually define the entryway floor space. Choose a durable, low-pile material.
- A Slim Piece of Furniture: A narrow console table, a small bench, or even just a floating shelf.
- Wall-Mounted Storage: A mirror to check your reflection on the way out, and a set of hooks for keys, bags, and a light jacket.
- A Basket or Tray: To contain shoes or mail.
Step-by-Step Implementation:
- Claim Your Wall: Identify the small section of wall immediately next to your front door. This is your canvas.
- Define the Floor: Lay down a runner rug (e.g., 2’x5′) to create a visual boundary. This signals “you are now in the entryway.”
- Add a Surface: Place your slim console table or bench against the wall. This is your “drop zone.”
- Go Vertical: Above the table, hang a mirror to bounce light and create a sense of space. Next to it, install your hooks. Place a small bowl on the table for keys and a basket underneath for shoes.
Pro-Tip: This designated zone prevents the kitchen island from becoming the default dumping ground for everything you carry in the door, keeping your main living area clutter-free.
11. Add Warmth and Absorb Sound with Natural Textures
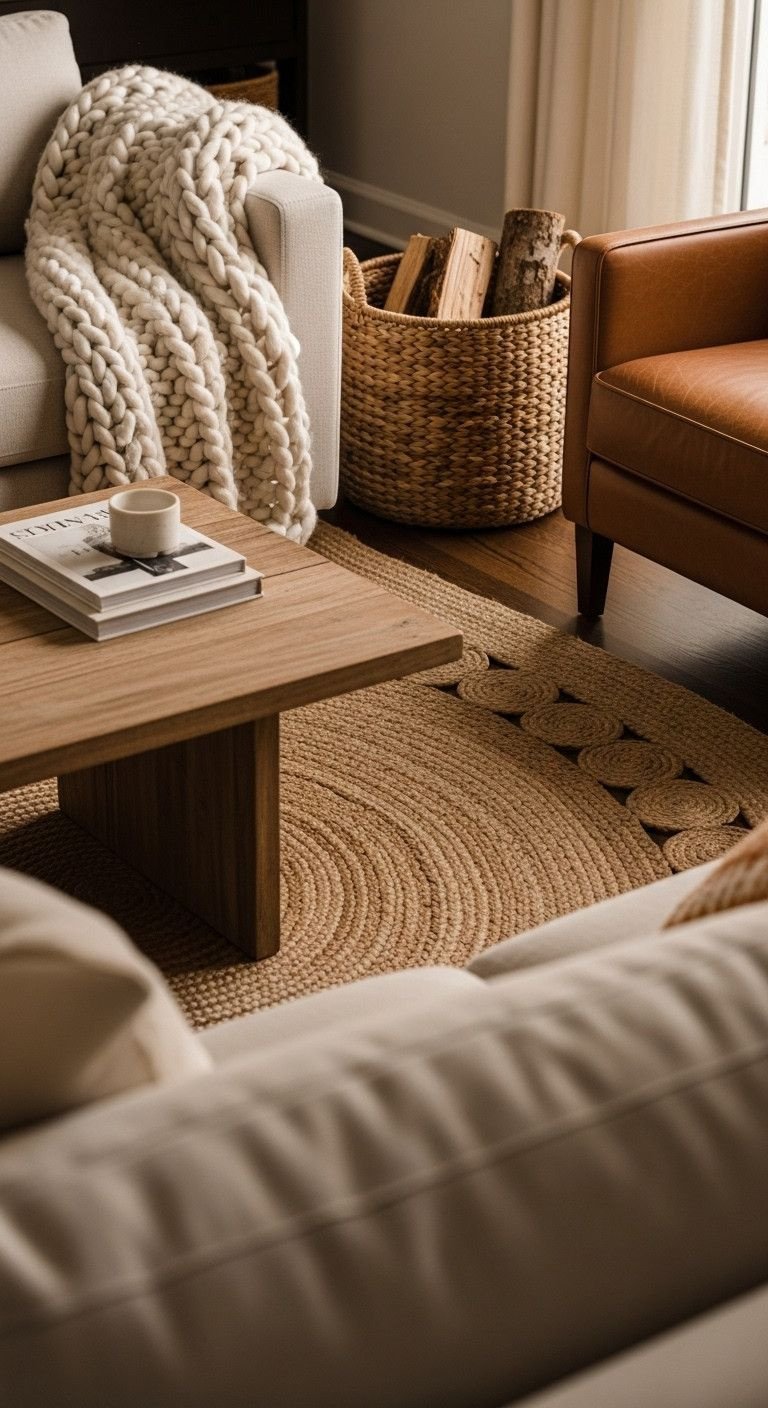
Pin this tip for making any open concept feel cozy!
Open concept layouts can sometimes feel cold or create an echo due to all the hard surfaces. The solution is to layer in a variety of natural textures. Soft materials absorb sound and add visual warmth, making the space feel cozier, quieter, and more inviting.
Key Elements Needed:
- Textiles: A chunky knit throw blanket, velvet or linen pillow covers, and thick curtains.
- Natural Fibers: A jute or wool area rug, woven baskets for storage, and rattan or cane furniture accents.
- Wood and Leather: A live-edge wood coffee table, a worn leather armchair, or wooden picture frames.
- Plants: Large and small plants add natural texture and life.
Step-by-Step Implementation:
- Start with the Floor: Swap a thin, synthetic rug for a thicker wool or natural jute rug. This is your biggest sound-absorber.
- Soften the Seating: Drape a chunky or faux fur throw over your sofa. Add pillows in a variety of materials—velvet, boucle, linen, or knit.
- Treat the Windows: Hang curtains, even if you have blinds. Fabric panels are excellent at absorbing sound that bounces off glass.
- Mix in Natural Elements: Incorporate items made of wood, rattan, and leather throughout the space. Place a large woven basket next to the sofa to hold extra blankets.
Lesson Learned: Hard surfaces (floors, windows, bare walls) reflect sound, creating an echo. Soft surfaces absorb it. The more soft textures you add, the cozier and quieter your open concept will feel.
12. Use Mirrors to Create an Illusion of Depth
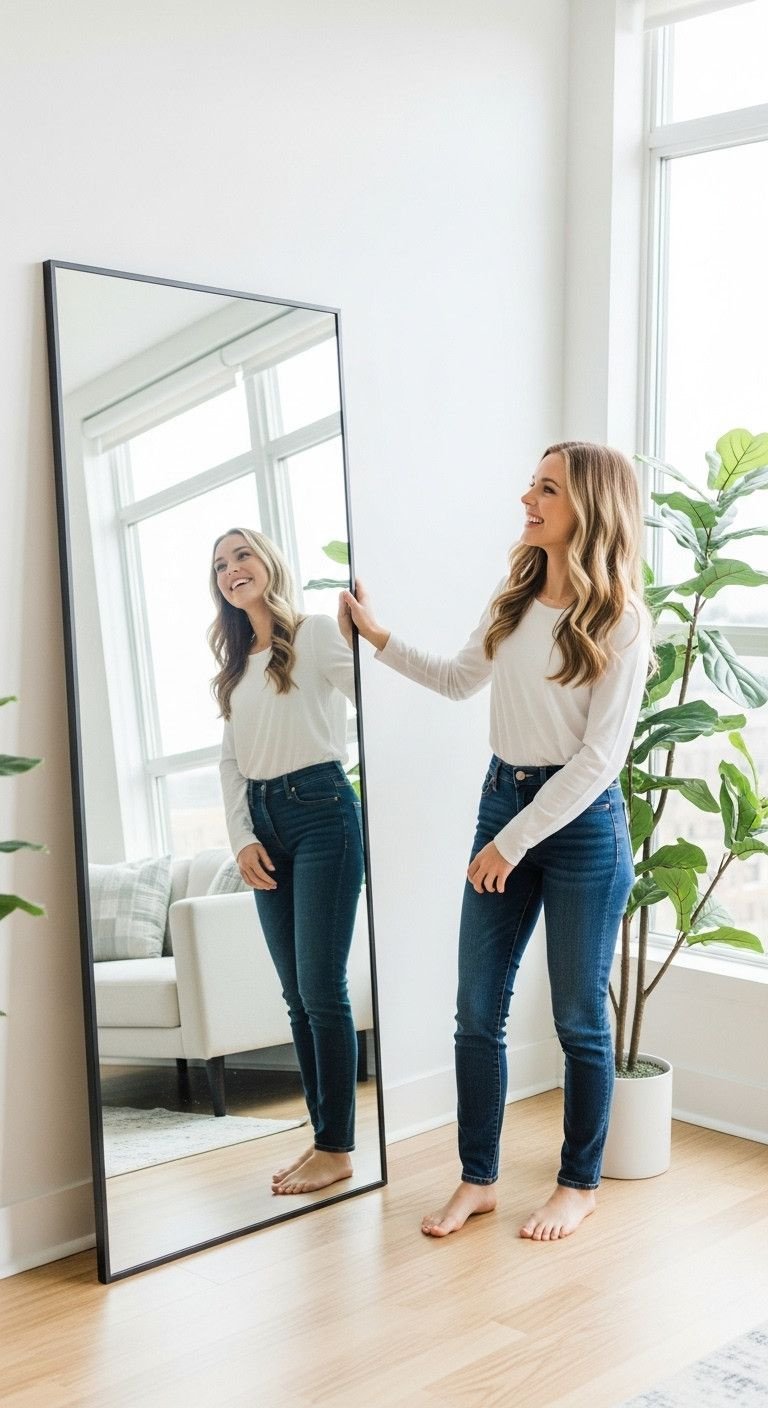
Save this classic designer trick for making small spaces feel huge!
Mirrors are a small apartment’s best friend. By strategically placing a large mirror, you can amplify natural light and create a powerful illusion of depth, making your open concept feel significantly larger and brighter than it actually is.
Key Elements Needed:
- A Large Mirror: A floor-length mirror (at least 65″ tall) or a large round or rectangular wall mirror (30″+ diameter). Choose a simple frame that matches your decor.
- Heavy-Duty Hanging Hardware: If wall-mounting, use hardware rated for the weight of your mirror.
- Felt Pads: To protect the wall if you choose to lean the mirror.
Step-by-Step Implementation:
- Identify Your Light Source: Find the largest window in your open concept space. The best place for a mirror is on the wall opposite or adjacent to this window to catch and reflect the most light.
- Choose Your Reflection: Position the mirror so it reflects something beautiful or interesting, like the window, a piece of art, or a nice view. Avoid placing it where it will reflect clutter.
- Lean or Hang: For a modern, renter-friendly look, simply lean a large floor mirror against the wall. For a more traditional or secure placement, hang a large mirror at eye level (about 60 inches from the floor to the center of the mirror).
- Create a Mirrored “Backsplash”: In the kitchen area, consider using mirrored tiles or a single sheet of antiqued mirror as a backsplash. This can make a small kitchen feel much wider.
Pro-Tip: Placing a large mirror behind a key piece of furniture, like a sofa or a sideboard, can anchor the piece and make the entire vignette feel more substantial and grand.
13. Create a Renter-Friendly “Broken-Plan” with a Bookcase
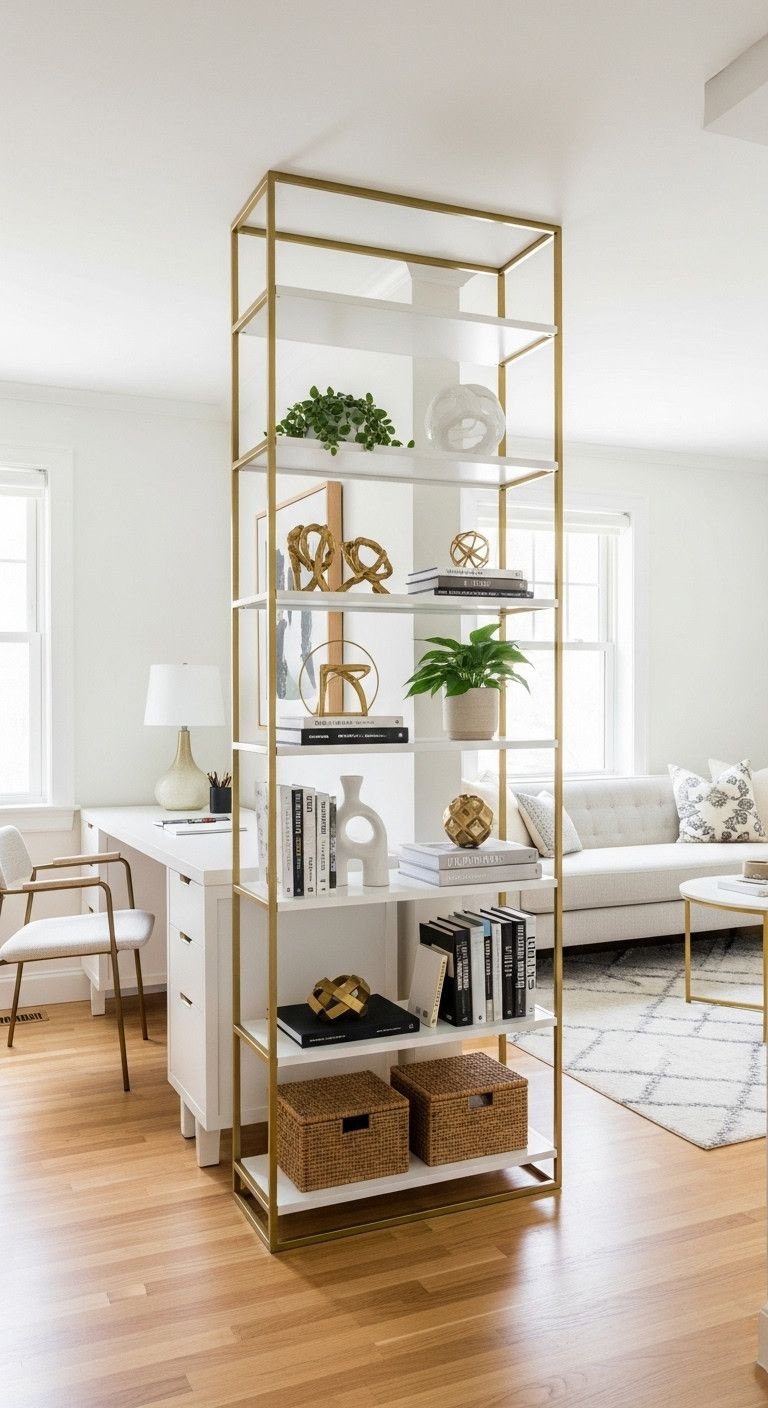
Pin this genius renter-friendly room divider idea!
For those who need more significant separation—like carving out a home office—a tall, open-backed bookcase is the perfect renter-friendly solution. It creates a “broken-plan” layout: a semi-open concept that offers clear zone definition without blocking light or making permanent changes to the apartment.
Key Elements Needed:
- Open-Backed Bookcase: A tall, sturdy bookcase without a solid back panel is crucial. This allows light and sightlines to pass through, preventing the space from feeling closed off. The IKEA KALLAX shelf is a classic choice.
- Anti-Tip Safety Kit: Even if freestanding, it’s wise to secure the unit to the wall for safety, especially if you have pets or children.
- Decorative Bins or Baskets: To store less attractive items on the lower shelves.
Step-by-Step Implementation:
- Determine Your Division Line: Decide where you want to create a “wall.” This is often used to partition a bedroom or office area in a studio, or to separate a dining area from the living room.
- Position the Bookcase: Place the bookcase perpendicular to a wall to create your division. Ensure it doesn’t block a major traffic path.
- Style Both Sides: Remember that the bookcase will be visible from both zones. Style the shelves thoughtfully from all angles. Alternate books, plants, and objects, leaving some shelves partially empty to maintain an airy feel.
- Use Baskets for Clutter: Use attractive woven or fabric bins on the bottom shelves to hide clutter like office supplies or cables, keeping the look clean from both sides.
Lesson Learned: An open-backed bookcase is key. A solid-backed one will act like a real wall, blocking light and making your apartment feel much smaller and darker.
Key Takeaways: Your Quick Guide to Flawless Flow
- Unify with a Single Floor: Use one type of flooring throughout the entire space to create a seamless foundation.
- Define with Rugs: Use large area rugs to anchor furniture and create clear, cozy zones without walls.
- Create Cohesion with Color: Stick to a simple 3-color palette and repeat the accent color in small doses across all zones.
- Layer Your Lighting: Combine overhead (ambient), focused (task), and decorative (accent) lighting to create mood and function.
- Float Your Furniture: Pull furniture off the walls to create intimate conversation areas and improve traffic flow.
People Also Ask About Open Concept Apartments
How do you make an open concept feel cozy?
To make an open concept feel cozy, focus on adding layers of soft texture and warm lighting. Use a large, plush area rug to anchor the seating area. Incorporate materials like chunky knit blankets, velvet pillows, and wood accents. A layered lighting scheme with multiple dimmable lamps, instead of a single harsh overhead light, is crucial for creating a warm, inviting ambiance.
How do you separate a living room from a kitchen without a wall?
You can separate a living room from a kitchen using strategic furniture placement and visual cues. The most effective methods are placing a large area rug to define the living zone, positioning the back of a sofa to create a boundary, or using a narrow console table behind the sofa. A kitchen island or peninsula also serves as a natural and functional divider.
What is the best color to paint an open concept apartment?
Light, neutral colors are best for an open concept apartment as they make the space feel larger, brighter, and more cohesive. Shades of off-white, soft gray, or warm beige create a seamless backdrop that unifies the different zones. You can then add personality and define areas with color in your furniture, rugs, and decor.
How do you deal with noise and cooking smells in an open floor plan?
To manage cooking smells, a powerful, externally-vented range hood is essential. For noise, the key is sound absorption. Use large area rugs, upholstered furniture, curtains, and even textile art on the walls. These soft surfaces prevent sound from bouncing around and creating an echo, making the space feel quieter and more comfortable. Always consult a professional for the installation of vented appliances.
Final Thoughts
Creating perfect flow in an open concept apartment isn’t about having a huge space, but about using smart, intentional design strategies. By unifying your foundation with consistent flooring and color, defining zones with rugs and furniture, and layering in texture and light, you can transform any open layout into a functional and beautiful home. You don’t have to do everything at once. Start with just one idea from this list—like adding a large area rug—and see what a big impact it can make.
Which of these ideas are you most excited to try in your own apartment? Share your plans in the comments below
Last update on 2026-01-14 at 01:48 / Affiliate links / Images from Amazon Product Advertising API
