As an Amazon Associate KitchenwareSets.com earns from qualifying purchases.
9 Open Concept Kitchen Ideas To Maximize Your Apartment Space
Does your apartment feel like the walls are closing in? It’s a common feeling. You’re trying to cook, and your guests are stuck in another room.
An open concept kitchen apartment is a design that removes walls between your cooking and living areas. This single change can solve the feeling of being cramped and disconnected.
An open concept kitchen in an apartment makes a small home feel significantly larger, brighter, and more welcoming. In this guide, you’ll discover 9 practical ideas to transform your space. Let’s create a home that flows with your life.
Your Apartment Feels Cramped, Doesn’t It? Here’s Why an Open Kitchen Is the Answer
Feeling disconnected from guests while you cook or wishing for more natural light are common frustrations in apartments with traditional layouts. A closed-off kitchen can make an already small apartment feel dark, segmented, and inefficient. The walls that separate your kitchen from your living room don’t just block views; they block light, conversation, and the feeling of spaciousness.
An open concept kitchen is the most effective architectural solution to this problem. By removing these barriers, you create a combined kitchen and living room, a single, light-filled space that enhances functionality and modern aesthetics. This open floor plan isn’t just about looks; it’s about changing how you live in your home. It fosters a more social, interactive environment where cooking and relaxing can happen together. For anyone looking to maximize space, an open layout is a game-changing approach that makes your home feel more expansive and connected.
9 Open Concept Kitchen Ideas To Maximize Your Apartment Space
Ready for some real inspiration? These aren’t just pretty pictures. We’re breaking down 9 distinct, practical strategies for creating a beautiful and functional open concept kitchen apartment. Based on proven interior design principles for small-space planning, each idea includes a simple breakdown of what you need and how to do it.
Here are the top open concept kitchen ideas we’ll cover:
1. The Multi-Functional Kitchen Island
2. The Space-Saving Peninsula Divider
3. The “Zoning” Area Rug
4. The Wall-Mounted Vertical Storage
5. The Seamless Unified Flooring
6. The Layered Lighting Plan
7. The Renter-Friendly Floating Bar
8. The Open Bookshelf Room Divider
9. The Cohesive Color Palette
1. The Multi-Functional Kitchen Island as a Central Hub
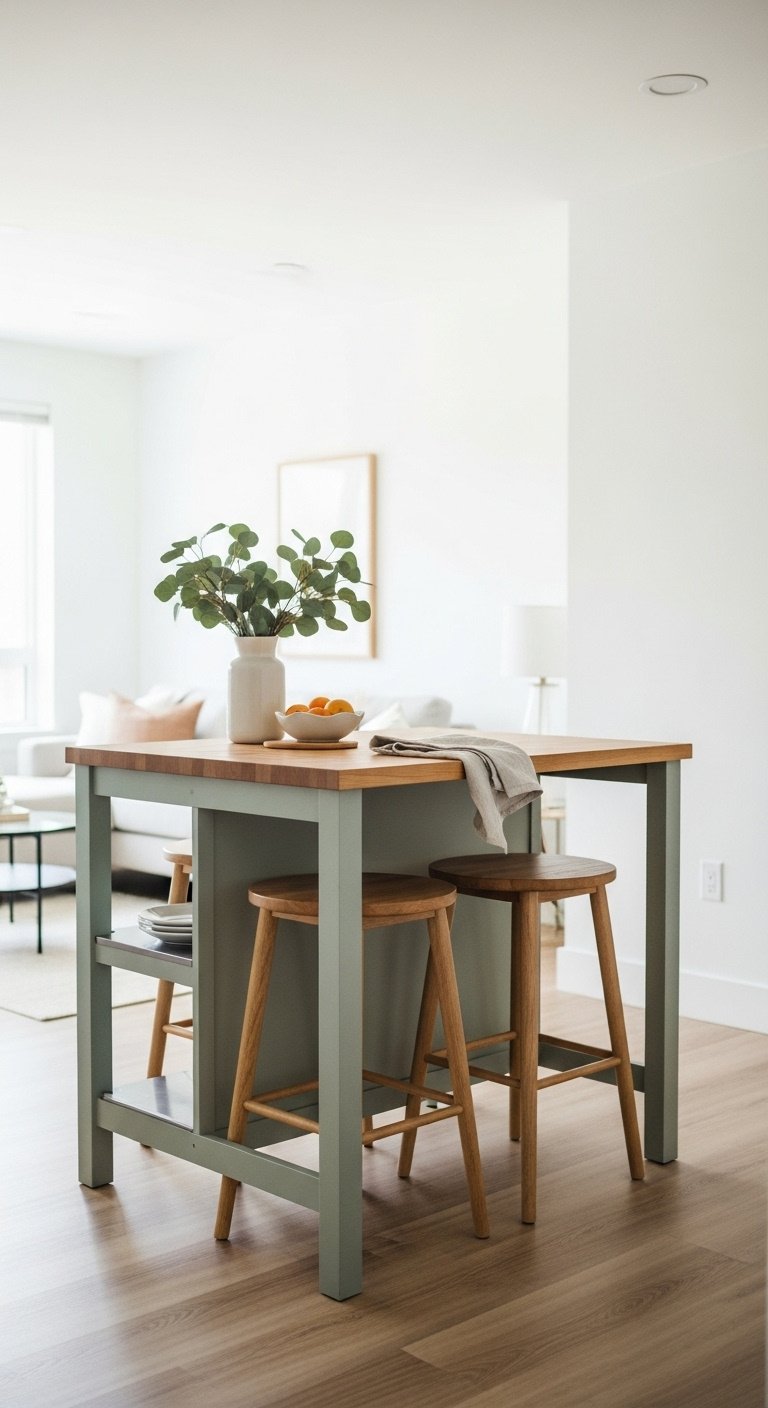
Pin this brilliant island idea to your ‘Small Kitchen Solutions’ board!
A kitchen island is the ultimate multi-tasker in an open layout. It adds valuable counter space for meal prep, offers concealed storage, and doubles as a casual dining spot, all while creating a subtle but clear division between the kitchen and living areas.
Materials Needed:
- A mobile kitchen island or cart: Look for one with a butcher block top, dimensions under 40 inches long, and features like drawers, shelves, and a towel bar for maximum utility.
- Two counter-height bar stools: Choose a backless or low-back style that can be fully tucked under the island’s overhang to save space.
- Small decorative tray: To corral items like salt, pepper, and a small plant, keeping the surface tidy.
Step-by-Step Directions:
- Measure Your Space: Use painter’s tape to mark the island’s footprint on your floor. Ensure you have at least 36 inches of clear walkway on all functional sides.
- Assemble & Position: Build your island and place it to act as a natural divider between the kitchen prep zone and the living room seating area.
- Create a “Dining” Zone: Place the bar stools on the living room side of the island. This invites interaction and clearly defines its dual purpose.
- Style the Surface: Use the tray to create a small, contained decorative moment, leaving the rest of the surface clear for cooking prep or casual meals.
Pro-Tip: Choose a kitchen island on casters (wheels) for ultimate flexibility. You can easily move it aside to create more space when entertaining.
2. The Smart Peninsula That Divides and Conquers
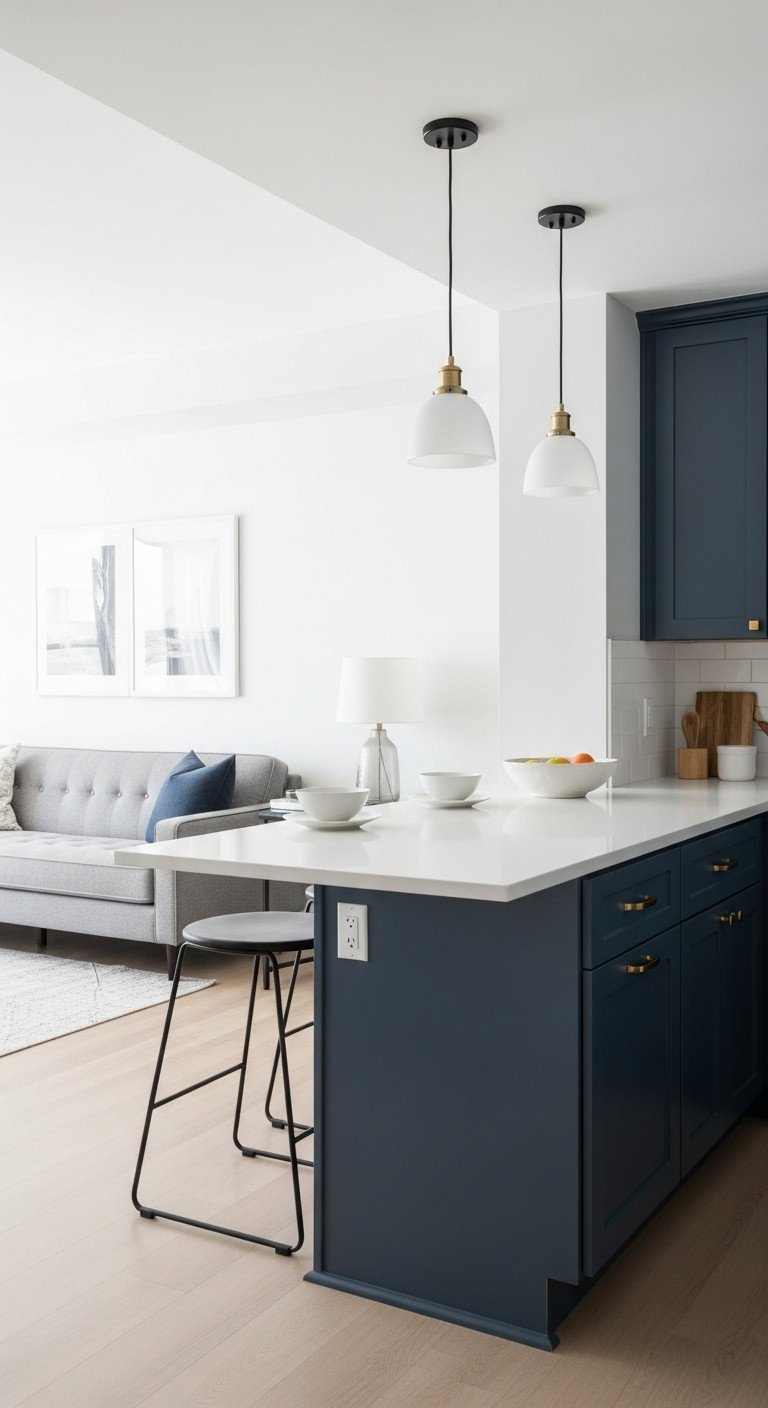
Save this space-saving peninsula layout for your dream kitchen!
When a freestanding island won’t fit, a peninsula is a brilliant alternative. By extending from a wall, it forms an L-shape that clearly separates the kitchen work zone from the living area without fully enclosing it, providing extra seating and counter space in a compact footprint.
Key Elements:
- Peninsula Countertop: Extends from an existing wall or counter run to form an L-shape, creating a visual barrier.
- Statement Pendant Lighting: Two or three pendant lights hung directly above the peninsula to define the zone and provide excellent task lighting.
- Comfortable Bar Stools: Since this becomes a primary dining spot, choose stools with some back support for comfort.
- Under-Counter Storage: Utilize the cabinet space under the peninsula for lesser-used appliances or seasonal items.
How to Style It:
- Anchor with Lighting: Install pendant lights centered over the peninsula. This is the most important step for visually defining it as a separate, intentional zone.
- Select Cohesive Stools: Choose bar stools that match the style of your living room furniture to create a seamless design bridge between the two areas.
- Set Up for Dining: Keep the peninsula clear, with place settings or a simple centerpiece like a fruit bowl, signaling its function as an eating area.
- Define the Walkway: Ensure the path around the end of the peninsula is wide and unobstructed, guiding foot traffic naturally around the kitchen work zone.
Lesson Learned: A peninsula is often better than an island in a long, narrow room because it preserves a wider, more open walkway through the main living space.
3. The “Zoning” Rug That Creates a Visual Room
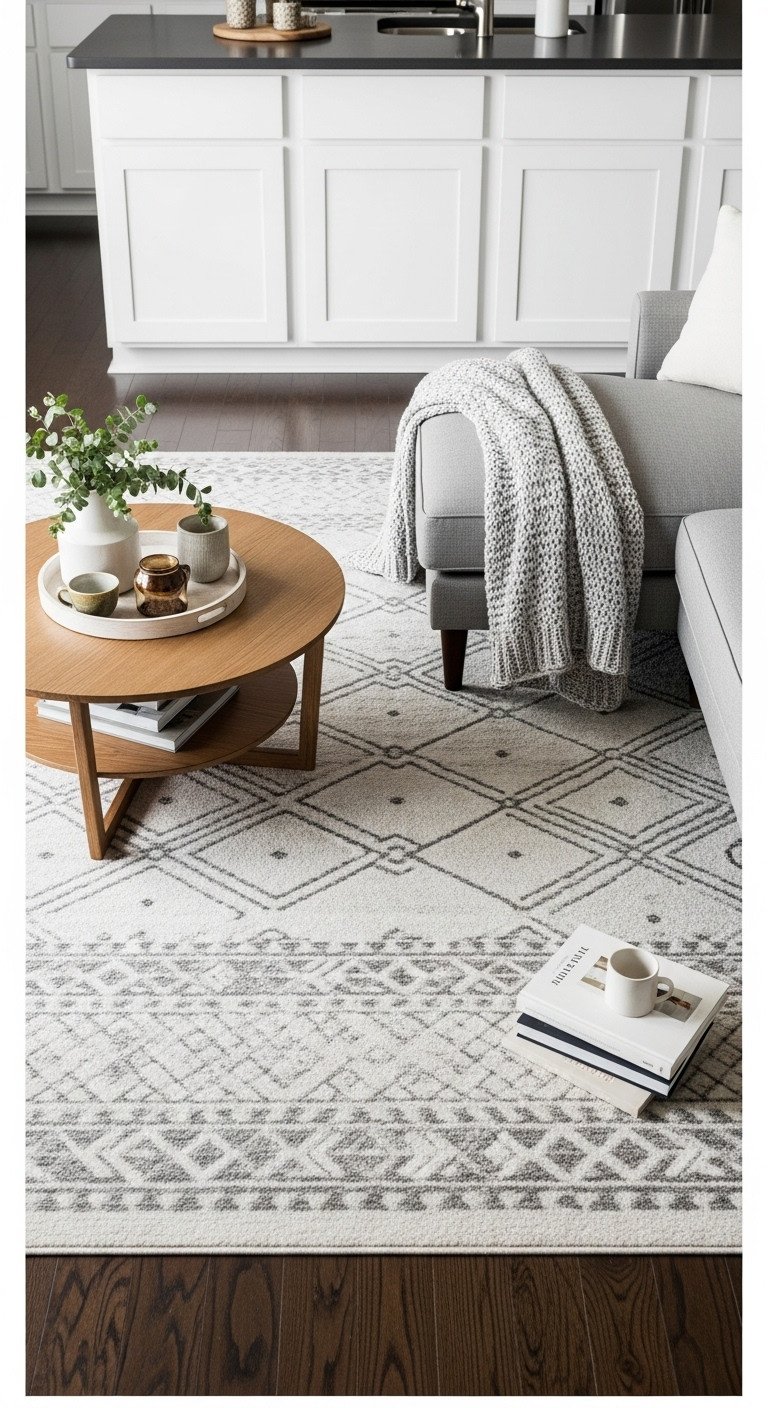
Pin this simple trick for defining your living space!
You don’t need walls to create the feeling of separate rooms. A large area rug is a powerful design tool that “zones” your open-plan apartment, visually anchoring your living room furniture and creating a clear boundary that signals “this is the living room.”
Materials Needed:
- A large area rug: Choose a size (like 8’x10′) that is big enough for the front legs of all your main living room furniture to rest on it. A low-pile or flatweave rug is best for high-traffic areas.
- Your primary living room furniture: Typically a sofa, accent chairs, and a coffee table.
- Double-sided rug tape or a rug pad: To prevent the rug from slipping and bunching.
Step-by-Step Directions:
- Clear the Area: Move all your living room furniture out of the way.
- Position the Rug: Place your rug pad and then unroll the area rug where you want your “living room” to be. The edge of the rug will create a powerful visual boundary.
- Anchor Your Furniture: Place the furniture back, making sure that at least the front two legs of your sofa and any chairs are sitting firmly on the rug. This “anchors” the pieces together as a group.
- Center the Coffee Table: Place your coffee table in the middle of the furniture grouping on the rug to complete the zone.
Pro-Tip: If your sofa must be against a wall, pull it forward just 2-3 inches off the wall after placing it on the rug. This tiny gap creates a sense of airiness and makes the placement feel more intentional.
4. The Wall-Mounted Vertical Storage That Frees Up Counters
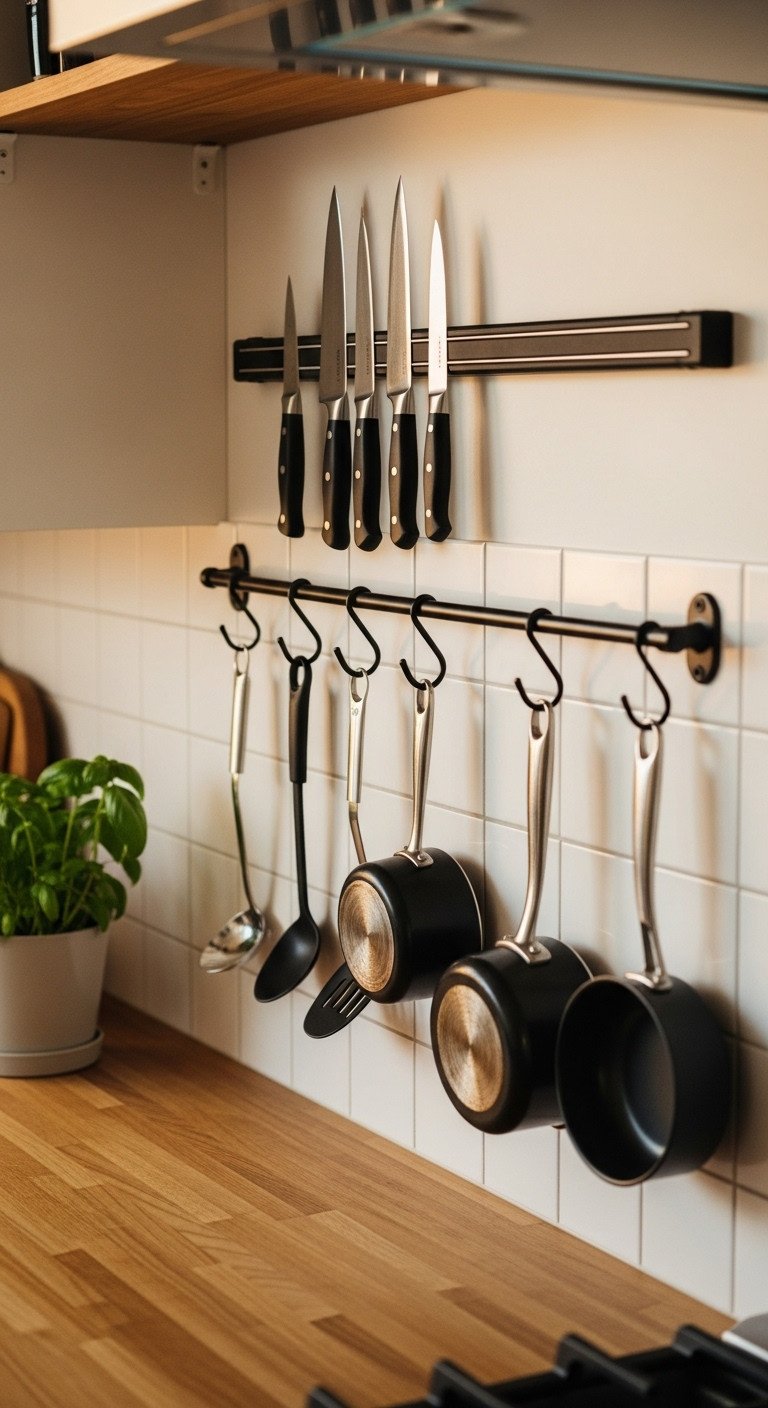
Save this clever storage tips to keep your kitchen tidy!
In an open concept layout, your kitchen is always on display, making countertop clutter a major issue. The solution is to go vertical. Using wall-mounted storage frees up precious counter space, keeps essential tools within reach, and can even become a stylish design feature.
Materials Needed:
- A high-power magnetic knife strip: Choose one at least 16 inches long to hold your most-used knives.
- A wall-mounted rail system with S-hooks: Systems like the IKEA KUNGSFORS are perfect for hanging utensils, small pans, and cutting boards.
- Floating shelves (optional): For storing everyday dishes, glasses, or spices.
- Stud finder, drill, and level: For secure installation.
Step-by-Step Directions:
- Identify Your Wall Space: Find a section of open wall, typically the backsplash area between your countertops and upper cabinets (or where upper cabinets would be).
- Locate Studs: Use a stud finder to mark the location of wall studs. This is critical for ensuring your storage can handle the weight.
- Install the Knife Strip: Mount the magnetic knife strip first, placing it high enough to be safe but low enough for easy access. Use a level to ensure it’s straight.
- Install the Rail System: Mount the rail below the knife strip. Once the rail is secure, you can add S-hooks and customize what you hang based on your needs.
Pro-Tip: Store your most aesthetically pleasing items vertically. Display your nice copper pans, matching utensil set, or colorful spice jars. Hide the less attractive items in cabinets.
5. The Seamless Flow of Unified Flooring
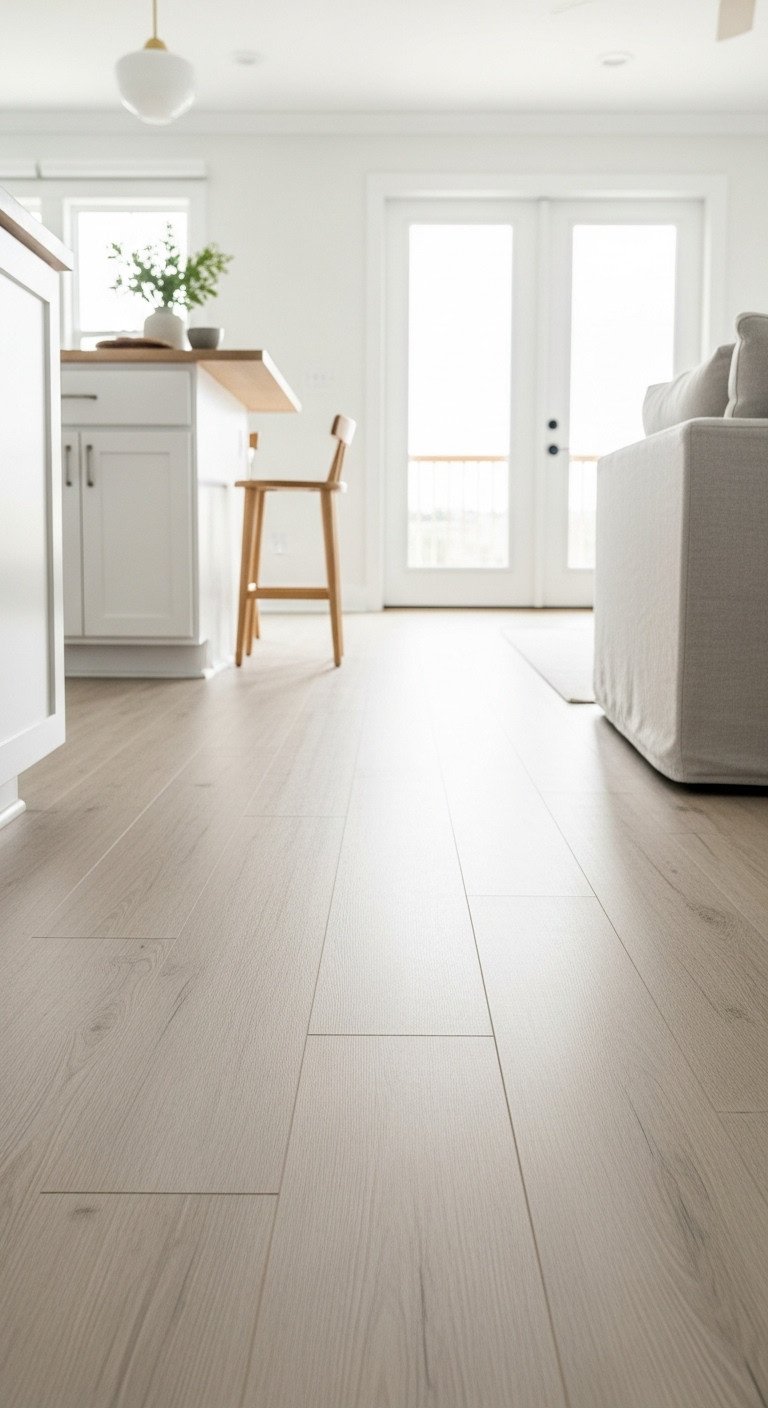
Pin this designer secret for making any small space feel huge!
The single most effective way to make an open concept apartment feel larger is to use one type of flooring throughout the entire space. A continuous, seamless floor creates an unbroken sightline, tricking the eye into perceiving a bigger, more cohesive area.
Key Elements:
- One type of flooring material: Choose a durable, water-resistant option suitable for both kitchens and living areas, such as Luxury Vinyl Plank (LVP), laminate, or engineered hardwood.
- Consistent installation direction: Lay the planks parallel to the longest wall in the room to enhance the sense of length and space.
- Minimal thresholds: Avoid using transition strips between the kitchen and living areas to maintain the seamless look.
Step-by-Step Directions:
- Select a Durable Material: Choose a high-quality LVP or laminate. These are excellent for apartments as they are often installed as a “floating floor” and are highly resistant to kitchen spills.
- Choose a Light Color: Lighter flooring colors like natural oak, birch, or light gray reflect more light and significantly enhance the feeling of spaciousness.
- Plan the Layout: Determine the longest wall in your open-plan area. Plan to run your flooring planks parallel to this wall for the best visual effect.
- Install Continuously: Install the flooring in one continuous run from the kitchen through to the living room without any breaks or transitions. This creates a powerful, unbroken sightline that tricks the eye into seeing a larger, more cohesive space.
Lesson Learned: Many people think they need tile in the kitchen and wood in the living room. In an open concept, this visually chops the space in half. One continuous floor is the single most effective trick for making the area feel larger.
6. The Layered Lighting Plan to Define Mood and Function
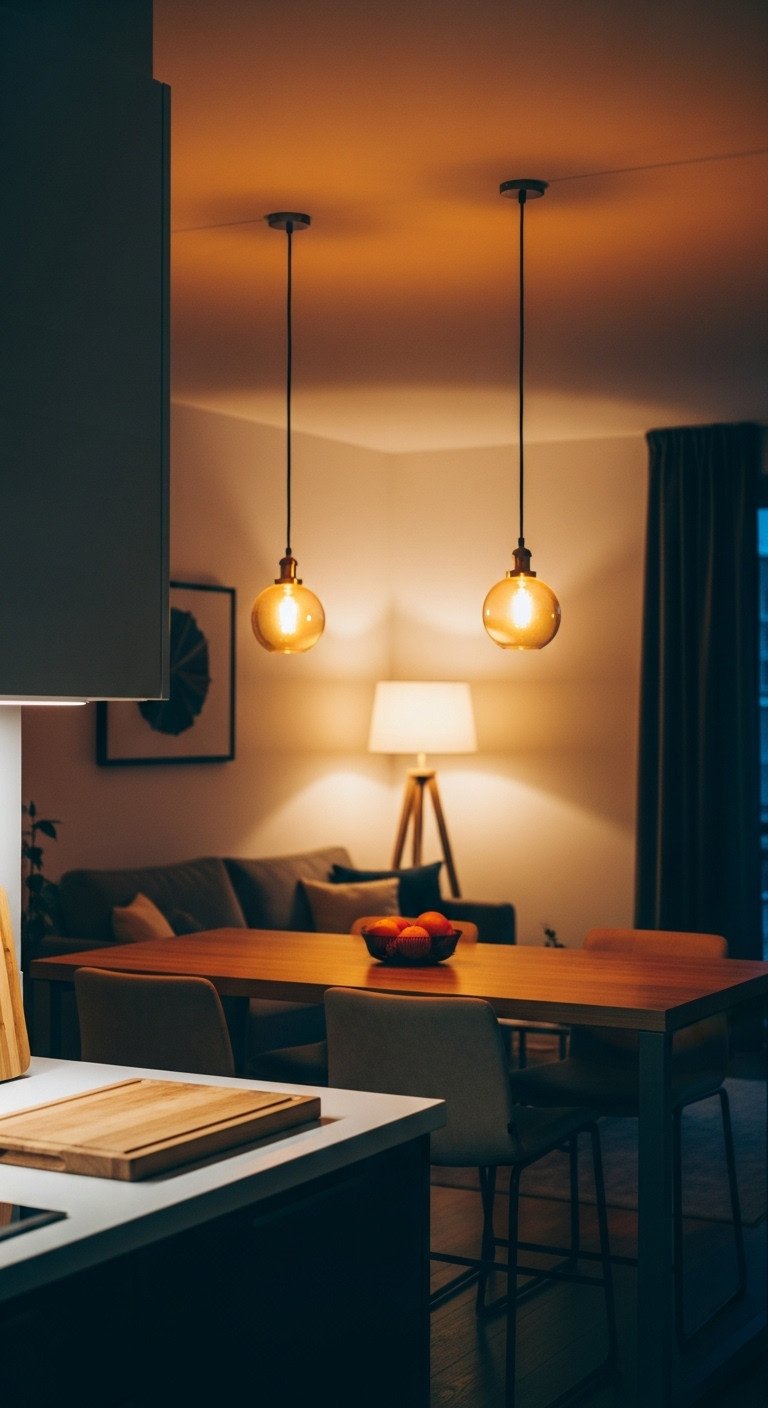
Save this lighting guide to create the perfect atmosphere!
In a single room that serves many purposes, a single light source won’t work. A layered lighting plan uses different types of light—ambient, task, and accent—to define zones and change the mood. It allows your space to be bright and functional for cooking, then warm and cozy for relaxing.
Materials Needed:
- Ambient Lighting: Recessed ceiling lights or a central flush-mount fixture on a dimmer switch.
- Task Lighting: An under-cabinet LED lighting kit for kitchen prep areas.
- Accent Lighting: One or two pendant lights over a peninsula/island, and a floor lamp or table lamp for the living area.
- Dimmers: Install dimmer switches on as many lights as possible for maximum control.
Step-by-Step Directions:
- Start with Ambient: Ensure you have good, general overhead lighting that can illuminate the entire space. Put this on a dimmer.
- Add Kitchen Task Lighting: Install a plug-in or hardwired LED light strip under your upper kitchen cabinets. This is a game-changer for cooking, as it eliminates shadows on your workspace.
- Define with Accent Lights: Hang pendant lights over your main dining/socializing spot (the island or peninsula). In the living room zone, add a floor or table lamp to create a soft, cozy pool of light for reading or relaxing.
- Use Them in Combination: For cooking, turn on the ambient and task lights. For relaxing in the evening, turn the ambient lights down low and use only the warm accent lamps in the living area.
Pro-Tip: Use “smart” bulbs in your lamps. This allows you to control the brightness and even the color temperature of your accent lighting from your phone, making it incredibly easy to switch the mood.
7. The Renter-Friendly Floating Bar for Dining
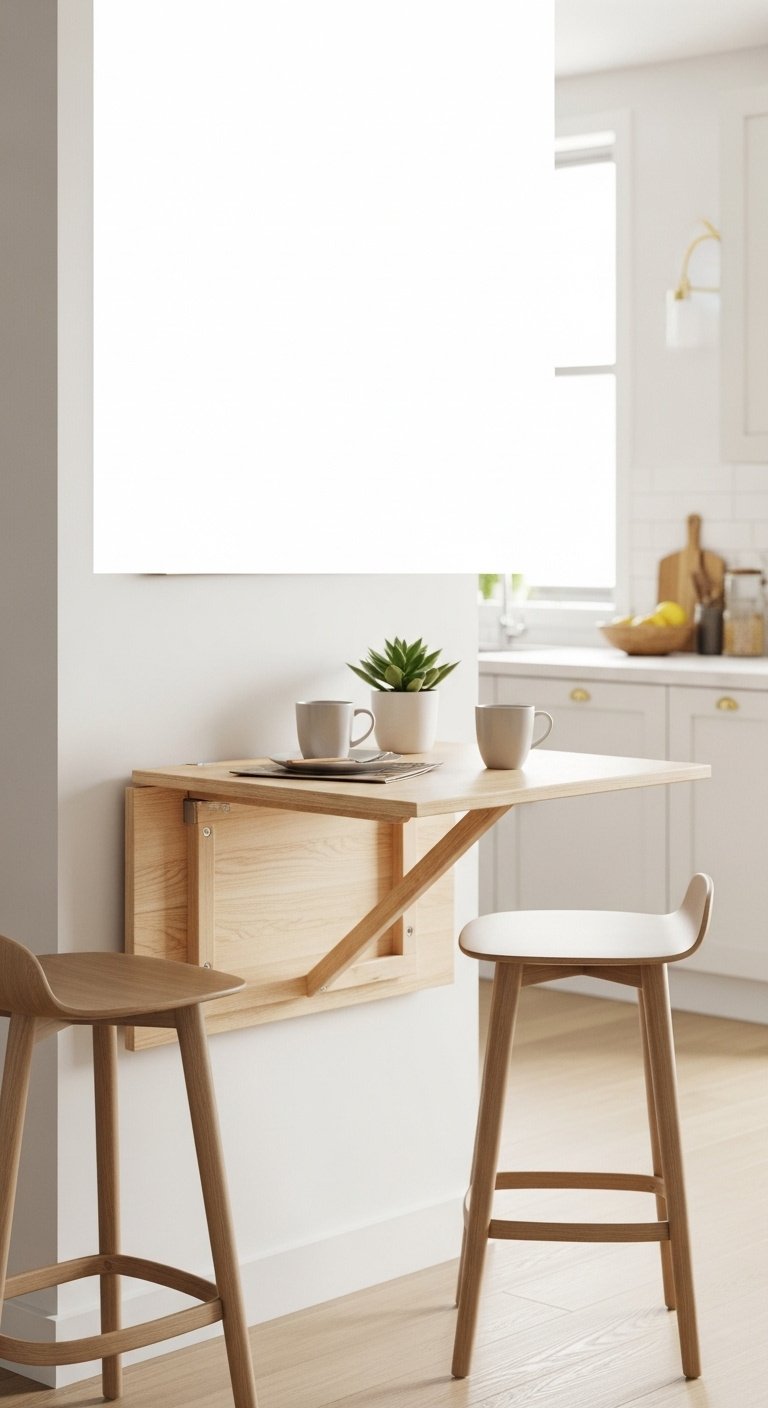
Pin this amazing space-saving idea for small apartments!
No room for a dining table? No problem. A wall-mounted, drop-leaf table creates a floating bar that provides a dedicated dining spot without consuming any floor space when not in use. It’s an ideal solution for renters and studio apartments.
Materials Needed:
- A wall-mounted drop-leaf table: These are designed to fold down flat against the wall when not in use.
- Two slim-profile bar or counter-height stools: Choose stools that can be easily stored in a corner or closet when the table is folded down.
- Heavy-duty wall anchors: If you cannot mount the table directly into studs, you must use high-quality anchors to ensure it’s secure.
- A level and a drill.
Step-by-Step Directions:
- Choose Your Wall: Identify a small, unused section of wall in your open-plan area. It can be near the kitchen or closer to the living room.
- Determine the Height: Decide if you want a counter-height (approx. 36 inches from the floor) or bar-height (approx. 42 inches) table and mark the wall accordingly.
- Secure the Mounts: Using a level, mount the table’s bracket securely to the wall. Hit studs if possible; otherwise, use robust wall anchors designed for the weight of the table plus anything you’ll put on it.
- Attach the Tabletop: Follow the manufacturer’s instructions to attach the folding tabletop to the wall bracket. Test the folding mechanism to ensure it operates smoothly.
Lesson Learned: This solution provides a dedicated dining spot without sacrificing precious floor space to a traditional table and chairs, keeping the open concept feeling truly open.
8. The Open Bookshelf as a “See-Through” Divider
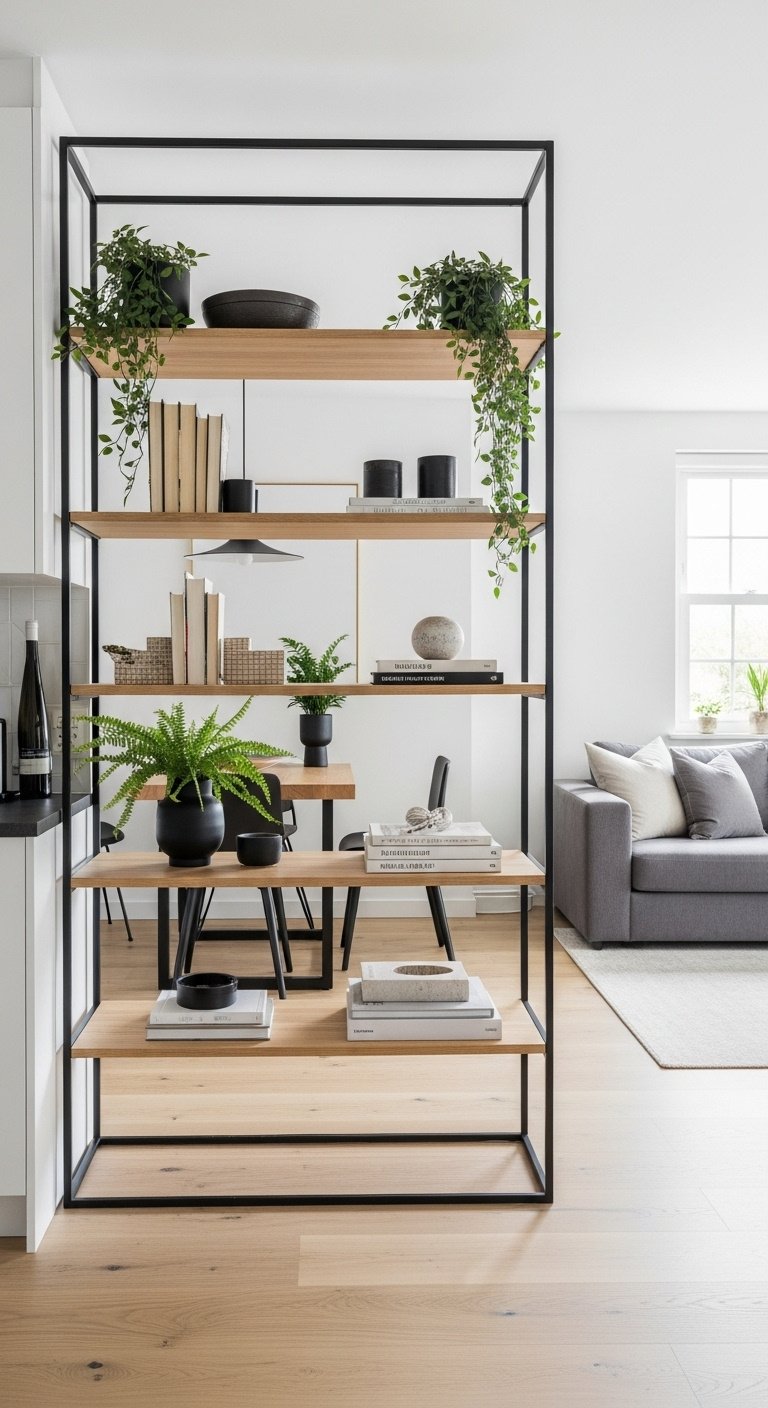
Save this stylish room divider idea for your open layout!
For a “broken-plan” feel that offers separation without sacrificing light, an open-back bookshelf is the perfect tool. Placed perpendicular to a wall, it creates a visual divide and offers storage and display space while still allowing light and sightlines to pass through, maintaining an airy feel.
Materials Needed:
- A tall, sturdy, open-back bookshelf: Choose a style that matches your decor, such as an industrial metal-and-wood unit or a minimalist ladder shelf. Ensure it’s stable.
- A curated collection of items to display: A mix of books (some stacked horizontally, some vertically), small sculptures, vases, and plants.
- (Optional) Furniture anchors or brackets: For safety, especially in homes with kids or pets, to secure the shelf to the wall or ceiling.
Step-by-Step Directions:
- Position the Bookshelf: Place the bookshelf perpendicular to a wall to create a partial screen between your kitchen/dining zone and your living zone.
- Style with Space: The key is to not overcrowd the shelves. Leave plenty of “negative space” so you can still see through the unit. This maintains the open and airy feeling.
- Vary Height and Texture: Arrange your items artfully. Mix tall items with short ones, and smooth textures with rough ones. Place some trailing plants like pothos that will hang down beautifully.
- Style Both Sides: Remember that the bookshelf will be visible from both the kitchen and living areas, so make sure it looks good from all angles.
Pro-Tip: For added function, use stylish woven baskets on the lower shelves to hide less attractive items like remote controls, chargers, or mail.
9. The Cohesive Color Palette That Unifies Everything
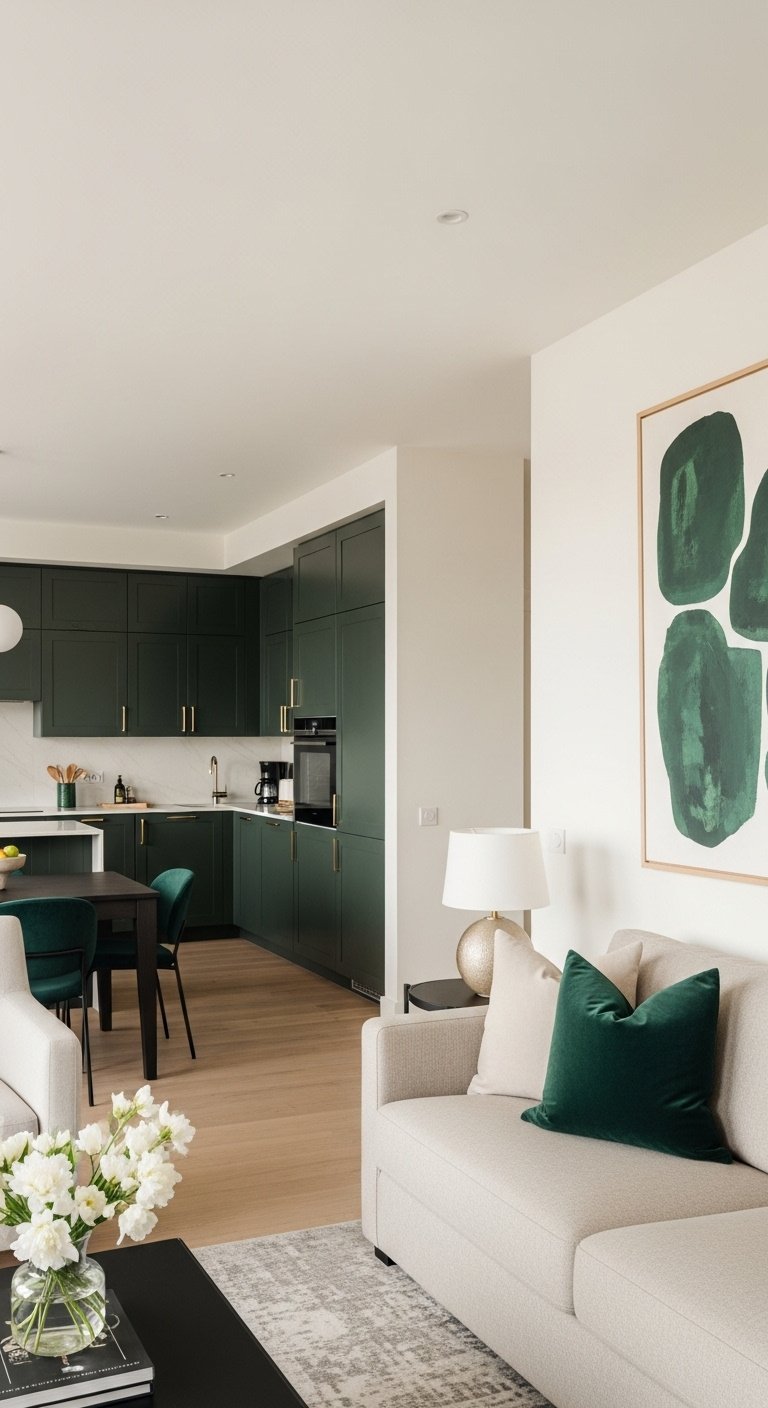
Pin this designer color trick to make your home look professionally styled!
A cohesive color palette is the invisible thread that ties your open concept space together. By strategically repeating one or two accent colors in both the kitchen and living areas, you create a harmonious and intentional design that feels professionally styled.
Key Elements:
- A primary neutral color (60%): This is for your walls and largest furniture pieces, like your sofa. Think soft whites, warm grays, or beiges.
- A secondary color (30%): A supporting color, often a texture like wood tones, used in flooring, tables, and cabinetry.
- An accent color (10%): A bold, memorable color used sparingly but strategically in both the kitchen and living areas to tie them together.
Step-by-Step Directions:
- Choose Your Accent Color: Start with the boldest choice. Let’s say you choose a deep navy blue.
- Anchor it in the Kitchen: Make a significant statement with the accent color in the kitchen. This could be your lower cabinets, the backsplash tile, or your bar stools.
- Repeat it in the Living Room: Now, “sprinkle” that same navy blue in at least three places in the living room. Examples: throw pillows on the sofa, a vase on the coffee table, a piece of artwork on the wall, or a cozy throw blanket.
- Tie it Together with Neutrals: Ensure the rest of the space (walls, sofa, rug) is in your chosen neutral palette. This allows the repeated accent color to stand out and do its job of connecting the two zones.
Lesson Learned: You don’t need to match everything. You just need to repeat one or two key colors intentionally to create a visual thread that pulls the entire open-concept space together.
Key Takeaways: Your Quick Guide to an Open Apartment Kitchen
- Define Zones Without Walls: Use large area rugs, peninsulas, or the back of a sofa to create clear, visual “rooms” within the open space.
- Unify with Cohesion: Use one type of flooring throughout the entire area and repeat a single accent color in both the kitchen and living spaces to create a harmonious, intentional look.
- Go Vertical with Storage: Keep countertops clear and the space feeling tidy by using wall-mounted storage like magnetic knife strips, pot rails, and floating shelves.
- Master Your Lighting: Use a layered lighting plan with dimmers. Bright task lighting for cooking, and soft accent lighting for a cozy living room feel in the evening.
- Prioritize Multi-Function: Every major piece should serve at least two purposes. An island is for prep and dining. An ottoman has storage. A bookshelf is for display and division.
People Also Ask About Open Concept Kitchen Apartments
How do you control cooking smells in an open concept kitchen?
Invest in a powerful range hood that vents to the outside. This is the single most effective solution. For renters or those without exterior venting, a high-quality recirculating hood with charcoal filters is essential. Supplement this by opening windows for cross-ventilation and using a portable air purifier with a carbon filter to trap lingering odors.
How do I hide the inevitable kitchen mess in an open floor plan?
The key is designing for “proactive storage.” Opt for deep drawers over lower cabinets, as they make items easier to access and put away quickly. Dedicate one cabinet as a “clutter garage” for small appliances. Most importantly, get a sink with a deep basin where you can discreetly place a few dirty dishes before guests arrive.
Will an open concept layout make my small apartment feel noisy?
It can, but you can easily mitigate noise with soft surfaces. Hard surfaces like tile and drywall reflect sound. Absorb it by adding a large, thick area rug, upholstered furniture, heavy curtains instead of blinds, and even decorative fabric wall hangings. These additions will dramatically reduce echo and ambient noise from appliances.
Where is the best place to put a TV in an open concept room?
Place the TV on a wall that is not the primary focal point from the kitchen. The goal is to create a distinct living/entertainment zone. Mounting the TV on a low console table against a side wall is often the best choice, as it doesn’t dominate the entire open space and allows for a furniture arrangement that encourages conversation.
Final Thoughts
Your apartment’s floor plan doesn’t have to define how you live. By embracing an open concept and using these smart, stylish ideas, you can create a space that feels larger, brighter, and more welcoming than you ever thought possible. It’s about more than just design; it’s about creating a home that flows with your life.
Which of these ideas are you most excited to try in your own space? Let me know in the comments below.
Last update on 2026-01-20 at 10:30 / Affiliate links / Images from Amazon Product Advertising API
