
As an Amazon Associate KitchenwareSets.com earns from qualifying purchases.
Stunning Outdoor Kitchen Design: BBQ Area Pergolas for Homes
Are you exhausted from running back and forth indoors while hosting a summer gathering? Struggling with limited space, unlevel ground, and relentless weather damage can quickly ruin your backyard enjoyment. A thoughtful outdoor kitchen design completely eliminates these stressful hosting barriers.
An outdoor kitchen design is a specialized architectural extension of your home’s exterior that combines culinary functionality with landscape design. The most effective layouts integrate weather-resistant cabinetry, a high-BTU built-in grill, task lighting, and a protective pergola structure to ensure year-round alfresco dining and entertaining.
Drawing from comprehensive analysis of current data and proven NKBA guidelines, we developed this actionable and authoritative framework. You will discover exact material lists, layout planning strategies, and expert implementation steps. Read on to transform your basic patio into a spectacular luxury cooking area.
Contents
show
7 Brilliant Outdoor Kitchen Design Concepts With BBQ Area Pergolas
Top outdoor kitchen design layouts featuring BBQ pergolas include classic wood setups, modern steel modular kits, L-shaped corners, Mediterranean pizza stations, luxury U-shaped terraces, fully enclosed weatherproof areas, and budget-friendly freestanding stations.
Planning your ideal exterior cooking zone requires balancing aesthetic desires with strict structural realities. By incorporating a sturdy pergola over your built-in grill, you instantly create a protected micro-climate that enables year-round use. Bridging the gap between landscaping and culinary arts means carefully evaluating how materials like stone-veneer and stainless-steel interact with the elements. Let’s explore how customizing these outdoor kitchen ideas transforms a basic backyard into a highly functional, weather-resistant culinary destination.
1. Planning The Classic Wood Pergola with Built-In BBQ Grill Station

Pin this classic pergola layout to your “Dream Backyard Planner” board!
The debate between a wood vs metal frame often begins when planning a traditional residential outdoor kitchen. A classic heavy timber cedar pergola shading a custom masonry grill island provides unmatched rustic charm. However, measuring your space and adhering strictly to local building codes is critical when combining combustible wood framing with high-heat cooking zones. Building this aesthetic requires careful attention to utility rough-ins and foundational strength.
Materials Needed
- Built-in stainless-steel gas grill (Look for 304-grade stainless with high BTU requirements for sear zones)
- Pre-cut heavy timber cedar pergola kit (treated for rust prevention on brackets and weather damage resistance)
- Stone-veneer panels or brick-based masonry materials for the grill island
- Granite countertops (superior durability compared to tile)
- Heat insulating jacket (mandatory for installing gas grills into combustible or semi-combustible frames)
- Concrete footing mix for pergola posts
- Stainless-steel access doors and trash drawer
Step-by-Step Directions
- Map the footprint of your outdoor living space using a free 3D design tool to ensure proper traffic flow and NKBA guidelines for landing space around the grill.
- Pour concrete footings for the pergola posts, ensuring they are perfectly plumb and leveling the surface.
- Run all utility rough-ins (natural gas lines and electrical conduits) before building the island structure.
- Construct the grill island frame using non-combustible framing materials like galvanized steel studs or concrete block.
- Install the stone veneer siding and secure the heavy granite countertops with industrial outdoor adhesive.
- Mount the heavy timber wood pergola overhead, ensuring a minimum 36-inch vertical clearance between the grill hood and the lowest wood beam.
- Drop the built-in grill, side burner, and storage components into the island cutouts and finalize the gas connections.
Pro-Tip: When planning a wood vs metal frame pergola over a grill, adhere strictly to local building codes regarding vertical clearance. If your pergola is lower than 8 feet, you absolutely must install a commercial-grade ventilation hood with high CFM ventilation ratings to prevent smoke damage and minimize fire risk to the wooden rafters above.

2. Designing a Modern Steel Pergola with a Modular Outdoor Kitchen

Save this modern, minimalist outdoor setup to your Pinterest board!
If you want to skip tedious masonry work, modern industrial layouts offer an incredibly sleek alternative. The RTA vs custom build debate heavily favors modular outdoor kitchen island frame kits for their speed and precision. Pairing a powder-coated steel pergola with high-density polyethylene polymer cabinetry creates a 100% weatherproof cooking zone. Configuring these modular elements allows for rapid deployment without sacrificing high-end aesthetics.
Materials Needed
- Modular outdoor kitchen island frame kits (aluminum or galvanized steel)
- Louvered steel or aluminum pergola kit (powder-coated for rust prevention)
- Polymer cabinetry or high-density polyethylene (HDPE) cabinet doors (100% weatherproof)
- Concrete countertops or sintered stone (highly resistant to UV fading)
- Drop-in gas grill and beverage center
- Smart home technology integration (motorized louver controls)
- Heavy-duty leveling feet for the island frame
Step-by-Step Directions
- Design your layout using an outdoor kitchen software platform to generate the exact modular frame pieces required.
- Assemble the steel louvered pergola, securely anchoring the base plates into your concrete or paver patio.
- Configure the lightweight modular outdoor kitchen frame modules by bolting the sections together in your desired layout under the pergola.
- Adjust the heavy-duty leveling feet on the frame to ensure the entire structure is perfectly level, compensating for patio drainage slopes.
- Attach the cement board or high-density polyethylene exterior cladding to the aluminum frame.
- Install the sintered stone or concrete countertops, leaving a precise 1/4-inch gap for a thermal expansion joint where slabs meet.
- Slide the appliances into their exact cutouts, plug in the beverage center to your GFCI outlet, and connect the gas line.
Pro-Tip: When utilizing modular outdoor kitchen kits, always account for patio slope. Patios are designed to slope away from the house for water drainage. Use adjustable leveling legs on your modular frames rather than shimming, ensuring your concrete countertops and cooking oils remain perfectly level.

3. Creating a Compact L-Shaped Kitchen under a Corner Pergola

Don’t let a small backyard stop you—pin this L-shaped layout!
Tackling an outdoor kitchen design for small backyards requires clever ergonomic planning. Utilizing L-shaped outdoor kitchen design plans allows you to map out highly efficient prep, cook, serve, and clean zones in a tight corner. By sliding an outdoor refrigerator beneath your counter and adding a compact corner pergola, you maximize your backyard space while retaining full culinary functionality.
Materials Needed
- Outdoor refrigerator (UL-rated for outdoor use; indoor fridges will fail in summer heat)
- Prefabricated L-shaped outdoor kitchen design plans or frame
- Triangular or standard corner pergola kit
- 30-inch built-in grill (ideal size for compact spaces)
- Stainless-steel access doors for plumbing access
- Bar stools for seating
- Privacy screens or lattice panels for the pergola walls
Step-by-Step Directions
- Map out the specific work zones: place the outdoor refrigerator on the short leg of the “L” (the prep/serve zone) and the grill on the longer leg (the hot zone).
- Erect the corner pergola against your existing privacy screens or fence line, ensuring you maintain a safe 24-inch clearance from combustible fences.
- Construct the L-shaped base island using structural framing, prioritizing the corner space for a hidden propane tank or bulk storage.
- Wire a dedicated 15-amp circuit specifically for the outdoor refrigerator, utilizing a weatherproof GFCI outlet placement.
- Install the countertops, ensuring a minimum 12-inch countertop overhang depth on the outer edge of the “L” if you plan to include bar seating.
- Mount heavy-duty corbels or invisible steel brackets under the overhang to support heavy appliances or leaning guests.
- Slide the outdoor-rated fridge into its cavity, ensuring front-venting clearance so the compressor doesn’t overheat.
Pro-Tip: Never use a standard indoor mini-fridge in an outdoor living room. They lack the insulation and heavy-duty compressors required to maintain safe food temperatures when ambient heat hits 90°F+. Always invest in a front-venting, outdoor-rated beverage center or fridge to prevent mechanical failure.

4. Building a Mediterranean Stone Pizza Oven & Grilling Pergola

Dreaming of wood-fired pizza at home? Pin this Mediterranean design!
Designing a luxury outdoor kitchen with pizza oven functionality elevates your backyard into a gourmet destination. A Mediterranean-inspired masonry layout requires exceptional structural integrity to support the extreme weight of stone-veneer and high-heat refractory cement. Installing a heavy wood-fired dome demands precise planning, especially when navigating extreme heat challenges and routing proper ventilation through your overhead structure.
Materials Needed
- Wood-fired pizza oven (pre-cast refractory dome or stainless-steel countertop model)
- Cinderblock and rebar (for the heavy-duty structural base)
- Stone-veneer or natural fieldstone facing
- High-heat refractory cement and firebricks
- Double-wall insulated stainless steel chimney pipe (Class A)
- Solid poured concrete slab foundation (4-6 inches thick)
- Granite countertops or large-format porcelain tiles
Step-by-Step Directions
- Excavate and pour a heavily reinforced concrete foundation; a true masonry pizza oven base can weigh over 2,000 lbs and requires serious structural integrity.
- Build the support base using cinderblocks reinforced with vertical rebar and filled with solid concrete.
- Pour a solid 4-inch concrete countertop slab to serve as the hearth base for the oven.
- Install the oven dome using refractory cement, ensuring a layer of ceramic fiber insulation blankets the exterior of the dome to retain heat.
- Frame your pergola over the space, leaving a precise opening between the rafters for the chimney assembly.
- Route the double-wall Class A insulated chimney pipe straight up through the pergola roof, ensuring minimum clearance to combustible wood framing as dictated by building codes.
- Apply the mediterranean stone-veneer to the base and finish the surrounding prep countertops.
Pro-Tip: When installing a wood-fired pizza oven under a combustible pergola structure, you must use a double-wall insulated chimney pipe (often called Class A pipe). Standard single-wall stovepipe will transfer extreme heat to the surrounding wood rafters, creating a severe fire hazard.
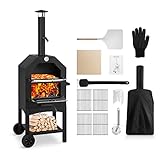
5. Designing a Luxury Alfresco Culinary Terrace with Bar Seating

Create the ultimate entertaining zone with this luxury bar layout!
Transitioning from casual cooking to high-end entertaining requires integrating thoughtful hospitality features. A luxury outdoor kitchen equipped with dual-level counters and bar seating naturally draws guests together while keeping them safely away from the hot grill. By weaving elegant landscape lighting and smart home technology into your pergola, you create an irresistible evening ambiance that drastically enhances property value.
Materials Needed
- Split-level kitchen island frame (36″ prep height / 42″ bar height)
- Bar seating (weather-resistant stools designed for 42-inch counters)
- Warming drawer and high-capacity ice maker
- Low-voltage LED landscape lighting and under-counter strip lights
- Commercial-grade waterproof string lights
- Built-in outdoor sink with a high-arc faucet
- Outdoor-rated sound system and patio heaters
Step-by-Step Directions
- Construct a dual-level island, setting the prep side at a standard 36-inch height and the guest-facing side at a 42-inch bar seating height.
- Incorporate proper toe kick dimensions (typically 3 inches deep by 4 inches high) at the bottom of the seating side so guests can sit comfortably.
- Wire low-voltage LED strip lights directly under the 12-inch bar overhang to create safety lighting and elegant evening ambiance.
- Weave commercial-grade waterproof string lights through the overhead pergola rafters to provide soft, diffuse overhead illumination.
- Install a large outdoor sink alongside a built-in ice maker and beverage cooler to create a dedicated bartending station away from the hot grill.
- Mount infrared electric patio heaters to the pergola beams, angling them toward the seating area to extend your hosting season into the crisp autumn months.
- Seal the granite countertops with a premium UV-resistant stone sealer to prevent wine and grease stains from ruining the luxury finish.
Pro-Tip: According to NKBA guidelines, if you are incorporating a 42-inch high raised bar counter, you need to provide a minimum of 12 inches of knee clearance (overhang) and allow 24 inches of linear width per stool to ensure your guests aren’t knocking elbows.

6. Constructing a U-Shaped Fully Enclosed Pergola Kitchen

Maximize your prep space with this ultimate U-Shaped outdoor kitchen!
For maximum storage and expansive prep space, nothing beats U-shaped outdoor kitchen layout ideas beneath an enclosed pavilion. Providing shelter from intense weather damage ensures your appliances and custom cabinetry remain pristine throughout the seasons. However, ventilating an enclosed cooking area requires aggressive smoke ventilation using a high-powered ventilation hood to maintain strict safety compliance.
Materials Needed
- Solid-roof pavilion or enclosed pergola kit with a weather-tight roof
- Massive 42-inch built-in gas grill and accompanying side burner
- Commercial-grade outdoor ventilation hood (minimum 1,200 CFM rating)
- Extensive storage cabinets, trash drawer, and utility access doors
- Large double-basin outdoor sink
- Outdoor-rated ceiling fans and infrared heaters
- Custom U-shaped masonry or aluminum frame
Step-by-Step Directions
- Draft your U-shaped layout, assigning the base of the “U” to the primary cooking zone (grill) and the side legs to prep, washing, and serving zones.
- Build the solid-roof pergola structure, ensuring the roof decking is completely sealed against weather damage with proper shingles or metal roofing.
- Install a massive commercial ventilation hood directly above the grill zone, venting it safely through the solid roof via a weatherproof roof jack.
- Plumb the side-leg of the “U” with hot and cold water lines for a fully functional double-basin outdoor sink.
- Incorporate banks of dry-sealed storage cabinets on the non-cooking legs of the layout to keep pots, pans, and grilling tools safe from moisture and pest control issues.
- Mount outdoor-rated ceiling fans to the pergola rafters to assist the vent hood with aggressive smoke ventilation and keep guests cool.
- Seal all stone joints, countertops, and backsplashes with waterproof silicone to create an easy cleaning environment.
Pro-Tip: If you build a solid-roof or enclosed pergola, a high-powered ventilation hood is not optional—it is required by fire code. Look for a hood that extends at least 3 to 6 inches beyond the cooking surface on all sides, and boasts a CFM ventilation rating of at least 1,200 to properly exhaust heavy BBQ smoke and grease.

7. Assembling a Budget-Friendly Freestanding Grill Station

Outdoor kitchens don’t have to cost a fortune—pin this DIY budget setup!
Building a DIY outdoor kitchen on a budget proves you do not need massive financial resources to enjoy alfresco dining. The built-in vs freestanding comparison often reveals that high-quality standalone grills paired with modular prep carts offer incredible flexibility for a tight budget. Mounting a simple DIY pergola overhead creates a dedicated cooking zone without the staggering expense of a licensed contractor or complex masonry.
Materials Needed
- High-quality freestanding gas or charcoal grill (with side tables)
- Modular rolling outdoor prep cart (stainless steel or treated wood)
- Basic 10×10 DIY wood or aluminum pergola kit
- Paver stones or pea gravel (for a quick, affordable patio base)
- High-temperature grill mat (for grease management)
- Freestanding patio cooler or rolling ice maker cart
- Weatherproof heavy-duty covers for the grill and carts
Step-by-Step Directions
- Level a 10×10 foot area of your yard, lay down landscape fabric for weed control, and install a simple patio base using crushed gravel and large concrete pavers.
- Erect the simple 10×10 DIY pergola over the new patio space, mounting the posts securely to concrete pier blocks.
- Position the heavy-duty freestanding grill on one side of the pergola to establish your dedicated cooking zone.
- Assemble a rolling outdoor prep cart equipped with storage shelves and a cutting board top, placing it directly adjacent to the grill.
- Place a high-temperature, absorbent grill mat underneath the cooking station for easy grease management and to protect your pavers.
- Set up a separate rolling patio cooler or beverage cart on the opposite side to keep foot traffic away from the hot grill.
- Organize your grilling tools, spices, and cleaning supplies on the prep cart’s lower shelves, mimicking the workflow of a built-in kitchen.
Pro-Tip: The greatest advantage in the built-in vs freestanding debate is flexibility and permits. A freestanding setup usually bypasses the need for a licensed contractor and municipal permits because you aren’t running permanent gas lines, plumbing, or pouring deep frost-line footings.
Key Takeaways: Your Quick Guide to Outdoor Kitchen Design
Utilizing free 3D design tools, enforcing safe ventilation, mastering kitchen zones, avoiding indoor appliances, prioritizing durable materials, using non-combustible framing, and scaling with freestanding options form the foundation of a successful build.
Before finalizing your backyard kitchen design, reviewing these core principles ensures a smooth installation. Modern DIY outdoor kitchen projects require balancing aesthetic goals with rigorous structural safety codes. Let’s recap the most critical structural and material considerations you need to remember.
- Leverage a 3D design tool before breaking ground – Utilizing outdoor kitchen software allows you to visualize your outdoor kitchen layout, map utility lines, and ensure adequate traffic flow before spending a dime on materials.
- Ventilation is mandatory under solid pergolas – If your outdoor cooking area sits beneath a solid roof, fire safety standards dictate the installation of a high-power ventilation hood to exhaust dangerous smoke and grease.
- Master the four distinct kitchen zones – A highly functional residential outdoor kitchen separates the space into dedicated Prep, Cook, Serve, and Clean zones, ensuring the chef isn’t crowded by socializing guests.
- Never use indoor appliances outside – A standard indoor fridge will fail in summer heat; you must invest in an outdoor refrigerator and weatherproof beverage center designed to withstand temperature fluctuations.
- Material durability dictates longevity – When choosing cabinets, prioritize high-density polyethylene (HDPE) or stainless-steel over traditional wood to prevent warping, rot, and intense weather damage.
- Frame grills with non-combustible materials – Building codes require that any high-heat built-in grill or pizza oven be supported by non-combustible framing (like steel or masonry) or fitted with a specialized insulating jacket.
- Scale your budget with freestanding options – If a massive custom masonry build breaks the budget, combining a heavy-duty freestanding grill with a modular prep cart under a DIY pergola provides incredible functionality at a fraction of the cost.
People Also Ask About Outdoor Kitchen Design
Navigating the complexities of backyard kitchen construction often raises specific questions regarding cost, materials, permits, and structural safety.
Whether you are utilizing advanced outdoor kitchen software to plan your layout or interviewing a professional installer, having accurate, authoritative information is crucial. Below, we address the most common logistical questions to help you finalize your patio kitchen design confidently and safely.
How much does an outdoor kitchen cost?
An outdoor kitchen costs between $5,000 and $25,000 on average, depending heavily on materials, appliances, and utility requirements.
A basic DIY outdoor kitchen on a budget featuring a prefabricated frame and mid-tier grill can be completed for under $5,000. Conversely, a luxury outdoor kitchen with custom masonry work, a built-in pizza oven, premium stainless-steel appliances, and complex plumbing or gas lines easily exceeds $30,000. Your choice between an RTA vs custom build will heavily dictate the final price.
What are the best materials for outdoor kitchens?
The best materials for outdoor kitchens include high-density polyethylene (HDPE), 304-grade stainless steel, masonry, and concrete or stone countertops.
Because a patio kitchen design is constantly exposed to the elements, you must avoid traditional MDF or indoor woods which swell and rot. Stainless-steel provides excellent rust prevention, while polymer cabinetry offers total moisture resistance. For countertops, granite countertops or sintered stone are vastly superior to tile, which can crack during winter freezes.
Do I need a permit for an outdoor kitchen?
Yes, you generally need a permit for an outdoor kitchen if the project involves running new electrical, plumbing, or natural gas lines.
Additionally, building a permanent structure like a large pergola or pavilion often requires municipal approval to ensure it meets setback lines and building codes. However, if you are simply setting up a freestanding grill and a rolling cart on an existing patio, you typically bypass the need for a licensed contractor and formal permitting. Always check your local guidelines first.
How to plan an outdoor kitchen layout?
To plan an outdoor kitchen layout, divide your space into four distinct zones: Prep, Cook, Serve, and Clean, while ensuring an efficient workflow between them.
Start by using a free design tool to map your patio’s dimensions. Follow NKBA guidelines by ensuring ample landing space (at least 15 to 24 inches of countertop) on either side of the grill. Popular configurations include straight islands, L-shaped outdoor kitchen design plans, and U-shaped layouts, which you should select based on your available square footage and entertaining style.
Can you use indoor cabinets outside?
No, you should never use indoor cabinets outside, as they are constructed from particleboard or MDF that will rapidly swell, warp, and disintegrate when exposed to humidity and rain.
Even under a heavily covered pergola, temperature fluctuations and ambient moisture will destroy indoor cabinetry. For any exterior kitchen setup, you must utilize materials engineered for extreme weather, such as powder-coated aluminum, stainless steel, or marine-grade polymer cabinetry.
How do you vent an outdoor grill?
You vent an outdoor grill located under a solid roof by installing a commercial-grade outdoor ventilation hood with a high CFM rating directly above the cooking surface.
If your open-air kitchen is entirely uncovered, natural breezes handle smoke ventilation. However, if you are building an enclosed space or a solid-roof pavilion, fire safety standards require a vent hood (typically 1,200 CFM or higher) to pull heat, grease, and smoke up and away from the combustible roof structure.
What is the best flooring for outdoor kitchens?
The best flooring for outdoor kitchens is poured concrete, natural stone pavers (like flagstone or travertine), or textured porcelain outdoor tile.
These materials provide the necessary structural integrity to support heavy masonry islands and appliances. When selecting flooring, prioritize materials with a non-slip texture to ensure safety compliance around wet prep zones. Avoid wood decking directly beneath a grill unless you install a large, high-heat protective grill mat to catch escaping embers and grease.
Should an outdoor kitchen be covered?
Yes, covering an outdoor kitchen with a pergola, awning, or pavilion is highly recommended to protect your appliances from weather damage and extend your usable cooking season.
While premium stainless-steel appliances are weatherproof, a covered outdoor kitchen protects the chef from blistering summer sun and unexpected rainstorms. A solid roof also allows you to comfortably integrate smart home technology, outdoor TVs, and delicate landscape lighting without fear of immediate water intrusion.
Does an outdoor kitchen add value to a home?
Yes, a well-designed outdoor kitchen yields a high return on investment (ROI), typically recouping 55% to 75% of its cost while significantly boosting a home’s resale appeal.
In warm-weather climates, an outdoor living room is increasingly viewed as an essential extension of the home’s square footage. Premium features like a built-in grill, stone-veneer finishes, and integrated bar seating act as major selling points that enhances property value and attracts high-end buyers.
How much clearance is needed for a grill?
Most manufacturers require a minimum clearance of 36 inches between the top of a grill and any combustible overhead structure, and 12 to 24 inches of clearance around the back and sides.
Always consult your specific appliance’s manual and local fire safety standards, as BTU requirements heavily influence clearance needs. If you are inserting a drop-in grill into a combustible frame (like wood), you must purchase a manufacturer-approved insulating jacket to prevent heat transfer and fire risks.
Final Thoughts on Outdoor Kitchen Design
Embarking on a custom outdoor kitchen design is one of the most rewarding home improvement projects you can undertake. By bridging the gap between culinary functionality and stunning landscape architecture, a thoughtfully planned outdoor cooking area completely redefines how you utilize your outdoor living space. Whether you opt for a sprawling Mediterranean pizza oven setup or a modern, modular island shaded by a sleek steel pergola, the true secret to success lies in meticulous planning.
Remember that a beautiful backyard remodel is only as good as its foundation. By adhering strictly to building codes, prioritizing weather resistant materials like stainless steel and high-density polymers, and managing smoke ventilation properly, you ensure your investment lasts for decades. The integration of a pergola not only anchors the aesthetic of your outdoor entertaining area, but it creates a protective, comfortable micro-climate that invites your family and friends to linger longer into the evening. Updated for September 2026, these foundational rules remain your strongest defense against structural failures.
You now have the blueprints, the material checklists, and the expert advice needed to design your own spectacular backyard oasis. Start sketching your layout, playing with a 3D design tool, and visualizing exactly how you want to cook and host next summer.
Which of these 7 pergola and outdoor kitchen combinations best fits your backyard vision? Are you leaning toward the speed of a modular setup, or the timeless appeal of custom masonry? Let us know in the comments below!
Last update on 2026-09-12 at 11:30 / Affiliate links / Images from Amazon Product Advertising API
