
As an Amazon Associate KitchenwareSets.com earns from qualifying purchases.
Outdoor Mud Kitchen DIY: Rustic Play Kitchen Ideas for Kids
Tired of saying “no” to messy play inside the house? That constant battle between wanting your child to explore and needing to keep your floors clean is a universal parent struggle. The perfect solution is waiting right in your backyard.
An outdoor mud kitchen DIY is a specialized wooden outdoor play station designed for children’s sensory and messy play. To build one safely, use weather-resistant cedar or pressure-treated wood, sand all edges thoroughly to prevent splinters, and apply a non-toxic, VOC-free marine sealant to protect the structure from rot and sun damage.
Leveraging tested frameworks and professional woodworking insights, this guide provides everything you need. You will discover nine distinct, actionable plans for every budget and skill level. Get ready to transform your outdoor space into a hub for creativity and learning.
Contents
show
How an Outdoor Mud Kitchen DIY Solves the Ultimate Messy Play Dilemma
An outdoor mud kitchen DIY is more than just a project; it’s a permanent solution to the indoor mess dilemma. By creating a dedicated outdoor play kitchen, you give your children the freedom to engage in the essential sensory play they crave without worrying about stained carpets or dirty walls. This specialized piece of childhood outdoor equipment becomes an invaluable outdoor learning space where kids can explore textures, practice pouring, and develop crucial fine motor skills. Building a mud kitchen yourself allows you to control the cost, materials, and, most importantly, the safety features. From selecting the right lumber to applying a non-toxic sealant, every step ensures your child has a secure environment for imaginative play.
Before you begin building a mud kitchen, it’s crucial to prioritize safety. Based on professional woodworking standards and child development principles, a safe build is a successful build. This isn’t just about creating a fun toy; it’s about constructing a durable, stable piece of furniture. When considering materials, naturally rot-resistant woods like cedar vs pine are a key decision point; cedar offers superior durability without the chemicals found in some pressure-treated lumber. Always adhere to safety guidelines to ensure your final project has complete structural integrity.
- Safety Checklist:
- Wood Selection: Always use heat-treated (HT) pallets or naturally rot-resistant wood like cedar. Avoid chemically treated (MB) pallets.
- Thorough Sanding: Sand every surface and edge with 80-grit then 120-grit paper to completely eliminate the risk of splinters.
- Non-Toxic Finishes: Use only child safety certified and VOC-free paints, stains, and sealants.
- Structural Stability: Ensure the kitchen is level, stable, and cannot be tipped over during play. Countersink all screws to prevent sharp edges.
- Drainage Solution: All sinks or basins must have drainage to prevent standing water, which can attract pests and grow mold.
In the following sections, we will explore three distinct project paths to match your resources and skill level: a budget-friendly pallet build, a modern IKEA hack, and a professional-grade cedar station.
9 Rustic Play Kitchen Ideas to Build the Perfect Outdoor Mud Kitchen DIY
Now that you understand the core safety principles, it’s time to find the perfect design for your space and budget. This section provides nine distinct mud kitchen ideas, each with a detailed step by step guide to help you build a fantastic sensory play area. Whether you’re planning a scrap wood project, looking for repurposed furniture ideas, or want to construct a durable station from scratch, these plans offer actionable instructions. Each idea is designed to enable open-ended play using materials like pallets, scrap lumber, and even PVC pipes, and can be accessorized with stainless steel bowls and utensil racks to promote sensory development.
1. Assemble a Budget-Friendly Pallet Wood Mud Kitchen

Pin this genius budget-friendly DIY project to your Kids Outdoor Activities board!
Supplies Needed
- 2-3 clean, Heat-Treated (HT stamped) wooden pallets
- 2 wide stainless steel drop-in bowls for outdoor play (approx. 12-inch diameter)
- 2.5-inch exterior-grade deck screws
- Orbital palm sander with 80-grit and 120-grit sandpaper
- Crowbar and hammer for dismantling
- Non-toxic, child-safe exterior wood sealant
Instructions
- Dismantle one pallet completely using the crowbar to harvest individual planks for the countertop and shelving.
- Cut the remaining pallet in half vertically to serve as the sturdy base frame for your mud kitchen.
- Sand every single piece of wood meticulously, starting with 80-grit to remove rough spots and finishing with 120-grit to fix splinters and ensure a child-safe surface.
- Frame the base by securing the harvested planks across the top of the halved pallets using exterior-grade deck screws.
- Measure the diameter of your stainless steel bowls, draw a circle on the newly formed countertop, and use a jigsaw for cutting the drop-in holes.
- Apply two coats of the non-toxic exterior sealant, allowing it to dry fully between coats to prevent rot and weather damage.
Pro-Tip: When utilizing scrap wood or pallets, always check for an ‘HT’ (Heat-Treated) stamp. Avoid ‘MB’ (Methyl Bromide) pallets completely, as they leach toxic chemicals. Applying a high-quality polyurethane coating after assembly prevents tannin leaching and ensures the station withstands intense weather.
2. Upcycle the IKEA Duktig Hack into an Outdoor Play Kitchen

Save this brilliant IKEA hack to your modern backyard inspiration board!
Supplies Needed
- 1 IKEA Duktig Play Kitchen (new or thrifted)
- 1 quart of premium exterior bonding primer
- 1 quart of high-quality exterior latex paint (satin finish)
- Non-toxic marine grade wood sealant (for weatherproofing)
- 1 small outdoor-safe water dispenser with a spigot
- Rust-resistant stainless steel hooks and hardware
Instructions
- Disassemble the IKEA kitchen if it is already built, or keep pieces flat-packed before painting to ensure complete coverage on all edges.
- Sand the laminate surfaces lightly with 120-grit sandpaper to give the primer a textured surface to grip onto.
- Apply a heavy coat of exterior bonding primer to all MDF and wood pieces, paying special attention to the bottom edges that will touch the ground.
- Paint the primed pieces with your exterior latex paint, allowing 24 hours of drying time to prevent weather damage later.
- Seal every inch of the painted wood with a non-toxic marine-grade sealant to completely winterize your DIY mud kitchen and stop moisture penetration.
- Assemble the kitchen using rust-resistant hardware, then place the water dispenser on the counter so the spigot hangs over the sink bowl for easy water play.
Pro-Tip: MDF (Medium Density Fiberboard) acts like a sponge outdoors. To ensure structural integrity, you must coat the bottom “feet” of the IKEA Duktig in an epoxy resin or place them on rubber caster wheels to prevent ground moisture from causing the anaerobic decomposition of the fiberboard.

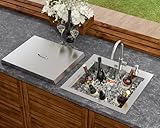
3. Construct a Pro Cedar Wood Double Sink Dirt Station

Save these professional woodworking plans to your DIY projects board!
Supplies Needed
- 6 pieces of 2x4x8 naturally rot-resistant cedar lumber (for the frame)
- 4 pieces of 1x6x8 cedar boards (for the countertop and backing)
- 2 heavy-duty rectangular plastic sensory bins (with lips)
- 2.5-inch exterior grade rust-proof wood screws
- Power drill with pilot hole and countersink bits
- Clear UV-protectant wood finish
Instructions
- Measuring and cutting your cedar 2x4s to create a sturdy rectangular base frame; a standard toddler ergonomic design is usually 20 to 24 inches high.
- Framing the base by connecting the 2x4s; always drill pilot holes before inserting the exterior grade rust-proof wood screws to prevent the cedar from splitting.
- Assembling the slatted countertop by spacing the 1×6 cedar boards across the top frame, leaving a 1/8-inch gap between boards for proper drainage solution.
- Designing the double sink layout by tracing the plastic sensory bins onto the countertop boards.
- Cutting the drop-in rectangles using a jigsaw, ensuring you cut 1/2 inch inside your traced line so the lip of the bins catches on the wood.
- Protecting the finished structure by applying a clear UV-protectant finish to maintain the rich color of the cedar and prevent sun damage.
Pro-Tip: For professional woodworking results, always practice countersinking screws. This technique drives the screw head slightly below the surface of the wood, eliminating sharp metal hazards that could scratch children during open-ended play.

4. Build a Scrap Wood Sensory Mud Kitchen with Storage Bins

Add this sustainable sensory play station to your DIY Kids Projects board!
Supplies Needed
- Assorted scrap lumber (2x4s, plywood offcuts, 1x2s)
- 4 heavy-duty plastic sensory play bins (shoebox size or larger)
- 1 box of 1.5-inch and 2.5-inch wood screws
- Wood glue (exterior rated)
- Water-based outdoor deck stain
- Smooth river rocks, sand, and pinecones (for sensory bins)
Instructions
- Measuring your heavy-duty plastic sensory play bins to determine the width and depth of the internal storage shelves you need to build.
- Assembling a basic box frame using your longest 2×4 scrap wood pieces for the upright legs.
- Fastening horizontal 1×2 cleats to the inside of the frame legs; these will act as slider rails for the plastic bins to easily slide in and out.
- Securing a solid piece of scrap plywood to the top of the frame to serve as a broad workspace for sensory processing and messy play activities.
- Staining the mismatched scrap lumber with a uniform, water-based outdoor deck stain to give the station a cohesive, finished look while protecting it from rot.
- Organizing the station by filling the sliding bins with different sensory textures: one for sand, one for water, one for dirt, and one for loose parts.
Pro-Tip: Incorporating “loose parts play” via sliding storage bins is a core tenant of the Montessori method. Ensuring your scrap wood is thoroughly inspected for rusted nails and properly sanded guarantees the environment supports safe, open-ended play.

5. Repurpose an Old Dresser into a Messy Play Mud Cafe

Repin this creative upcycled furniture project for your kids’ backyard garden!
Supplies Needed
- 1 solid wood thrifted dresser (avoid particleboard)
- 1 piece of outdoor-rated plywood (for the backboard)
- Outdoor chalkboard paint for wood
- Exterior enamel paint (colorful, child-safe)
- Caulk and a caulking gun
- Drawer pulls or knobs
Instructions
- Removing the top two drawers of the dresser completely to create an open shelving space for the mud cafe DIY oven or storage area.
- Caulking every seam, crack, and joint on the dresser interior and exterior to prevent moisture from causing internal rot.
- Painting the main body of the dresser with a bright, colorful exterior enamel paint to give it a fun, child-friendly aesthetic.
- Coating the sheet of outdoor-rated plywood with three even layers of outdoor chalkboard paint for wood, letting it cure completely between layers.
- Fastening the painted plywood to the back of the dresser using screws, ensuring it extends up 2 feet above the dresser top to act as a menu board.
- Securing hooks to the sides for hanging aprons and attaching new drawer pulls to modernize the look.
Pro-Tip: If you upcycle a dresser, the original drawer glides will likely rust or swell shut. Remove the metal tracks and replace them with simple wooden cleats rubbed with beeswax to ensure the drawers open smoothly regardless of humidity or weather damage.

6. Install an Interactive Mud Kitchen with a Working Sink and Pump

Save this incredible working water pump DIY to your ultimate backyard ideas board!
Supplies Needed
- 1 manual water hand pump for sink (often used for RVs or boats)
- 1 large galvanized metal bucket or deep sink bowl
- Clear PVC vinyl tubing (sized to fit the pump nozzle)
- 1 large 5-gallon food-safe water jug (reservoir)
- Hole saw drill bits
- Plumber’s putty or silicone caulk
Instructions
- Drilling a hole in your mud kitchen countertop using the hole saw bit, ensuring it perfectly matches the diameter of the manual water hand pump base.
- Installing the hand pump into the hole and securing it tightly with the provided under-counter mounting nut.
- Sealing the base of the pump on top of the counter with a bead of silicone caulk to prevent surface water from dripping into the cabinet below.
- Cutting a length of clear PVC tubing long enough to reach from the bottom of the pump nozzle to the very bottom of your hidden 5-gallon water jug reservoir.
- Connecting the tubing securely to the pump and dropping the other end into the water jug housed on a lower shelf.
- Priming the pump by pulling the handle a few times to draw water up from the jug, instantly integrating water play into the dirt station!
Pro-Tip: Standing water breeds mosquitoes and mold. Always design a drainage solution by drilling a large hole in the bottom of your galvanized sink bucket and running a short PVC pipe to direct greywater away from the kitchen base into a nearby garden bed.

7. Design a Compact Portable Mud Kitchen for a Balcony

Pin this space-saving play kitchen idea for your apartment balcony!
Supplies Needed
- 1×12 pine or cedar boards (for a slim profile frame)
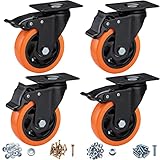
- 4 heavy-duty locking caster wheels for outdoor furniture
- 1 small, deep stainless steel insert pan (restaurant prep style)
- Folding shelf brackets (for a drop-down prep counter)
- Wood glue and 1.5-inch screws
- Marine varnish
Instructions
- Measuring and cutting the 1×12 boards to build a tall, narrow box frame no deeper than 12 inches to ensure it fits perfectly on a standard apartment balcony.
- Assembling the narrow frame, placing the heaviest wood at the base to prevent top-heavy stability issues.
- Installing the heavy-duty locking caster wheels directly to the bottom four corners of the frame using sturdy lag screws.
- Attaching the folding shelf brackets to one side of the kitchen and securing a spare piece of wood on top to create a drop-down prep station that saves space when not in use.
- Waterproofing the entire slim build with a thick coat of marine varnish to protect against wind-driven balcony rain.
- Locking the caster wheels firmly in place before letting children play to ensure the portable unit doesn’t roll during use.
Pro-Tip: When building compact, portable furniture for children, the center of gravity is critical. Always store heavy items (like water jugs or bags of play sand) on the lowest shelf to anchor the unit and prevent it from tipping over during vigorous play.
8. Create a Nature Play Center with Hooks and Utensil Racks

Save these brilliant outdoor kitchen organization ideas!
Supplies Needed
- 1 long piece of 1×2 wood (for the rack bar)
- Pack of stainless steel S hooks for hanging utensils
- Small outdoor-rated cup hooks
- Rust-proof wire baskets
- Assorted real kitchen tools (whisks, ladles, wooden spoons, tongs)
- Measuring tape and drill
Instructions
- Measuring the width of your mud kitchen backboard to determine the ideal length for your wooden utensil rack bar.
- Cutting the 1×2 wood to size and sanding the edges smooth to ensure child safety.
- Fastening the wooden bar horizontally across the top of the mud kitchen backboard using wood screws.
- Hanging the stainless steel S hooks over the wooden bar, spacing them evenly to hold larger utensils like ladles and strainers.
- Drilling pilot holes lower down on the backboard to securely screw in the smaller cup hooks, perfect for hanging lightweight measuring cups or wire baskets.
- Organizing the real kitchen tools onto the racks, ensuring tongs and whisks are easily accessible to build fine motor skills during play.
Pro-Tip: Skip the plastic toy utensils. Equipping your nature play center with real, thrifted metal and wooden kitchen tools not only withstands the elements better but provides proper sensory feedback and ergonomic grip training for developing hands.

9. Craft a Cheap Recycled Tire Mud Kitchen Station

Pin this incredibly cheap and sustainable upcycling project!
Supplies Needed
- 2-3 used car tires (cleaned thoroughly)
- 1 large round piece of exterior plywood (cut slightly larger than the tire diameter)
- 1 large stainless steel mixing bowl
- Heavy-duty construction adhesive
- Spray paint designed for plastics/rubber
- Wooden outdoor play kitchen accessories
Instructions
- Cleaning the used car tires rigorously with soap and a stiff brush to remove all road grime, oil, and debris.
- Painting the exterior of the dry tires with a high-quality rubber-adhering spray paint in bright colors to prevent the black rubber from absorbing too much heat in the sun.
- Gluing the tires together in a stack using heavy-duty construction adhesive to create a solid, stable cylinder base.
- Measuring and cutting a hole in the center of your round plywood top that perfectly fits the diameter of your stainless steel mixing bowl.
- Securing the wooden countertop to the top tire using more construction adhesive, weighing it down with bricks while it cures overnight.
- Dropping the mixing bowl into the hole and stocking the area with durable wooden outdoor play kitchen accessories for instant muddy fun.
Pro-Tip: Unpainted black tires present severe safety hazards during a heat wave, absorbing enough solar radiation to cause contact burns. Always seal and encapsulate recycled tires with light, reflective outdoor paint to ensure the play space remains cool and child-safe.
Key Takeaways: Your Quick Guide to Outdoor Mud Kitchen DIY
- Choose the Right Lumber for Longevity: Opt for naturally rot-resistant cedar wood or heat-treated (HT) pallets to ensure your outdoor mud kitchen DIY withstands weather and remains child-safe.
- Prioritize Weatherproofing and Sealants: Applying a non-toxic, VOC-free marine grade wood sealant is a critical step in building a mud kitchen to prevent mold, sun damage, and wood expansion.
- Eliminate Splinters and Sharp Edges: Thorough sanding using 80 to 120-grit sandpaper and countersinking exterior-grade screws are essential safety hazards prevention techniques.
- Incorporate Real Kitchen Accessories: Ditch the plastics and equip your messy play station with stainless steel bowls, actual garden tools, and metal whisks to build fine motor skills and promote sensory play.
- Design for Easy Cleanup and Drainage: Always drill drainage holes in sinks and incorporate sliding heavy-duty plastic bins to solve the problem of limited space and easy cleanup.
- Integrate Interactive Water Features: Upgrading your mud kitchen ideas with a simple manual water hand pump elevates the outdoor learning space, seamlessly connecting water and dirt for the ultimate sensory experience.
FAQs About Outdoor Mud Kitchen DIY
How much does it cost to build a mud kitchen?
Building a mud kitchen costs anywhere from $0 to $250, depending heavily on your materials. If you utilize heat-treated pallet wood, scrap lumber, and thrifted bowls, you can easily construct a budget-friendly station for under $20. Conversely, purchasing premium cedar wood, a manual water hand pump, and high-end outdoor hardware will push the project closer to $150-$250.
What wood is best for a mud kitchen?
Cedar and redwood are the best wood choices for an outdoor mud kitchen due to their natural resistance to rot, decay, and insect damage. While pressure-treated pine is a common budget option for outdoor furniture, experts recommend avoiding it for children’s toys due to the harsh chemicals used in the treatment process. If you use standard pine or pallets, you must seal them thoroughly with an exterior marine varnish.
How to waterproof a mud kitchen?
To waterproof a mud kitchen, apply two to three coats of a non-toxic exterior polyurethane or marine-grade wood sealant. Pay special attention to the end grains and the “feet” of the kitchen that touch the ground, as these absorb the most moisture. For painted designs, like an IKEA Duktig hack, start with an exterior bonding primer followed by high-quality latex exterior paint.
What ages is a mud kitchen for?
A mud kitchen is ideal for toddlers and preschool-aged children between 2 and 7 years old. During these crucial developmental years, the messy play activities provided by a dirt lab directly support the early years foundation stage (EYFS) by enhancing sensory processing, open-ended creativity, and fine motor skills through pouring, mixing, and measuring.
How to keep a mud kitchen clean?
Keep a mud kitchen clean by incorporating a working water source for easy rinse-downs and drilling drainage holes in all sink basins. Installing a small hose hook nearby allows parents to quickly spray down the station after play. To prevent mold and pest control issues, always empty standing water from pots and cover the kitchen with a tarp during severe weather.
Can you use an IKEA kitchen outside?
Yes, you can use an IKEA play kitchen outside if you thoroughly waterproof the MDF (Medium Density Fiberboard) components. MDF will swell and disintegrate if exposed to rain. You must prime the entire disassembled unit with an exterior bonding primer, paint it with outdoor enamel, and coat it in polyurethane. Additionally, mount the base on caster wheels to elevate it from ground moisture.
Where to place a mud kitchen in the garden?
Place your mud kitchen in a shaded, well-draining area of your backyard to prevent sun damage and muddy pooling. Avoid placing it directly under trees that drop excessive sap or berries. Positioning the kitchen near an outdoor water spigot makes filling the sink reservoirs easy, and keeping it within clear sightlines of the house ensures you can monitor outdoor play safely.
Is pressure treated wood safe for kids?
Modern pressure-treated wood (post-2004) is generally considered safe for outdoor furniture, but it is not recommended for food-contact surfaces or high-touch play areas like mud kitchens. The chemicals used to prevent rot can leach out over time. If you must use pressure-treated lumber for the base frame to save money, ensure the countertop and interactive elements are made from untreated cedar or sealed pine.
How do you make real mud for a mud kitchen?
To make the best, safest mud for a mud kitchen, mix sterilized play sand, organic topsoil (free of fertilizers), and water. Avoid using random dirt from garden beds that may contain animal waste, sharp rocks, or chemical pesticides. Providing a basket of natural loose parts like pinecones, flower petals, and smooth pebbles allows children to safely “cook” creative, sensory-rich mud pies.
Why are mud kitchens good for kids?
Mud kitchens are exceptional for child development because they facilitate open-ended play, sensory exploration, and emotional regulation. According to the Montessori method, unrestricted outdoor messy play encourages creativity and scientific inquiry. Children build fine motor skills by whisking and pouring, while the tactile experience of water and dirt helps soothe and regulate their sensory processing systems.
Final Thoughts on Your Outdoor Mud Kitchen DIY
Creating an outdoor mud kitchen DIY is one of the most rewarding backyard projects you can undertake for your children. Not only do you solve the age-old problem of keeping messy play out of the living room, but you also provide a dedicated outdoor learning space that actively promotes sensory processing, fine motor skills, and boundless imagination. Whether you decide to upcycle a thrifted dresser, construct a budget-friendly pallet station, or invest in a professional cedar wood build, the foundational principles remain the same: prioritize child safety, choose durable materials, and waterproof rigorously.
By following the step-by-step woodworking plans and implementing the expert weatherproofing tips outlined above, you can ensure your DIY project withstands the elements and provides years of educational entertainment. Remember, the goal isn’t just to build a piece of childhood outdoor equipment; it’s to create an environment where open-ended play and nature intersect safely.
Are you planning to build a simple recycled tire dirt lab, or are you going all out with a double-sink interactive water pump station? Gather your supplies, start sanding, and let the muddy memories begin! Which of these 9 rustic play kitchen ideas are you most excited to build this weekend? Let us know your plans in the comments below
Last update on 2026-09-18 at 11:32 / Affiliate links / Images from Amazon Product Advertising API
