
As an Amazon Associate KitchenwareSets.com earns from qualifying purchases.
13 Whimsical Pink Cottagecore Kitchen Ideas for Home Decorators
Are you tired of your sterile, cold cooking space? Many homeowners struggle with dark kitchens and outdated cabinetry that lack personality and warmth. Transforming these difficult rooms into a whimsical pink cottagecore kitchen solves this modern design dilemma perfectly.
A pink cottagecore kitchen blends rustic English country charm with soft pastel hues to create a cozy, nostalgic cooking space. Key elements include blush painted cabinets, natural butcher block countertops, vintage floral accents, and antique hardware, transforming an ordinary room into a whimsical, vintage-inspired sanctuary.
Drawing from comprehensive analysis of interior design principles and historical restoration methods, this aesthetic goes beyond simple paint choices. In this guide, you will discover stunning cottagecore kitchen ideas that balance modern utility with grandma aesthetic warmth. Get ready to build your dream home layout and elevate your daily cooking routine.
Designing a romantic pink kitchen requires a delicate balance of color theory, architectural context, and rich textures. If you simply paint everything pink, the room might feel flat or resemble a toy. Instead, we anchor soft pastel tones with earthy elements like reclaimed wood, aged metals, and woven textiles. This pink farmhouse style thrives on a layered, deeply lived-in approach.
Whether you are dealing with a small kitchen space or looking for a dark kitchen solution, integrating these vintage kitchen ideas completely transforms the atmosphere. By utilizing shabby chic decor and natural wood finishes, you can easily modernize outdated cabinetry while preserving true antique charm. Let us explore the fundamental styling techniques, DIY projects, and curated details that will help you achieve the ultimate pink kitchen makeover this August 2026.
Contents
show
1. Painting Kitchen Cabinets a Soft Blush Pink

Pin this gorgeous blush cabinet transformation to your dream kitchen board!
Updating traditional cabinetry is the most impactful way to start your DIY pink kitchen cabinet transformation. This project requires strict attention to detail, but the resulting pale whisper pink cabinets completely revitalize a dark or outdated room. Focusing on the durability of your finish ensures your hard work lasts for years.
Materials Needed
- Deglosser or liquid sandpaper to prep outdated cabinetry
- High-adhesion stain-blocking primer
- High-quality acrylic enamel paint in a pale whisper pink or dusty rose
- Foam rollers (for smooth doors) and angled synthetic brushes (for trim)
- Heavy-duty brass cup pulls and ornate hardware
Step-by-Step Directions
- Remove all cabinet doors, drawers, and existing hardware, labeling each piece to ensure easy reassembly.
- Clean all surfaces thoroughly with a degreaser to remove years of cooking oils, then apply liquid sandpaper to dull the previous finish.
- Apply one even coat of stain-blocking primer, allowing it to dry completely to prevent wood tannins from bleeding through your pastel tones.
- Paint the cabinets using a foam roller for the flat centers and an angled brush for the traditional cabinetry grooves, applying two to three thin coats.
- Let the doors cure for at least 72 hours before reattaching them and installing the new antique brass hardware.
Pro-Tip: As a certified designer, I always recommend looking into heritage color palettes and using a cabinet-specific enamel. Standard wall paint lacks the hard-curing resins needed to resist chipping in a high-traffic Victorian scullery or modern kitchen environment.

2. Installing Rustic Open Shelving for Vintage Display

Save these styling tips to make your open shelves look perfectly curated!
Replacing heavy upper cabinets with open shelving instantly solves dark kitchen problems by making the space feel larger. Using reclaimed materials provides the necessary rustic + blush contrast for an authentic, warm aesthetic. This approach allows you to openly display beautiful ceramics rather than hiding them behind closed doors.
Materials Needed
- Thick planks of reclaimed wood or butcher block (cut to size)
- Heavy-duty decorative cast iron shelf brackets
- Heavy-duty wall anchors and 3-inch wood screws
- Stud finder and a laser level
- Vintage canisters, pink depression glass, and copper teacups for styling
Step-by-Step Directions
- Locate the wall studs using your stud finder, marking them clearly with a pencil to ensure your heavy rustic shelves have adequate support.
- Use a laser level to mark the exact height and placement for your iron brackets, ensuring they are perfectly horizontal across the wall space.
- Drill pilot holes directly into the studs, then secure the ornate iron brackets tightly to the wall using 3-inch wood screws.
- Place the natural wood shelves onto the brackets, screwing them in from underneath so the wood cannot slide or tip.
- Curate the shelves by layering items: place tall vintage canisters in the back, stack pastel ceramics in the middle, and drape a trailing indoor plant over the edge.
Pro-Tip: Proper bespoke joinery and installation are critical. Reclaimed wood shelves are extremely heavy before you even add dishes. Always anchor directly into studs rather than relying on drywall anchors when storing antique ceramics or heavy copper pots.

3. Hanging Floral Wallpaper for English Country Charm

Pin this stunning floral wallpaper idea for your next weekend DIY project!
Integrating floral wallpaper instantly elevates an English cottage pink kitchen by adding immense depth and pattern. This classic design choice perfectly balances solid paint colors with traditional botanical motifs. If you are dealing with a limited budget makeover, peel-and-stick varieties offer a fantastic renter-friendly hack.
Materials Needed
- High-quality vintage floral peel-and-stick wallpaper (pink and sage green palette)
- Wallpaper smoothing tool or plastic squeegee
- Precision craft knife (X-Acto knife) with extra blades
- Measuring tape and a long straight edge
- Step ladder and a damp microfiber cloth for prep
Step-by-Step Directions
- Wipe down the entire wall surface with a damp cloth to remove dust and grease, allowing it to dry completely for maximum adhesion.
- Measure the height of your wall and cut your first strip of floral wallpaper, leaving an extra two inches at both the top and bottom for trimming.
- Peel back the top six inches of the backing, align the paper perfectly straight at the ceiling line, and press it firmly against the wall.
- Slowly pull the backing downward while using the smoothing tool to push air bubbles out toward the edges.
- Match the pattern exactly on the next strip before applying, and finally, use the straight edge and precision knife to trim the excess paper at the baseboards.
Pro-Tip: To achieve true historical restoration vibes without the commitment, look for William Morris patterns in high-quality removable vinyl. If you are applying this near a stove, ensure the wallpaper is rated for moisture protection and heat resistance.

4. Sourcing and Styling Retro Pink Appliances

Don’t forget to save this adorable pink appliance inspiration to your kitchen decor boards!
Curating pastel kitchen inspiration often centers around functional statement pieces like Smeg appliances or affordable retro alternatives. These glossy focal points anchor your pink and green kitchen while offering high-end modern functionality. By pairing them correctly, you balance extreme aesthetic appeal with daily utility.
Materials Needed
- A statement retro pink appliance (such as a 2-slice toaster, stand mixer, or electric kettle)
- Grounded, aesthetically pleasing cord organizers
- Butcher block countertops or a dedicated coffee station tray for display
- Complementary accessories (like a matching pink butter dish or bread box)
Step-by-Step Directions
- Select a designated “appliance zone” on your countertop that has easy access to outlets but doesn’t clutter your primary food prep space.
- Place the retro pink toaster or kettle squarely on a decorative wooden tray or directly onto your butcher block to ground the glossy finish with natural wood.
- Organize and hide the black power cords using adhesive cord wrappers attached to the back of the appliance to maintain a clean, pristine look.
- Group the appliance with two supportive, functional decor items, such as a vintage flour canister and a potted plant, following the rule of three.
- Keep the appliance polished with a microfiber cloth to maintain its glossy, 1950s diner-meets-cottage sheen.
Pro-Tip: While Smeg appliances are the gold standard for the dreamy blush cottagecore aesthetic, there are many highly-rated, affordable retro alternatives. The key to making them look luxurious is keeping the surrounding countertop completely free of modern plastic packaging and visual clutter.

5. Installing a Farmhouse Sink with Antique Brass Faucets

Add this gorgeous apron-front sink idea to your farmhouse renovation board!
A classic apron-front sink is a cornerstone of any heritage design style. Pairing a deep, white fireclay farmhouse sink with unlacquered brass faucets creates a stunning brass + blush focal point in the room. This upgrade dramatically improves plumbing functionality while strictly adhering to the rustic cottagecore feel.
Materials Needed
- White fireclay or porcelain apron-front farmhouse sink
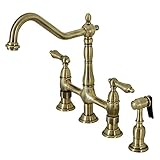
- Unlacquered antique brass bridge faucet with cross handles
- Plumber’s putty, Teflon tape, and silicone sealant
- Adjustable wrenches and basin wrench
- Sink mounting harness or custom cabinet supports (fireclay sinks are exceptionally heavy)
Step-by-Step Directions
- Ensure your base cabinet is structurally reinforced to handle the extreme weight of a fireclay apron-front sink when filled with water.
- Slide the farmhouse sink into the custom cutout, using a level to ensure perfect drainage pitch, and seal the edges with high-quality waterproof silicone.
- Apply plumber’s putty beneath the brass drain flange and secure it tightly into the sink basin.
- Wrap the threaded pipe connections of your antique brass bridge faucet with Teflon tape to prevent leaks.
- Feed the faucet lines through the countertop holes and secure the nuts from underneath using a basin wrench, then connect the hot and cold water supply lines.
Pro-Tip: If you want true cottagecore authenticity, opt for unlacquered brass for your faucets and hardware. Unlacquered brass undergoes beautiful patina development over time, aging naturally to create a living finish that perfectly contrasts with soft pastel tones.
6. Displaying Vintage Copper Cookware and Ceramics

Pin this stunning copper cookware display to inspire your kitchen organization!
Organizing copper cookware on heavy iron pot racks turns everyday kitchen tools into high-impact functional art. The warm copper + rose color palette perfectly complements shabby chic vibes while solving severe storage issues for small spaces. Leaning into this maximalist aesthetic prevents the room from feeling empty or sterile.
Materials Needed
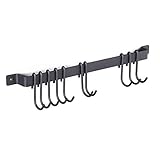
- Wall-mounted wrought iron pot rack or a heavy-duty brass rail system
- S-hooks for hanging pots
- A curated collection of vintage or new copper pots and pans
- Copper polish (like Bar Keepers Friend) for maintenance
- Heavy-duty wall anchors designed for heavy loads
Step-by-Step Directions
- Identify a blank wall space near your stove or prep area that can accommodate hanging cookware without obstructing traffic flow.
- Mount the wrought iron pot rack securely to the wall studs, ensuring it is level and capable of holding substantial weight.
- Polish your copper cookware to your desired level of shine—some prefer a high gloss, while others prefer a tarnished, historic patina.
- Arrange the copper pots on the S-hooks, placing the largest, heaviest skillets at the edges and smaller saucepans in the center to create visual balance.
- Intermingle small bundles of dried herbs or braided garlic among the pots to soften the metallic display and add an organic, farmhouse touch.
Pro-Tip: The combination of copper + rose is a cornerstone of the English country pink kitchen. If vintage solid copper pans are out of your budget, you can achieve the exact same aesthetic using high-quality copper-plated stainless steel sets.
7. Creating a Cottagecore Indoor Herb Garden

Save this easy indoor herb garden tutorial to bring nature into your kitchen!
An indoor herb garden brings essential nature + nostalgia into your space, enhancing the biophilic design elements. The combination of terracotta + pink adds incredible warmth, grounding the cooler pastel tones with rich, earthy textures. Cultivating culinary herbs bridges the gap between aesthetic beauty and the functional homestead lifestyle.
Materials Needed
- A set of aged terracotta pots and pale pink ceramic planters with drainage holes
- Organic, well-draining indoor potting soil
- Culinary herb starters (rosemary, basil, thyme, and mint)
- A vintage brass plant mister for humidity
- Decorative stamped metal or wooden plant labels
Step-by-Step Directions
- Select a south-facing or well-lit kitchen window sill that receives at least 6 hours of bright, indirect sunlight daily.
- Fill the bottom of your terracotta pots with a thin layer of small pebbles to ensure proper drainage and prevent root rot.
- Gently transplant the herb starters into the pots, filling the remaining space with organic potting soil and pressing down lightly around the stems.
- Arrange the pots along the window sill, alternating between the rustic terracotta and the glazed pink ceramic pots for textural contrast.
- Insert vintage-style metal plant labels into the soil and give the leaves a gentle spray with a brass plant mister.
Pro-Tip: Embracing biophilic design is essential for the cottagecore aesthetic. Terracotta + pink is a highly effective color pairing because the earthy orange undertones of the clay naturally warm up cooler pastel pink paints, preventing the room from feeling sterile.

8. Layering Checkered Flooring with Soft Textiles

Pin this beautiful pink checkered floor and rug combo for major cottage vibes!
Classic checkered flooring provides a beautiful geometric base for your cottage core decor. Layering these hard surfaces with pink + white floral runner rugs softens the room immensely. This renter-friendly flooring hack transforms boring ground spaces into a striking design feature that perfectly matches the grandma aesthetic.
Materials Needed
- Pink and white checkered vinyl floor tiles (or floor paint and stencils for a DIY approach)
- A vintage-inspired floral or faded oriental runner rug
- Heavy-duty non-slip rug pad (essential for kitchen safety)
- Scotchgard or fabric waterproofing spray
- Floor cleaner suitable for vintage or painted tiles
Step-by-Step Directions
- If installing temporary checkered flooring, thoroughly clean and dry your existing floor before laying down pink and white peel-and-stick vinyl tiles in a diamond pattern.
- Cut your non-slip rug pad to be exactly one inch smaller than your runner rug on all sides so it remains completely hidden.
- Place the non-slip pad in high-traffic areas, typically directly in front of the sink or parallel to the kitchen island.
- Treat your vintage-style runner rug with a fabric waterproofing spray to protect it from inevitable kitchen spills and grease splatters.
- Unroll the runner rug over the pad, ensuring the floral textile patterns contrast beautifully with the geometric pink and white checkered floor beneath it.
Pro-Tip: In a kitchen environment, textile maintenance is everything. If you are layering rugs over painted or vinyl checkered flooring, always opt for machine-washable runner rugs. The “shabby chic” look is beautiful, but stained rugs quickly turn “shabby” into just “messy.”
9. Upcycling a Wood Kitchen Island with Pink Accents

Don’t buy new—save this island upcycling hack to your DIY furniture board!
Upcycling a thrifted wood kitchen island is a highly sustainable way to build a central focal point. Blending a wood + pastel palette perfectly balances rustic utility with romantic design. Treating food-grade surfaces correctly ensures your new statement piece is both safe for cooking and visually stunning.
Materials Needed
- A thrifted wooden dresser, antique table, or basic kitchen island
- Furniture chalk paint in a dusty rose or muted salmon color
- Matte polyacrylic protective topcoat
- Medium and fine-grit sandpaper (120 and 220 grit)
- Food-safe mineral oil or beeswax butcher block conditioner
Step-by-Step Directions
- Sand the base of your thrifted island with 120-grit sandpaper to rough up the surface, wiping away all dust with a tack cloth.
- Apply two coats of dusty rose chalk paint to the base, legs, and drawers, allowing proper drying time between coats.
- For a true shabby chic, distressed texture, use fine-grit sandpaper to gently rub away the pink paint around the edges, corners, and raised details to reveal the wood underneath.
- Seal the painted base with a clear, matte polyacrylic topcoat to protect against scuffs from barstools and shoes.
- Sand the wooden butcher block top down to raw wood, clean it, and massage food-safe beeswax conditioner into the grain to protect it from moisture and food stains.
Pro-Tip: When dealing with the wood + pastel aesthetic, never paint the food prep surface. Preserving antique wood on the top while painting the base pink anchors the room. Always use 100% food-safe mineral oils—never standard polyurethane—on surfaces where you will knead dough or chop vegetables.

10. Adding Whimsy with Lace Curtains and Gingham Linens

Save these beautiful vintage window treatment ideas for your cottage kitchen!
Dressing windows with delicate lace curtains and gingham linens beautifully diffuses natural light. This lace + linen combination is essential for achieving a deeply romantic, lived-in homestead atmosphere. By utilizing window treatments strategically, you enhance your kitchen’s privacy without completely blocking out necessary sunlight.
Materials Needed
- Vintage or reproduction white lace cafe curtains (tier curtains)
- A tension rod or brass cafe curtain rod
- Pink and white gingham cotton dish towels and oven mitts
- Ruffled linen chair pads for dining nooks
- Fabric starch for crisp pressing
Step-by-Step Directions
- Wash and press your gingham linens and lace curtains, using a light fabric starch on the gingham to give it a crisp, traditional farmhouse feel.
- Install a brass cafe rod exactly halfway up your kitchen window frame to allow maximum natural light through the top while providing privacy at the bottom.
- Thread the delicate lace cafe curtains onto the rod, gathering them slightly to create soft, romantic folds.
- Drape a pink gingham dish towel casually over the handle of your oven or neatly folded over the edge of your farmhouse sink.
- Layer ruffled linen chair pads onto your wooden dining chairs, tying them securely with exaggerated bows in the back to maximize the whimsy.
Pro-Tip: The combination of lace + linen is a hallmark of the grandma aesthetic. Cafe curtains are highly strategic in kitchens; they block the view of dirty dishes from the outside while allowing unhindered natural light to flood the upper half of the room, keeping small pink kitchens feeling bright and airy.

11. Creating a Pink Tile Backsplash Feature

Pin this stunning pink backsplash inspiration for your upcoming kitchen reno!
Installing a pink tile backsplash provides critical moisture protection while anchoring your modern plus cottagecore aesthetic. Choosing artisanal tilework over flat, mass-produced ceramics adds essential texture. This permanent, high-impact design feature protects your kitchen walls from cooking messes while maintaining beautiful historical charm.
Materials Needed
- Glossy pastel pink ceramic subway tiles or zellige tiles
- Pre-mixed tile mastic (adhesive)
- White or antique white unsanded grout
- V-notch trowel, rubber grout float, and tile spacers
- Wet saw (for cutting tiles) and a large sponge
Step-by-Step Directions
- Prepare your wall by ensuring the drywall is clean, flat, and free of grease, shutting off power to any outlets in the backsplash zone.
- Apply the tile mastic to a small section of the wall using your V-notch trowel, creating deep ridges for the tiles to grip.
- Press the pink ceramic tiles into the adhesive using a traditional brick-lay pattern, inserting plastic tile spacers between each piece to ensure uniform gaps.
- Allow the adhesive to cure for 24 hours, then remove the spacers and use a rubber float to press white grout diagonally into all the joints.
- Wait 15-20 minutes for the grout to haze over, then wipe the tiles clean with a damp sponge, polishing them to reveal the glossy pastel finish.
Pro-Tip: If you want a more rustic, historically accurate look, opt for artisanal zellige tiles rather than standard subway tiles. Zellige tiles have irregular surfaces and slight color variations that reflect light beautifully, adding an essential layer of texture to a maximalist interior.

12. Displaying Mason Jars and Vintage Canisters

Save these beautiful vintage storage ideas to keep your counters clutter-free!
Utilizing transparent Mason jars and vintage canisters is a brilliant strategy for elegant clutter management. This apothecary style organization turns mundane pantry staples into beautiful, curated displays. It organizes your dry goods openly on the counter, perfectly marrying antique charm with highly practical modern kitchen storage.
Materials Needed
- A set of vintage pink depression glass canisters or high-quality reproductions
- Large glass Mason jars with tight-sealing metal or wooden lids
- Small metal scoops for dry goods
- Chalkboard labels or embossed label maker tape
- Pantry staples (flour, sugar, oats, coffee beans)
Step-by-Step Directions
- Wash and thoroughly dry all vintage canisters and Mason jars, ensuring no moisture remains inside that could spoil dry baking goods.
- Decant your pantry staples from their ugly commercial plastic packaging directly into the glass jars to instantly elevate the visual aesthetic of your kitchen.
- Bury a small metal or wooden scoop directly inside the flour and sugar canisters for practical, old-world baking convenience.
- Apply minimalist embossed labels or hand-written tags to the bottom or back of the jars so you can identify similar-looking powders (like baking soda vs. powder).
- Arrange the canisters in a cluster on your countertop or open shelving, placing the tallest jars in the back and the smallest in the front.
Pro-Tip: Apothecary style storage is a secret weapon for clutter management. By removing branded cardboard boxes and neon plastic bags from your sightline, your kitchen instantly feels more serene. However, keep genuine antique depression glass away from extreme heat sources, as old glass can shatter.
13. Curating a Victorian Scullery-Inspired Coffee Station

Pin this adorable Victorian-inspired coffee station to your morning routine board!
Designing a Victorian scullery coffee zone brings distinct butler’s pantry design elements into a romantic cottagecore kitchen. This dedicated station keeps your morning routine beautifully organized and visually pleasing. It creates a highly functional corner that blends modern needs like espresso seamlessly with antique charm.
Materials Needed
- A small thrifted side table, bar cart, or dedicated section of counter space
- An espresso machine or vintage-style French press
- A vintage pink floral tea set (cups, saucers, and teapot)
- A small brass or wooden serving tray
- Glass jars for coffee beans, loose leaf tea, and sugar cubes
Step-by-Step Directions
- Designate a specific “beverage zone” away from your main cooking area to create a mini butler’s pantry feel that improves kitchen traffic flow.
- Place a brass or wooden serving tray down first to anchor the station and protect the wood surface from coffee spills and heat.
- Position your espresso maker or French press on one side of the tray, organizing the functional elements (beans, filters) in glass jars beside it.
- Display your vintage pink floral teacups and saucers prominently on the other side, stacking them neatly or hanging them from a mug tree.
- Complete the station with whimsical details like a small pot of honey with a wooden dipper, antique silver spoons, and a tiny bud vase with a single rose.
Pro-Tip: Implementing a Victorian scullery or butler’s pantry design doesn’t require a massive house. By visually grouping your coffee items onto a single tray or cart, you create “zones.” This professional interior design trick prevents your modern appliances from visually cluttering the rest of your vintage workspace.

Before beginning your pink kitchen makeover, it is completely normal to have questions about color pairing, budget thrifting, and design execution. Synthesizing complex design concepts into actionable advice helps time-pressed DIYers plan properly. Here are the most common questions about this unique home decor style to guide your upcoming renovation.
How to decorate a pink cottagecore kitchen?
To decorate a pink cottagecore kitchen, start by painting cabinets or walls a soft blush pink, then layer in natural wood textures, vintage floral patterns, and antique brass hardware.
Focus on creating a warm, nostalgic atmosphere rather than modern perfection. Incorporate open shelving to display vintage ceramics, hang copper cookware from iron racks, and dress windows with delicate lace curtains. The key is to blend functional cooking spaces with highly curated, romantic, and rustic elements like indoor herb gardens and checkered flooring.
What colors go well with a pink kitchen?
Sage green, creamy whites, warm terracotta, and natural wood tones are the best colors to pair with a pink kitchen.
These combinations balance the sweetness of the pink paint. A pink and sage green aesthetic is highly popular because it mimics a natural botanical garden. Additionally, incorporating metallic tones like antique brass and aged copper provides necessary warmth and depth, preventing the pastel tones from looking overly flat or childish.
Is pink a good color for a farmhouse kitchen?
Yes, muted shades like dusty rose, plaster pink, and pale whisper pink work beautifully in farmhouse kitchens because they evoke a historic, English country charm.
Unlike bright neon pinks, muted pastel tones pair perfectly with traditional farmhouse elements like apron-front sinks, shaker cabinets, and butcher block countertops. The softness of the color softens the heavy, rustic nature of typical farmhouse decor, creating a more romantic, lived-in homestead vibe.
How to paint kitchen cabinets blush pink?
To paint kitchen cabinets blush pink, you must thoroughly degrease, sand, and prime the wood with a stain-blocking primer before applying a high-quality, hard-curing acrylic enamel paint.
Because kitchens deal with heavy moisture and grease, skipping the prep work will result in chipping pastel paint. Always use a foam roller for smooth surfaces and an angled brush for traditional cabinetry grooves. Allow the paint to cure for at least 72 hours before reattaching ornate hardware.
Where to buy vintage pink kitchen decor?
You can source authentic vintage pink kitchen decor from local thrift stores, antique malls, estate sales, Etsy, and flea markets.
Look specifically for pink depression glass, vintage floral teacups, and retro canisters. If you prefer the convenience of new items with a nostalgic look, many modern retailers sell excellent reproductions, including retro appliances, botanical peel-and-stick wallpaper, and modern copper cookware designed to look aged.
What are cottagecore kitchen essentials?
Cottagecore kitchen essentials include open wooden shelving, vintage floral textiles, copper pots, a farmhouse sink, and living elements like an indoor herb garden.
The aesthetic requires a mix of utility and romance. Rather than hiding baking supplies, essentials include glass Mason jars and ceramic canisters to display dry goods openly. You’ll also want tactile fabrics like gingham dish towels, lace cafe curtains, and a washable, slightly distressed runner rug.
How to mix pink and green in a kitchen?
Mix pink and green seamlessly by using one as the dominant architectural color (like blush cabinets) and the other as a supporting accent (like sage green floral wallpaper or plants).
Keeping both colors muted—think dusty rose and muted sage rather than hot pink and lime—ensures they complement rather than clash. You can easily introduce green into a pink kitchen through natural elements like trailing pothos plants, fresh culinary herbs on the windowsill, or vintage botanical art prints.
Can a modern kitchen be cottagecore?
Yes, a modern kitchen can achieve a cottagecore feel by swapping sleek modern hardware for unlacquered brass, adding vintage textiles, and displaying rustic cookware.
You don’t need to rip out modern cabinets. Soften the space by adding a patterned floral runner rug, putting dry goods into glass apothecary jars, draping lace over the windows, and displaying wooden cutting boards. Incorporating a retro-style pastel appliance on the counter also bridges the gap between modern function and vintage aesthetics.
What is grandma aesthetic decor?
Grandma aesthetic decor—often called Grandmacore—focuses on cozy, nostalgic interior design featuring floral wallpapers, lace doilies, antique teacups, and shabby chic furniture.
In a kitchen, this translates to spaces that feel deeply lived-in, warm, and inviting. It rejects modern minimalism in favor of maximalist displays of sentimental items, mismatched vintage china, embroidered linens, and a color palette heavily reliant on soft pastels like dusty pink and mint green.
Are pink kitchens back in style?
Pink kitchens are experiencing a massive resurgence in style, largely driven by the cottagecore, grandmillennial, and vintage maximalist design trends.
Today’s pink kitchens step away from the stark, retro neon diner look of the 1950s and instead embrace heritage, earthy pinks like terracotta, plaster, and pale blush. These sophisticated hues are celebrated for their ability to bring warmth, personality, and soft light into a home, moving away from the all-white kitchens of the previous decade.
To ensure your pink cottagecore kitchen overview is complete, reviewing these fundamental interior design principles is critical. If you are a time-pressed decorator, keep these six core rules in mind before purchasing materials for your renovation:
- Anchor Pink with Natural Textures – To prevent a pink aesthetic from looking like a toy, always ground soft pastel paints with heavy, natural textures like butcher block countertops and reclaimed wood shelving.
- Prioritize Heritage Hardware – Swapping generic builder-grade cabinet pulls for heavy, ornate antique brass instantly elevates the room and authenticates the vintage grandma aesthetic.
- Layer Textiles for Coziness – Use lace cafe curtains, pink gingham linens, and washable floral runner rugs to soften hard floors and diffuse harsh natural light.
- Opt for Durable Finishes – When painting outdated cabinetry, always use a high-adhesion primer and a hard-curing acrylic enamel; standard wall paint will not survive a high-traffic kitchen.
- Embrace Open Display Storage – Remove upper cabinet doors or install open iron brackets to display vintage copper cookware, Mason jars, and pink depression glass as functional art.
- Integrate Biophilic Design – Breathe life into the space by creating an indoor herb garden using terracotta pots, as the earthy orange clay perfectly complements dusty rose palettes.
Transforming your space into a pink cottagecore kitchen is about so much more than just picking a paint color; it’s about curating a feeling of warmth, nostalgia, and slow living. By blending the rustic durability of natural wood and unlacquered brass with the romantic softness of dusty rose paints and floral textiles, you create an environment that feels both functional and magical. You don’t have to tackle a massive renovation all at once—the true heart of the grandma aesthetic lies in collecting and layering over time.
Remember that interior design principles for this specific style lean heavily into the imperfect. A slightly tarnished copper pot, a thrifted island with distressed paint, and an overgrown indoor herb garden are exactly what give the space its authentic charm. Whether you start small by hanging a pair of vintage lace curtains or decide to spend the weekend painting your cabinets a pale whisper pink, every step brings you closer to that dreamy, English country feel.
Which of these whimsical ideas are you going to tackle first? Are you brave enough to try the blush cabinet transformation, or are you starting with a gorgeous floral peel-and-stick wallpaper? Share your upcoming kitchen projects in the comments below, and don’t forget to save your favorite ideas to Pinterest!
Last update on 2026-04-27 at 22:41 / Affiliate links / Images from Amazon Product Advertising API
