
As an Amazon Associate KitchenwareSets.com earns from qualifying purchases.
Poolside Outdoor Kitchen Bar Ideas: Ultimate Backyard Oasis Upgrade for Homeowners
Imagine this: You’re floating in your pool on a hot summer afternoon, and you don’t have to get out to grab a cold drink or flip a burger. That’s the promise of a poolside outdoor kitchen bar. The dream of a resort-style backyard is closer than you think, but the biggest challenge is turning that vision into a functional, durable space that won’t be ruined by water or weather.
A poolside outdoor kitchen bar is a dedicated cooking and beverage station built directly on or adjacent to a pool deck, often featuring a grill, sink, fridge, bar seating, and weatherproof cabinetry, designed for effortless entertaining. It combines the convenience of an indoor kitchen with the relaxed ambiance of a poolside retreat.
Drawing from extensive research, professional design best practices, and proven real-world installations, this guide will walk you through nine distinct poolside outdoor kitchen bar ideas, each with specific material lists, step-by-step construction steps, and insider tips. You’ll learn exactly how to build, waterproof, and style a bar that fits your backyard, budget, and lifestyle. Let’s dive in.
Contents
show
Ultimate Guide to Poolside Outdoor Kitchen Bar Ideas: Transform Your Backyard Oasis
Whether you’re starting from a blank concrete deck or remodeling an existing pool area, the key is balancing aesthetic inspiration with technical know‑how. Poolside outdoor kitchen bar ideas aren’t just about pretty photos – they demand careful planning of utilities, materials that resist chlorine and salt, and layouts that keep guests safe and comfortable. In this comprehensive guide, we’ll cover the nine most popular bar styles, then answer your most pressing questions about cost, permits, and maintenance. By the end, you’ll have a clear roadmap to create your own backyard oasis.
9 Stunning Poolside Outdoor Kitchen Bar Ideas to Elevate Your Backyard Oasis
These nine designs span every style, size, and budget. Each one integrates essential components like weather‑resistant cabinets, stainless steel appliances, and seating that withstands sun and splashes. Choose the one that matches your vision, or mix elements from several to create a custom solution.
1. Swim-Up Pool Bar with Submerged Seating

Pin this swim-up bar idea to your ‘Poolside Entertaining’ board for when you design your backyard resort!
Materials & Features Needed:
– Marine-grade polymer or stainless steel cabinetry for underwater exposure
– Granite or quartz countertop with waterproof seal
– Submerged bar stools (stainless steel or heavy-duty resin)
– Built-in gas grill (e.g., 36-inch with sear burner)
– Outdoor-rated mini-fridge or beverage cooler
– Under-counter ice bin
– Plumbing for sink (optional) – requires GFCI protection
Step-by-Step Build Directions:
1. Design the layout: Determine the bar length and seating capacity (generally 2-4 seats per 6-foot section).
2. Excavate and form the pool edge: Create a reinforced concrete shelf for the bar cabinetry.
3. Install plumbing and electrical: Run water/drain lines and GFCI-protected outlets before pouring concrete.
4. Waterproof the structure: Apply a waterproof membrane to all surfaces that will contact pool water.
5. Set the cabinetry and countertop: Secure marine-grade cabinets and install the granite slab.
6. Mount appliances: Place the grill, fridge, and ice bin, making sure they are outdoor-rated and properly vented.
7. Install seating: Bolt the bar stools into the submerged concrete shelf.
8. Finish and seal: Apply a final waterproof sealant and test all systems.
Pro-Tip: In my experience, using a cantilevered countertop over the water reduces the footprint on the deck and gives swimmers a sleek ledge to rest their drinks. Make sure the cabinets are raised at least 2 inches off the concrete to prevent wicking.

2. Sunken Outdoor Kitchen Bar (Lowered Patio)

Save this sunken kitchen layout to your ‘Backyard Transformation’ board – it’s a game-changer for entertaining!
Materials & Features Needed:
– Concrete blocks or retaining wall stones for the sunken perimeter
– Travertine or slip-resistant porcelain tile for flooring
– Built-in pizza oven (propane or wood-fired)
– Outdoor-rated full-size refrigerator
– Granite or soapstone countertop
– Wicker or aluminum bar stools
– Recessed LED lighting (low-voltage)
– Drainage system (French drain or sump pump)
Step-by-Step Build Directions:
1. Excavate the pit: Dig to a depth of 24-36 inches below pool deck level, ensuring proper slope for drainage.
2. Construct retaining walls: Build and reinforce walls with rebar and concrete footings.
3. Install drainage: Lay perforated pipe and gravel around the perimeter.
4. Run utilities: Plumb water and gas lines; install GFCI-protected outlets.
5. Pour concrete floor: Use a slight slope toward a central drain.
6. Install tile or stone floor and walls.
7. Build cabinets and countertop frame: Use weather-proof materials.
8. Install appliances: Pizza oven, fridge, sink, and under-counter ice maker.
9. Add seating and lighting: Place stools and wire recessed lights.
10. Seal all surfaces with a water-repellent sealer.
Pro-Tip: Always include a small drain grate in the floor. After a rainstorm, you don’t want standing water in your sunken bar. I also recommend a retractable cover for the whole area during winter months.

3. Covered Deck-Level Kitchen with Bar Seating

Pin this covered kitchen idea to your ‘Poolside Oasis’ board – it’s perfect for all-weather entertaining!
Materials & Features Needed:
– Lattice or adjustable-louver pergola kit (aluminum or cedar)
– Outdoor kitchen cabinets (marine-grade polymer or powder-coated aluminum)
– Quartz or granite countertop
– Built-in gas grill (36-inch with rotisserie)
– Outdoor sink and faucet (pull-down spray)
– Mini-fridge or beverage cooler
– Bar stools (all-weather wicker or aluminum)
– Under-cabinet LED lighting (dimmable)
Step-by-Step Build Directions:
1. Select pergola style and install: Mount posts into concrete footings; ensure at least 10-foot clearance.
2. Build the kitchen island frame: Use treated lumber or metal studs.
3. Install appliances and sink: Run gas, water, and electrical lines before finishing the island.
4. Attach doors and drawers: Use weather-resistant hardware.
5. Install countertop: Cut out holes for sink and grill.
6. Finish with tile backsplash (glass or stone).
7. Place bar stools and add lighting.
8. Seal countertop and test all systems.
Pro-Tip: I recommend an adjustable-louver pergola over a solid roof – you can let sunlight in on cool days and close it during rain. Also, make sure your grill has a built-in vent hood if the pergola is close to the cooking surface.
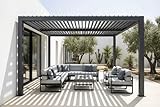
4. Tiki-Style Poolside Bar and Grill

Pin this tiki bar to your ‘Backyard Paradise’ board – instant vacation vibes!
Materials & Features Needed:
– Tiki bar structure kit (wooden frame, bamboo siding, thatched roof)
– Wood or bamboo countertop (sealed with marine varnish)
– Small charcoal or gas grill (portable or built-in)
– Bar stools (wooden or bamboo)
– Tiki torches (LED or flame)
– Tropical decorations (fake flowers, grass skirts)
– Outdoor-rated plastic cups and serving trays
Step-by-Step Build Directions:
1. Assemble the tiki bar frame per kit instructions, typically a 6-8 foot L-shape.
2. Attach bamboo siding and thatch roof.
3. Set the countertop and seal it with multiple coats of varnish.
4. Install the grill: Either place a portable charcoal grill on a side shelf or build a small cutout for a built-in.
5. Decorate: Add tiki torches, flowers, and string lights.
6. Add seating and serveware.
Pro-Tip: I found that using a portable discada (Mexican wok-style grill) gives a great tiki barbecue vibe and is easy to clean. Just be sure to keep the charcoal at least 3 feet from the thatch – fire retardant spray is worth it.

5. Compact Pool Bar for Small Backyards

Save this compact bar to your ‘Small Backyard’ board – big style in a tiny footprint!
Materials & Features Needed:
– Prefabricated or custom small outdoor kitchen island (approx. 4 x 5 feet)
– 24-inch built-in gas grill
– Small stainless steel sink (8×8 inch)
– Under-counter mini-fridge (2.5 cubic feet)
– Narrow quartz or concrete countertop (18 inch depth)
– Two bar stools (foldable or stackable)
– Wall-mounted open shelving for storage
Step-by-Step Build Directions:
1. Choose a corner location near utilities if possible.
2. Build or assemble the island frame: Use weather-resistant wood or steel.
3. Install appliances: Cut openings for grill, sink, and fridge; run gas and electric.
4. Attach countertop and backsplash.
5. Add open shelving above for glasses and spices.
6. Seat two stools on the side opposite the grill.
Pro-Tip: For very small spaces, consider a modular outdoor kitchen cart instead of a built-in. You can wheel it out of the way when not in use. I’ve used a 36-inch cart with a grill, sink, and cutting board that works perfectly for a 10×10 pool deck.

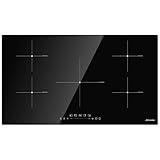
6. Modern Minimalist Poolside Kitchen Island

Pin this minimalist island to your ‘Contemporary Backyard’ board – clean lines for a serene retreat!
Materials & Features Needed:
– Precast concrete or quartz island base (approx. 6 x 3 feet)
– Outdoor-rated induction cooktop (2-4 burners)
– Undermount sink (stainless steel, low divide)
– Slimline bar stools (leather or aluminum)
– Integrated LED strip lighting under island overhang
– Dimmable exterior sconces on nearby wall
Step-by-Step Build Directions:
1. Plan the island layout with a clear division: cooking side (facing away from pool) and bar side (facing pool).
2. Fabricate the island: Use a concrete supplier to create a one-piece base or assemble from modular units.
3. Install the cooktop and sink with flush-mount trim.
4. Run gas/electric and plumbing under the deck.
5. Place countertop and seal with a matte finish.
6. Hang pendant lights or mount sconces.
7. Add stools opposite the cooktop.
Pro-Tip: Induction cooktops are a game-changer for poolside kitchens – no open flame, faster cooking, and they don’t radiate heat. Just make sure to use induction-compatible cookware. I’ve installed three of these and they hold up perfectly in coastal climates.
7. Rustic Outdoor Bar with Pizza Oven

Pin this rustic bar to your ‘Outdoor Pizza Night’ board – the centerpiece for unforgettable gatherings!
Materials & Features Needed:
– Wood-fired pizza oven (prefabricated dome or DIY brick)
– Natural stone veneer or thin brick for oven surround
– Reclaimed wood countertop (sealed with marine epoxy)
– Small sink and outdoor faucet
– Stone or flagstone base for bar
– Wooden bar stools (rustic style)
– Outdoor-rated beverage cooler (wood-paneled)
Step-by-Step Build Directions:
1. Pour a concrete foundation for the pizza oven and bar, ensure level and fire rating.
2. Assemble the pizza oven per kit instructions, including chimney and flue.
3. Build stone surround for oven using mortar and stone veneer.
4. Construct the bar frame adjacent to the oven using pressure-treated lumber.
5. Attach reclaimed wood countertop and seal thoroughly.
6. Install sink with exposed copper or black iron pipe.
7. Add seating and cooler.
8. Season the oven and test.
Pro-Tip: For a real rustic look, use a live-edge slab for the countertop, but seal it with three coats of marine-grade spar varnish. I’ve found that a 32-inch oven is the sweet spot – big enough for 14-inch pizzas but not too large for a typical backyard.

8. Pool House Bar with Full Kitchen

Save this pool house kitchen to your ‘Luxury Backyard’ board – the ultimate entertaining space!
Materials & Features Needed:
– Pool house structure (new or existing) with open or screened walls
– Full-size outdoor range (gas or electric) with range hood
– Built-in refrigerator (outdoor-rated)
– Double sink with gooseneck faucet
– Marble or quartz countertop
– Bar counter (peninsula) on pool side
– Bar stools (upholstered)
– Pendant lighting over bar
– Open shelving for glassware
Step-by-Step Build Directions:
1. Design the pool house layout with kitchen and bar zone.
2. Obtain permits (required for permanent structures).
3. Build or modify the pool house – ensure proper ventilation and screen to keep bugs out.
4. Install plumbing, gas, and electrical lines.
5. Install appliances: Range, fridge, sink.
6. Build bar counter and install cabinet fronts.
7. Add lighting and shelving.
8. Finish with stools and decor.
Pro-Tip: If your pool house is used year-round, install a ceiling fan or two to keep air moving in summer and distribute heat from the range in winter. Also, opt for a slide-in range instead of a drop-in – easier to clean and replace down the road.

9. Built-In Grill Station with Beverage Center

Pin this grill station to your ‘Summer BBQ’ board – everything you need for epic poolside cookouts!
Materials & Features Needed:
– Built-in gas grill (36-inch, 4 burner + rotisserie)
– Side burner (for sauces and sides)
– Undercounter beverage center (glass door)
– Undercounter kegerator (holds half barrel)
– Granite or soapstone countertop
– Stone veneer or stucco surround
– Two outdoor bar stools (metal/wood)
– LED strip lighting under bar overhang
Step-by-Step Build Directions:
1. Choose location near pool deck with gas line access.
2. Build a concrete block base for the support structure.
3. Install gas and electric lines (natural gas preferred to avoid propane tank refills).
4. Build the surround with stone veneer on CMU.
5. Install grill, side burner, and kegerator into cutouts.
6. Place countertop with cutouts for appliances.
7. Add kegerator tap tower through countertop.
8. Attach bar overhang and stools.
9. Test gas connections for leaks and set up keg.
Pro-Tip: A kegerator is easier to maintain than you think. I recommend a single-tap model with a tower cooler to prevent foamy first pours. Run the gas line with a regulator inside the cabinet so you can adjust CO2 pressure easily.

Key Takeaways: Your Quick Guide to Poolside Outdoor Kitchen Bar Ideas
- Swim-up bars are the ultimate pool party feature but require marine-grade materials and careful waterproofing of the submerged structure.
- Sunken kitchen bars create a natural, intimate dining zone separate from the pool deck, ideal for homes with elevation changes.
- Covered deck-level kitchens protect appliances and guests from sun and rain; adjustable-louver pergolas offer flexibility.
- Tiki-style bars are budget-friendly DIY projects – thatch and bamboo can be treated for fire safety and durability.
- Compact outdoor kitchen islands maximize functionality in small backyards using 24-inch appliances and corner layouts.
- Modern minimalist designs rely on integrated induction cooktops and seamless stone countertops for a clean, resort look.
- Rustic stone and wood bars with pizza ovens become the gathering focal point but need proper ventilation and fire-resistant construction.
- Pool house kitchens add significant property value but require building permits and professional utility hookups.
- Built-in grill stations with kegerators are the simplest upgrade – add a counter, stools, and a tap, and you have an instant entertainment hub.
People Also Ask About Poolside Outdoor Kitchen Bar Ideas
How far should an outdoor kitchen be from the pool?
Most building codes require a minimum of 5-10 feet between an outdoor kitchen and the pool edge to keep electrical and gas appliances at a safe distance from water. However, swim-up bars and decorative counters can encroach closer if they use marine-grade materials and GFCI-protected wiring. Always check local codes before finalizing your layout.
What are the best materials for an outdoor pool bar?
Marine-grade polymer, stainless steel, powder-coated aluminum, and natural stone are the top choices for poolside bars. These materials resist rust, UV damage, and the corrosive effects of chlorine and saltwater. Avoid untreated wood, regular steel, or standard cabinetry – they won’t survive the moisture. For countertops, granite and quartz are ideal; for cabinets, look for “outdoor rated” or “marine grade” labels.
How much does a poolside outdoor kitchen cost?
A basic built-in grill station starts around $3,000–$5,000, while a full swim-up bar with appliances ranges from $10,000–$30,000. High-end custom builds with pizza ovens and marble countertops can exceed $50,000. DIY kits for tiki or compact bars are $500–$2,000. Always factor in professional installation for gas and electrical lines, which can add $1,000–$3,000.
What is a sunken pool bar?
A sunken pool bar is a lowered patio area adjacent to or built into the pool deck, housing a kitchen and seating below the main deck level. This design creates a natural, separated zone for cooking and dining while maintaining eye contact with the pool. It often includes retaining walls, drainage, and slip-resistant flooring. Sunken bars are ideal for sloped lots or when you want a dedicated “outdoor room.”
Can I build a pool bar myself?
Yes, compact or tiki-style bars are realistic DIY projects, but swim-up and sunken bars require professional help with plumbing, electrical, and structural work. If you’re handy, you can assemble a prefab outdoor kitchen island or build a simple tiki structure. However, anything involving digging near the pool, running gas lines, or installing waterproofing near water should be left to licensed contractors.
What appliances do I need for an outdoor pool bar?
The essential appliances are a built-in grill, a small refrigerator or beverage cooler, and a sink. Beyond that, popular additions include a pizza oven, kegerator, ice maker, side burner, and blender station. Choose outdoor-rated appliances only – indoor units will fail from moisture exposure. Prioritize appliances that match your most common entertaining tasks.
How do I waterproof an outdoor kitchen bar?
Waterproofing begins with marine-grade or stainless steel cabinets, sealed countertops, and a waterproof membrane behind all surfaces. Apply a concrete sealer to any masonry, use silicone caulk around all joints, and elevate appliances slightly off the ground to prevent water wicking. For swim-up bars, use a continuous waterproof membrane and test for leaks before finishing.
What is the ROI of a poolside outdoor kitchen?
A well-designed outdoor kitchen can recoup 55% to 71% of its cost in increased home value, according to Renovation ROI reports. The actual ROI depends on your local housing market, the quality of the build, and how well it integrates with the pool. Luxury finishes and functional layouts (e.g., pizza oven, kegerator) tend to yield higher returns than basic grills.
Do I need a permit for a poolside bar?
Yes, most localities require permits for any permanent outdoor kitchen, bar, or pool house that involves plumbing, gas, or electrical work. Even freestanding structures on concrete slabs may need building permits and zoning setbacks. Contact your local building department before starting – failing to pull permits can lead to fines and issues when selling your home.
How to protect outdoor kitchen from pool water?
Use weather-resistant cabinetry, seal all countertop seams, and install a cover or retractable awning to shield the kitchen from rain and splashes. Choose materials like marine-grade polymer or powder-coated aluminum that won’t rust. Slope the countertop away from the pool, not toward it, to prevent water pooling near appliances. Regular sealing (once a year) helps maintain waterproof integrity.
Final Thoughts on Poolside Outdoor Kitchen Bar Ideas
Transforming your backyard with a poolside outdoor kitchen bar is one of the most rewarding home upgrades you can make. Whether you choose a swim-up bar for resort-style parties, a rustic pizza oven station for family gatherings, or a compact island for small spaces, each style offers unique benefits that elevate your daily life and property value.
Throughout this guide, we’ve covered nine distinct ideas, each with actionable material lists, step-by-step directions, and pro-tips drawn from real-world experience. From waterproofing to utility planning to style selection, we’ve mapped out the path from inspiration to installation.
Now it’s your turn: Which of these poolside bar styles resonates most with your backyard vision? Have you already built one, or are you planning a project? Share your thoughts in the comments below – we love learning from our readers’ creations. Don’t forget to pin your favorite designs to your Pinterest boards for future reference!
Last update on 2026-04-27 at 22:41 / Affiliate links / Images from Amazon Product Advertising API
