
As an Amazon Associate KitchenwareSets.com earns from qualifying purchases.
Small Back Patio Kitchen Ideas: Modern Space-Saving Designs for Backyard Entertainers
You love cooking outdoors, but your patio is tiny. It feels impossible to fit a grill, prep space, and seating without turning your backyard into a cluttered mess. The dream of hosting summer cookouts seems out of reach when every square foot counts.
A small back patio kitchen is a compact, fully functional outdoor cooking and dining setup designed for limited spaces, typically under 100 square feet, using modular or built-in components to maximize every inch. You don’t need a backyard the size of a golf course to host killer cookouts. The right plan transforms your cramped concrete slab into the heart of your home’s entertainment zone.
Drawing from professional patio design principles and proven small-space layouts, this guide delivers nine distinct small back patio kitchen ideas. Each solution is tailored to your budget, skill level, and patio shape. You’ll walk away with a clear roadmap to build the compact outdoor kitchen you’ve been dreaming of.
Contents
show
9 Small Back Patio Kitchen Ideas to Maximize Your Space
You have options. Whether you want a quick assembly project, a permanent masonry installation, or a dirt-cheap DIY build, the following nine ideas cover every approach. Each concept includes a real-world example, a step-by-step primer, and expert tips to avoid costly mistakes.
1. Modular Outdoor Kitchen Island: Prefab Components for Quick Assembly

Pin this sleek modular island setup to your ‘Dream Patio’ board!
A modular outdoor kitchen offers the fastest path to a professional look without a contractor. Prefab components from brands like NewAge, Outelement, or Phantom arrive in boxes and assemble in hours. These islands typically include a built-in grill, side burner, cabinet storage, and a weather-resistant countertop. They sit directly on your patio and can often be moved later if needed.
What You Need
- Modular kitchen island kit (e.g., NewAge 5-Piece Island)
- Gas grill (often included, or you can drop in a separate model like Weber Spirit II)
- Stainless steel side burner module (optional)
- Outdoor-rated electrical extension cord (if needed for lights)
- Patio floor protection pads (to prevent scratches)
- Basic tool kit (screwdriver, Allen wrench – often included)
Step-by-Step Assembly Directions
- Unbox all modules and verify components against the manual.
- Assemble the base cabinet according to the manufacturer’s instructions (typically using locking brackets).
- Attach the countertop (usually granite or stainless steel) using provided silicone adhesive.
- Slide the grill and side burner into the designated cutouts, securing with screws.
- Connect the gas line from the grill to the quick-connect or propane tank, ensuring a leak-free seal (use soapy water test).
- Install the back panel (if included) to hide propane tank and wires.
- Position the island on your patio, ensuring it’s level (use shims if needed).
- Test the grill and burners before first use.
Pro-Tip: Choose a modular island with a built-in trash pull-out to keep your small patio clutter-free. Many modular units now include a hidden drawer for garbage – a game-changer for outdoor entertaining.

2. Built-In Grill Station with Storage Cabinets: The Permanent Solution

Save this built-in grill idea for when you’re ready to go all-in on your patio remodel!
A built-in grill station delivers the highest-end look and becomes a permanent part of your patio. It requires more planning, permits, and investment, but the reward is a cooking zone that feels like an extension of your home. For small patios, a straight-run counter against the house wall works best – typically 6–8 feet long by 2 feet deep.
What You Need
- Outdoor grill (e.g., Napoleon Prestige 500, 30-inch drop-in)
- Outdoor kitchen cabinets (e.g., RTA Outdoor Cabinets, 2 base + 1 drawer)
- Stainless steel doors and drawer faces
- Cement board (HardieBacker) for framing sheathing
- Stone veneer panels (faux or real) or tile
- Concrete countertop mix (DIY) or pre-fab quartz
- Outdoor-rated sink and faucet (optional but recommended)
- Gas line kit (if converting from propane to natural gas)
- Structural framing (2×4 treated lumber or metal studs)
Step-by-Step Assembly Directions
- Measure your patio space and mark the footprint for the grill station (allow 3 inches clearance on all sides for air circulation).
- Build a pressure-treated lumber frame anchored to the patio slab or deck.
- Wrap the frame with cement board, securing with corrosion-resistant screws.
- Install the outdoor-rated cabinets inside the frame, leaving space for the grill.
- Apply stone veneer or tile to the exterior using thin-set mortar.
- Install the countertop (pre-fab or poured concrete) with a cutout for the grill and sink.
- Connect the grill gas line to your natural gas stub-out or propane tank, then test for leaks.
- Add the sink plumbing (if applicable) with a shut-off valve and drain to a bucket or garden (if no direct sewer access).
- Install the stainless steel doors and drawer fronts, adjusting hinges.
Pro-Tip: For a small patio, use a slide-in grill rather than a built-in one – it saves space and is easier to replace. Frame the opening to fit a standard 30-inch slide-in grill.
3. DIY Pallet Outdoor Kitchen: Budget-Friendly and Rustic

This DIY pallet kitchen is perfect for renters – pin it to your ‘Budget Backyard’ board!
A DIY pallet outdoor kitchen proves you don’t need deep pockets to cook alfresco in style. With two or three heat-treated pallets (look for the HT stamp), some screws, and a weekend of work, you can create a rustic, functional cooking station for under $200. It’s also easy to move when you relocate.
What You Need
- 2–3 heat-treated wooden pallets
- Metal countertop (or butcher block sealed with spar urethane)
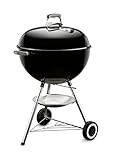
- Charcoal kettle grill (e.g., Weber Original Kettle)
- Outdoor paint or waterproof stain
- Screws, brackets, L-brackets
- Sandpaper (80 and 120 grit)
- Casters (optional, for mobility)
- String lights
Step-by-Step Assembly Directions
- Disassemble one pallet to get individual boards for shelves and facing.
- Sand all pieces thoroughly to remove splinters.
- Assemble the main frame: stand two pallets side by side for the back, one flat as the base.
- Attach the base to the uprights using L-brackets.
- Add a countertop support board across the front at 36 inches high.
- Place the metal countertop on the support and secure from underneath.
- Add open shelving using reclaimed boards.
- Paint or stain the entire unit with waterproof finish (two coats). Let dry.
- Attach casters for mobility (optional).
- Place the kettle grill to the side – never directly under the counter for fire safety.
Lesson Learned: When I built my first pallet kitchen, I skipped weatherproofing and the pallet rotted within a year. Always use two coats of exterior spar urethane – it’s worth the extra $15.
4. Compact Pizza Oven Setup: Wood-Fired Goodness in Tiny Spaces

Get ready to be the most popular host on the block – pin this pizza setup!
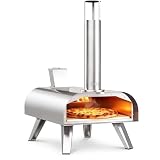
A compact pizza oven transforms your small patio into an Italian trattoria. Models like the Ooni Koda 12, Gozney Roccbox, or Solo Stove Pi take up less than 2 square feet of counter space and reach 900°F in 20 minutes. You can place them on a heat-resistant table or a dedicated cart, and store them away when not in use.
What You Need
- Portable pizza oven (e.g., Ooni Koda 16, dimensions 18.5″ x 24.5″ x 17.5″)
- Heat-resistant table or cart
- Wooden pizza peel
- Pizza stone (if not included)
- Propane tank or wood pellets
- Infrared thermometer
- Pizza ingredients
Step-by-Step Directions (Setup & Pizza Cooking)
- Place the pizza oven on the heat-resistant table, ensure level and stable.
- For gas models: connect the propane tank, check for leaks with soapy water.
- Preheat for 20–30 minutes until stone reaches 700–800°F.
- Stretch dough, dress quickly, launch with a quick jerk of the peel.
- Rotate every 30 seconds until charred and bubbly (about 90 seconds).
- Remove and let cool for 2 minutes, then slice.
Pro-Tip: For the smallest footprint, get an Ooni Koda 12 (propane) and a foldable metal table. It packs away completely – ideal for renters.
5. L-Shaped Patio Kitchen with Seating: Defining the Zone

Pin this L-shaped beauty to your ‘Outdoor Entertaining’ board – the ultimate space-miser!
An L-shaped outdoor kitchen is the most efficient use of a small corner. It wraps around the patio edges, freeing up the center for movement. With a counter overhang on one leg, you add bar seating without needing a separate dining table – perfect for parties on a 8×10 patio.
What You Need
- Two lengths of outdoor kitchen cabinets (e.g., one 36″, one 48″)
- Gas grill (30-inch drop-in)
- Drop-in sink (optional)
- Outdoor-rated countertop with 12-inch overhang
- Bar stools (2–3), weather-resistant
- Post brackets or countertop supports for the overhang
- L-brackets to join cabinet sections
Step-by-Step Assembly Directions
- Plan the L-shape: 4 ft leg along the wall, 5 ft leg perpendicular.
- Build or install base cabinets, secure them together with L-brackets.
- Install the countertop with a 12-inch overhang on the outer side of the short leg.
- Add support posts or brackets under the overhang every 2 ft.
- Cut out countertop for grill and sink.
- Drop in appliances, seal with silicone.
- Connect gas and plumbing or electrical.
- Place bar stools under overhang with 12 inches of knee room.
Pro-Tip: On a tiny patio, make the short leg only 2 ft deep – just wide enough for a sink or mini-fridge, with the overhang on the long leg for seating.

6. Minimalist Straight-Run Kitchenette: The Slimmest Option

Less is more – pin this ultra-slim design to your ‘Modern Patio’ board!
A minimalist straight-run kitchenette is the thinnest possible outdoor cooking setup. The counter is only 24 inches deep, and the total length can be as short as 6 feet. It fits against a wall or fence, leaving the rest of the patio open for seating or a fire pit. This is ideal for patios that are only 4–5 feet wide.
What You Need
- Slim gas grill (e.g., Weber Q 2200 or 22-inch built-in)
- Compact prep counter (stainless steel worktable, 24″ deep)
- Under-counter mini fridge (e.g., EdgeStar 2.3 cu ft outdoor rated)
- Open steel shelving
- Weather-resistant countertop (stainless steel or tile)
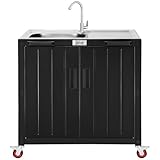
- Small sink (15×13″) with counter-mounted faucet
- Quick-connect gas line or propane
- GFCI outdoor outlet
Step-by-Step Assembly Directions
- Measure patio width; ensure 24-inch deep counter leaves a 3-ft walkway.
- Build a simple base frame from pressure-treated lumber against the wall.
- Attach the prep counter; place the grill on top (or cut hole for built-in).
- Install mini fridge under counter left side, sink in middle.
- Connect sink to garden hose quick-connect for water; drain to 5-gallon bucket.
- Secure open shelving above counter at reachable height.
- Run gas line from grill to propane tank or natural gas stub.
- Seal counter cuts with silicone.
Pro-Tip: For a truly no-build straight-run, use a 6-ft stainless steel commercial table (about $150) and place a portable grill and cutting board on top. Drill a hole for a small sink faucet – instant kitchenette.

7. Portable Cart Grill Station: Moveable and Flexible

Perfect for balconies and tiny patios – pin this portable powerhouse!
A portable grill cart gives you total flexibility. You can wheel it to the best spot for grilling, then tuck it into a corner when you need the patio for other activities. Popular models from Weber, Char-Broil, and Cuisinart come with side shelves, cabinet storage, and sometimes a built-in side burner.
What You Need
- Portable grill cart (e.g., Weber Spirit II E-310)
- Propane tank (20 lb, fits in cart base)
- Cutting board (to fit over side table)
- Weatherproof grill cover
- Wheel chocks (for uneven ground)
- Optional: magnetic spice rack, paper towel holder
Step-by-Step Assembly Directions
- Assemble the cart per manual: attach grill head to base, mount side shelves, connect propane.
- Place cart on patio with 3 ft clearance from walls.
- Lock wheels or add chocks.
- Set cutting board on one shelf, platter on the other.
- Fill cabinets with tools, plates, napkins.
- Add magnetic accessories for easy access.
- Cover when not in use.
Pro-Tip: Upgrade your cart with a magnetic paper towel holder and a tool hook – keeps everything within reach and frees counter space.

8. Outdoor Bar and Grill Combo: Cocktails + Cookout

This bar-grill combo is a party magnet – pin it to your ‘Patio Party’ board!
An outdoor bar and grill combo merges cooking and cocktail mixing into one compact island. With a 4-foot counter, you can fit a 24-inch drop-in grill, a small sink, and a mini fridge, while the 12-inch overhang seats two guests. Your patio becomes a social hub where the cook never feels isolated.
What You Need
- Prefabricated outdoor bar island kit (e.g., Outelement O300) or custom build
- Small gas grill (drop-in, 24-inch)
- Under-counter mini fridge (Danby outdoor rated)
- Small sink (10-inch round)
- Granite or quartz countertop with 12-inch overhang
- Bar stools (2–3, waterproof)
- Ice bucket, cocktail shaker, glassware
- Light strip for under-bar ambiance
Step-by-Step Assembly Directions
- Build or assemble the bar island base with cutouts for grill and sink.
- Install countertop with overhang.
- Drop in grill and sink; seal edges.
- Place mini fridge under bar on the drink side.
- Install water line for sink (quick-connect to hose) and drain to bucket.
- Attach gas line to grill.
- Add battery-powered light strip under lip of counter.
- Stock bar: ice bucket, glasses, blender in cabinet.
Pro-Tip: Use a 24-inch portable pellet grill on a cart instead of a built-in – roll it out for cooking and back when done, keeping the bar top purely for drinks.

9. All-in-One BBQ Island with Sink and Fridge: The Full Kitchen

This is the ultimate small patio kitchen – pin it to your ‘Home Goals’ board!
The all-in-one BBQ island is the closest you can get to an indoor kitchen outdoors. In a footprint of just 6 feet by 3 feet, it packs a gas grill, a clamshell sink, a mini fridge, and generous cabinet storage. This setup requires plumbing and electrical work, but the result is a fully self-contained cooking station.
What You Need
- Pre-built all-in-one island (e.g., RTA Outdoor Living 6-ft Island) or custom build
- Drop-in gas grill (30-inch)
- Clamshell sink with faucet (15×15 inch)
- Under-counter mini fridge (2.3 cu ft)
- GFCI outdoor electrical outlet
- Natural gas quick-connect or propane
- Water supply and drainage (greywater solution)
- Stainless steel backsplash
- Weatherproof cabinet doors
Step-by-Step Assembly Directions
- Position pre-built pod on level patio, or build frame with pressure-treated lumber and cement board.
- Install countertop with cutouts for grill, sink, and built-in cutting board.
- Place grill and sink; secure with brackets. Connect gas lines. Run water lines and drain to a 5-gallon bucket.
- Install mini fridge in lower cabinet, ensuring ventilation holes.
- Wire a GFCI outlet inside a weatherproof cabinet.
- Add towel bar, paper towel holder, and trash pull-out drawer.
- Seal counter cuts with silicone; install doors and fronts.
- Test all appliances.
Pro-Tip: For the sink drain, install a 12-volt pump under the island that pumps greywater into a rain barrel or garden bed (check local regulations) – avoids digging a drain line.
Key Takeaways: Your Quick Guide to Small Back Patio Kitchen Ideas
- Always measure your patio footprint and plan kitchen zones (cooking, prep, storage, seating) before buying anything. A scaled layout prevents expensive mistakes and ensures proper clearances (3 ft around the grill).
- Modular outdoor kitchen islands are the fastest, easiest way to get a built-in look without construction – just assemble and place. They’re ideal for renters and DIY beginners.
- For the smallest footprint, go with a straight-run kitchenette (slim counter) or a portable grill cart. These options fit patios as narrow as 4 feet wide and can be stored away.
- Incorporate seating into your design using an L-shaped counter with an overhang or a bar-style island – it saves space by eliminating the need for a separate dining table.
- Prioritize weatherproofing from day one: use outdoor-rated cabinets, seal all wood, and invest in a quality grill cover. This prevents rust, rot, and costly replacements.
- DIY pallet kitchens are budget-friendly (under $200) but require annual re-sealing and fire safety precautions – never place a charcoal grill directly under a wooden counter.
- If you want a sink and fridge, be prepared for plumbing and electrical work – consider a portable pump for greywater or a camping-style outdoor sink to keep it simple.
People Also Ask About Small Back Patio Kitchen Ideas
What is the best layout for a small outdoor kitchen?
The best layout for a small outdoor kitchen is a straight-run (linear) or an L-shaped design, depending on your patio shape. A straight run fits against a wall or fence and works for patios as narrow as 4 feet. An L-shape uses a corner to add prep space and seating without expanding the footprint. Both maximize every inch while maintaining proper clearance for safety and movement.
How much does a small outdoor kitchen cost?
A small outdoor kitchen can cost anywhere from $200 for a simple DIY pallet setup to $5,000+ for a pre-fabricated modular island with grill, sink, and mini fridge. A mid-range built-in using outdoor cabinets and a drop-in grill typically runs $2,000–$3,500 for materials. Labor adds $1,000–$2,500 if you hire a contractor for gas and electrical connections.
Can you put an outdoor kitchen on a covered patio?
Yes, but you must ensure proper clearance between the grill and the ceiling (at least 3 feet) and have adequate ventilation. If the patio is fully covered, a grill hood or side draft system is recommended to prevent smoke buildup. Also, use weatherproof cabinets and appliances rated for outdoor use to handle humidity and rain splashes.
What is the minimum space needed for an outdoor kitchen?
The minimum space for a functional outdoor kitchen is about 4 feet wide by 6 feet long (tight) or 6 feet by 8 feet for comfortable cooking and movement. A straight-run counter requires at least 2 feet of depth and 4 feet of width for a 30-inch grill plus prep space. Always add a 3-foot walkway around the cooking area.
How do you maximize space in a small patio kitchen?
Use vertical storage (shelving, hooks), choose multi-functional furniture (island with seating), and opt for compact appliances (22-inch grill, under-counter fridge). Foldable side tables, magnetic spice racks, and hanging utensil rods keep counters clear. Consider a portable cart that can be wheeled away to open the patio for other activities.
Can you put a grill under a covered patio?
Yes, but keep the grill at least 3 feet away from the house wall and 18 inches from any roof or ceiling structure. Use a grill with a closed lid when under cover, and consider a heat-resistant mat underneath. Never place a charcoal grill under a covered patio due to hot ash and flare-ups – gas grills are safer in that scenario.
What is the best material for outdoor kitchen countertops?
Granite and quartz are the most durable and heat-resistant for outdoor kitchens, while stainless steel is budget-friendly and easy to clean. Concrete is trendy but needs sealing every few years. Avoid marble (etches) and laminate (degrades). For small patios, stainless steel is popular because it’s lightweight and reflects heat.
How do you protect an outdoor kitchen from rain?
Use a weatherproof cover for the entire island or individual appliances when not in use, and seal all countertop joints with marine-grade silicone. Install a grill hood or small roof overhang (pergola with polycarbonate panels) for rain protection while cooking. Choose stainless steel cabinets (304 grade) that withstand moisture without rusting.
Which grill is best for a small backyard?
A portable gas grill (like the Weber Q 2200 or a 22-inch drop-in) is best for small patios because it’s compact and easy to store. For built-in setups, a 30-inch gas grill with a lid is the most space-efficient. Charcoal kettle grills are cheap but need more clearance for heat. Pellet grills are versatile but take up more counter space.
Can I build an outdoor kitchen without a permit?
In most areas, a small outdoor kitchen under 100 square feet that doesn’t involve permanent gas lines, electrical, or structural changes does not require a permit. However, if you install a natural gas line, a sink with plumbing, or a concrete pad, you likely need a permit. Always check your local building department – fines for unpermitted work can be costly.
Final Thoughts on Small Back Patio Kitchen Ideas
Your back patio doesn’t have to be spacious to become the heart of your outdoor entertaining. As we’ve seen, whether you choose a modular island for quick gratification, a built-in station for a permanent look, or a simple portable cart for flexibility, the key is to plan around your space, your cooking style, and your budget. Start by grabbing a tape measure and sketching your patio – that first step transforms a dream into a project. And remember, every great outdoor kitchen began as a single idea on a small patch of concrete.
So what’s your first move going to be? I’d love to hear about your patio kitchen plans – drop a comment below and share what layout you’re leaning toward!
Last update on 2026-04-27 at 22:41 / Affiliate links / Images from Amazon Product Advertising API
