As an Amazon Associate KitchenwareSets.com earns from qualifying purchases.
Perfect Starbucks Copycat Birthday Cake Pops Every Time
Do you ever find yourself staring at those perfect pink Starbucks Birthday Cake Pops, debating whether that little ball of deliciousness is worth the coffee shop price tag? You’re not alone. That craving for a sweet, moist vanilla cake pop is real, but so is the hit to your wallet, especially if you have a whole family clamoring for one.
The good news? You can stop debating and start baking. It’s surprisingly simple to recreate that iconic treat right in your own kitchen. Forget the long lines and the expense; the real joy is in making a whole batch of these delightful pops for a fraction of the cost.
You can make perfect Starbucks Copycat Birthday Cake Pops at home for a fraction of the price. This guide, updated for 2025, provides an easy-to-follow recipe using a simple box cake mix tips for an ultra-moist vanilla cake, plus all the pro tips you need for a flawless, crack-free pink candy coating every single time. As a die-hard fan of the original, I spent weeks testing every tips to perfectly replicate the taste and texture. This is the foolproof method that works every single time.
What Makes This Copycat Recipe the Best?
This recipe is the best because it delivers authentic Starbucks flavor and texture with minimal effort and cost. We’ve perfected the process to ensure your homemade cake pops are moist, delicious, and look just like the real thing, saving you a significant amount of money.
- Unbeatable Flavor & Texture: We use a simple but game-changing trick to make a standard boxed cake mix taste like it came from a high-end bakery. The result is an incredibly moist, vanilla-forward cake center.
- Huge Cost Savings: When you compare the cost of a single cake pop from the coffee shop to making them at home, the savings are staggering. You can make an entire batch of 3 dozen pops for what you might spend on just a few, costing just a fraction of the coffee shop price for each one.
- So Easy, It’s Fun: You don’t need to be a professional baker or have any fancy equipment. This recipe is straightforward and a perfect weekend project to do with family or friends.
Your Step-by-Step Guide to Perfect Birthday Cake Pops
Making Starbucks-style cake pops at home is a simple, multi-step process that begins with baking and crumbling the cake and ends with dipping and decorating. The key stages are:
1. Bake & Crumble the Cake
2. Form the Cake Dough
3. Roll & Chill the Balls
4. Melt the Candy & Insert Sticks
5. Dip & Decorate
6. Dry & Store
The Ultimate Starbucks Copycat Birthday Cake Pop Recipe
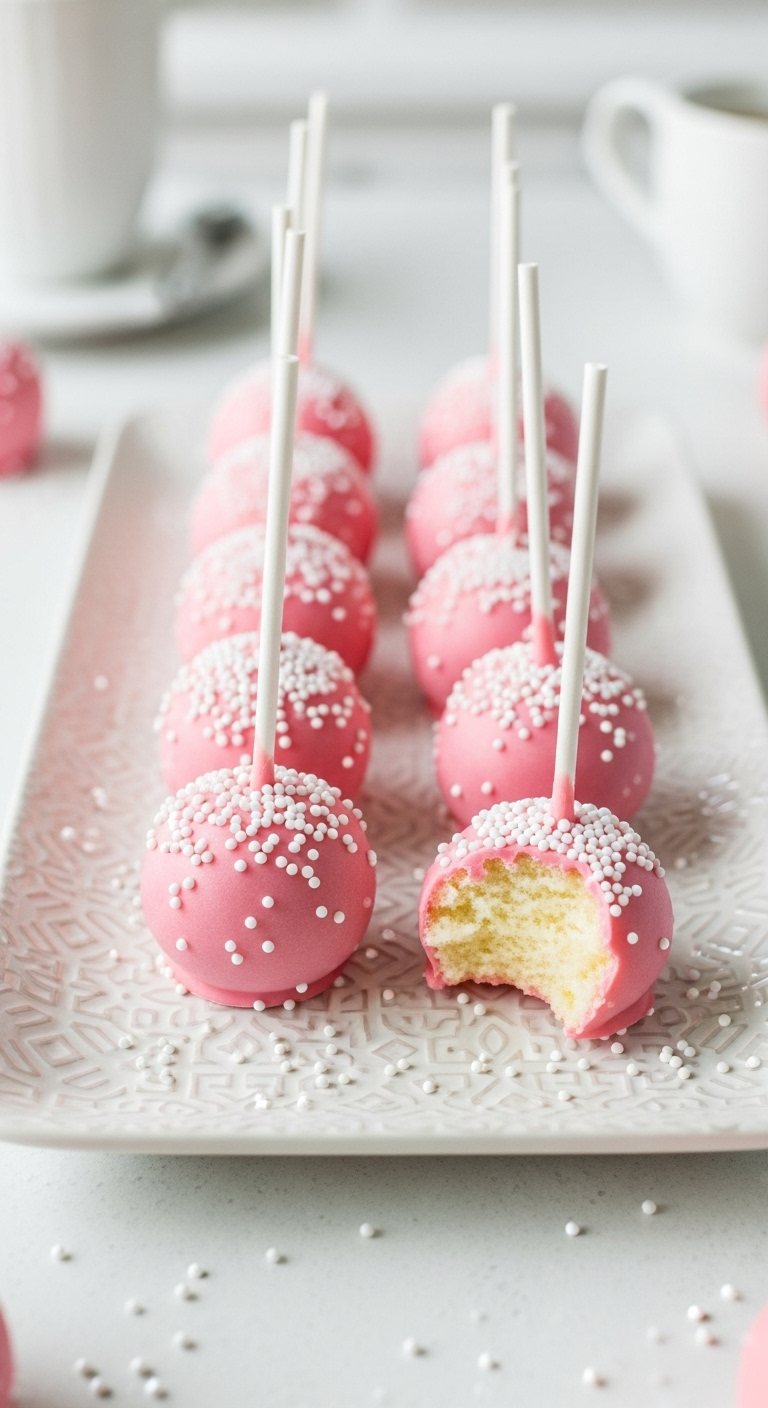
This recipe will give you the exact ingredients and a detailed method for creating about 36-48 cake pops that taste just like they came from the Starbucks counter.
@happytummy_702 Starbucks Copycat Birthday Cake Pops 🍭. They turned out great ☺️ Come make some with me – recipe below 👇🏼 Ingredients Cake 1 – 13.25oz (375g) any vanilla store cake mix 1/3 cup (70ml) neutral oil 1 cup (240ml) milk or water 4 large eggs Add ONE of these options: 1. 3-4 tbsp ready-to-use vanilla frosting or 2. 1/4 cup (28g) powdered sugar & 1/2 tsp vanilla or 3. Vanilla buttercream 1/4 cup (56g) softened unsalted butter 1 cup (118g) powdered sugar 1 tsp vanilla Splash of milk (start w/ 1 tsp, add more until smooth) Pinch of salt Coating 12oz (340g) pink candy melts White nonpareils Lollipop sticks Instructions 1. Preheat your oven – typically 325°- 350°F depending on what type of pan you’re using 2. Combine all cake ingredients in a large bowl. Pour batter into lined or greased pan and transfer into oven. DO NOT OVER BAKE. Stick a toothpick in the center to see if it comes out clean 2-4 mins BEFORE box bake time is finished. 3. Transfer cake while it’s still hot into a large stand mixing bowl and crumble cake on low speed, using the paddle attachment until there are no large pieces. Some bakers take off the darker crust pieces, but I find this wasteful and unnecessary. 4. In a small mixing bowl, combine all buttercream ingredients. Since it’s not used for decoration, sifting the powdered sugar is not required. Mix well until smooth, a little lumpy is alright. 5. Add buttercream to crumbled cake and mix on low until batter comes together. Roll cake pops weighing approx 30g each, or 1-1/4inch (3cm) in diameter. Chill in freezer for 15 mins. 6. Melt your pink candy melts in microwave in 20-30 sec increments until smooth. You can also use a double boiler. Dip a lollipop stick into the candy melt, then gently stab the cake pop approx halfway. Repeat to all cake pops, then chill again in freezer for 15 mins. 7. Melt your candy again once pops are chilled. Dip and submerge the entire cake pop, insuring it meets where it was dipped previously. Holding the stick with one hand, use your other hand to gently tap until all excess chocolate has dripped off. You want to achieve one even coating. Do not dip again, as this extra weight may make your cake pop detach from the stick. 8. Decorate with sprinkles or nonpareils quickly before pink melt dries. Place sticks into a styrofoam block. Repeat until all cake pops are dipped and sprinkled. #cakepops #starbucks #copycatrecipe
Ingredients:
- 1 box (15.25 oz) vanilla or classic white cake mix
- Ingredients listed on cake mix box (we recommend using milk instead of water and adding 1 extra egg)
- 1/2 cup vanilla frosting (store-bought or homemade)
- 16 oz light pink candy melts
- 1-2 tsp coconut oil or vegetable shortening (like Crisco)
- White nonpareils sprinkles
Equipment:
- 9×13 inch baking pan
- Large mixing bowl or stand mixer with paddle attachment
- Baking sheet lined with parchment paper
- 1-inch cookie scoop (optional, but highly recommended for uniform size)
- Approx. 36-48 6-inch lollipop sticks
- Microwave-safe bowl or tall jar for melting
- Cake pop stand or styrofoam block for drying
Instructions:
- Bake the Cake: Prepare and bake the vanilla cake in a 9×13 pan according to the package directions. For a richer, moister cake that tastes homemade, use our recommended substitutions: use whole milk instead of water and add one extra egg to what the box calls for. Let the cake cool for about 15 minutes until it’s warm to the touch, but not hot.
- Crumble & Mix: While the cake is still warm, carefully trim the dark golden-brown edges from the top and sides. This step is key for a uniform texture. Crumble the remaining soft cake into a large mixing bowl or the bowl of a stand mixer. Mix on low speed with the paddle attachment until only fine crumbs remain.
- Form the Dough: Add the 1/2 cup of vanilla frosting to the cake crumbs. Mix on low speed just until a cohesive, moist dough forms that can be easily pressed together. It should have the consistency of play-doh. Be careful not to overmix, as this can make the dough oily.
- Roll & Chill: Use a 1-inch cookie scoop to portion the dough evenly. Roll each portion firmly between your palms into a smooth, tight ball and place it on your parchment-lined baking sheet. Freeze the cake balls for 20-30 minutes, or refrigerate for at least 2 hours, until firm.
- Melt & Prep Sticks: While the balls are chilling, melt the pink candy melts with 1 teaspoon of coconut oil in a tall, microwave-safe jar. Heat in 30-second intervals at 50% power, stirring thoroughly between each interval until completely smooth. Dip about 1/2 inch of a lollipop stick into the melted candy and insert it into the center of a chilled cake ball, pushing it about halfway through. Repeat for all cake balls. Return the pops to the freezer for another 10 minutes to set the candy “glue.”
- Dip & Decorate: Remove just a few cake pops at a time from the freezer to work with. Hold the stick and dip one cake pop straight down into the melted candy until it’s fully coated. Lift it out and allow the excess candy to drip off. You can gently tap the stick on the side of the bowl to help this along.
- Add Sprinkles: Immediately, before the candy sets, hold the pop over a small bowl and generously cover the wet coating with white nonpareils sprinkles. The coating sets very quickly, so you have to be fast!
- Dry & Enjoy: Place the finished cake pop upright in a cake pop stand or a block of styrofoam to dry completely. Once the coating is fully hardened, they are ready to enjoy. Store any leftovers in an airtight container.
Pro Tip: Using milk instead of water and adding an extra egg is a classic baker’s secret to making any box cake mix taste incredibly rich and homemade. It creates a denser, more flavorful crumb that is perfect for cake pops.
Made this recipe? Pin it and share your beautiful creations!
7 Pro Tips for Foolproof Cake Pops Every Time
To get truly professional-looking cake pops, you need to follow a few key techniques that address common problems like cracking, falling apart, and lumpy coatings. We’ve made all the mistakes so you don’t have to. These 7 tested tips are the key difference between frustrating failures and perfect, coffee-shop-worthy cake pops.
- Chill, Chill, and Chill Again
- Don’t Add Too Much Frosting
- Achieve the Perfect Melt Consistency
- Prevent the Dreaded Cracks
- Work in Small Batches
- Use a Scoop for Uniformity
- Secure the Stick with Candy “Glue”
1. The Chilling Secret: Your #1 Defense
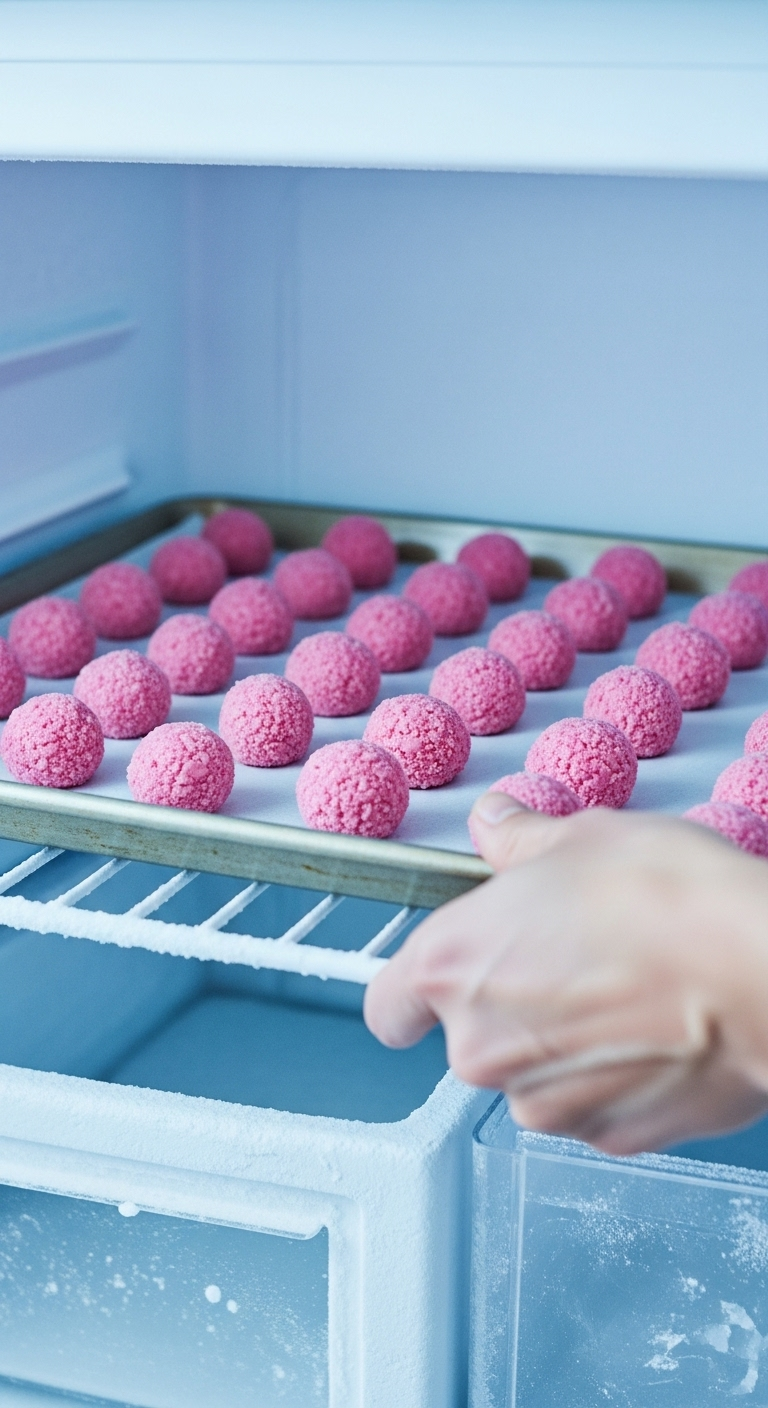
The absolute most critical step for success is properly chilling the cake balls at two key stages. This prevents them from falling off the stick when you dip them into the warm candy coating.
Step-by-Step Directions:
- First Chill: After rolling the mixture into balls, place them on a parchment-lined sheet and freeze for at least 20-30 minutes (or refrigerate for 2 hours). They should be firm to the touch, like cold butter, but not frozen solid.
- Second Chill: After you insert the candy-dipped sticks (the “glue” step), pop them back into the freezer or fridge for another 10-15 minutes. This solidifies the candy, locking the stick firmly in place.
Lesson Learned: In my experience, skipping the second chill is the number one reason cake balls plunge into the melted candy. This step is non-negotiable for success!
Save this essential tip to your ‘Baking Hacks’ board!
2. Get the Right Dough Consistency
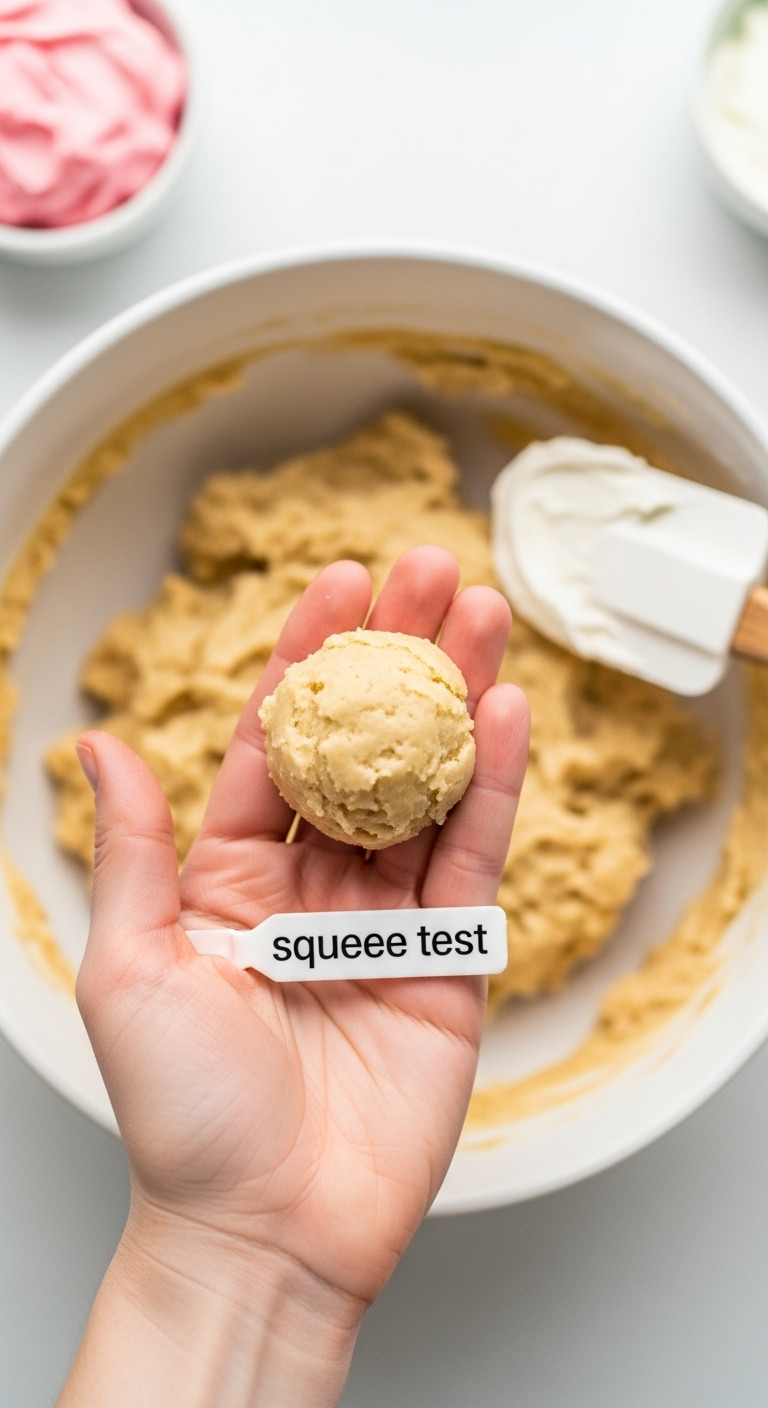
To create a cake pop that holds its shape, you must achieve a dough that is moist and pliable, not wet or greasy. This is controlled by the amount of frosting you add.
Step-by-Step Directions:
- Start Small: Begin by adding just the recommended 1/2 cup of frosting to your bowl of fine cake crumbs.
- Mix Gently: Mix on the lowest speed or by hand only until the mixture comes together into a dough. Over-mixing can make it oily.
- The Squeeze Test: Take a small amount of the mixture and squeeze it in your hand. If it holds its shape perfectly without feeling overly sticky or leaving a greasy residue on your palm, it’s perfect. If it’s still too crumbly, add more frosting just one tablespoon at a time until you reach the right consistency.
Pro Tip: It’s always easier to add more frosting than to take it away. A dough that’s too wet from excess frosting will result in heavy, greasy cake pops that are much more likely to slide right off the stick.
Pin this tip to remember the perfect dough test!
3. Master the Candy Melt
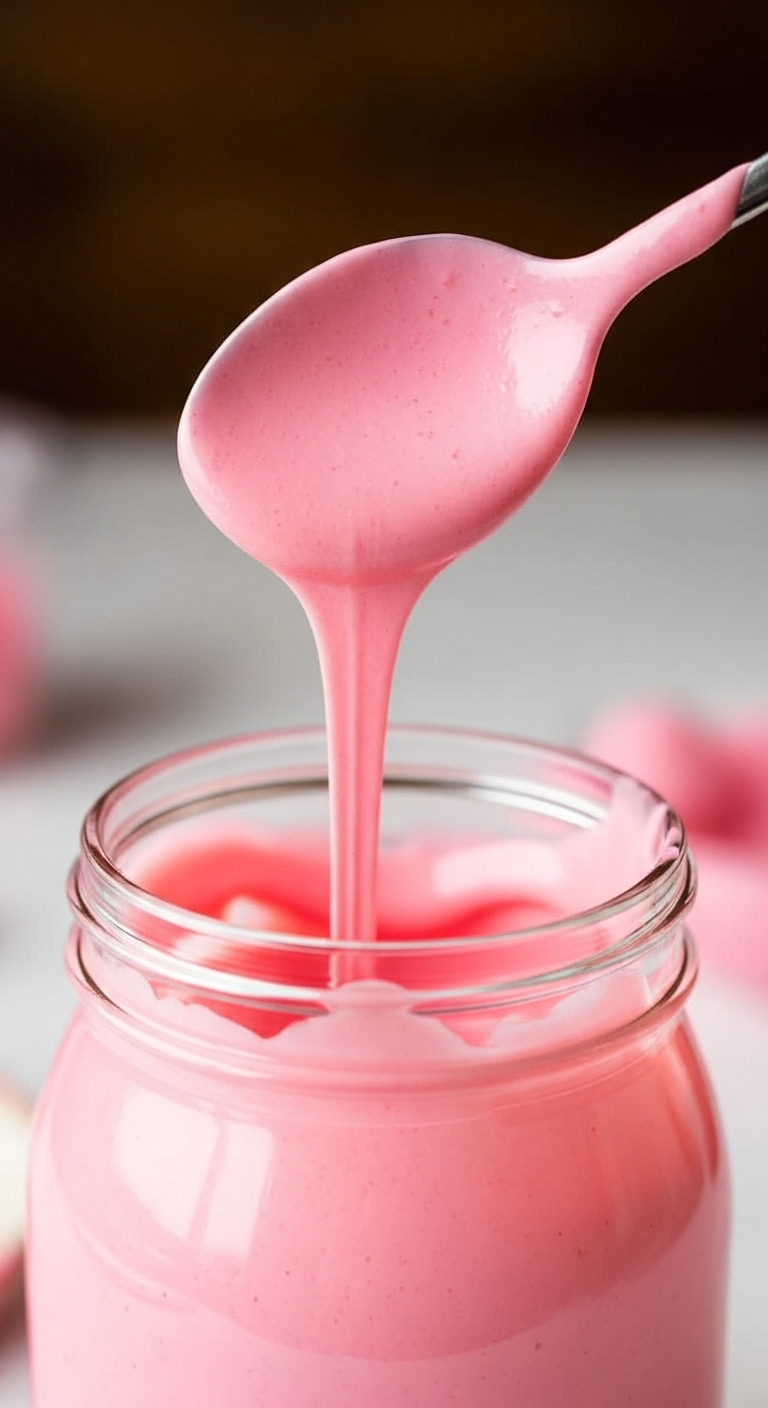
For a beautiful, smooth coating, your melted candy needs to be thinned to the right consistency. If it’s too thick, you’ll get a lumpy, uneven finish.
Step-by-Step Directions:
- Melt Slowly: Microwave your candy melts in a tall, microwave-safe jar or glass. Use 30-second intervals at 50% power, and stir thoroughly between each one, even if they don’t look melted. The residual heat does most of the work.
- Thin it Out: Once the melts are smooth, check the consistency. If it’s thick like pudding, stir in 1 teaspoon of coconut oil or vegetable shortening. Continue adding just 1/2 teaspoon at a time, stirring well, until the candy flows smoothly and continuously off a spoon, similar to a thin gravy or warm maple syrup.
Why this works: Coconut oil or shortening is a fat that helps to emulsify the candy, breaking down any thickness and creating a much smoother, more fluid consistency. This makes dipping effortless and is the secret to that thin, professional-looking shell.
Never have thick coating again! Save this melting tip.
4. Prevent the Dreaded Coating Cracks
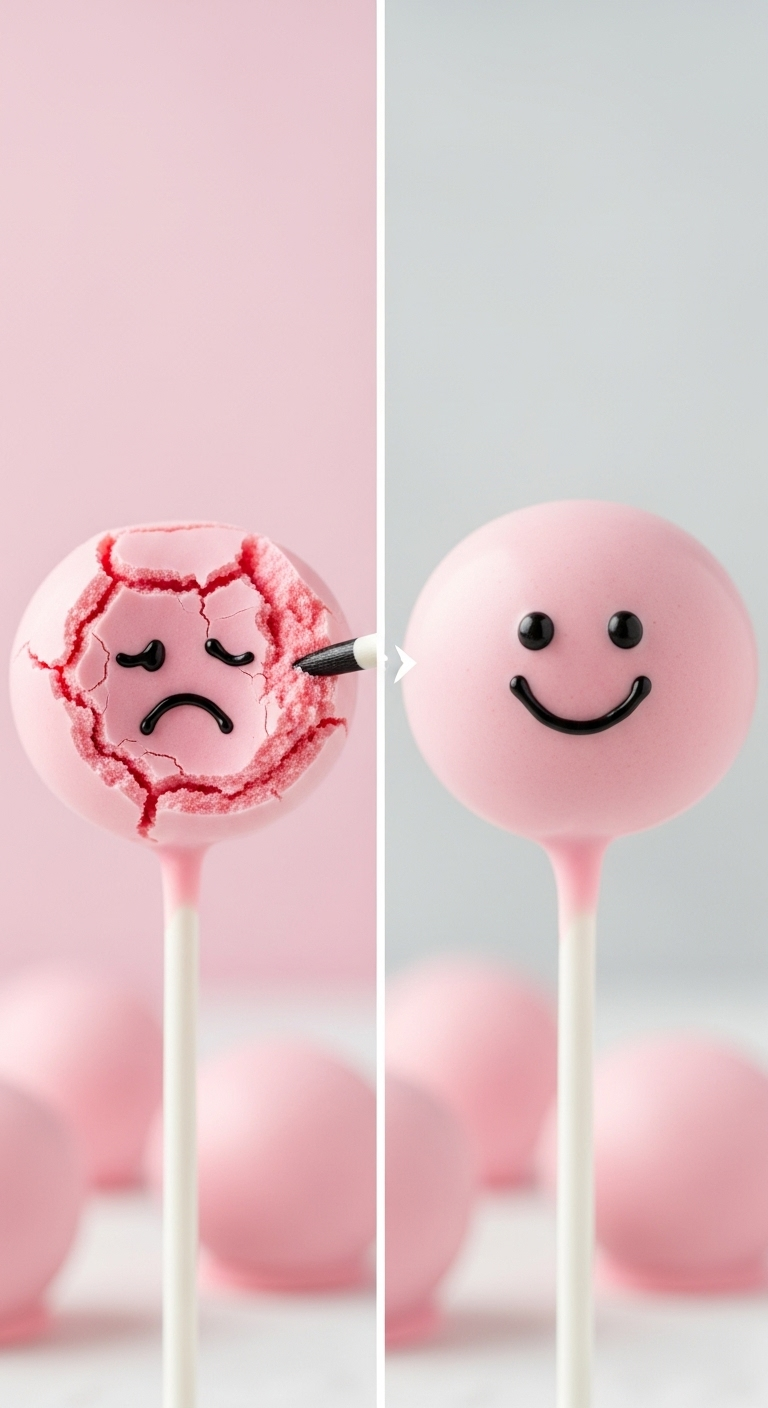
To stop the candy coating from cracking, you must manage the temperature difference between the cold cake ball and the warm candy. A drastic temperature shock is the primary culprit.
Step-by-Step Directions:
- Don’t Over-Chill: Ensure your cake balls are firm and cold, but not frozen solid. If you’ve had them in the freezer and they are rock hard, let them sit at room temperature for 5-10 minutes to take the intense chill off before dipping.
- Check Candy Temperature: Your melted candy coating should be warm and fluid, but not scorching hot. If it feels very hot to the touch, let it cool for a few minutes before you begin dipping.
Lesson Learned: Think of it like a science experiment. A rapid temperature change causes the cold cake ball to expand as it warms, which forces the quickly-hardening candy shell to crack under the pressure. Letting the temperatures get a little closer to each other is the key to preventing this.
Want perfect pops? Pin this anti-cracking guide!
5. Work in Small, Cool Batches
The best way to maintain the ideal cake pop temperature is to only work with a few cake pops at a time while the rest stay chilled. This creates an efficient, assembly-line-style workflow.
Step-by-Step Directions:
- Keep them Chilled: Leave your main tray of prepped cake pops (with sticks inserted) in the refrigerator or freezer.
- Batch it Up: Bring out only 4-5 cake pops at a time to your dipping station.
- Return and Repeat: Once you’ve dipped and decorated that small batch, place them in your drying stand. Then, grab the next few from the fridge to continue the process. This prevents the cake balls from getting too warm and soft while they wait their turn.
Pro Tip: This assembly-line method not only keeps your cake pops perfectly cool but also makes the process feel much less overwhelming and more organized.
Stay organized in the kitchen! Pin this workflow idea.
6. Use a Scoop for Uniform Pops
To get cake pops that are all the same size and look professional, use a small cookie scoop to portion the dough. This is the easiest and fastest method for consistency.
Step-by-Step Directions:
- Choose Your Scoop: A 1-tablespoon or 1-inch (often labeled as a #60) cookie scoop is the perfect size for standard cake pops, closely matching the Starbucks version.
- Scoop and Release: Press the scoop firmly into your bowl of cake pop dough, level it off, and release a perfectly portioned amount.
- Roll Smooth: Gently roll the portioned dough between your palms to create a tight, smooth, round ball. Using a scoop ensures each ball starts with the exact same amount of dough, making the rolling step much easier.
Why this works: Uniform size isn’t just for looks. It’s a key factor in consistent results. It ensures all your cake pops chill and set at the same rate, and it helps them cook (or rather, dip and dry) evenly.
For perfectly even cake pops, save this simple trick!
7. The Candy “Glue” Stick Trick

To ensure the cake ball stays securely on the stick, you must first dip the stick in melted candy to create a strong “glue”. This anchors the stick inside the cake ball.
Step-by-Step Directions:
- Dip the Stick First: Take a bare lollipop stick and dip about 1/2-inch of one tip into your bowl of melted candy coating.
- Insert into Ball: Immediately insert that candy-coated end into the center of a chilled cake ball. Push it firmly about halfway to two-thirds of the way through the ball.
- Chill to Set: Place the pop on its baking sheet and return it to the fridge or freezer for 10 minutes. The candy inside will harden, acting as a powerful glue that anchors the stick to the cake.
Lesson Learned: Simply dipping a dry, bare stick into a cake ball offers zero structural support. The hardened candy anchor is what gives the pop the strength to be dipped and swirled in the coating without tragically falling off.
The most important step! Pin it so you don’t forget.
Key Takeaways: Your Quick Guide to Starbucks Copycat Birthday Cake Pops
- The Box Mix Hack is Key: Elevate a standard vanilla cake mix by adding an extra egg and using whole milk instead of water. This creates a super moist, dense, bakery-quality cake base perfect for pops.
- Chilling is Not Optional: You must chill the cake balls after rolling AND after inserting the sticks. This two-step chilling process is the #1 way to prevent them from falling apart during dipping.
- Thin Your Candy Melts: For a smooth, professional coating that isn’t thick or clumpy, thin your melted candy with a teaspoon of coconut oil or shortening until it drips smoothly from a spoon.
- Huge Savings: Enjoy your favorite coffee shop treat for a fraction of the price, making them a perfect, budget-friendly option for parties, gifts, or a simple afternoon indulgence.
People Also Ask About Starbucks Copycat Birthday Cake Pops
What are the ingredients in Starbucks birthday cake pops?
The original Starbucks Birthday Cake Pops contain a vanilla cake base mixed with vanilla buttercream, which is then dipped in a pink-colored confectionary coating (candy melts) and topped with white sprinkles. This copycat recipe faithfully replicates that exact combination using a vanilla cake mix, vanilla frosting, pink candy melts, and white nonpareils for an authentic taste and look.
What does Starbucks coat their cake pops in?
Starbucks coats their cake pops in a sweet, vanilla-flavored confectionary coating, which is essentially a type of candy melt. It is not pure white chocolate, but a similar product specifically designed to melt smoothly and harden with a satisfyingly crisp shell. For our copycat recipe, we use light pink candy melts to achieve that same signature look, flavor, and texture.
How do you store homemade cake pops and how long do they last?
To store your finished cake pops, place them in an airtight container to protect them from air and moisture. They will stay fresh at room temperature for up to 3 days or in the refrigerator for up to one week. For longer storage, you can freeze them for up to 3 months. To serve from frozen, simply let them sit at room temperature for about 10-15 minutes to soften slightly before enjoying.
Can I make other flavors like the chocolate Starbucks cake pop?
Absolutely! This recipe is a fantastic base for creating any flavor of cake pop. To make a copycat of the popular chocolate cake pop, simply substitute the vanilla cake mix and vanilla frosting with a rich chocolate fudge cake mix and chocolate frosting. Then, dip them in melted brown or black candy melts to get that classic, decadent look.
Final Thoughts
Now that you have the secrets to making perfect Starbucks Birthday Cake Pops, the only limit is your imagination! Go ahead, impress your friends, delight your family, and treat yourself without breaking the bank. There is so much satisfaction in creating a beloved treat at home that tastes even better than the original.
What flavor will you try making next? Let me know in the comments below
