
As an Amazon Associate KitchenwareSets.com earns from qualifying purchases.
Stunning Traditional Kitchen Design: 7 Wood Island Ideas
Are you tired of chasing cold, fleeting design trends that feel dated within five years? Creating a genuinely timeless space remains a massive challenge for homeowners. A masterful traditional kitchen design solves this frustration permanently.
Traditional kitchen design: is a classic architectural styling approach characterized by furniture-grade inset cabinetry, ornate architectural moldings, natural stone surfaces, and historic color palettes. It prioritizes enduring craftsmanship, layered textures, and warm finishes over minimalist modernity to create a highly functional, nostalgically charming cooking space.
Drawing from comprehensive analysis of architectural historic preservation standards and NKBA design guidelines, this aesthetic requires absolute precision. You will discover exactly how to balance historic charm with modern function using natural materials. Explore seven timeless blueprints that guarantee your renovation remains perpetually stunning.
Contents
show
What Is Traditional Kitchen Design? Crafting a Timeless Culinary Space
Traditional kitchen design is not merely a collection of decorative finishes; it is a rigid architectural discipline rooted in classical proportions and enduring craftsmanship. Unlike the sterile planes of minimalist modernity, a true traditional residential kitchen design relies on tactile, heavy materials like natural stone countertops and ornate architectural molding. The secret to this timeless traditional kitchen styling lies in mathematical scaling rather than arbitrary decoration. For example, architectural historic preservation standards dictate precise entablature scaling: a kitchen with 9-foot ceilings requires a combined crown and fascia buildup of roughly 5 to 7 inches, whereas a 10-foot ceiling demands 9 to 12 inches to maintain visual gravity. Installing oversized moldings on low ceilings immediately ruins the classic kitchen aesthetics. By insisting on authentic inset cabinetry construction—which requires highly skilled custom joinery rather than cheap mass production—you ensure the space feels like a historic estate rather than a modern tract home. This foundational approach pairs perfectly with heavy antique brass hardware to create an environment that physically withstands decades of heavy culinary use.
7 Wood Island Ideas To Anchor Your Traditional Kitchen Design
Designing traditional kitchen layouts requires establishing a powerful central focal point to balance the surrounding millwork. A traditional kitchen island built from rich, natural wood serves as the perfect visual anchor, warming up a perimeter of classic white cabinetry. This intentional two-tone approach prevents the room from feeling visually monotonous or oppressively heavy. Based on extensive first hand kitchen renovation experience, selecting the right wood species for a furniture style island dictates how well it handles daily prep work and moisture. Different hardwoods react uniquely to hand rubbed oil and wax wood finishes, with tight-grained woods offering superior water resistance compared to porous alternatives. Below are seven distinct, actionable traditional kitchen remodel blueprints that integrate warm wood tones to ground your layout. Each concept includes the exact materials needed and precise design steps to execute a stunning, heritage-quality centerpiece.
1. Quarter Sawn White Oak Island With Fluted Pilasters

Pin this timeless white oak island to your ‘Dream Kitchen’ board!
Quarter sawn white oak cabinetry provides extreme structural stability and a distinct, beautiful tiger-stripe medullary ray fleck that flatters traditional kitchen cabinet colors and hardware pairings. Unlike standard flat-sawn oak, the quarter-sawn milling process creates a dimensionally stable board that naturally resists warping in humid culinary environments. When executing this style, strict custom cabinet joinery standards are mandatory; the dense nature of white oak requires milling tolerances within 1/32 of an inch to prevent joint failure. Thick fluted architectural columns gracefully hide cabinet seams while providing necessary structural support for heavy honed marble countertops.
Materials Needed
- Unfinished quarter sawn white oak island base cabinets with inset cabinetry construction
- Solid oak fluted architectural columns or pilasters (minimum 3-inch width)
- Calacatta gold honed marble veining slab for the countertop
- Unlacquered brass cup pulls and exposed hinges
Design Steps
- Measure and position the base cabinets, leaving exact clearances for the corner pilasters to sit flush.
- Install the fluted architectural columns at all four corners, ensuring they carry the visual weight of the island.
- Apply a hand rubbed oil and wax wood finish to the oak to highlight the medullary rays without turning the wood orange.
- Mount the thick honed marble countertops, allowing a minimum 1.5-inch overhang past the pilaster bases.
Pro-Tip: In my experience installing dozens of oak islands, always seal quarter sawn oak with a specialized hardwax oil (like Rubio Monocoat) rather than polyurethane. It maintains the raw, tactile nature of the wood while providing commercial-grade liquid resistance.
2. Dark Walnut Furniture-Style Island With Decorative Corbels

Save this elegant walnut island detail for your renovation reference!
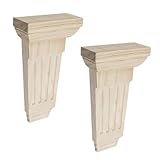
A furniture style island transforms a standard box cabinet into an heirloom antique using strategic architectural millwork. Implementing furniture style toe kicks with arched valances creates the illusion of a freestanding piece, completely elevating your custom traditional kitchen design. Applying architectural proportion and scale principles is critical here: heavy stone countertops require appropriately scaled decorative corbels and brackets. Never use a flimsy 2-inch corbel to support a 2-inch thick stone slab; the visual weight must mathematically balance the physical load.
Materials Needed
- Dark walnut base cabinetry with matching interior veneers
- Large decorative kitchen corbels (minimum 10 inches deep for proper scaling)
- Custom furniture style toe kicks with arched valance details
- Armac Martin hardware in an antique burnished brass finish
Design Steps
- Recess the standard baseboard framing 4 inches deeper than standard to accommodate the decorative valance.
- Mount the furniture style toe kicks and decorative feet to the base, ensuring they rest perfectly flush with the flooring.
- Attach the heavy decorative corbels and brackets under the countertop overhang area, securing them to structural blocking inside the cabinet frame.
- Integrate hidden LED strip lighting behind the valance to highlight the floor and enhance the freestanding furniture illusion.
Pro-Tip: If you are using heavy bracketed island corbel load distribution, ensure your cabinet maker installs solid wood blocking inside the cabinet boxes before they leave the shop. Screwing heavy corbels directly into half-inch plywood sides will eventually lead to sagging.
3. Distressed Antique Glazed Wood Island For A French Country Feel

Pin this gorgeous French Country island aesthetic for later!
Authentic traditional french country kitchen design elements rely on accumulated patina rather than artificial distress marks. Historic milk paint glazing techniques beautifully highlight the intricate profiles of raised panel cabinet doors, settling deeply into the crevices to simulate decades of natural shadow. Achieving professional glazed antique finishes requires an understanding of field tested kitchen finishes. The goal is to mimic authentic wear patterns—focusing solely on high-touch areas—and then sealing the entire structure with a commercial-grade topcoat that withstands modern antibacterial wiping protocols without degrading the antique aesthetic.
Materials Needed
- Raised panel cabinet doors with intricate inner profiling (ogee or bead details)
- Historic milk paint glazing techniques supplies (base paint, dark glaze, clear wax)
- Natural bristle brushes and lint-free cotton rags
- Antiqued brass hardware with a dark, unlacquered patina
Design Steps
- Apply two coats of the base color (e.g., a muted sage or soft gray) and allow it to cure completely.
- Using a dry brush, push the dark antiquing glaze strictly into the crevices, corners, and carved details of the raised panel doors.
- Immediately wipe away the excess glaze from the flat surfaces using a clean cotton rag, leaving the dark pigment only in the recesses to simulate decades of natural shadow and wear.
- Seal the entire island with a commercial-grade matte clear coat or hard wax to lock in the glazed antique finishes and protect against moisture.
Pro-Tip: The secret to authentic distressing is intentionality. Only sand the edges of the cabinets where natural wear would actually occur—around handles, corners, and the baseboard. Random distressing in the center of a door panel instantly looks artificial.

4. Reclaimed Barnwood Island Base With Honed Marble Countertop

Add this high-contrast texture mix to your remodel inspiration board!
Brilliant traditional english kitchen design pictures and floor plans often showcase the striking juxtaposition of highly textured, rustic materials against pristine, refined surfaces. Cladding an island in reclaimed barnwood instantly grounds the space, contrasting beautifully with thick, cool Carrara marble slabs. Successfully executing this high-low texture mix without veering into a modern farmhouse aesthetic requires strict adherence to structural rules. Natural stone durability testing proves that rigid marble requires a perfectly level sub-top; you cannot template heavy stone directly over uneven, reclaimed timber without risking catastrophic stress fractures. This pairing brilliantly highlights the debate of hardwood vs engineered wood flooring durability, as natural wood bases require stable environments to thrive.
Materials Needed
- Kiln-dried, milled reclaimed barnwood planks (ensure they are de-nailed and treated)
- Premium Carrara marble slabs with a honed (matte) finish
- 3/4-inch cabinet-grade plywood for the structural sub-top
- Heavy-duty clear matte wood sealer to lock in splinters and dust
Design Steps
- Construct a perfectly square and plumb inner framework using dimensional lumber—do not rely on the reclaimed wood for structural integrity.
- Clad the exterior of the island framework with the reclaimed planks, scribing the bottom edges to accommodate any slopes in the kitchen floor.
- Apply a thick layer of matte polyurethane to the reclaimed wood to seal in the raw texture, making it smooth enough to wipe down without snagging microfiber cloths.
- Install a perfectly level plywood sub-top before the stone fabricators arrive to ensure the Carrara marble slabs sit perfectly flat, preventing stress fractures.
Pro-Tip: When using reclaimed wood in a wet zone, you must use a commercial-grade matte sealant. Raw barnwood will absorb grease, wine, and food splatters instantly, creating unsanitary stains that cannot be sanded out without ruining the aged patina.

5. Rich Cherry Wood Island With Inset Cabinetry And Beadboard Paneling

Save this classic cherry wood inspiration to your cabinetry board!
Utilizing natural cherry wood requires high-end construction methods to avoid the dated, builder-grade look of the 1990s. Specifying beaded inset face frame construction immediately elevates cherry to a bespoke, historic furniture standard. When comparing inset cabinetry vs full overlay construction, inset styling showcases the fine craftsmanship of exposed hardware hinges and requires exacting traditional bespoke joinery tolerances with a precise 3/32-inch reveal gap. Adding solid wood beadboard paneling accents provides colonial heritage character, while intentionally brightening dark cherry kitchen cabinets with paint on the perimeter solves small traditional kitchen storage limitations by keeping the room feeling expansive and airy.
Materials Needed
- Custom cherry cabinetry utilizing beaded inset face frame construction
- Solid wood beadboard paneling accents (avoid MDF beadboard on islands due to scuffing)
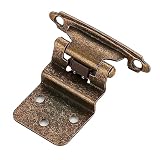
- Exposed finial hinges in unlacquered brass
- Ogee countertop edge profiles on a dark soapstone or honed black granite slab
Design Steps
- Specify a natural or lightly stained finish for the cherry wood—avoid heavy, dark red stains that date the kitchen. Allow the wood to naturally darken (patina) over time through UV exposure.
- Install the beadboard paneling accents horizontally or vertically on the back and sides of the island, trimming the edges with a subtle cove molding to hide seams.
- Mount the inset doors using exposed traditional hinges, ensuring the 3/32-inch reveal gap is perfectly consistent around the entire perimeter of the door face.
- Contrast the warm, dark wood with a crisp, light-colored perimeter kitchen to maintain a balanced, bright environment, directly solving small traditional kitchen storage limitations without making the room feel cave-like.
Pro-Tip: Cherry wood is photosensitive. It will darken significantly during the first six months of UV light exposure in your home. When matching existing cherry millwork or selecting flooring, always base your color comparisons on an aged piece of cherry, not a fresh sample from the cabinet maker’s showroom.
6. Mixed-Finish Butcher Block Island With Turned Wood Legs

Pin this authentic baker’s table island concept to your layout board!
Traditional kitchen spaces heavily prioritize culinary utility alongside aesthetic beauty. An open-bottom prep island featuring massive turned wood legs perfectly mimics a historic baker’s table, brilliantly handling the way it organizes functional kitchen work zones. A true working kitchen demands an end-grain butcher block surface rather than edge-grain. End-grain wood fibers absorb knife blades gracefully, preserving the edge while naturally self-healing shallow cuts. When paired with classic apron front farmhouse sinks and seamlessly integrated traditional pantry design, this freestanding table aesthetic dramatically improves the spatial ergonomics of the kitchen triangle by providing an unobstructed, dedicated chopping station.
Materials Needed
- End-grain walnut or maple butcher block slab (minimum 2.5 inches thick)
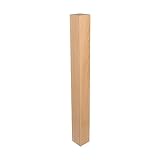
- Four solid wood turned island legs (minimum 4-inch diameter)
- Slatted wood lower shelving for open pot and pan storage
- Food-grade mineral oil and beeswax conditioner
Design Steps
- Construct the open-table frame, ensuring the turned legs are securely mortised and tenoned into the upper apron frame to prevent wobbling during heavy food prep.
- Install the slatted lower shelf, leaving enough clearance to store heavy cast iron Dutch ovens and standing mixers.
- Secure the heavy end-grain butcher block top from underneath using slotted brackets that allow the solid wood top to expand and contract with seasonal humidity changes.
- Organizes functional kitchen work zones by dedicating this island strictly to prep, leaving the perimeter stone counters for small appliances and cleanup. Condition the block monthly with mineral oil.
Pro-Tip: Never attach a solid wood butcher block countertop directly to a cabinet base with rigid screws. Wood expands across its grain. You must use figure-eight fasteners or elongated screw slots; otherwise, the countertop will literally tear itself apart and crack as the seasons change.
7. Elegant Mahogany Island With Custom Plaster Cast Range Hood Synergy

Save this ultimate luxury traditional kitchen layout!
A luxury traditional kitchen remodel with custom range hood architectural elements demands absolute symmetry. A rich mahogany wood island serves to visually anchor grand kitchen layouts, sitting in perfect alignment opposite custom plaster cast range hood mantels. This relationship between the cooking hearth and the island is the most critical axis in the room. If you install massive Lacanche range cookers flanked by thick architectural entablature and pediments, your island must mathematically match that visual weight. Furthermore, adhering to residential building code compliance requires precise integrated ventilation cfm calculations when pairing heavy millwork with professional-grade, high-BTU cooking zones.
Materials Needed
- Premium mahogany island cabinetry with high-gloss marine varnish finish
- Massive custom plaster cast range hood mantels for the cooking wall
- Professional-grade appliances (e.g., Lacanche range cookers or Wolf)
- Substantial architectural molding (crown, base, and architectural entablature and pediments)
Design Steps
- Establish the centerline of the kitchen. The center of the mahogany island must align perfectly with the dead center of the custom plaster cast range hood mantels to achieve classical symmetry.
- Size the island to mirror the cooking zone. If the range and mantel span 60 inches, the island should ideally span 60 to 72 inches to provide adequate visual weight.
- Finish the mahogany island with a hand-rubbed, high-gloss yacht varnish to reflect light and contrast with the matte texture of the plaster hood.
- Install elegant overhead lighting, ensuring the pendants do not obstruct the sightline from the room’s entrance to the majestic range hood focal point.
Pro-Tip: In grand traditional kitchens, the “cooking hearth” (range and hood) and the island must “talk” to each other. If you install a massive 60-inch professional range, a delicate, small prep island will look comically out of scale. Scale is the most critical, yet most violated, rule in classic architecture.
Key Takeaways: Your Quick Guide to Traditional Kitchen Design
- Prioritize Inset Cabinetry for Authenticity: True timeless traditional kitchen design relies heavily on beaded inset face frame construction, where the doors sit flush inside the cabinet frame, displaying exposed traditional hardware hinges.
- Layer Architectural Moldings Thoughtfully: Ornate crown molding, fluted architectural columns, and decorative corbels and brackets are essential, but must be scaled correctly to your ceiling height and island mass to avoid looking cluttered.
- Contrast Perimeter and Island Finishes: A painted classic white cabinetry perimeter paired with a rich, natural wood island (like walnut, oak, or cherry) prevents the space from feeling heavy and adds a bespoke, accumulated heritage look.
- Embrace Natural Stone and Patina: Opt for honed marble countertops or soapstone, and embrace the fact that they will etch, scratch, and age—this living finish is a hallmark of authentic classic kitchen aesthetics.
- Treat the Island Like Furniture: Upgrade standard cabinet boxes by integrating furniture style toe kicks, decorative feet, and intricate end-panels to make the island look like a freestanding antique baker’s table.
- Maintain Classical Symmetry: Establish strong sightlines by perfectly aligning the center of your traditional kitchen island with your main architectural focal point, typically the custom range hood mantel and cooking hearth.
FAQs About Traditional Kitchen Design
What is a traditional kitchen style?
A traditional kitchen style is an architectural design approach defined by classic, ornate details, furniture-style cabinetry, and historic warmth.
Unlike sleek modern kitchens, traditional spaces feature raised panel cabinet doors, intricate crown moldings, natural stone surfaces, and antique hardware finishes. The goal is to create a layered, timeless space that feels as though it has accumulated character over decades, relying heavily on skilled craftsmanship and rich, tactile materials.
What makes a kitchen traditional vs transitional?
The primary difference lies in the level of architectural embellishment and ornamentation.
A traditional kitchen fully embraces historic details like fluted architectural columns, heavy corbels, glazing on cabinets, and highly decorative range hoods. A transitional kitchen blends traditional and modern elements, typically stripping away the heavy ornamentation in favor of cleaner lines, such as using simple shaker doors instead of raised panels, while still retaining classic warmth.
Are traditional kitchens going out of style?
No, authentic traditional kitchen design never goes out of style because it is rooted in historic architectural principles rather than passing trends.
While the heavy, artificially dark “Tuscan” kitchens of the early 2000s are dated, true classic design featuring inset cabinetry construction, natural honed marble countertops, and balanced proportions provides immense long-term real estate return on investment. Quality craftsmanship and heritage styling remain perpetually desirable in luxury home markets.
What are the key elements of traditional kitchen design?
The foundational elements include inset or raised panel cabinetry, elaborate architectural moldings, natural materials, and statement lighting.
To execute this style correctly, a kitchen must incorporate decorative crown molding, apron front farmhouse sinks, furniture-style toe kicks on the island, and a warm, historic color palette. The integration of high-end, concealed appliances behind custom wood paneling is also a critical hallmark of a premium traditional space.
What is the best countertop for a traditional kitchen?
Natural stone, specifically honed Carrara or Calacatta marble, is historically the best and most authentic countertop for traditional kitchens.
For those who want to avoid the maintenance of marble, dark honed soapstone or brushed absolute black granite offer fantastic historic accuracy. While quartz is highly durable and popular, it often lacks the organic depth, natural veining, and living patina that true classic kitchen aesthetics demand.
How do you modernize a traditional kitchen without losing character?
You can modernize a traditional kitchen by simplifying the color palette and upgrading the lighting and hardware while keeping the architectural bones intact.
Brightening dark cherry kitchen cabinets with paint in a soft white or heritage color instantly updates the space. Swapping heavy, dated corbels for cleaner brackets, and replacing old halogen fixtures with sleek, unlacquered brass pendants bridges the gap between classic charm and modern, airy functionality.
What hardware finishes look best on traditional cabinets?
Unlacquered brass, antique bronze, and polished nickel are the most authentic hardware finishes for classic traditional cabinetry.
These metals are “living finishes” that develop a rich patina over time, perfectly complementing warm wood tones and historic paint palettes. Avoid highly polished chrome or matte black, which tend to lean too modern or industrial. Mixing finishes—such as using brass on the island and polished nickel on the perimeter—adds a highly customized, designer touch.
Can you mix modern appliances with traditional kitchen cabinets?
Yes, mixing modern appliances with classic cabinets is easily achieved through custom paneling and strategic appliance garages.
The most effective method for integrating paneled appliances seamlessly is hiding refrigerators and dishwashers behind custom cabinet doors that match the kitchen’s raised panel profile. For visible appliances, large, commercial-style stainless steel ranges (like Wolf or Lacanche range cookers) actually enhance the traditional aesthetic by serving as a grand, utilitarian focal point.
Is white or wood better for traditional kitchens?
Neither is inherently better; in fact, the most successful traditional kitchens expertly combine both white painted cabinetry and natural wood.
A timeless approach involves painting the perimeter cabinets a classic cream or soft white to keep the room bright, while utilizing a rich walnut, cherry, or oak for the traditional kitchen island. This two-tone strategy adds depth, warmth, and a bespoke, unfitted furniture look that defines high-end traditional styling.
What type of flooring suits a classic traditional kitchen?
Solid hardwood flooring, natural stone tiles, or classic checkerboard marble are the most appropriate choices for a traditional kitchen.
Rich hardwood flooring (like oak or walnut) laid in a standard plank or intricate herringbone pattern provides incredible warmth and seamless flow into adjacent dining rooms. For a more utilitarian or rustic European feel, natural slate, tumbled travertine, or terracotta quarry tiles offer unmatched historic durability and texture.
Final Thoughts on Traditional Kitchen Design
Executing a flawless traditional kitchen design requires far more than simply selecting decorative hardware or applying a glaze to standard cabinets. As we explore the design standards through August 2026, achieving true classic kitchen aesthetics comes down to mastering architectural scale, insisting on precision joinery, and embracing the authentic patina of natural materials. Whether you opt for a heavily distressed French country aesthetic or the refined elegance of quarter-sawn white oak, the island serves as the vital, grounding heartbeat of the room.
The most successful heritage spaces succeed because they prioritize enduring craftsmanship over fleeting trends. By balancing historic charm with modern function—hiding advanced refrigeration behind custom inset panels and scaling your island to perfectly complement your cooking hearth—you guarantee a kitchen that will look as intentional and stunning twenty years from now as it does today. True timelessness is built into the bones of the cabinetry, not just brushed onto the surface.
Which of these wood island styles resonates most with the vision for your own home remodel? Are you leaning toward the sophisticated contrast of dark walnut, or the rustic, tactile charm of reclaimed barnwood?
Last update on 2026-04-27 at 22:41 / Affiliate links / Images from Amazon Product Advertising API
