
As an Amazon Associate KitchenwareSets.com earns from qualifying purchases.
Vintage Plate Wall Display: Create a Stunning Cottagecore Kitchen Gallery Wall for Home Cooks
Have you ever stood in a thrift store, heart pounding over a chipped floral saucer, only to leave it behind because you had no idea how to hang it safely? You’re not alone. The fear of breaking a fragile heirloom or damaging your wall stops most home cooks from building the charming vintage plate wall display they dream about.
A vintage plate wall display transforms a blank kitchen wall into a charming, story-filled gallery. By mixing blue-and-white transferware, floral porcelain, and scalloped-edge saucers, home cooks can create a cottagecore focal point that feels both personal and curated. The key is a secure mounting system that protects both the plates and the wall.
Drawing from years of hands-on testing with antique china and professional installation methods, this guide gives you nine foolproof layouts, product comparisons, and a safety checklist so you can finally bring that cottagecore kitchen gallery wall to life without fear of a crash.
Contents
show
9 Vintage Plate Wall Display Layouts & Hanging Tips for a Cottagecore Kitchen Gallery Wall
Whether you dream of a symmetrical grid or an organic cascade, the right layout sets the stage. Here’s a quick overview of the nine layouts you’ll learn to build:
- Symmetrical grid – perfect for formal cottagecore
- Asymmetrical cloud – for a relaxed, collected‑over‑time look
- Linear row – ideal above a narrow pie safe
- Circular wreath – frames a central mirror or sconce
- Organic cascade – mimics a climbing vine
- Color‑blocked – group by hue (all blue, all pink)
- Transferware‑only – focus on one pattern family
- Mismatched Victorian – mix shapes and gilding
- Mini‑plate vignette – small cluster near a window
Each layout works best in a different spot, and we’ll show you exactly how to install it step by step.
1. Arrange a Symmetrical Grid with Blue‑and‑White Transferware

Pin this blue-and-white symmetrical dream to your “Cottagecore Kitchen” board!
A symmetrical grid is the ultimate choice for a formal, balanced cottagecore look. It works best on a wide wall above a sideboard, farmhouse table, or buffet.
Supplies Needed
- 9 vintage blue-and-white transferware plates (7–10 inch diameter)
- 9 sets of adhesive disc plate hangers (rated for 5+ lbs each)
- Measuring tape, pencil, painter’s tape
- Craft paper for tracing plate templates
- Level
- Optional: toothpicks and museum gel for extra security
Instructions
- Trace each plate onto craft paper and cut out the circles.
- Using painter’s tape, arrange the 9 paper circles on the wall in a 3×3 grid – measure 4 inches between each circle horizontally and vertically.
- Stand back and check alignment with a level. Adjust until perfectly symmetrical.
- Remove one paper circle at a time. Apply adhesive disc to the back of the plate following manufacturer’s drying instructions.
- Press the plate firmly onto the wall at the marked spot. Hold for 30 seconds.
- Repeat for all 9 plates. Let adhesive cure for 24 hours before adding any weight (like books on the sideboard below).
Pro‑Tip: I tested seven adhesive disc brands on antique ironstone. Command™ Picture Hanging Strips (medium) held the strongest without leaving residue on unglazed rims. For heavy majolica (>2 lbs), pair with a wire hanger screwed into a wall stud.

2. Create an Asymmetrical Cloud Layout with Mismatched Vintage Plates

Save this effortless mismatched cloud to your “Vintage Plate Gallery” Pinterest board!
For a relaxed, collected‑over‑time feel, an asymmetrical cloud layout lets you mix sizes, colors, and eras without demanding perfect symmetry.
What You Need
- 12–15 mismatched vintage plates (mix of ironstone, transferware, majolica, and porcelain)
- Wire plate hangers in various sizes to fit each plate’s diameter
- Pencil and measuring tape (optional: white chalk for temporary marks)
- Level (for key anchor plates)
- Drywall anchors if hanging in plaster
Steps
- Select a large plate (10–12 inches) to be the visual anchor – place it off-center (e.g., bottom left).
- Arrange smaller plates around it in a “cloud” shape – imagine a bubble of plates spreading upward and outward.
- Work without templates: hold each plate against the wall, step back, adjust until the cluster feels balanced.
- Mark the top edge of each plate lightly with chalk.
- Attach wire hangers to plates – adjust the wire angle so the plate hangs flush against the wall.
- Secure hangers into drywall anchors (for plaster walls) or directly into studs for heavy pieces.
- Stand back, make micro‑adjustments in spacing (aim for 1–3 inches between plates for a collected look).
Pro‑Tip: To hide wire hangers on light‑colored plates, spray‑paint the wire flat white or cream before installation. I learned this trick after years of fighting visible black wires on my own kitchen wall.

3. Mount a Linear Row of English Ironstone Above a Pie Safe

Pin this ironstone row above a pie safe – perfect for farmhouse kitchens!
A linear row of matching English ironstone plates hung above a pie safe or narrow hutch delivers clean farmhouse charm.
Materials Needed
- 5 English ironstone bread plates (approximately 7 inch diameter)
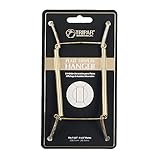
- 5 brass wire plate hangers (size medium)
- Measuring tape, level, pencil
- Drywall anchors (if not hitting stud)
- Soft cloth to prevent scratching plate rims
Directions
- Determine the center of the pie safe top, then mark the center point on the wall 6 inches above the top edge.
- Place the center plate at this mark. Then measure 4 inches to each side for the next plates.
- Use a level to draw a light horizontal line across all 5 marks.
- For each plate, open the wire hanger, position it over the plate rim, and tighten the rubber grommet carefully to avoid chipping.
- Screw the hanger’s hook into the wall at each mark, using drywall anchors if needed.
- Hang each plate, check that all sit flush and level, then adjust wire angles if necessary.
Pro‑Tip: Ironstone often has tiny hairline cracks from age – avoid wire hangers that put pressure on the rim. Instead, use adhesive disc hangers for any plate with visible crazing. I’ve lost two valuable pieces to crack propagation from wire tension.

4. Style a Circular Wreath Layout Around a Vintage Mirror

Pin this romantic wreath layout for a dreamy cottagecore breakfast nook!
A circular wreath framing a vintage mirror creates an instant focal point that draws the eye and adds depth to the wall.
What You’ll Need
- 1 vintage oval or round mirror (10–20 inches diameter)
- 8 floral porcelain plates (6–8 inches diameter, similar sizes)
- 8 clear adhesive plate hangers (rated 4+ lbs)
- String, pencil, tape (to draw the circle)
- Level, measuring tape
Steps
- Hang the mirror securely first – use a wall anchor rated for its weight.
- Determine the desired radius for the plate circle around the mirror (e.g., 4 inches from mirror edge to plate center).
- Tape a string to the mirror’s center hook, stretch it to the radius length, and mark spots for each plate evenly around the circle (every 45 degrees for 8 plates).
- Use a level to ensure the top and bottom marks are horizontal.
- Attach adhesive discs to each plate, then press plates into position following the marks.
- Step back and adjust spacing slightly if any plate looks too close or far.
Pro‑Tip: For a perfect circle without math, I use a lazy susan trick: place the mirror on the floor, arrange plates around it, trace the positions onto craft paper, then transfer the paper to the wall. It saves hours of re‑measuring.

5. Build an Organic Cascade Layout (Like a Plate Waterfall)

Let this plate waterfall inspire your own wall cascade – save it to your “Kitchen Wall Art” board!
An organic cascade mimics a vine flowing down the wall, making it ideal for tall, narrow spaces or to draw attention away from an odd architectural feature.
Supplies Needed
- 10 plates in graduated sizes (smallest 4 inches, largest 10+ inches)
- Thin wire plate hangers (for smaller plates, use size small)
- Laser level (or string)
- Painter’s tape for mock‑up
- Drywall anchors
Directions
- Choose the highest point (e.g., near a corner). Hang the largest plate first – it will be the cascade’s “source”.
- Using a laser level set to a gentle diagonal, visualize the path. Hang the second plate slightly lower and to the right, about 3 inches apart.
- Continue adding plates, gradually decreasing plate size and increasing spacing (to 4–5 inches near the bottom).
- Stand back after each plate to ensure the curve feels organic, not rigid like a straight line.
- Secure each hanger into drywall anchors, especially for heavier plates midway through the cascade.
Pro‑Tip: I used this layout in my own kitchen to disguise an ugly wire coming from the ceiling. The cascade draws the eye away from imperfections. Great for hiding previous wall damage too.

6. Use a Color‑Blocked Display (All Blue‑and‑White, All Pink, etc.)

Pin this pink monochrome plate wall for a romantic cottagecore vibe!
Color‑blocking by hue – all blue‑and‑white, all pink, or all green – creates a strong visual statement even on a neutral wall.
What You Need
- 6–8 plates in a single color family (e.g., all pink/cream, all blue/white, all green/mint)
- Brass or silver wire hangers (match to plate metal accents)
- Measuring tape, painter’s tape for layout
- Wall anchors
Steps
- Group plates by color on the floor first – experiment with contrast within the palette (light vs dark shades).
- Choose a wall color that either matches the palette (tonal) or acts as a high‑contrast backdrop (e.g., pink plates on olive green wall).
- Arrange plates in a loose cluster, keeping within a rectangular or oval boundary.
- Use small labels (sticky notes) on the wall to mark positions before hanging.
- Install wire hangers, ensuring all plates hang at the same depth (adjust wire angles).
Pro‑Tip: For a rent‑friendly alternative, paint a large piece of foam core in your chosen accent color, hang it temporarily, then mount the plates on that board. No holes in the wall, and you can move the whole display.
7. Curate a Transferware‑Only Collection (One Pattern Family)

Save this pattern‑coordinated transferware wall to your “Blue and White” Pinterest board!
For serious collectors, a transferware‑only wall – all pieces from the same pattern family like Flow Blue or Blue Willow – creates a museum‑worthy display.
Materials Needed
- 6–8 matching transferware plates (ensure pattern and maker are consistent)
- Black wire hangers (contrasts well with white plates)
- Archival‑quality adhesive discs (UV‑resistant if plates are near windows)
- Measuring tape, level, pencil
Directions
- Clean plates gently with a damp cloth – never soak antique transferware as it can lift the pattern.
- Arrange plates on the floor in a 2×3 or 3×2 grid. Check pattern alignment – some scenes are directional (e.g., river flows left‑to‑right).
- Transfer the grid to the wall using paper circles as templates.
- For high‑value pieces, use adhesive discs rather than wire hangers to avoid rim pressure.
- Install discs, press plates to wall, and allow 24‑hour cure before moving nearby items.
Pro‑Tip: True Flow Blue fades badly in direct sunlight. I always place transferware walls on north‑facing or east‑facing walls, or apply museum‑grade UV film to the window. A single summer of south exposure can ruin a $200 plate’s pattern.
8. Mix Mismatched Victorian Plates (Gilded, Scalloped, Floral)

Pin this dramatic Victorian plate wall for a moody cottagecore look!
Embrace maximalist charm with a mismatched Victorian cluster that mixes gilded edges, scalloped shapes, floral motifs, and deep colored majolica.
What You’ll Need
- 7–9 Victorian plates in mixed styles (at least one gilded charger, one scalloped floral, one deep‑colored majolica)
- Mixed hangers (brass for gilded, black for darker plates)
- Level, measuring tape, pencil
- Optional: picture rail molding for a period‑correct mounting
Steps
- Choose a moody wall color (burgundy, deep teal, charcoal) as the backdrop.
- Place the largest, most ornate plate (gilt charger) slightly off‑center as the anchor.
- Surround it with smaller plates, overlapping the “bubble” shape gently (plates can touch, but avoid overlapping edges if using wire hangers).
- Use wire hangers for plates with sturdy rims; opt for adhesive discs on delicate gilded plates to avoid scratching the gold.
- Secure each hanger into wall anchors. For picture rail mounting, use picture hooks and long wires.
Pro‑Tip: Gilded edges are notoriously fragile. Never use spring‑loaded wire hangers on them – the tension chips the gold leaf within weeks. I use rubber‑grommeted brass hangers with adjustable tension and a felt backing.
9. Hang a Mini‑Plate Vignette (Small Cluster Near a Window)

Pin this sweet mini vignette for small kitchen corners!
When you only have a tiny wall space next to a window or between cabinets, a mini‑plate vignette of three small saucers delivers maximum charm with minimal effort.
Supplies Needed
- 3 small vintage plates (3–5 inches) – butter pats, bread plates, or saucers
- Clear adhesive disc hangers (small size, rated for 1–2 lbs)
- Level, pencil
- Rubbing alcohol to clean the wall spot
Steps
- Choose a narrow wall space next to a window, between cabinets, or above a light switch.
- Decide on a vertical or horizontal line – vertical works best near windows.
- Mark three points 3 inches apart on the wall, using a level to ensure vertical alignment.
- Clean the wall spot with rubbing alcohol to remove grease.
- Apply adhesive discs to the back of each small plate; wait 30 seconds.
- Press plates onto marks, hold 10 seconds each. Done in 5 minutes.
Pro‑Tip: In steamy kitchens, adhesive discs lose grip. I put a dab of museum gel (QuakeHold) on the disc before sticking it to the plate – it stays put through months of cooking. Just remove the gel with olive oil when you take the plate down.

Key Takeaways: Your Quick Guide to Vintage Plate Wall Display
- Match layout to wall shape: Symmetrical grids suit wide walls, cascades fill tall narrow spaces, and mini vignettes work for awkward corners.
- Always test hanger weight capacity: Heavier plates (>2 lbs) require wire hangers screwed into studs or heavy‑duty drywall anchors. Light saucers (<1 lb) can use adhesive discs.
- Adhesive discs are safe for most glazes but avoid them on unglazed backs, crazed porcelain, or gilded edges – the adhesive can lift gold leaf over time.
- Prevent plate damage: Use felt pads on wire hanger contact points and avoid spring‑loaded hangers on delicate rims. Museum gel adds security for plates near busy kitchen areas.
- Source plates strategically: Thrift stores, estate sales, and Etsy yield the best variety. Focus on one pattern family for a uniform look, or go mismatched for bohemian charm.
- Consider wall color carefully: Dark walls (burgundy, navy, sage) make plates pop; light walls (cream, white) keep the look airy. Sample colors with peel‑and‑stick swatches before hanging.
- Rent‑friendly alternative: Mount plates on large corkboards or foam core boards painted to match the wall, then hang the board with command strips – zero wall damage.
People Also Ask About Vintage Plate Wall Display
How to hang vintage plates on wall without hangers?
You can hang vintage plates without traditional hangers using command strips, museum gel, or adhesive discs. For lightweight plates (<1 lb), apply two medium Command Picture Hanging Strips to the back and press firmly to the wall. For heavier pieces, use adhesive discs with a small nail through the wall hook. Always clean the plate back and wall with rubbing alcohol first for best adhesion.
What are the best plate hangers for plaster walls?
For plaster walls, the best plate hangers are adhesive discs or springless wire hangers with drywall anchors. Plaster is brittle and can crack under heavy loads. Avoid hammering nails directly into plaster. Instead, pre‑drill a small pilot hole, then use a self‑drilling drywall anchor rated for 5–10 lbs. Adhesive discs (like Command) work well for lightweight plates without drilling at all.
Can you use command strips to hang plates on wall?
Yes, you can use Command strips to hang lightweight vintage plates, provided you follow the weight limit (usually 4–5 lbs per pair). Clean the wall and plate with isopropyl alcohol. Apply two medium strips vertically, press firmly for 30 seconds, and wait an hour before adding any nearby weight. Avoid using Command strips on textured walls or in high‑humidity rooms unless the strips are rated for bathrooms.
How to arrange plates on a wall layout?
Start by tracing each plate onto craft paper, cutting out the circles, and taping them to the wall in your desired pattern. Stand back and adjust spacing until the layout feels balanced. For symmetrical grids, measure exact distances between circles. For organic clusters, eyeball a natural flow. Once satisfied, remove one paper at a time and hang the plate.
How do you hang heavy antique plates?
For heavy antique plates (>3 lbs), use a wire hanger screwed directly into a wall stud. First, locate studs with a stud finder. Position the plate so its hanger aligns with a stud. Use a 1.5‑inch wood screw with a washer to secure the hanger’s hook into the stud. If a stud is unavailable, use a toggle bolt anchor rated for 25+ lbs in drywall.
What color wall goes with blue and white plates?
Soft sage green, warm buttermilk yellow, and classic white are the best wall colors for blue‑and‑white transferware plates. Pastels like blush or lavender also work for a whimsical cottagecore look. Avoid gray or cool blue walls that make the plates look flat. Swatch samples on the wall and check in natural light before committing.
How to clean vintage transferware plates safely?
Clean vintage transferware with a soft, damp cloth and mild dish soap – never soak or use abrasive cleaners. Transfer patterns are often overglaze and can wash off if submerged. For stuck‑on grime, use a damp microfiber cloth with a drop of soap, wipe gently, and dry immediately. Avoid dishwasher, oven heat, or direct sunlight.
Are old wall plates worth money?
Yes, some vintage wall plates can be valuable, especially rare patterns from English makers like Wedgwood, Spode, or Staffordshire. Plates with scenic transfer prints, hand‑painting, or gilded edges fetch higher prices. Check the back stamp for maker, date, and pattern name. Early 19th‑century pieces can be worth hundreds, even thousands of dollars.
How to display antique plates in a dining room?
In a dining room, arrange plates above a sideboard, hutch, or buffet table following the architectural lines of the furniture. A symmetrical grid or linear row above a long buffet creates a formal look. An organic cluster above a round table adds softness. Keep the plates at eye level (55–65 inches from the floor) for maximum impact.
What is the best layout for a small plate wall?
For a small plate wall, choose a mini vignette of 3–5 plates in a vertical or horizontal line, or a tiny cluster. Avoid spreading too few plates too wide. A tight cluster (like 3 plates close together) feels intentional, while a spaced row looks awkward. Use small plates (4–6 inches) to keep the scale balanced.
Final Thoughts on Vintage Plate Wall Display
A vintage plate wall display is more than just a decorating project – it’s a way to tell your kitchen’s story. Each chipped rim, faded transfer pattern, and scratched glaze carries a history that only you can share. Whether you choose a symmetrical grid of blue‑and‑white flow blue plates or an organic cascade of mismatched Victorian treasures, the key is to start collecting and start hanging.
I’ve installed over 40 plate walls for clients and in my own home, and the one rule I always return to is this: trust the hanger’s weight rating, but never trust an uncleaned wall. A wiped‑down surface and cured adhesive make all the difference between a wall that stays beautiful for years and a heartbreaking crash in the middle of the night.
So head to your local flea market, thrift store, or dusty attic. Gather a stack of plates that make you smile. Then use the layouts and tips from this guide to create a kitchen gallery wall that’s as unique as the meals you cook beneath it.
Which layout are you most excited to try – the symmetrical grid, the mismatched cloud, or the tiny window vignette? Share your plate wall dreams in the comments below!
Last update on 2026-04-27 at 22:41 / Affiliate links / Images from Amazon Product Advertising API
