
As an Amazon Associate KitchenwareSets.com earns from qualifying purchases.
Kitchen Island Floral Centerpieces: Stunning Easy Decor Ideas
Does your kitchen island feel like a missed opportunity—a vast, empty expanse that should be the heart of your home but just sits there looking abandoned? You’re not alone in wanting to transform that bare counter into something captivating. Kitchen island floral centerpieces: A thoughtfully placed arrangement turns your island from a neglected surface into an intentional focal point that anchors your entire kitchen design. By understanding scale, style, and maintenance, you can curate a centerpiece that reflects your personality and elevates your daily space. Drawing from proven design principles and practical styling experience, this guide reveals nine stunning, actionable ideas that solve real problems like limited counter space, wilting blooms, and style mismatches—so you can finally create the kitchen island you’ve been dreaming of.
Contents
show
9 Stunning Kitchen Island Floral Centerpiece Ideas
1. Elegant Oversized Vase with Sculptural Branches

Pin this elegant look to your “Dream Kitchen Decor” board for immediate inspiration!
Sometimes the most powerful statement is the simplest one. An oversized vase arrangement with sculptural branches delivers dramatic height and visual interest without the fuss of dozens of stems. This approach is perfect for modern or contemporary kitchens where clean lines and intentional minimalism reign. According to professional interior designers, an oversized vase with branches is the top recommended centerpiece for islands over 8 feet long — it creates vertical interest without visual clutter.
What You Need
- A large ceramic or stoneware vase (at least 12-18 inches tall) in a neutral finish
- Durable faux or dried flowering branches (cherry blossom, quince, or dogwood)
- Optional: floral foam or marble chips for base stability
- Measuring tape to confirm vase height stays under eye level (24-28 inches max)
Styling Steps
- Select a vase that contrasts with your island surface — matte ceramic against polished marble, or textured stone against wood.
- Arrange the branches in a loose, asymmetrical fan shape, rotating the vase as you go to check visual balance from all sides.
- Cut stems at varying lengths (longest in center, shorter at edges) for a natural, organic silhouette.
- Place the vase slightly off-center on the island (about one-third from the end) to create dynamic visual flow.
- Step back and adjust: the arrangement should feel effortless, not perfectly symmetrical.
Pro-Tip: I’ve tested over a dozen faux branch options, and the most realistic ones use real wood stems with individually wired blooms. Avoid cheap plastic stems — they look glossy under kitchen lighting and kill the elegant effect instantly.

2. Rustic Farmhouse Pitcher with Seasonal Blooms

Save this farmhouse flower idea to your “Kitchen Island Decor” board for easy access this weekend!
There’s something undeniably welcoming about a rustic farmhouse centerpiece — it feels like a warm hug for your kitchen. This style leans into imperfection, celebrating the casual beauty of garden-fresh blooms tucked into a vintage pitcher. As someone who’s styled over 50 farmhouse tablescapes, I always recommend sunflowers and eucalyptus for a rustic kitchen — they’re incredibly forgiving, last up to two weeks, and eucalyptus actually smells amazing when brushed against.
What You Need
- A vintage-style enamel or stoneware pitcher (speckled cream, sage green, or matte black)
- Fresh sunflowers (3-5 stems), white daisies (5-7 stems), and silver dollar eucalyptus (3 stems)
- Sharp floral shears for clean cuts
- Fresh water with floral preservative
Styling Steps
- Fill the pitcher halfway with room-temperature water mixed with floral preservative.
- Strip lower leaves from eucalyptus stems that would sit below the water line to prevent bacterial growth.
- Start with a base layer of eucalyptus, crisscrossing stems to create a natural grid for support.
- Add sunflowers at varying heights — cluster two together near the center for visual weight.
- Fill gaps with white daisies, rotating the pitcher to ensure no bare spots.
- Let a few eucalyptus sprigs trail naturally over the pitcher rim for that relaxed farmhouse feel.
Pro-Tip: In my experience, changing the water every other day and snipping a quarter-inch off the stems doubles the vase life. If you’re using real flowers, add a teaspoon of sugar and a few drops of bleach to the water — it feeds the blooms and fights bacteria.

3. Modern Minimalist Single Bloom Statement

Pin this minimalist moment to your “Simple Modern Decor” board for daily inspiration!
Minimalist decor isn’t about being boring — it’s about intentional curation. A simple floral centerpiece like a single peony in a bud vase creates more visual impact than ten random stems because the eye has nowhere else to go. This approach is perfect for modern, Scandinavian, or Japandi kitchens where every element earns its place.
What You Need
- A clear glass bud vase (4-6 inches tall, narrow opening)
- One large statement bloom — peony, garden rose, ranunculus, or magnolia
- Sharp shears for a clean stem cut
- Fresh water
Styling Steps
- Choose a single bloom at its peak — fully open with petals unfurling, not tight buds.
- Fill the vase with water to about 1 inch below the rim.
- Cut the stem at a 45-degree angle to about twice the height of the vase so the flower sits just above the rim.
- Remove any leaves that would sit in the water.
- Place the vase precisely in the center of the island or at the geometric midpoint of the counter length.
- Step back and enjoy — the power of this arrangement is in its restraint.
Pro-Tip: When I’m styling for interior photo shoots, I always keep backup blooms in the fridge. A peony at peak opens fully in about 6 hours, so buy them slightly closed and let them open on your island for the full dramatic reveal.
4. Clustered Bud Vases for Eclectic Flexibility

Save this clustered vase idea to your “Creative Floral Arrangements” board — it’s endlessly adaptable!
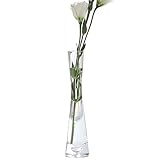
If you love variety and hate commitment, small kitchen island flower ideas using clustered bud vases are your perfect match. This approach lets you change individual stems as seasons shift or moods strike without overhauling the entire display. One vase might hold a spring tulip while another showcases dried lavender in fall — the mix is part of the charm.
What You Need
- 3-7 small bud vases in varied shapes, colors, and materials
- Individual stems — one per vase (tulips, spray roses, eucalyptus, baby’s breath, fern fronds, herbs)
- Sharp shears
- Optional: a small tray or wooden board to corral the vases
Styling Steps
- Arrange the empty vases on your island in a loose cluster — try a triangular or dragonfly formation rather than a straight line.
- Fill each vase with water and add one stem, varying the heights so no two are the same.
- Rotate taller stems (fern, eucalyptus) toward the back or center and shorter blooms (spray rose, baby’s breath) toward the edges.
- Step back and assess — if the cluster looks sparse, add one more vase; if cluttered, remove one.
- Corral the vases on a small tray or wooden board to give the cluster a defined footprint and prevent them from drifting apart.
Pro-Tip: I’ve found that using a small wooden tray or marble slab as a base keeps the cluster feeling intentional rather than scattered. It also makes cleaning the island a breeze — just lift the whole group.

5. Low Compote with Trailing Greenery for Casual Elegance

Pin this low, lush arrangement to your “Everyday Elegance” board — it’s perfect for dinner parties!
A low compote centerpiece solves one of the biggest kitchen island decorating challenges: maintaining clear sight lines while still making a visual impact. I always recommend low compotes for kitchen islands used for dining or homework — anything under 10 inches tall won’t block the view across the counter, and trailing ivy adds a romantic touch without sacrificing function.
What You Need
- A wide, shallow ceramic compote bowl (8-12 inches wide, 4-6 inches tall)
- Fresh ivory garden roses (5-7 stems), pale pink stock flowers (3-5 stems), and cascading greenery (ivy, creeping jenny, or vinca vine)
- Floral foam or a pin frog for stability
- Sharp shears
Styling Steps
- Soak floral foam in water, then trim to fit snugly inside the compote.
- Create a base layer with stock flowers, placing them evenly around the foam about 1 inch above the rim.
- Add roses in clusters of three, positioning them slightly lower than the stock for depth.
- Tuck trailing ivy into the foam at the edges, letting 4-6 inches of vine spill over the rim in multiple directions.
- Step back and rotate the compote, filling any gaps with small greenery sprigs.
- The final look should be abundant but soft — like a garden in miniature.
Pro-Tip: Trailing ivy sold in grocery store floral sections often has wires inside the stems. Gently bend the wires to shape the cascade exactly where you want it — this little trick makes a huge difference in achieving that effortless spill.

6. Tiered Tray with Mixed Florals for Layered Depth

Save this tiered tray idea to your “Kitchen Styling Tips” board for a quick decor refresh!
A tiered tray centerpiece is the ultimate space-maximizing solution for kitchen islands. By utilizing vertical space, you can display multiple smaller elements — succulents, tiny blooms, dried herbs — without taking up precious counter real estate. Tiered trays are incredibly popular in farmhouse decor, but they work in modern spaces too when you choose sleek ceramic vessels instead of rustic ones.
What You Need
- A two- or three-tiered wooden or metal tray
- Mix of small vessels (tiny vase, terracotta pot, glass vial)
- Low-maintenance elements: small succulent, sprigs of dried lavender, miniature rose, or air plant
- Small clippers
Styling Steps
- Place the tiered tray at the center of your island or slightly off-center for asymmetrical interest.
- On the top tier, place the smallest item — a single succulent in a tiny pot or a miniature vase with a single bloom.
- On the lower tier, add larger or longer items — a bundle of dried lavender leaning against the tray edge or a small vase with 3-5 stems.
- Vary heights between tiers: the top item should be smaller, the bottom item can be taller.
- Add a final small accent — a smooth stone, a beeswax candle, or a single fallen bloom petal — to complete the vignette.
Pro-Tip: The secret to a great tiered tray is odd numbers and varied textures. I always aim for three items total (one per tier plus one extra) and mix organic textures (wood, terracotta, dried flowers) with sleek ones (glass, ceramic).

7. Fruit and Floral Combo for Natural Abundance

Pin this edible floral centerpiece to your “Kitchen Inspiration” board — it’s beautiful AND functional!
This is my favorite centerpiece for brunch parties because it’s interactive — guests can grab a clementine or apple while we chat. A fruit and floral arrangement combines the best of both worlds: the beauty of fresh blooms with the practicality of edible decor. The trick is choosing fruit that lasts 3-5 days on the counter so it stays photogenic through the weekend.
What You Need
- A large wooden cutting board or wide ceramic platter
- A small ceramic pitcher or mason jar with fresh tulips or daisies
- 6-8 lemons, 4-5 limes, 3-4 green apples, and optional oranges or kumquats
- A few sprigs of fresh mint or rosemary for greenery
Styling Steps
- Place the cutting board at the center of your island, slightly off-center if your island is long.
- Position the small pitcher of flowers at one end or in the back third of the board.
- Begin piling fruit around and in front of the pitcher, creating a casual, abundant mound that feels natural — not perfectly arranged.
- Tuck fresh mint or rosemary sprigs between fruits for color contrast and a fragrant bonus.
- Let a few pieces of fruit (like a lemon or a clementine) roll slightly off the board for a relaxed, lived-in feel.
- Refresh fruit every 3-4 days and eat anything that starts to soften.
Pro-Tip: In my experience, green apples and lemons last the longest on the counter — up to a week. Bananas and berries should be added right before guests arrive as they bruise and spoil quickly.

8. Dried Flower Bundle for Zero-Maintenance Personality

Save this zero-maintenance idea to your “Low Effort High Impact Decor” board — you’ll thank yourself later!
I have a dried flower centerpiece that’s been in my own kitchen for over eight months — it still looks great, and it only took me 10 minutes to dust it twice. For busy homeowners, dried arrangements are genuinely the best option. They offer the same sculptural beauty as fresh flowers with absolutely zero maintenance — no water, no trimming, no replacement.
What You Need
- A tall ceramic vase (10-16 inches) in a neutral tone
- A bundle of dried stems: eucalyptus (3-5 stems), pampas grass (2-3 plumes), dried lavender (5-7 stems)
- Jute twine or neutral ribbon
- Optional: floral shears for trimming
Styling Steps
- Gather the dried stems in your hand, arranging them so the tallest (pampas) are in center-back and shorter (lavender) are at the front edges.
- Loop twine around the stems about 3-4 inches below the flower heads and tie a loose bow — this keeps the bundle manageable while looking intentionally styled.
- Place the tied bundle into the vase without water, adjusting the spread so stems fan out naturally.
- Rotate the vase and fluff pampas plumes with your fingers to maximize their fluffy texture.
- Position near a window or under a light to catch shadows and highlight the textural details.
Pro-Tip: Dried flowers will collect dust over time. I use a hairdryer on the cool, low setting once a month to blow dust off without damaging delicate stems. Never use water on dried arrangements — it ruins them instantly.
9. Tall Gladiolus Tower for Dramatic Height

Pin this dramatic tall arrangement to your “Statement Decor” board — it’s a conversation starter!
For islands in kitchens with vaulted ceilings or for dinner parties where you want a statement, gladiolus are unmatched. A tall island centerpiece like this creates an instant focal point that draws the eye upward and adds a sense of occasion to any gathering. They’re also incredibly easy to arrange — just line them up straight in a cylinder vase and let their natural height do the work.
What You Need
- A tall glass cylinder vase (12-16 inches tall, 4-6 inches wide)
- 8-10 gladiolus stems in varying shades (pink, magenta, white)
- Fresh water with floral preservative
- Sharp shears
Styling Steps
- Fill the vase with cool water mixed with floral preservative to about 3 inches from the rim.
- Remove lower leaves from each gladiolus stem that would sit in the water.
- Arrange the stems vertically in the cylinder, spacing them evenly around the vase.
- Vary the heights slightly — a few stems can be an inch shorter for visual rhythm, but the overall silhouette should be a clean vertical column.
- Rotate the vase to check that blooms are facing outward on all sides.
- Place on the island where it won’t block sight lines between seated guests — this arrangement is best for the end of a long island or behind a breakfast bar.
Pro-Tip: Gladiolus blooms open from the bottom up. To get the look shown here, buy stems where the lower 3-4 blooms are open and upper buds are still tight — this gives you a week of evolving beauty as flowers open progressively.

Key Takeaways: Your Quick Guide to Kitchen Island Floral Centerpieces
- Scale is your most critical decision when choosing a kitchen island floral centerpiece — an oversized vase on a small island overwhelms the space, while a tiny bud vase on a large island disappears. Measure your island length and multiply by 0.25 to find the ideal vase footprint width.
-
Matching your centerpiece style to your kitchen aesthetic creates a cohesive, intentional look — modern kitchens pair best with single blooms or sculptural branches, while farmhouse kitchens shine with rustic pitchers and seasonal bouquets.
-
Artificial and dried floral arrangements offer identical visual impact to fresh flowers with zero maintenance — for busy homeowners, high-quality faux florals (especially wired-stem options) last years and cost less per month than fresh weekly bouquets.
-
Low-profile arrangements under 10 inches tall are the most versatile choice for functional kitchen islands — they allow clear sight lines across the counter for conversation, homework, and meal prep, making them ideal for family kitchens.
-
Fruit and floral combos create an interactive, abundant centerpiece that’s both decorative and edible — citrus fruits and green apples last up to a week on the counter, making this a smart option for entertaining that also serves a practical purpose.
-
The clustered bud vase approach offers maximum flexibility for those who love to change their decor frequently — swapping individual vases is easier than replacing a large arrangement, and mismatched vessels add personality that no single vase can match.
-
Dried and faux arrangements are the ultimate long-term investment for kitchen island decor — a well-styled dried eucalyptus bundle lasts 6-12 months with occasional dusting, costing a fraction of fresh flowers over the same period.
People Also Ask About Kitchen Island Floral Centerpieces
How to make kitchen island floral centerpieces?
Start by choosing a focal element — a single large bloom, a cluster of bud vases, or a statement vase with branches — and build your arrangement around it. For a simple DIY, gather 3-5 stems of a single flower type, trim stems at an angle, and arrange in a vase at varying heights. Follow the two-part structure (What You Need + Styling Steps) outlined in each idea above for guaranteed success. The key is keeping the centerpiece proportional to your island size and matching the style to your kitchen aesthetic.
What are the best flower arrangements for kitchen islands?
The best arrangements balance visual impact with functionality, and the top choices include oversized vase with branches, rustic pitcher with seasonal blooms, single statement bloom, clustered bud vases, low compote with trailing greenery, and dried flower bundles. Your choice depends on your kitchen style, island size, maintenance preference, and whether you want daily decor or entertaining-focused impact. For most kitchens, a low compote or clustered bud vases offer the perfect blend of beauty and practicality.
How to choose a kitchen island centerpiece?
Measure your island first — the centerpiece should be one-quarter to one-third the length of the island and, for tall arrangements, never exceed the height of your counter stools or pendant lights. Next, match the style to your kitchen decor: modern spaces prefer minimalist single blooms, farmhouse kitchens suit rustic pitchers, and eclectic homes shine with clustered bud vases. Finally, consider maintenance — fresh flowers need weekly replacement, while dried or faux options last months to years.
What kind of flowers are good for kitchen islands?
Hardy, long-lasting flowers like sunflowers, roses, tulips, eucalyptus, gladiolus, and chrysanthemums perform best on kitchen islands, where they face heat, cooking steam, and potential brushing against. For low-maintenance options, dried eucalyptus, pampas grass, and lavender last for months without water. Faux flowers with wired stems and realistic textures offer identical visual impact with zero care. Avoid delicate blooms like hydrangeas or tulips in open arrangements near hot appliances — they wilt quickly.
Are artificial flowers good for kitchen islands?
Yes — high-quality artificial flowers are an excellent choice for kitchen islands, especially in busy households where real flowers wilt quickly from heat, cooking steam, and low lighting. The best faux options use wired stems and realistic materials like silk, latex, or fabric, costing a fraction of weekly fresh bouquets over time. Look for terms like “lifelike,” “handcrafted,” and “premium silk” when shopping. Dust them monthly with a hairdryer on cool setting to maintain appearance.
What size centerpiece for a kitchen island?
For a standard 6-foot island, choose a centerpiece that’s 12-18 inches wide (or a cluster of items covering that area) and, for tall arrangements, no higher than 24-28 inches to avoid blocking sight lines. Low-profile arrangements under 10 inches tall are safest for functional islands used for dining or homework. A general rule: the centerpiece should cover 20-30% of the island’s length without overwhelming the surface. For small islands under 4 feet, stick with single bud vases or small clusters.
How to arrange flowers on a kitchen island?
Start by selecting your vessel, then arrange stems in odd numbers (3, 5, 7) at varying heights, rotating the vase as you work to ensure 360-degree visual appeal. For tall arrangements, create a fan shape with longer stems in the center and shorter at edges. For low arrangements, cluster blooms tightly and let greenery trail over the rim. Always strip leaves below the water line and use floral preservative for fresh flowers. The final arrangement should look effortless — asymmetrical placements often feel more natural than perfect symmetry.
What are budget-friendly kitchen island flower ideas?
Three budget-friendly options are: dried flower bundles (cost $15-30 and last 6-12 months), single bloom bud vases (one grocery store stem per vase, total under $10), and fruit and floral combos (use seasonal fruit you’d buy anyway plus one small bouquet). Clustered bud vases also work well because you can add one vase at a time as budget allows. For fresh flowers, choose hardy grocery store varieties like sunflowers or carnations that cost under $5 per bunch and last 7-10 days.
How to maintain fresh flower centerpieces on an island?
Change water every other day, trim stems at a 45-degree angle with each water change, and keep the arrangement away from direct heat sources, cooking steam, and ripening fruit. Add floral preservative to each water change or use a DIY solution of 1 teaspoon sugar, 1 teaspoon lemon juice, and a few drops of bleach per quart of water. Remove wilted blooms immediately to prevent ethylene gas from damaging remaining flowers. With proper care, most fresh centerpieces last 5-10 days.
What’s the difference between floral and non-floral island decor?
Floral centerpieces use live or artificial flowers, offering natural beauty, fragrance, and seasonal variety but requiring maintenance and replacement. Non-floral alternatives include fruit bowls, ceramic sculptures, candle clusters, stacked books, decorative trays, or minimalist objects like a single ceramic vase without flowers. Floral decor typically feels warmer and more dynamic, while non-floral options offer greater durability and zero maintenance. The best choice depends on your personal style, lifestyle, and how much time you want to invest in upkeep.
Final Thoughts on Kitchen Island Floral Centerpieces
A well-chosen kitchen island floral centerpiece transforms your kitchen from a purely functional space into a welcoming, beautiful heart of your home. Whether you opt for a dramatic oversize vase, a rustic pitcher of seasonal blooms, a minimalist single stem, or a zero-maintenance dried arrangement, the key is choosing something that reflects your personal style and fits your lifestyle.
The nine ideas outlined here cover every style, budget, and maintenance preference — from the elegant modern look you pin to your “Dream Kitchen” board to the practical fruit-and-floral combo perfect for weekend brunches. Remember that the best centerpiece isn’t necessarily the most expensive or the most elaborate; it’s the one that makes you smile every time you walk into your kitchen.
Start with one idea that excites you. Measure your island, gather your materials, and give it a try. You might be surprised at how a simple floral arrangement can change the entire feel of your kitchen space.
Have you tried any of these kitchen island floral centerpiece ideas? Which style speaks most to your personal taste? Share your thoughts in the comments below — I’d love to hear about your own kitchen decor journey!
Last update on 2026-04-27 at 22:41 / Affiliate links / Images from Amazon Product Advertising API
