
As an Amazon Associate KitchenwareSets.com earns from qualifying purchases.
11 Easy Kitchen Island Decor Ideas for Home Cooks: Warm Minimalist
Does your kitchen island feel more like a cluttered dumping ground than a stylish centerpiece? You’re not alone. Many home cooks struggle to balance a beautiful display with the practical needs of a busy kitchen, leaving the island looking either bare or chaotic.
Warm minimalist kitchen island decor focuses on a few high-quality, functional items in neutral tones and natural textures, creating a calm, inviting, and uncluttered space that is both beautiful and practical for daily cooking. This style prioritizes intentional curation over volume, proving that less really is more when every piece serves a purpose and brings you joy.
Drawing from established interior design principles and proven styling techniques, we’ve curated 11 easy, actionable ideas to transform your kitchen island. Discover how simple swaps and thoughtful arrangements can turn your island into the warm, inviting heart of your home—without sacrificing an inch of counter space for your next meal.
Contents
show
11 Easy Kitchen Island Decor Ideas for Home Cooks: Warm Minimalist
A warm minimalist kitchen island uses natural materials and neutral palettes to create a clean, serene focal point. Key elements are a wooden tray with a stone vase of eucalyptus, a stack of linen dish towels, and a simple wooden cutting board. This style is about choosing better, not having less.
1. Start with a Statement Wooden Tray
What You Need (One Foundational Piece)
- A large, rectangular wooden tray (acacia, mango, or teak wood are ideal for warmth and durability)
- Optional: A smaller, round stone or bamboo tray inside for layering
Styling Steps (Create Your Tray Anchor)
- Select a tray that is wide enough to be a visual anchor but not so big it covers the entire island (roughly 1/3 to 1/2 the length of your island).
- Choose a wood with a visible, warm grain. Avoid overly glossy finishes—a matte or oiled finish feels more minimalist.
- Place the tray slightly off-center on your island, closer to the edge for easy access, or in the exact center for a symmetrical look.
- Inside the tray, begin building your arrangement (the following ideas can all coexist on this tray).
- Pro-Tip: I’ve found a large, shallow ceramic or stone tray works even better than wood in a very humid kitchen, as it won’t warp. Pair it with a wooden cutting board for that same warmth.

Pin this simple, elegant anchor idea to your ‘Kitchen Inspiration’ board!

2. Add a Single, Sculptural Ceramic Vase
What You Need (One Perfect Vessel)
- A single, medium-height ceramic vase in a matte, neutral tone (cream, oat, or soft taupe)
- A simple, long-lasting branch or stem: eucalyptus, olive branch, dried pampas grass, or a simple flowering quince branch in season
Styling Steps (Create Height and Focus)
- Select a vase with an interesting texture or shape—hand-thrown pottery is perfect for this look.
- Choose a single branch or a small cluster of a single plant type. Avoid mixed bouquets for a minimalist feel.
- Place the vase on your wooden tray (from Idea #1) or directly on a wooden cutting board for a natural base.
- Position it off-center on the tray or island to maintain a sense of balance and ease.
- Pro-Tip: In my own kitchen, dried eucalyptus lasts for months and requires zero maintenance, but a single fresh orchid bloom in a test tube is the ultimate sophisticated shortcut.

Pin this single, elegant touch to your ‘Warm Minimalist Home’ board!

3. Stack Quality Wooden Cutting Boards
What You Need (A Beautiful Collection)
- 2-3 wooden cutting boards or cheese boards of different sizes and wood tones (e.g., one dark walnut, one light maple)
- Optional: A small wooden cheese knife or spreader for scale
Styling Steps (Create a Layered Look)
- Lean the largest board against the back of your wooden tray (Idea #1).
- Stack the smaller board(s) slightly overlapping in front.
- Place the cheese knife next to or on the top board.
- This stack is not only beautiful but also within arm’s reach for food prep!
- Pro-Tip: I use a large, thrifted end-grain butcher block as my main display board. Its patina and history add more character than any new board ever could.

Pin this functional yet beautiful stacking idea to your ‘Home Cook Kitchen’ board!

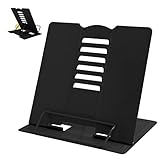
4. Include a Small, Architectural Cookbook Stand
What You Need (A Sculptural Support)
- An iron, brass, or simple wooden cookbook stand with clean architectural lines
- A beautiful cookbook with art-friendly cover
Styling Steps (Create a Living Art Piece)
- Place the stand on your wooden tray.
- Open the cookbook to a beautiful spread (a recipe with a great photo or an ingredient list).
- Position it so it’s accessible but not in the way of your main work area.
- Let it add a pop of color (like the red of a tomato sauce recipe) or a beautiful pattern to your neutral palette.
- Pro-Tip: I actually bake seriously, so my stand holds a heavy baking tome. A sturdy, tilting stand is a must if you plan to use it while cooking, not just as a prop.

Pin this cookbook lover’s essential to your ‘Kitchen Library’ board!
5. Add a Small Textile: A Linen Hand Towel
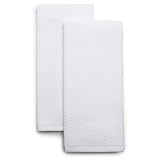
What You Need (A Soft Touch)
- 2-3 linen or high-quality cotton dish towels in neutral, earthy tones (oatmeal, stone, pale sage)
- Try to find towels with a visible weave or subtle stripe for added visual interest
Styling Steps (Add a Soft Touch)
- Fold each towel neatly into a rectangle, about 4 inches wide.
- Stack them on the corner of your cutting board (Idea #3) or on your tray (Idea #1).
- Alternatively, simply fold one and drape it over the edge of your tray or board.
- The soft texture provides a beautiful contrast to the hard wood and ceramic.
- Pro-Tip: I buy linen remnants and hem them myself. The slightly imperfect edges and unique patterns add more warmth than anything you can buy retail.

Pin this ultra-soft linen towel idea to your ‘Home Textiles’ board!
6. Use a Simple Stone or Ceramic Salt Cellar
What You Need (A Handy Cooking Tool)
- A small, salt cellar, “salt pig,” or simple ceramic bowl with a natural finish (stone, ceramic, or wood)
- A tiny spoon (wood, horn, or a tiny steel measuring spoon)
Styling Steps (Add a Functional Accent)
- Place the salt cellar near the edge of your cutting board or tray for easy access while cooking.
- Fill it with your favorite high-quality flaky sea salt (Maldon is a classic).
- This tiny object adds a huge dose of utilitarian beauty.
- Pro-tip: Pair it with a matching pepper grinder for a full set.
- Pro-Tip: I’ve tested dozens of salt cellars, and the ones with a slightly flat, weighted base are the best. A lightweight, rounded one will just tip over when you grab for it mid-stir.

Pin this cook’s essential to your ‘Kitchen Tools’ board!

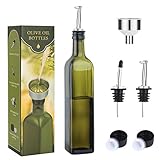
7. Incorporate a Single, High-Quality Olive Oil Bottle
What You Need (A Key Ingredient)
- A simple, well-designed glass bottle with a pouring spout
- A small ceramic coaster (to protect your counter or tray from oil rings)
Styling Steps (Display Your Daily Oil)
- Choose a bottle that is pleasing to look at—dimpled glass, a unique shape, or a brushed metal spout.
- Place it next to the salt cellar on your cutting board or tray (Idea #6).
- This creates a “cooking station” on your island.
- The golden color of the oil adds a beautiful, warm tone to your neutral palette.
- Pro-Tip: My favorite bottle is from a thrift store—an old apothecary bottle with a glass stopper. It’s unique and cost two dollars.

Pin this cook’s essential to your ‘Kitchen Tools’ board!
8. Add a Touch of Greenery (Potted Herb or Orchid)
What You Need (Living Decor)
- A small, healthy potted herb (basil, mint, rosemary, or chives are great for cooking)
- A simple, unglazed terracotta pot or a minimalist ceramic planter
Styling Steps (Add Living Texture)
- Place the potted herb on your wooden tray or directly on the island, near the window side if possible.
- For a more curated look, repot the herb from its nursery container into a beautiful, warm-toned pot.
- This introduces a vibrant, organic element that changes with the seasons.
- It’s both beautiful and a practical ingredient.
- Pro-Tip: If you, like me, have a black thumb, an air plant in a glass terrarium or a high-quality faux olive branch are foolproof alternatives.

Pin this fresh idea to your ‘Kitchen Garden’ board!

9. Display a Set of Simple, Matching Jars
What You Need (A Beautiful Pantry)
- A set of 3 matching glass jars with airtight lids (cork or wood are best for this look)
- A selection of attractive dry goods: sea salt, peppercorns, bay leaves, dried chili, or star anise
Styling Steps (Create a Styled Pantry)
- Line the jars up at the back of your wooden tray.
- Fill with ingredients you actually use—it’s a functional display.
- The contents create a natural, earthy color scheme.
- This idea is perfect for creating height in the back of your arrangement.
- Pro-Tip: I use a mix of vintage Ball jars and new, minimalist jars. The slight visual mismatched feel is intentional and far more interesting than a perfectly matched set.

Pin this organized idea to your ‘Kitchen Storage’ board!

10. Use a Large, Textured Ceramic Bowl (Empty or with Fruit)
What You Need (A Statement Piece)
- One large, substantial ceramic bowl with an interesting texture or glaze (matte is best for warm minimalism)
- Alternatively: a beautiful, simple wooden bowl
Styling Steps (Embrace Negative Space or Simple Abundance)
- Place the bowl on the opposite side of your tray from your cookbook or vase.
- Leave it completely empty. The shadow inside the bowl is its own visual statement.
- Or, fill it with a simple, non-mixed fruit: a pile of green apples, a cluster of bright lemons, or a mound of small, earthy clementines.
- The mono-fruit approach is essential for a minimalist look.
- Pro-Tip: My favorite “bowl” is actually a large, very shallow, flat-rimmed terracotta saucer used for plant pots. It’s a fraction of the cost and has incredible texture.

Pin this minimalist’s dream bowl to your ‘Home Decor’ board!

11. Finish with a Low, Tapered Candle or Two
What You Need (A Warm Glow)
- A small, flat candle holder (brass, ceramic, or stone)
- 1-2 short beeswax or natural taper candles, in an ivory, cream, or warm grey tone
Styling Steps (Add the Warm Glow of Candlelight)
- Place the candles and holder on the far edge of your tray or island.
- They provide a beautiful vertical counterpoint to the low, horizontal items.
- Light them when you’re cooking dinner or having a quiet morning coffee.
- This is the warmest, most inviting element you can add.
- Pro-Tip: If you, like me, worry about open flames, a beautiful brass taper candle holder holding an LED beeswax candle is a safe, convincing alternative. I use them near a window.

Pin this cozy finishing touch to your ‘Candle Love’ board!

Key Takeaways: Your Quick Guide to Warm Minimalist Kitchen Island Decor
- Start with a large, natural-textured tray to anchor your display and visually corral items. This simple principle prevents clutter from spreading across your entire island and creates an instant, intentional focal point.
- Choose high-quality, sculptural items like a single ceramic vase with one branch over large, mixed floral arrangements. The “one of a kind” approach is the core of minimalist styling, adding height and elegance without visual noise.
- Incorporate functional tools like cutting boards, salt cellars, and olive oil bottles as beautiful, everyday decor. This is the heart of warm minimalism for a home cook—having everything you need at hand while being surrounded by beauty.
- Layer textures with linen towels, a wooden cookbook stand, and a textured ceramic bowl to add depth to a neutral palette. Warm minimalism thrives on tactile variety, which is far more interesting than color variety.
- Use negative space strategically. A large, beautiful bowl left empty, or a clear section of your tray, is as important as the objects you choose. The space around an item defines it.
- Finish with a small source of warmth, like a pair of beeswax candles, to make the space feel truly inviting. This final, ambient touch transforms your island from a styled display into a lived-in, welcoming part of your home.
- Curate, don’t clutter. The best warm minimalist island decorations are the ones you use and love every day. Resist the urge to fill every inch. Your island should feel calm, purposeful, and ready for your next meal.
People Also Ask About Warm Minimalist Kitchen Island Decor
What is the key principle for warm minimalist kitchen island decor?
The key principle is “curate, don’t clutter.” You select a small number of high-quality, meaningful objects that are functional and beautiful, then give them space to breathe. It’s about choosing a few anchor pieces like a wooden tray, a single vase, and a beautiful cookbook, rather than filling the surface with many small decorative items. The focus is on natural textures, neutral tones, and the harmonious interplay of light and shadow on the objects you choose. This creates a calm, intentional, and inviting focal point.
How should I style a small kitchen island for a warm minimalist look?
For a small island, a single, large, and beautiful object is more effective than many small ones. A substantial wooden cutting board or a large ceramic bowl can act as the entire centerpiece. Pair it with a single, small vase with a simple branch or a beautiful salt cellar. Avoid placing anything within the first 6 inches of the island edge to ensure it still functions as a usable work surface. The goal is to create a visual anchor without overwhelming the limited space.
What kind of flowers are best for a minimalist kitchen island?
A single, long-stemmed flower like a tall lily, or a few stems of eucalyptus or olive branches, perfectly fits the minimalist aesthetic. Avoid large, mixed bouquets. For a truly low-maintenance option, dried flowers like pampas grass, bunny tails, or dried eucalyptus last for months and require zero water. The key is to have a single, sculptural element that adds height and a touch of nature without creating visual noise.
Can you decorate a kitchen island with a sink?
Yes, a kitchen island with a sink presents a unique opportunity. Place a small, beautiful soap dispenser and a folded linen hand towel directly on the counter next to the sink. You can also add a single, low vase with a small flower or a small plant on the corner furthest from the sink. The main principle is to keep the area immediately around the sink as functional and uncluttered as possible, letting the sink itself be the focal point.
How do I choose a centerpiece for a large kitchen island?
For a large island, scale is crucial. You need larger, more substantial objects to fill the visual space. A very large wooden tray can anchor a grouping. Inside it, use a tall, sculptural vase with branches, a stack of 2-3 large cutting boards, and a sizable ceramic bowl. You can also create multiple smaller, distinct vignettes along the length of the island. For example, a “cooking station” with oil and salt at one end and a “serving station” with a bowl and candles at the other.
What are some budget-friendly warm minimalist decor ideas?
Start with things you already own. A beautiful wooden cutting board, a simple bowl, or a stack of well-folded linen towels are all perfect starting points. Instead of buying new vases, use a thrifted glass bottle or a small pitcher. The most important element is the tray, and you can find simple wooden ones at thrift stores or IKEA. The warm minimalist look is about the quality and intention of the arrangement, not the cost of the items.
How can I incorporate seasonal decor into a warm minimalist island?
For a warm minimalist look, change one or two key elements each season, not the entire arrangement. For fall, swap a dried eucalyptus branch for a wheat or dried leaf arrangement, and add a small, grey stoneware pumpkin. For spring, use a budding quince branch in your vase and a light, cream linen towel. The rest of the island remains the same, ensuring a cohesive, intentional look that still celebrates the changing year.
What is the most common mistake in decorating a kitchen island?
The most common mistake is overcrowding. It’s instinctive to want to display every cute trinket, but this creates visual chaos and makes the island less functional for cooking. A cluttered island looks messy, not minimalist. The second mistake is leaving the island completely bare. An empty island can feel cold and institutional. The goal is a purposeful, balanced look that invites use and contemplation.
How do I keep my kitchen island decor clean and free of cooking splatters?
The key is to use durable, easy-to-clean materials for your core decor. Choose a wooden tray with a smooth, sealed finish that can be wiped. Use ceramics and glass for vases and bowls. Avoid anything with deep crevices or delicate fabrics that can’t be easily cleaned. For more frequently used items like the cookbook, a simple dusting is enough. For the cutting board, wash it after use. The main tray and its core items are your “display zone” and stay clean.
What materials are best for a warm minimalist kitchen island look?
Natural, textural materials are the backbone of this style. Wood (acacia, walnut, oak, teak), linen, ceramic (matte finishes), stone (terracotta, marble, river rocks), and brass are your best choices. Avoid overly glossy, plastic, or synthetic materials. The goal is to create a surface that feels warm, organic, and inviting to the touch. The contrast between the smooth, cool stone of the counter and the warm, grainy wood of a cutting board is the essence of this look.
Final Thoughts on Warm Minimalist Kitchen Island Decor
A warm, minimalist kitchen island isn’t about having the perfect, expensive objects. It’s about choosing a few beautiful, functional things you love and giving them the space to be seen and used. It’s a philosophy that invites calm, mindfulness, and a deeper connection to the daily ritual of cooking. Start with one piece—a wooden tray, a single vase, a beautiful linen towel—and build your island’s story from there.
The most beautiful kitchens are the ones that feel lived in, loved, and ready for the next meal. We hope these 11 ideas have inspired you to create a warm, minimalist island that you’ll love spending time at. What’s the first item on your tray going to be? Let us know in the comments below!
Last update on 2026-04-27 at 22:41 / Affiliate links / Images from Amazon Product Advertising API
