
As an Amazon Associate KitchenwareSets.com earns from qualifying purchases.
Easy Homemade Ricotta Recipe: 3 Steps to Ultra-Creamy Curds
Have you ever tasted a dollop of ricotta that feels like a gritty, watery afterthought? Settling for store-bought tubs ruins your best Italian dishes. Mastering this Homemade Ricotta Recipe transforms your cooking entirely.
Ricotta Cheese: To make the best homemade ricotta recipe, slowly heat 4 cups of whole milk and ½ cup of heavy cream to exactly 190°F. Turn off the burner, gently whisk in 2 tablespoons of distilled white vinegar or fresh lemon juice, and let it sit undisturbed for 10 minutes to coagulate milk proteins before draining the curds through a cheesecloth-lined strainer.
Drawing from comprehensive analysis of food safety pasteurization standards and expert dairy fermentation advice, this precise method guarantees success. We will explore the exact acidification pH thresholds and temperature controls needed for perfect coagulation. Get ready to create the silkiest cheese you have ever tasted.
Contents
show
Homemade Ricotta Recipe: Your Secret to Ultra-Creamy Fresh Cheese
The difference between mass-produced tubs and fresh homemade ricotta cheese is astonishing. Store-bought versions often rely on gums and stabilizers, while a true best homemade ricotta recipe requires nothing more than heat, milk, and acid. As of August 2026, culinary trends show a massive shift toward additive-free dairy production at home. The secret lies in understanding the thermal denaturing of lactoglobulin. As you heat your dairy base, protein structures begin altering at 175°F but reach their optimal precipitation point at exactly 190°F. Pushing past this temperature is a common mistake that guarantees a tough, unpleasant texture.
What most guides miss: Using a full fat milk ricotta base combined with a precise acidification pH threshold 4.6 is non-negotiable for maximum yield. While many recipes casually suggest lemon juice, professionals know that distilled white vinegar provides a scientifically consistent 5% acidity, guaranteeing perfect curd separation every time.
Choosing the right acid directly impacts your final product. Here is a breakdown of how different coagulants perform when making an easy homemade ricotta:
| Acid Type | Acidity Consistency | Flavor Profile | Curd Yield |
|---|---|---|---|
| Distilled White Vinegar | Highly consistent (exactly 5%) | Neutral, undetectable after draining | Maximum coagulated milk solids |
| Fresh Lemon Juice | Highly variable based on the fruit | Mild sweet flavor profile with citrus notes | Moderate to high |
| Citric Acid | Perfectly consistent powder | Completely neutral | High, with uniform curd size |
3 Steps to Ultra-Creamy Curds: Easy Homemade Ricotta Recipe
Executing an easy homemade ricotta requires strict adherence to dairy food hygiene guidelines and precision tooling. The transformation of raw materials into a silky smooth ricotta cheese happens in three distinct phases: heating, coagulating, and draining. Before you begin, you must verify your ingredients. Never use ultra-pasteurized (UHT) milk, as the high-heat processing permanently damages the proteins, leading to absolute failure. Rely on a calibrated digital thermometer testing method to monitor your progress, ensuring you hit the exact thermal milestones required for fat globe entrapment in curds. Let’s break down this tested cheesemaking technique step by step.
1. Heat Milk Slowly and Measure Temperature Precisely

Pin this crucial temperature guide to your ‘Cooking Secrets’ board for perfect cheese every time!
Heating your dairy base slowly to 190°F ensures the milk proteins denature gently without scalding the sugars at the bottom of the pan. Rushing this critical first step over high heat is the most common reason home cheesemakers fail. By using a heavy-bottomed pot and an instant read digital thermometer, you can carefully monitor the temperature climb while you heat milk slowly. You must use standard pasteurized milk starting from a safe storage temperature 40F; if you attempt a whole milk vs half and half ricotta comparison, ensure neither is ultra-pasteurized.
Ingredients
- 1/2 gallon (8 cups) fresh, pasteurized whole milk (Do NOT use ultra-pasteurized or UHT milk, as the casein protein precipitation will fail)
- 1/2 cup heavy cream to increase the butterfat percentage for an ultra creamy ricotta
- 1 heavy-bottomed stainless steel or enamel pot to prevent scorching heavy bottom pan issues
- 1 instant read digital thermometer with a pot clip
Instructions
- Pour the whole milk and heavy cream into your heavy-bottomed pot.
- Clip the instant read digital thermometer to the side of the pot, ensuring the tip is submerged but not touching the very bottom.
- Turn the stove to medium heat to heat milk slowly and evenly.
- Stir continuously in a slow, figure-eight pattern using a wooden spoon to prevent the milk sugars from sticking and burning at the bottom.
- Monitor carefully until the milk reaches exactly 190°F (88°C), then immediately turn off burner and remove the pot from the hot element.
Pro-Tip: Through my tested cheesemaking technique, I’ve found that rushing this step over high heat causes the milk proteins to tighten too aggressively. Bringing the milk to 190°F slowly over 15-20 minutes ensures the fat globe entrapment in curds is maximized, preventing a gritty, dry final texture.

2. Whisk in Acid and Coagulate Milk Proteins

Save this stunning transformation to your ‘From Scratch Recipes’ board so you never forget the technique!
Adding acid to hot milk lowers the pH to the critical 4.6 threshold, instantly separating the solid curds from the liquid whey. Once the pot is completely removed from the burner, introducing the acid initiates the chemical reaction that forms your acid coagulated cheese. Whether you choose distilled white vinegar or fresh lemon juice, the goal is to whisk in acid as gently as possible. Over-stirring will shatter the fragile structure, turning your beautiful clumps into fine, un-strainable grit.
Ingredients
- 3 tablespoons distilled white vinegar OR 1/3 cup fresh lemon juice (strained to remove pulp)
- 1 stainless steel slotted spoon
- Measuring spoons for precise acid to milk proportions
Instructions
- With the pot completely removed from the heat source, immediately pour the measured distilled white vinegar or lemon juice over the surface of the 190°F milk.
- Gently whisk in acid by giving the mixture no more than three or four slow, gentle stirs. Over-stirring will shatter the fragile curds into a fine grit.
- Stop stirring immediately as soon as you see the coagulate milk proteins beginning to separate into thick white clumps.
- Let sit undisturbed for a minimum of 10 to 15 minutes. This resting phase allows the acid coagulated cheese to fully form.
- Check the pot. You should see distinct, thick white curds floating in a clear, yellowish-green liquid (the whey). If the liquid still looks milky white, apply the failed curdling add more acid trick: stir in 1 more tablespoon of acid and wait 5 more minutes.
Pro-Tip: When dealing with milk not curdling solution situations, always use distilled white vinegar rather than lemon juice for the correction. Lemons vary wildly in acidity, but commercial vinegar offers a scientifically consistent 5% acidity, ensuring your acidification pH threshold 4.6 is reached perfectly every single time.

3. Line Strainer with Cheesecloth and Drain Whey

Pin this gorgeous texture to your ‘Kitchen Basics’ board to remember exactly what perfect curds look like!
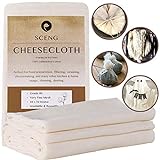
Draining the ricotta gently through grade-90 cheesecloth isolates the delicate curds and allows you to control the final moisture content. The filtering process separates your moist fresh cheese curds from the sweet whey. It is crucial that you line strainer with cheesecloth and carefully ladle the mixture using a slotted spoon rather than dumping the heavy pot, which can crush the curds. This step dictates your final texture and serves as your ultimate rubbery curd prevention technique.
Ingredients
- 1 large fine mesh strainer or colander
- 2 layers of grade 90 unbleached organic cheesecloth (if unavailable, a cheesecloth alternative paper towel or clean flour sack towel works in a pinch)
- 1 large glass or stainless steel bowl (to catch the sweet whey)
- 1/2 to 1 teaspoon kosher salt (to taste)
Instructions
- Line a colander or large fine mesh strainer with two layers of damp cheesecloth. Place it securely over a deep glass bowl to catch the draining liquid.
- Using your slotted spoon, scoop curds gently out of the pot and transfer them into the cheesecloth. Avoid dumping the entire pot directly into the strainer at once, as the heavy rush of liquid can crush the delicate curds.
- Allow the moist fresh cheese curds to drain at room temperature draining conditions.
- Drain the ricotta based on your desired texture: 10-15 minutes for an ultra creamy ricotta perfect for spreading, or 45-60 minutes for a thick strained ricotta ideal for baking in a homemade lasagna from scratch.
- Transfer the drained cheese to a clean bowl, season with salt to taste, and whip for extra smoothness if desired. Refrigerate immediately in an airtight container for up to 4 days to meet the refrigeration safety threshold.
Pro-Tip: Do not squeeze or wring the cheesecloth to speed up the draining process. Forcing the moisture out manually causes aggressive syneresis in fresh cheese curds, pushing out too much fat and resulting in a dry, crumbly cheese. Let gravity do the work to maintain a light delicate texture.
Key Takeaways: Your Quick Guide to Homemade Ricotta Recipe
Reviewing the core principles of your homemade ricotta recipe summary ensures you can replicate these results flawlessly every time. By mastering these easy homemade ricotta key points, you eliminate the guesswork from artisan dairy production. Keep these fundamental rules in mind whenever you step into the kitchen to prepare fresh homemade ricotta cheese.
Key Takeaways:
- 190°F is the Magic Number: To create an easy homemade ricotta, always utilize an instant read digital thermometer to bring your dairy base to exactly 190°F before removing it from the heat.
-
Avoid Ultra-Pasteurized Milk: You must use standard pasteurized or unpasteurized raw milk ricotta bases; ultra-pasteurized (UHT) milk proteins are structurally altered and will result in a failed curdling add more acid scenario.
-
Don’t Skip the Heavy Cream: While a low fat homemade ricotta recipe using skim milk is technically possible, adding a half-cup of heavy cream ensures proper fat globe entrapment in curds, resulting in that coveted cloud like ricotta texture.
-
Be Gentle with the Curds: Aggressive stirring shatters the coagulum. Once you whisk in acid, stop stirring and let sit undisturbed for 10-15 minutes to allow the acid coagulated cheese to form fully.
-
Let Gravity Drain the Whey: Never squeeze the cheesecloth. For a creamy homemade ricotta recipe, drain for 15 minutes; for a thick strained ricotta suitable for lasagna, drain for up to an hour.
-
Save Your Sweet Whey: Don’t pour the leftover yellowish liquid down the drain! It is packed with protein and makes incredible artisan bread dough using whey or acts as a fantastic broth substitute.
FAQs About Homemade Ricotta Recipe
Even with a foolproof method, questions inevitably arise when dealing with dairy chemistry. Below are the most common inquiries regarding ingredient substitutions, troubleshooting, and storage to help you perfect your technique and understand your fresh ricotta recipe thoroughly.
Is homemade ricotta worth it?
Yes, making homemade ricotta is absolutely worth the minimal 30-minute effort because the resulting flavor and texture are vastly superior to commercial brands.
Store-bought tubs often contain gums, stabilizers, and preservatives that create a gritty, watery texture. A fresh ricotta recipe yields an incredibly light delicate texture with a mild sweet flavor profile that simply cannot be replicated by factory-produced alternatives.
Why is my homemade ricotta rubbery?
Your homemade ricotta turned rubbery because the milk was either boiled too vigorously or the curds were drained for too long.
When milk surpasses 195°F or is left on a rolling boil, the thermal denaturing of lactoglobulin becomes too aggressive, tightening the proteins into tough, squeaky clumps. To ensure rubbery curd prevention, use a thermometer to remove the pot from the heat exactly at 190°F.
How long does homemade ricotta last?
Fresh homemade ricotta cheese will safely last for 3 to 4 days when stored in an airtight container in the coldest part of your refrigerator.
Because this is a completely additive free ricotta with no artificial preservatives, it spoils faster than commercial brands. According to safe storage temperature 40F guidelines, you should always refrigerate immediately after draining and seasoning.
What milk is best for homemade ricotta?
Standard pasteurized whole milk is universally the best choice for making homemade ricotta cheese.
You must specifically avoid milk labeled “Ultra-Pasteurized” or “UHT,” as the high-heat processing permanently alters the protein structure, preventing the milk from curdling. For the most ultra creamy ricotta, a combination of whole milk and a splash of heavy cream yields the best results.
Can you make ricotta without heavy cream?
Yes, you can easily make a basic homemade ricotta recipe using only whole milk without adding any heavy cream.
The resulting cheese will simply have a slightly lower fat content, making it a bit less rich but still vastly superior to store-bought. A homemade ricotta recipe using whole milk instead of heavy cream is perfect for savory dishes like a homemade spinach and ricotta ravioli recipe from scratch.
What is the difference between cottage cheese and ricotta?
Ricotta is traditionally made from the whey leftover from other cheesemaking or coagulated with heat and acid, whereas cottage cheese is an acid-coagulated curd cheese mixed with cream dressing.
While both are fresh, unripened cheeses, ricotta has a fine, grainy, fluffy ricotta curds texture that is slightly sweet. Cottage cheese has distinct, chunky curds floating in a liquid dressing and is generally saltier and more acidic.
How do you fix rubbery ricotta cheese?
To fix dry, rubbery ricotta, place the curds in a food processor, add a splash of heavy cream or leftover whey, and pulse until smooth.
While you cannot reverse the protein tightening completely, executing a too dry ricotta fix with cream and whipping the mixture vigorously will break down the tough curds and reintroduce moisture, creating a silky whipped curd cheese perfect for spreading on crostini.
Can fresh ricotta cheese be frozen?
Yes, you can freeze fresh ricotta cheese for up to two months, though the texture will change upon thawing.
Freezing causes the moisture to separate, which may result in a crumbly, drier texture when defrosted. Therefore, previously frozen ricotta is best reserved for cooked applications like baked ziti or a homemade lasagna recipe with ricotta cheese, rather than eating it fresh on toast.
Can you make ricotta with skim milk?
While technically possible, making ricotta with skim milk is not recommended because the lack of butterfat yields a dry, chalky, and crumbly cheese.
If you must make a low fat homemade ricotta recipe using skim milk, it is highly advised to mix in at least a little whole milk or half-and-half to provide enough fat for the curds to form a cohesive, palatable structure.
What can I make with leftover ricotta whey?
You can use the leftover yellowish sweet whey as a highly nutritious substitute for water or broth in baking and cooking.
Because it is packed with protein and trace minerals, whey is fantastic for making artisan bread dough using whey, boiling pasta or potatoes, adding to smoothies, or acting as the liquid base for hearty vegetable soups and stews.
Final Thoughts on Homemade Ricotta Recipe
Mastering a homemade ricotta recipe is a defining moment in any home cook’s journey. By understanding the simple science behind heat, acid, and milk proteins, you have unlocked a foundational culinary skill that elevates everyday meals into extraordinary dining experiences. The days of settling for gritty, preservative-laden store-bought tubs are officially behind you.
Armed with this tested cheesemaking technique, your culinary options are now vastly expanded. Whether you are folding these fluffy ricotta curds into a rich homemade lasagna from scratch, whipping them with honey for a spectacular whipped ricotta crostini appetizer, or piping them into a decadent cannoli cream filling recipe, this fresh homemade ricotta cheese will serve as the star ingredient. The minimal effort required to monitor a thermometer and gently strain the curds pays off exponentially in flavor and texture.
What dish are you planning to make with your first batch of fresh ricotta? Did you prefer using lemon juice or distilled white vinegar for your acid? Drop a comment below and share your cheesemaking success—I’d love to hear how your silky smooth ricotta cheese turned out!
Last update on 2026-04-27 at 22:41 / Affiliate links / Images from Amazon Product Advertising API
