As an Amazon Associate KitchenwareSets.com earns from qualifying purchases.
The Best Wendys Chili Recipe Copycat For Cozy Nights
Ever get that sudden, undeniable craving for a warm, comforting bowl of Wendy’s chili? That rich, meaty, perfectly seasoned chili that just hits the spot, especially on a chilly day. You know the one. It’s a specific taste, a specific texture, and when the craving hits, nothing else will do.
The problem, of course, is that you either have to get in the car and head to the drive-thru, or you’re left trying to approximate it with other recipes that just don’t get it right. They’re too chunky, too spicy, or they’re missing that signature savory flavor that makes Wendy’s chili so iconic. It’s frustrating when you want that homestyle taste without leaving your cozy kitchen.
Here’s the solution you’ve been searching for. This is the ultimate, tested-and-perfected Wendy’s chili recipe copycat that delivers the authentic, hearty flavor and texture you love, made with simple ingredients right at home. We’ve cracked the code on everything from the finely crumbled meat to the perfect balance of beans and seasonings, so you can make a pot of chili that’s even better than the original.
Craving That Iconic Bowl? Here’s How to Make Wendy’s Chili at Home
This Wendy’s Chili copycat recipe delivers the signature taste you love using simple, accessible ingredients. It perfectly combines finely crumbled ground beef, a classic mix of pinto and kidney beans, and a secret blend of savory seasonings in a rich tomato base, all simmered to perfection for a truly authentic and hearty meal perfect for cozy nights in.
In my experience, a lot of copycat recipes get close, but they miss one or two crucial details that make all the difference. That’s why I’ve spent so much time testing and tweaking this version. We’re not just throwing ingredients in a pot; we’re recreating the experience of that chili. It’s about achieving that specific, almost-soupy consistency, the non-chunky meat, and that deep, savory flavor that isn’t overwhelmingly spicy. This recipe is the culmination of all that testing, designed to be a foolproof guide to recreating your favorite fast-food comfort food, but with the quality and love of a homemade meal.
Why This Copycat Recipe Is Better Than The Original
This recipe works because it focuses on three critical details that other recipes often miss. By mastering the meat texture, the seasoning blend, and the bean-to-liquid ratio, you get a chili that’s not just similar, but arguably better because you control the quality of every single ingredient.
Here’s what makes this recipe the definitive copycat:
- The Signature Meat Texture: We use a specific technique involving a potato masher and a bit of liquid while cooking the ground beef. This breaks the meat down into the fine crumbles that are characteristic of Wendy’s chili, rather than leaving you with big, chunky pieces.
- The Balanced Savory Flavor: The seasoning is more than just chili powder. We use a precise blend of cumin, garlic, and a touch of sugar to balance the acidity of the tomatoes. The real “secret” is adding a savory, umami-rich ingredient like a beef bouillon cube, which mimics the flavor enhancers used in the commercial version to create that deep, satisfying taste.
- The Perfect Consistency: One of the biggest mistakes people make is draining their canned beans. Do not drain the beans! The starchy liquid in the cans is crucial for thickening the chili and contributing to its signature, slightly soupy consistency.
The Ultimate Wendy’s Chili Copycat Recipe (Updated for 2025)
This is it—the one-stop, definitive recipe for making Wendy’s chili at home. It’s been designed for ease and authenticity. This recipe yields a generous amount, perfect for a family dinner with leftovers for the week.
- Yields: 10-12 servings
- Prep Time: 15 minutes
- Cook Time: 2 hours
Get ready to fill your home with the most amazing, comforting aroma.
1. The Only Wendy’s Chili Recipe You’ll Ever Need

Making this iconic chili is a straightforward process of browning the meat correctly, sautéing the vegetables, and simmering all the ingredients together until the flavors meld. Following these steps precisely will give you the most authentic result.
Ingredients:
- 2 lbs lean ground beef
- 1 large yellow onion, finely chopped
- 1 large green bell pepper, finely chopped
- 2 celery stalks, finely chopped
- 1/4 cup chili powder
- 2 tbsp ground cumin
- 2 tsp garlic powder
- 1 tsp salt
- 1 tsp black pepper
- 1 tsp sugar
- 1 (28 oz) can tomato sauce
- 1 (28 oz) can diced tomatoes, undrained
- 1 (15 oz) can dark red kidney beans, undrained
- 1 (15 oz) can pinto beans, undrained
- 2 cups beef broth or water
Instructions:
- In a large Dutch oven or stockpot over medium-high heat, add the ground beef. Cook, breaking it apart with a spoon as it begins to brown.
- Texture Secret: Once the beef starts to release its fat, add 1/2 cup of your beef broth or water to the pot. Use a potato masher or a sturdy whisk to press down and break the meat into very fine crumbles. Continue cooking until no pink remains. Do NOT drain the fat or liquid from the pot. This is a key flavor component.
- Add the finely chopped onion, bell pepper, and celery directly to the pot with the meat. Cook for 5-7 minutes, stirring frequently, until the vegetables have softened.
- Stir in the chili powder, cumin, garlic powder, salt, pepper, and sugar. Continue to cook and stir for 1 minute until the spices are fragrant. This step toasts the spices and deepens their flavor.
- Pour in the tomato sauce, the entire can of diced tomatoes (with their juice), the entire can of kidney beans (with their liquid), and the entire can of pinto beans (with their liquid). Add the remaining beef broth. Stir everything together until it is well combined.
- Bring the chili to a gentle boil, then immediately reduce the heat to low. Cover the pot and let it simmer for at least 1.5 to 2 hours. Stir it every 20-30 minutes to prevent sticking. Remember, the longer it simmers, the more the flavors will develop.
- Before serving, give it a final stir and taste. Adjust with a little more salt or chili powder if you feel it’s needed.
Recipe Notes: The chili will thicken as it simmers and will thicken even more as it cools. The flavor is always even better the next day!
Pin this recipe to your ‘Comfort Food’ board for later!
5 Pro-Tips to Make Your Copycat Chili Better Than Wendy’s
To truly master this recipe, you need to perfect the meat texture, add a secret flavor booster, consider using a slow cooker, know how to freeze it for later, and create an epic toppings bar. These five tips elevate the recipe from a simple copycat to a signature dish.
I’ve learned these tricks through trial and error, and they are the difference-makers. Here’s the deal on how to make your chili truly unforgettable.
1. The Secret to Perfect Wendy’s-Style Meat Texture
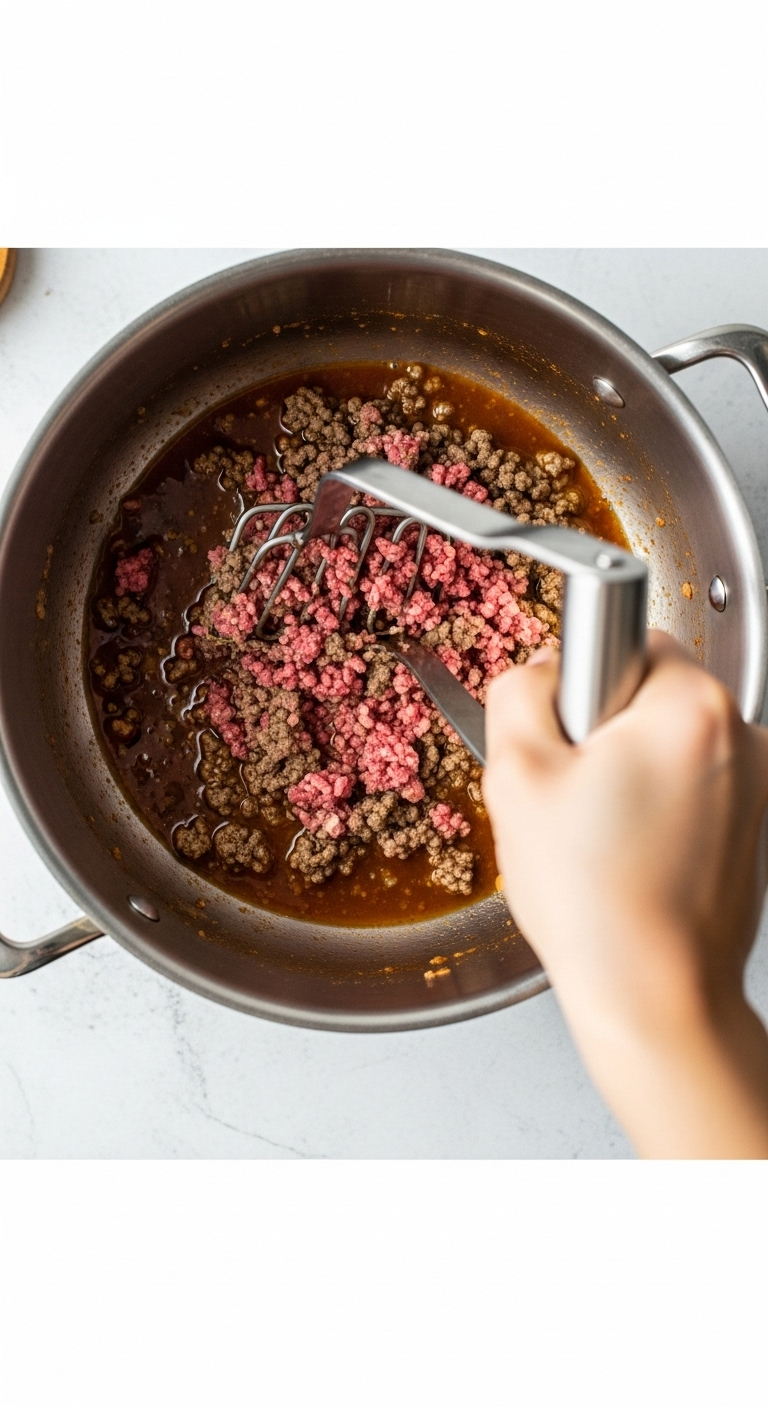
The key to the authentic texture is using liquid and a tool like a potato masher to break down the ground beef into fine crumbles instead of large chunks.
Materials Needed:
* Ground Beef
* Water or Beef Broth
* Potato Masher or Sturdy Whisk
Step-by-Step Directions:
1. Place your ground beef in a large pot or Dutch oven over medium-high heat.
2. As the beef begins to cook and render its fat, pour in approximately 1/2 cup of liquid (water or broth). The liquid helps to steam and gently separate the meat proteins, preventing them from clumping together.
3. Immediately begin breaking up the meat with your potato masher, pressing down firmly and consistently across the entire pot. If you don’t have a masher, a sturdy whisk works well too.
4. Continue this process of mashing and stirring until the meat is fully cooked and has broken down into the very fine, consistent crumbles you see in the restaurant’s chili.
Pro-Tip: Don’t drain the pot after this step! The rendered fat and flavorful liquid are absolutely essential for the chili’s final taste and mouthfeel. This is a crucial detail that many recipes miss and is key to a rich, not watery, chili.
Save this cooking hack to your ‘Kitchen Tips’ board!
2. Getting the Flavor Just Right (The “Secret” Ingredient)

The secret to replicating the deep, savory flavor is to add a concentrated source of umami, like a beef bouillon cube or a small amount of yeast extract. This mimics the commercial flavor enhancers found in the original.
Materials Needed:
* Your chili base (after adding spices)
* 1 Beef bouillon cube/granules OR a pinch of yeast extract (like Marmite)
Step-by-Step Directions:
1. After you’ve stirred in your main seasonings (chili powder, cumin, etc.), it’s time to introduce the flavor enhancer.
2. If using beef bouillon, crush one cube between your fingers and sprinkle it into the chili. Stir until it fully dissolves.
3. If using yeast extract (which is what is listed on the official canned version), start with a very small amount—about 1/4 teaspoon. It is very potent. Stir it in completely.
4. Let the chili simmer for at least 20-30 minutes after adding this ingredient before you taste and adjust. This ingredient needs time to meld and adds a deep, savory, almost meaty background flavor that you can’t quite put your finger on, but you’d miss it if it were gone.
Lesson Learned: Start with a small amount! These ingredients are powerful. You can always add a little more later in the simmering process, but you can’t take it away. I learned this the hard way once!
Unlock more flavor secrets! Follow us on Pinterest.
3. Slow Cooker & Instant Pot Instructions
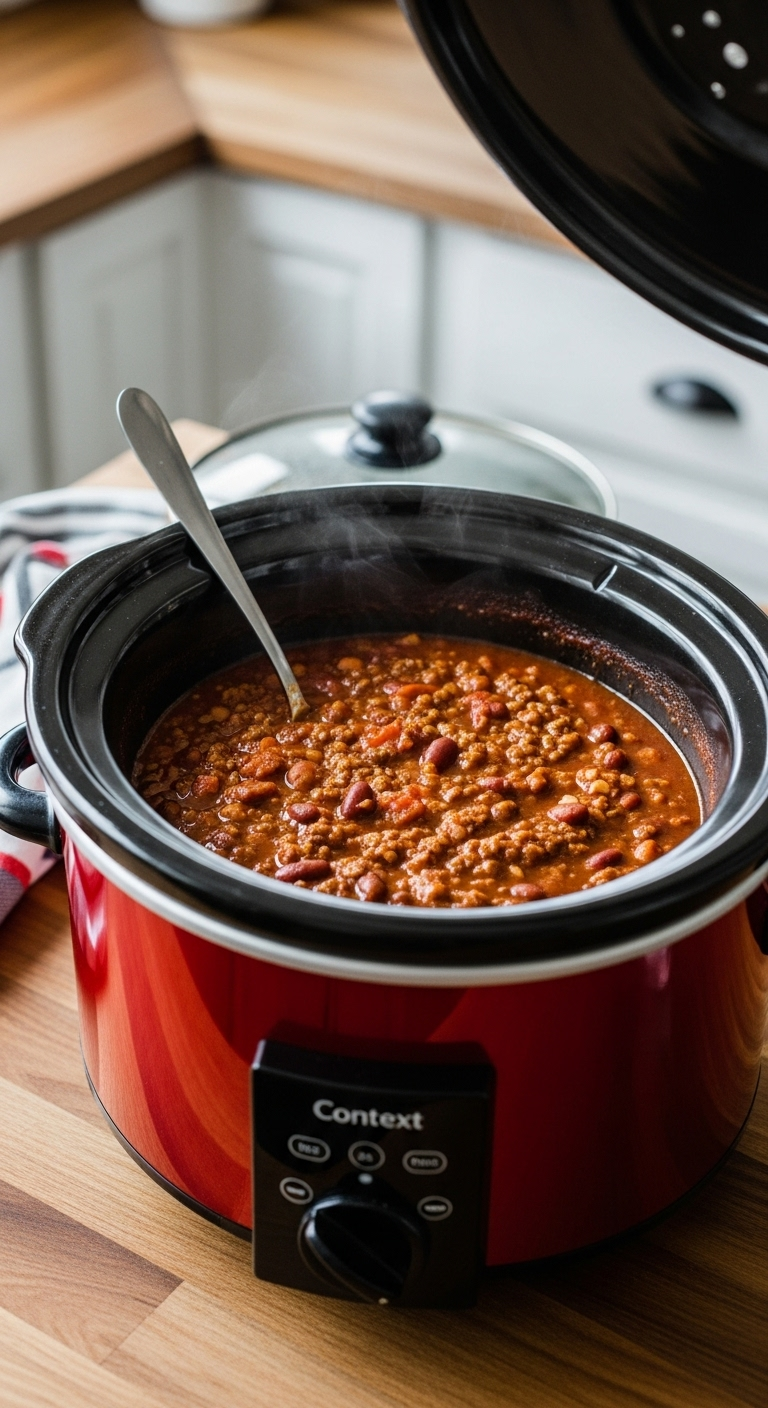
Yes, you can easily adapt this recipe by browning the meat and veggies on the stove first, then transferring everything to a slow cooker to simmer all day, or by using the Sauté and Pressure Cook functions on an Instant Pot.
Materials Needed:
* All recipe ingredients
* Slow Cooker or Instant Pot
Step-by-Step Directions (Slow Cooker):
1. On your stovetop, perform steps 1-3 of the main recipe in a large skillet: brown the beef using the fine-crumble technique and cook the vegetables.
2. Transfer this cooked meat and veggie mixture to the basin of your slow cooker.
3. Add all the remaining ingredients (tomatoes, beans, spices, broth) and stir everything to combine thoroughly.
4. Cover and cook on LOW for 6-8 hours or on HIGH for 3-4 hours.
Step-by-Step Directions (Instant Pot):
1. Set your Instant Pot to the “Sauté” function on high. Perform steps 1-3 of the main recipe directly in the Instant Pot liner.
2. Press “Cancel” to turn off the Sauté function. Stir in a splash of your broth and scrape the bottom of the pot to deglaze it, which helps prevent a burn notice.
3. Add all remaining ingredients and stir well.
4. Secure the lid, ensure the steam release valve is set to “Sealing,” and cook on High Pressure for 20 minutes.
5. When the timer finishes, allow the pressure to release naturally for 10-15 minutes before carefully performing a quick release to vent the remaining steam.
Pro-Tip: For both the slow cooker and Instant Pot methods, the flavor will still improve immensely if you let the finished chili sit on the “Keep Warm” setting for at least an hour before serving. This allows the flavors to settle and meld just like they do on the stovetop.
Love your slow cooker? Pin this easy dinner idea!
4. Storing, Freezing, and Reheating for Later
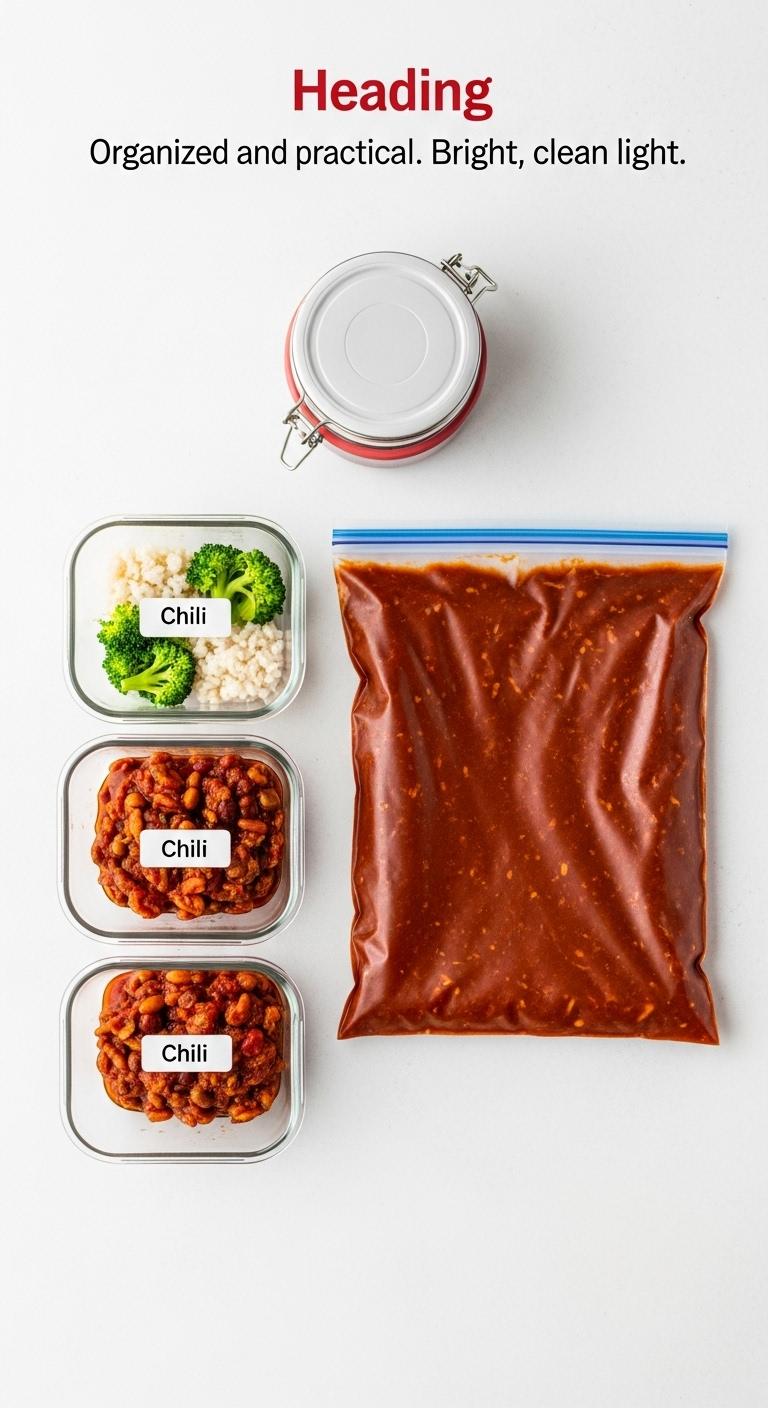
Absolutely! This chili is perfect for meal prep. Store it in an airtight container in the fridge for up to 5 days or freeze it in portions in freezer-safe bags or containers for up to 3 months.
Materials Needed:
* Airtight containers
* Freezer-safe zip-top bags or containers (like Souper Cubes)
Step-by-Step Directions:
1. Cool Down: First and foremost, let the chili cool completely to room temperature before storing. Putting hot chili in the fridge or freezer can raise the temperature and isn’t food-safe.
2. Refrigerating: Portion the cooled chili into airtight containers. It will keep well in the refrigerator for up to 4-5 days. The flavor actually deepens and improves by day two!
3. Freezing: Ladle cooled chili into freezer-safe containers or zip-top bags. If using bags, squeeze out as much air as possible and lay them flat on a baking sheet to freeze. Once solid, you can stack the flat “bricks” of chili to save freezer space. It maintains great quality for up to 3 months.
4. Reheating: For best results, thaw frozen chili in the refrigerator overnight. Reheat it gently on the stovetop over medium-low heat, stirring occasionally, until it’s heated through. You can also use a microwave, stirring every minute or so. If it seems too thick, add a splash of water or beef broth to restore its original consistency.
Pro-Tip: My favorite meal prep hack is to freeze the chili in individual serving sizes using “Souper Cubes” or silicone muffin tins. Once the blocks are frozen solid, I pop them out and store them all together in a large freezer bag. This makes for incredibly fast, perfectly portioned lunches or dinners.
Make life easier! Pin this meal prep idea.
5. Create the Ultimate Chili Bar (Toppings & Serving Ideas)

The best way to serve this chili for a crowd is to set up a “Chili Bar” with the chili in a slow cooker on warm, surrounded by bowls of various toppings and bases like baked potatoes or hot dogs.
Materials Needed:
* A large pot of your finished copycat chili
* A slow cooker (to keep it warm)
* An assortment of small bowls for toppings
Step-by-Step Directions (Chili Bar Setup):
1. Keep your chili piping hot and ready for serving by placing it in a slow cooker set to the “Keep Warm” function. This is the centerpiece of your bar.
2. Arrange a wide variety of toppings in small, individual bowls around the slow cooker. This allows guests to customize their own bowls.
3. Classic Toppings: Shredded sharp cheddar cheese, sour cream, finely chopped white or red onion, sliced fresh or pickled jalapeños, and classic oyster or saltine crackers.
4. Fun Toppings: Fritos corn chips (for a Frito pie!), fresh cilantro, sliced avocado, or even a dash of your favorite hot sauce.
5. Bases: Don’t just serve it in a bowl! Offer different “bases” for the chili. This turns it into a full, interactive meal. Great options include hot dogs in buns (for chili dogs), baked potatoes, french fries (for chili cheese fries), or a bowl of macaroni (for chili mac).
Pro-Tip: For the most authentic Wendy’s experience at home, make sure you finely chop the white onion and use a good quality, sharp cheddar cheese. And don’t forget the classic saltine or oyster crackers on the side for crumbling on top!
Hosting a party? Pin these fun chili bar ideas!
Key Takeaways: Your Quick Guide to The Best Wendys Chili Recipe Copycat For Cozy Nights
This recipe is easy, but getting it perfect comes down to a few key details. If you remember nothing else, remember these four points for an authentic, better-than-the-drive-thru result every time.
- The Right Texture is Key: Don’t just brown the beef. Add a little water or broth and use a potato masher to actively break it down into the signature fine crumble. This is non-negotiable for authenticity.
- Don’t Drain the Beans: The liquid from the canned pinto and kidney beans is a critical ingredient. It provides flavor, starch, and the necessary liquid to achieve the classic consistency of the chili.
- Simmer Low and Slow: Patience is a virtue. You must allow the chili to simmer for at least 1.5 to 2 hours. This is where the magic happens and all the individual flavors meld into one cohesive, delicious pot of chili.
- Boost the Umami: A touch of beef bouillon or a tiny smear of yeast extract is the “secret” that replicates that deep, savory, restaurant-quality flavor that makes this chili so craveable.
People Also Ask About wendy’s chili recipe copycat chili
What is the secret ingredient in Wendy’s chili?
While there’s no single official “secret,” the unique savory flavor of Wendy’s chili is often attributed to ingredients that boost umami. In the officially licensed canned version sold in stores, this is listed as yeast extract. For a homemade copycat, adding a crushed beef bouillon cube or a tiny bit of yeast extract (like Marmite) is the best way to replicate this deep, savory flavor profile.
What kind of beans are in Wendy’s chili?
Wendy’s chili famously uses a blend of two specific types of beans: dark red kidney beans and pinto beans. To make an authentic copycat recipe, it is crucial to use both of these varieties. Furthermore, you must add them to the pot undrained, as the starchy liquid from the cans helps create the signature consistency and thickness of the chili.
What makes Wendy’s chili taste so good?
The unique and beloved taste of Wendy’s chili comes from a combination of three key factors: the finely crumbled ground beef texture, the specific blend of pinto and kidney beans, and a well-balanced, savory (but not overly spicy) seasoning base. A long, slow simmer is the final step that allows all these distinct flavors and textures to meld together perfectly, creating the iconic, comforting taste.
Final Thoughts
There is something incredibly satisfying about recreating a beloved comfort food in your own kitchen. This Wendy’s chili copycat recipe does more than just mimic the flavor; it empowers you to make a version that’s fresher, more flavorful, and filled with the kind of love that can only come from a homemade meal.
With these detailed steps and pro-tips, you’re not just making chili; you’re mastering a classic. You now have the secrets to that perfect texture and deep, savory taste. So the next time that craving strikes on a cozy night, you can skip the drive-thru and head straight to your own stove for a bowl of chili that’s even better than you remember.
What are your must-have chili toppings? Let me know in the comments below
