
As an Amazon Associate KitchenwareSets.com earns from qualifying purchases.
13 Effortless Kitchen Countertop Decor Ideas for Homeowners
Staring at a messy paper pile where your breakfast should be? You are not alone. Finding functional kitchen countertop decor ideas feels impossible when space is tight. We want beautiful surfaces, but we desperately need room to cook.
Kitchen countertop decor is the practice of blending aesthetic accents with functional culinary tools to create curated, clutter-free vignettes. The most effective styling strategy balances natural textures, like rustic wooden cutting boards, with contained organization zones using decorative trays. This ensures your daily meal prep space remains entirely unobstructed.
Drawing from certified interior designer styling principles and ergonomic kitchen clearance standards, we can transform your space. You will discover a simple five-step framework covering decluttering, grouping, layering, adding textures, and protecting prep zones. These practical setups guarantee a beautiful, highly functional cooking environment.
Contents
show
13 Effortless Kitchen Countertop Decor Ideas for Homeowners
Mastering your kitchen countertop styling requires a strategic balance between beautiful staging and practical utility. The tension between aesthetics and daily culinary tasks is a real struggle for many homeowners. We resolve this using a proven, five-step framework: Declutter, Group with Trays, Layer Heights, Add Natural Textures, and Preserve Prep Zones.
Before arranging a single item, try the 15-minute prep zone clearance test. Clear a continuous stretch of counter entirely bare, wiping it down completely. Notice how this negative space instantly calms the room while providing massive functional value for chopping and mixing. From there, we intentionally add curated vignettes that elevate the aesthetic without overwhelming the workspace. Here are thirteen actionable ways to achieve that perfect balance.
1. Corral Daily Essentials with a Woven Rattan Tray

Pin this simple tray styling trick to your Kitchen Organization board!
Three loose items floating on a counter read visually as clutter. However, those exact same three items placed on woven rattan counter trays instantly become a curated design vignette. This psychological shift happens because the tray grounds the objects, creating a definitive boundary for your everyday kitchen essentials.
For standard 24-inch depth counters, limit your tray diameter to 11 or 13 inches to preserve workspace. This strategy involves corralling essentials on trays to make wiping down the counters incredibly fast, as you only need to lift one object instead of four.
Decorative Elements
- 11-inch to 13-inch round woven rattan tray with low edges
- Textured ceramic salt cellar with wooden spoon
- Heavy-weight brass pepper mill
- Small cruet olive oil bottle with pour spout
Styling Steps
- Place the woven tray at least 15 inches away from the cooktop to avoid grease splatter.
- Position the tallest item (olive oil cruet) at the back left of the tray.
- Group the salt cellar and pepper mill in the front right corner to create an asymmetrical visual balance.
- Leave at least 30% of the tray surface exposed to maintain a clean, uncluttered aesthetic.
Pro-Tip: As an interior designer, I always recommend placing felt pads under rattan trays; the rough natural fibers can easily scratch polished stone surfaces over time if dragged during cleaning.

2. Layer Rustic Wooden Cutting Boards Against the Backsplash

Save this vertical styling technique to your Kitchen Upgrades board!
Kitchens are filled with hard, cold materials like stone, tile, and stainless steel. Layering wooden cutting boards against your backsplash introduces instant warmth and organic textural contrast. This vertical staging technique decorates the room without consuming valuable flat surfaces in your kitchen perimeter prep station.
When setting up your wood cutting board vs marble slab display, the physical mechanics matter. Lean the boards at a slight 15-degree angle against the wall so they do not tip forward when heavy cabinet doors slam nearby. Treat the wood with non-toxic, food-safe mineral oil monthly to prevent the material from drying out and cracking in the dry indoor air.
Materials Needed
- One large rectangular wooden cutting board (at least 18 inches tall)
- One medium round or paddle-shaped wooden board (12-14 inches)
- Non-toxic, food-safe mineral oil for board conditioning
- Heavy object (like a utensil crock) to anchor the base
Styling Steps
- Condition both wooden boards with food-safe mineral oil to enrich the grain and protect against moisture.
- Lean the tallest, rectangular board vertically against the backsplash tile.
- Overlap the smaller, round board in front of the tall board, off-centering it to the right.
- Place a heavy ceramic crock or stone mortar in front of the boards to prevent them from sliding forward on slick countertops.
Pro-Tip: Staggering shapes is essential here. A round paddle board layered over a sharp rectangular board creates tension and visual interest that two identically shaped boards simply cannot achieve.

3. Optimize Awkward Dead Corners with Tiered Marble Risers

Pin this brilliant corner space solution to your Home Organization board!
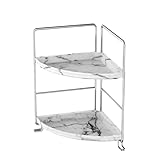
L-shaped countertops often suffer from the “black hole” effect—a deep, shadowy recess where random mail and vitamins gather. Tiered marble countertop risers solve this by intentionally optimizing awkward kitchen counter corners through vertical elevation.
When styling deep dark corner counter dead zones, you effectively reclaim unusable depth. By placing a two-tier shelf in this corner, you lift secondary items off the flat workspace, establishing micro-zones for ergonomic culinary efficiency. Pay close attention to your under-cabinet lighting; ensure the items placed on the top tier clear the light bulbs to prevent accidental heat damage to delicate tea leaves or spices.
Decorative Elements
- Two-tier marble and brass corner shelf riser
- Set of three small glass spice or tea jars
- Folded natural linen tea towel
- Small potted succulent or faux trailing plant
Styling Steps
- Measure the clearance between the countertop and the upper cabinets (standard is 18 inches) to ensure the riser will fit with items on top.
- Push the tiered riser deep into the 90-degree corner, centering it evenly between the two walls.
- Place heavier, less frequently used items (like specialty teas or salt cellars) on the bottom tier for stability.
- Drape a folded linen towel over the edge of the top tier to soften the hard lines of the stone.
- Add a small trailing plant to the top tier to draw the eye upward and utilize the vertical space.
Pro-Tip: If you have dark countertops, styling a deep corner requires reflective materials. Use a white marble riser or brass accents to bounce the limited light around that shadowy zone.
4. Build a Dedicated Coffee Bar Station

Save this ultimate morning routine setup to your Coffee Bar Ideas board!
Coffee gear has a habit of spreading across the entire kitchen, leaving grounds and spills everywhere. By executing intentional aesthetic kitchen coffee bar countertop setup ideas, you contain the mess into one specific zone.
Creating functional prep zones keeps your morning routine completely separate from the primary cooking triangle. When organizing a coffee station + syrup dispenser, always measure the clearance height from the countertop to the upper cabinets. Many espresso machines require top-loading water tanks, meaning you need sufficient vertical space to refill them without dragging the heavy machine across the counter every morning.
Decorative Elements
- Wooden or stone base tray (large enough for accessories, not the machine)
- 2-3 glass syrup dispenser bottles with metal pumps
- Stack of matching ceramic espresso cups or mugs
- Small airtight fluted glass storage jar for beans
Styling Steps
- Locate your coffee station on a perimeter counter outside the main stove-to-sink work triangle to prevent morning traffic jams.
- Keep the heavy espresso machine directly on the counter, but place the wooden tray immediately next to it.
- Decant commercial coffee syrups into aesthetic glass dispensers and place them at the back of the tray.
- Stack 2 or 3 favorite ceramic mugs in the front left of the tray, leaving the handle of the top mug facing outward for easy grabbing.
Pro-Tip: Never push your coffee maker completely flush against the back wall. Leaving a 2-inch gap prevents steam damage to your backsplash or paint when the machine is heating up.

5. Style Dark Granite Counters with Warm Brass Accents

Pin this moody, elegant styling trick to your Kitchen Design board!
Dark stone absorbs light rapidly, which can make a kitchen feel heavily weighted and gloomy. If you want to know how to style kitchen counters with black granite, the secret lies in high-contrast reflection.
Unlike white marble counter styling, dark countertops desperately need harmonizing metal finishes and textures to bounce ambient light back into the room. Unlacquered brass is perfect here; it develops a beautiful living patina over time due to kitchen moisture, offering organic depth. Coated brass, alternatively, stays highly polished and shiny, offering a sharper, more modern contrast against the dark background.
Decorative Elements
- Brass pedestal bowl or footed tray
- Solid brass salt and pepper grinders
- Fresh, bright produce (like lemons or green apples)
- White ceramic or linen elements for stark contrast
Styling Steps
- Identify the darkest area of your granite counter that still receives some ambient kitchen light.
- Place the brass pedestal bowl in this area; the metallic finish acts as a mirror to bounce light into the shadows.
- Fill the bowl with bright, highly contrasting produce—lemons work best against dark stone to create instant visual pop.
- Position the brass salt and pepper grinders nearby, maintaining a cohesive metallic thread in that visual zone.
Pro-Tip: If your dark granite has warm brown or gold flecks, brass is your best friend. If it has cool gray or silver flecks, opt for polished nickel instead to harmonize with the stone’s undertones.

6. Contrast White Quartz with Matte Black Canisters

Save this modern minimalist styling idea to your Kitchen Aesthetics board!
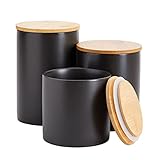
All-white kitchens risk looking like sterile operating rooms if they lack grounding visual anchors. Incorporating matte black kitchen canisters provides the necessary depth to break up the endless sea of white.
Understanding how to decorate white quartz kitchen counters requires balancing hard and soft elements. When comparing a glass canister set vs opaque ceramic jars, opaque matte black options protect light-sensitive ingredients like coffee beans from degrading in bright kitchens. Black accents also create strong geometric tension against honed quartz, creating a sophisticated, high-end visual aesthetic that commands attention.
Decorative Elements
- Set of 3 matte black kitchen canisters in varying heights
- Airtight wooden lids (acacia or walnut)
- Small wooden serving scoop
- Textured trivet or runner
Styling Steps
- Select a prominent stretch of white quartz counter that feels too sterile or empty.
- Group the three matte black canisters together in a tight cluster, not lined up in a rigid row.
- Place the tallest canister in the back, the medium to the left, and the smallest tucked in the front right to create a triangle of visual weight.
- Rest the wooden scoop against the smallest canister to introduce an organic shape to the hard geometric lines.
Pro-Tip: Before placing any metal objects permanently on white quartz, check the bottoms. Bare metal can leave microscopic gray scratch marks (metal transfer) on light quartz that are incredibly difficult to polish out. Always use felt pads.
7. Conceal Appliance Cords with Hardcover Cookbook Stands

Pin this genius cord-hiding hack to your Kitchen Solutions board!
Visible wall outlets and tangled wires completely destroy the aesthetic of a carefully designed kitchen. Using a hardcover cookbook display stand offers a brilliant solution for ugly appliance cord concealment while doubling as lifestyle art.
When establishing how to display cookbooks on kitchen counter without damage, physical placement is highly important. Interior photographers often use leading lines and large objects to hide electrical elements in professional staging. Ensure you select a cookbook with heavy paper stock; thin pages will rapidly curl and warp when exposed to the daily humidity fluctuations found near active cooking zones.
Decorative Elements
- Adjustable wooden or brass cookbook stand
- Visually appealing hardcover cookbook (heavy paper stock)
- Zip ties or velcro cord wraps
- Small decorative object (like a mortar and pestle)
Styling Steps
- Gather the excess slack from your appliance cords (toaster, blender, etc.) and bind them tightly with a velcro wrap.
- Push the bundled cords flush against the backsplash directly beneath the wall outlet.
- Position the cookbook stand directly in front of the outlet and cord bundle, ensuring it’s far enough from the sink to avoid water splashes.
- Open the cookbook to a page with beautiful photography and use the stand’s page holders to keep it flat.
- Place a small mortar and pestle next to the stand to anchor the vignette.
Pro-Tip: Never display vintage or highly valuable cookbooks near the stove. The combination of ambient humidity, airborne cooking oils, and heat will warp the spine and stain the pages within weeks.

8. Elevate Sink Side Aesthetics with Amber Glass Dispensers

Save this easy sink upgrade to your Kitchen Organization board!
The wet zone around the sink is often the ugliest area of the kitchen, cluttered with neon plastic bottles and soggy sponges. Introducing amber glass soap dispenser bottles instantly creates a spa-like aesthetic while organizing messy dish soap and sponges efficiently.
Pairing a sink caddy + natural scrub brush completely changes the tactile experience of washing dishes. You must use a sealed concrete or silicone tray beneath the bottles; standing water trapped beneath glass will etch mineral rings into porous stone countertops and completely rot butcher block worktops within days.
Decorative Elements
- Two amber or frosted glass pump dispensers (one for hand soap, one for dish soap)
- Small waterproof tray (silicone, sealed concrete, or ceramic)
- Natural wood dish brush (toss the neon plastic sponges)
- Small ceramic dish for holding rings/jewelry
Styling Steps
- Recycle your plastic, brightly colored commercial soap bottles.
- Fill your glass dispensers and place them on the waterproof tray—never directly on the countertop.
- Position the tray on the side of the sink opposite your dominant hand to keep the work-zone clear.
- Rest the wooden dish brush directly on the tray, and place the small jewelry dish in front of the dispensers.
Pro-Tip: If you have hard water, skip the clear glass dispensers. Within a week, water spots and internal soap scum will make them look cloudy and dirty. Amber or opaque ceramic dispensers hide this completely.

9. Anchor the Kitchen Island with an Oversized Ceramic Fruit Bowl

Pin this stunning island centerpiece idea to your Kitchen Decor board!
A sprawling, empty kitchen island often feels barren and uninviting without a focal point. Utilizing an oversized kitchen island centerpiece anchors the vast flat surface and draws the eye directly to the center of the room.
When anchoring kitchen island centerpieces, interior designers rely heavily on proportional scaling. A standard-sized bowl on an eight-foot island looks like a forgotten piece of clutter. Instead, select large organic ceramic fruit bowls that occupy roughly 10% to 15% of the visual depth of the island. This ensures the piece commands the space while still leaving plenty of room for dining and entertaining.
Decorative Elements
- One oversized, textured ceramic or wooden bowl (14 to 18 inches in diameter)
- Large batch of single-color produce (e.g., all lemons, all artichokes, or all pomegranates)
- Optional: Textured table runner
Styling Steps
- Find the exact geometric center of your kitchen island to ensure symmetry from all viewing angles (living room, stove, and dining area).
- Place the bowl directly in the center, or anchor it slightly over a folded linen runner to add a textile element.
- Fill the bowl completely with a single type of produce. Mixing fruits creates visual noise; massing one color creates high-impact art.
- Ensure the height of the bowl and fruit does not obstruct the sightline between the cook in the kitchen and guests in the living room.
Pro-Tip: If you hate buying fresh fruit just for display, use high-quality faux artichokes or moss balls. They provide incredible organic texture, fill massive bowls effortlessly, and never rot or attract fruit flies.

10. Display Everyday Utensils in Textured Stoneware Crocks

Save this functional storage solution to your Cooking Zone board!
Shoving thirty mismatched plastic spatulas into a jar looks messy, no matter how beautiful the container is. Investing in textured stoneware utensil crocks demands that you edit and curate your visible tools for proper utensil holder styling.
When comparing a ceramic utensil crock vs wall magnetic strip, crocks offer a softer, grounded aesthetic that hides the less attractive handles. To achieve perfect proportions, follow the handle-height rule: your displayed wooden spoons should extend exactly 1.5 to 2 times the height of the crock. This prevents the display from looking top-heavy or tipping over during a busy cooking session.
Decorative Elements
- Heavyweight textured stoneware or ceramic crock (at least 6 inches wide)
- Curated set of wooden spoons and spatulas (similar wood tones)
- Curated set of stainless steel tools
- Small folded felt pad for the bottom
Styling Steps
- Edit your utensils aggressively. Remove brightly colored silicone spatulas, melted plastic spoons, and mismatched items to a hidden drawer.
- Place a small felt pad inside the bottom of the empty crock to protect the ceramic and muffle the sound of dropping tools.
- Group all wooden tools toward the back and stainless tools toward the front to create intentional texture zones within the crock.
- Position the crock 12 to 18 inches to the right (or left, if left-handed) of your stovetop for perfect ergonomic access.
Pro-Tip: A crock full of 30 jammed utensils looks messy no matter how beautiful the pottery is. Cap your displayed utensils at 8 to 10 essential tools, and let the rest live in a drawer.

11. Introduce Living Greenery with Potted Culinary Herbs

Pin this fresh, biophilic design idea to your Kitchen Greenery board!
Hard cabinetry lines and stone surfaces can make a kitchen feel rigid and unwelcoming. Adding culinary herb potted planters softens these edges, effectively incorporating natural living greenery into your functional cooking space.
Choosing real potted herbs vs faux greenery counter decor embraces biophilic design principles that connect indoor environments to nature. Herbs like basil, rosemary, and thyme tolerate the temperature fluctuations near a sunny sink window quite well. Avoid delicate herbs like cilantro on the counter, as they will rapidly bolt and die when exposed to the typical warmth of an active kitchen.
Decorative Elements
- 1 or 2 distressed terracotta or glazed ceramic pots with drainage holes
- Matching waterproof saucers
- Living culinary herbs (Basil, Rosemary, or Thyme)
- Small metallic herb shears
Styling Steps
- Identify the countertop area that receives the most indirect natural sunlight (usually near the sink window).
- Repot grocery store herbs into aesthetic terracotta pots—never leave them in the ugly plastic nursery sleeves.
- Ensure the waterproof saucer is robust; leaking water under a pot will permanently stain quartz and rot wood.
- Place the metallic herb shears next to the pot as a decorative, functional accent that encourages daily harvesting.
Pro-Tip: Kitchens experience massive temperature swings from ovens and boiling water. Keep your herbs away from the immediate stove zone, or the radiant heat blasts will crisp the leaves within 48 hours.

12. Stage a Clutter-Free Prep Zone Next to the Stove
Save this functional design rule to your Kitchen Layouts board!
The most overlooked aspect of interior design is knowing where to leave things completely bare. Purposefully clearing meal preparation pathways solves the daily frustration of insufficient kitchen counter prep room.
By adhering to spatial clearance zones around cooktops, you prioritize function over form. The National Kitchen & Bath Association (NKBA) guidelines recommend a minimum of 36 inches of continuous, clear countertop space for primary prep zones. Keeping this area empty represents powerful negative space utilization on countertops, providing a visual break that makes the entire kitchen feel larger, cleaner, and highly functional.
Decorative Elements
- Minimalist olive oil cruet
- Small wooden salt cellar
- Exactly zero other items (preserving 36 inches of negative space)
Styling Steps
- Identify your primary prep zone (usually the expanse of counter between the sink and the stove).
- Relocate all decorative trays, knife blocks, and appliances away from this specific 36-inch zone.
- Push the strictly essential cooking elements (like the oil cruet and salt cellar) completely flush against the back wall.
- Wipe the expanse down. The gleaming, empty surface acts as a visual break in the kitchen, allowing the eye to rest and providing massive functional value.
Pro-Tip: In interior styling, we call this “negative space.” If every inch of your countertop is styled with vignettes, trays, and plants, the room feels like a crowded antique shop rather than a high-end, functional kitchen.

13. Organize Oils and Spices with a Wooden Lazy Susan
Pin this spinning storage hack to your Countertop Organization board!
Cooking oils and daily spices are the messiest, most frequently accessed items in the kitchen. Using a lazy susan turntable organizer for arranging oil cruets and spice cellars prevents greasy bottles from leaving permanent rings directly on the stone.
When analyzing a lazy susan vs rectangular decorative tray, turntables solve deep-corner access issues perfectly. Because heavy glass oil bottles weigh down the wood, you must ensure the lazy susan you purchase has high-capacity steel ball bearings; otherwise, the mechanism will grind, jam, and eventually break under the pressure of daily cooking use.
Decorative Elements
- 10 to 12-inch acacia or walnut wood lazy susan with a slight lip
- Matching glass oil cruets
- Uniform glass or ceramic spice jars
- Wooden pepper mill
Styling Steps
- Place the lazy susan in the corner or near the stove, ensuring it has enough clearance from the wall to spin freely.
- Position the tallest, heaviest items (oil and vinegar cruets) dead center over the ball bearings to balance the weight.
- Arrange the smaller spice jars and pepper mill around the perimeter.
- Ensure the lazy susan you choose has a slight raised lip—this prevents glass bottles from flying off when spun quickly during meal prep.
Pro-Tip: Never put a lazy susan right up against the stove edge. The radiant heat will warp the wooden base over time, ruining the spinning mechanism and making the turntable wobbly.

Key Takeaways: Your Quick Guide to Kitchen Countertop Decor Ideas
To successfully manage kitchen counter organization, you must combine strict functionality with intentional aesthetics. These key principles will ensure your space remains beautiful and usable year-round.
- Trays anchor the chaos – Corralling essentials on trays transforms loose clutter into an intentional vignette, creating a single visual footprint that is easier to clean around.
- Vertical layering builds depth – Layering wooden cutting boards against the backsplash draws the eye upward, adding warm organic texture without consuming flat prep space.
- Protect porous stone immediately – Always use a tray or a lazy susan turntable organizer beneath oil cruets and soap dispensers to prevent permanent staining on marble and granite surfaces.
- Contrast is mandatory – If you have dark countertop decor, bounce light using brass accents; if you have white quartz, ground the space using matte black canisters.
- Respect the 36-inch rule – Maintain at least 36 inches of completely bare kitchen perimeter prep station to ensure the space remains highly functional for daily cooking.
- Scale up for islands – An oversized ceramic fruit bowl works best as a kitchen island centerpiece; small items look like forgotten clutter on large, flat expanses.
- Lighting dictates corner styling – When optimizing awkward kitchen counter corners with tiered risers, ensure your top-tier items clear your under-cabinet lighting fixtures to prevent heat damage.
FAQs About Kitchen Countertop Decor Ideas
Here are expert answers to the most common questions regarding how to manage clutter and style tricky countertop layouts.
How to decorate kitchen counters without clutter?
To decorate kitchen counters without clutter, limit decor strictly to functional items grouped onto grounding elements like wooden trays or marble risers.
Instead of adding purely decorative trinkets, elevate the everyday items you already use. Swap plastic soap bottles for amber glass, use aesthetic ceramic utensil crocks, and lean beautiful cutting boards against the backsplash. This ensures every item serves a culinary purpose while maintaining a curated aesthetic.
What should you display on your kitchen counters?
You should display only high-use culinary items, anchored by decorative trays, alongside one or two organic elements like potted herbs or a fruit bowl.
Interior designers recommend displaying wooden cutting boards, a styled coffee station, matching spice or oil cruets, and your most frequently used cooking utensils. Hide small appliances like toasters and blenders in cabinets to preserve visual breathing room and maximize prep space.
How do you style a kitchen countertop corner?
Style a kitchen countertop corner using a tiered riser or a tall, heavy-bottomed vase to utilize the vertical space without consuming the primary work area.
Deep corners are notorious dead zones that attract clutter. Placing a two-tier marble or wood shelf in the corner allows you to neatly stack small jars, tea canisters, or a small plant, drawing the eye upward and making the recess look intentional rather than neglected.
What looks good on dark kitchen countertops?
Reflective metals like brass or copper, warm natural woods, and crisp white ceramics look exceptionally good on dark granite or soapstone countertops.
Dark stone absorbs light, which can make a kitchen feel heavy and closed-in. By introducing a bright brass pedestal bowl, light-toned oak cutting boards, or stark white textured vases, you create high-contrast focal points that bounce ambient light back into the room.
How to decorate white quartz kitchen counters?
Decorate white quartz kitchen counters using high-contrast elements like matte black metal canisters, warm terracotta pottery, and rich walnut wood tones to prevent a sterile appearance.
While white quartz looks clean, an all-white kitchen can quickly feel like an operating room. Introduce organic textures and grounded, earthy colors to add visual warmth and depth, being careful to always use felt pads under metal objects to prevent scratching the stone.
What decor pieces belong on a kitchen island?
A kitchen island requires a single, oversized decor piece, such as a large ceramic bowl filled with fresh fruit or a tall, wide vase featuring seasonal branches.
Because islands offer massive, flat surface areas, grouping small trinkets on them makes the space look messy and out of proportion. A solitary, large-scale centerpiece anchors the room, provides a visual focal point, and is easy to move when you need the entire island for dining or prep.
How many items should be on a kitchen counter?
Interior styling principles suggest leaving at least 30% to 40% of your total kitchen counter space completely bare to balance decor with functional negative space.
Rather than counting individual items, group your essentials into 3 or 4 distinct “vignettes” (like a coffee station, a sink tray, and a stove-side crock). Keep the main 36-inch food prep zone between the sink and stove entirely empty for daily culinary tasks.
What is the rule of three in counter styling?
The rule of three is a design principle stating that objects grouped in odd numbers—specifically threes—are more visually appealing and memorable than even-numbered groupings.
When styling a countertop tray, you might combine one tall item (an oil cruet), one medium item (a salt cellar), and one short, organic item (a small plant). This creates an asymmetrical triangle of visual weight that forces the eye to move smoothly across the arrangement.
How do you make kitchen counters look expensive?
Make kitchen counters look expensive by decanting commercial products into uniform glass dispensers, eliminating paper clutter, and utilizing heavy, natural materials like stone, brass, and solid wood.
Luxury is found in cohesive, intentional details. Removing brightly colored plastic packaging, hiding appliance cords behind hardcover cookbooks, and limiting the color palette of your exposed tools will instantly elevate the perceived value of your entire kitchen.
How to balance kitchen counter decor and prep space?
Balance decor and prep space by confining all styled elements to the perimeters, corners, and backsplashes, strictly protecting a 36-inch continuous clearance zone for cooking.
Functional design requires strict zoning. Keep your heavy cutting boards leaning against the back wall and your utensil crocks tightly grouped near the stove edge. By treating the front-center of your counters as a “no-decor” zone, you achieve aesthetic appeal without sacrificing workflow.
Final Thoughts on Kitchen Countertop Decor Ideas
Mastering kitchen countertop decor ideas ultimately comes down to a single philosophy: if it earns a permanent spot on your counter, it must be both beautiful and functional. You do not need to strip your kitchen bare to achieve a clean aesthetic, nor do you need to crowd it with purely ornamental knick-knacks. By corralling your everyday tools onto textured trays, leaning warm wooden boards against your backsplash, and upgrading your utilitarian soap dispensers to amber glass, you instantly transform visual clutter into intentional design.
The most professionally curated kitchen counters rely heavily on negative space. Respecting that 36-inch clearance zone for meal prep ensures your kitchen remains a workspace first and a showcase second. Remember to match your styling materials to your stone—bouncing light off dark granite with brass, and warming up stark white quartz with rich woods and matte blacks.
Look at your kitchen right now. Which zone is currently collecting the most visual clutter, and which of these thirteen styling techniques are you going to implement first to reclaim that space?
Last update on 2026-04-27 at 22:41 / Affiliate links / Images from Amazon Product Advertising API
