
As an Amazon Associate KitchenwareSets.com earns from qualifying purchases.
5 Simple Kitchen Styling Ideas for a Modern Home for Home Cooks
Is your kitchen feeling a little uninspired? That cluttered countertop or blank wall can make even the best cooking space feel like a chore. You want a kitchen that’s both beautiful and practical, but where do you even start?
Kitchen styling is the art of arranging functional items and decorative accents in your kitchen to create a cohesive, inviting look that also supports your daily cooking needs. It’s about balancing form and function by using everyday objects like trays, jars, cookbooks, and plants to add personality without sacrificing usability. This approach transforms your culinary space into a place you’ll love spending time in.
Drawing from verified styling methods and professional design principles, this guide will walk you through five simple, zone-by-zone ideas to refresh your modern kitchen. You’ll discover actionable steps to style your countertops, island, open shelves, stove area, and window sill – all without a full remodel. By the end, you’ll feel confident creating a curated, functional kitchen that truly works for you.
Contents
show
Discover Simple Kitchen Styling: Transform Your Modern Home Cooking Space
Before we dive into the five specific zones, it helps to understand the core idea: kitchen styling isn’t about adding more stuff – it’s about editing what you have and arranging it with intention. Professional designers use principles like the rule of threes, visual weight, and negative space to create vignettes that feel balanced and effortless. For the home cook, this means your everyday tools become part of the decor. A wooden tray, a ceramic oil cruet, a stack of cookbooks – these items, when grouped thoughtfully, can turn a dull countertop into a focal point.
The key is to treat each area of your kitchen as a mini stage. Start with one zone that feels most manageable (maybe the window sill) and build confidence. As you style, ask yourself: “Does this item earn its place here?” If it’s not useful or beautiful, it should go. This mindset shift is what separates a cluttered kitchen from a styled one.
Expert Insight: “Many home cooks buy trendy decor they never use,” says ASID designer Maria Smith. “Instead, focus on functional decor – items you touch daily. A fruit bowl, a kettle, a salt cellar. When these are arranged thoughtfully, your kitchen naturally looks stylish.”
Below are the five zones you can transform with simple, actionable steps.
1. Style Your Countertop Vignette with Everyday Objects

Pin this vignette idea to your ‘Dream Kitchen’ board for easy reference!
Your countertop is prime real estate. The goal is to create a small, intentional arrangement – a countertop vignette – using objects you already own. This anchors the space visually and keeps it from feeling bare or cluttered.
What You Need
- A slim wooden tray (choose one that fits in the unused corner of your counter)
- A ceramic oil cruet or a small vase
- 2–3 cookbooks (stack horizontally or vertically for height)
- A small potted succulent or a sprig of fresh herbs in water
- A glass jar for utensils (optional but adds height variation)
Steps
- Anchor the vignette with the wooden tray – place it on the counter, about 4 inches from the backsplash.
- Layer the cookbooks inside the tray on the left side, stacking them flat or standing one up.
- Position the cruet or vase on the right side, slightly overlapping the books.
- Add the succulent or herb jar at the front-right corner to introduce organic texture.
- Balance with a utensil jar behind the books if you need extra height. Step back and adjust spacing – items should feel connected but not crowded.
Pro-Tip: According to interior design expert Maria Smith, always use the rule of threes for countertop vignettes – three main items grouped together feel more balanced than four or five. Varying heights (short, medium, tall) creates visual interest.

2. Dress Your Kitchen Island with a Functional Bench Scape

Save this island styling idea to your ‘Kitchen Goals’ board – you’ll use it every day!
Your kitchen island is often the heart of casual dining and prep. The challenge: keep it functional while adding style. A functional bench scape uses items you actually use – fruit, napkins, a pitcher – so the island remains ready for action.
Supplies Needed
- A large ceramic or wooden bowl (for fruit or decorative items)
- A pottery pitcher or large vase (for dried flowers or a single branch)
- Fresh fruit (apples, lemons, or pears – they double as snacks)
- A set of linen napkins (folded or stacked)
- (Optional) a small wooden cutting board or wine corkscrew
Instructions
- Position the large bowl at one end of the island (closest to where you usually sit). Fill it with fruit.
- Place the pitcher at the opposite end, slightly angled inward. Add dried lavender or a leafy branch.
- Stack the linen napkins on the small cutting board beside the bowl.
- Make sure the center of the island remains clear – you need counter space.
- Adjust the arrangement so it doesn’t block your view of the kitchen. Step back and confirm the grouping feels balanced when seated.
Pro-Tip: For maximum visual impact, use items you touch daily: fruit you eat, napkins you use. This “functional decor” method keeps your island beautiful and useful – no dust-collecting knickknacks.

3. Curate Your Open Shelves with Layered Collections

Pin this open shelf styling idea to your ‘Kitchen Decor’ board for instant inspiration!
Open shelves are a chance to show off your personality, but they can quickly become messy. The secret is layered collections – grouping items by color, material, and function, while leaving breathing room.
What You Need
- A set of 3–5 matching dinner plates or bowls (stack or lean)
- A clear glass carafe or pitcher
- A small wooden box or ceramic canister (for tea bags or utensils)
- A small trailing plant (like pothos or a small fern)
- A small framed art print or a wooden cutting board for vertical interest
Steps
- Clear the shelf completely. Only put back items you use or love.
- Start with the tallest item at the back – lean the framed print against the wall or place the carafe.
- Stack plates in the middle, slightly offset from the print. Place the wood box in front of the plates.
- Position the trailing plant at one end, draping over the shelf edge to add organic softness.
- Step back and assess negative space. Remove any item that feels cramped. The goal is a balanced “breathing” arrangement.
Pro-Tip: The rule of threes applies on shelves too: group items in odd numbers (3 plates, 1 carafe + 2 canisters) and vary heights. Leave at least 2–3 inches of empty space between groups to avoid clutter.
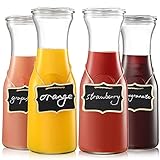
4. Organize Your Stove Area with Aesthetic Accessibility

Save this stove area styling idea to your ‘Kitchen Organization’ board – it’s both beautiful and practical!
The stove area is your cooking command center. Styling it means keeping essentials within arm’s reach while making it look intentional. Think functional theater – a place where tools become decoration.
Supplies Needed
- A small enamel kettle or tea pot (that you actually use)
- A wooden salt cellar or small ceramic dish
- A jar or canister for wooden spoons, spatulas, etc.
- A mortar and pestle (optional but adds texture)
- A small plant or herb pot (if space allows)
Steps
- Clear the stove top completely. Remove everything that isn’t used daily (e.g., dirty sponges, excess oils).
- Place the kettle on one back burner – it adds height and is used daily.
- Position the salt cellar beside the stove within arm’s reach.
- Set the utensil jar on the counter next to the stove, not on the cooktop itself.
- Add the mortar and pestle on the opposite side of the stove, only if you have space. Avoid overcrowding.
- Stand back – the stove should look ready for action, not cluttered.
Pro-Tip: Heat-proof everything! Never place plastic or wood items directly on the stove top while cooking. The kettle and mortar are safe because they sit on cold burners. Use the stove area only for items that can withstand occasional heat splash.

5. Brighten Your Kitchen Window Sill with a Mini Garden

Pin this window sill idea to your ‘Kitchen Plants’ board – it’s the easiest way to bring life into your space!
A window sill is often overlooked, but it’s perfect for a mini garden. Adding plants + pots softens the hard kitchen surfaces and brings natural texture. Herbs are especially rewarding – you can snip them while cooking.
Supplies Needed
- 3 small terra cotta pots (or matching planters) with succulents or herbs
- A small watering can (glass or metal)
- A glass jar (for a single herb cutting like mint or basil)
- A small wooden tray (optional, to catch water)
Steps
- Choose your sill – make sure it gets indirect sunlight. Clean the area.
- Place the three pots in a row, evenly spaced. Use a tray underneath if the sill is wood.
- Position the watering can at one end as both tool and decor.
- Fill the glass jar with water and add a single mint or basil cutting. Place it at the opposite end.
- Water the plants based on their needs (succulents only every 2 weeks). Enjoy the living decor.
- Rotate the plants occasionally so all sides get light.
Pro-Tip: Herbs like basil and mint are perfect for kitchen sills because you can snip them while cooking. Rotate the plants every week to prevent leaning. A small wooden tray under pots protects the sill from water rings – essential for renters.

Key Takeaways: Your Quick Guide to Kitchen Styling
Kitchen styling is the process of arranging functional and decorative objects in a kitchen to create a visually cohesive and practical space that supports daily cooking.
- Focus on zones, not the whole room at once – style your countertop, island, open shelves, stove area, and window sill individually for a cohesive but uncluttered look.
- Use the “Rule of Threes” for vignettes – group items in odd numbers (preferably three) with varying heights to create visual interest that feels balanced.
- Incorporate functional decor – choose items you actually use daily (fruit, cookbooks, oil, kettle) to keep styling practical, not dust-catching.
- Leave negative space – shelves and counters need breathing room; about 20% empty space prevents clutter and allows each item to shine.
- Mix materials and textures – combine wood (warm), ceramic (smooth), glass (transparent), and plants (organic) for a layered, expensive look.
- Your stove area is a theatre stage – keep only essentials (kettle, salt, utensils) within reach and heat-safe; remove dirty sponges and excess bottles.
- Start with one zone and build confidence – pick the easiest (window sill) and expand over time. Small changes make a big visual impact.
People Also Ask About Kitchen Styling
How do I style kitchen countertops on a budget?
Style kitchen countertops on a budget by using items you already own – arrange a wooden cutting board, a jar of utensils, a cookbook, and a plant or fresh fruit. The key is editing: remove everything unnecessary, then create one small vignette in a corner. Thrift stores offer cheap ceramic canisters and wood trays. Avoid buying trendy decor; functional items (oil, salt, spices) are the best decor.
How to style kitchen open shelves?
Style open shelves with the 40-40-20 rule: 40% functional storage (plates, bowls, glasses), 40% decorative items (jars, plants, art), and 20% empty space. Start by placing the tallest item at the back (carafe, vase), then layer shorter items in front. Groups of three items, varying heights, avoid overcrowding. Use neutral dishware to create a cohesive palette and add a trailing plant for organic softness.
How to style a kitchen island bench?
Style a kitchen island bench to be both pretty and functional by placing a large bowl of fruit or decorative items at one end and a pitcher of flowers at the other. Keep the center completely clear for meal prep. Use a small wooden cutting board or linen napkins to add texture. Avoid covering more than 30% of the island surface – it must remain usable for cooking.
What should I put on my kitchen countertops?
Put only everyday essentials on your kitchen countertops to avoid visual clutter. Essential items include a coffee station, a knife block, a utensil holder, a fruit bowl, and a small plant. Group them into one or two vignettes using a tray to create a collected look. Everything else should be stored in cabinets. The fewer items on the counter, the more spacious and stylish the kitchen feels.
How do I make my kitchen look expensive?
Make your kitchen look expensive without spending much by focusing on layering, texture, and editing. Use materials that feel rich: a marble cutting board, wooden utensils, ceramic vases. Group items in odd numbers and vary heights. Remove plastic packaging, mismatched containers, and excess small appliances. A clear countertop with intentional vignettes signals luxury. Add warm lighting (lamps or under-cabinet lights) to elevate the mood.
How to style a stove area?
Style your stove area by keeping only heat-safe, daily-use items on or near the cooktop. Place a pretty enamel kettle on a back burner, a wooden salt cellar beside the stove, and a ceramic jar for spoons. Remove sponges, excess oil bottles, and anything plastic. The goal is a functional theater – items should look arranged but be fully usable. Keep the cooktop itself clear when not in use.
How to style a kitchen window sill?
Style a kitchen window sill with a mini garden of succulents or herbs in small terra cotta pots. Add a small watering can and a glass jar with a single herb cutting. Group the pots in odd numbers (three works best) and leave space between them. Choose plants that thrive in indirect light – succulents, pothos, or basil. Rotate them weekly for even growth.
How to style glass front kitchen cabinets?
Style glass front kitchen cabinets by curating dishware and glassware as display pieces – arrange matching plates and bowls in neat stacks, and group clear glassware together. Use a consistent color palette (all white or all neutral) for a cohesive look. Add a small decorative item like a ceramic candlestick or a small plant on a lower shelf. Avoid overcrowding; leave some shelves partially empty for visual breathing room.
How to declutter and style a kitchen?
Declutter and style your kitchen in three steps. First, remove everything from counters. Sort items into three piles: daily use, weekly use, and store away. Second, return only daily-use items to countertops, grouping them in vignettes using trays. Third, keep 20% of shelf space empty. Repeat the process for each zone. This creates an airy, intentional look while preserving function.
What kitchen styles are timeless?
Timeless kitchen styles include modern farmhouse, traditional, and Scandinavian minimalism. Modern farmhouse uses shaker cabinets, apron sinks, and open wood shelving. Traditional relies on raised-panel cabinetry, granite counters, and classic hardware. Scandinavian emphasizes light wood, white walls, and simple functional decor. All three avoid trendy colors and patterns, making them easy to refresh with small styling updates.
Final Thoughts on Kitchen Styling
Kitchen styling doesn’t require a full renovation or a decorator’s budget. As we’ve shown through these five simple ideas, the most impactful changes come from thoughtful editing, intentional arrangement, and a focus on functional beauty. By styling your countertop, island, shelves, stove area, and window sill zone by zone, you create a cohesive and inviting space that supports your cooking rhythm.
Remember the principles: odd-numbered groupings, varied heights, negative space, and a mix of materials. Use what you already own first. Start with the easiest zone – perhaps your window sill with a few succulents – and let your confidence grow. Professional interior designers call this “styling from the ground up,” and anyone can do it.
The most sophisticated kitchens are not the most expensive – they are the most curated. Take a step back, look at your kitchen with fresh eyes, and make one small change today. Which zone will you start with? Let us know in the comments below – we’d love to see your kitchen transformation.
Last update on 2026-09-12 at 11:30 / Affiliate links / Images from Amazon Product Advertising API
