
As an Amazon Associate KitchenwareSets.com earns from qualifying purchases.
Modern Farmhouse Green Kitchen Ideas: 13 Stunning Designs
Are you tired of your all-white or gray farmhouse kitchen feeling a little… lifeless? You know the look you want—warm, cozy, and full of character—but you’re craving a color that feels fresh and personal.
A modern farmhouse green kitchen combines sage, olive, or forest green cabinetry with warm wood tones, brass or matte black hardware, stone or butcher block countertops, and rustic elements like apron sinks and open shelving. It balances cozy farmhouse charm with clean, contemporary lines, creating a timeless yet on-trend look that feels both grounded and inviting.
Drawing from comprehensive analysis of current design trends and proven color theory, we’ve curated 13 distinct green kitchen designs that are achievable and stunning. In this guide, you’ll discover exact material pairings, step-by-step recreation steps, and pro tips to help you build a kitchen that feels uniquely yours.
Contents
show
What Defines a Modern Farmhouse Green Kitchen? (And Why It’s 2025’s Top Design Choice)
A modern farmhouse green kitchen is a deliberate blend of two beloved aesthetics: the rustic warmth of a traditional farmhouse and the clean, streamlined simplicity of modern design. The unifying element is a green color palette—ranging from soft sage to deep forest—that brings a sense of nature, calm, and personality into the heart of the home. This isn’t a rustic kitchen that stumbled into green paint; it’s a carefully curated space where every material and finish is chosen to complement and contrast with the chosen shade.
Think of it as the perfect marriage between a cozy, well-worn country kitchen and a sleek, functional contemporary space. The green is the anchor, and it’s supported by a cast of essential design elements. These include classic shaker cabinets, the central farmhouse sink (often an apron-front style), warm wood tones on floors or countertops, and natural stone or quartz surfaces. Hardware, usually in brass or matte black, serves as the jewelry, while architectural details like open shelving and sliding barn doors add that unmistakable farmhouse soul.
The reason this style is dominating 2025 design trends is simple: it offers a deep, personal alternative to the neutral-toned kitchens we’ve seen for years. It allows homeowners to invite the outdoors in, creating a space that feels simultaneously up-to-date and warmly familiar. The key is layering textures—wood, metal, stone, and painted surfaces—to create depth and warmth, ensuring the space doesn’t feel flat or monotone. This is a style that feels personal, grounded, and surprisingly easy to live with.
13 Stunning Modern Farmhouse Green Kitchen Ideas – From Sage to Dark Forest
In this gallery, you’ll find 13 fully fleshed-out designs. Each idea covers a unique shade of green, from the softest sage to the richest hunter, and pairs it with specific materials, hardware, and design elements. Think of these as your blueprints: each design includes a shopping list, a step-by-step guide to recreate the look, and a pro tip drawn from real-world expertise.
1. Sage Green Shaker Cabinets with Brass Hardware

Pin this timeless sage + brass combo to your ‘Dream Kitchen’ board!
This is the quintessential modern farmhouse look: soft, inviting, and effortlessly chic. The combination of sage green shaker cabinets with polished brass hardware is a match made in design heaven. The warmth of the brass perfectly offsets the cool, calming undertones of the sage, creating a balanced and highly sophisticated space. This pairing works so well because the brass adds a touch of luxury without feeling ostentatious, while the sage keeps the look grounded and natural.
What You Need
- Shaker-style cabinet doors with MDF or poplar construction
- Sage green cabinet paint (e.g., Benjamin Moore Sage 470, Sherwin-Williams Clary Sage) – brush or spray application
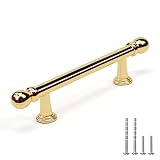
- Polished brass cabinet pulls (3-inch bar pulls for drawers, 1-inch knobs for doors); look for solid brass with lacquer finish to slow tarnish
- White marble or quartz countertops (Carrara or Calacatta style) – 2 cm or 3 cm thickness
- Fireclay apron-front sink (30” x 18”, undermount or drop-in)
- Brass gooseneck faucet (widespread or single-hole)
- Painting supplies: primer (stain-blocking), high-quality synthetic brushes, roller, painter’s tape, drop cloths
Step-by-Step Directions
- Prep your cabinets – Remove doors and hardware, clean surfaces with TSP degreaser, sand lightly with 120-grit sandpaper, and apply a high-adhesion primer. Let dry 24 hours.
- Paint the cabinet boxes and doors – Apply two to three thin coats of sage green paint, sanding lightly between coats with 220-grit. Use a foam roller for flat panels and a brush for frames. Let cure 48 hours.
- Reinstall hardware – Measure carefully and drill pilot holes for the brass pulls. Attach using screws provided, ensuring even spacing.
- Countertops – Work with a fabricator to template and install marble or quartz. Seal marble every 6 months if using natural stone.
- Install sink and faucet – Drop the fireclay sink into the cutout, seal with silicone, and mount the brass faucet according to manufacturer instructions.
- Style your kitchen – Add open shelving with white dishes, a wooden cutting board, and a small ceramic vase with dried flowers.
Pro-Tip: For a budget-friendly alternative to marble, look at engineered quartz with subtle veining (e.g., Cambria ‘Berwyn’ or Caesarstone ‘Blizzard’). It offers the same look with zero maintenance and better stain resistance.
2. Deep Forest Green Kitchen Island with Marble Countertop

Save this dark green island design to your ‘Kitchen Island Goals’ board!
If you want a bold, dramatic statement without committing to an entire kitchen of dark cabinetry, a painted island is your best bet. A deep forest green kitchen island acts as the powerful anchor of the room, drawing the eye and creating a sophisticated focal point. Paired with a pristine white marble countertop, the contrast is striking. The marble’s bright, airy quality prevents the dark green from feeling heavy, while the wood floors and brass pendant lights add warmth and texture.
What You Need
- Kitchen island base (custom-built or prefab, approx. 8 ft long x 3 ft wide x 36 in high)
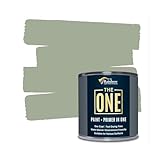
- Deep forest green paint (e.g., Benjamin Moore Forest Green 2136-20, Sherwin-Williams Pewter Green) – satin finish
- Honed Carrara marble slab (2 cm thickness, with subtle grey veining)
- Large white farmhouse apron sink (30” x 18”, for island installation)
- Brass gooseneck pendant lights (two fixtures, with single Edison bulbs, adjustable heights)
- Butcher block or stainless steel prep surface (optional small section at one end)
- Primer, paint, brushes, painter’s tape
Step-by-Step Directions
- Design island dimensions – Make it large enough to accommodate the sink and prep zone. Allow 12” overhang for seating on one side.
- Build or modify island base – Ensure plumbing access for sink is already roughed in. Install the cabinet doors and frames onto the base.
- Paint island base – Sand, prime, and apply two coats of deep forest green paint. Use a satin finish for durability.
- Template and install marble countertop – Hire a fabricator. Include cutout for the sink. Seal marble with penetrating sealer before installation.
- Drop in the sink – Set the fireclay sink into the marble cutout with silicone caulk. Attach plumbing.
- Hang pendant lights – Center them over the island, 30–36 inches above the countertop. Choose brass fixtures with adjustable cord lengths.
- Style – Add a wooden fruit bowl, a stack of white ceramic bowls, and a small vase with eucalyptus.
Pro-Tip: If natural marble is out of budget, use quartz in a marble-look pattern (e.g., Silestone ‘Summit White’). It accepts sink cutouts just as well and needs zero sealing.
3. Olive Green Cabinets with Warm Wood Open Shelving

Pin this olive + wood combo to your ‘Natural Kitchen Vibes’ board!
This design is for those who love a natural, earthy aesthetic. Olive green cabinets have a distinct yellow undertone that makes them incredibly warm and welcoming. They pair beautifully with natural wood, especially rich walnut. By using olive on the lower cabinets and warm wood open shelving above, you create a lovely visual balance: the weight of the color on the bottom is counterbalanced by the airy lightness of the shelves. The butcher block countertops tie the whole look together, adding even more organic texture.
What You Need
- Lower cabinet boxes with shaker doors (painted olive green)
- Olive green paint (e.g., Sherwin-Williams Olive Grove SW 7195, Behr Natural Green 410E)
- Walnut floating shelves – 1.5” thick, 8” deep, custom length, with concealed mounting brackets
- Butcher block countertop (maple or walnut, oiled with mineral oil)
- Brass bridge kitchen faucet (with side spray)
- White ceramic dinnerware (simple shapes)
- Terra cotta pots with herbs or succulents
- Screws, wall anchors, level
Step-by-Step Directions
- Paint lower cabinets – Remove doors, sand, prime, apply two coats of olive green paint in satin finish. Reattach doors with new handles (optional brass cup pulls).
- Install butcher block countertop – Measure and cut to fit. Sand edges smooth, and apply three coats of mineral oil (or use a cutting board wax). Let cure 24 hours.
- Mount open shelves – Locate studs, drill holes, attach brackets. Slide shelves onto brackets and secure with set screws.
- Style shelves – Start with the heaviest items (dinner plates) on bottom shelf, lighter bowls and mugs on top. Add plants at varied heights.
- Install faucet – Deck-mounted or wall-mounted brass bridge faucet. Connect water lines.
- Accessorize – Place a wooden cutting board leaning against the backsplash, and a small ceramic vase with rosemary on the counter.
Pro-Tip: Butcher block countertops require regular oiling – every 4-6 weeks initially, then as needed. Use mineral oil mixed with beeswax for a protective seal.

4. Two-Tone Green and White Farmhouse Kitchen

Save this two-tone green and white farmhouse kitchen to your ‘Kitchen Color Schemes’ board!
Want the best of both worlds? A two-tone green and white farmhouse kitchen gives you the personality of green with the freshness of white. This layout places sage green on the upper cabinets and white on the lower cabinets. This arrangement is a clever design trick: the darker color on top can make a low ceiling feel lower, so it’s best for spaces with standard or tall ceilings. If your ceiling is on the shorter side, you can reverse the scheme. The crisp white lowers keep the floor visually open and uncluttered, while the green brings the eye upward.
What You Need
- Set of standard shaker cabinets (upper and lower, separate)
- Sage green paint for uppers – (e.g., Farrow & Ball Green Smoke No. 47)
- White paint for lowers – (e.g., Benjamin Moore Chantilly Lace OC-65)
- White quartz countertops – (e.g., Silestone ‘Eternal’ or Caesarstone ‘Frosty Carrina’)
- Brass gooseneck faucet with side spray
- White ceramic subway tile backsplash (3”x6”, white with beveled edge)
- Primer, paint, brushes, roller, painter’s tape
Step-by-Step Directions
- Determine cabinet layout – Decide which boxes are upper vs. lower. Remove doors.
- Paint upper cabinets sage green – Sand, prime, apply two coats. Use a smooth roller for large flat panels.
- Paint lower cabinets white – Same process, separate brushes to avoid cross-contamination.
- Install countertop – Work with a fabricator for quartz. Include cutout for sink.
- Install backsplash – Apply white subway tile with bright white grout. Use spacers for uniform joints.
- Complete plumbing – Install brass gooseneck faucet.
- Style – Add a potted plant on the counter, a wooden fruit bowl, and a rug in a neutral pattern.
Pro-Tip: For a seamless transition between the two colors, paint the cabinet crown molding the same color as the upper cabinets. This visually extends the green upward and anchors the look.

5. Dark Green Lower Cabinets with Light Upper Cabinets

Pin this dark + light combo to your ‘Kitchen Contrast’ board!
For a more dramatic and grounded look, reverse the two-tone scheme. Dark green lower cabinets with light upper cabinets creates a powerful anchor for the room. The deep, rich color on the bottom makes the kitchen feel substantial and luxurious, while the white uppers and bright backsplash ensure the space remains light and airy. This arrangement is perfect for those who are less afraid of dark colors but still want a balanced, functional space.
What You Need
- Set of shaker cabinets (separate upper and lower)
- Hunter green paint for lowers (e.g., Benjamin Moore Hunter Green 2041-10)
- White paint for uppers (e.g., Sherwin-Williams Alabaster SW 7008)
- Soapstone countertop (dark charcoal, with subtle veins)
- White subway tile backsplash (3”x6” beveled)
- Brass bridge faucet
- Dark hardwood floors (engineered wood, 5” wide, espresso stain)
Step-by-Step Directions
- Prepare cabinets – Remove doors and hardware. Label all parts.
- Paint lowers dark green – Sand, prime with stain-blocking primer, apply two coats of hunter green in satin finish.
- Paint uppers white – Same process, using white paint in semi-gloss for easy cleaning.
- Install soapstone countertop – Soapstone is soft – hire a professional for fabrication and sealing.
- Tile backsplash – Apply subway tile to wall between counter and upper cabinets. Use white grout.
- Install faucet – Bridge faucet with side spray, brass finish.
- Flooring – If replacing, install dark hardwood planks before cabinets or as a floating floor over new subfloor.
Pro-Tip: Soapstone darkens over time. If you want to speed up the patina, apply mineral oil every few weeks during the first year. It protects while deepening the color.

6. Mint Green Accents in a White Rustic Kitchen

Pin this fresh mint + white kitchen to your ‘Bright Farmhouse’ board!
If you love the idea of green but aren’t ready for a full cabinetry commitment, this is your perfect starting point. A mint green accent in a white rustic kitchen is a low-risk, high-reward way to bring in color. Mint green is a historic color found in 1930s farmhouses, so it feels authentically vintage. Painting just the kitchen island or a single piece of furniture in mint creates a playful, charming focal point without overwhelming the space.
What You Need
- Existing or new kitchen island (painted white initially)
- Mint green paint (e.g., Sherwin-Williams Mint Condition SW 6755, Behr Fresh Guacamole P350-3)
- White shaker cabinets (already in place)
- Farmhouse apron sink
- Brass faucet with vintage design
- Mint green island stools (if no island, use a small side table)
- Open shelving (2-3 floating white shelves)
Step-by-Step Directions
- Paint the island mint green – Remove any hardware, sand, prime, apply two coats of mint green. Let cure 24 hours.
- Update hardware on white cabinets – Switch to brass cup pulls or knobs to tie in the brass faucet.
- Install open shelving – Mount white shelves on a wall. Decorate with white dishes, a few mint green plates, and small plants.
- Add mint green accessories – Replace dish towels, a runner rug, and a vase with mint tones.
- Complete the look – Add a wooden cutting board and a ceramic butter dish on the counter.
Pro-Tip: For a truly low-commitment accent, skip painting and use removable peel-and-stick wallpaper in a mint pattern on the island front. Temporary but effective.
7. Forest Green Cabinets with Butcher Block Countertops

Pin this wood + green combo to your ‘Earthy Farmhouse’ board!
This idea leans heavily into the natural, organic side of the farmhouse aesthetic. Forest green cabinets with butcher block countertops is a match made in earthy heaven. The deep, rich green of the cabinets feels like a walk in the woods, and it’s beautifully softened by the warm, natural grain of the wood countertops. Maple is a classic choice for butcher block; its light color provides a gentle contrast to the forest green, while its hardness makes it durable for a busy kitchen.
What You Need
- Forest green shaker cabinets (stock or custom, painted)
- Butcher block countertop (maple, 1.5” thick, edge-grain or end-grain)
- White apron sink (fireclay)
- Brass gooseneck faucet
- Mineral oil and beeswax countertop finish
- Backsplash – optional white beadboard or subway tile
Step-by-Step Directions
- Install cabinets – Mount base and wall cabinets. Level and secure to studs.
- Paint cabinets (if not pre-finished) – Sand, prime, apply forest green paint (e.g., Farrow & Ball Pigeon). Use eggshell or satin.
- Template and cut butcher block – Measure countertop area. For a seamless island, use one full slab. Cut sink hole with a jigsaw.
- Apply finish – Sand butcher block to 220 grit. Wipe on mineral oil, let soak, remove excess. Repeat three times over 48 hours.
- Install countertop – Set on cabinets. For a farmhouse look, allow 1/2” overhang on all sides.
- Install sink and faucet – Drop-in under-mount or top-mount with silicone seal.
- Maintain – Re-oil countertop monthly. Sand out any water rings with 320 grit and re-oil.
Pro-Tip: Butcher block is a food-safe surface but not ideal for raw meat – always use a cutting board. The block itself is perfect for bread and prep.
8. Sage Green Cabinets with Subway Tile Backsplash

Save this classic sage + subway tile look to your ‘Timeless Farmhouse Kitchen’ board!
This combination is the definition of timeless. Sage green cabinets with a subway tile backsplash is a classic for a reason. The look is clean, fresh, and never goes out of style. The sage green provides a soft, calming backdrop, while the bright white subway tile reflects light and opens up the space. This pairing is incredibly versatile and works with almost any countertop material, from marble to quartz to butcher block.
What You Need
- Sage green cabinets (existing or new)
- White subway tile (3”x6” beveled ceramic, white)
- White grout (unsanded for narrow joints)
- Marble or quartz countertop (white with subtle veining)
- Brass bridge faucet
- White fireclay apron sink
- Tile trowel, spacers, wet saw
Step-by-Step Directions
- Prepare countertop area – Remove old backsplash. Clean surface, apply backer board if needed.
- Tile installation – Start from bottom, use a level line. Apply thin-set mortar with notched trowel. Press tile into place, use 1/8” spacers.
- Cut tiles – Use a wet saw for edges. For outlet cutouts, mark and cut with a tile bit.
- Grout – Apply grout with a rubber float after 24 hours. Wipe off haze with a damp sponge.
- Seal grout – Apply a penetrating sealer to prevent staining.
- Install bridge faucet – Follow manufacturer instructions. Connect water supply lines.
- Style – Add a wooden cutting board and a leafy plant (e.g., a fern) on the counter.
Pro-Tip: If you’re tiling a large area, use a tile leveling system to avoid lippage. It’s worth the extra cost for a professional finish.

9. Olive Green Kitchen with Copper Accents

Pin this olive + copper combo to your ‘Warm Farmhouse’ board!
For a truly unique and rich aesthetic, consider pairing olive green with copper accents. Copper is a warmer, earthier alternative to brass, and its reddish-brown tones complement the yellow undertones in olive green beautifully. This combination feels deeply organic and artisan-crafted. Using a copper range hood as a focal point is a bold and beautiful statement that instantly elevates the kitchen.
What You Need
- Olive green cabinets (existing or painted)
- Copper cabinet hardware (3” bar pulls, 1” knobs, satin copper finish)
- Copper range hood (chimney-style, ducted, 36” width)
- Butcher block countertop (walnut or cherry for warmth)
- Copper faucet (bridge or gooseneck)
- Copper cookware (saucepan, skillet – for decorative hanging)
Step-by-Step Directions
- Paint cabinets olive green (if not already) – Follow painting steps from earlier ideas. Use a satin finish.
- Install copper hardware – Measure and drill pilot holes. Attach pulls and knobs.
- Mount copper range hood – Install ducting to exterior. Mount hood at 24-30” above stove top. Secure to wall studs.
- Install copper faucet – Deck-mounted or wall-mounted. Connect water lines.
- Hang cookware – Install a small pot rack or wall-mounted bar near stove. Hang copper pots for visual interest.
- Style – Add a copper vase with dried lavender, and a woven runner on the floor.
Pro-Tip: Copper is a softer metal, so pulls may show scratches over time – embrace the rustic look. For a polished appearance, choose lacquered copper hardware.

10. Dark Green Painted Walls with White Trim

Pin this bold wall color kitchen to your ‘Colorful Farmhouse’ board!
Who says the green has to be on the cabinets? Using dark green painted walls with white trim is a bold, dramatic way to introduce the color without a cabinet overhaul. This is a fantastic option for renters or anyone who wants a high-impact change with less commitment. The dark walls create a cozy, intimate atmosphere that’s perfect for a home that gets lots of natural light.
What You Need
- Sample size of dark green paint (test first)
- Dark green wall paint (e.g., Benjamin Moore Hiking Path or Farrow & Ball Studio Green)
- White paint for trim and cabinets (e.g., Benjamin Moore Simply White in semi-gloss for trim, matte for cabinets if desired)
- Primer (tinted to green for walls)
- Painter’s tape, drop cloths, roller with extension pole
- White shaker cabinets (already in place)
- White quartz countertop and backsplash
Step-by-Step Directions
- Test color – Paint a 2×2 foot area on wall near window. Observe at different times of day.
- Prepare walls – Clean, patch holes, sand, and apply tinted primer.
- Paint walls dark green – Apply two coats of flat or matte finish. Use a brush for edges, roller for large areas.
- Paint trim and cabinets – Use white paint in semi-gloss for trim. If cabinets are already white, just touch up.
- Install or clean countertops – White quartz reflects light and contrasts with dark walls.
- Finish with brass hardware – Swap cabinet knobs and faucet for brass to warm up the look.
- Style – Add a large mirror or art piece on one green wall to reflect light.
Pro-Tip: Use a flat finish on the walls to minimize light reflection and create a cozy, matte look that hides imperfections better than eggshell.
11. Green Cabinet with Barn Door Pantry

Pin this barn door pantry idea to your ‘Farmhouse Storage’ board!
A green cabinet with a barn door pantry is a gorgeous and functional way to reinforce your kitchen’s color scheme. Painting the barn door to match your green cabinets creates a seamless, intentional look. This is a great way to add a major farmhouse element that also serves a practical purpose—hiding a pantry! The hardware, often in matte black or bronze, adds another layer of rustic charm.
What You Need
- Pre-hung sliding barn door (or DIY using a solid core slab door, 36”x80”)
- Barn door hardware kit (track, rollers, stoppers, handles – in matte black or bronze)
- Green paint (same color as cabinets, e.g., Sherwin-Williams Clary Sage or Benjamin Moore Sage)
- Primer, paint, painter’s tape
- Pantry shelving (wood shelves inside pantry)
- Floor guide (to keep door from swinging)
Step-by-Step Directions
- Measure the opening – Add 8-10 inches on each side for the door to slide. Ensure wall space adjacent is enough.
- Obtain or build barn door – Use a solid core slab for sound dampening. Remove any old hardware.
- Paint barn door – Sand, prime, and apply two coats of green paint (matching kitchen cabinet color). Let cure.
- Install track – Mount track to header above door opening. Use lag bolts into studs. Level carefully.
- Attach rollers – Install rollers onto door, then hang door on track. Adjust with set screws.
- Install floor guide – Drill guide into floor to prevent door sway.
- Add handles – Attach a pull handle on the outer side.
- Finish pantry interior – Install wooden shelves and organize.
Pro-Tip: To prevent food smells from spreading, install a strip of weatherstripping along the door edge that contacts the door frame. This also seals light gaps.

12. Soft Sage Green Kitchen with Shiplap Ceiling

Pin this shiplap ceiling design to your ‘Statement Ceilings’ board!
Don’t forget the fifth wall! A soft sage green kitchen with a shiplap ceiling is a masterclass in adding texture and character. The white shiplap ceiling draws the eye upward, making the room feel taller and more expansive. It’s a perfect canvas for a wooden beam, which adds warmth and a touch of rustic elegance. This design works exceptionally well in kitchens with high ceilings, where the ceiling can become a stunning feature.
What You Need
- Primed MDF shiplap planks (1×6, tongue and groove, 12 ft long)
- Paintable caulk (for gaps)
- White paint (semi-gloss for ceiling)
- Nail gun (with 1-1/4” brad nails)
- Circular saw or miter saw for cuts
- Faux wood beam (lightweight polyurethane, 8-12 ft)
- Construction adhesive for beam
Step-by-Step Directions
- Prepare ceiling – Remove any light fixtures (turn off power). Patch holes. Determine joist direction.
- Install shiplap – Start at one end, nail into joists. Leave 1/8” gap between planks. Stagger joints.
- Cut around fixtures – Turn power back on only after cutting is done. Install electrical boxes flush.
- Caulk seams – Fill nail holes and seams with paintable caulk. Let dry, sand lightly.
- Paint shiplap – Apply one coat of primer (if MDF) and two coats of white semi-gloss ceiling paint.
- Install faux beam – Apply construction adhesive to beam, press into ceiling (or secure with screws if heavy). For lightweight beams, adhesive + a few brad nails suffice.
- Finish kitchen – Install or touch up sage cabinets. Add brass chandelier.
Pro-Tip: If your ceiling is not perfectly level, use shims behind the shiplap to true up the surface. This prevents cracking down the line.
13. Hunter Green Cabinets with Brass Fixtures and Wood Beams

Pin this dramatic hunter green design to your ‘Designer Kitchen’ board!
This is the ultimate, designer-loved look for those who want a dramatic, luxurious feel. Hunter green cabinets with brass fixtures and wood beams is a bold, confident combination that turns your kitchen into a moody, sophisticated haven. The deep, almost-black green provides a stunning backdrop for the bright, polished brass and the rich, warm wood of the ceiling beams. The white marble countertops are essential, providing a bright contrast that keeps the room from feeling too dark.
What You Need
- Custom or semi-custom shaker cabinets (painted on-site)
- Hunter green paint (e.g., Benjamin Moore Black Forest Green 2139-20, Sherwin-Williams Greenblack SW 6994)
- Polished brass cabinet pulls (satin or high-shine)
- Brass gooseneck faucet
- White marble countertop (Carrara or Calacatta, 2 cm, honed)
- Faux wood beams (3”x6” or 4”x8”, hollow, polyurethane)
- Brass pendant lights (3-4 fixtures over island)
- White farmhouse apron sink
Step-by-Step Directions
- Paint cabinets hunter green – Remove all doors, sand, prime with dark-tinted primer, apply two to three coats of satin hunter green. Let cure fully.
- Install countertop and sink – Set marble slab, cut sink hole, install fireclay sink.
- Install brass hardware – Measure and drill evenly spaced holes. Attach brass pulls and knobs.
- Install brass faucet – Mount deck or wall faucet; connect water lines.
- Install faux wood beams – Determine beam layout (usually parallel to ceiling joists). Use strong construction adhesive and screws into joists. Fill screw holes with wood putty and stain to match.
- Hang pendant lights – Wire to existing ceiling junction boxes. Hang at 30-36” above island countertop.
- Style – Add a white ceramic urn, a cutting board, and a sheepskin throw on a stool.
Pro-Tip: Hunter green is a very dark hue – ensure your kitchen has adequate lighting. A mix of under-cabinet LED tape, pendant lights, and natural light will prevent the space from feeling like a cave.

Key Takeaways: Your Quick Guide to Modern Farmhouse Green Kitchen Ideas
- Sage green is the most versatile shade for modern farmhouse kitchens. It pairs effortlessly with both brass and matte black hardware, warm wood tones, and white marble or quartz. For a timeless look, choose a sage with warm undertones (LRV 40-50).
-
Dark greens (forest, hunter, olive) need strong contrast and ample lighting. Pair them with bright white countertops, light backsplashes, and multiple light sources to prevent the space from feeling closed in. Use under-cabinet LED strips to illuminate work surfaces.
-
Mixing wood tones with green cabinets creates an organic, layered farmhouse aesthetic. Use warm woods (walnut, maple, oak) on countertops, open shelving, or flooring to balance the coolness of green. Butcher block is an affordable, durable option that softens the look.
-
Brass is the go-to metal for green farmhouse kitchens. It adds a warm, reflective quality that enhances both light and dark greens. Copper is a more rustic alternative that develops a beautiful patina. Avoid chrome unless your space is very modern.
-
Two-tone kitchen schemes (green on lower cabinets, white on uppers) offer the best of both worlds. They ground the space with color while keeping the room light and airy. This arrangement works especially well in open-concept kitchens where the cabinets are visible from living areas.
-
Always test green paint in your actual kitchen lighting. LRV (Light Reflectance Value) matters: below 20 is very dark, 20-40 is medium-dark, 40-60 is medium-light. A large sample painted on cardboard will tell you how the color behaves at different times of day.
-
Don’t overlook the fifth wall – the ceiling. A white shiplap ceiling or exposed wood beams adds enormous farmhouse character without competing with green cabinets. It’s a design move that instantly elevates a kitchen from ordinary to custom.
People Also Ask About Modern Farmhouse Green Kitchen Ideas
What shade of green is best for a modern farmhouse kitchen?
Sage green is the most popular and versatile choice for modern farmhouse kitchens, with warm undertones that complement wood and brass. For a lighter, airier feel, choose a sage with LRV above 50. Olive green offers a warmer, more earthy alternative. Forest and hunter green create a bold, dramatic statement but require ample natural or artificial light. Always test samples in your kitchen’s specific lighting before committing.
How to mix wood and green in a farmhouse kitchen?
The key is to balance warm wood tones against the green to create contrast and depth. For sage or olive cabinets, pair with walnut or cherry butcher block countertops or open shelving. For darker greens like forest, use lighter woods like white oak on the floor or ceiling beams. Avoid using the same wood tone throughout – vary the species or finish. A mix of painted green and stained wood creates the signature farmhouse layering.
Can you use dark green in a small farmhouse kitchen?
Yes, dark green can work in a small farmhouse kitchen if you increase contrast and light. Use dark green only on the lower cabinets or as an accent wall, with white uppers, white countertops, and a bright backsplash. Maximize natural light with sheer window treatments, and install under-cabinet LED strips. A glossy finish on darker greens helps reflect light. Avoid dark green on all vertical surfaces in a small windowless kitchen.
What countertops go best with green farmhouse cabinets?
White marble or quartz are the top choices, as they provide the essential contrast that makes green cabinets pop. For sage and olive greens, marble with subtle grey veining (Carrara) works beautifully. For darker greens, a bright white quartz with minimal speckling (like pure white or frosty white) provides maximum contrast. Butcher block complements olive and sage for a warmer, more rustic look. Soapstone is a great match for dark green cabinets but darkens the overall palette.
Which hardware finish looks best with green farmhouse cabinets?
Polished brass is the most popular finish, offering a warm, reflective accent that complements both light and dark greens. Satin brass is a lower-sheen alternative that resists fingerprints. Copper creates a more rustic, earthy feel. Matte black provides a modern, high-contrast look. Avoid chrome unless your kitchen is very contemporary. Mixing finishes (brass on cabinets, black on faucet) is acceptable if done intentionally.
How to style a sage green farmhouse kitchen?
Start with a neutral base of white countertops and backsplash, then layer natural textures. Add open shelving with white dishes and ceramic jars. Incorporate warm woods through cutting boards, butcher block, or a farmhouse table. Use brass or copper accents for hardware and light fixtures. Bring in live plants like eucalyptus, ferns, or herbs in terra cotta pots. Finish with a woven runner, a vintage rug, and unfussy linen towels.
Are green farmhouse kitchens still in style for 2025?
Yes, green farmhouse kitchens are more popular than ever in 2025, moving from trend to timeless staple. Sage green has become the new neutral, replacing gray in many designer kitchens. The shift towards nature-inspired, biophilic design strongly supports green as a core color. Dark green cabinets with brass hardware are being featured in major design magazines and remain a top choice among interior designers for their longevity and sophistication.
What color walls go with green farmhouse kitchen cabinets?
For sage or olive cabinets, white walls (warm white, off-white, or cream) are the safest and most farmhouse-appropriate choice. Light greige also works. For dark green cabinets, consider a soft white like Benjamin Moore Cloud White or a very light warm gray to prevent the room from feeling too heavy. Avoid stark white (too clinical) and avoid painting walls the same green as cabinets – it can feel monolithic.
How to incorporate green into a white modern farmhouse kitchen?
The easiest way is to paint the kitchen island in a green shade that contrasts with white perimeter cabinets. Sage, olive, or forest green all work, depending on the look you want. Alternatively, add green open shelving, a green pantry door, or green accent pieces like bar stools, a rug, or ceramic canisters. You can also install a green tile backsplash in a subway or herringbone pattern.
What is the difference between rustic and modern farmhouse green?
Rustic farmhouse green leans into distressed finishes, visible wood grain, and aged hardware – think chippy paint and antique patina. Modern farmhouse green uses clean, smooth shaker cabinet doors, sleek hardware (brushed brass or matte black), and crisp white accents. The green itself is usually a more uniform paint application rather than a distressed look. Modern farmhouse also emphasizes open shelving, pendant lighting, and a lighter overall color palette.
Final Thoughts on Modern Farmhouse Green Kitchen Ideas
The 13 designs we’ve walked through prove that green is far more than a passing kitchen trend – it’s a deeply livable, emotionally resonant color that anchors a modern farmhouse aesthetic with warmth, personality, and connection to nature. Whether you’re drawn to the soft tranquility of sage, the earthy calm of olive, or the dramatic richness of hunter green, each shade brings its own character.
The real secret isn’t just picking the right green – it’s how you layer it. Pairing green cabinets with warm wood, brass or copper hardware, and stone countertops creates the texture and balance that defines a truly beautiful farmhouse kitchen. Start with a sample pot of your favorite green. Test it on your cabinets or wall. Walk in and out of the room throughout the day. See how it feels when the morning light hits it, when the pendant lights are on, when the family gathers around the island.
Your perfect green farmhouse kitchen is one that makes you feel at home. And now you have 13 clear blueprints to help you get there.
What’s the first green shade you’re going to test in your kitchen? We’d love to hear your choice in the comments below!
Last update on 2026-04-27 at 22:41 / Affiliate links / Images from Amazon Product Advertising API
