
As an Amazon Associate KitchenwareSets.com earns from qualifying purchases.
13 Beautiful Kitchen Island Centerpiece Ideas with Easy Decor Swaps for Home Cooks
Your kitchen island is begging for a makeover, but where do you even start? It’s a blank canvas that somehow ends up cluttered with mail, keys, and yesterday’s coffee cup. You want it to look beautiful, but you need a practical approach that won’t overwhelm your counter space or your schedule.
A kitchen island centerpiece is a curated collection of decorative objects placed on the island to serve as the room’s focal point, often using trays, vases, and greenery. Home cooks can refresh the look by swapping seasonal elements. This one strategic change can transform your kitchen from chaotic to curated in minutes.
Drawing from tested interior design principles and real-world styling experience, this guide walks you through 13 beautiful, swap-friendly kitchen island centerpiece ideas. Each one is designed for easy updates, so you can change your island’s look with the seasons, your mood, or even your dinner party theme. You’ll learn exactly what to use, how to arrange it, and how to swap it out without starting from scratch.
Contents
show
1. Classic Round Tray with Mason Jar Bouquet (Swap: Fresh Flowers for Dried Eucalyptus)
Items Needed
- Round wooden decorative tray (large enough to hold a pint-size mason jar with room on sides)
- 1–2 clear glass mason jars (wide mouth)
- Fresh flower bouquet (or dried eucalyptus stems for swap)
- Small linen napkin or placemat under the jar (optional)
- Twine or ribbon to wrap around jar (optional)
Arrangement Steps
- Place the tray slightly off-center on the island (not dead center, to allow prep space).
- If using, lay the linen napkin folded on one side of the tray.
- Fill the mason jar with water, trim flower stems diagonally, and arrange them in a loose, natural cluster.
- Place the jar on the napkin or directly on the tray, centered within the tray.
- Add a few loose petals or a small sprig of eucalyptus on the tray for a styled, intentional look.
Pro-Tip: When swapping to dried eucalyptus, pre-soak the stems in boiling water for 30 seconds to reduce shedding. Use a smaller jar so the tray isn’t overwhelmed.


2. Large Wooden Dough Bowl with Artificial Greenery (Swap: Real Oranges for Winter Pinecones)
Items Needed
- Extra-large wooden dough bowl (rustic finish, at least 24 inches long)
- 3–5 stems of artificial greenery (eucalyptus, olive branches, or boxwood)
- 5–7 small pinecones (or real oranges cut in half for summer swap)
- A handful of moss or filler (optional)
Arrangement Steps
- Place the dough bowl in the center of the island, parallel to the island length.
- Insert the tallest greenery stems first, positioned at the ends and middle.
- Weave shorter stems between the taller stems, creating a full, layered look.
- Tuck pinecones (or orange halves) into the greenery at irregular intervals.
- Pull a few stems over the edges of the bowl for a natural, relaxed overflow.
Pro-Tip: To keep the arrangement from looking flat, vary the heights of the stems by cutting them at different lengths. Use floral foam blocks at the bottom of the bowl to anchor stems.


3. Tall Ceramic Vase with Dried Branches (Swap: Pussy Willow for Curly Willow)
Items Needed
- Tall ceramic vase (matte finish, 18–24 inches high, weighty base)
- 10–15 dried branches (pussy willow, curly willow, or preserved eucalyptus)
- A handful of small pebbles or marbles to fill the vase (if needed for stability)
Arrangement Steps
- Place the vase off-center (one-third from the edge) on the island.
- Add a layer of pebbles to the vase for weight (optional).
- Insert the branches one by one, crossing them at the base to create a fan-like spread.
- Arrange branches so the tallest is in the middle, gradually shorter toward the sides.
- Rotate the vase to ensure branches don’t block the view across the island.
Pro-Tip: To prevent branches from sliding, wrap a rubber band around the bundle before inserting – then hide the band with a few decorative stones inside the vase.


4. Glass Cloche with Fairy Lights and Miniature Scene (Swap: Spring Flowers for Fall Mini Pumpkins)
Items Needed
- Glass cloche dome with wooden base (about 12–14 inches tall)
- Battery-operated fairy lights (copper wire, warm white)
- Base materials (artificial moss, sand, or pebbles)
- Decorative objects (mini mushrooms, tiny eggs, or mini pumpkins)
- Small figurine or two (optional)
Arrangement Steps
- Place the wooden base off-center on the island.
- Spread a layer of moss or sand on the base.
- Arrange the fairy lights in a spiral pattern, leaving the battery pack outside (taped to the base).
- Place the decorative objects on the moss – position the largest in the middle, smaller around.
- Carefully lower the glass dome over the scene, ensuring it sits flush on the base.
- Turn on the fairy lights at night for a magical glow.
Pro-Tip: For a cohesive look, keep the color palette limited to three hues. In spring, use pastel eggs and white flowers; in fall, use orange pumpkins and brown acorns.


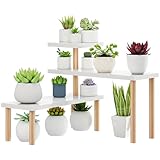
5. Tiered Stand with Small Potted Plants (Swap: Succulents for Mini Herbs)
Items Needed
- Three-tiered metal stand (black, gold, or silver)
- 4–6 small potted succulents (or mini herb plants for swap)
- Small matching saucers or drip trays
- Decorative pebbles or moss to top the pots (optional)
Arrangement Steps
- Place the tiered stand at one end of the island (so it doesn’t block prep space).
- Place the succulents on each tier, arranging by height: tallest on bottom, shortest on top.
- If using saucers, slip them under the pots to catch any water.
- Add a layer of pebbles or moss on top of the soil for a finished look.
- Rotate the stand weekly to ensure even light for all plants.
Pro-Tip: Water succulents only once every two weeks – overwatering is the #1 killer. For herbs, snip the tops regularly to encourage bushy growth.

6. Decorative Cutting Board with Pitcher and Flowers (Swap: Pitcher for a Glass Carafe)
Items Needed
- Large round or rectangular wooden cutting board (acacia, teak, or bamboo)
- Ceramic pitcher (white or neutral tone)
- Fresh flowers (tulips, roses, or a grocery bouquet)
- Small glass vase or floral foam (to keep flowers hydrated inside the pitcher)
Arrangement Steps
- Place the cutting board in the center of the island (if large) or at one end (if small).
- Fill the pitcher with water and arrange the flowers in a loose cluster (cut stems at an angle).
- Set the pitcher on the cutting board, slightly left of center for asymmetrical balance.
- Scatter a few loose flower petals or small greenery clippings on the board around the pitcher.
- If using a carafe swap, fill it with chilled water and add a floating candle.
Pro-Tip: To keep tulips upright, wrap them in newspaper overnight after cutting – they’ll stand straight the next day.

7. Set of Three Candlestick Holders with Greenery Base (Swap: Tapers for Mini Pumpkins)
Items Needed
- Three brass (or wood) candlestick holders in varying heights (8, 10, and 12 inches)
- Taper candles (white or ivory)
- Narrow rectangular tray or wooden board
- Fresh eucalyptus leaves (or artificial) to create a base layer
- Optional: small floral wire to weave leaves together
Arrangement Steps
- Place the tray on the island, parallel to the island length.
- Arrange the eucalyptus leaves in a single layer on the tray, covering the surface.
- Place the tallest candlestick holder at the back (farthest from the seating area), the medium in the middle, shortest at the front.
- Insert the taper candles into the holders.
- Fluff the eucalyptus leaves to hide the base of the holders.
Pro-Tip: To prevent hot wax from dripping on the leaves, place a small drip ring (a metal or silicone collar) under each candle. For safety, never leave lit candles unattended.


8. Large Decorative Bowl with Seasonal Ornaments (Swap: Christmas Baubles for Summer Lemons)
Items Needed
- Large footed glass bowl (clear, 12–14 inch diameter)
- Seasonal filler (ornament balls, lemons, pinecones, etc.)
- Base filler (tissue paper or sand if items are small, to add height)
Arrangement Steps
- Place the glass bowl in the center of the island.
- If using small items (ornaments, pinecones), add a layer of tissue paper or sand to fill the bottom third.
- Pour the seasonal filler into the bowl, mounding it slightly in the center.
- For lemons, arrange the fruit in a circular pattern, stem ends down.
- Add one or two standout pieces on top (e.g., a single large ornament or a lemon with a leaf).
Pro-Tip: To make artificial ornaments look high-end, mix matte and shiny finishes. For lemons, choose organic unwaxed ones so they don’t become sticky over time.


9. Rustic Tray with Coffee Station (Swap: Coffee for Wine)
Items Needed
- Rectangular wooden tray (with handles, at least 16×10 inches)
- Coffee mug or travel cup
- Coffee dripper (Chemex, Aeropress, or pour-over)
- Small bag of coffee beans + wooden scoop
- Optional: small succulent or greenery
Arrangement Steps
- Place the tray at one end of the island, close to the seating area.
- Position the coffee dripper in the back right corner.
- Place the mug in front of the dripper.
- Set the coffee bag and scoop in the back left.
- Add the small succulent in the front left to balance the visual weight.
- For wine swap: remove all coffee items, place a wine bottle in the back, two glasses in front, and a small vase with rosemary.
Pro-Tip: Use a tray with raised edges to prevent spills. Keep a small microfiber cloth nearby for quick cleanups.


10. Asymmetrical Vignette with Stacked Cookbooks and Vase (Swap: Cookbooks for Magazines)
Items Needed
- 2–3 hardcover cookbooks (varying sizes, attractive covers)
- Small ceramic or glass vase (4–6 inches tall)
- Dried stem (rabbit grass, lavender, or eucalyptus)
- Optional: small decorative object (bottle opener, carved wooden bird)
Arrangement Steps
- Place the largest cookbook on the island, angled slightly to the left.
- Stack the next size book on top, canted at a slight angle.
- Place the smallest book on top, aligned with the middle book.
- Set the small vase on the top book, slightly off-center.
- Insert the dried stem into the vase.
- Add the optional decorative object beside the stack.
Pro-Tip: Choose books with spine colors that complement your kitchen palette. If books are too thick, use magazine stacks instead.


11. Single Large Hurricane Candle with Floral Wreath Base (Swap: Wreath for Succulent Ring)
Items Needed
- Large hurricane glass cylinder (10–12 inches tall, 6 inch diameter)
- Pillar candle (white or ivory, diameter to fit glass)
- Small floral wreath (diameter slightly larger than the hurricane base)
- Optional: battery-operated flameless candle for safety
Arrangement Steps
- Place the hurricane glass in the center of the island.
- Insert the pillar candle inside.
- Position the wreath around the base of the hurricane, flat on the island surface.
- Adjust the wreath so it touches the glass all around.
- If using succulents, press the ring gently to create a snug fit.
Pro-Tip: For a fire-safe option, use a flameless candle with a remote control. The wreath can be made from preserved moss that lasts months.

12. Minimalist Tray with Single Statement Vase (Swap: Vase for Sculptural Bookends)
Items Needed
- Rectangular black (or gold) metal tray, slim profile
- Tall, sculptural ceramic vase (matte finish, 16–20 inches)
- One large statement leaf (monstera, fiddle leaf fig, or palm)
- Small amount of water for the leaf stem
Arrangement Steps
- Place the tray at one end of the island (off-center).
- Fill the vase with a small amount of water.
- Trim the leaf stem to fit the vase height.
- Insert the leaf, angling it to create a dynamic curve.
- Place the vase on the tray, slightly left or right of center.
- Ensure no other items on the tray – the emptiness on the tray is part of the design.
Pro-Tip: For a true minimalist look, keep the color palette monochrome: black, white, and green. Swap the leaf when it loses its sheen.


13. Combination of Multiple Small Items in a Row (Swap: Items for a Ruler and Candles)
Items Needed
- Long, narrow wooden tray (optional – but helps contain the row)
- 3–7 small decorative objects of varied heights (e.g., bud vase, salt cellar, coaster set, mineral specimen, small brass bell, tiny stack of books)
- Ruler or measuring tape (for spacing)
Arrangement Steps
- If using a tray, place it lengthwise down the center of the island.
- Without a tray, mark the center line of the island with painter’s tape temporarily (optional).
- Arrange the objects in a straight line, starting with the tallest near the center or one end.
- Use a ruler to space objects evenly (e.g., 4 inches apart).
- Adjust heights by placing some on small stacked coasters or books.
- For the swap: replace all objects with 3–5 taper candles in identical holders, spaced evenly.
Pro-Tip: For a cohesive look, limit the color palette to three colors. Swap the objects seasonally – use small pumpkins in fall, seashells in summer.


Key Takeaways: Your Quick Guide to Kitchen Island Centerpiece Ideas
- Start with a base – A tray, dough bowl, or cutting board anchors the centerpiece and protects the island surface. It makes seasonal swaps effortless.
- Vary heights and texture – Use objects of different heights (vases, candlestick holders, stacked books) and textures (wood, glass, metal, greenery) to create visual interest. This is the “rule of three” in design.
- Consider your island size – Large islands can handle oversized dough bowls or tall vases; small islands benefit from a single statement piece or a linear row of mini objects.
- Use the “swap” strategy – Change your centerpiece seasonally by swapping a few key items: fresh flowers for dried branches, citrus for pinecones, or coffee station for wine bar. This keeps the kitchen feeling fresh year-round.
- Don’t forget function – A centerpiece doesn’t have to be purely decorative. Coffee stations, herb gardens, and bread boards are beautiful and practical.
- Negative space is your friend – Don’t overcrowd the island. Leave at least 50% of the surface free for meal prep. A minimalist approach often looks more intentional.
- Safety and durability matter – In a kitchen, choose materials that can handle accidental splashes (glass, ceramic, sealed wood) and avoid trailing candles near hot pans.
People Also Ask About Kitchen Island Centerpiece Ideas
What belongs on a kitchen island?
A kitchen island should hold a curated collection of items that create a focal point without obstructing food prep. Common base items include a decorative tray, a wooden dough bowl, or a large vase. On top, add a mix of fresh or artificial greenery, candles, fruit bowls, or ceramic vases. Avoid clutter—limit to 3–5 objects per vignette to maintain visual balance.
How do you decorate a large kitchen island?
For a large island, use oversized objects to fill the space without overwhelming it. A extra-large dough bowl filled with olive branches or a tall ceramic vase with curly willow works well. Alternatively, create a linear arrangement of multiple objects (like a row of three candlestick holders) that spans the length of the island. The key is to scale up your decor.
How do you decorate a small kitchen island?
Stick to one or two small objects on a tray to avoid clutter. A round tray with a single bud vase and a small candle is perfect. Or use a narrow rectangular tray holding a stack of two cookbooks and a small succulent. Keep the height low—under 12 inches—so the island feels open and functional.
Can you put a centerpiece on a kitchen island with a sink?
Yes, but position the centerpiece on the side of the sink away from the faucet. Use a durable, waterproof tray (ceramic or metal) to catch splashes. A glass vase with fresh flowers or a small plant works well. Avoid trailing fabrics or paper items near the water source. The sink itself can become part of the centerpiece—set a wooden soap dispenser and a small plant next to it.
How to style a kitchen island with a tray?
Place a tray of appropriate size on the island, then layer items inside it. Choose a tray that is large enough to hold a vase and an accent object without looking overcrowded. Use the “rule of three”: one tall object (vase), one medium (candle holder), and one short (small stone or seashell). Group items asymmetrically for a natural look.
What is the rule of three in kitchen island decor?
The rule of three states that objects grouped in odd numbers (especially three) are more visually appealing. Apply it by placing three candlestick holders of varying heights, or a vase, a book, and a bowl. This creates tension and balance. Always arrange the tallest item in the back, shortest in the front.
How tall should a kitchen island centerpiece be?
A centerpiece on a kitchen island should be between 12 and 24 inches tall to remain unobtrusive. If your island is behind a seating area, keep the height below eye level when seated (about 18 inches). Taller pieces (up to 36 inches) work for islands in open-concept kitchens where sightlines are open.
How do you keep a kitchen island clutter-free with a centerpiece?
Use a tray to contain the centerpiece—it visually defines the decor zone and prevents items from spreading. Limit yourself to a few well-chosen objects. Store daily-use items (coffee machine, toaster) in cabinets or on a separate counter. Rotate decor only once a month to reduce decision fatigue.
What are the best flowers for a kitchen island centerpiece?
Low-maintenance, long-lasting flowers like orchids, tulips, or sunflowers are ideal. For a longer life, use dried eucalyptus or preserved flowers. Avoid flowers with strong fragrances that could interfere with cooking smells (like lilies). Fresh herbs like rosemary or basil are beautiful and functional.
Should I use fresh or fake flowers on my kitchen island?
Both work; the choice depends on your lifestyle. Fresh flowers add a natural, seasonal touch and pleasant scent but need replacing every 5–7 days. High-quality artificial flowers (silk or preserved) offer a permanent, zero-maintenance solution. For a realistic look, choose artificial flowers that have visible details like veins and uneven petals.
How do I create a kitchen island vignette?
To create a vignette, start with a base (tray, cutting board, or bowl), then add layers of varying heights. Place your tallest item in the back, medium items in the middle, and smallest in front. Include at least two textures (e.g., smooth glass and rough wood). Keep the arrangement asymmetrical for a more natural, designer look.
What are some budget-friendly kitchen island centerpiece ideas?
You don’t need expensive items. Use a simple wooden cutting board as a base, then add a mason jar with grocery-store flowers and a candle. Repurpose items you already own: a fruit bowl, a stack of books, or a pitcher. Swap fillers seasonally – in fall, use pinecones and small gourds instead of store-bought decor.
Final Thoughts on Kitchen Island Centerpiece Ideas
Your kitchen island is more than a prep space—it’s a focal point that sets the mood for your entire home. The 13 ideas above, paired with the easy decor swaps, give you the tools to transform your island from a blank surface into a curated vignette that reflects your personality, the season, and your cooking life. Remember the fundamentals: start with a base (tray, dough bowl, or board), vary heights, and leave negative space. Whether you choose a single dramatic vase or a linear row of petite objects, the goal is to create a centerpiece that feels intentional and effortless.
Which of these ideas will you try first? Do you have a favorite swap from your own kitchen? Share in the comments below—I’d love to see how you style your island!
Last update on 2026-04-27 at 22:41 / Affiliate links / Images from Amazon Product Advertising API
