
As an Amazon Associate KitchenwareSets.com earns from qualifying purchases.
DIY Outdoor Mud Kitchen: Montessori-Inspired Rustic Backyard Play Area for Kids
Tired of expensive plastic toys that break after one season? You want to foster your child’s creativity outdoors, but the cost of quality backyard play equipment is overwhelming. A DIY outdoor mud kitchen is the perfect solution, turning a corner of your yard into a hub for imaginative, sensory-rich play.
A DIY outdoor mud kitchen is a custom-built, weather-resistant backyard play station designed for children to engage in sensory, messy play using repurposed wood like pallets, a stainless steel basin, and non-toxic sealants. You can build a durable, educational nature kitchen DIY for well under a hundred dollars. This project delivers endless hours of fun.
Drawing from proven methodologies and established best practices, this guide will walk you through every step. We’ll cover everything from sourcing safe materials to applying durable, child safe finishes. You’ll discover how to build a beautiful, rustic outdoor play kitchen that not only saves you money but also profoundly benefits your child’s development.
Contents
show
How Building a DIY Outdoor Mud Kitchen Transforms Backyard Play
Opting for a DIY mud kitchen over expensive store-bought versions is about more than just saving money; it’s an investment in durable, meaningful play. While commercial plastic kitchens can become brittle and fade in the sun, a well-built wooden nature play station is a sturdy, lasting piece of garden furniture. This project bridges the gap between basic woodworking and educational psychology, giving you the “why” behind the “how.” By understanding the profound sensory play benefits, you’ll see this isn’t just a toy, but a crucial tool for cognitive growth. The process empowers you to create a custom, budget-friendly structure that perfectly fits your space and your child’s needs, emphasizing stable base construction and safety from the very beginning. According to the Reggio Emilia approach, providing children with beautiful, functional tools and environments respects them as capable learners, and a thoughtfully built mud play kitchen does exactly that.
Information Gain Block: The Developmental Science of Messy Play
What most guides miss is the deep connection between a mud kitchen DIY and early childhood brain development. This isn’t just about fun; it’s about work. Educators aligned with Montessori education and loose parts pedagogy recognize that activities like mixing thick mud, carrying buckets of water, and arranging pebbles are forms of “heavy work play.” This type of play provides essential proprioceptive input—the feedback our muscles and joints send to the brain, which helps children understand their body in space. For many children, especially those with sensory processing disorder, this input is incredibly calming and organizing for the nervous system. Furthermore, the open-ended nature of a messy kitchen fosters crucial executive functions. There are no rules, so children must plan, problem-solve, and adapt their “recipes” as they go, building a foundation for complex thinking and creativity that structured toys simply cannot offer.
7 Step-by-Step Instructions to Build a Simple DIY Mud Kitchen
This section provides a highly actionable, structured blueprint for building your kids mud kitchen from raw materials to a finished play station. We’ve broken down the entire construction process into seven logical phases, ensuring even a beginner can follow along. From creating free mud kitchen plans to applying the final weatherproof coat, these step-by-step instructions are designed for success. We’ll focus on creating a durable, easy-to-clean workspace that can withstand the elements and years of enthusiastic play. Following this woodworking guide will result in a safe, stable, and incredibly engaging backyard sensory table your children will adore.
1. Measure Your Space and Prepare Free Mud Kitchen Plans

Pin these easy mud kitchen plans to your backyard DIY board to start building!
The first step in any successful woodworking project is careful planning. Before you make a single cut, you need to assess your garden backyard space and design a kitchen that fits both the environment and your child. This phase is crucial for creating a compact, space saving design and generating a diy mud kitchen plans with shopping list to prevent multiple trips to the hardware store.
Supplies Needed
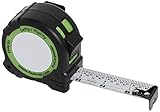
- Standard 25-foot locking tape measure with easy-read fractions
- Carpenter’s pencil and grid paper for sketching your homemade mud kitchen dimensions
- Pressure-treated timber for the structural legs (typically 2x4s)
- Clean, heat-treated wooden pallets or crates (check for the “HT” stamp)
- Safety glasses and sturdy work gloves
Instructions
- Measure the dedicated footprint in your garden backyard, ensuring there is enough room for multiple children to access the nature play station simultaneously.
- Design your dimensions based on your child’s age; a standard toddler mud kitchen worktop should sit roughly 20 to 24 inches off the ground.
- Calculate the exact cuts needed for your 2×4 legs and pallet slats to minimize waste.
- Prepare a flat, level surface on your lawn or patio where the assembly will take place.
Pro-Tip: From an environmental psychology in play perspective, positioning the kitchen near existing natural elements (like a low-hanging tree or dirt patch) naturally encourages integration of the surrounding environment into their schematic play patterns.
2. Dismantle and Sand Pallet Wood to Prevent Splinters

Save this critical safety step for your upcoming pallet wood project!
Working with reclaimed wood is a fantastic way to build a budget-friendly kitchen, but it requires thorough preparation. This step is non-negotiable for ensuring child safety. You must meticulously sand every surface to prevent splinters and create smooth, washable surfaces that are gentle on little hands. Following these safety precautions is essential.
Supplies Needed
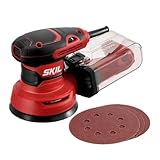
- Random orbital sander with variable speed control
- Sandpaper discs (start with 80-grit, finish with 120-grit or 220-grit)
- Heavy-duty crowbar or pallet buster tool
- Pliers or a claw hammer for removing rusty nails
- N95 respirator mask and safety goggles for dust protection
Instructions
- Dismantle the pallets carefully using a crowbar, pulling boards apart slowly to avoid splitting the recycled wood kitchen materials.
- Remove every single hidden nail or staple using pliers or a hammer; run your hand carefully over boards to ensure no sharp metal remains.
- Sand the flat surfaces thoroughly with 80-grit sandpaper to remove rough spots and old, flaking treatments.
- Smooth the edges and corners aggressively to avoid sharp edges, finishing with 120-grit paper to create a completely splinter-free, easy-to-clean surface.
Pro-Tip: SAFETY FIRST: When dealing with reclaimed materials, always assume the wood requires heavy processing. Taking the time to sand down to raw wood not only ensures child safe finishes, but opens up the wood grain so your non-toxic sealant can properly penetrate and stop rot.
3. Assemble the Base Frame for Ground-Contact Durability

Pin this sturdy base frame assembly step for a mud kitchen that lasts years!
The foundation of your wooden mud kitchen is the most critical part of the build. A stable base construction ensures the unit won’t wobble or tip over during vigorous play, and using the right materials will protect it from the elements. This is where you build the core wooden frame that will support the worktop, sink, and all the heavy work play to come.
Supplies Needed
- Cordless power drill with appropriate driver bits
- 2.5-inch coated exterior wood screws (rust-proof)
- Heavy-duty wood glue rated for outdoor use
- 24-inch spirit level to ensure a flat worktop
- Pocket hole jig (optional but recommended for hidden, strong joints)
Instructions
- Cut your four structural corner legs to your predetermined height, ensuring the bottoms are completely flush for ground contact safety.
- Construct the rectangular base frame by attaching horizontal support braces between the four legs using exterior screws and outdoor wood glue.
- Level the crossbeams perfectly using your spirit level; an uneven frame will cause your stainless steel sink basin to drain improperly later.
- Secure internal support joists horizontally across the middle of the frame if you plan to create an extra-long double-sink setup.
- Attach cross-bracing to the bottom section of the legs to create a sturdy lower shelf, which will drastically increase the overall stable base construction.
Pro-Tip: Utilizing pocket hole joinery on the underside of your frame not only hides unsightly screw heads but creates incredibly strong right-angle joints that dramatically increase the structural load bearing for toys, keeping kids safe as they lean heavily onto the counter.

4. Install the Worktop and Drop-In Stainless Steel Sink

Don’t forget to save this guide on how to mount a mud kitchen sink!
The sink is the heart of the mud kitchen, where all the messy magic happens. The easiest and most effective solution is to install a drop-in basin. Using a large, durable stainless steel sink bowl with a wide lip is a far better choice than a real plumbed sink; it’s cheaper, simpler to install, and much easier to clean. This is the step that truly encourages imagination for mud pie making.
Supplies Needed
- Smooth, tightly spaced wooden planks for the worktop surface
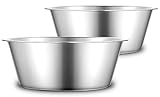
- Large stainless steel mixing bowl or deep pan with a wide outer lip
- Power jigsaw with a fine-toothed wood-cutting blade
- Power drill with a large spade bit (for starting the jigsaw hole)
- Clear, outdoor-grade silicone sealant (optional, if you want a permanent sink)
Instructions
- Attach your worktop boards securely to the top of the base frame, ensuring they are tightly packed to prevent mud from falling straight through.
- Place your stainless steel bowl upside down exactly where you want the sink, and trace the outer rim using a pencil.
- Measure inward by 1/2 inch from your traced line and draw a second, smaller inner circle—this inner circle is your actual cut line.
- Drill a pilot hole inside the inner circle large enough to fit your jigsaw blade.
- Cut carefully along the inner circle using the jigsaw, then gently drop your sink into the hole. The wide lip will catch on the wood, holding it firmly in place.
- Install a working water tap or a simple water dispenser jug right next to the basin for easy access during nature soup ideas formulation.
Pro-Tip: Skip permanently sealing the sink into the worktop. Leaving the stainless steel sink as a removable drop-in basin creates an incredibly easy-to-clean setup, allowing you to easily dump out stagnant, muddy water at the end of a long day of play.
5. Attach the Backboard for Storage and Utensil Hooks

Maximize space with this brilliant mud kitchen storage hack!
A backboard transforms the mud kitchen from a simple table into a functional workspace, much like a potting bench alternative. This vertical space is perfect for organizing loose parts, adding shelves, and installing hooks + utensils to hang mud kitchen accessories. Making tools visually accessible not only keeps the area tidy but also promotes independence and organizational skills.
Supplies Needed
- 3 to 4 long, sturdy pallet planks (approx. 4 feet in length)
- Thick structural wood for vertical backboard supports
- Rust-resistant screw-in cup hooks or small utility hooks
- A narrow wooden plank for a high display shelf
- Exterior chalkboard paint (optional, for a menu board)
Instructions
- Secure two long, thick pieces of timber vertically to the back of the base frame legs, extending them upwards to create the structural uprights for the backboard.
- Mount your horizontal pallet planks across these uprights, screwing them in firmly from the front to create a solid, slat-wall style backboard.
- Attach a narrow wooden plank horizontally near the very top to act as an upper shelf for storing nature craft ideas or small potted herbs.
- Measure and mark out evenly spaced dots along the lower planks, ensuring they are well within your child’s arm reach.
- Screw in the cup hooks securely at your marks, testing them to ensure they can handle the weight of small metal pots and heavy wooden spoons.
Pro-Tip: Utilizing a vertical backboard isn’t just about aesthetics; it heavily supports loose parts pedagogy. When children can visually survey all their tools displayed openly on hooks rather than dumped in a bin, it triggers independent decision-making and deeper imaginative play.

6. Seal with Non-Toxic Weatherproofing to Stop Wood Rot

Weatherproof your outdoor toys so they survive the winter!
This final construction step is essential for protecting your hard work from the elements. A proper finish is the key to weatherproofing wood and will stop wood rot before it starts. It’s critically important to choose a non-toxic sealant that is certified as toy-safe, as children will inevitably be touching these surfaces constantly.
Supplies Needed
- Child-safe, non-toxic outdoor wood sealant or pure, raw linseed oil
- Wide, high-quality synthetic paint brushes
- Clean, lint-free cotton rags or microfiber cloths
- Drop cloth or old tarp
- Fine 220-grit sanding sponge for between coats
Instructions
- Wipe down the entire fully assembled kitchen with a slightly damp cloth to remove any lingering sawdust from the sanding phase. Let it dry completely.
- Stain or seal the wood by applying your chosen non-toxic weatherproofing with a brush, working meticulously in the direction of the wood grain.
- Coat the end-grains of the wood (the cut ends) particularly heavily, as these act like straws and will suck up ground moisture rapidly, causing rot.
- Dry the first coat according to the manufacturer’s instructions, then lightly buff the surface with a fine sanding sponge.
- Apply a second, thinner coat of sealant to ensure maximum water-repellency, ensuring your outdoor cook station is fully protected against the elements.
Pro-Tip: If you upgrade your materials to use cedar instead of pallet wood, the natural cedar wood tannins provide incredible inherent resistance to insects and rot. However, even cedar requires a high-quality UV-blocking, non-toxic sealant to prevent it from fading to a dull gray over a single summer.

7. Stock Accessories and Set Up the Mud Pie Station

Pin these adorable mud kitchen accessory ideas to inspire open-ended play!
With the construction complete, it’s time for the best part: stocking the kitchen and inviting your kids to play. To customize your mud pie station, you’ll want to gather a mix of durable utensils and natural materials. Providing a rich assortment of loose parts play items like bowls + spoons alongside sand + water is what truly fosters creativity and makes the space come alive.
Supplies Needed
- Thrifted stainless steel pots, muffin tins, and heavy-duty baking pans
- Sturdy wooden spoons, whisks, and silicone spatulas
- Small metal or plastic watering can for pouring exercises
- Assorted baskets for organizing natural loose parts
- Clean potting soil, play sand, and pebbles
Instructions
- Organize your thrifted cheap mud kitchen accessories by hanging the utensils on the backboard hooks and stacking the pots neatly on the lower shelves.
- Gather natural elements like pinecones, acorns, flower petals, and vibrant green leaves into small sorting baskets.
- Fill the main sink basin with a mixture of clean dirt, sand, and water to prime the play area.
- Prepare a menu of mud kitchen recipes to spark their imagination on day one!
- Classic Mud Pies: Thick mud packed into a muffin tin, garnished with small white pebbles.
- Wildflower Nature Soup: A large pot of water infused with crushed flower petals, grass clippings, and stirred vigorously with a whisk.
- Bark Bakery Cookies: Flat pieces of tree bark painted with wet mud “icing.”
- Step back and let them play freely, allowing the messy kitchen to work its magic on their developing minds.
Pro-Tip: Don’t buy plastic kitchen toys for outdoor use; they become brittle and crack under UV rays. Instead, scour local thrift stores for real, heavyweight stainless steel and wood items. Manipulating real, heavy tools provides essential “heavy work play” that intensely satisfies a child’s proprioceptive input needs!

Key Takeaways: Your Quick Guide to DIY Outdoor Mud Kitchens
Here is a quick overview of the most critical points to remember as you embark on your DIY mud kitchen project. This scannable summary highlights the essential safety, structural, and play-based insights from our guide.
- Plan for Ergonomics: A standard toddler mud kitchen should feature a worktop height of 20 to 24 inches to ensure comfortable, sustained imaginative play without straining little backs.
- Prioritize Ground Contact Safety: Always use pressure treated timber for the structural legs touching the earth to stop wood rot and ensure a lasting, stable base construction.
- Aggressive Sanding is Mandatory: When using pallet-based materials, you must thoroughly sand and inspect the wood to prevent splinters and completely avoid sharp edges.
- Utilize Real, Durable Accessories: Ditch the brittle plastic and stock your nature lab with heavy-duty thrifted metal pans and wooden spoons, which naturally support proprioceptive input and withstand the elements.
- Seal with Child-Safe Products: Always seal the final structure with a zero-VOC, toy-safe, non-toxic sealant to protect against weathering while maintaining rigorous safety standards.
- Embrace the Mess for Development: Providing a dedicated space for dirt + fun isn’t just about getting messy; it directly develops motor skills, fosters loose parts play, and deeply connects kids to nature.
FAQs About DIY Outdoor Mud Kitchens
Here are answers to some of the most common questions people have when planning their mud kitchen project.
What wood should I use for a mud kitchen?
The best wood for a mud kitchen is natural cedar, redwood, or heat-treated (HT) wooden pallets for the upper structure, paired with pressure-treated lumber for the ground-contact legs. Cedar is naturally insect and rot-resistant due to its cedar wood tannins, making it a premium choice. If you are on a budget, pallet-based wood is an excellent low cost alternative, but you must ensure the pallets are stamped “HT” (Heat Treated) rather than “MB” (Methyl Bromide), as chemically treated pallets are unsafe for children’s toys.
How do you waterproof a mud kitchen?
You waterproof a mud kitchen by heavily coating the sanded wood with a child-safe, non-toxic exterior wood sealant or pure raw linseed oil. To properly stop wood rot, pay special attention to the end-grains (the cut ends of the boards), as they absorb moisture the fastest. Apply two to three coats of sealant annually as part of your routine maintenance guide. Keeping the kitchen elevated slightly off wet grass on pavers also dramatically improves weatherproofing wood longevity.
How much does it cost to build a mud kitchen?
A DIY mud kitchen typically costs between $30 and $100, depending on your access to free materials and the tools you already own. If you source free recycled wood crates or pallets and thrift your mud kitchen accessories, your only expenses will be screws, wood glue, and a high-quality non-toxic sealant. This makes the DIY route a highly budget-friendly option compared to premium store bought versions.
What age is a mud kitchen for?
Mud kitchens are ideal for children aged 18 months to 8 years old, growing alongside their developmental stages. Toddlers use the backyard sensory table to develop gross motor skills and explore textures through basic splashing and pouring. As children grow into preschoolers and primary ages, the play evolves into complex schematic play patterns, role-playing café scenarios, and experimenting with “chemistry” by mixing natural nature soup ideas.
Does a mud kitchen need a roof?
A mud kitchen does not strictly need a roof, but adding a simple canopy or positioning it under a tree provides shade and protects the wood from heavy rain. If your outdoor play kitchen is fully exposed to harsh weather, a slanted wooden roof or a fabric sunshade can prevent the working tap water from overheating in the summer and slow down UV fading. However, a roofless, open-air design is perfectly fine if properly sealed and covered with a tarp during severe winter weather.
Can you use a mud kitchen in winter?
Yes, a mud kitchen can absolutely be used in the winter by swapping out liquid water and mud for snow, ice blocks, and pinecones. Winter nature play is fantastic for children! They can use their pots + pans to bake “snow cupcakes,” paint the snow with food coloring, or smash ice chunks with wooden spoons. Just ensure you drain any closed water dispensers to prevent freezing and cracking.
How do I stop my mud kitchen from rotting?
To prevent rot, seal the wood annually, ensure excellent drainage in your sink, and never let the wooden legs sit directly in pooling water. The biggest threat to an outdoor cook station is standing moisture. Drill small drainage holes in the bottom of your storage shelves so rainwater can escape. Additionally, placing the legs on small stone pavers provides crucial ground contact safety and drastically extends the life of the unit.
How to make a mud kitchen with a working tap?
To add a working tap without plumbing, mount a large outdoor water dispenser with a spigot directly above the stainless steel sink basin. This is a highly popular, easy DIY vs kit upgrade. Simply install a sturdy wooden shelf right above the sink, purchase a beverage dispenser with a push-button spigot, and let the kids control their own water flow during messy play.
What should be in a mud kitchen?
A well-stocked mud kitchen should include a stainless steel basin, heavy wooden spoons, old metal pots, a watering can, and baskets of natural loose parts. Avoid fragile plastics; instead, opt for durable, thrifted metal tools. Stocking the discovery kitchen with pinecones, pebbles, flower petals, and clean play dirt encourages open-ended loose parts play and inspires endless nature craft ideas.
Are mud kitchens worth it?
Yes, mud kitchens are overwhelmingly worth the effort; they provide years of independent, outdoor sensory play that fundamentally benefits early childhood brain development. While they require a weekend of drilling + assembly, the payoff is immense. They pull children away from screens, encourage them to connect with nature, and provide a safe space to exert independence while developing fine motor skills.
Final Thoughts on Building Your DIY Outdoor Mud Kitchen
Taking the time to build a DIY outdoor mud kitchen is one of the most rewarding backyard projects you can tackle for your children. Not only does it provide a highly customized, durable alternative to expensive and brittle plastic store bought options, but it transforms a forgotten corner of your yard into a vibrant outdoor learning space. By carefully selecting pallet-based materials, executing stable base construction, and prioritizing child safe finishes, you are crafting a rugged heirloom piece that will withstand years of vigorous nature play.
The true beauty of an earth kitchen lies in its simplicity. You don’t need advanced woodworking skills to succeed—just patience, a few basic tools, and a willingness to embrace the mess. The resulting sensory play benefits are staggering. As your children mix, pour, and concoct their wild nature soup ideas, they are quietly developing fine motor skills, practicing social cooperation, and regulating their nervous systems through natural loose parts play.
You now have the blueprint, the safety tips, and the design inspiration to create the ultimate backyard playground feature. So grab your tape measure, fire up the orbital sander, and start building a space where imagination rules and dirt is always on the menu. What will be the very first recipe your kids cook up in their new kitchen?
Last update on 2026-09-17 at 11:31 / Affiliate links / Images from Amazon Product Advertising API
