
As an Amazon Associate KitchenwareSets.com earns from qualifying purchases.
7 Ultimate DIY Mud Kitchen Ideas: Easy Outdoor Play for Toddlers
Kids today spend countless hours staring at bright digital screens indoors. What if you could build a magical world of adventure right in your backyard? Finding engaging, budget-friendly outdoor activities that hold a toddler’s attention is a constant struggle. Creating a DIY mud kitchen solves this modern parenting dilemma beautifully.
A DIY mud kitchen is an outdoor play station that allows children to engage in sensory play by cooking with natural materials like mud, water, and sand. It is highly beneficial for toddlers as it promotes fine motor skills, creativity, and STEM learning concepts through unstructured, open-ended play. This hands-on experience deeply connects kids to nature.
Drawing from comprehensive child development research and proven educational methodologies, this guide provides tested backyard solutions. You will discover exactly how to construct durable play spaces using simple, upcycled materials. Get ready to transform your outdoor area into a DIY sanctuary of imaginative learning today.
Contents
show
Why Build a DIY Mud Kitchen? Unlocking a World of Sensory Play
Before diving into how to build these structures, it helps to understand why a toddler mud kitchen is far more than just a messy toy. These setups provide an invaluable outdoor learning environment that actively supports healthy child development. Rooted in the Montessori method and Loose parts play theory, an outdoor sensory play station encourages children to explore textures, weights, and volumes at their own pace.
Educator recommended approaches consistently highlight that nature kitchen diy projects facilitate profound sensory processing. When kids mix dirt and water to create a “pie,” they are actually developing fine motor skills and grasping early STEM learning concepts like cause and effect. The proven benefits of this unstructured, open-ended play extend to emotional regulation and imaginative problem-solving. While many commercial options exist, a homemade mud kitchen offers a budget-friendly way to customize a space specifically for your child’s developmental stage, making the effort of building it incredibly rewarding.
7 Ultimate DIY Mud Kitchen Ideas for Easy Outdoor Fun
If you are ready to start building a mud kitchen, you don’t need to be a master carpenter. Finding actionable, inspiring mud kitchen designs that match your specific skill level, budget, and available backyard space is easier than you think. This comprehensive list provides seven distinct mud kitchen plans free of complex jargon.
Whether you want a simple mud kitchen built in ten minutes or a deluxe station crafted from reclaimed lumber, these step-by-step guides offer clear instructions and detailed measurements. Each idea includes essential safety tips and non-toxic finish recommendations, ensuring your project meets important safety standards while providing years of durable fun.
1. Assemble a Simple & Sturdy Pallet Mud Kitchen

Pin this budget-friendly mud kitchen idea to your “DIY for Kids” board!
A pallet mud kitchen is the perfect project for beginners looking for cheap materials and a sturdy result. By using reclaimed wood, you keep costs incredibly low while creating a robust outdoor play area. These reclaimed pallet wood mud kitchen plans are specifically designed for those with no prior DIY experience, offering an easy entry into backyard woodworking.
Supplies Needed
- 1 Heat-Treated (HT) wood pallet, in good condition
- 1 large stainless steel bowl for the sink
- Power sander or sanding blocks (medium and fine grit)
- Crowbar and hammer
- Cordless drill with screws (exterior grade, 1.5″ and 3″)
- Jigsaw or hand saw
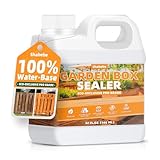
- A non-toxic, weather-proof wood sealant or outdoor paint
- A few small hooks for mud kitchen accessories
Step-by-Step Directions
- Sand Everything: Thoroughly sand all surfaces of the pallet to remove splinters and create safe edges. This is the most important step for a child-safe finish.
- Deconstruct the Pallet: Use a crowbar to carefully pry off the top and bottom deck boards. Leave the three vertical support blocks connected by one central board.
- Assemble the Frame: Stand the central structure upright. Re-attach two deck boards to the top to create the countertop. Attach one or two boards lower down to create a storage shelf.
- Cut the Sink Hole: Place your stainless steel bowl upside down on the countertop and trace around it. Drill a starter hole, then use a jigsaw to cut out the circle, staying about 1/4 inch inside your line so the bowl’s lip can rest on top.
- Add a Backsplash: Attach another deck board vertically along the back of the countertop to create a backsplash.
- Seal for Durability: Apply 2-3 coats of non-toxic outdoor sealant to the entire structure, letting it dry completely between coats. This step is key to prevent wood rot.
- Final Touches: Mount a few hooks on the backsplash for hanging old kitchen utensils. Drop in the sink bowl and you’re ready for play!
Pro-Tip: Safety First with Pallets
Before you begin, check the pallet for a stamp. Only use pallets marked with “HT” (Heat Treated). Avoid any marked “MB” (Methyl Bromide), as they are treated with toxic chemicals. This is a critical safety standard for any childrens mud kitchen.
2. Construct a Quick “No-Tool” Cinder Block Kitchen

Need a quick build? Pin this brilliant no-tools-needed idea!
If you are wondering how to build a mud kitchen without power tools, this cinder block design is your ultimate solution. It is an incredibly fast, tight budget fix that requires absolutely zero DIY experience. Because the design is highly modular, it can easily be expanded as your child grows or moved across the yard in a matter of minutes.
Supplies Needed
- 4-6 standard cinder blocks (8x8x16 inches)
- 1 thick, untreated wood plank (e.g., a 2″ x 12″ x 6′ cedar or redwood board)
- 1 sturdy basin or bowl for the sink (an enamelware bowl works great)
- Optional: exterior construction adhesive for a more permanent structure
Step-by-Step Directions
- Choose Your Spot: Find a relatively level patch of ground in your backyard play area.
- Build the Supports: Stack two cinder blocks on top of each other to create the first leg. The holes in the blocks can be used for mud kitchen storage of sticks or utensils.
- Create the Second Leg: Measure the length you want for your countertop and stack the other two cinder blocks to create the second leg.
- Place the Countertop: Lay the wood plank across the top of both cinder block stacks. Ensure it’s stable and doesn’t wobble.
- Position the Sink: Simply place your basin or bowl on top of the countertop. Since you aren’t cutting a hole, this version is incredibly simple design and highly portable.
- (Optional) Secure the Structure: For a more permanent and sturdy setup, apply a generous amount of exterior construction adhesive between the stacked blocks and under the plank.
Pro-Tip: Perfecting Your Base
For added stability on uneven ground, first dig a shallow, level trench for the bottom blocks to sit in. This is a simple ground leveling technique that greatly improves the safety of your free-standing structure and creates a tested design that won’t topple during aggressive play.

3. Upcycle an Old Dresser into a Charming Mud Kitchen

Don’t throw it out! Pin this creative upcycled dresser idea for later.
Transforming an indoor piece of furniture into an outdoor play station is a genius way to tackle clutter management. A mud kitchen made from old chest of drawers provides immediate, built-in storage. This colorful, storage-rich option is perfect for parents who want a creative mud kitchen that keeps loose parts neatly organized when playtime is over.
Supplies Needed
- 1 old wooden dresser, changing table, or small cabinet
- Jigsaw
- Power sander
- Weather-proof, non-toxic outdoor paint or stain
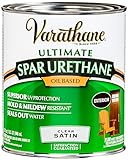
- Marine-grade polyurethane or spar urethane sealant
- 1 sink bowl (a metal pet food bowl is a great size)
- Cordless drill
Step-by-Step Directions
- Prepare the Dresser: Remove any top drawers where the sink will go. If it’s a changing table, you might already have a perfect open space. Clean the entire piece thoroughly.
- Sand for Painting: Lightly sand all exterior surfaces to help the new paint adhere properly.
- Cut the Sink Hole: Following the method in Idea #1, trace and cut a hole in the top surface for your sink bowl.
- Paint and Protect: Paint the dresser in a fun, colorful shade using exterior-grade paint. This is your chance to get creative with mud kitchen decor!
- Seal for the Outdoors: This is the most critical step. Once the paint is dry, apply at least three coats of a marine-grade or spar urethane sealant over the entire piece, especially the countertop and feet. This durable construction step is essential to prevent wood rot on furniture not originally intended for outdoor use.
- Reassemble and Play: Insert the drawers you’re keeping, drop in the sink, and fill the drawers with loose parts, pots, and pans. The drawers provide amazing mud kitchen storage.
Pro-Tip: Managing the Mess
To make cleanup easier and protect the inside of your new wooden drawers, line them with heavy-duty plastic sheeting or insert removable plastic bins. This makes it a breeze to manage the inevitable mud + water mess without destroying the interior of your upcycled furniture.
4. Mount a Compact, Space-Saving Wall Kitchen

Short on space? Pin this genius wall-mounted mud kitchen idea!
Not everyone has acres of land for backyard play areas. A compact, wall-mounted mud kitchen offers brilliant limited space solutions for patios, balconies, or tiny urban gardens. By utilizing vertical areas for mud kitchen storage ideas for small spaces, you provide the full sensory experience without sacrificing your lawn footprint.
Supplies Needed
- 1 small wooden board for the countertop (e.g., 1″ x 10″ x 3′)
- 2 heavy-duty folding shelf brackets
- A pegboard or small wooden board for the backsplash
- Screws for mounting to your specific surface (fence, brick, etc.)
- A lightweight, removable bin or bowl for the sink
- Hooks, small baskets, and clips for storage
Step-by-Step Directions
- Prepare the Wood: Sand and seal all wooden components with weather-proof outdoor sealant, just as in the previous ideas.
- Attach Brackets: Mount the two folding shelf brackets to the underside of your countertop board.
- Mount the Backsplash: Drill the backsplash board directly to the fence or wall at your desired height.
- Attach the Countertop: Mount the hinged side of the folding brackets to the wall or fence, just below the backsplash. Test the folding mechanism to ensure it works smoothly.
- Add Storage: Attach hooks, wire baskets, or clips to the backsplash. This is where you can hang utensils and store loose parts without taking up any floor space.
- Place the Sink: Simply set the lightweight plastic bin on the countertop to act as a removable sink, making for easy cleanup.
Pro-Tip: Essential Mounting Safety
Ensure you are mounting the kitchen to a solid, structural part of your fence or wall. Use appropriate anchors for your specific wall type (e.g., masonry anchors for brick). Meeting these structural safety standards by testing the weight capacity of the folded-down shelf before letting children play is absolutely crucial.

5. Design a Deluxe Double Sink Mud Kitchen

The ultimate setup for siblings! Pin this deluxe double-sink mud kitchen plan.
If you have multiple children or run a home daycare, upgrading to a deluxe double sink mud kitchen is a fantastic investment. This large, feature-rich station allows children to play side-by-side without arguing over workspace. Featuring separate sinks and expansive shelving, this plan mimics a real-world cooking environment and can easily integrate a simple mud kitchen with running water.
Supplies Needed
- Cedar or Redwood lumber (e.g., 2x4s for legs, 1x6s for shelves and countertop)
- 2 matching stainless steel bowls
- Deck screws (exterior grade)
- Miter saw or circular saw
- Jigsaw, drill, and sander
- Weather-proof sealant
- Optional: a manual water pump or beverage dispenser with a spigot
Step-by-Step Directions
- Build the Frame: Construct a simple workbench frame. Create two rectangular sides using 2x4s, then connect them with horizontal 2x4s to determine the length and depth.
- Attach Shelves and Countertop: Attach 1×6 boards across the bottom supports to create a large storage shelf. Attach more 1×6 boards across the top to form a solid countertop.
- Create the Backsplash: Build a tall backsplash with an upper shelf for additional storage, similar to a real kitchen hutch.
- Cut Two Sink Holes: Carefully measure and cut two separate holes for your twin sinks, leaving enough workspace in the middle.
- Install a “Faucet”: For a simple “running water” feature, drill a hole behind one sink and install a beverage dispenser spigot connected to a water jug stored on the top shelf. Alternatively, install a manual hand water pump leading to a bucket below.
- Sand and Seal: Perform a final thorough sanding on all surfaces and edges. Apply multiple coats of a high-quality outdoor sealant to your durable construction.
Pro-Tip: Sensory Sorting Strategy
Designate one sink exclusively for water and one for “dry” ingredients like sand, dirt, and leaves. This educator recommended approach helps children practice sorting and organization—key principles in the Montessori method—and makes mess containment a little easier for parents.

6. Create a Natural Log & Stump Kitchen

Embrace nature! Pin this gorgeous and natural mud kitchen idea.
For eco-friendly parenting advocates, a natural log kitchen seamlessly blends eco-conscious aesthetics with Waldorf education philosophies. Rather than building a rigid structure, you arrange nature-provided materials to create a beautifully organic nature kitchen diy space. It perfectly facilitates loose parts play theory, directly connecting kids to the natural environment.
Supplies Needed
- Several tree stumps or thick logs of varying heights
- A large, flat-ish rock or a cross-cut tree slab for a cutting board
- A metal bucket or old pot for a sink
- Optional: a hand saw to level the tops
Step-by-Step Directions
- Source Your Materials: Look for fallen trees or stumps in your yard or ask local tree removal services. Ensure the wood is safe and free from pests.
- Level the Stumps: If necessary, use a hand saw or chainsaw to create flat, stable surfaces on your stumps. This is crucial for safety. The tops should be relatively level to prevent pots from sliding off.
- Arrange Your “Kitchen”: Arrange the stumps to create different work surfaces and “stools.” A taller stump can be the main counter, while shorter ones can be chairs or prep areas.
- Position the Sink and Counter: Place your metal bucket sink on one stump and your flat rock “cutting board” on another.
- Gather Nature’s Utensils: This kitchen’s beauty lies in its accessories. Encourage kids to find sticks for whisks, acorns for ingredients, and large leaves for plates. This fully embraces open-ended play.
Pro-Tip: Choosing Durable Materials
If sourcing logs, try to find rot-resistant species like Cedar, Black Locust, or Redwood. For other woods like pine or oak, placing them on a bed of gravel rather than directly on damp soil can greatly help prevent wood rot and extend the life of your natural setup.

7. Arrange a Minimalist Crate & Bowl Station

The easiest DIY ever! Pin this minimalist and portable mud kitchen idea.
Sometimes, the best outdoor mud kitchen ideas using household items are the simplest ones. A minimalist crate station offers the cheapest and most temporary option for parents wanting to test the waters before committing to a larger build. Utilizing basic wooden crates, this portable play area can be set up or taken down in a matter of seconds.
Supplies Needed
- 2-3 wooden crates (the kind from a craft store or old fruit crates)
- A sturdy, non-breakable bowl
- Optional: zip ties
Step-by-Step Directions
- Check for Splinters: Even new craft crates can have rough spots. Do a quick sand of any splintery areas to make them child-safe.
- Stack the Crates: Arrange the crates by stacking them. You can place two side-by-side on the bottom and one on top to create a small counter and shelf.
- Secure for Safety (Optional but Recommended): For toddlers who might pull on things, use a few zip ties to temporarily connect the crates to each other. This adds stability but is easily removable.
- Add the “Sink”: Place your bowl on the top crate. Fill the open sides of the crates with your mud kitchen accessories, and your messy play station is ready to go in under five minutes.
Pro-Tip: Indoor Rainy Day Hack
This portable setup is a parent approved life-saver for bringing messy play indoors on a rainy day. Just lay down a large tarp or old shower curtain, and swap the wet mud for taste-safe alternatives like oobleck (cornstarch and water) or cocoa powder “dirt.”

Key Takeaways: Your Quick Guide to Building a DIY Mud Kitchen
To confidently start your backyard project, keep these foundational rules of mud kitchen construction in mind. Reviewing this quick summary ensures you won’t miss any critical steps regarding safety, materials, or child development benefits.
- Safety First, Always: The most critical step for any DIY mud kitchen is to thoroughly sand all wood surfaces to remove splinters and only use non-toxic, child-safe paints and sealants.
- Upcycling is Your Best Friend: You can build a fantastic homemade mud kitchen for very little money by utilizing upcycled materials like wooden pallets, old dressers, or even just cinder blocks and planks.
- It’s More Than Just a Mess: Mud kitchens are powerful educational tools for child development, actively promoting sensory play, fine motor skills, creativity, and early STEM concepts in a fun, open-ended play environment.
- Weatherproofing is Not Optional: To guarantee your creation lasts through the seasons, you must seal it with multiple coats of a weather-proof, outdoor-rated sealant like spar urethane. This is essential to prevent wood rot.
- The Sink is the Heart: A simple stainless steel bowl or plastic basin is all you need to create the central feature. Don’t overthink it; a removable bowl makes for the easiest cleanup.
- Accessorize with Nature: The absolute best mud kitchen accessories are entirely free. Encourage kids to use loose parts like stones, sticks, leaves, pine cones, and flowers as their pots, pans, and ingredients.
People Also Ask About DIY Mud Kitchens
Even after seeing various plans, many parents have specific lingering questions about materials, safety, and everyday use. Below are clear, authoritative answers to the most common queries to help you overcome any final barriers before starting your build.
What is the best wood to use for a mud kitchen?
The best woods for a DIY mud kitchen are naturally rot-resistant species like Cedar, Redwood, or Teak. If those are outside your tight budget, pressure-treated pine is a durable option, but you must ensure it is a modern, safer variety (like ACQ) and fully seal it with a non-toxic finish to create a safe barrier for children. Utilizing industry standard materials ensures longevity.
How do you weatherproof a mud kitchen?
To properly weatherproof your mud kitchen, you must apply 2-3 coats of a high-quality outdoor sealant. Look for products labeled “spar urethane” or “marine varnish,” as they are designed to be flexible and withstand water and UV rays. Ensure you coat every surface, including the bottoms of the feet and all cut edges, to maintain your tested design over the years.
What age is a mud kitchen suitable for?
Mud kitchens are most popular for toddlers and preschoolers, typically ages 2 to 7. This is the prime age for sensory play and imaginative development. However, with adult supervision, even younger children can enjoy the sensory aspects, and older children often enjoy the creative “potion making” and nature lab elements that an exploration station provides.
What do you put in the bottom of a mud kitchen?
You put ingredients for play in the mud kitchen, not in the bottom of the structure itself. The drawers, shelves, and bowls should be filled with loose parts like sand, soil, pebbles, leaves, flowers, and water. For the ground underneath the kitchen, a layer of mulch or pea gravel can heavily assist with water drainage and mess containment.
How do you make a mud kitchen sink?
The easiest way to make a mud kitchen sink is to use a drop-in bowl. Simply trace the bowl’s outline on your wooden countertop, drill a pilot hole, and use a jigsaw to cut out the circle. A stainless steel mixing bowl or a sturdy plastic basin works perfectly, allowing kids to mix mud + water efficiently.
Are mud kitchens worth it?
Yes, educators and parents overwhelmingly agree that mud kitchens are worth it due to their immense developmental benefits. For a remarkably small investment of time and money, a backyard mud kitchen provides endless fun and encourages creativity, problem-solving, and a connection to nature that is invaluable for a child’s early growth.
How do you keep a mud kitchen clean?
To keep a mud kitchen clean, focus on easy-to-clean materials and regular tidying. Using a removable sink + bowl configuration is the greatest tip for easy cleanup. Periodically, hose down the entire structure and use a stiff brush to scrub off any stubborn mud. Teaching your child to “clean up” their station after play is also a fantastic daily learning opportunity.
What are some good mud kitchen accessories?
The best mud kitchen accessories include old pots, pans, muffin tins, whisks, and measuring cups. Supplement these standard household items with natural loose parts like pine cones, sea shells, river rocks, sticks, and flower petals. Installing a chalkboard for writing daily pretend menus is also a fantastic, low-cost addition.
How do you add running water to a mud kitchen?
You can add a simple “running water” feature by installing a beverage dispenser with a spigot. Mount the dispenser securely on a shelf slightly above the sink. For a highly interactive alternative, install a manual hand pump designed for camping water jugs, which allows kids to actively pump the water themselves while playing.
Can you build a mud kitchen from pallets?
Yes, pallets are one of the most popular materials for building a budget-friendly and sturdy mud kitchen. It is absolutely crucial, however, to use only pallets stamped “HT” for “Heat Treated,” as pallets marked “MB” are treated with highly toxic chemicals and fail basic safety standards for children’s outdoor toys.
Final Thoughts on Your DIY Mud Kitchen Adventure
Embarking on a DIY mud kitchen project is so much more than a simple weekend woodworking task; it is a direct investment in your child’s happiness, creativity, and educational development. As we’ve explored, creating a fantastic outdoor play kitchen doesn’t require a master’s degree in carpentry or a massive budget. By utilizing upcycled materials, prioritizing child-safe finishes, and embracing the beauty of natural accessories, you can easily craft a sensory play station that rivals expensive commercial alternatives.
Remember that a perfect, pristine aesthetic isn’t the ultimate goal here. The true value lies in providing a sturdy, safe, and engaging space where your toddler can freely experiment with mud, water, and nature. Focus on building a durable structure that withstands the elements—and energetic play—by thoroughly sanding surfaces and applying weather-proof sealants.
Now that you have the blueprints, safety standards, and inspiration, it’s time to roll up your sleeves. Which of these seven creative designs fits your backyard best? Gather your wooden crates, pallets, or cinder blocks this September, and start building a space where childhood memories are made.
Last update on 2026-09-17 at 11:31 / Affiliate links / Images from Amazon Product Advertising API
