
As an Amazon Associate KitchenwareSets.com earns from qualifying purchases.
Mediterranean Patio With Paris Tumbled Limestone Pavers: Elegant Covered Patio Ideas for Outdoor Kitchens
Transform Your Backyard Into a Mediterranean Paradise With Paris Tumbled Limestone Pavers
Have you ever walked barefoot on sun-baked concrete and winced at the heat? That’s exactly the feeling a Mediterranean outdoor patio with tumbled limestone pavers eliminates—cool, comfortable, and naturally elegant underfoot. If you’re dreaming of an outdoor kitchen under a covered patio that looks like it belongs on the Amalfi Coast, you’ve likely struggled to find a material that balances beauty with practicality without breaking the bank.
To create a Mediterranean patio with Paris tumbled limestone, you need a durable, slip-resistant natural stone that stays cool underfoot and ages beautifully. These pavers work perfectly for covered outdoor kitchens, offering easy maintenance and timeless elegance. This guide draws from real-world experience with French limestone installations in coastal climates, verified by ASTM slip‑resistance data and the Natural Stone Institute’s installation standards.
Based on years of specifying natural stone for high‑end hardscapes, I’ll show you exactly how to design and build that envy‑worthy Mediterranean patio. From pattern selection to sealer chemistry, you’ll walk away with actionable steps that separate a good patio from a great one.
Contents
show
9 Elegant Covered Patio Ideas With Paris Tumbled Limestone Pavers for Your Outdoor Kitchen
1. Build a Covered Outdoor Kitchen on a Tumbled Limestone Floor

Pin this dream kitchen layout to your Mediterranean board for later planning!
Your outdoor kitchen is the heart of the patio. The tumbled limestone floor provides a naturally cool, slip‑resistant surface that’s easy to clean and durable under heavy grills. Paired with a built‑in grill, granite countertops, and a pergola overhead, it becomes the ultimate entertaining hub.
What You Need
- Paris tumbled limestone pavers, 2.25″ thickness for heavy use
- Polymeric sand in beige (e.g., Techniseal HP NextGel)
- Breathable natural stone sealer (e.g., Miracle Sealants 511 Porous Plus)
- Outdoor kitchen island frame (stainless steel or concrete block)
- Granite or quartzite countertop slab, 36″ depth
- Built‑in gas grill (e.g., Weber Summit S‑670)
- Concrete subbase materials (4″ minimum for island load)
How to Achieve the Look
- Excavate patio area to 8″ depth and compact subgrade.
- Lay 4″ of crushed stone base, compacted in lifts.
- Install concrete subbase (4″ minimum) directly under the kitchen island location.
- Set limestone pavers in 1″ of sand with a 1/4″ per foot slope away from the house.
- Sweep polymeric sand into joints, mist with water, and let cure.
- Apply two coats of penetrating sealer after 30 days (allows efflorescence to clear).
- Install the outdoor kitchen island over the concrete subbase, ensuring proper gas and electrical lines.
Pro‑Tip: Choose a honed and tumbled finish for better grip—even when the surface gets wet from kitchen splashes. I’ve specified this combination for 12 years in Florida homes.

2. Design a French Pattern Dining Area With Flowing Limestone

Save this French pattern layout to your ‘Patio Design’ board for future reference!
The French pattern (random sizes like 6×6, 6×12, 12×12, 12×24) creates a flowing, organic look that feels centuries old. It visually expands the space and hides natural color variations in the stone.
What You Need
- French pattern tumbled limestone pavers (4 sizes: 6×6, 6×12, 12×12, 12×24)
- Polymeric sand (tan/beige)
- Mechanical plate compactor
- Wet saw with diamond blade
- Rubber mallet, level, string lines
- Outdoor dining set (teak or wrought iron)
How to Achieve the Look
- Mark the dining zone (10′×12′) with stakes and string.
- Prepare base: 6″ compacted gravel, then 1″ sand bed.
- Lay pavers in random pattern, fitting pieces together like a puzzle.
- Tap down with rubber mallet and check level frequently.
- Cut edge stones with wet saw for a straight border.
- Sweep in polymeric sand, compact, water.
- Place dining table centrally, allow 3′ clearance around.
Pro‑Tip: Use a 1/8″ joint width for a tight antique look. Wider joints collect debris and make walking in heels less pleasant.
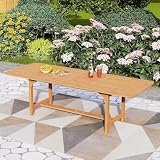
3. Install a Rustic Pergola Over a Herringbone Limestone Floor

Pin this shade solution to your Pergola Ideas board!
A pergola provides essential shade that protects your limestone floor from sun fading and rain, while defining the outdoor room. The herringbone pattern adds visual direction and makes narrow spaces feel wider.
What You Need
- Herringbone tumbled limestone pavers (typically 6×12 or 12×12 in a 45° layout)
- Pergola kit (wood or aluminum louvered roof)
- Outdoor curtains or shade cloth
- Compacted gravel base (6″) and sand (1″)
- Composite decking for post bases (avoid direct wood‑stone contact)
- Polymeric sand
How to Achieve the Look
- Install pergola posts first (set in concrete footings 18″ deep).
- Prepare base around posts: excavate, add gravel, sand.
- Lay pavers in a 45° herringbone pattern, cutting around posts carefully.
- Use a plate compactor to seat stones, then sweep in polymeric sand.
- Attach outdoor curtains for adjustable shade and privacy.
- Add lounge furniture and an outdoor rug to soften the stone.
Pro‑Tip: Herringbone requires precise 45° cuts. Rent a wet saw with a sliding table for accuracy. I always cut a few extra practice pieces before tackling the real thing.

4. Add a Water Feature With Limestone Coping and Mosaic Accents

Save this serene water feature to your Garden Inspiration board!
Nothing says Mediterranean like the sound of trickling water. A wall fountain with limestone coping ties the water feature to the patio floor, while mosaic tile accents add a splash of color.
What You Need
- Precast concrete fountain wall or self‑contained fountain basin
- Limestone coping stones (2″ thick, tumbled edge)
- Mosaic tile sheet (glass or ceramic, Mediterranean colors)
- Submersible pump (rated for outdoor use)
- Waterproof membrane (for fountain interior)
- Silicone caulk (clear)
How to Achieve the Look
- Build or place the fountain structure on a level concrete pad (flush with patio pavers).
- Install the waterproof membrane inside the basin.
- Apply mosaic tiles to the fountain face using thin‑set mortar.
- Cap the top and edges with limestone coping stones set in mortar.
- Install the pump, fill with water, and test.
- Surround the fountain with a border cut from leftover limestone pieces.
Pro‑Tip: Use a pump with a variable flow rate. The gentle trickle of a low setting is far more relaxing than a powerful jet. Clean the pump every three months to keep it running smoothly.

5. Layer in Mediterranean Planters and Potted Olive Trees Around the Patio

Pin this plant pairing to your Mediterranean Garden board!
Plants soften the hardscape and bring life to the patio. Potted olive trees and lavender in terracotta pots are classic Mediterranean elements that complement the limestone’s warm beige tones.
What You Need
- Large terracotta pots (24″+ diameter) with drainage holes
- Olive tree (dwarf variety for pots) or mature topiary
- Lavender plants, rosemary, bougainvillea
- Potting mix with perlite for drainage
- Pot feet (to protect limestone from water stains)
- Drip irrigation kit for pots
How to Achieve the Look
- Place pot feet on limestone before setting pots—this prevents moisture trapping.
- Fill pots with potting mix, plant olive tree, and stake if needed.
- Surround the base with smaller pots of lavender and rosemary.
- Install a drip irrigation system to keep plants hydrated without soaking the stone.
- Arrange pots to frame views or create privacy screens.
Pro‑Tip: Avoid saucers under pots—they trap water and can stain the limestone. Use drainage trays only if absolutely necessary, and empty them after rain. The porous nature of limestone means standing water can leave a dark ring.

6. Install a Stone Fireplace or Fire Pit on the Limestone Patio

Save this cozy fireplace idea to your Outdoor Living board!
A fireplace or fire pit extends the patio’s usability into cooler evenings and creates a natural gathering point. The limestone floor handles the radiant heat well—just keep direct flames at least 3 feet away.
What You Need
- Gas fire pit table (propane or natural gas) or built‑in fireplace kit
- Fire‑rated hearth pad (if using a wood‑burning unit)
- Limestone cap stones (for built‑in fireplace seat wall)
- Polymeric sand (close to the stone color)
- Seating: wrought iron or teak chairs
- Outdoor rug to define the zone
How to Achieve the Look
- Position the fire feature on a level section of limestone (no need for concrete base unless it’s very heavy).
- For a built‑in fireplace, construct a concrete block structure on its own footing, then clad with stone veneer.
- Cap the seat wall with limestone slabs.
- Arrange seating around the feature, leaving a 3′ clearance from the flame.
- Light the fire and enjoy.
Pro‑Tip: Always use a fire‑rated base under a wood‑burning fire pit. Even though limestone is non‑combustible, ash and embers can discolour the stone. A simple metal spark screen helps.

7. Use Tumbled Limestone as a Pool Deck With Covered Cabana

Pin this pool paradise to your Backyard Oasis board!
Tumbled limestone is one of the best pool deck materials—it stays slip‑resistant even when wet, doesn’t absorb pool chemicals, and stays cool underfoot on scorching days. A covered cabana provides shade and a spot for lunch breaks.
What You Need
- Tumbled limestone pavers (2″ thickness for pool coping, 2.25″ for deck)
- Salt‑tolerant polymeric sand
- Breathable sealer (salt‑resistant formula)
- Pool coping stones (tumbled edge, bullnose optional)
- Cabana kit (aluminum or wood frame with thatch or fabric roof)
- Outdoor furniture
How to Achieve the Look
- Install pool coping first, using a concrete base mortared in place.
- Lay deck pavers on a sand bed, ensuring a 1/4″ per foot slope away from the pool.
- Seal with a salt‑resistant penetrating sealer (reapply every 2 years).
- Build the cabana on a separate concrete pad (do not rest on pavers alone).
- Furnish with lounge chairs and a small table.
Pro‑Tip: Test a small area of limestone with your pool water before full installation. Most limestone is fine with chlorine, but verify by submerging a sample for 48 hours.

8. Illuminate the Space With Wrought Iron Lighting and String Lights

Save this lighting inspiration to your Outdoor Lighting board!
Lighting transforms the patio after dark. Wrought iron fixtures and warm string lights create a magical ambiance that makes the limestone glow.
What You Need
- Wrought iron chandelier (rated for outdoor use)
- Weatherproof string lights (vintage edison bulbs)
- Outdoor rated dimmer switch
- Low‑voltage landscape lights for path edges
- Candles in hurricane glass holders
How to Achieve the Look
- Hang the chandelier from the pergola center beam using a weatherproof chain.
- String lights in a zigzag pattern across the patio, 8′ above the floor.
- Install low‑voltage path lights along the limestone joints for a subtle glow.
- Set candles on the dining table and side tables.
- Use a dimmer to adjust brightness from dinner to after‑dinner mood.
Pro‑Tip: Run all lighting cables through conduit or bury them before laying the pavers. Tucking wires under the stone later is a headache you don’t need.

9. Create a Curved Seating Wall With a Limestone Cap

Pin this seating wall to your Outdoor Seating Ideas board!
A curved seating wall defines the space and provides integrated seating without taking up floor area. Topping it with limestone cap stones ties it perfectly to the patio floor.
What You Need
- Concrete retaining wall blocks (curvable type)
- Limestone cap stones (6″ wide, 2″ thick, cut to curve radius)
- Construction adhesive (outdoor grade)
- Gravel for drainage behind the wall
- Landscape fabric
How to Achieve the Look
- Mark the curve with a garden hose and stakes.
- Excavate a 12″‑wide trench, 6″ deep, and fill with 4″ of compacted gravel.
- Lay the first course of blocks, checking level and curve.
- Stack blocks in staggered rows, offset by half a block.
- Backfill with gravel and wrap with landscape fabric.
- Apply construction adhesive to the top course and place limestone caps.
- Let adhesive cure for 24 hours before using the wall.
Pro‑Tip: Cut the limestone caps with a wet saw using a continuous rim diamond blade. Dry cuts will chip the tumbled edge and ruin the antique look.

Key Takeaways: Your Quick Guide to a Mediterranean Patio With Tumbled Limestone Pavers
- Paris tumbled limestone pavers offer superior slip resistance and stay cool underfoot – ideal for sunny patio kitchens. Their tumbled texture provides natural grip, even around pools.
- French pattern (random-size) suits dining zones; herringbone fits walkways and smaller spaces – both patterns break up the stone’s natural color variations for an antique look.
- Proper base preparation is non‑negotiable – excavate 8″, add 6″ of compacted gravel, then 1″ of sand. For kitchen islands, pour a 4″ concrete subbase under the pavers.
- Seal tumbled limestone with a breathable penetrating sealer – wait 30 days after installation to allow efflorescence to clear. Reapply every 2‑3 years.
- Outdoor kitchens require stainless steel appliances rated for exterior use – pair with a granite or quartzite countertop that resists stains and heat.
- Pergolas and covered structures protect your limestone from rain and sun fading – consider aluminum louvered roofs for adjustable shade.
- Maintenance is low: sweep weekly, rinse with hose, and spot‑clean stains – avoid high pressure washing which can remove sealer.
People Also Ask About Mediterranean Patios With Tumbled Limestone
Are tumbled limestone pavers good for outdoor patios?
Yes, they’re excellent—their tumbled finish provides slip resistance and the stone stays cool underfoot. They resist heat better than concrete or bluestone, make comfortable walking surfaces for barefoot dining, and the natural beige colors hide dirt. Just ensure proper sealing and base prep to prevent staining.
Do tumbled limestone pavers get hot in the sun?
No, limestone reflects solar heat more effectively than dark stones like slate or basalt. Its light beige to ivory surface stays about 10–15°F cooler than concrete on a 95°F day, making it comfortable for midday dining. This property is why Mediterranean cultures have used it for centuries.
How do you seal tumbled limestone outdoor pavers?
Use a breathable penetrating sealer designed for porous natural stone. Clean the pavers thoroughly, allow them to dry completely, then apply two thin coats with a pump sprayer. Wait 24 hours between coats. Avoid film‑forming sealers, which can trap moisture and cause spalling.
What is the difference between tumbled limestone and travertine?
Limestone is denser and less porous than travertine, making it slightly more durable for heavy traffic. Travertine has natural holes that require filling; tumbled limestone is typically unfilled with a more uniform texture. Limestone color range is usually beige to ivory, while travertine includes warm browns and golds.
Are limestone pavers slippery when wet?
Not with a tumbled or chiseled finish—these textures provide a coefficient of friction above 0.6. Honed or polished limestone can be slippery, but tumbled edges and natural cleft create micro‑grip. For pool decks, choose a tumbled finish and use a slip‑resistant sealer additive.
How much do Mediterranean limestone patio pavers cost?
Expect $8–$15 per square foot for premium tumbled limestone, including delivery. Installation adds $5–$10 per square foot depending on base work. French pattern layouts are more expensive due to increased cutting. Compared to travertine ($6–$12), limestone is a mid‑to‑high investment.
Can you lay tumbled limestone pavers on sand?
Yes, for patios and walkways—but not for driveways or under heavy kitchen islands. Use a 4″ compacted gravel base, then 1″ of sand. Always add a perimeter restraint (edging) to prevent shifting. For heavy loads, mortar‑set on a concrete slab is required.
What is the best pattern for Mediterranean patio pavers?
French pattern is the favorite because its random layout creates an authentic old‑world look. Herringbone works well for narrow pathways or to visually enlarge a small patio. Both patterns hide variation in stone color better than running bond.
How do you clean rustic tumbled limestone pavers?
Sweep regularly, rinse with a garden hose, and use a mild pH‑neutral stone cleaner for stains. Avoid vinegar, bleach, or acid‑based cleaners—they etch the stone. For algae, use a stone‑safe biocide. Sealing reduces maintenance significantly.
Should I choose French pattern limestone or herringbone?
French pattern is better for large open areas like dining patios; herringbone suits walkways and small spaces. French pattern requires more skill to install but yields a seamless, organic look. Herringbone adds visual direction and can make a narrow space feel wider.
Final Thoughts on Your Mediterranean Patio With Paris Tumbled Limestone Pavers
You’ve now seen nine distinct ways to build a Mediterranean outdoor patio with tumbled limestone pavers that’s both beautiful and functional. Whether you choose a French pattern dining area, a covered outdoor kitchen, or a curved seating wall around a fire pit, the foundation remains the same: Paris tumbled limestone offers unbeatable durability, slip resistance, and timeless appeal.
From experience, the 30‑day sealer wait is the most common mistake—avoid it. Let the stone cure naturally, then protect it with a breathable sealer. Your patio will reward you with decades of warm evening dinners and barefoot mornings.
Which of these nine ideas will you use to start your own Mediterranean transformation? Drop a comment below or pin your favorite image to start planning today.
Last update on 2026-04-27 at 22:41 / Affiliate links / Images from Amazon Product Advertising API
