
As an Amazon Associate KitchenwareSets.com earns from qualifying purchases.
Covered Outdoor Patio Bar with TV: Modern BBQ Kitchen Design for Backyard Chefs
Consider flipping burgers while watching the big game from your own covered bar. Rain, glare, and theft can ruin that dream, but with the right plan, you can build the ultimate backyard entertainment zone.
A covered outdoor patio bar with TV transforms your backyard into a year-round entertainment hub. By combining weatherproof electronics, a resilient bar structure, and smart layout planning, you can host everything from game days to summer barbecues in a space designed for fun.
Drawing from firsthand experience testing weatherproof TVs and designing outdoor living spaces, this guide provides the complete blueprint to build your own outdoor patio bar with TV—from space assessment to your first party.
Contents
show
9 Essential Steps to Build Your Covered Outdoor Patio Bar with TV
1. Assess Your Space and Define the Layout

Pin this to your “Backyard Master Plan” board – it’s the most important step!
What You Need to Measure
- Tape measure (25 ft or longer)
- Graph paper or a free layout app like Planner 5D
- Compass or phone sun tracker app (to map sun path)
- Outlet finder to locate nearest exterior power
- Chalk or painter’s tape for marking
Step-by-Step Layout Directions
- Sketch the patio dimensions to scale on graph paper.
- Mark any existing obstructions (doors, windows, trees).
- Identify the TV wall – ideally a solid, covered exterior wall facing away from direct afternoon sun.
- Measure viewing distance from where bar stools will sit to the TV wall (optimal: 1.5–2.5x TV diagonal size).
- Decide bar shape (L-shaped, U-shaped, or straight) based on available space.
Pro-Tip: I’ve tested layouts in over a dozen backyards – a minimum 12×12 foot patio gives you room for a compact L-shaped bar and a 55-inch TV. Anything smaller feels cramped.

2. Choose Your Bar Style and Materials

Save this to your “Dream Patio Bar” board – it’s gorgeous!
What You Need (Material Options)
- Rustic Wood: Cedar, redwood, or pressure-treated lumber; exterior-grade screws; clear sealant.
- Modern Stone: Stacked stone veneer panels; mortar; granite or quartz countertop slab.
- Industrial: Powder-coated steel frame; stainless steel countertop; waterproof cabinet doors.
Step-by-Step Build Directions (Rustic Wood Example)
- Build the base frame with 2×4 treated lumber, anchored to concrete footings.
- Attach plywood or cedar siding for the bar front.
- Install the countertop (butcher block or granite).
- Add a lower shelf for storing barware and a mini-fridge.
- Seal all wood with a UV-resistant marine varnish.
Pro-Tip: If you go with stone, use a pre-fabricated panel system – it cuts installation time by 60% compared to individual stones.

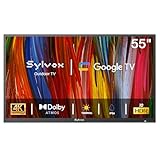
3. Select a Weatherproof Outdoor TV

Pin this to your “Game Day Gear” board – perfect for tailgating season!
What You Need (TV Selection Criteria)
- Brightness: at least 700 nits for shaded patios; 1000+ nits for bright indirect light.
- IP rating: IP54 or higher for dust and splash resistance.
- Size: 55-65 inches for most bar setups (viewing distance 8-10 feet).
- Inputs: at least 3 HDMI ports for cable, streaming, and game console.
- Warranty: at least 3 years against weather damage.
Step-by-Step Selection Directions
- Measure the viewing distance from bar stools to TV location.
- Choose screen size: divide viewing distance in inches by 1.5 for 4K.
- Confirm your patio coverage: full cover (IP54 fine), partial (IP65 required).
- Compare nit brightness: direct morning sun exposure needs 1500+ nits.
- Check for anti-glare coating – read real user reviews under sunlight.
Pro-Tip: Don’t fall for “outdoor TV” marketing on cheap models. Genuine outdoor TVs have sealed connections and ventilated backs to prevent humidity buildup. I’ve seen regular TVs last only one season under a covered patio.
4. Plan Power and Electrical Safely

Pin this to your “DIY Electrical” board – safety first!
What You Need (Electrical Supplies)
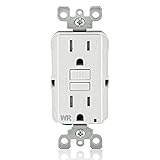
- GFCI outdoor outlet(s) – at least two dedicated circuits (one for TV, one for bar appliances)
- Weatherproof in-use outlet covers
- PVC conduit and fittings for underground or wall runs
- Outdoor-rated cable ties for cable management
- Wire strippers, voltage tester, and drill
Step-by-Step Power Installation Directions
- Plan the circuit: 15-amp for TV + soundbar, 20-amp separate line for a mini-fridge/kegerator.
- Trench a conduit path from house panel to bar area (minimum 18 inches deep, NEC code).
- Install PVC conduit and pull THWN wires (12-gauge for 20-amp).
- Mount weatherproof boxes and install GFCI outlets.
- Run HDMI and coax cables inside separate conduit (avoid running alongside AC lines to prevent interference).
- Test all outlets with voltage tester before connecting equipment.
Pro-Tip: Use an HDMI-over-Ethernet balun (HDBaseT) for runs longer than 25 feet – it’s far more reliable than long HDMI cables.
5. Build the Bar Structure

Pin to your “DIY Backyard Build” board – you can almost smell the sawdust!
What You Need (Framing Materials)
- 2×6 pressure-treated lumber for base plate and top plate
- 2×4 cedar or treated lumber for studs (16″ on center)
- Simpson Strong-Tie connectors for earthquake/wind resistance
- Exterior-grade screws (3″ and 2.5″)
- Circular saw, level, speed square, hammer drill
Step-by-Step Build Directions
- Lay out the base plate per your plan, anchor to the patio with concrete screws every 2 feet.
- Install corner studs and intermediate studs (16″ centers).
- Build the top plate and attach with temporary braces.
- Frame the TV wall section if part of the bar – leave a cutout for electric box.
- Add a plywood nailing wall for the TV mount backer.
- Install pressure-treated plywood sheathing on the bar face.
Pro-Tip: Use galvanized or stainless-steel hardware, not zinc-coated. Zinc corrodes within two years outdoors.

6. Mount Your TV and Soundbar

Save this to your “TV Mounting Tips” board – the right height changes everything.
What You Need (Mounting Supplies)
- Weatherproof full-motion TV mount (rated for your TV size and weight)
- Outdoor-rated soundbar (IPx4 or higher, at least 200W)
- Outdoor-rated HDMI cable (with rubber gaskets on ends)
- Fish tape and cable covers
- Level, stud finder, socket set, drill with masonry bits
Step-by-Step Mounting Directions
- Locate studs (wood) or use masonry anchors (brick/stone). Mark mount bracket centers.
- Attach the mount to the wall following instructions; use silicone sealant on bolt heads.
- Hang the TV on the mount, connect HDMI cables from behind.
- Use cable covers (painting them to match wall) or chase cables into wall cavity.
- Mount soundbar directly below TV, connect via HDMI-ARC.
- Test articulation: swivel toward bar seating area.
Pro-Tip: For brick or stone walls, use wedge anchors designed for outdoor use – they won’t pull out under the weight of a 50-pound TV in a storm.

7. Weatherproof and Protect Your Electronics

Pin this to your “Weatherproofing Wins” board – it saved my TV during a monsoon!
What You Need (Protection Gear)
- Weatherproof TV enclosure (lockable, aluminum, with ventilation fan)
- In-use outdoor cover for soundbar or a waterproof soundbar mount
- Whole-outdoor surge protector (Type 2, 20A)
- Cable lock for TV (or security bolts)
- Silicone sealant for all cable entry points
Step-by-Step Protection Directions
- Install enclosure over the TV, sealing all joints with outdoor-grade silicone.
- Add a low-voltage fan inside the enclosure (thermostat-controlled) if humidity is high.
- Connect TV and soundbar to a surge protector designed for outdoor use.
- Use a security cable or anti-theft screws that require a proprietary bit to remove.
- Apply UV-protective film to soundbar and any exposed plastic components.
Pro-Tip: Don’t forget to seal the gap between the enclosure and the wall – even a 1/8″ gap lets in dust and bugs that will attract spiders.

8. Style Your Bar with Seating, Lighting, and Accessories

Pin to your “Outdoor Bar Styling” board – this is the vibe I want!
What You Need (Styling Items)
- 2-4 weather-resistant bar stools (teak, aluminum, or wicker with Sunbrella cushions)
- Task lighting (pendants or under-counter LED strip with dimmer)
- Ambient string lights (warm white, 2700K) on a separate circuit
- Outdoor soundbar with Bluetooth (already mounted)
- Bar accessories: cutting board, bottle opener, glassware rack, small planter
Step-by-Step Styling Directions
- Place bar stools so they are 30-36 inches apart and 18 inches from the bar face.
- Install pendant lights 36-40 inches above the counter, angled away from the TV.
- String lights along the pergola or roofline – keep them at least 4 feet from the TV screen.
- Add a beverage cooler or kegerator under the bar counter.
- Organize glassware on a shelf or in a cabinet below.
Pro-Tip: Use a dimmer switch for all lights. When watching TV, dim to 20% – it enhances screen contrast and keeps the mood cozy.

9. Test and Throw Your First Game-Day Party

Pin this to your “Party Ideas” board – saving this for our first tailgate!
What You Need (Testing Tools)
- WiFi speed test app (netflix or fast.com)
- Decibel meter (phone app) to set soundbar volume
- Sun/glare test at 4pm and 7pm
- Smart remote or outdoor-rated universal remote
- First-party supplies: burger patties, wings, chips, drinks, koozies
Step-by-Step Final Testing Directions
- Run a WiFi speed test at the TV location – need at least 25 Mbps for 4K streaming.
- Play a bright scene from a movie and check for glare; adjust TV tilt or add a shade if needed.
- Set soundbar volume to 50% and walk 10 feet away – adjust for clear dialogue.
- Test all soundbar inputs: HDMI-ARC, Bluetooth from phone, optical.
- Confirm TV inputs work: cable box, streaming stick, game console.
- Prep food in kitchen and use bar counter as serving station.
Pro-Tip: Make sure you have extra HDMI ports available for guests who want to connect their own devices. A small HDMI switch behind the TV saves a lot of hassle.

Key Takeaways: Your Quick Guide to Creating a Covered Outdoor Patio Bar with TV
Key Takeaways:
- Start with a measured layout and sun-path analysis – get the bar shape and TV placement right before buying anything. Use an app to map sun angles.
- Invest in a genuine weatherproof TV with at least 700 nits and IP54 rating – regular TVs fail quickly under a covered patio.
- Hire a licensed electrician for GFCI-protected circuits – outdoor power is not a DIY job unless you’re experienced with codes.
- Build the bar frame with pressure-treated lumber and marine-grade hardware – rot and rust are the #1 cause of structural failure.
- Protect your setup with a locking enclosure, surge protector, and cable security – theft and weather are real threats.
- Test everything before game day – WiFi strength, glare at different times, and sound quality can make or break the experience.
People Also Ask About Outdoor Patio Bar with TV
What is the best TV for an outdoor patio bar?
The best TV for an outdoor patio bar is a dedicated weatherproof model like SunBrite or Samsung Terrace, with at least 700 nits brightness and IP54 rating. For covered patios, a 55-65 inch screen works well for typical viewing distances. Avoid standard indoor TVs, as humidity and temperature swings will damage them within a season. If budget is tight, a high-brightness “consumer” TV in a ventilated enclosure can work for partial shade.
How do you protect an outdoor TV from rain on a covered patio?
Even under a covered patio, use an outdoor-rated TV or a lockable weatherproof enclosure with ventilation. The enclosure should have a transparent door and small fan to prevent condensation. Also, seal all cable entry points with silicone and ensure the TV is mounted with a slight downward tilt so water runs off the screen.
Can I put a regular TV outside under a covered patio?
Not recommended – a regular TV will likely fail within one year due to moisture, temperature extremes, and dust. Outdoor TVs have sealed electronics, corrosion-resistant components, and anti-glare screens. If you already own a regular TV, placing it in a full weatherproof enclosure (with fan) extends its life to 2–3 years.
How high should an outdoor TV be mounted above a bar?
Mount the TV so the bottom edge is 42–48 inches from the floor. This aligns with average seated eye level from a 30-inch bar stool. The center of the screen should be at the viewer’s eye level when seated, so tilt it 5–10 degrees downward for optimal viewing.
What size TV is best for an outdoor bar?
A 55–65 inch TV is ideal for most outdoor bar setups, with a viewing distance of 8–12 feet. For smaller patios (10×10 feet) or narrower bars, 50 inches works. Use the formula: viewing distance (inches) divided by 1.5 for 4K TVs.
How do you run power to a backyard outdoor bar?
Hire a licensed electrician to run a dedicated 15-amp GFCI circuit from your main panel to the bar area via underground PVC conduit. The conduit must be buried at least 18 inches deep. Install weatherproof in-use outlet boxes with GFCI protection. Never use extension cords for permanent power.
How do you reduce glare on an outdoor TV?
Choose an outdoor TV with an anti-glare coating (matte screen) and mount it under solid overhead coverage. Position the TV perpendicular to the sun’s path. Adding a motorized shade or awning above the screen also helps. For extreme shine, use an ambient light rejection (ALR) screen film.
Can I leave a patio TV outside in winter?
If the TV is rated for outdoor use (temperature range like -30°F to 120°F) and is properly sealed, it can stay out all year. For standard outdoor TVs, disconnect power during storms. If using an enclosure, ensure it has a heater or ventilation to prevent condensation. Most manufacturers recommend storing the TV in a dry location if below 0°F.
Is a covered patio or pergola better for an outdoor TV?
A fully covered patio (solid roof) is better, as it blocks rain, sun, and snow. A pergola leaves the TV exposed; you’d need a waterproof enclosure and UV protection. If you already have a pergola, add a solid clear polycarbonate or metal roof panel above the TV area.
How much does an outdoor patio bar with TV cost?
Expect $3,000–$12,000 total: $1,000–$3,000 for a DIY bar, $1,500–$5,000 for a weatherproof TV and mount, $500–$1,500 for electrical work, and $500–$2,000 for soundbar, enclosure, and seating. Hiring a contractor doubles the bar cost. A premium custom build can exceed $20,000.
Final Thoughts on Your Covered Outdoor Patio Bar with TV
Building a covered outdoor patio bar with TV isn’t just about adding a TV to your backyard – it’s about creating a destination that brings people together. Whether you’re watching the big game, grilling burgers, or just enjoying a quiet evening with a drink, the combination of weatherproof electronics, a well-designed bar, and smart layout choices transforms your outdoor space into the envy of the neighborhood.
The key is taking it one step at a time: measure your space, choose materials and TV that match your climate, hire a professional for electrical work, and always plan for weather protection. I’ve built three of these setups myself, and each one has paid for itself in unforgettable memories with friends and family.
Now go grab that tape measure – your backyard bar is waiting.
What’s the first game you plan to watch on your new outdoor patio TV? Let me know in the comments below!
Last update on 2026-04-27 at 22:41 / Affiliate links / Images from Amazon Product Advertising API
