
As an Amazon Associate KitchenwareSets.com earns from qualifying purchases.
Kitchen Wall Ideas: Functional Shelving & Decor for Home Cooks
Your kitchen walls hold untapped potential. Every home cook knows the struggle: cluttered counters, hard-to-find spices, utensils buried in drawers. But the solution is right there on your walls.
The best kitchen wall ideas combine storage and style: open shelving for spices, magnetic racks for knives, and pegboards for utensils, freeing counter space for cooking. That’s the core principle that transforms a blank wall into a powerful cooking ally, making meal prep faster and more enjoyable.
Drawing from comprehensive analysis of current design trends and proven home-cook feedback, we’ve curated nine functional yet beautiful ideas that turn wasted vertical space into organized, efficient storage. Whether you have a tiny galley kitchen or a sprawling cook space, these solutions are built for real use.
Contents
show
Transform Your Kitchen Walls: Functional Shelving & Decor for Home Cooks
Your kitchen’s walls are prime real estate. Ignoring them means missing out on storage, style, and workflow efficiency. The ideas below are designed specifically for home cooks – not just decor, but tools that actively improve your cooking experience. Let’s dive into nine ways to make your walls work harder for you.
1. Install Open Shelving for Everyday Ingredients

Pin this to your ‘Kitchen Organization’ board – it saves counter space and looks beautiful!
Open shelving is more than a trend; it’s a workhorse for the home cook. By mounting floating shelves on a blank wall, you keep everyday ingredients like flour, pasta, and spices within arm’s reach without sacrificing counter space. The clear glass jars not only look gorgeous but let you see exactly what you have, preventing overbuying.
What You Need
- 2–3 wood shelves (20–48 inches long, 1 inch thick)
- Floating shelf brackets or L‑brackets (heavy duty, rated 50+ lbs)
- Stud finder, level, drill, screws, wall anchors
- Sandpaper, wood stain or paint (optional)
Installation Steps
- Locate wall studs with a stud finder and mark positions.
- Hold shelf bracket at desired height, level, and mark screw holes.
- Drill pilot holes into studs (or use wall anchors if no stud).
- Secure brackets with screws.
- Place shelf on brackets and fasten from underneath (if using floating system).
- Arrange clear glass jars with dry ingredients, spices, and cookbooks.
Pro-Tip: Use shelves with a 1‑inch lip on the front to prevent jars from sliding off during cooking vibration.

2. Create a Pegboard Utensil Organizer

Save this genius idea to your ‘Kitchen Hacks’ board – clutter‑free utensils!
A pegboard is the ultimate customizable organizer. Instead of digging through a drawer for a spatula or tongs, mount a pegboard near your stove and hang your most-used tools. You can rearrange the hooks anytime to match your changing needs.
Supplies Needed
- 24×36 inch pegboard panel (hardboard or metal)
- Pegboard mounting kit (screws, stand‑offs)
- Assorted pegboard hooks (straight, loop, wire)
- Wood frame strips (optional, for a finished look)
- Paint or chalkboard paint (optional)
Steps
- Cut pegboard to desired size or choose pre‑cut.
- Frame with wood strips or leave raw.
- Mark stud positions, drill holes, insert stand‑offs, and screw into studs.
- Install hooks in a layout that groups utensils by size/use.
- Hang spatulas, ladles, tongs, and turners.
- Add a small shelf at the bottom for a cookbook or spice jar.
Pro-Tip: Use a board painted with chalkboard paint above the pegboard for a menu or recipe spot.

3. Hang a Wall‑Mounted Magnetic Knife Strip

Pin this to ‘Kitchen Safety’ – knifes out of drawers, safe and accessible!
A magnetic knife strip frees up drawer space and keeps your blades sharp and visible. Unlike knife blocks that dull edges and take up counter room, a wall-mounted strip holds all your knives securely while adding a sleek, professional look.
What You Need
- 16‑inch magnetic knife strip (wood or stainless steel)
- Screws and wall anchors (or adhesive pads for light use)
- Level, drill, pencil
Steps
- Choose a wall space away from heat sources and free of splashes.
- Hold strip at comfortable height (usually 6–12 inches above counter).
- Level and mark screw holes.
- Drill pilot holes, insert anchors, screw strip into wall.
- Clean knives, attach to magnet – slight angle to grip securely.
- Test hold: each knife should not slide when lightly tugged.
Pro-Tip: Mount the strip at least 4 inches from the back of the counter to avoid bumping knives while cooking.

4. Use a Wall‑Mounted Pot and Pan Rack

Save to ‘Cooking Central’ – free up cabinet space with a stylish pot rack!
If you own multiple heavy pots and pans, a wall-mounted pot rack is a game-changer. It keeps your most-used cookware accessible while freeing up valuable lower cabinets for other items. Choose from ceiling-mounted racks or wall rails with S‑hooks.
What You Need
- Wall‑mounted pot rack (e.g., 24‑inch rail with S‑hooks)
- Heavy‑duty screws and wall anchors (rated for 75 lbs)
- Level, stud finder, drill, socket wrench
Steps
- Decide location: above stove, over island, or beside range. (Check clearances per local codes: 30 inches above stove recommended.)
- Locate studs; mark positions.
- Hold rack rail at desired height; level and mark screw points.
- Drill pilot holes, install screws into studs (or use toggle bolts if no stud).
- Attach rail and tighten securely.
- Hang S‑hooks, then hang pots by handles.
- Arrange heaviest pots nearest to wall brackets.
Pro-Tip: Install a simple shelf above the rack to hold lids upright – use a lid holder from a kitchen supply store.

5. Build a Wall Spice Rack Near the Stove

Pin to ‘Spice Organization’ – have your spices at arm’s reach!
No more rummaging through a cluttered cabinet. A wall spice rack placed near your stove puts every seasoning right where you need it. Choose a tiered wooden shelf for a classic look or magnetic tins on a metal strip for a modern touch.
What You Need
- Wall‑mounted tiered spice rack (12–18 inches wide)
- Screws and wall anchors (for drywall)
- Level, drill, pencil
- Spice jars (4 oz, clear glass or metal tins)
Steps
- Choose a location: inside a cabinet door, on the side of a fridge, or on a blank wall near but not over the stove (avoid steam direct).
- Hold rack, level, mark screw holes.
- Drill pilot holes, insert anchors, screw rack into wall.
- Fill jars with spices and label (use uniform labels).
- Arrange alphabetically or by frequency of use.
- For magnetic version: apply magnetic strip to wall, attach metal tins.
Pro-Tip: Use a wall rack with a front rail to prevent jars from falling when you pull one out.

6. Mount a Hanging Herb Garden

Save to ‘Grow Your Own’ – fresh herbs right in your kitchen!
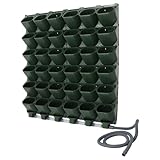
Imagine snipping fresh basil, mint, or thyme directly into your pan. A wall-mounted herb garden brings that convenience to your kitchen without taking up counter space. Many herbs thrive on a sunny wall, and vertical planters are available in DIY or store‑bought options.
What You Need
- Vertical planter (felt pockets, metal frame with pots, or wooden pallet)
- Potting soil (succulent mix with perlite)
- Herb seedlings or seeds (basil, thyme, chives, oregano, mint)
- Screws and wall anchors (weight up to 15 lbs)
- Drip tray (if watering directly)
Steps
- Choose a wall that gets 4–6 hours of indirect sunlight (east or west facing).
- Mount planter brackets following instructions – use anchors for drywall.
- If using homemade pallet: attach wire backing, drill pockets, staple landscape fabric.
- Fill each pocket or pot with soil, plant seedlings.
- Water gently, allow excess to drain into tray.
- Water every 2–3 days (more in summer). Trim leaves to encourage growth.
Pro-Tip: Set a tray beneath the planter to catch drips; line felt pockets with plastic sheeting to protect walls.
7. Install a Wall‑Mounted Paper Towel Holder & Utility Bar

Pin to ‘Small Space Solutions’ – keep countertops clutter‑free!
A wall-mounted paper towel holder frees up counter space and keeps paper towels accessible without taking up a single inch of work surface. Pair it with a small utility bar for hanging dish towels or lightweight utensils.
What You Need
- Under‑cabinet paper towel holder (adhesive or screw‑mount)
- Optional: small wall‑mounted utility bar (12 inches) with hooks
- Screws (if not adhesive), drill, level
Steps
- Clean area under upper cabinet or choose a blank wall space.
- If adhesive: peel backing, press firmly for 30 seconds, rest 24 hours before loading.
- If screw‑mount: mark holes, drill, screw in.
- Place paper towel roll onto arm.
- Mount utility bar nearby if desired – hang dish towels, silicone spatulas.
- Ensure towel pulls easily without catching.
Pro-Tip: For adhesive mounts, use a surface primer like Command strips for smooth surfaces – do not exceed weight limit.

8. Hang a Wall‑Mounted Cutting Board Rack

Pin to ‘Kitchen Organization’ – cutting boards tidy and dry!
Cutting boards pile up in cabinets, often warping or staying damp. A wall-mounted cutting board rack holds them vertically, allowing air circulation and freeing up shelf space. Plus, it makes grabbing the right board a snap.
What You Need
- Wall‑mounted cutting board rack (sized for 2–4 boards)
- Screws and wall anchors (if mounting on tile, use masonry bits)
- Level, drill, pencil, tile drill bit (if tiled wall)
Steps
- Choose a spot near the sink or stove – convenient for prep.
- Hold rack against wall (avoid electrical wires). Level, mark screw locations.
- For tile: use a diamond‑tip tile bit; drill slowly with water mist. Insert anchors.
- For drywall: locate studs or use toggle bolts for heavy racks.
- Screw rack securely.
- Insert cutting boards vertically into slots.
- Clean rack weekly with damp cloth.
Pro-Tip: Position the rack so that boards are easily accessible from the main cooking zone – generally 18–24 inches from the counter.

9. Create a Wall Gallery with Cook‑Themed Art & Vintage Finds

Pin to ‘Kitchen Decor Inspiration’ – add personality to your cooking space!
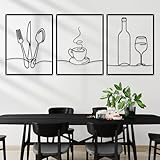
A gallery wall in the kitchen combines art with function. Mix framed prints, a small mirror, a wooden cutting board, or a magnetic clip. The trick is to balance aesthetics with items that actually help your cooking routine.
What You Need
- 3–5 framed pieces (prints, photos, a small mirror, a wooden cutting board)
- Adhesive picture hangers or nails
- Level, pencil, measuring tape
- Blue painter’s tape for layout
Steps
- Gather your pieces; include a functional item (magnetic clip, small shelf).
- Lay them out on the floor to find a pleasing arrangement.
- Measure the wall area (usually above a table or between cabinets).
- Use painter’s tape to outline each piece on the wall.
- Adjust spacing (aim for 2–3 inches between frames).
- Mark nail positions on tape, then remove tape and drive nails.
- Hang each piece, use level to adjust.
- Add a small shelf at the bottom for a vase or cookbook.
- Step back and tweak tilt or spacing.
Pro-Tip: Use the same frame colour (black or natural wood) for a cohesive look; mix small and large pieces for rhythm.
Key Takeaways: Your Quick Guide to Kitchen Wall Ideas
- Open Shelving – Perfect for storing ingredients and cookbooks. Use heavy‑duty brackets and keep items in clear jars for a uniform look.
- Pegboard – Customizable tool organizer; mount near the stove and paint it to match your kitchen.
- Magnetic Knife Strip – Frees drawer space, reduces dulling, and keeps knives safe. Requires strong magnets.
- Pot Rack – Ideal for heavy pans; install into ceiling joists or use wall‑mounted rails with S‑hooks.
- Spice Rack – Mount beside or above the stove (but not directly over heat) for easy access while cooking.
- Herb Garden – Vertical planter near a sunny window gives you fresh basil, mint, and thyme year‑round.
- Gallery Wall – Blend art with functional pieces (shelf, clip) for a personalized, curated look.
People Also Ask About Kitchen Wall Ideas
What can I put on a blank kitchen wall to make it functional?
Install open shelves, a pegboard, a magnetic knife strip, or a pot rack. Any of these turn a bare wall into valuable storage without taking floor space. For a budget option, use adhesive hooks for lightweight utensils. Always secure heavy items into studs for safety.
How do I decorate a kitchen wall on a budget?
Use peel‑and‑stick tile, a single large art print, or a DIY floating shelf from scrap wood. Thrifted mirrors and vintage plates also add charm for under $20. Focus on one accent wall to keep costs low. For functional decor, a magnetic knife strip is both cheap and useful.
What is the best wall covering for a kitchen instead of tile?
Beadboard, shiplap, or washable wallpaper are durable and budget‑friendly. Beadboard offers a classic farmhouse look and is easy to paint. For high‑moisture zones near the stove, use semi‑gloss paint or moisture‑resistant wallpaper. Avoid matte finishes near splatter areas.
How do I choose kitchen wall decor for a small kitchen?
Stick to light colors (white, pale grey) and mirrors to reflect light. Use vertical open shelves to draw the eye up. Mount a magnetic strip for knives and a pegboard for utensils – both take zero counter space. Avoid cluttering: one main focal point, like a small gallery, works best.
How to create a gallery wall in the kitchen?
Select 3–5 pieces: a mix of art, a small mirror, and a functional item (e.g., a magnetic clip). Arrange them on the floor first. Use painter’s tape to mark positions on the wall, keeping 2–3 inches between frames. Hang the heaviest piece first, then balance the others. Include a small shelf for a plant.
What kind of art is best for a kitchen?
Choose food‑ or cooking‑themed prints, black‑and‑white photography, or botanical art. Avoid fragile canvases that can’t be wiped clean. Metal prints or framed posters with glass protect against grease and moisture. Stick to a cohesive frame colour (black or natural wood) for a polished look.
Is shiplap good for kitchen walls?
Yes, shiplap is an excellent choice for a farmhouse or modern look. It’s easy to install, can be painted any color, and hides wall imperfections. Use primed MDF shiplap (moisture‑resistant) in kitchens. Seal the seams with caulk to prevent grease build‑up behind the boards.
How to decorate a kitchen wall without drilling holes?
Use removable adhesive hooks (Command strips), peel‑and‑stick wallpaper, or a leaning ladder shelf. For art, use removable picture hanging strips (rated for 10+ lbs). Magnetic boards also attach to fridge or metal backsplash without damage. Always test adhesion on a small area first.
What are the latest kitchen wall trends?
Textured plaster, limewash paint, and mixed materials (wood + metal) are trending in 2026. Open shelving remains popular but with fewer items for a minimalist look. Smart storage solutions, like magnetic knife strips and pot racks, are also in high demand. Biophilic elements (herb gardens, living walls) are growing.
Can I put a TV on a kitchen wall?
Yes, but size and placement matter. Choose a small (24‑32 inch) TV mount that tilts, and place it where it won’t obstruct cooking – above a pantry or in a breakfast nook. Ensure the mount is rated for the TV weight and use a swivel arm for viewing angles. Keep it away from steam and grease.
Final Thoughts on Kitchen Wall Ideas
Your kitchen walls are more than just a surface to paint – they’re an opportunity to enhance your cooking experience. Whether you choose open shelving for your spices, a pegboard for your utensils, or a gallery wall that reflects your taste, each idea here is designed to make your time in the kitchen more efficient and enjoyable.
Start with the idea that solves your biggest frustration. Maybe it’s a magnetic knife strip to free up drawer space, or a pot rack to clear out lower cabinets. Once you see the difference, you’ll wonder why you didn’t do it sooner. Remember to prioritize safety – always mount heavy items into studs, and choose moisture‑resistant materials for areas near the stove and sink.
The best part? Many of these projects can be completed in a weekend, with minimal tools and budget. Your kitchen is the heart of your home – let your walls work for you.
Which of these 9 functional wall ideas will you try first? Let me know in the comments – I’d love to see your transformation!
Last update on 2026-09-18 at 11:32 / Affiliate links / Images from Amazon Product Advertising API
