
As an Amazon Associate KitchenwareSets.com earns from qualifying purchases.
Easy Mud Kitchen DIY Plans: 7 Rustic Recycled Pallet Ideas for Kids
Have you noticed how wildly expensive pre-made outdoor toys have become lately? You are not alone in wanting a budget-friendly solution that actually lasts. Building Mud Kitchen DIY Plans solves this exact frustration beautifully.
Easy Mud Kitchen DIY Plans involve using heat-treated, sanded recycled pallets to construct an outdoor sensory play station for kids. By building a solid frame, adding a wooden countertop with drop-in stainless steel bowls for sinks, and sealing the wood, you can create a highly durable backyard setup. This approach guarantees years of engaging developmental value.
Drawing from proven woodworking methodologies and verified child-safety standards, this guide ensures secure and stable construction. You will discover actionable blueprints to build an exceptional outdoor culinary wonderland. Dive in to transform simple pallet wood into an unforgettable nature play space.
Contents
show
How Do Easy Mud Kitchen DIY Plans Unlock Endless Outdoor Sensory Play?
Easy mud kitchen DIY plans unlock endless outdoor sensory play by providing a dedicated, child-scaled environment where kids can freely explore natural textures like soil, water, and sand. Building an outdoor culinary wonderland offers incredible developmental benefits, encouraging toddlers and preschoolers to engage in imaginative dramatic play. When you build a custom DIY mud kitchen, you are actively facilitating a space where children can practice scooping, pouring, and mixing. These vital motor skills build the foundation for complex cognitive development.
Historically, parents faced a frustrating dilemma. Commercial outdoor play kitchens often cost upwards of hundreds of dollars and feature thin, easily weathered plastics. Fortunately, rustic recycled pallet ideas provide a brilliant workaround. Upcycling pallet wood into a highly functional play station allows you to bypass expensive retail markups entirely. You can easily construct a sturdy, weatherproof masterpiece utilizing basic tools and inexpensive mud kitchen accessories.
Safety remains paramount when selecting materials for kids. You must actively prioritize heat-treated wooden pallets to guarantee a non-toxic environment. Once appropriately sanded and sealed, this resilient upcycled timber seamlessly connects with drop-in sinks and outdoor spigots. This intentional combination transforms discarded shipping materials into a vibrant hub for messy, memorable nature play.
7 Rustic Recycled Pallet Ideas for Kids: Easy Mud Kitchen DIY Plans
Creating an engaging outdoor play kitchen requires a clear, actionable approach rather than just generic inspiration. The following step-by-step mud kitchen instructions cater to various backyard dimensions and skill levels. Whether you possess basic beginner skills or advanced woodworking expertise, these blueprints guide you through cutting, assembling, and finishing your ideal setup.
Before diving into the building an outdoor play kitchen, gather your essential tools. A reliable circular saw, a power drill, and an orbital sander are mandatory for efficient construction. Always verify your pallet slats feature the vital “HT” (Heat-Treated) stamp. Prepare your workspace, secure your stainless steel bowls, and choose the perfect rustic pallet mud kitchen variation for your family’s needs.
1. Build a Simple Single-Pallet Mud Kitchen Station

Save this beginner-friendly pallet project to your DIY Backyard Ideas board!
This basic outdoor play kitchen represents the fastest, most straightforward approach for absolute beginners. By utilizing a single pallet, you minimize complex cuts while maximizing play value. The design heavily emphasizes the foundational relationship between the rustic base material and the sleek, durable sink insert. Because kids interact directly with the wood, learning to dismantle pallets safely and prioritizing aggressive sanding become your most crucial safety steps.
Supplies Needed
- 1 clean, heat-treated (HT) wooden pallet
- Orbital sander with 80-grit and 120-grit sandpaper
- 1 large stainless steel mixing bowl with a wide lip (approx. 10-12 inches wide)
- Jigsaw and power drill
- 1.5-inch exterior wood screws
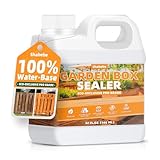
- Non-toxic, child-safe exterior wood sealer
Instructions
- Dismantle the back slats of the pallet carefully using a pry bar, leaving the front face intact to serve as the main backboard of your kitchen.
- Cut the removed slats to size and screw them together to form a basic rectangular box frame that will serve as the kitchen’s base and legs.
- Attach remaining slats across the top of your base to create a solid, flat wooden countertop.
- Trace the bottom (not the lip) of your stainless steel mixing bowl onto the center of the countertop.
- Drill a pilot hole inside the traced circle, then use your jigsaw to cut out the circular hole.
- Sand the entire structure aggressively, starting with 80-grit to remove splinters and finishing with 120-grit for a smooth, child-safe texture.
- Seal the wood with a non-toxic outdoor sealant and drop the stainless steel bowl into the cutout once dry.
Pro-Tip: Always cut your sink hole about 1/2 inch smaller than the overall diameter of your bowl. The wide lip of the stainless steel bowl needs that extra wood to rest on so it doesn’t fall straight through when filled with heavy wet mud!

2. Construct a Double-Basin Sensory Pallet Kitchen

Pin this brilliant double-basin design for the ultimate toddler sensory station!
When siblings or friends play together, messy play stations must accommodate multiple hands simultaneously. This twin sink mud station features an extended pallet frame explicitly designed to house two large basins. By utilizing heavy-duty plastic wash basins, you can dedicate one side strictly to wet, sloppy mud and the other to clean, bubbly water. This dual-zone approach creates exceptional toddler sensory tables. Because water and sand carry significant weight, building proper structural cross-bracing underneath the countertop is absolutely essential.
Supplies Needed
- 2-3 heat-treated pallets (dismantled for loose lumber)
- 2 heavy-duty rectangular plastic wash basins (approx. 12×14 inches each)
- Measuring tape and carpenter’s square
- Jigsaw, power drill, and 2-inch exterior deck screws
- 2×4 lumber scraps (for cross-bracing)
- Orbital sander and exterior wood stain/sealer
Instructions
- Build a wider rectangular base frame measuring at least 40 inches long to accommodate two side-by-side sinks comfortably.
- Install a 2×4 cross-brace directly down the middle of your base frame to provide structural support for the heavy basins.
- Assemble your pallet wood countertop across the frame, securing each slat with two screws on each end to prevent warping.
- Measure the underside dimensions of your rectangular wash basins (just below the top rim).
- Draw two identical rectangles onto your countertop, leaving at least 6 inches of workspace between them.
- Cut out both rectangular holes using your jigsaw.
- Sand all rough edges, seal the wood thoroughly, and drop your plastic basins into the slots once dry.
Pro-Tip: If you plan to leave the plastic basins outdoors year-round, drill three small drainage holes in the bottom of each basin. This prevents stagnant rainwater from collecting and breeding mosquitoes when the kitchen isn’t in use!

3. Design a Corner Rustic Pallet Mud Bakery

Save this genius space-saving corner mud bakery idea to your DIY projects board!
If your yard layout demands space efficiency, an L-shaped mud kitchen perfectly maximizes unused patio corners. Rather than simply focusing on washing stations, this outdoor mud pie station shifts the focus heavily toward pretend play baking. By integrating painted stovetop elements and a functional mud pie oven, you elevate the imaginative experience. Utilizing sturdy cabinet hinges allows you to build a safe, drop-down wooden oven door that feels incredibly realistic to young bakers using their rolling pins.
Supplies Needed
- 3-4 dismantled pallets
- Black exterior paint or large wooden coasters (for stovetop burners)
- 2 heavy-duty cabinet hinges and a magnetic catch
- 1 small cabinet handle/pull
- Set of durable outdoor wooden play utensils and rolling pins
- Miter saw, drill, and wood screws
- Old muffin tins and baking racks (upcycled)
Instructions
- Construct two separate rectangular base frames: one measuring 36 inches long, and a shorter one measuring 24 inches long.
- Join the two frames together at a 90-degree angle using heavy-duty wood screws to create your L-shape.
- Plank the top of both sections with pallet slats to create a seamless, continuous L-shaped countertop.
- Paint four black circles on one side of the countertop to simulate stovetop burners, or screw down round wooden coasters.
- Build an “oven” beneath the stovetop by boxing in a lower shelf with pallet wood.
- Attach a small square of pallet wood to the front of the oven using your cabinet hinges at the bottom, creating a drop-down oven door.
- Install the cabinet pull on the top of the oven door and add a magnetic catch so the door stays shut when not in use.
Pro-Tip: When installing a drop-down oven door for kids, attach a small piece of chain or strong nylon rope to the inside of the door and the interior oven wall. This prevents the door from dropping all the way to the ground and snapping the hinges when stepped on!

4. Assemble a Pallet Mud Kitchen with a Working Hose Sink

Upgrade your DIY mud kitchen with this real working water hack! Pin it now!
Integrating a real working hose sink mud kitchen fundamentally changes how children interact with the play station. By establishing a direct connection between a standard garden hose and a sturdy brass spigot mounted to the backboard, you create a DIY outdoor kitchen with running water. This brilliant plumbing hack requires absolutely no professional plumbing skills. By mastering the simple application of a standard 3/4″ GHT (Garden Hose Thread) adapter, you empower your children to manage their own water flow independently.
Supplies Needed
- Pallet mud kitchen frame (pre-built)
- 1 brass garden hose bib/spigot (with a mounting flange)
- 1 Garden Hose Thread (GHT) female-to-female adapter
- Standard garden hose
- Plumber’s tape (Teflon tape)
- Drill with a spade bit (sized to your spigot pipe)
- Stainless steel sink basin (with a drain hole drilled in the bottom)
Instructions
- Drill a hole through the vertical backboard of your pallet kitchen, positioned 8-10 inches directly above where your sink basin sits.
- Push the threaded back end of the brass spigot through the hole from the front side.
- Secure the spigot to the front of the pallet backboard using the mounting flange and small wood screws.
- Wrap the protruding threads on the back of the backboard with plumber’s tape to ensure a watertight seal.
- Screw the female-to-female GHT adapter onto the taped threads on the back of the kitchen.
- Connect your standard garden hose directly into the adapter on the back.
- Turn the main house water on low; children can now turn the spigot handle on the front of the mud kitchen for real, working running water!
Pro-Tip: Since this kitchen features real running water, drainage is crucial. Route a piece of flexible PVC tubing from the drain hole in your sink basin down into a nearby flower bed. Your kids can water the plants while they play!

5. Create an Upcycled Pallet Kitchen with a Chalkboard Backsplash

Combine art and sensory play with this DIY chalkboard mud kitchen! Pin for later!
Bridging artistic expression with messy play creates a multi-dimensional sensory art station. By treating the solid wooden backboard with specialized outdoor chalkboard paint, you encourage rich dramatic play scenarios. Children love writing daily cafe menus or drawing out their imaginary mud pie recipes. To ensure this dual-purpose upcycled pallet kitchen survives the elements, you must use exterior-grade paints. Properly filling the wood grain and executing the crucial “seasoning” step guarantees the chalkboard backsplash remains functional and wipes clean beautifully.
Supplies Needed
- Pallet wood (for a solid, gap-free backboard)
- Wood filler and putty knife
- Fine-grit sandpaper (220-grit)
- Exterior-grade weather-resistant chalkboard paint
- High-quality foam paint roller
- Painter’s tape
- Chunky outdoor sidewalk chalk
Instructions
- Construct a solid backboard for your mud kitchen by placing pallet slats tightly together vertically.
- Fill any gaps, knotholes, or deep grain lines in the wood with wood filler to create a completely flat, seamless surface.
- Sand the dried wood filler and the entire backboard surface with fine 220-grit sandpaper until it is completely smooth to the touch.
- Tape off the edges of your backboard if you want to leave a natural wood border around your chalkboard.
- Roll on the first coat of exterior chalkboard paint using a foam roller for a smooth, brush-stroke-free finish. Allow to dry completely.
- Apply a second and third coat of chalkboard paint, allowing proper drying time between each layer as specified by the manufacturer.
- Season the dried chalkboard by taking a piece of chalk on its side and rubbing it over the entire painted surface, then wipe it clean with a dry rag.
Pro-Tip: Never skip the “seasoning” step on a DIY chalkboard! If you just start drawing immediately, the porous fresh paint will permanently trap the binder from the chalk, leaving “ghost” images of your child’s first drawing forever.

6. Craft a Compact Patio Pallet Mud Kitchen for Small Spaces

No yard? No problem! Pin this compact patio mud kitchen for small space inspiration!
Urban living should never prevent children from experiencing sensory enrichment. A compact patio mud kitchen specifically caters to tight apartment balconies by dramatically shrinking the design footprint. Compared to massive backyard setups, these half-pallet projects require a highly vertical organization strategy using smart hooks and narrow countertops. To safely operate in enclosed spaces, always coat the wood with a high-quality, low-VOC non-toxic outdoor sealer. Furthermore, swapping out messy wet mud for neat kinetic sand ensures brilliant balcony sensory play without staining your concrete floors.
Supplies Needed
- 1 wooden pallet (cut exactly in half)
- 1 small, deep stainless steel dog bowl (perfect compact sink)
- Screw-in cup hooks or S-hooks for vertical storage
- Circular saw and drill
- Non-toxic, low-VOC outdoor wood sealer
- Rubber furniture feet or exterior silicone
- Kinetic sand or dry beans (balcony-friendly mud alternatives)
Instructions
- Cut your pallet exactly in half straight down the middle center stringer using a circular saw, creating two narrow, tall sections.
- Use one half as the vertical backsplash, and dismantle the other half to build a narrow 12-inch deep countertop and base.
- Mount the narrow countertop to the vertical backsplash, creating a slim, space-saving L-profile that hugs the wall.
- Drill a hole and drop in your small stainless steel dog bowl; these feature a great lip for mounting and take up half the space of a mixing bowl.
- Screw cup hooks across the entire vertical backboard to hang all pots, pans, and utensils, eliminating the need for bulky lower shelves.
- Apply your non-toxic outdoor wood sealer to protect the wood from rain blowing onto the balcony.
- Attach rubber furniture feet to the bottom legs, or coat the bottoms in exterior silicone, to prevent the wood from wicking up standing water on flat concrete patios.
Pro-Tip: If you are using this on an apartment balcony, swap out wet messy mud for dry kinetic sand, smooth river pebbles, or dried chickpeas. It provides the exact same scooping and pouring sensory experience with zero muddy runoff staining your patio floor!
7. Build the Ultimate Pallet Mud Kitchen with Nature Storage Shelves

Go big with the ultimate deluxe mud kitchen! Pin this shelving masterpiece!
For parents blessed with ample yard space and a sprawling collection of backyard treasures, the ultimate pallet mud kitchen solves every organizational headache. This deluxe outdoor play kitchen incorporates multi-level nature storage shelves perfectly engineered to display acorns, pebbles, and dried petals. By securing clear acrylic jars beneath sturdy L-bracketed shelving, kids gain instant access to their natural loose parts. Because this towering structure holds heavy stainless steel pots and wet ingredients, anchoring the tall backboard remains a critical safety priority to prevent tipping hazards.
Supplies Needed
- 5-6 fully dismantled heat-treated pallets
- Sturdy 4×4 posts (for main structural legs)
- Heavy-duty L-brackets and 3-inch deck screws
- Clear acrylic jars with screw-on lids (for nature storage)
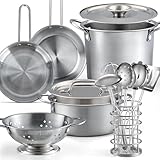
- Stainless steel play pots and pans set
- Miter saw, power drill, and level
- Exterior wood stain
Instructions
- Frame your main base using the heavy 4×4 posts for the legs, creating a robust footprint measuring at least 48 inches wide by 20 inches deep.
- Plank the main countertop and add a lower bottom shelf, ensuring all pallet slats are screwed down flush and tight.
- Construct a tall, oversized backboard that extends at least 3 feet above the countertop.
- Build three horizontal upper shelves across the backboard, securing them from the back with screws and reinforcing the bottom of each shelf with heavy-duty L-brackets.
- Screw the lids of your clear acrylic jars directly to the underside of the lowest shelf; this allows kids to easily unscrew the hanging jars to access stored pebbles, seeds, and petals.
- Install a row of sturdy hooks along the edges of the kitchen to hang your stainless steel pots, pans, and whisks.
- Stain the entire massive structure with a rich exterior weatherproofing stain to protect your investment for years to come.
Pro-Tip: Because this deluxe kitchen is tall and heavy, it presents a tipping hazard if children try to climb the shelving. Always anchor the back of the 4×4 legs deeply into the ground, or attach the backboard to a stable fence or wall using heavy-duty structural brackets.
Key Takeaways: Your Quick Guide to Mud Kitchen DIY Plans
Reviewing the core tenets of mud kitchen DIY plans ensures your final project remains structurally sound and safe for long-term outdoor sensory play. When transitioning raw pallet wood into a highly functional play station, overlooking critical preparation steps can lead to early wood rot or dangerous splinters. To streamline your building process, follow these established best practices.
The relationship between the natural elements (rain, dirt, UV rays) and your upcycled materials demands proactive weatherproofing. Properly sealing your wood and installing reliable drainage systems differentiates a weekend project from a lasting backyard fixture. Keep this highly scannable summary handy as your ultimate safety and construction checklist before you make your very first cut.
Key Takeaways:
- Source the Right Pallets for Safety: Always look for pallets stamped with “HT” (Heat Treated). Never use pallets stamped with “MB” (Methyl Bromide), as they have been treated with highly toxic pesticides unsafe for children.
- Sanding is the Most Critical Step: Pallet wood is notoriously rough. Spend 80% of your build time sanding with 80-grit followed by 120-grit sandpaper to completely eliminate dangerous splinters.
- Choose Durable Sink Basins: Stainless steel mixing bowls and heavy-duty plastic wash basins with wide lips make the best drop-in sinks because they can support the heavy weight of wet mud and water without cracking.
- Weatherproof for Longevity: Untreated pallet wood will rot quickly outdoors. Apply a high-quality, non-toxic, child-safe exterior wood sealer annually to protect the kitchen from moisture and UV damage.
- Prioritize Drainage: If you incorporate real water or leave the kitchen uncovered in the rain, ensure your sink basins have drainage holes drilled in the bottom to prevent stagnant, mosquito-breeding water.
- Anchor Tall Structures: If you build a deluxe model with tall shelving, firmly anchor the kitchen to a fence or bury the legs in the ground to prevent tipping hazards if children climb on the counters.
People Also Ask About Mud Kitchen DIY Plans
Navigating the complexities of outdoor DIY projects naturally generates important questions about material safety, age appropriateness, and budget. Before committing time and energy to building a play station, resolving these logistical uncertainties ensures a smoother construction process. The following expert clarifications address common misunderstandings regarding pallet treatments and structural weather resistance.
What is the best wood to use for a DIY mud kitchen?
The best wood for a DIY mud kitchen is cedar or redwood, as they are naturally rot-resistant and insect-repellent, though heat-treated pallet wood is the best budget-friendly alternative.
If you choose to use pallet wood to save money, you must ensure it is thoroughly sanded to prevent splinters and coated with a high-quality exterior sealant. Avoid MDF or indoor plywood, as these materials will swell, delaminate, and rot within months of being exposed to outdoor moisture and rain.
Are wooden pallets safe for children’s toys?
Wooden pallets are safe for children’s toys only if they are clearly stamped with “HT” (Heat Treated) and meticulously sanded.
Pallets stamped with “MB” (Methyl Bromide) have been treated with toxic pesticides and should never be used near children or gardens. Additionally, because pallets are used for shipping, avoid any pallets that have visible chemical spills, strange odors, or excessive grease stains. Always extract all rusty nails and sand the wood completely smooth.
How much does it cost to build a DIY mud kitchen?
Building a DIY mud kitchen typically costs between $30 and $100, depending on the materials you already have on hand.
If you source free heat-treated pallets and upcycle old pots, pans, and mixing bowls from thrift stores, your only expenses will be screws, sandpaper, and a can of outdoor wood sealer. In contrast, purchasing a pre-built commercial wooden mud kitchen online usually costs between $150 and $300.
What age is a mud kitchen suitable for?
Mud kitchens are highly suitable and developmentally beneficial for children ranging from 18 months to 7 years old.
Toddlers (18 months to 3 years) benefit from the raw sensory experience of pouring, splashing, and feeling different textures. Older children (4 to 7 years) engage in complex dramatic play, creating elaborate “recipes,” running pretend cafes, and experimenting with natural science concepts like volume and displacement.
How do I protect my wooden mud kitchen from the weather?
To protect your wooden mud kitchen from weather damage, apply two coats of a non-toxic, exterior-grade wood sealer or marine varnish.
You should reapply this protective coating once a year before the wet season begins. Additionally, storing the kitchen under a covered patio, placing a simple waterproof grill cover over it during heavy winters, and drilling drainage holes in the sinks will significantly extend its lifespan.
Do I need to connect real running water to a play kitchen?
No, connecting real running water is entirely optional; a simple bucket of water or a refillable beverage dispenser placed on the counter works perfectly.
While attaching a hose to a brass spigot is a fun upgrade, many parents prefer a “closed system” where they provide one pitcher of water per play session. This helps conserve water and prevents the backyard from turning into an unmanageable swamp!
What accessories should I include in an outdoor mud kitchen?
The best accessories for an outdoor mud kitchen include stainless steel pots, sturdy wooden spoons, old muffin tins, funnels, and clear jars for nature items.
Avoid cheap thin plastics that become brittle and crack in the sun. Thrift stores are excellent places to find durable, second-hand metal kitchenware. Don’t forget to stock the kitchen with natural “loose parts” like pinecones, pebbles, seashells, and dried flower petals.
Can I put a mud kitchen on an apartment balcony?
Yes, you can easily put a compact mud kitchen on a balcony by building a half-pallet design and substituting mud with dry kinetic sand or pebbles.
To make it balcony-friendly, focus on vertical storage using hooks and narrow shelving. Using dry sensory materials ensures that you won’t have muddy water runoff dripping down onto your neighbor’s balcony below.
How tall should a mud kitchen counter be?
A mud kitchen countertop should generally be between 20 to 24 inches tall for toddlers, and 25 to 28 inches tall for preschoolers.
When designing your DIY plans, measure your child from the floor to their hip bone; this is the ideal ergonomic height for a standing work surface. If you want the kitchen to grow with your child, build a taller counter and provide a sturdy, wide stepping stool for their younger years.
What is the best way to cut a hole for the sink basin?
The best way to cut a perfect sink hole is to trace the bottom of your basin, drill a pilot hole inside the circle, and cut along the line using a jigsaw.
Always trace the bottom of the bowl, not the wider top lip. You want the hole to be slightly smaller than the bowl’s maximum diameter so the lip of the bowl catches the wood and rests securely on the countertop without falling through.
Final Thoughts on Mud Kitchen DIY Plans
Taking on these custom mud kitchen DIY plans empowers you to build an incredible developmental tool right in your own backyard. Not only does building your own outdoor culinary wonderland save you significant money compared to store-bought models, but it also allows you to completely customize the height, layout, and sensory features. You can perfectly match the design to your specific backyard dimensions and your child’s age group.
Whether you opt for a simple single-pallet sensory station or decide to construct the ultimate multi-tiered nature bakery, the core principles of safe DIY pallet projects for kids remain consistent. As we advance through 2026, sustainable upcycling continues to dominate outdoor play trends. Always prioritize safety by sourcing heat-treated pallets, dedicating ample time to aggressive sanding, and effectively sealing the wood with non-toxic finishes.
Remember, an outdoor play kitchen is fundamentally designed to be messy, rustic, and heavily used. Absolute perfection is never the goal. The minor imperfections inherent in upcycled pallet wood only add wonderful character to the imaginative nature soups and sensory experiences your kids will soon enjoy. Grab your drill, hunt down some free pallets, and get ready to invite a little bit of glorious, muddy chaos into your life.
Which of these 7 mud kitchen designs are you planning to build for your yard? Let us know in the comments below, and don’t forget to share a picture of your finished masterpiece!
Last update on 2026-09-17 at 11:31 / Affiliate links / Images from Amazon Product Advertising API
